This survey will take about 1 minute.
Your answers will help us to improve our website.
Zelda: Breath of the Wild (BotW)
The Middle Trials Walkthrough
★ Sequel: Tears of the Kingdom Guide here!
★ Get a head start with our Beginner's Guide
┗ The Best Recipes to Cook | Rupee Farming
★ Shrines Locations | Korok Seeds Locations
★ Explore after the story with our Post Game Guide
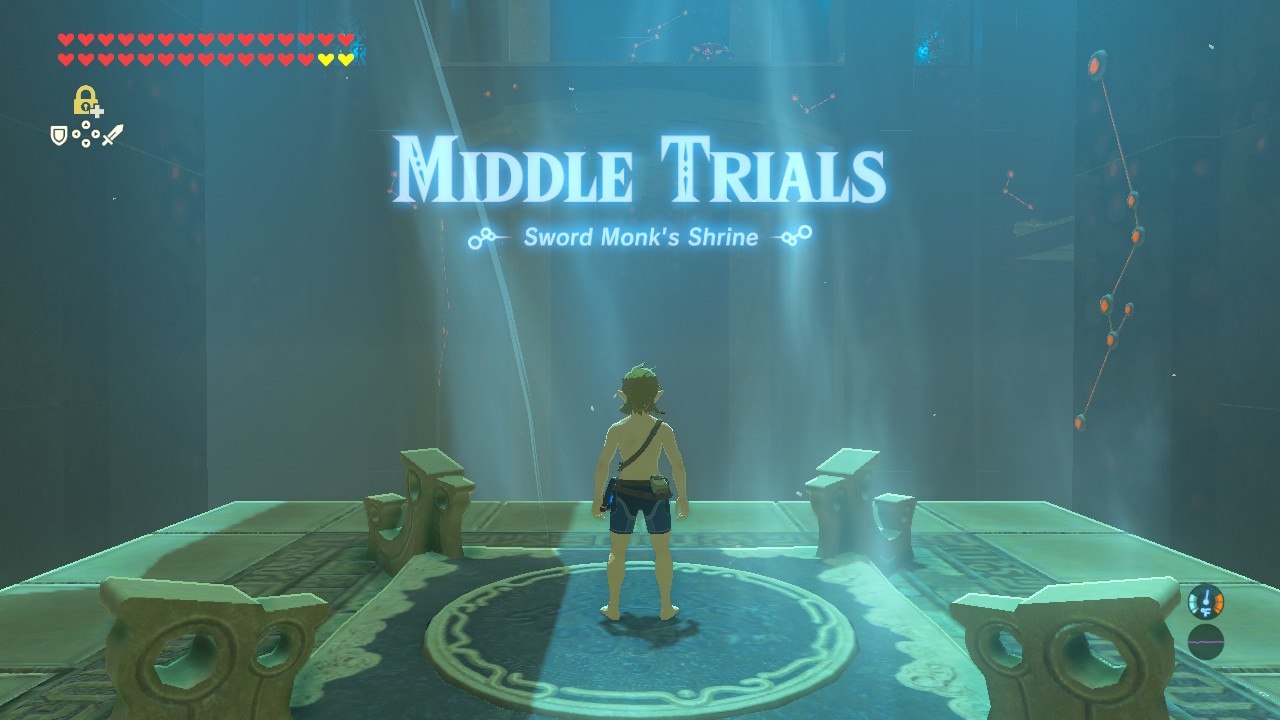
The Middle Trials is the second set of challenges added in The Master Trials DLC of The Legend of Zelda: Breath of the Wild (BotW). Here are tips on how to clear all 17 floors of The Middle Trials and what to expect on each floor!
| All Trial of the Sword Guides | ||
|---|---|---|
| EX Trial of the Sword | ||
| The Beginning Trials | The Middle Trials | The Final Trials |
List of Contents
The Middle Trials Walkthrough
| Jump to a floor! | ||
|---|---|---|
| Floor 1 | Floor 2 | Floor 3 |
| Floor 4 | Floor 5 | Floor 6 |
| Floor 7 | Floor 8 | Floor 9 |
| Floor 10 | Floor 11 | Floor 12 |
| Floor 13 | Floor 14 | Floor 15 |
| Floor 16 | Floor 17 | |
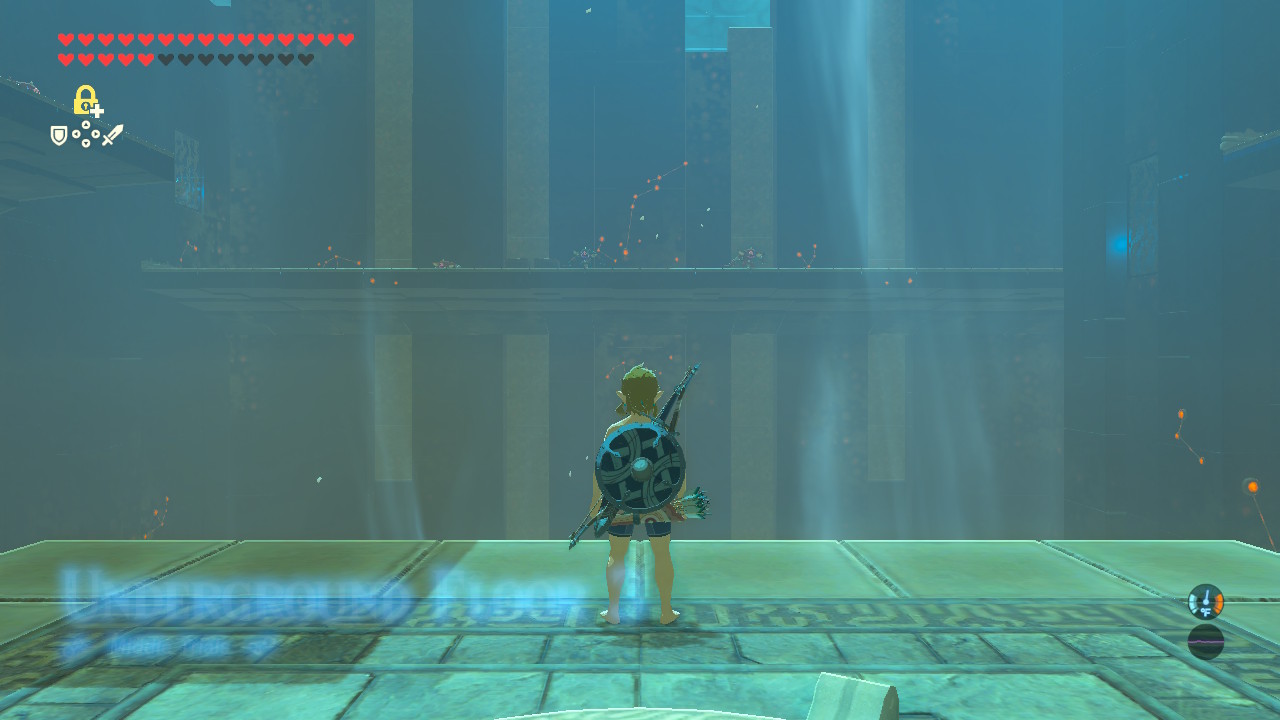
The Middle Trials has a total of 17 floors with two Resting Spots. Completing the Middle Trials leads you to the room where you can boost the Master Sword's power from 40 to 50.
Floor 1
| Enemies |
・Bokoblin (5) |
|---|---|
| Equipment |
・Soldier's Broadsword (1) ・Boko Club (1) ・Spiked Boko Club (1) ・Woodcutter's Axe (1) ・Boko Spear (1) ・Spiked Boko Spear (1) ・Soldier's Bow (2) ・Boko Bow (1) ・Arrow (Multiple) ・Fire Arrow (Multiple) ・Spiked Boko Shield (1) |
| Food & Materials |
・Various Food (Multiple) |
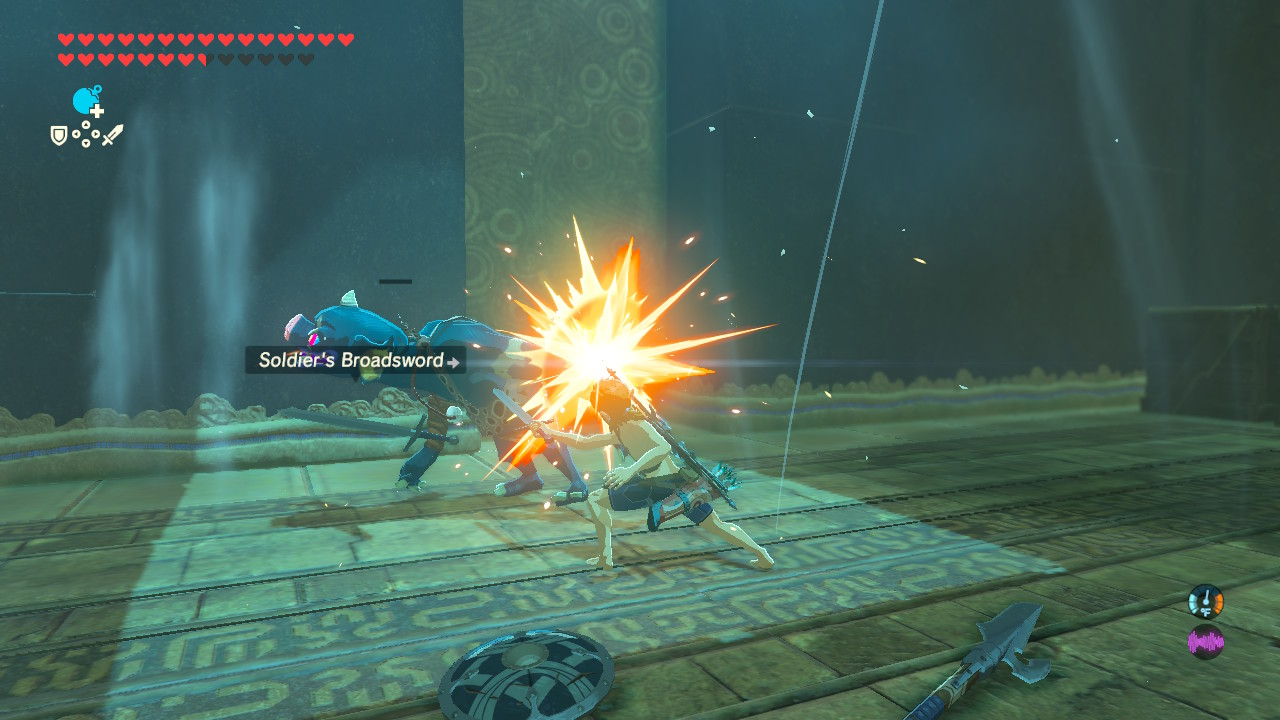
The first floor of the Middle Trials requires you to paraglide to different parts of the arena. As soon as the cutscene ends, quickly paraglide to the right area with no enemies and grab the Boko Spear.
Keep moving once you get the spear, as the Bokoblin Archer will continously shoot Fire Arrows at you. With spear in hand, paraglide up to the central area with the archer and take it out.
Take out the spear-wielding Bokoblin next and grab its weapon as it's stronger. Take out the club-wielding Bokoblin on this level and paraglide to the upper area.
Once you take out the enemies here, don't warp out yet! Grab all the weapons you can find and destroy the crates to get the stuff inside.
There's also a chest on the second area (where the warp portal is) sitting on a wooden platform on the top right wall. Drop a bomb below the platform and detonate it once the updraft pushes it upwards. Open the chest to receive a Knight's Bow.
Floor 2
| Enemies |
・Blue Bokoblin (1) ・Bokoblin (2) ・Meteo Wizzrobe (1) ・Fire Wizzrobe (1) |
|---|---|
| Equipment |
・Soldier's Broadsword (1) ・Feathered Edge (1) ・Fire Rod (1) ・Meteor Rod (1) ・Soldier's Spear (1) ・Spiked Boko Bow (1) ・Arrow (Multiple) ・Soldier's Shield (1) |
| Food & Materials |
・Various Food (Multiple) |
Floor 2 requires you to fly around using the paraglider, although the area is noticeably bigger. As soon as you warp in, a Blue Bokoblin and a regular Bokoblin will rush at you from the left side of the room. Quickly dispatch them and destroy the crates to get the food inside.
Grab any dropped weapons and paraglidie up. You'll most likely encounter a Fire Wizzrobe as you're flying upwards. Wait for it to reappear and shoot its head with an arrow to knock it out, sending it down the bottomless pit.
Once that's done, paraglide to the top platform overlooking the first area and dispatch the lone Bokoblin.
The last enemy here is a Meteo Wizzrobe. Much like the other Wizzrobe, hitting it on the head with an arrow knocks it out, causing it to fall down the bottomless pit.
Floor 3
| Enemies |
・Blue Bokoblin (2) ・Bokoblin (5) |
|---|---|
| Equipment |
・Lizal Forked Boomerang (1) ・Feathered Spear (1) ・Enhanced Lizal Spear (1) ・Phrenic Bow (1) ・Boko Bow (1) ・Spiked Boko Bow (2) ・Arrow (Multiple) ・Reinforced Lizal Shield (1) |
| Food & Materials |
・Various Food (Multiple) |
Floor 3 requires you to be constantly on the move as the Bokoblin Archers will keep shooting at Link from their well-guarded platforms.
As soon as you warp into the floor, glide to the upper right platform and take out the Bokoblin Archers before they have a chance to snipe you.
Shoot the balloons holding up the platform in the middle of the room to knock the Bokoblin Archer on it down to the bottomless pit. As long as you keep gliding and shooting, you won't get hit by the enemy archers.
Once you defeat all enemies, destroy the crates and grab all of the items from the treasure chests.
Floor 4
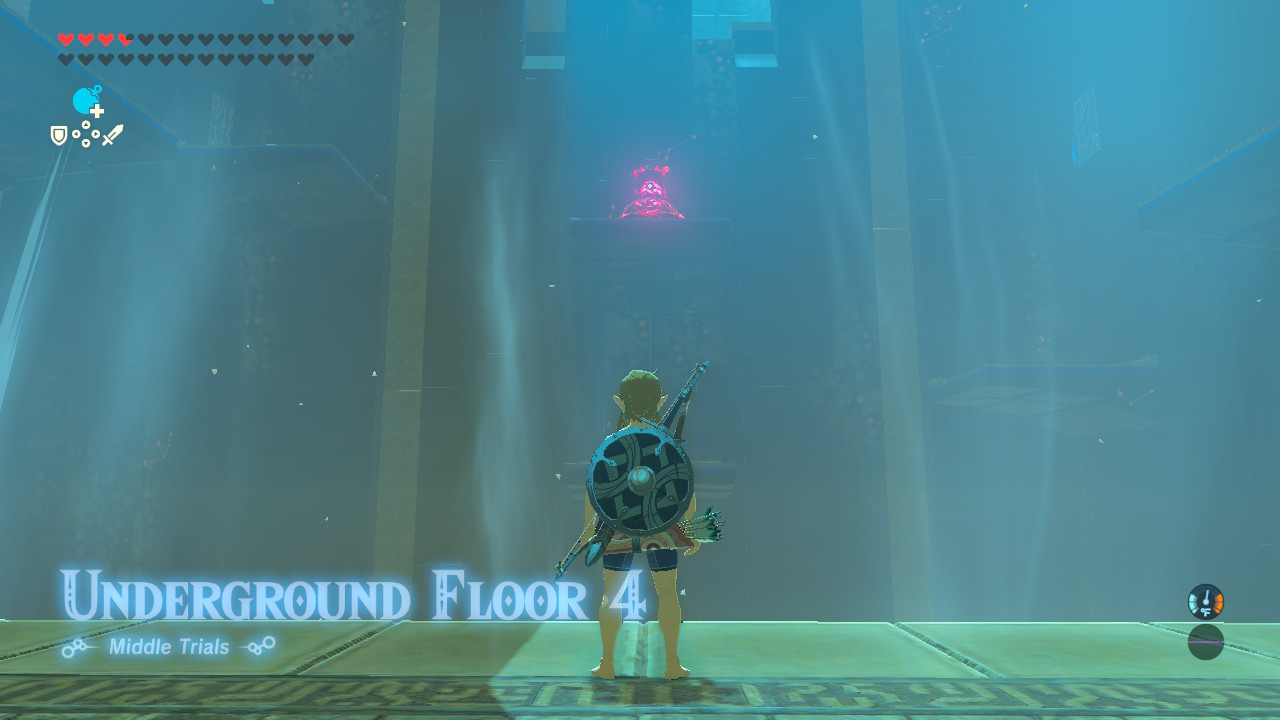
| Enemies |
・Decayed Guardian (1) |
|---|---|
| Equipment |
・Soldier's Bow (1) ・Arrow (Multiple) ・Knight's Shield (1) |
| Food & Materials | None |
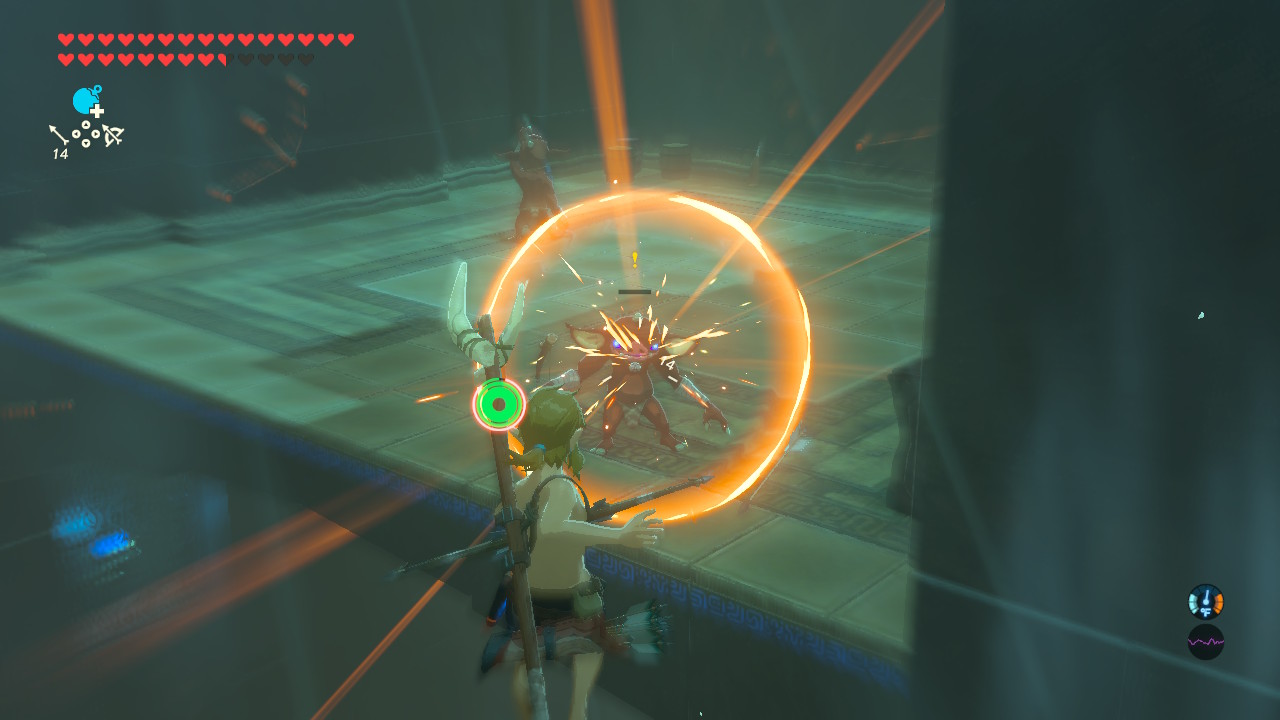
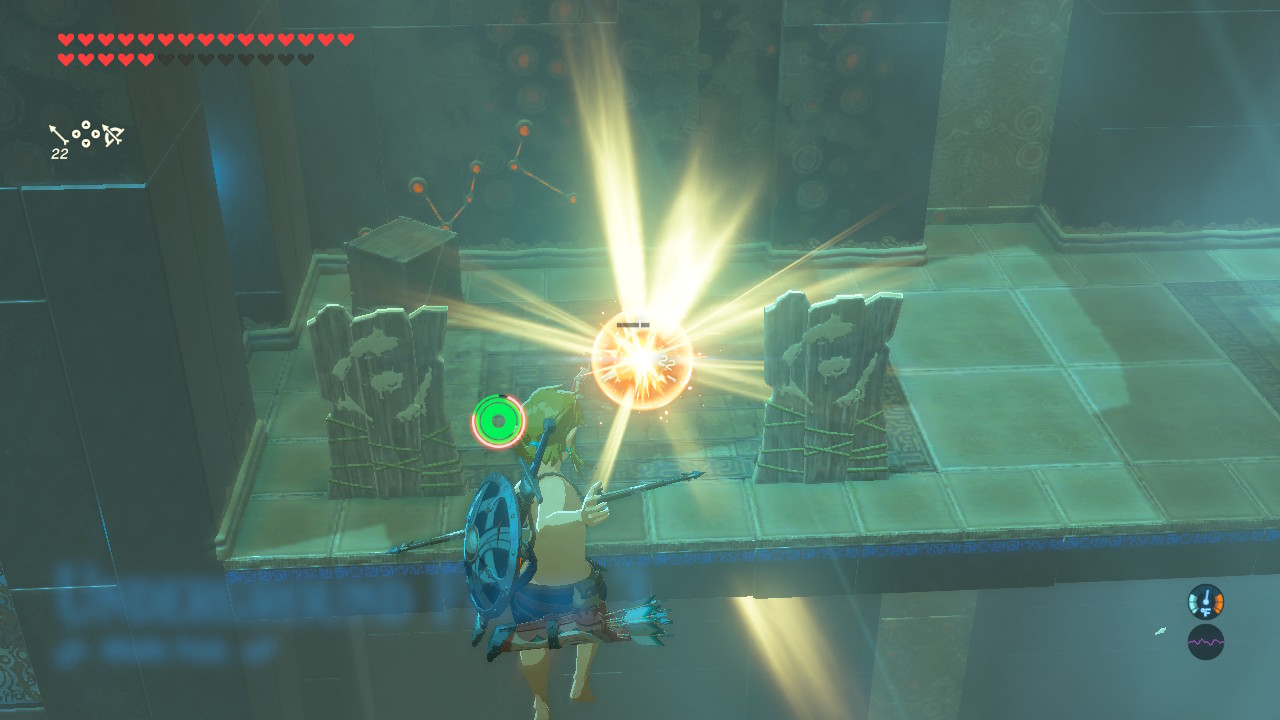
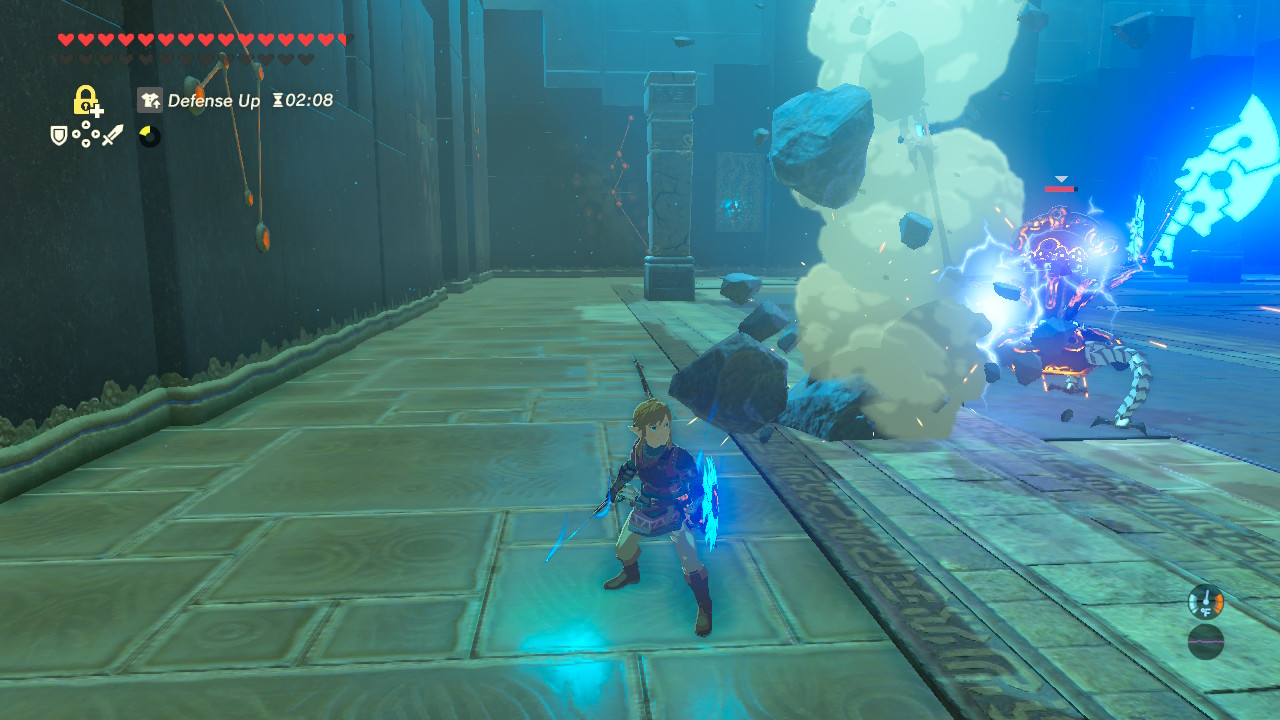
A Decayed Guardian serves as your first boss in the Middle Trials. As soon as you warp in, it will line its sights at you and fire a powerful laser that can potentially knock you down into the bottomless pit!
Paraglide upwards to the platform its sitting on and use your strongest weapons against it. You can also use Stasis on it to freeze it in place, resetting its laser timer and giving you some free hits.
Parry the Laser
You can also simply parry the laser. Head up the upper right platform to get into position and perfect parry the laser beam to instantly destroy the Decayed Guardian.
Floor 5
| Enemies | None |
|---|---|
| Equipment |
・Torch (1) ・Knight's Broadsword (1) ・Woodcutter's Axe (1) ・Falcon Bow (1) ・Arrow (Multiple) ・Hylian Trousers (1) |
| Food & Materials |
・Apple (2) ・Fairy (1) ・Hylian Shroom (2) ・Hyrule Bass (3) ・Ironshroom (2) ・Various Food (Multiple) |
Floor 5 is a Resting Spot. Use this opportunity to cook food and capture fairies.
It's also a good idea to destroy all the trees here and use the wood to cook Rock-Hard Food Food. While disgusting to eat, it still recovers hearts and can be invaluable in later floors once your food starts running out.
Floor 6
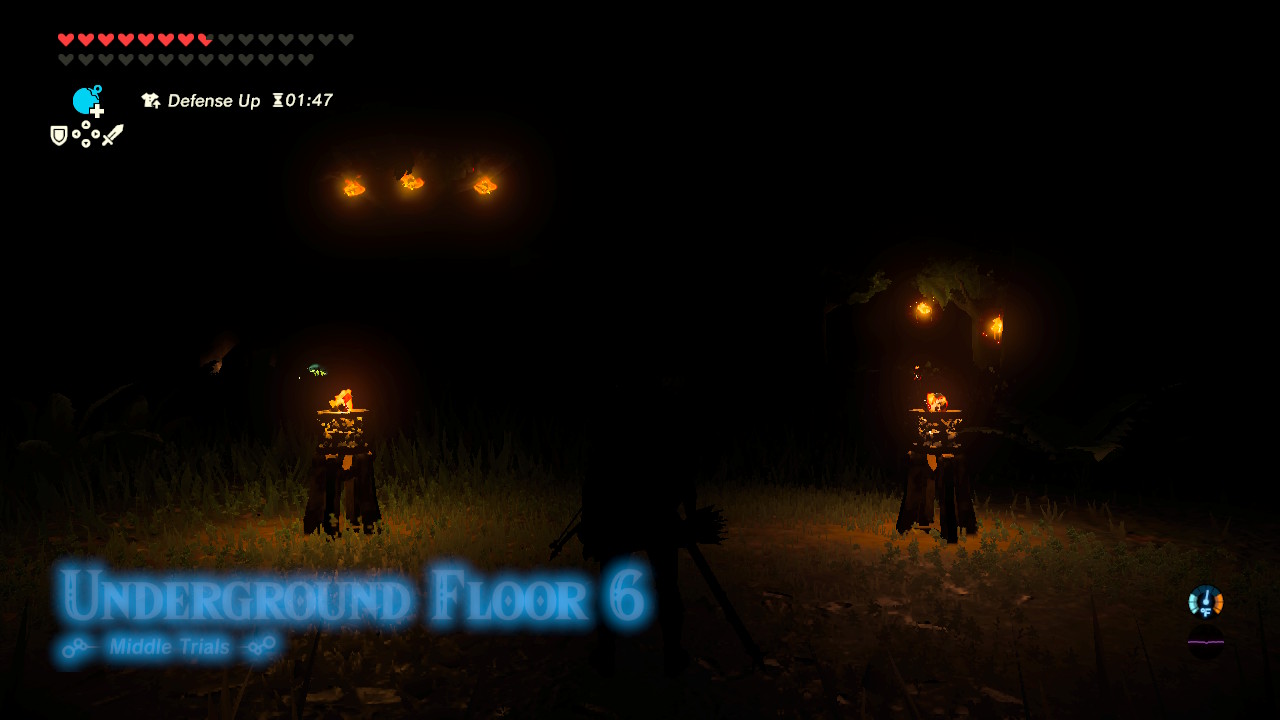
| Enemies |
・Fire Keese (5) ・Electric Chuchu (1) |
|---|---|
| Equipment | None |
| Food & Materials | None |
This floor introduces you to the main mechanic of the succeeding floors - defeat all enemies in pitch darkness.
Shoot the Electric Chuchu at the back of the room to spook the Fire Keese. They will most likely fly near the ground, igniting the grass and lighting up parts of the floor.
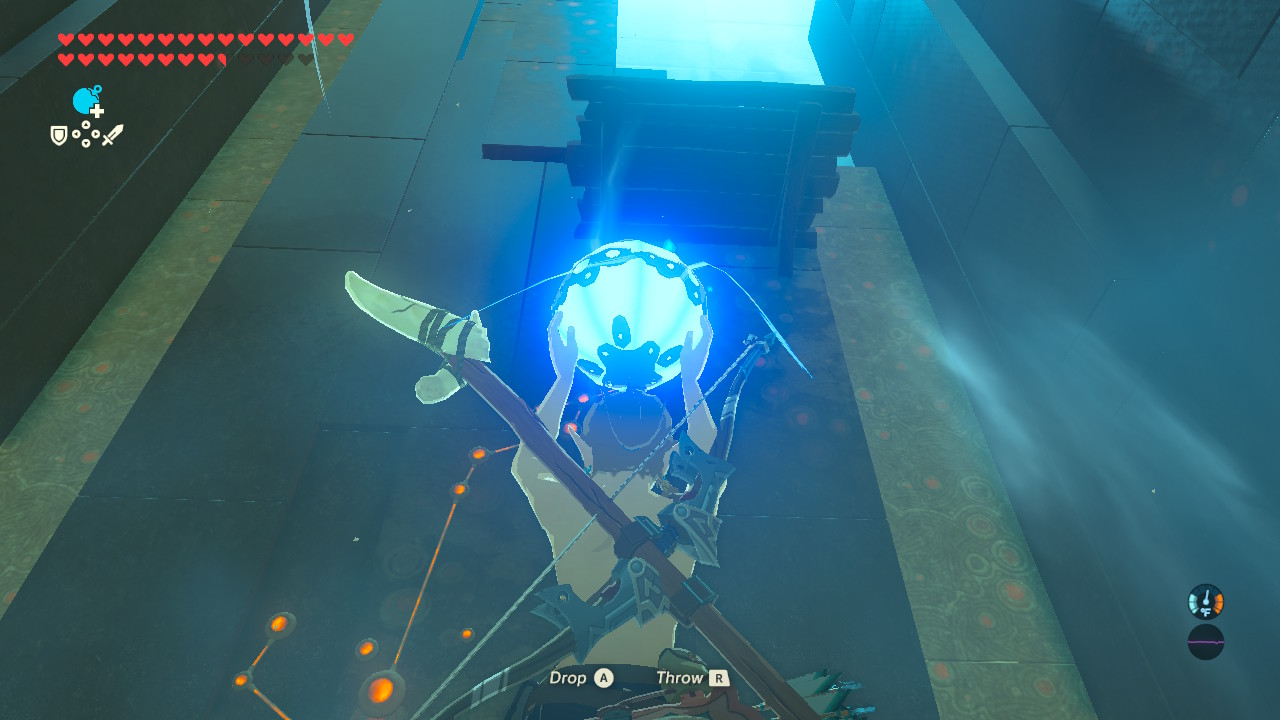
Simply wait for the Keese to fly towards you and dispatch them with your weapon. You can also throw a Remote Bomb at them from a safe distance.
Floor 7
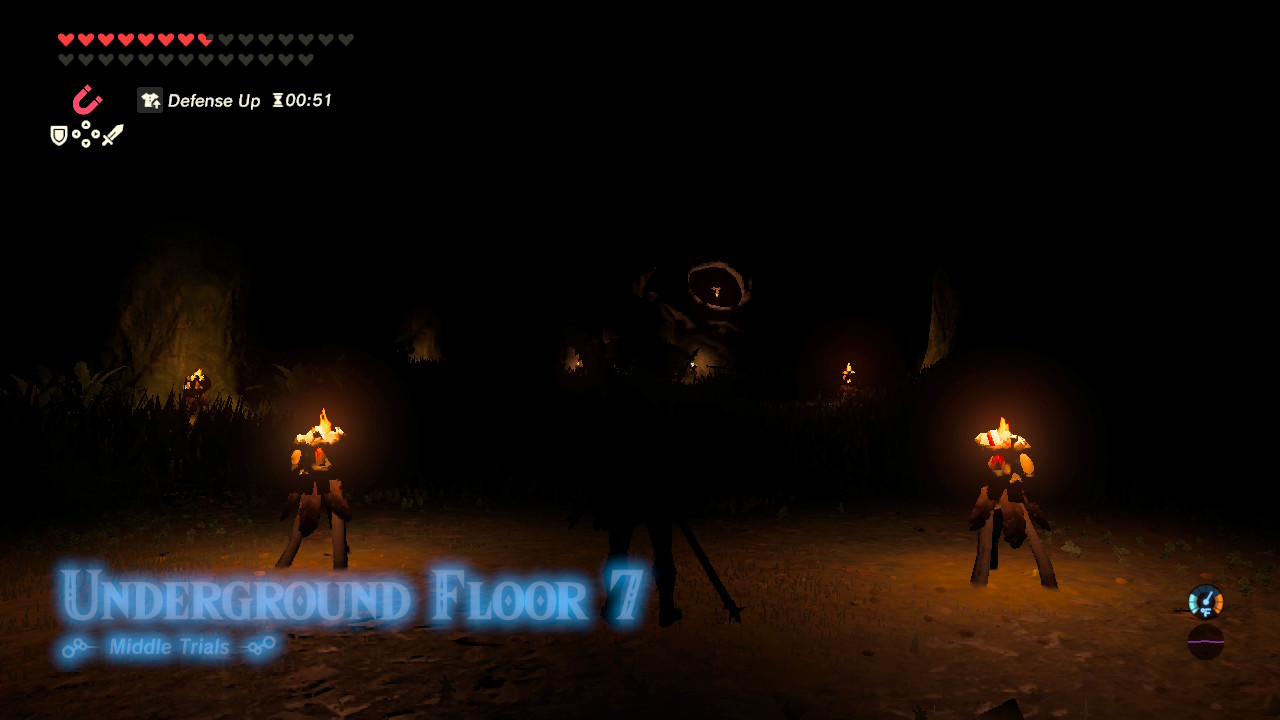
| Enemies |
・Fire-Breath Lizalfos (2) ・Blue Lizalfos (2) |
|---|---|
| Equipment |
・Torch (1) ・Flameblade (1) ・Forest Dweller's Spear (1) ・Enhanced Lizal Spear (1) ・Strengthened Lizal Bow (1) ・Fire Arrow (Multiple) |
| Food & Materials |
・Various Food (Multiple) |
Floor 7 is arguably the toughest of the pitch black rooms. You're facing off against five Lizalfos here, two of which are Fire-breathing variants.
Lure the Fire-Breathing Lizalfos
Lure the Fire-breathing Lizalfos to your initial warp area where the torches are and use a spear to safely engage them and better spot their attacks. If they start breathing fire, shoot their now-prone heads with an arrow to stun them.
With the two Fire-breathing Lizalfos out of the way, head to the camp and shoot the lantern on the right eye of the Skull Cave. This will trigger a massive explosion that will most likely kill or heavily damage the Lizalfos inside.
Take out any stragglers and, once all enemies are taken care of, pick up all the weapons, arrows, and food you can find before warping to the next floor.
Floor 8
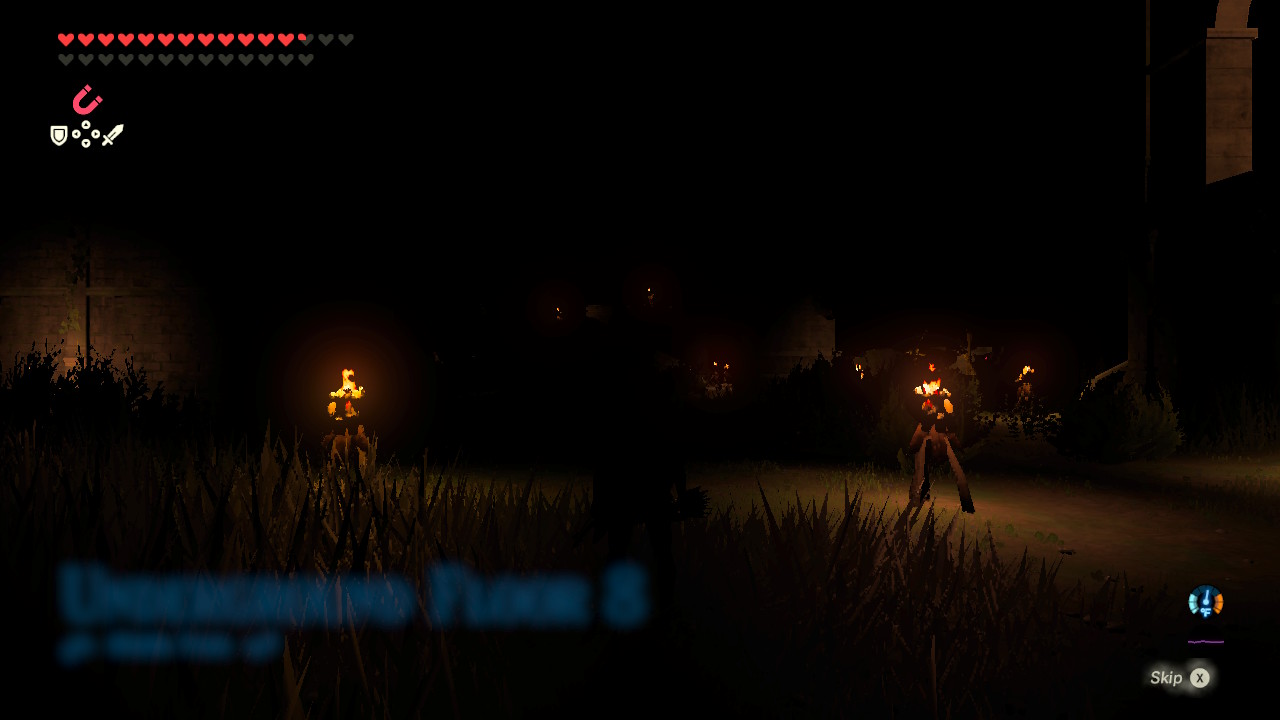
| Enemies |
・Black Bokoblin (2) ・Blue Bokoblin (1) ・Meteo Wizzrobe (1) |
|---|---|
| Equipment |
・Torch (2) ・Soldier's Broadsword (1) ・Rusty Broadsword (2) ・Dragonbone Boko Club (1) ・Meteor Rod (1) ・Dragonbone Boko Bat (1) ・Rusty Halberd (1) ・Arrow (Multiple) ・Soldier's Shield (1) ・Rusty Shield (1) |
| Food & Materials |
・Seared Steak (1) ・Various Food (Multiple) |
This floor is also set in perpetual darkness but the layout is quite different, with many ruins dotting the landscape. As soon as you warp into the level, head up the tall tower-like structure to the right so you can get a better view of where the enemies are located.
Snipe the Enemies with Your Bow
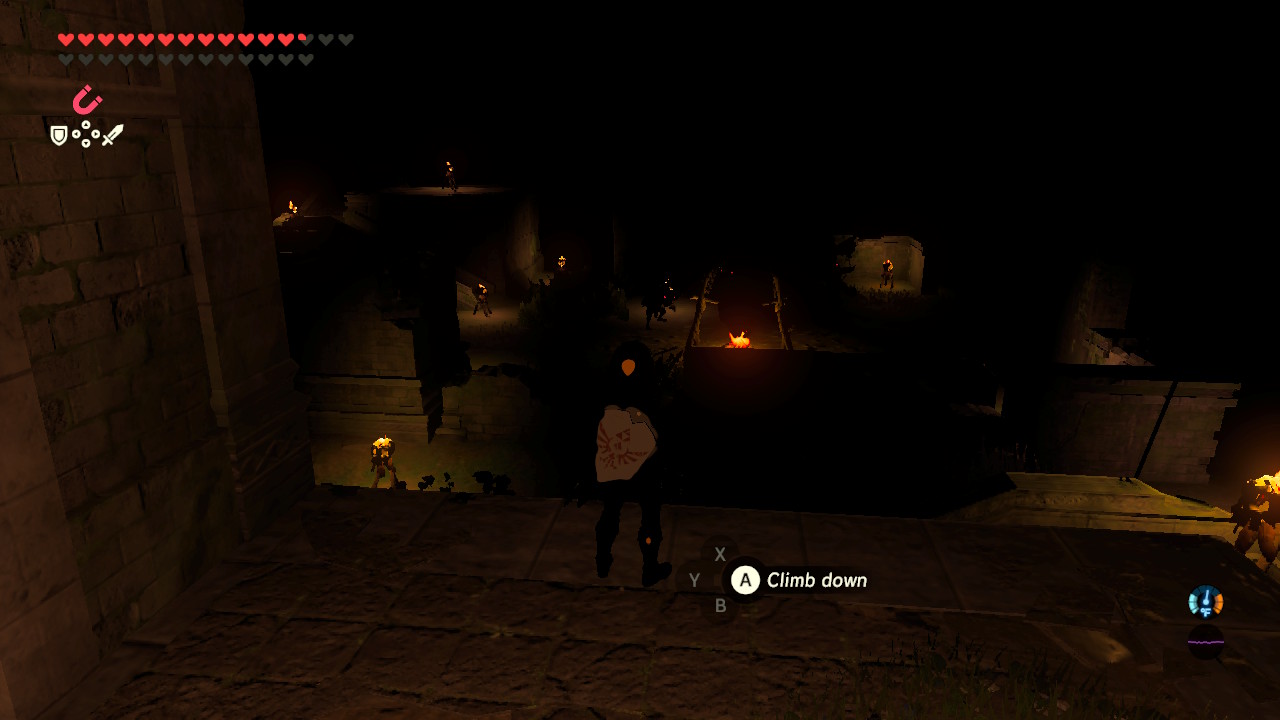
You can easily take out the enemies here with your bow, provided you have enough arrows. The Bokoblins tend to run towards each other when you start picking them off, allowing you to easily take on groups.
If you want to conserve your arrows, you can simply snipe the enemies from a distance and then quickly run down to finish them off.
Defeat the Meteo Wizzrobe
The deadliest enemy here is the Meteo Wizzrobe, which you'll find hanging around the middle of the room. Once it spots you, it will turn invisible, and then cast a powerful fire spell that can knock Link off his feet and deplete several hearts.
As soon as you spot the Wizzrobe, paraglide towards it and shoot its head with an arrow to stun it. Quickly take out your strongest weapon and strike it repeatedly.
Don't give it a chance to recover from your attacks! If you do, it will summon Fire Chuchus or Fire Keese or worse - cast a spell that raises the temperature of the room, causing Link to take constant heat damage!
Once it gets its bearings, use the Stasis rune and shoot its head again and strike it with your strongest weapon to defeat it.
Grab all the weapons and arrows you can find before warping to the next floor.
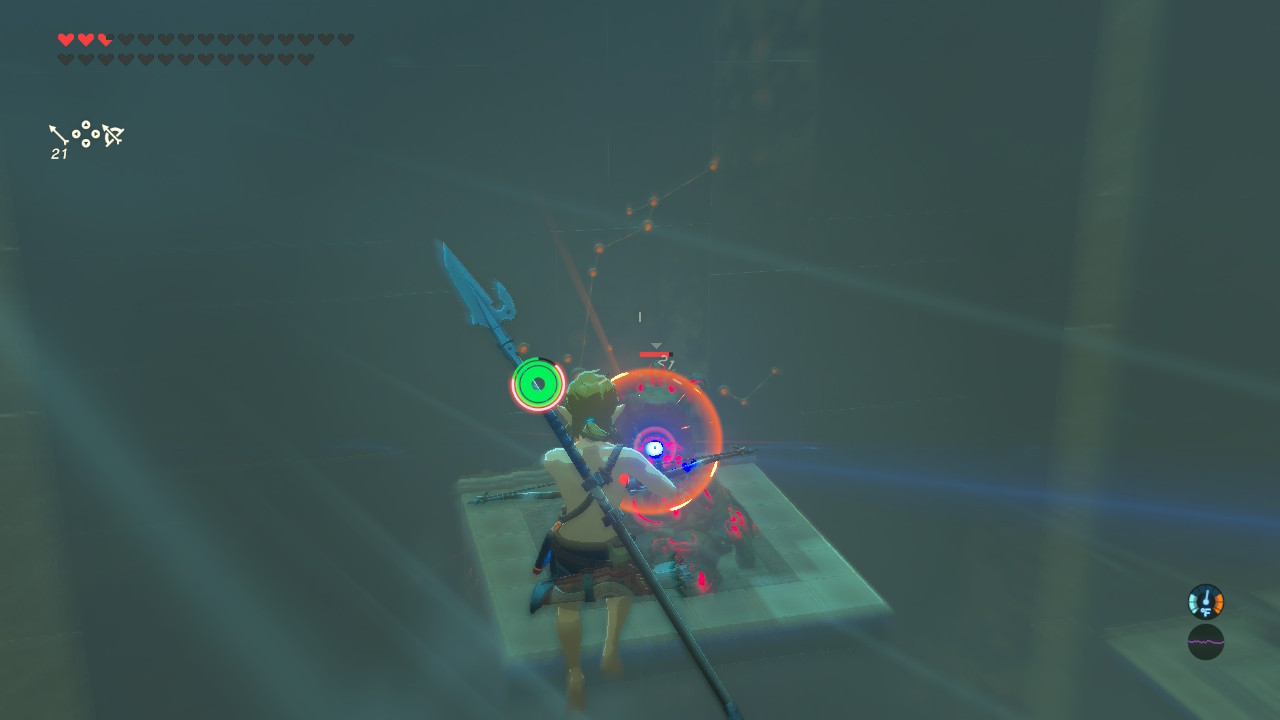
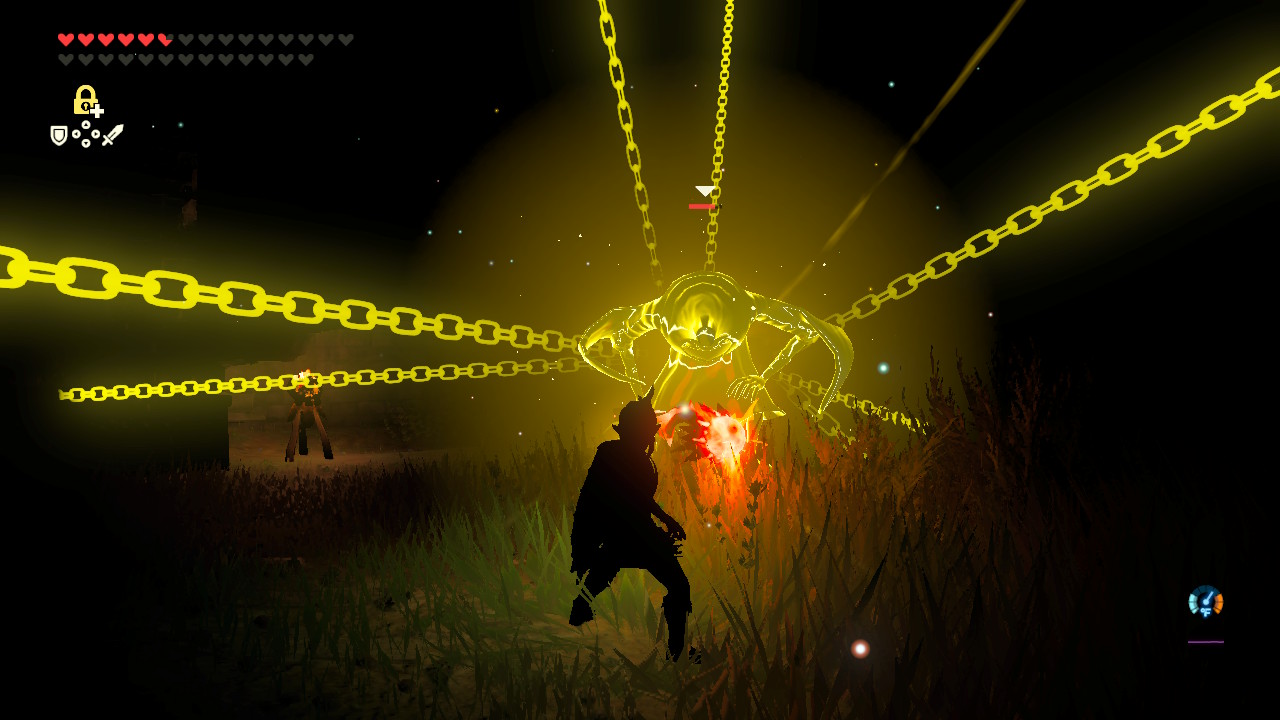
Floor 9
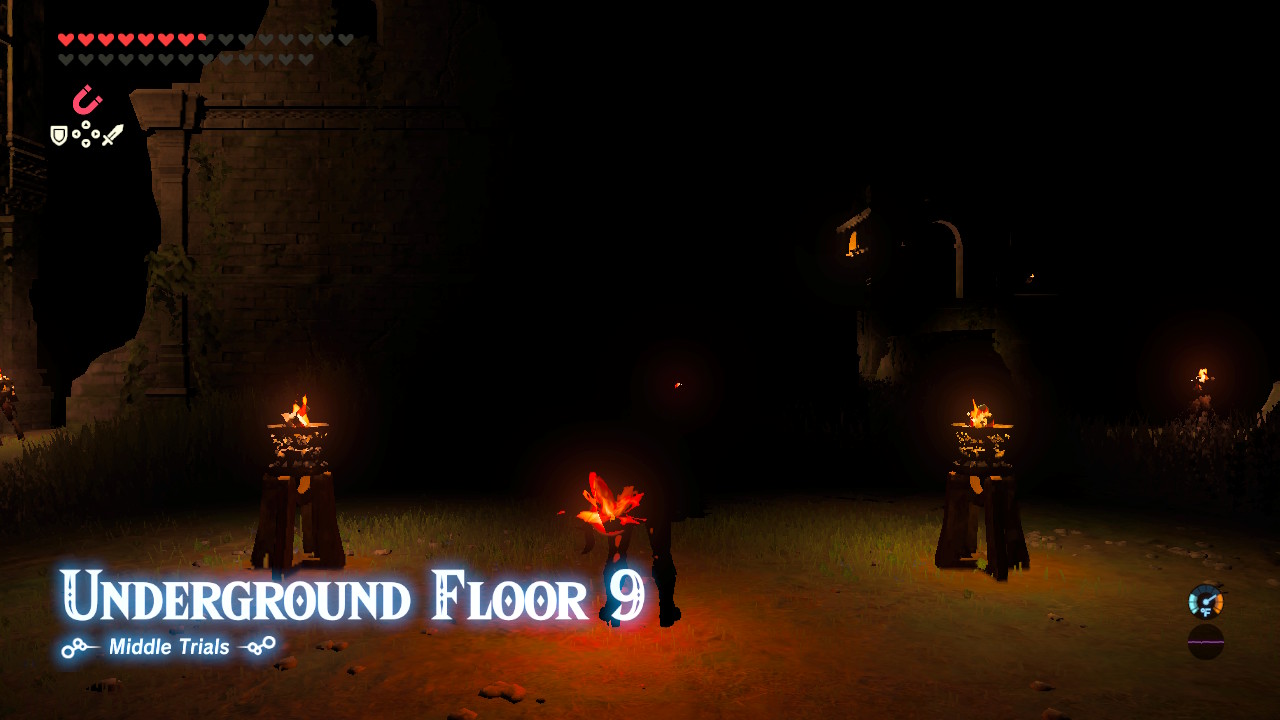
| Enemies |
・Decayed Guardian (1) |
|---|---|
| Equipment |
・Torch (2) ・Rusty Broadsword (1) ・Arrow (Multiple) ・Rusty Shield (1) |
| Food & Materials | None |
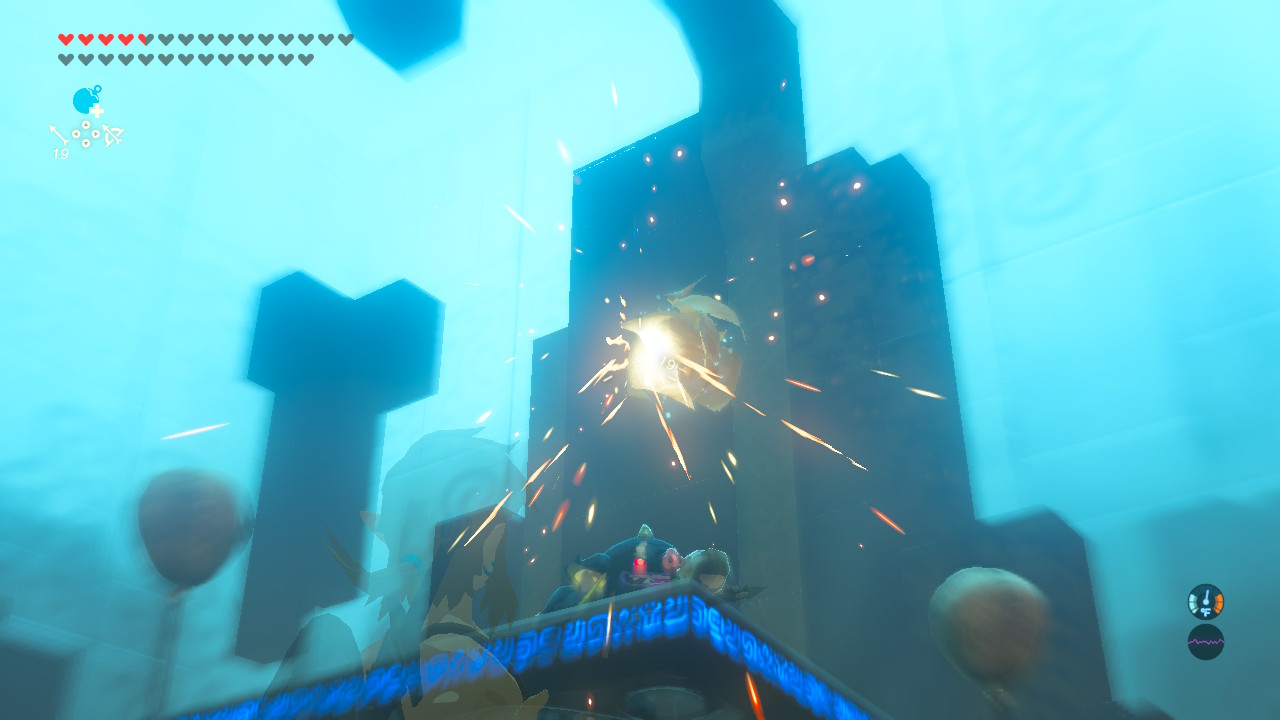
This floor has only one enemy - a Decayed Guardian sitting in the middle of the room. It will light up and start targeting Link once it spots it, and eventually unleash a powerful laser beam.
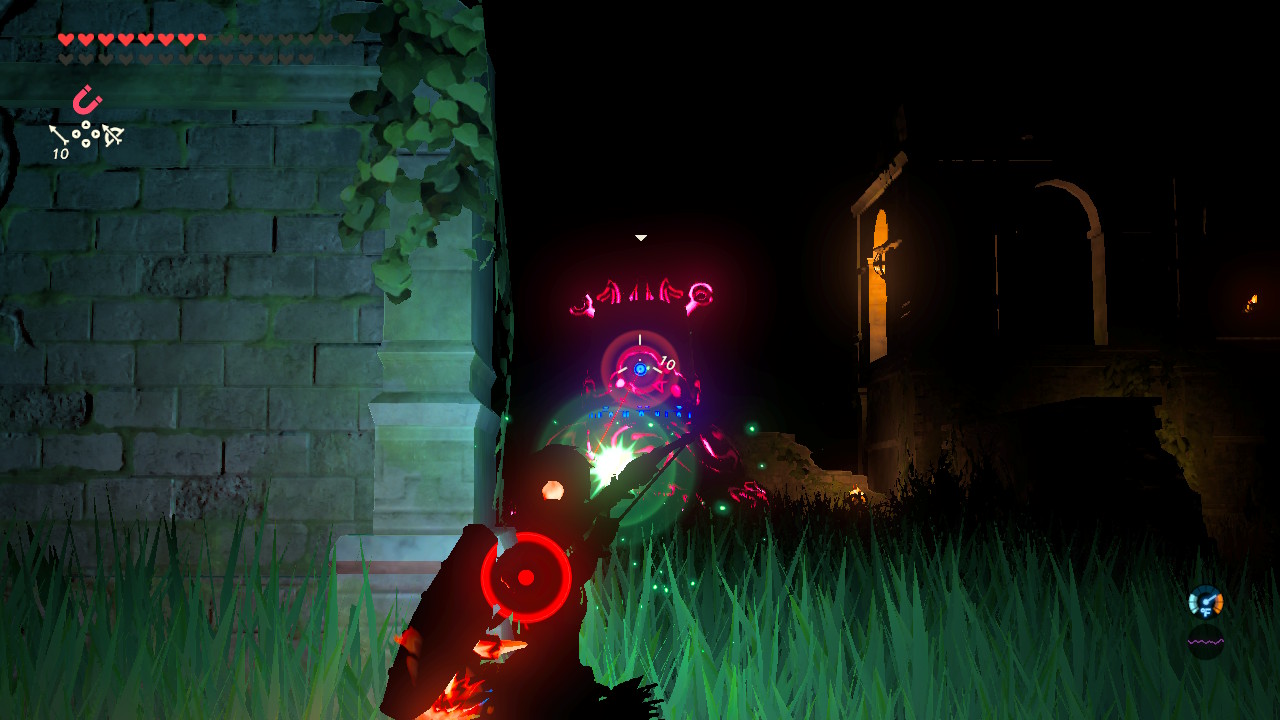
Ready your Stasis rune and use it on the Guardian before it shoots its laser. Use your strongest weapons against it once its stunned, and then quickly hide behind the ruined walls once it starts counting down its laser attack.
Parry the Laser
You can also simply parry the laser. Get into position and perfect parry the laser beam to instantly destroy the Decayed Guardian.
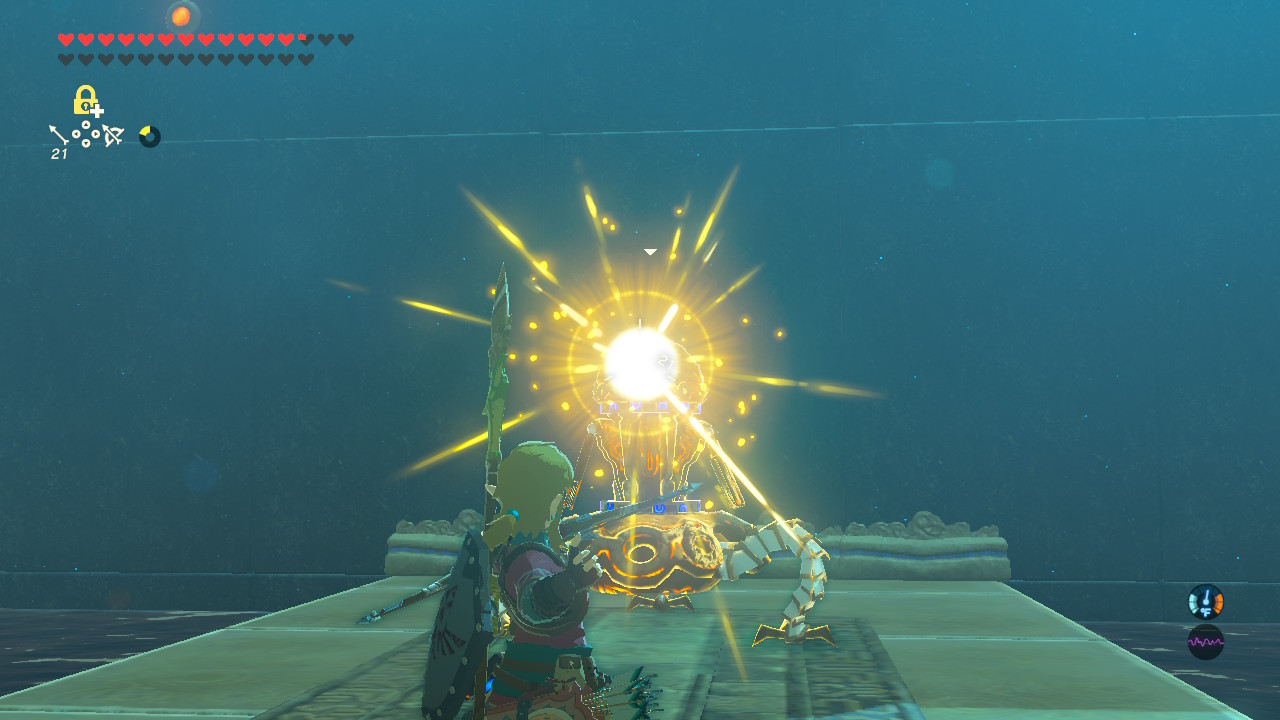
Floor 10
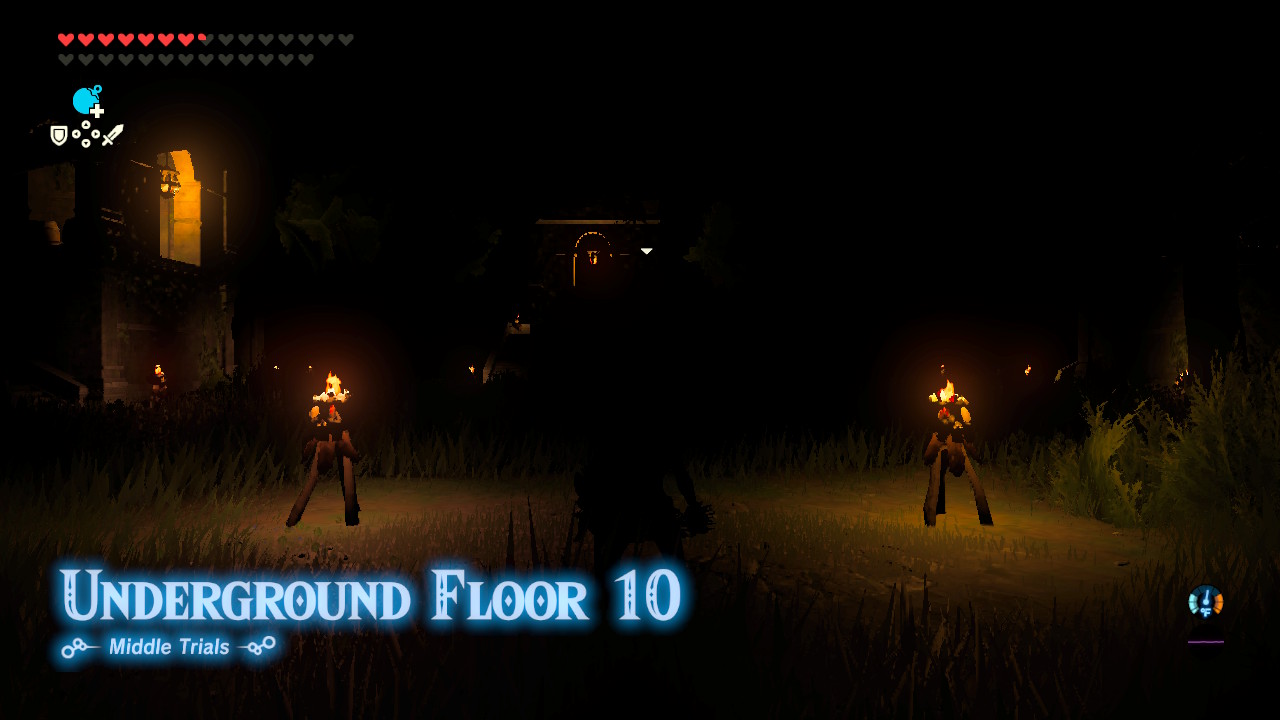
| Enemies |
・Black Hinox (1) |
|---|---|
| Equipment |
・Torch (2) ・Knight's Broadsword (1) ・Thunderstorm Rod (1) ・Rusty Claymore (1) ・Rusty Halberd (1) ・Knight's Bow (1) ・Arrow (Multiple) |
| Food & Materials | None |
A Black Hinox serves as the second boss for the Middle Trials.
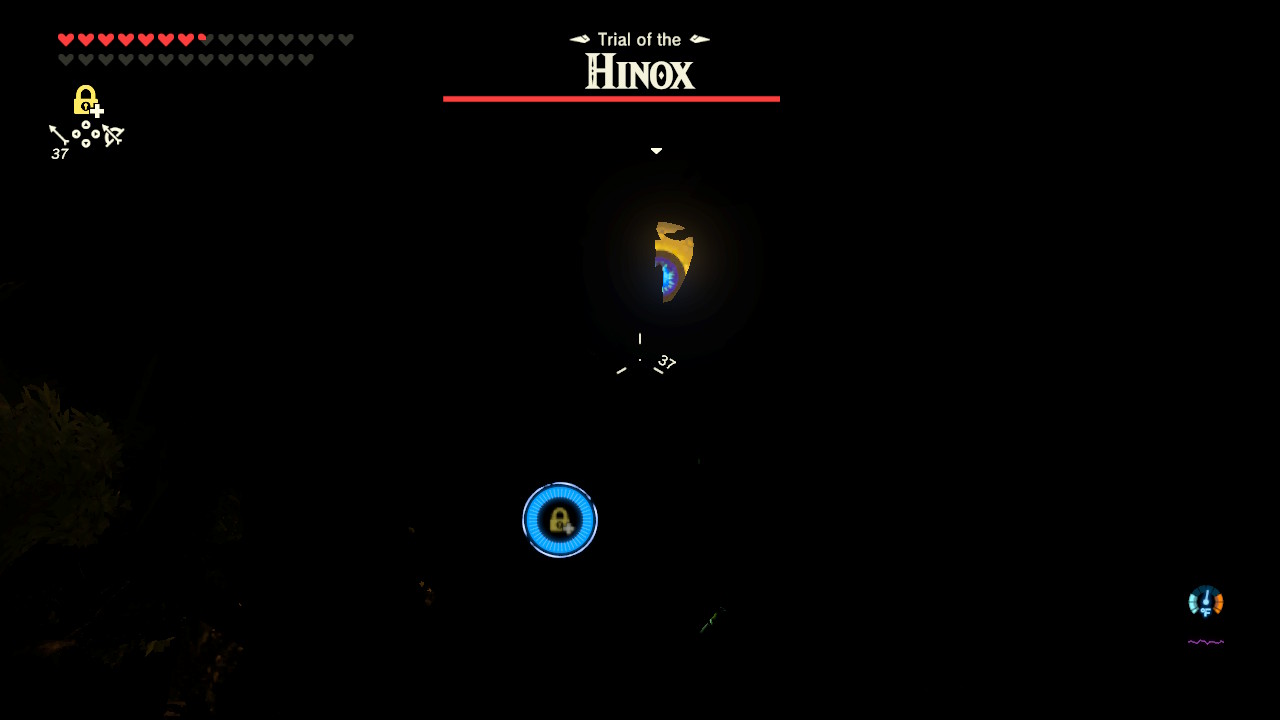
The dark room can make it more difficult to engage the lumbering beast. Fortunately, it's single eye glows in the dark and can help you track its movements.
Defeat the Black Hinox
Keep your distance and shoot its eye to stun it, and then attack it with your strongest weapon.
Once you deplete its health enough, it will start covering its eye. Shoot its right leg with a Fire Arrow. This sets the wooden armor covering it on fire, allowing you to shoot its eye and stun it once more.
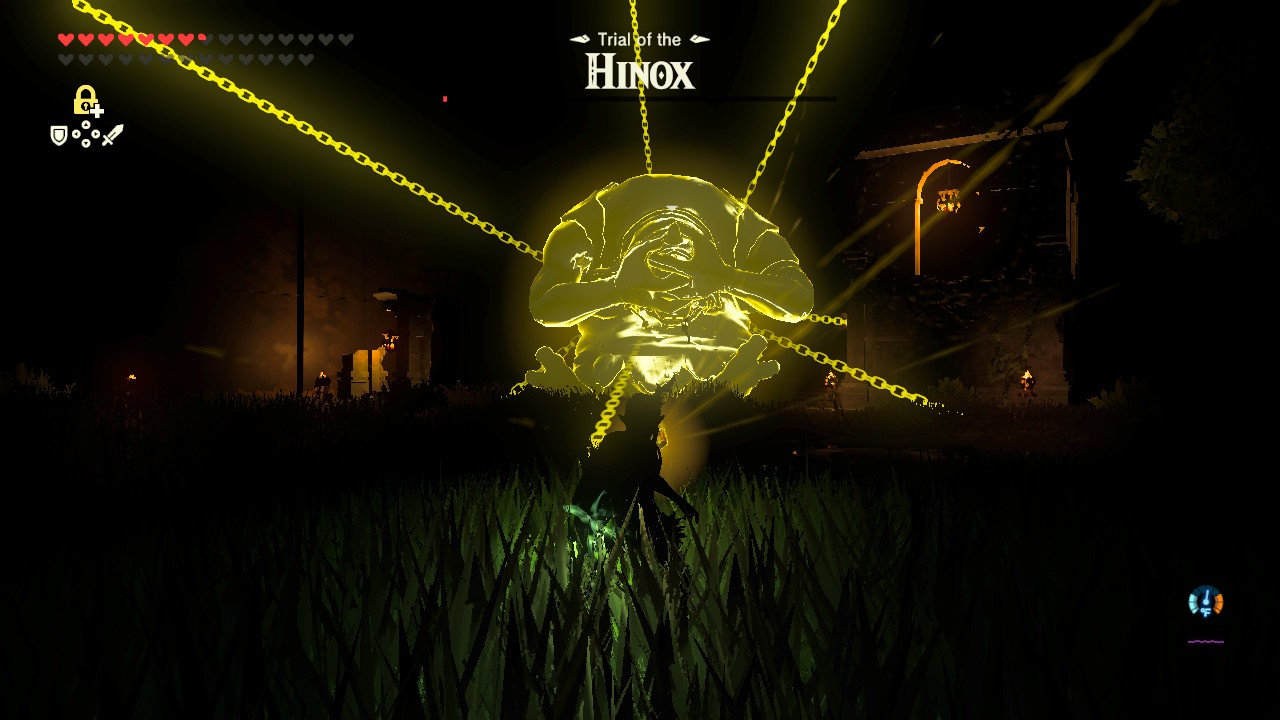
You can also use the Stasis rune to get some distance away from the Hinox. This also gives it a yellow glow, allowing you to see where it actually is in the darkness.
Once defeated, grab all of the weapons it drops and warp to the next floor.
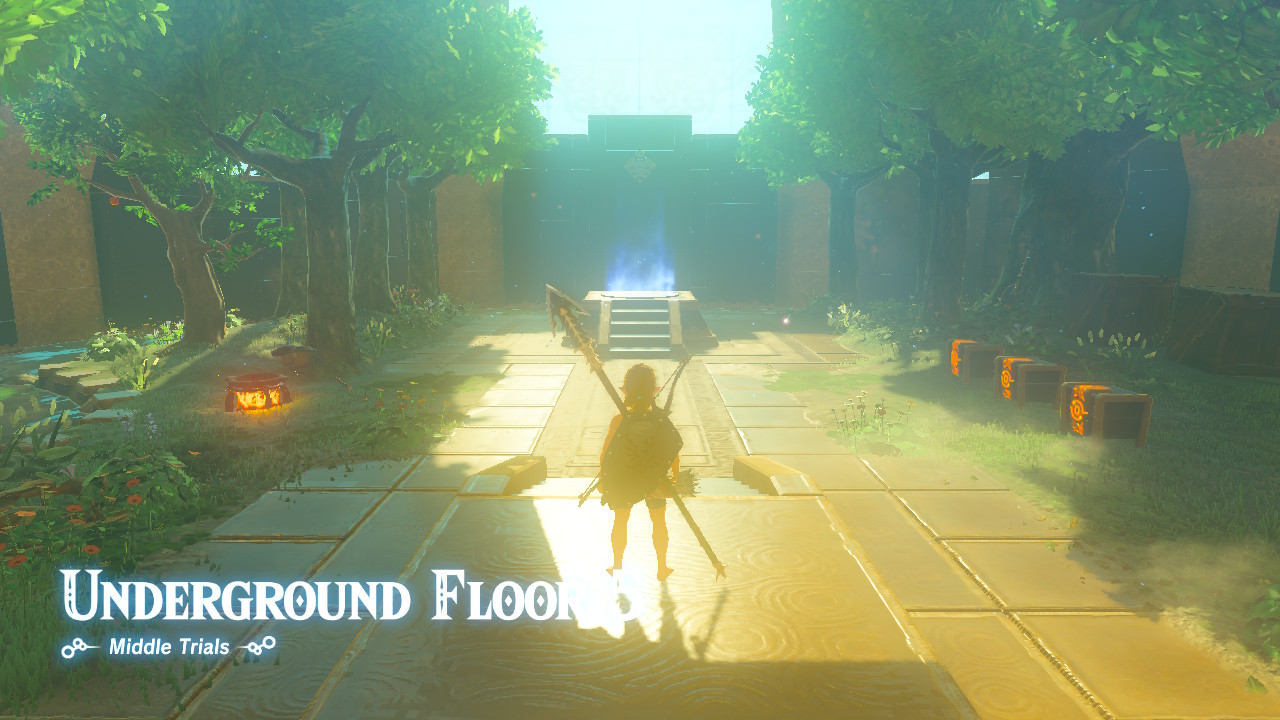
Floor 11
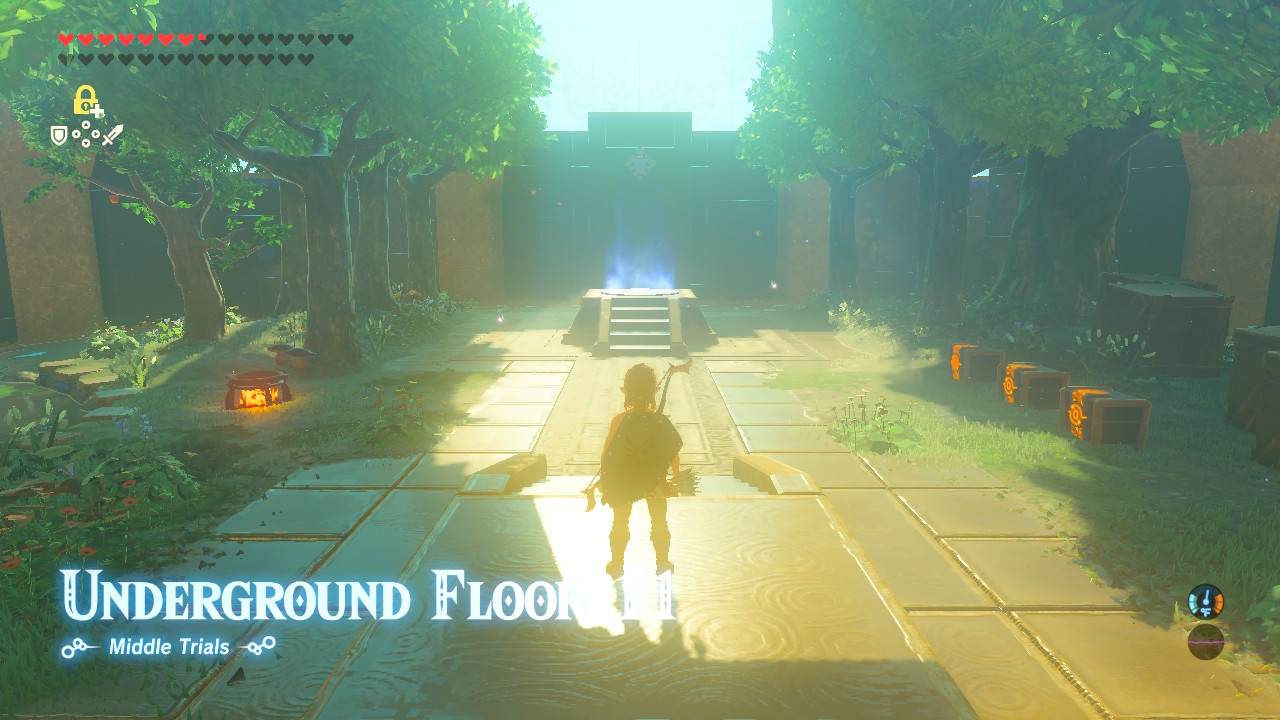
| Enemies | None |
|---|---|
| Equipment |
・Forest Dweller's Sword (1) ・Forest Dweller's Spear (1) ・Arrow (Multiple) ・Hylian Tunic (1) |
| Food & Materials |
・Apple (2) ・Endura Shroom (2) ・Fairy (2) ・Hyrule Bass (3) ・Ironshroom (2) ・Various Food (Multiple) |
Floor 11 is a Resting Spot. Use this opportunity to cook food and capture fairies.
It's also a good idea to destroy all the trees here and use the wood to cook Rock-Hard Food Food. While disgusting to eat, it still recovers hearts and can be invaluable in later floors once your food starts running out.
Floor 12
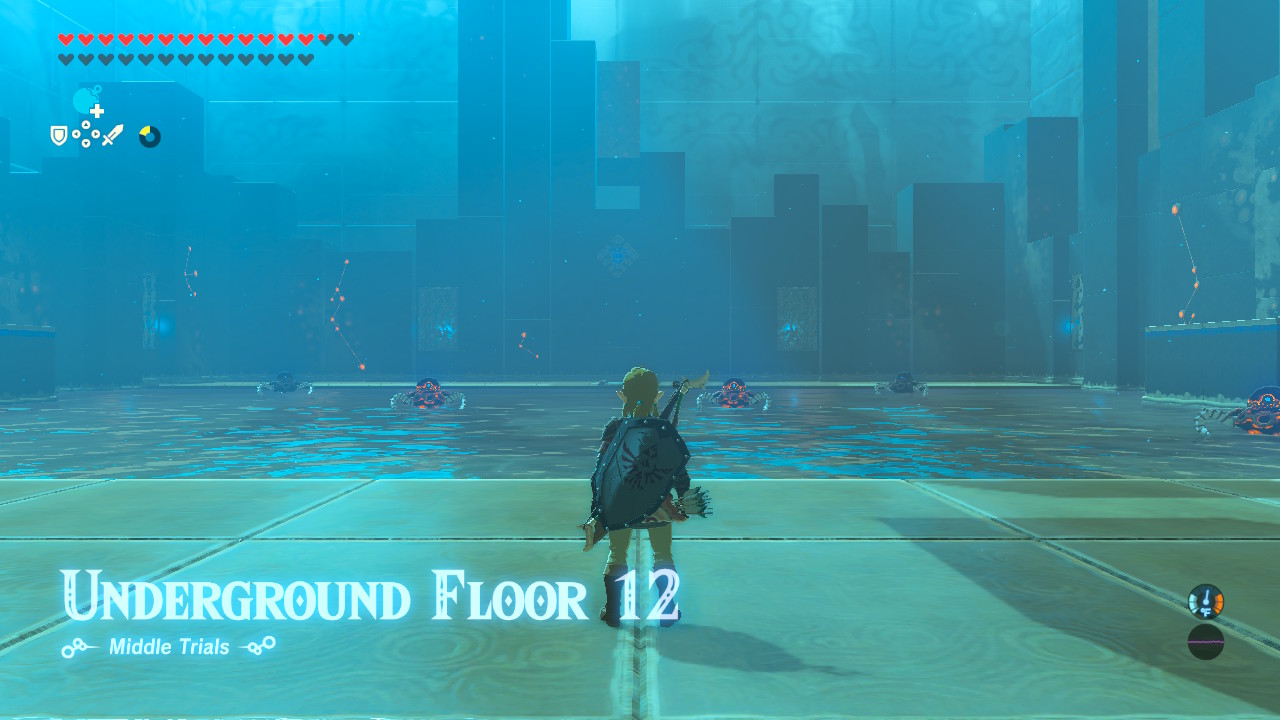
| Enemies |
・Guardian Scout I (6) |
|---|---|
| Equipment |
・Arrow (10) |
| Food & Materials | None |
Floor 12 pits you against six Guardian Scouts. Although they have low health and no other attacks other than their laser bolt, they can quickly overwhelm Link if you give them the chance.
Use Cryonis on the water to block the laser bolts, and dispatch the Guardians one-by-one. You can either rush towards them and pummel them with your strongest weapon, or simply shoot at their eye to instantly destory them.
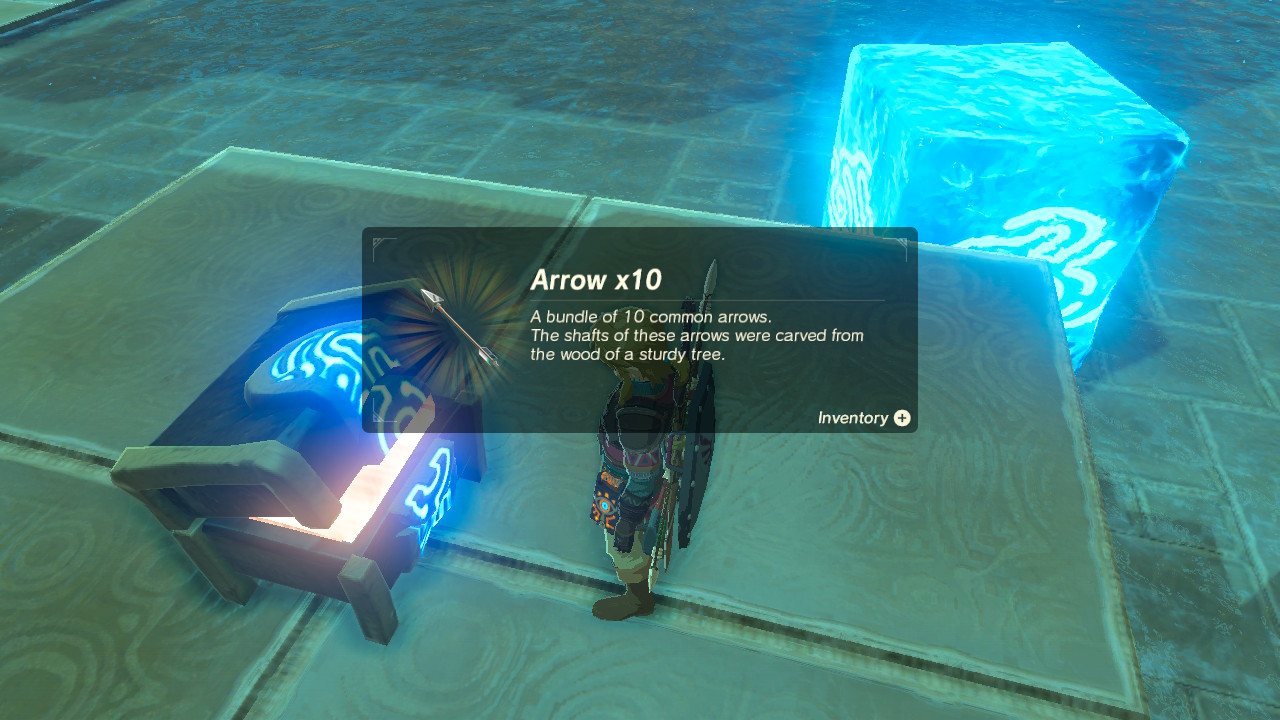
Before heading to the next room, use Cryonis to reach the left platform with the treasure chest containing 10 arrows.
Floor 13
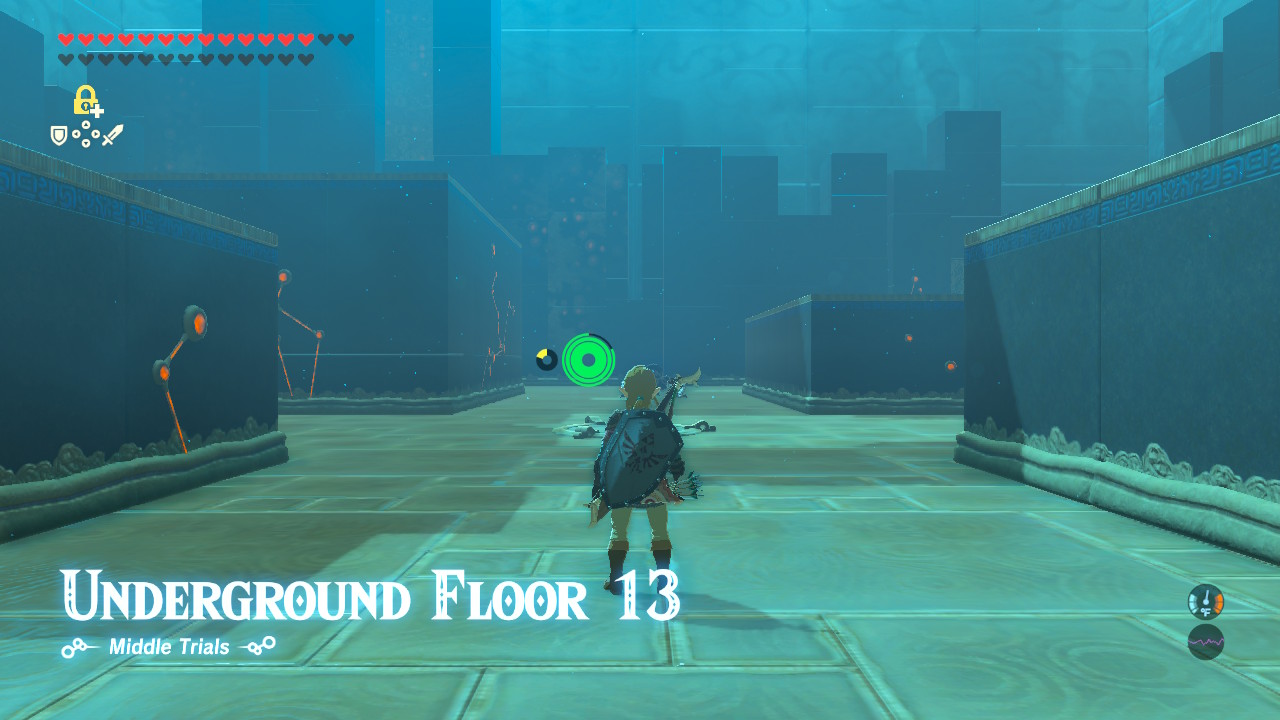
| Enemies |
・Guardian Scout II (3) |
|---|---|
| Equipment |
・Guardian Sword (1) ・Ancient Battle Axe (1) ・Guardian Spear (1) ・Duplex Bow (1) |
| Food & Materials | None |
You'll face off against three Guardian Scout IIs here. As soon as you warp in, equip your Stasis Rune and use it against the first enemy. Hitting it until it becomes red will deplete all of its health as soon as Stasis wears off.
Do the same with the other Guardian Scouts. It's a good idea to wait for them to power down so that they don't rush at you. This also ensures you're only engaging one Guardian Scout at a time.
Before warping out, make sure you replace your old weapons with the Guardian ones. They are stronger and do extra damage to the Guardian-type enemies you'll encounter in the next rooms.
Floor 14
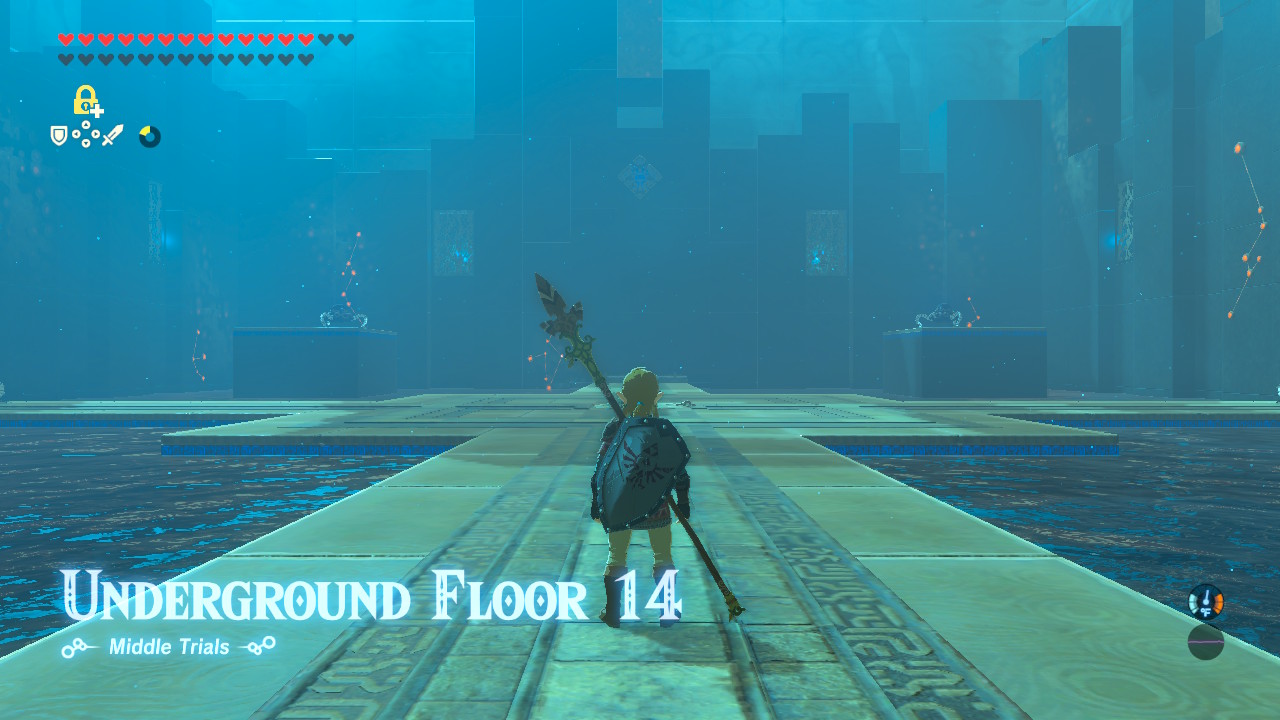
| Enemies |
・Guardian Scout II (2) ・Guardian Scout I (4) |
|---|---|
| Equipment |
・Guardian Sword (2) ・Eightfold Longblade (1) ・Guardian Shield (2) |
| Food & Materials | None |
The next area has four Guardian Scouts placed on four elevated platforms, and two Guardian Scout IIs sitting on the east and west side of the rooms.
Shoot the Guardian Scouts
As soon as you warp in, use your bow to snipe the four Guardian Scouts sitting on top of the four platforms. This prevents them from continously shooting at Link once he engages the two Guardian Scout IIs.
Once you defeat these scouts, you can safely engage the two Guarddian Scout IIs separately. Use the Stasis strategy against them to quickly defeat them without issue.
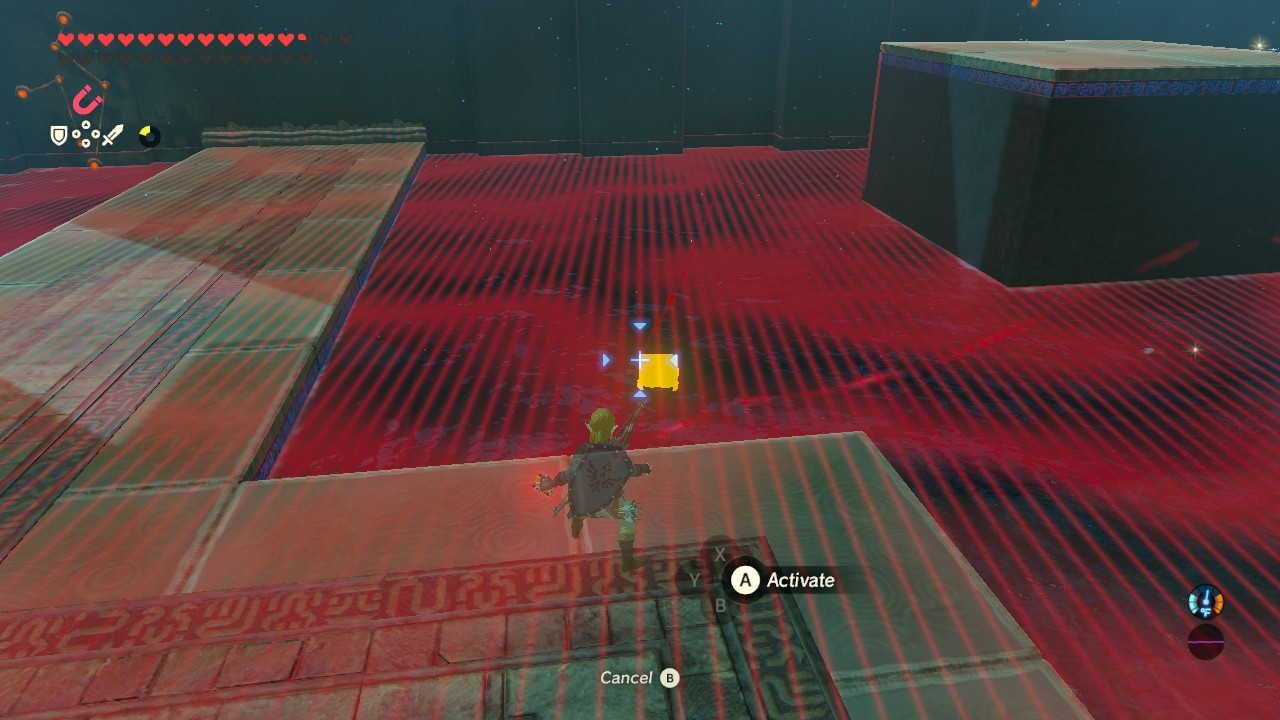
Before warping out, make sure to grab the chest submerged underwater. Use the Magnesis rune to bring an open it to receive an Eightfold Longblade.
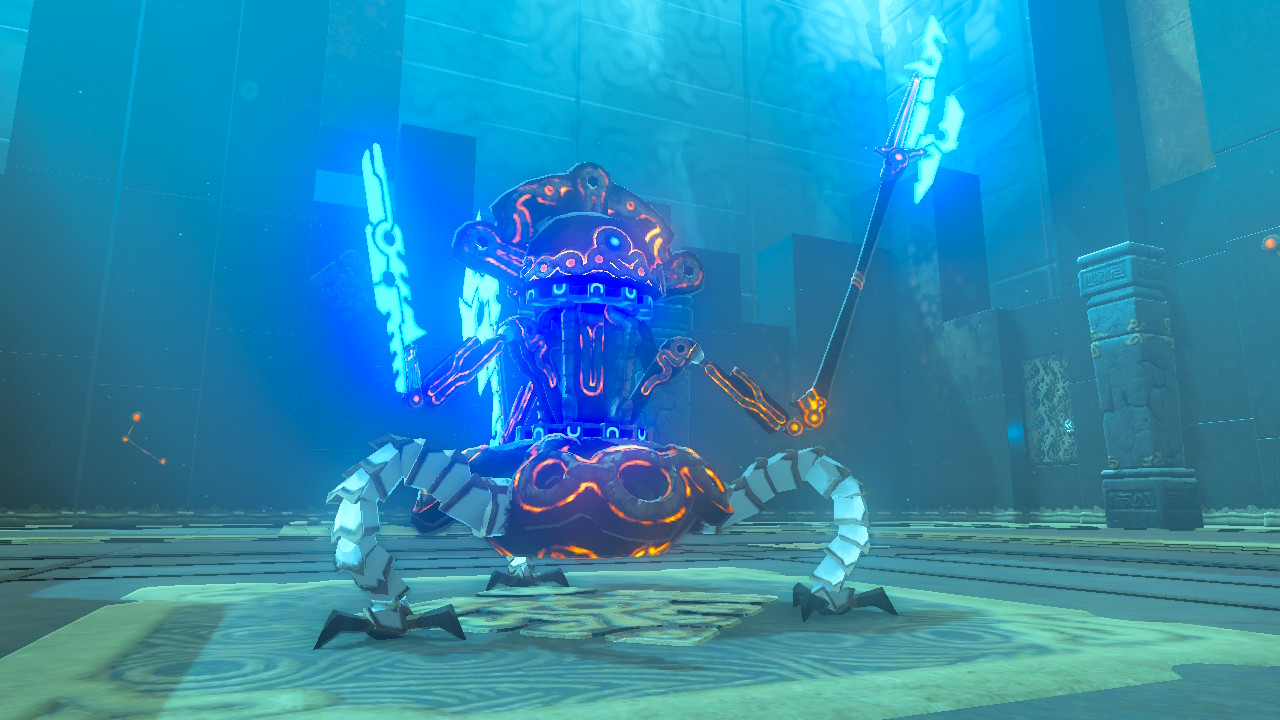
Floor 15
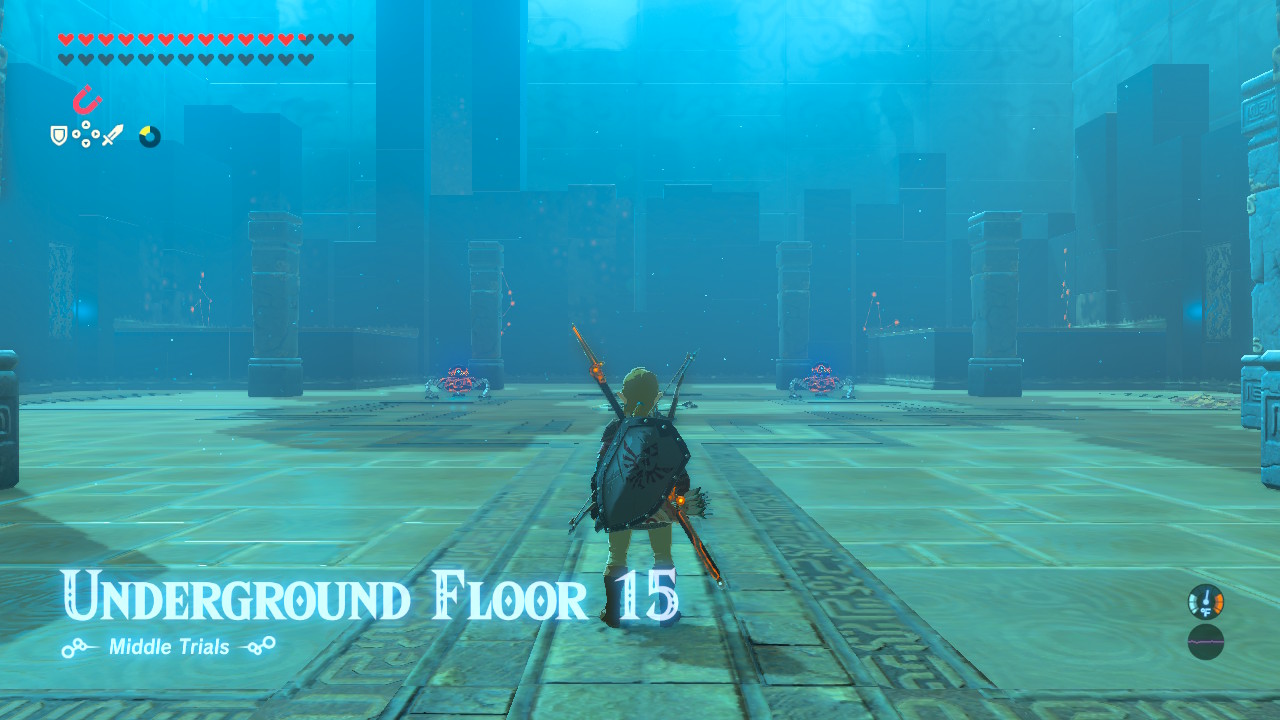
| Enemies |
・Guardian Scout II (2) |
|---|---|
| Equipment |
・Guardian Sword+ (1) ・Ancient Battle Axe (1) ・Guardian Spear (1) ・Guardian Shield+ (1) |
| Food & Materials | None |
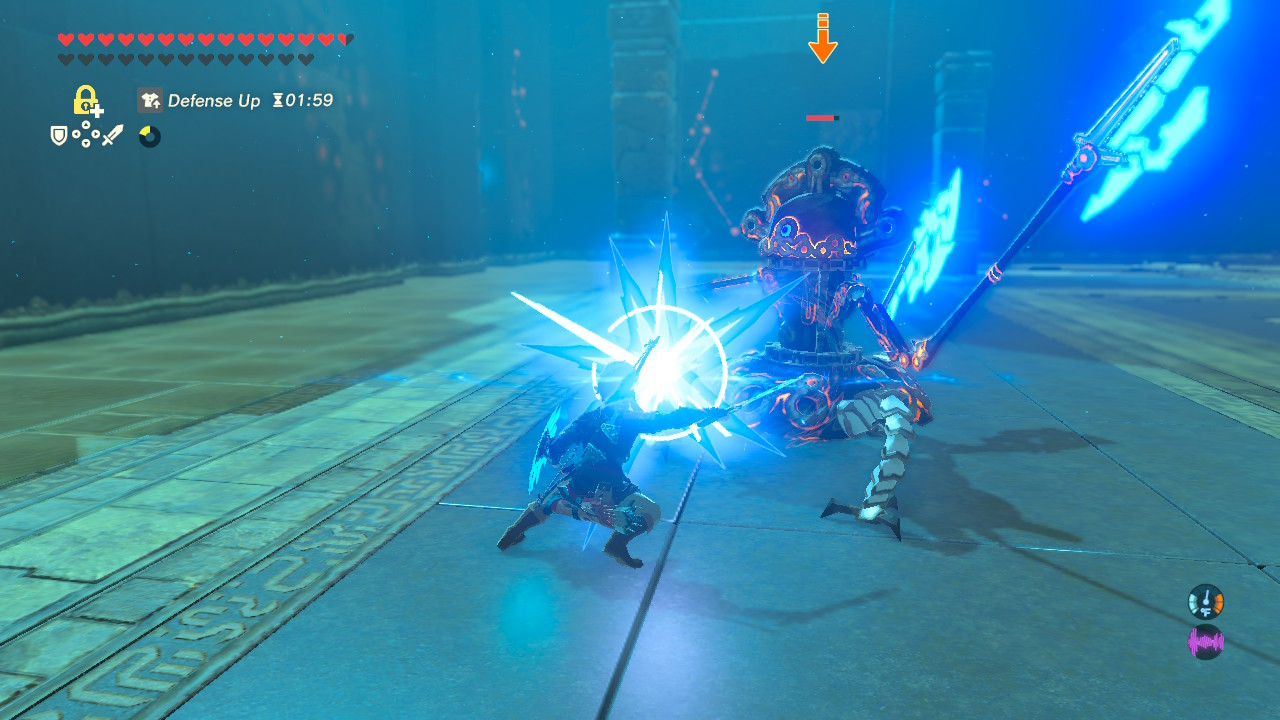
Floor 15 pits you against two Guardian Scout IIs. The two scouts will immediately rush at you as soon as they warp into the room, forcing you to battle them both at the same time.
Keep Your Distance
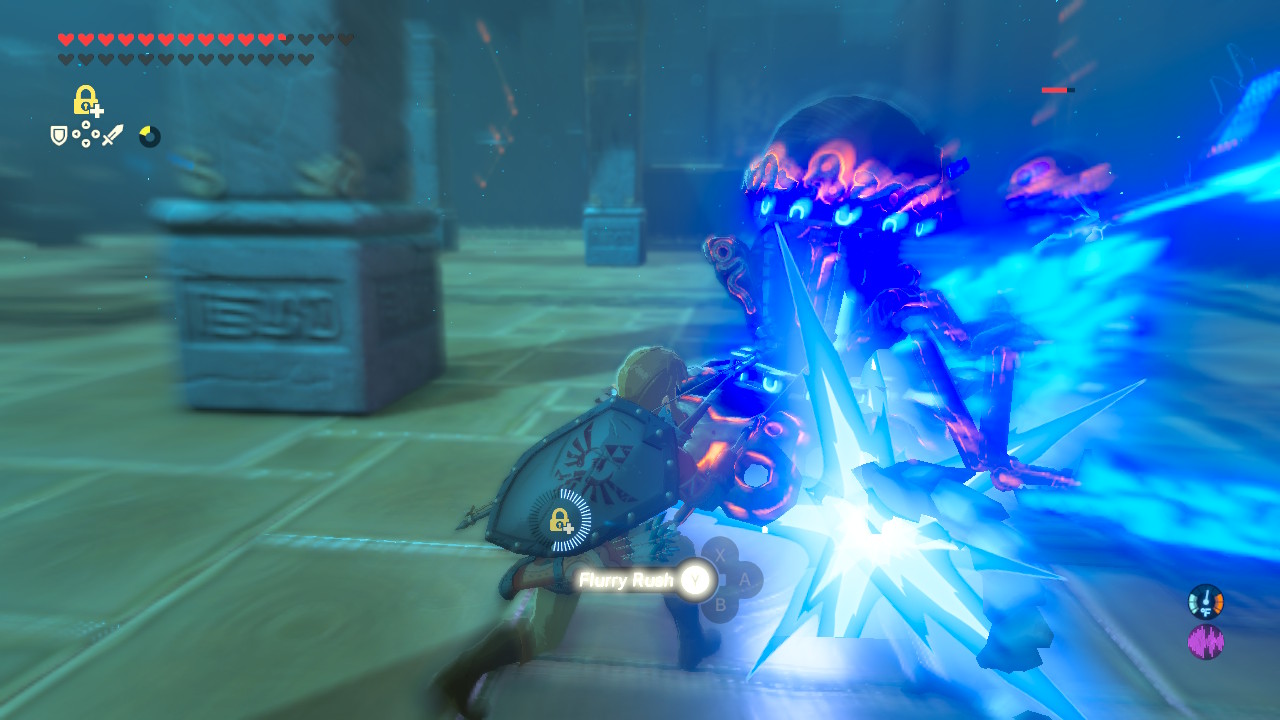
It's a good idea to keep your distance from the two scouts as all of its attacks, even its laser barrage, tends to be short range. Shooting the Guardians from range also ensures you don't get hit by one of the Guardian's spears.
Use Stasis
Use Stasis on one of the Guardian Scouts so that you have some space to engage the other scout.
Eventually, one of the Guardians will do a spinning charge attack. Hide behind one of the pillars so that it stuns itself, allowing you to hit it with your strongest weapons.
Once both Guardians are down, grab all of the weapons and heal up for the next floor.
Floor 16
| Enemies |
・Guardian Scout IV (1) |
|---|---|
| Equipment |
・Guardian Sword+ (1) ・Ancient Battle Axe+ (1) ・Guardian Spear+ (1) |
| Food & Materials | None |
A Guardian Scout IV serves as the last boss for the Middle Trials. It's a one-on-one battle, much like a A Majort Test of Strength, but don't underestimate the enemy! It's using a Guardian Sword+, Ancient Battle Axe+, and a Guardian Spear+.
Dodge its Attacks
Although intimidating, the Guardian Scout IV's attacks are easy to dodge, giving Link an opportunity to unleash a Flurry Rush.
The two attacks you need to watch out for is its Sword Chop and its Double Axe Slash. If the Guardian uses its sword, dodge to the right. If it's using its axe, dodge backwards on either swipes to unleash a flurry rush.
Hide Behind the Pillars
Eventually, the Guardian will jump back to do its spinning charge attack. Run behind one of the pillars so that the Guardian knocks itself out and give you an opportunity to wail on it with your strongest weapons.
Laser Spin
When the Guardian does its laser spin attack, keep your distance! Wait for it to cause an updraft and use the paraglider to fly towards the Guardian and shoot its eye with an arrow.
Laser Attack
The Guardian will eventually start charging its powerful laser attack. You can either perfect parry this attack or simply use Stasis on it and rush towards it to finish it off.
Floor 17
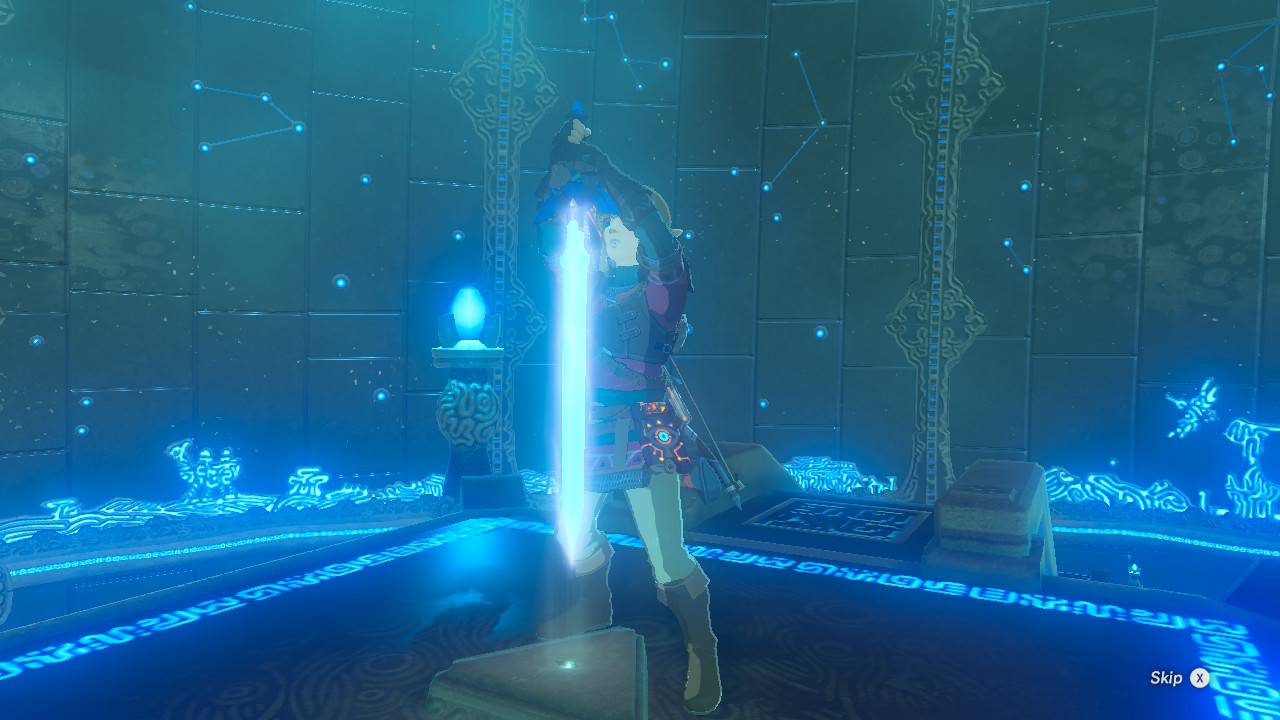
Walk up to the Master Sword to complete The Middle Trials and boost the Master Sword's power from 40 to 50.
Breath of the Wild Related Guides

Trial of the Sword Guides
| All Trial of the Sword Guides | ||
|---|---|---|
| EX Trial of the Sword | ||
| The Beginning Trials | The Middle Trials | The Final Trials |
Other DLC Quests
Comment
Author

The Legend of Zelda: Breath of the Wild Walkthrough & Guides Wiki
The Middle Trials Walkthrough
Please participate in our site
improvement survey
03/2026
improvement survey
03/2026
Would you assist in
improving Game8's site?
improving Game8's site?

×
We are listening to our users' valuable opinions and discussing how to act on them.
The information collected through this survey will be used for the purpose of improving our services. In addition, the information will only be disclosed a part of a statistic in a format that will not allow identification of personal information.
Begin Survey
Not Now
×
Please rate each item regarding Game8.co's Advertisements.
Amount of Ads
Very Dissatisfied
Somewhat Dissatisfied
Fine
Somewhat Satisfied
Highly Satisfied
Placement of Ads
Timing of Ad Display
Ad Loading Speed
Safeness of Ads
Content of Ads
×
Please rate each item regarding Game8.co's Quality of Articles.
Amount of information
Very Dissatisfied
Somewhat Dissatisfied
Fine
Somewhat Satisfied
Highly Satisfied
Frequency of updates
Speed of new information
Accuracy of articles
Understandibility of articles
Readability of sentences
×
Please rate each item regarding Game8.co's Usability of the Site.
Ease of finding information
Very Dissatisfied
Somewhat Dissatisfied
Fine
Somewhat Satisfied
Highly Satisfied
Loading Speed
Use of Color
Font Size
Visibility of Images
Easy to Understand Layout
×
Please rate each item regarding Game8.co's Message Boards, Comments.
Ease of Writing
Very Dissatisfied
Somewhat Dissatisfied
Fine
Somewhat Satisfied
Highly Satisfied
Readability
Ease in Finding Information
Comment Quality
Comment Quantity
Admin Response
×
Please rate each item regarding Game8.co's Site's new design.
Please rate our site's new design
Very Dissatisfied
Somewhat Dissatisfied
Fine
Somewhat Satisfied
Highly Satisfied
Do you think that the website's design change makes the site easier to use?
Has the new design made it easier for you to find information on the site?
Has the new design improved the overall visual appeal of the site?
How would you rate your overall satisfaction with the new design of the site?
×
How likely are you to recommend Game8 to someone you know?
Very Unlikely
0
1
2
3
4
5
6
7
8
9
10
Very Likely
If you have other opinions regarding potential improvement to the website, please share them with us. We would appreciate your honest opinion.
Note: This is a free response section, so you can proceed without entering anything.
Note: Please be sure not to enter any kind of personal information into your response.
Note: Please be sure not to enter any kind of personal information into your response.
×
Thank You
×
Thank you for participating in our survey! Your answers will help us to improve the quality of our website and services.
We hope you continue to make use of Game8.
We hope you continue to make use of Game8.
Close
Rankings
- We could not find the message board you were looking for.
Gaming News


![Tides of Tomorrow Review [Early Preview] | A Real Tide Turner](https://img.game8.co/4430520/55ac77566157b2a1d29564ff575d5274.png/thumb)
Popular Games

Genshin Impact Walkthrough & Guides Wiki
Resident Evil Requiem (RE9) Walkthrough & Guides Wiki
Honkai: Star Rail Walkthrough & Guides Wiki
Monster Hunter Wilds Walkthrough & Guides Wiki
Umamusume: Pretty Derby Walkthrough & Guides Wiki
Pokemon TCG Pocket (PTCGP) Strategies & Guides Wiki
Arknights: Endfield Walkthrough & Guides Wiki
Wuthering Waves Walkthrough & Guides Wiki
Zenless Zone Zero Walkthrough & Guides Wiki
Digimon Story: Time Stranger Walkthrough & Guides Wiki


Recommended Games
Yu-Gi-Oh! Master Duel Walkthrough & Guides Wiki
Super Smash Bros. Ultimate Walkthrough & Guides Wiki
Diablo 4: Vessel of Hatred Walkthrough & Guides Wiki
Fire Emblem Heroes (FEH) Walkthrough & Guides Wiki
Pokemon Brilliant Diamond and Shining Pearl (BDSP) Walkthrough & Guides Wiki
Elden Ring Shadow of the Erdtree Walkthrough & Guides Wiki
Monster Hunter World Walkthrough & Guides Wiki
The Legend of Zelda: Tears of the Kingdom Walkthrough & Guides Wiki
Persona 3 Reload Walkthrough & Guides Wiki
Cyberpunk 2077: Ultimate Edition Walkthrough & Guides Wiki


All rights reserved
© 2020 Nintendo. The Legend of Zelda, Wii U, and Nintendo Switch are trademarks of Nintendo.
The copyrights of videos of games used in our content and other intellectual property rights belong to the provider of the game.
The contents we provide on this site were created personally by members of the Game8 editorial department.
We refuse the right to reuse or repost content taken without our permission such as data or images to other sites.