This survey will take about 1 minute.
Your answers will help us to improve our website.
Minecraft Dungeons
Dingy Jungle Mission Walkthrough | Dingy Jungle Secrets
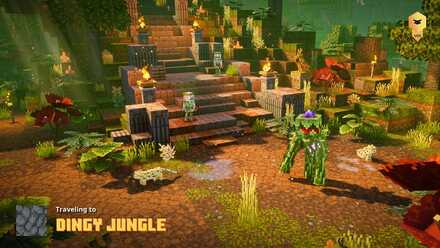
Dingy Jungle is the first Mission of the Jungle Awakens DLC in Minecraft Dungeons. Learn how to get through this level, what gear and artifacts can be found here, and tips and strategies for beating it!
| Previous Mission | Current Mission | Next Mission |
|---|---|---|
| - | Dingy Jungle | Overgrown Temple |
| Unlockable Secret Mission | ||
| Panda Plateau | ||
List of Contents
Basic Information
Dingy Jungle is a Normal Mission introduced in the Jungle Awakens DLC. This is the first mission of the Island Realms map.
Weapon Drops
 Bow Bow
|
 Fighter's Bindings Fighter's Bindings
|
 Gauntlets Gauntlets
|
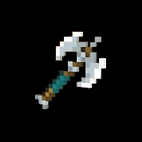
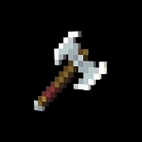 Double Axe Double Axe
|
 Soul Fists Soul Fists
|
 Bonebow Bonebow
|
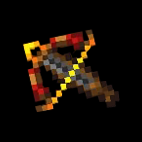
 Exploding Crossbow Exploding Crossbow
|
 Maulers Maulers
|
 Whirlwind Whirlwind
|
 Vine Whip Vine Whip
|
 Whip Whip
|
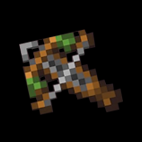
 Firebolt Thrower Firebolt Thrower
|
Armor Drops
 Archer's Armor Archer's Armor
|
 Hunter's Armor Hunter's Armor
|
 Mystery Armor Mystery Armor
|
 Shadow Walker Shadow Walker
|
 Ocelot Armor Ocelot Armor
|
Artifact Drops
 Tasty Bone Tasty Bone
|
 Totem of Regeneration Totem of Regeneration
|
 Iron Hide Amulet Iron Hide Amulet
|
Recommended Power for Each Difficulty
| Recommended Power | |||||||
|---|---|---|---|---|---|---|---|
| I | II | III | IV | V | VI | VII | |
| Default | - | 4 | 10 | 16 | 22 | 27 | 33 |
| Adventure | - | 39 | 45 | 51 | 56 | 62 | 68 |
| Apocalypse | - | 74 | 80 | 86 | 91 | 97 | 103 |
Mission Objectives
| # | Step by Step Objectives |
|---|---|
| 1 |
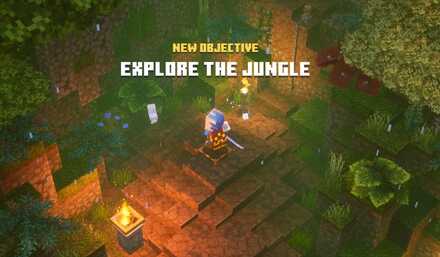 Explore the Jungle Follow the yellow markers through the jungle. Most of the enemies can inflict Poison which deals continuous damage so be careful around these mobs. |
| 2 |
 Pass the Stronghold There will be two gates to be opened for this objective and both triggers ambushes so be prepared to fight your way through this stronghold. |
| 3 |
 Explore the Vine Maze Continue following the markers after surviving the stronghold until you reach the vine maze. From this point onward, corrupted vines will start popping up everywhere. Although they're not much of a threat, they can still distract or block you. |
| 4 |
 Follow the Pass In addition to corrupted vines, poison quill vines are now present on almost everywhere. These mobs are also stationary but can shoot poisonous projectiles at you. |
| 5 |
 Survive the Ambush Follow the markers again until you encounter corrupted vines that seem to be acting as walls enclosing a square area. Approach the stone wall nearby and you will be ambushed by waves of mobs. Some of these mobs are Leapers that move like Redstone Golems but use leaping attacks instead. |
| 6 |
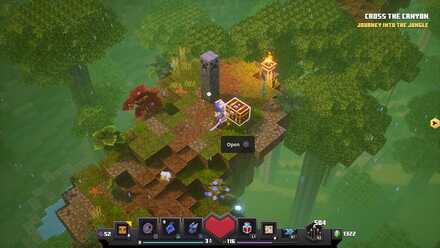
 Cross the Canyon Travel over the tree tops across the chasm while fending off mobs. This is also the area where the secret is located (if there are any indicated on your map). Just find the creeper statue and move onward past it until you find either another entrance or an obsidian chest. |
| 7 |
 Survive the Gauntlet Poison quill vines are scattered around your path so it is recommended to have Deflect enchantment on your armor to make it easier to pass through. You can also take all the hits and just heal with healing artifacts or by drinking a potion. |
| 8 |
 Search for the Temple Climb up and move onwards until you find the temple. Watch out for humanoid plants called **Whisperers as they are fast and can summon corrupted vines to block, poison quill vines to attack, and sometimes normal vines to snare. |
| 9 |
 Search for Clues The switch that opens the temple is blocked by a bamboo wall. Although it looks very easy to break down, you will need to make the two stone faces on either side have the correct faces, and you will need to look for clues to know which are the right ones. |
| 9A |
 First Clue The first clue is found across a cliff that you have already passed by. It is located near a waterfall just before the entrance to the temple. Memorize its face and make the left stone face on the temple entrance have the same face. |
| 9B |
 Second Clue The second clue is found further into the jungle. Go onward past the temple until you reach the end of the path and look for this statue. Memorize its face and make the right stone face on the temple entrance have the same face. |
| 10 |
 Survive the Ambush After having the correct faces, the bamboo gate will be disabled. Press the newly revealed switch to trigger an ambush. The mobs that will spawn are basically every enemy that you have fought in this mission so far except for the corrupted vines and poison quill vines. Prepare for a grueling fight. |
| 11 |
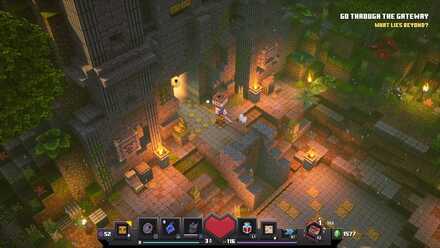 Go Through the Gateway The entrance to the temple will be opened after wiping them all out. Simply go up and enter the temple to clear the mission! |
Secret Locations
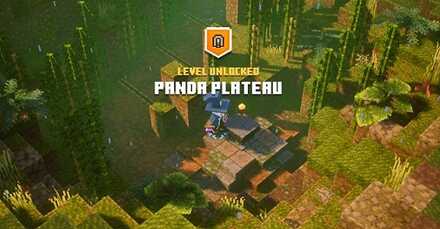
Panda Plateau Secret Mission

The secret area containing the map to Panda Plateau is found during the Cross the Canyon objective. It is usually found past the creeper statue but on most times, you might find an obsidian chest instead. This secret area appears randomly so you might need to restart the mission a few (or a lot) of times before it appears.
How to Unlock the Panda Plateau Secret Mission
Obsidian Chest

This obsidian chest is located at the same area as where the secret entrance is supposed to appear. This means if there is a secret indicated on your map, you either get the secret area or this obsidian chest.
Chest Locations
Chest Near a Waterslide

One of the mini dungeons inside this mission has some sort of waterslide. Once you get to the top, survive the ambush and you will be rewarded with a chest.
Lava Area

Another one of the mini dungeons in this mission is filled with lava. You might have to travel (while fighting, of course) a long way to reach this chest on an altar.
Near the End of the Lava Area

You will be ambushed right before you exit the same lava area. Surviving every wave will make a chest appear nearby.
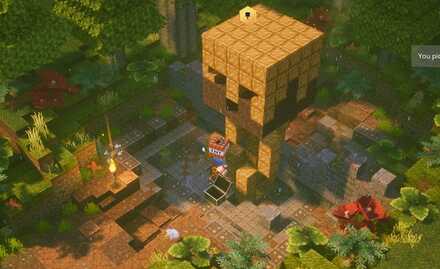
Creeper Statue
You can find a creeper statue during the Cross the Canyon objective which summons a horde of creepers when you investigate it. Wipe them all out and you will be rewarded with a chest.
Tips & Strategies
Poisonous Mobs

Almost every new enemy introduced in the Jungle Awakens DLC can inflict Poison on each hit. Try to avoid their attacks as this status effect can whittle your health down quickly.
Since most of them are ranged, having Deflect on your armor can help you deal with most of their attacks.
Ocelots Hate Creepers

A lot of ocelots are scattered around the jungle. These cuties chase down creepers and attack them, which can also stop creepers from detonating.
Creepers are afraid of ocelots but ocelots are afraid of you, so they might stop attacking creepers and run away if you approach them.
Make Use of the Vines
Use the corrupted vines that appear out of nowhere as a tool to trigger beneficial enchantments such as Radiance or Soul Siphon.
Related Links
Jungle Awakens Missions
| Missions | |
|---|---|
| 1 | Dingy Jungle |
| 2 | Overgrown Temple |
| Secret Mission | |
| 1 | Panda Plateau |
Jungle Awakens Guides
| All Jungle Awakens Guides | |
|---|---|
 All Jungle Awakens Secrets All Jungle Awakens Secrets |
 How to Unlock Panda Plateau How to Unlock Panda Plateau |
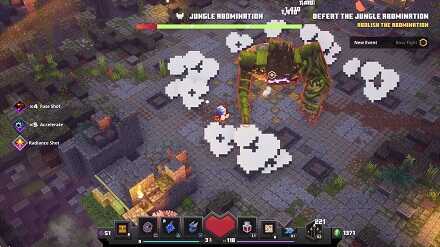 Jungle Abomination Boss Fight Guide Jungle Abomination Boss Fight Guide |
 Jungle Awakens New Equipment and Artifacts Jungle Awakens New Equipment and Artifacts |
Comment
3  Anonymous about 5 years
Where u find clue no.2? I only can find no.1
Author

Dingy Jungle Mission Walkthrough | Dingy Jungle Secrets
Please participate in our site
improvement survey
04/2026
improvement survey
04/2026
Would you assist in
improving Game8's site?
improving Game8's site?

×
We are listening to our users' valuable opinions and discussing how to act on them.
The information collected through this survey will be used for the purpose of improving our services. In addition, the information will only be disclosed a part of a statistic in a format that will not allow identification of personal information.
Begin Survey
Not Now
×
Please rate each item regarding Game8.co's Advertisements.
Amount of Ads
Very Dissatisfied
Somewhat Dissatisfied
Fine
Somewhat Satisfied
Highly Satisfied
Placement of Ads
Timing of Ad Display
Ad Loading Speed
Safeness of Ads
Content of Ads
×
Please rate each item regarding Game8.co's Quality of Articles.
Amount of information
Very Dissatisfied
Somewhat Dissatisfied
Fine
Somewhat Satisfied
Highly Satisfied
Frequency of updates
Speed of new information
Accuracy of articles
Understandibility of articles
Readability of sentences
×
Please rate each item regarding Game8.co's Usability of the Site.
Ease of finding information
Very Dissatisfied
Somewhat Dissatisfied
Fine
Somewhat Satisfied
Highly Satisfied
Loading Speed
Use of Color
Font Size
Visibility of Images
Easy to Understand Layout
×
Please rate each item regarding Game8.co's Message Boards, Comments.
Ease of Writing
Very Dissatisfied
Somewhat Dissatisfied
Fine
Somewhat Satisfied
Highly Satisfied
Readability
Ease in Finding Information
Comment Quality
Comment Quantity
Admin Response
×
Please rate each item regarding Game8.co's Site's new design.
Please rate our site's new design
Very Dissatisfied
Somewhat Dissatisfied
Fine
Somewhat Satisfied
Highly Satisfied
Do you think that the website's design change makes the site easier to use?
Has the new design made it easier for you to find information on the site?
Has the new design improved the overall visual appeal of the site?
How would you rate your overall satisfaction with the new design of the site?
×
How likely are you to recommend Game8 to someone you know?
Very Unlikely
0
1
2
3
4
5
6
7
8
9
10
Very Likely
If you have other opinions regarding potential improvement to the website, please share them with us. We would appreciate your honest opinion.
Note: This is a free response section, so you can proceed without entering anything.
Note: Please be sure not to enter any kind of personal information into your response.
Note: Please be sure not to enter any kind of personal information into your response.
×
Thank You
×
Thank you for participating in our survey! Your answers will help us to improve the quality of our website and services.
We hope you continue to make use of Game8.
We hope you continue to make use of Game8.
Close
Rankings
- We could not find the message board you were looking for.
Gaming News


![Forza Horizon 6 Review [Preview] | Beautiful Roads With a Whole Lot of Oversteer](https://img.game8.co/4460981/a7254c24945c43fbdf6ad9bea52b5ce9.png/thumb)
![Borderlands Mobile Review [Playtest] | The Same Borderlands Made Easy](https://img.game8.co/4465500/aac0c880a39ec5cd46073e49d18f3ed5.png/thumb)
Popular Games

Genshin Impact Walkthrough & Guides Wiki
Crimson Desert Walkthrough & Guides Wiki
Umamusume: Pretty Derby Walkthrough & Guides Wiki
Honkai: Star Rail Walkthrough & Guides Wiki
Monster Hunter Stories 3: Twisted Reflection Walkthrough & Guides Wiki
Wuthering Waves Walkthrough & Guides Wiki
The Seven Deadly Sins: Origin Walkthrough & Guides Wiki
Pokemon TCG Pocket (PTCGP) Strategies & Guides Wiki
Pokemon Pokopia Walkthrough & Guides Wiki
Zenless Zone Zero Walkthrough & Guides Wiki


Recommended Games
Monster Hunter World Walkthrough & Guides Wiki
Fire Emblem Heroes (FEH) Walkthrough & Guides Wiki
Pokemon Brilliant Diamond and Shining Pearl (BDSP) Walkthrough & Guides Wiki
Super Smash Bros. Ultimate Walkthrough & Guides Wiki
Diablo 4: Vessel of Hatred Walkthrough & Guides Wiki
Cyberpunk 2077: Ultimate Edition Walkthrough & Guides Wiki
Yu-Gi-Oh! Master Duel Walkthrough & Guides Wiki
Elden Ring Shadow of the Erdtree Walkthrough & Guides Wiki
The Legend of Zelda: Tears of the Kingdom Walkthrough & Guides Wiki
Persona 3 Reload Walkthrough & Guides Wiki


All rights reserved
Mojang © 2009-2020. "Minecraft" is a trademark of Mojang Synergies AB
The copyrights of videos of games used in our content and other intellectual property rights belong to the provider of the game.
The contents we provide on this site were created personally by members of the Game8 editorial department.
We refuse the right to reuse or repost content taken without our permission such as data or images to other sites.
there is also treetop tangle witch in not a dlc there is also gauntlet of gales witch is also not dlc