It's an Ill Wind that Blows Walkthrough and Circuit Puzzle Guide

It's an Ill Wind that Blows is a Main Story Quest in Mario + Rabbids Sparks of Hope (Mario Rabbids 2). Read on for a walkthrough of the quest, including rewards, location, and how to solve the crane and circuit puzzles!
List of Contents
It's an Ill Wind that Blows Walkthrough
| Click to Jump to a Section! | ||
|---|---|---|
| Objectives | Walkthrough | Crane & Circuit Guide |
Quest Objectives
| Objectives |
|---|
|
1. Journey to the Windmill
2. Vanquish the Puddle keeping you from the desert. 3. Head towards the site of the Windmill. 4. Squash the Puddle keeping you from the windmill site. 5. Enter the Windmill site. 6. Connect the Circuit. 7. Use the Crane to help you progress. 8. Find a way to reach the Rabbid pipe area. 9. Conquer the Puddle protecting the Rabbid pipe area. 10. Unfold the Ladder on top of the crane. 11. Get to the Windmill. 12. Destroy the Darkmess Tentacle on the Windmill! |
Quest Walkthrough
| Step-by-Step Guide | |
|---|---|
| 1 | 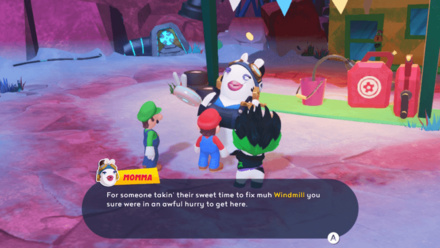 Speak to Momma and eradicate the nearby Darkmess Puddle. |
| 2 | 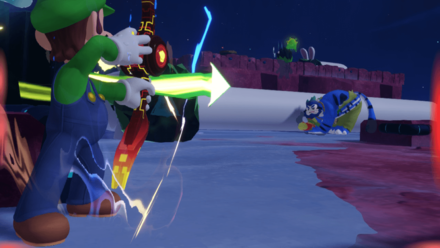 The Desert Riptides (Battle Quest) Defeat all 5 Riptides to clear the quest. It is recommended to attack them from afar as they pursue attackers and deal considerable splash-based damage. Be sure to use skills like Steely Stare or Hero Sight before attacking to maximize damage! Note: Be on the lookout for nearby Scopers that will attempt to snipe your Heroes. |
| 3 | 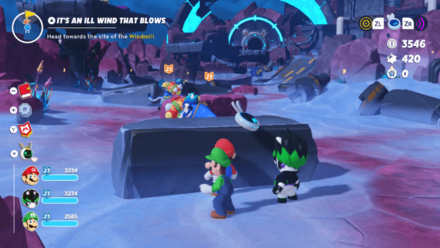 Press on towards the site of the Windmill. There will be multiple enemies on the way there so be sure to stock up on items and the like before moving forward. |
| 4 |  Use the pipe that will lead you to the entrance of the Windmill. You will be required to use Beep-0's Wave ability in order to get there. |
| 5 | 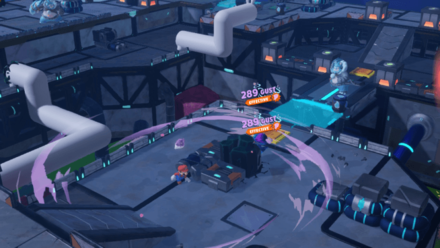 Danger, Keep Out! (Battle Quest) Spellraisers are enemies with impressive attack range and can summon Stooges to the battlefield. Exploit their weakness to gust attacks and use the splash barrels to send them flying! |
| 6 |  Use Beep-0's Scan ability to reveal a bridge leading to crate you'll need to place on the blue platform. |
Crane Guide & Circuit Puzzle Solution
| 7 | 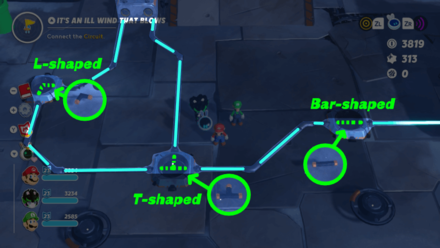 First Circuit Puzzle Solution Proceed to the newly accessible pipe and head start connecting the circuit. Follow the order of the circuitry as shown above and turn them accordingly based on its placement. |
|---|---|
| 8 | 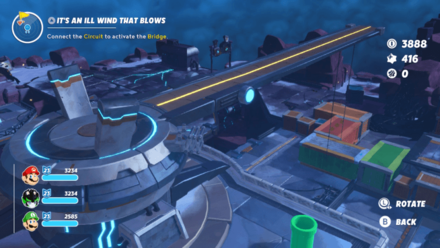 Turn the crane clockwise twice to form a path using the shipping containers. |
| 9 | 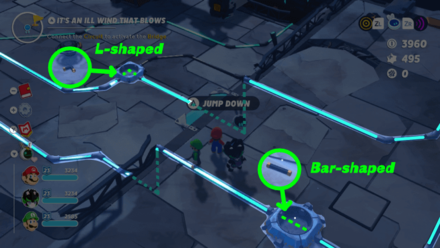 Second Circuit Puzzle Solution, Part 1 Follow the newly formed path and follow the order of the circuitry shown above to form a bridge. Afterwards, carry the yellow rock and slot it to its rightful place. Note: With the pipe unlocked, remove the last two pipes used for the next step. |
| 10 | 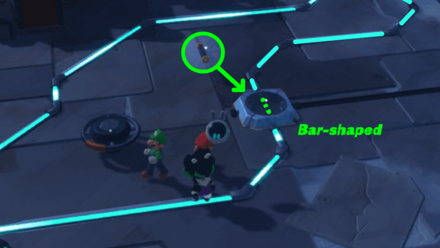 Second Circuit Puzzle Solution, Part 2 After removing the two pipes, place the bar-shaped one to there the L-shaped pipe was previously placed. |
| 11 |  Second Circuit Puzzle Solution, Part 3 While carrying the L-shaped circuit, go to the second level using the white pipe and place it as shown above. Note: A path will open after fixing the circuit, then move the orange crate to its respective platform. |
| 12 | 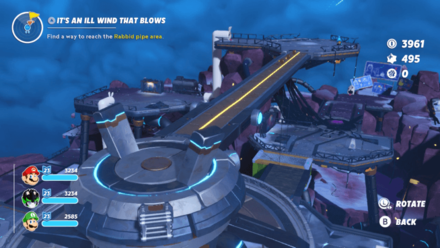 Return to the crane and move it counterclockwise. Get off the crane and clear the Darkmess Puddle blocking the Rabbid pipe area. |
| 13 | 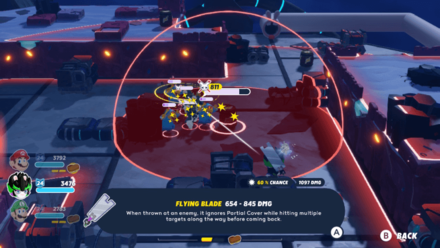 Magikoopa Mayhem (Battle Quest) Magikoopas are enemies with extremely wide attack range and are resistant to every Super Effect. Have Luigi snipe them from afar and use the shock barrels to throw them off. Taking out the Magikoopas will make surviving six turns much easier. |
| 14 | 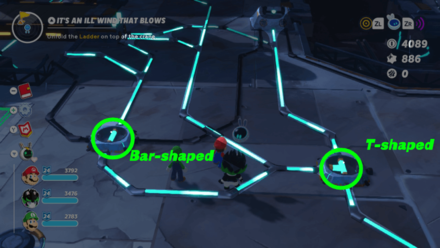 Third Circuit Puzzle Solution, Part 1 Go through the Rabbid pipes until you reach another circuit puzzle. Place a bar-shaped pipe on the left slot vertically, while a clockwise T-shaped pipe is inserted on the right slot. Note: A path will open where you can move a crate to the elevated platform to unlock a white Rabbid pipe on the right side of the circuit. Follow that path to get the triangular piece needed for the next step. |
| 15 | 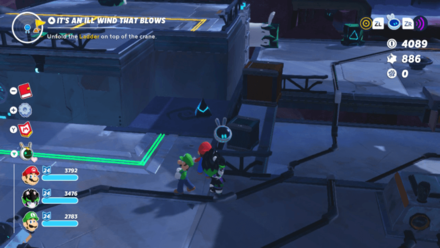 Third Circuit Puzzle Solution, Part 2 In order to bring the triangular piece to its slot, move the crate away from the elevation and move it back to the platform near the entrypoint. Drop the triangular piece on the elevated platform, then use the Rabbid pipe to slot the piece in place. |
| 16 | 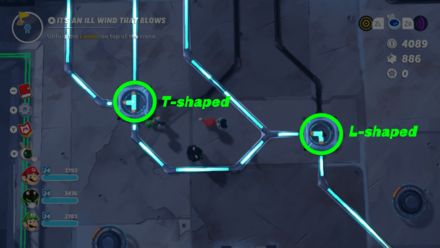 Third Circuit Puzzle Solution, Part 3 Place the bar-shaped pipe on the northwest circuit slot, then follow the circuitry above to unlock the final bridge that will bring you to the crane's peak. |
| 17 | 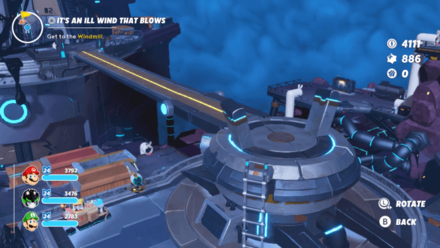 After lowering the ladder, move the crane counterclockwise then proceed to the Windmill. |
| 18 | 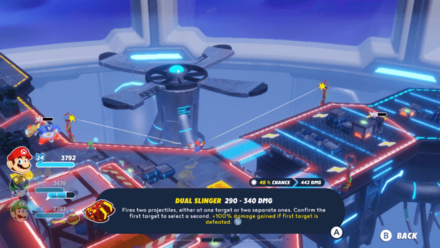 A Foul Windmill Blows (Battle Quest) For this battle, you will have to protect the 4 turning mechanisms for 8 turns in order to succeed. Be sure to use Beep-0's Tacticam and observe the barrels that surround the foes, the posts you can shoot that shocks anyone on the metal mesh spaces, and the spawn points of enemies. Note: Be sure to keep all four sides protected by using the jump pads and performing Team Jumps. |
| 19 | 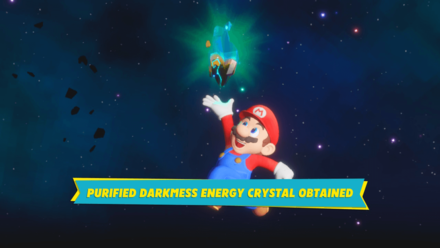 After defending the turning mechanisms, you will be rewarded with a Purified Darkmess Energy Crystal. |
| ◀ Previous Quest | Next Quest ▶ | Uncork the Volcano | Momma's Payback |
|---|
It's an Ill Wind that Blows Battle Quests and Rewards
| Battle Quest | Overview |
|---|---|
| The Desert Riptides |
Objectives: Defeat all 5 Riptides.
Rewards: ・80 Coins ・190 Star Bits |
| Danger, Keep Out! |
Objectives: Defeat all 5 Spellraisers
Rewards: ・80 Coins ・190 Star Bits |
| Magikoopa Mayhem |
Objectives: Survive for 6 turns
Rewards: ・80 Coins ・190 Star Bits |
| A Foul Windmill Blows |
Objectives: Protect 4 turning mechanisms for 8 turns
Rewards: ・185 Coins ・430 Star Bits |
How to Unlock It's an Ill Wind that Blows
Available Upon Reaching Barrendale Mesa
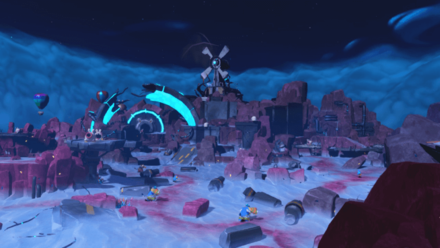
The Main Story Quest It's an Ill Wind that Blows is available upon reaching Barrendale Mesa for the first time.
Previous and Next Guides
| ◀ Previous Quest | Next Quest ▶ | Uncork the Volcano | Momma's Payback |
|---|
Mario + Rabbids Sparks of Hope Related Guides
List of Story Walkthrough Quests
Author
It's an Ill Wind that Blows Walkthrough and Circuit Puzzle Guide
improvement survey
03/2026
improving Game8's site?

Your answers will help us to improve our website.
Note: Please be sure not to enter any kind of personal information into your response.

We hope you continue to make use of Game8.
Rankings
- We could not find the message board you were looking for.
Gaming News
Popular Games

Genshin Impact Walkthrough & Guides Wiki

Honkai: Star Rail Walkthrough & Guides Wiki

Umamusume: Pretty Derby Walkthrough & Guides Wiki

Pokemon Pokopia Walkthrough & Guides Wiki

Resident Evil Requiem (RE9) Walkthrough & Guides Wiki

Monster Hunter Wilds Walkthrough & Guides Wiki

Wuthering Waves Walkthrough & Guides Wiki

Arknights: Endfield Walkthrough & Guides Wiki

Pokemon FireRed and LeafGreen (FRLG) Walkthrough & Guides Wiki

Pokemon TCG Pocket (PTCGP) Strategies & Guides Wiki
Recommended Games

Diablo 4: Vessel of Hatred Walkthrough & Guides Wiki

Cyberpunk 2077: Ultimate Edition Walkthrough & Guides Wiki

Fire Emblem Heroes (FEH) Walkthrough & Guides Wiki

Yu-Gi-Oh! Master Duel Walkthrough & Guides Wiki

Super Smash Bros. Ultimate Walkthrough & Guides Wiki

Pokemon Brilliant Diamond and Shining Pearl (BDSP) Walkthrough & Guides Wiki

Elden Ring Shadow of the Erdtree Walkthrough & Guides Wiki

Monster Hunter World Walkthrough & Guides Wiki

The Legend of Zelda: Tears of the Kingdom Walkthrough & Guides Wiki

Persona 3 Reload Walkthrough & Guides Wiki
All rights reserved
MARIO + RABBIDS SPARKS OF HOPE © 2022 Ubisoft Entertainment. All Rights Reserved. Rabbids, Sparks of Hope, Ubisoft and the Ubisoft logo are registered or unregistered trademarks of Ubisoft Entertainment in the U.S. and/or other countries. Nintendo properties are licensed to Ubisoft Entertainment by Nintendo. SUPER MARIO characters © Nintendo. Trademarks are property of their respective owners. Nintendo Switch is a trademark of Nintendo.
The copyrights of videos of games used in our content and other intellectual property rights belong to the provider of the game.
The contents we provide on this site were created personally by members of the Game8 editorial department.
We refuse the right to reuse or repost content taken without our permission such as data or images to other sites.


![Monster Hunter Stories 3 Review [First Impressions] | Simply Rejuvenating](https://img.game8.co/4438641/2a31b7702bd70e78ec8efd24661dacda.jpeg/thumb)


