Part 4 Centuries of Glory Burned Away Walkthrough and All Flag Locations
This is a guide to the Main Quest Centuries of Glory Burned Away in Wo Long: Fallen Dynasty. Read on to see a full walkthrough of Centuries of Glory Burned Away, all flag locations in Centuries of Glory Burned Away, as well as the recommended level and rewards for Centuries of Glory Burned Away!
| Previous Mission | Next Mission |
|---|---|
| The Battle of Hulaoguan Pass | Darkness Over the Hanshui River |
List of Contents
Centuries of Glory Burned Away Rewards and How to Unlock
Centuries of Glory Burned Away How to Unlock
| How to Unlock | Complete The Battle of Hulaoguan Pass mission |
|---|---|
| Recommended Level | 43 |
| Clear Condition | Defeat Taotie |
Centuries of Glory Burned Away Rewards
| This section is currently under construction, stay tuned for more updates! |
Centuries of Glory Burned Away All Flag Locations
Battle Flag 1
| ① | At the start of the mission, you can look to your left and find the first Battle Flag has already been raised. |
|---|
Battle Flag 2
| ① | Proceed down the stairs behind the first flag then continue on the path. |
|---|---|
| ② | Turn left where the flames start to block the path then jump over the broken house to enter the next area. |
| ③ | Drop down then proceed forward to the house behind the arch. |
| ④ | Exit through the house and turn left to find the second Battle Flag. |
Marking Flag 1
| ① | After raising the second Battle Flag, face the direction of the Komainu statue and proceed straight ahead. |
|---|---|
| ② | The first Marking Flag will be at the end of the path near some flames. |
Marking Flag 2
| ① | Turn around from the first Marking Flag and take a few steps forward then turn right after the first Komainu statue. |
|---|---|
| ② | Defeat the giant then enter through the gate. |
| ③ | Take the path on the left before the second entrance and raise the second Marking Flag at the end of the path. |
Battle Flag 3
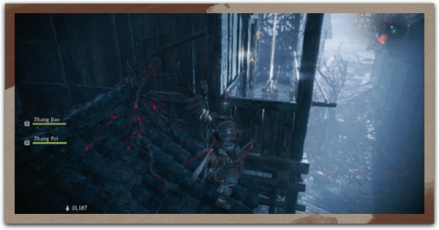
| ① | Turn around then climb the wooden scaffolding into the roof of the house. |
|---|---|
| ② | Drop down the roof and defeat the enemies to raise the third Battle Flag. |
Marking Flag 3
| ① | Head back to the location of the second Battle Flag. |
|---|---|
| ② | Continue walking straight ahead then turn left at the path with the brazier. |
| ③ | Turn right at the next brazier then enter the house at the end. |
| ④ | Climb the ladder and head to the opposite window behind the ladder. The third Marking Flag will be on a wooden platform right outside the window. |
Battle Flag 4
| ① | Exit through the opening in front of the ladder then kick down the pot of water to the right to extinguish the flames. |
|---|---|
| ② | Enter the gate and continue forward until you need to turn left into another entrance. |
| ③ | Continue through and raise the fourth Battle Flag on the right. |
Marking Flag 4
| ① | Climb the wooden platform with white paint beside the fourth Battle Flag. |
|---|---|
| ② | Kick down the pot of water to extinguish the flames then continue passing over the houses and wooden paths to the right. |
| ③ | Drop down at the end then climb the ladder. |
| ④ | Drop down to the lower wooden platform then raise the fourth Marking Flag. |
Marking Flag 5
| ① | Drop down the platform with the ladder then climb the wooden platform marked with white paint. |
|---|---|
| ② | Continue on the wooden platform to exit the town square. |
| ③ | After you exit, turn right then climb up the wooden structure with white paint. |
| ④ | Continue moving forward then turn right at the entrance. |
| ⑤ | Turn left to the slope that leads up. |
| ⑥ | At the top, drop down through the opening on the left and raise the fifth Marking Flag. |
Marking Flag 6
| ① | Drop down to the water, continue forward and turn left to continue through the tunnel. |
|---|---|
| ② | Upon exiting the tunnel, turn left and raise the sixth Marking Flag located behind the rubble. |
Battle Flag 5
| ① | Return to the area where you exited the tunnel then climb up the slope. |
|---|---|
| ② | The fifth Battle Flag will be located at the top. |
Marking Flag 7
| ① | Continue on the path after raising the fifth Battle Flag and turn left after the second brazier. |
|---|---|
| ② | Jump up and enter the house through the hole then continue up the path. |
| ③ | The seventh Marking Flag will be at the top. |
Battle Flag 6
| ① | Head back down the slope you just passed then exit the house. |
|---|---|
| ② | Defeat the enemies to raise the sixth Battle Flag. |
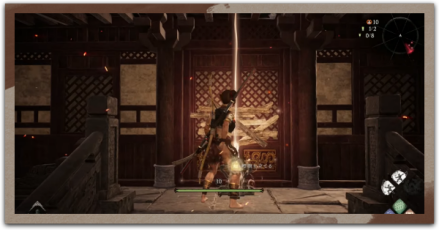
| ③ | After raising the sixth Battle Flag, climb up the wooden platforms behind it and open the doors to begin the boss fight with Taotie. |
Marking Flag 8
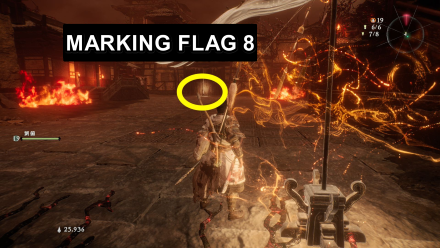
| ① | After raising the sixth Battle Flag, continue forward and you should see the eight Marking Flag. |
|---|
How to Defeat the Dragon in Centuries of Glory Burned Away
The Dragon Leaves Once Its HP is Low
As you're running around in the town during this mission, you may notice a dragon periodically attack with lightning. You can get rid of the dragon by hitting it with ranged attacks and once its HP get low enough, it will fly away.
Centuries of Glory Burned Away Collectibles
Dragon Vein Crystal Location
You can find the Dragon Vein Crystal in an area before exiting the town square to reach Marking Flag 5.
Golden Cicada Shell Location 1
The location of the first Golden Cicada Shell can be found on your way to Marking Flag 3. Instead of turning right at the second brazier, turn left to the corner. You can find the Golden Cicada Shell behind some flames.
Golden Cicada Shell Location 2
The location of the second Golden Cicada Shell can be found in the area of Marking Flag 5. Drop down to the water and enter the tunnel on the right.
Shitieshou Location
The location for the Shitieshou in this mission is in the same area as the first Golden Cicada Shell. You can find this on the way to Marking Flag 3 by turning left at the second brazier.
Tablet Location 1
The first tablet, Luoyang Townswoman's Last Words, can be found just to the left of Battle Flag 2.
Tablet Location 2
The second tablet, Colorfully Shining Well Writings, can be found in the same area as Battle Flag 3 beside the wooden bridge.
Tablet Location 3
The third tablet, Civil Officer's Last Words, can be found in the house beside Marking Flag 8. Climb the wooden platform and drop down through the roof and you can see the tablet at the corner of the room.
Centuries of Glory Burned Away Strategies and Tips
Pass Through the Flames
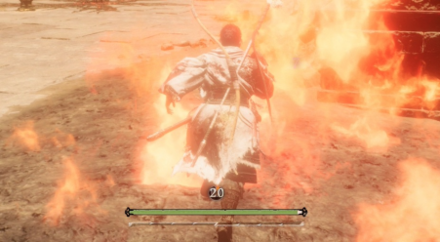
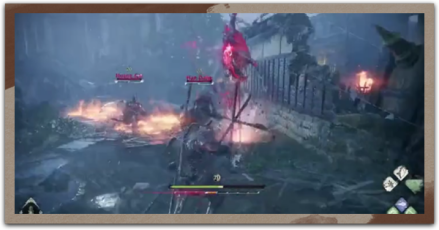
While most of the areas in this mission will be covered in flames, you can still pass through them as they don't deal significant damage.
Avoid Passing Through Open Areas to Reduce Dragon Attacks
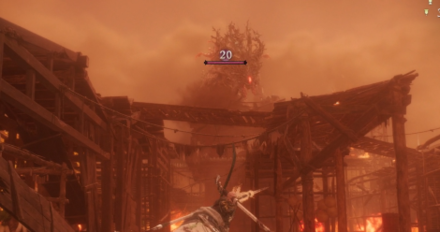
As much as possible, avoid having to move through the areas outside as this exposes you to attacks from the dragon. Should you need to move outside, try to find another area with a roof as the dragon can't attack you this way.
Centuries of Glory Burned Away Boss Guides
Taotie
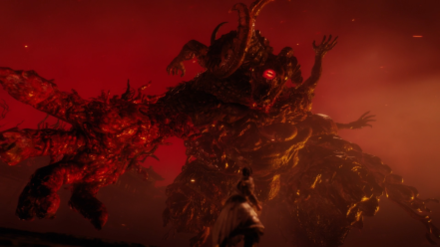
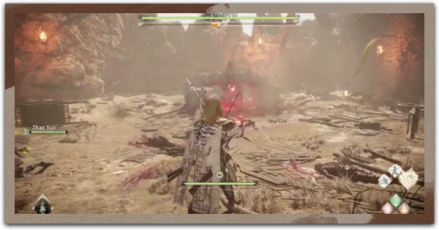
Taotie mainly makes use of abilities instead of basic attacks. These abilities can be dodged and easily played around by paying attention to its animations. Take the time to observe its attack patterns and respond accordingly.
How to Beat Taotie: Boss Fight Strategy Guide
Wo Long: Fallen Dynasty Related Guides

List of All Main Missions (Battlefields)
| Part 1: Encounter | |
|---|---|
 The Village of Calamity The Village of Calamity |
- |
| Part 2: Delusion | |
 Two Chivalrous Heroes Two Chivalrous Heroes |
 The Valley of Crying Wraiths The Valley of Crying Wraiths |
 The Demon Fort of the Yellow Heaven The Demon Fort of the Yellow Heaven |
- |
| Part 3: Corruption | |
 In Search of the Immortal Wizard In Search of the Immortal Wizard |
 Fall of the Corrupted Eunuc Fall of the Corrupted Eunuc |
| Part 4: Tyranny | |
 The Battle of Hulaoguan Pass The Battle of Hulaoguan Pass |
 Centuries of Glory Burned Away Centuries of Glory Burned Away |
 Darkness Over the Hanshui River Darkness Over the Hanshui River |
 Tyrant’s Final Banquet Tyrant’s Final Banquet |
| Part 5: Fortitude | |
 War's Flames Blaze Fiercely War's Flames Blaze Fiercely |
 The Way of the Warrior The Way of the Warrior |
 Lu Bu, Mightiest Among Men Lu Bu, Mightiest Among Men |
- |
| Part 6: Malice | |
 Behold the Glaive of Righteousness Behold the Glaive of Righteousness |
 Decisive Battle of Guandu Decisive Battle of Guandu |
| Part 7: Ascension | |
 The Crouching Dragon Roars The Crouching Dragon Roars |
- |
All Main Missions (Main Battlefields)
List of All Side Missions (Sub Battlefields)
Author
Part 4 Centuries of Glory Burned Away Walkthrough and All Flag Locations
Rankings
- We could not find the message board you were looking for.
Gaming News
Popular Games

Genshin Impact Walkthrough & Guides Wiki

Honkai: Star Rail Walkthrough & Guides Wiki

Arknights: Endfield Walkthrough & Guides Wiki

Umamusume: Pretty Derby Walkthrough & Guides Wiki

Wuthering Waves Walkthrough & Guides Wiki

Pokemon TCG Pocket (PTCGP) Strategies & Guides Wiki

Abyss Walkthrough & Guides Wiki

Zenless Zone Zero Walkthrough & Guides Wiki

Digimon Story: Time Stranger Walkthrough & Guides Wiki

Clair Obscur: Expedition 33 Walkthrough & Guides Wiki
Recommended Games

Fire Emblem Heroes (FEH) Walkthrough & Guides Wiki

Pokemon Brilliant Diamond and Shining Pearl (BDSP) Walkthrough & Guides Wiki

Diablo 4: Vessel of Hatred Walkthrough & Guides Wiki

Super Smash Bros. Ultimate Walkthrough & Guides Wiki

Yu-Gi-Oh! Master Duel Walkthrough & Guides Wiki

Elden Ring Shadow of the Erdtree Walkthrough & Guides Wiki

Monster Hunter World Walkthrough & Guides Wiki

The Legend of Zelda: Tears of the Kingdom Walkthrough & Guides Wiki

Persona 3 Reload Walkthrough & Guides Wiki

Cyberpunk 2077: Ultimate Edition Walkthrough & Guides Wiki
All rights reserved
Copyright ©2022 KOEI TECMO GAMES CO., LTD. All Rights Reserved.
The copyrights of videos of games used in our content and other intellectual property rights belong to the provider of the game.
The contents we provide on this site were created personally by members of the Game8 editorial department.
We refuse the right to reuse or repost content taken without our permission such as data or images to other sites.
 The Yellow Heaven Burns
 Tale of Guiguzi
 The Flying Swallow of Heishan
 Shadow of the Sacred Mountain
 Escape from the Capital
 The Valorous Trio
 Like Father, Like Son
 The Lost Sacred Artifact
 The Tiger’s Loyal Subjects
 Fate of the Entertainer
 Massacre of Meiwu Fort
 Realm of Battle
 Green Plum, Warm Liquor
 Zhao Yun's Exile
 The Unparalleled Spear
 The Uninhibited Heart
 Caliber of a Hero
 Legend of the Thunder God
 Preachers of the Dark Path
 The Assault on Wuchao
 The Fearless Blade
 Let’s Make Our Armor Shine!
 Heirloom Seal of the Realm
 The Request of Goddess Luo
 The Two Walls Stand Tall
 Pride of the Yuan Clan
 The Crouching Dragon’s Trial
 Let’s Make Our Halberds Shine!
 Wizardry Spell Mastery
 The Scarlet Crystal


