 See Map and Guide List
 Chapter 5-1: Traveler's Hub
 Chapter 5-2: Powdered Peaks
 Chapter 5-3: Peculia
 Chapter 5-4: Nimbus
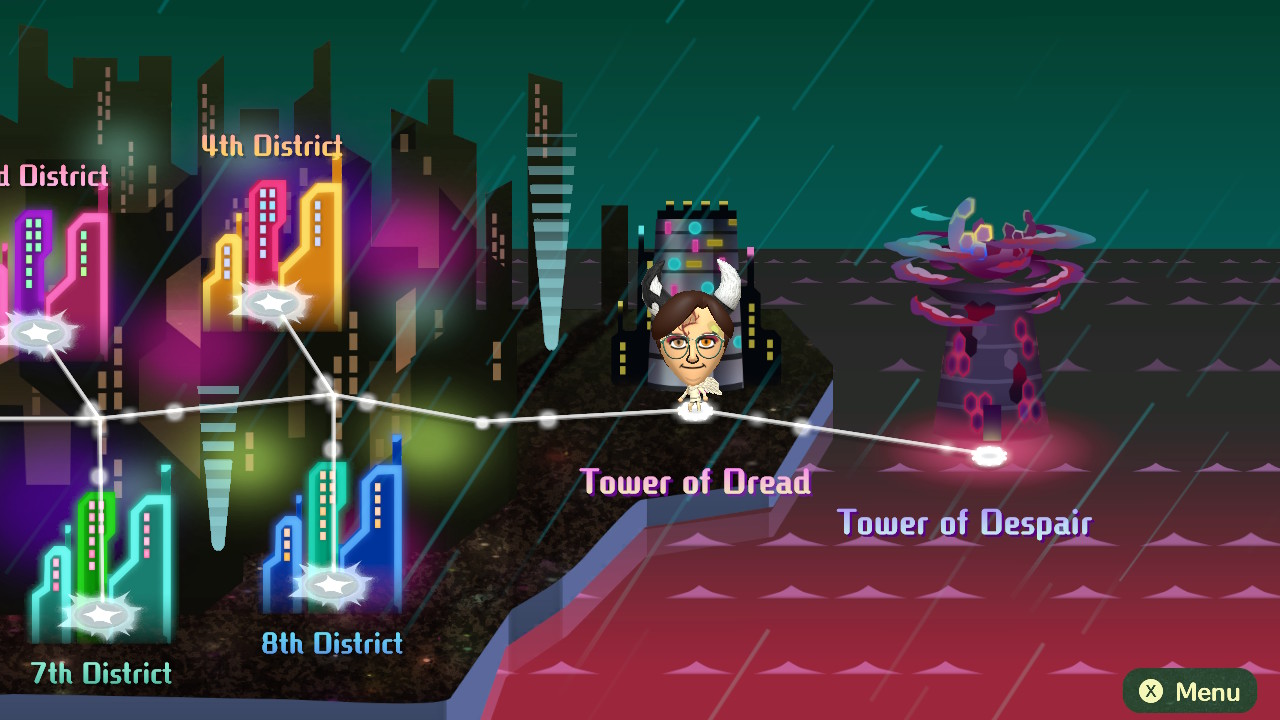
 Galados Isle
 New Lumos
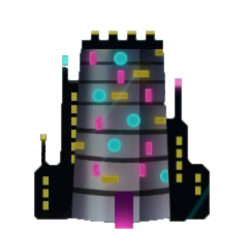 Tower of Dread
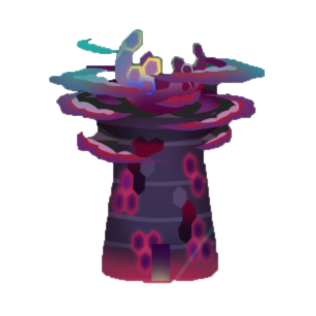 Tower of Despair
This survey will take about 1 minute.
Your answers will help us to improve our website.
Miitopia Switch
Tower of Despair Guide
Welcome to Game8's Miitopia Switch Wiki! See our guides below that will help you get started on your adventure!

This is a guide for beating the Tower of Despair, the final area of Miitopia for the Nintendo Switch! Read on to learn about the only new area added to Miitopia and how to beat the most difficult enemies of the game!
List of Contents
How to Unlock Tower of Despair
Clear Tower of Dread
The Tower of Despair is a new area added to the Nintendo Switch version of Miitopia. It is unlocked after defeating the Tower of Dread in New Lumos. Once you enter, you cannot leave or give up, until you beat the Tower or lose, so it's recommended to be well-prepared for the Tower of Despair beforehand.
Best Team for Tower of Despair
Offense-Heavy Party
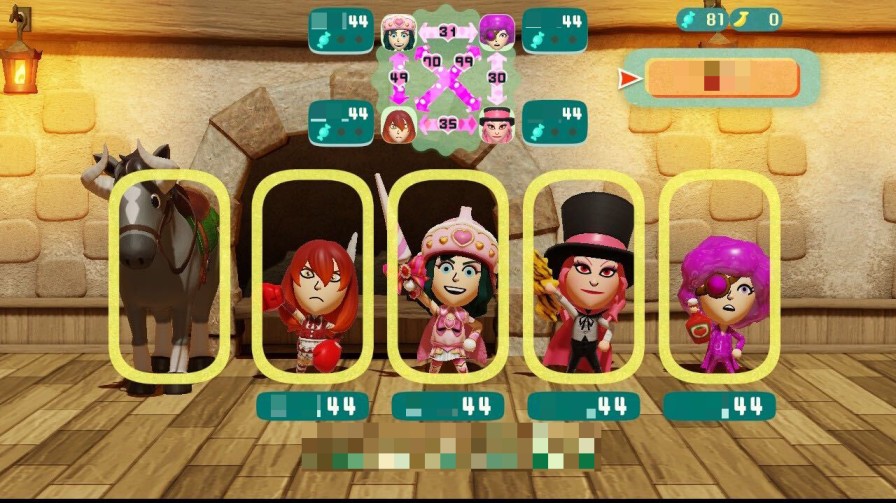
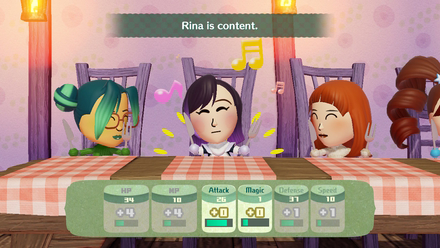
The party prioritizes offense and dealing damage, while also having skills that act as defensive walls or make up for status effect afflictions.
| Job | Best Personalities/Strengths |
|---|---|
 Cat Cat
(Position: 2nd from left) |
Main Character: Cool, Level 44 ・Main attacker ・Gets in attacks before the enemy with high Speed ・Deals high damage with Sharpen Claws and Feline Frenzy combo ・Buff stats +47-63 with Grub ・Main Character should have Level 99 relationship with Horse |
 Warrior Warrior
(Position: 1st/leftmost position) |
Party Member 1: Cool, Level 44 ・High health and attack power ・Dark Eye Slash skill deals great damage and has a high activation probability ・Super Snap Out of It skill can revive a fallen friend back into battle ・Buff stats +29-52 with Grub ・Make sure to have the Mounted Attack III skill (unlocked at Horse relationship level 60) |
 Scientist Scientist
(Position: 3rd from left) |
Party Member 2: Cool, Level 44 ・Safety Mask is a great skill for protecting party members ・Gets in attacks before the enemy with high Speed ・Black Hole skill deals powerful damage to all enemies ・Buff stats +33-52 with Grub ・Good to reach relationship level 50 with the Horse for the Neigh II skill |
 Vampire
(Position: Leftmost or rightmost position) Vampire
(Position: Leftmost or rightmost position) |
Party Member 3: Energetic, Level 44 ・Placed on either edge so it will be more readily targeted for enemy attacks ・Revive skill can make the Vampire a defensive wall ・Curse skill returns half the damage to the enemy ・Energetic personality and overall stats of Vampire help you reserve Sprinkles ・Bat Tornado skill is useful to defeat enemies ・Buff stats +21-63 with Grub ・Make sure to have the Mounted Attack III skill (unlocked at Horse relationship level 60) |
| Scientists or Clerics are recommended as the Traveler companion of the party. |
Warriors may be replaced
| Original Party Member | - | Alternative Party Member |
|---|---|---|
|
Warrior
|
⟶ |
 Elf Elf
|
|
Warrior
|
⟶ |
 Cleric Cleric
|
Because the Warrior is vulnerable to Magic attacks and the activation probability of the Super Snap Out of It skill isn't that high, you can fulfill the Warrior's intended role with either an Elf or a Cleric. The Elf has the Dancing Arrow support skill and the Forest Aegis defensive skill, while the Cleric has the Righteous Anger insta-kill skill and very reliable recovery/revival skills.
This is only recommended if your Elf or Cleric party members deal more damage than your Warrior.
Position Vampires first or last
The Tower of Despair bosses have the ability to attack multiple party members at once, so it's best to direct most attacks towards the Vampire by putting them in the first or last positions. The Vampire can take the hits as well as revive itself even if it falls.
Also, you won't want your Main Character, the Cat, taking damage or a status effect while they're sharpening their claws, as they're the main damage dealer of the party.
Cool is generally best personality
As with the main story, Cool is generally the best personality to go with. In the Tower of Despair, you'll face a lot of enemies that you'll need to last long against in battle. You can't rely on Sprinkles, so the Cool personality is generally best for dealing extra attacks and the 10% chance of avoiding enemy attacks.
Vampires are the exception, as their Curse skill necessitates being attacked by enemies, which makes it somewhat incompatible with the Cool personality.
Best Personality for All Jobs: Personality Tier List
What You Need Before Tower of Despair
➤EXP Farming: Best Level Grinding Spots |
➤List of Equipment |
Buff Your Stats Through Grub or Equipment
The Tower of Despair is the hardest area of Miitopia, so you should definitely buff your stats, through both upgrading equipment and eating Grub. It's recommended to only feed Grub to the party members that will face the Tower of Despair, so you're not spread thin when it comes to stat buffs. Note that the priority of stats to buff will vary between Jobs.
How to Farm Grub and Best Grub to Farm
Max Out Sprinkles and Safe Spot Levels
It's important to max out the level of the Sprinkles and the Safe Spot before facing the Tower of Despair. You're going to heavily rely on Sprinkles and the Safe Spot to recover HP and MP during the Tower of Despair, so maxing out the quantity of Sprinkles and the power of the Safe Spot is important. This is done by rescuing 2,500 faces (defeating 2,500 enemies).
Add a Traveler to Your Party
One exploit you can do is recruit a Traveler from the Traveler's Hub to your party by accepting a quest from them. After accepting their quest, they will aid your party until you beat that quest, so you can actually get them to help you defeat the Tower of Despair. It's recommended to recruit a Cleric or a Scientist, mainly as a support to recover or prevent status ailments.
Buff Relationship Levels Between Party Members
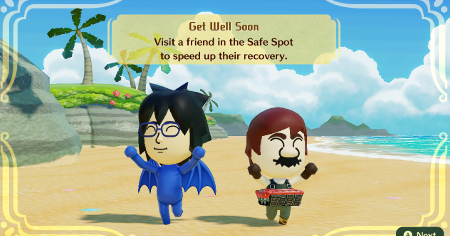
Your party members are prone to getting knocked out while battling in the Tower of Despair, but you can turn that into your advantage by utilizing the Avenge assists and Resurgence assist, all unlocked when 2 Mii's reach relationship Level 20. Avenge gives party members an attack boost when their friend gets knocked out, while Resurgence allows a party member to be revived if another party member falls before them.
Resurgence also works well when paired with the Safe Spot, in order to get your party members back up to full health quickly. The Get Well Soon assist unlocked at relationship level 7 speeds this recovery up even more.
Relationship Guide: How to Increase Relationship Level
Reduce Number of HP Bananas to 0
It's best to get rid of all your HP bananas before taking on the Tower of Despair. HP bananas and MP candy replenish your HP/MP very minimally, yet they take a whole turn to consume. The Safe Spot and Sprinkles are much more efficient ways of recovering HP and MP.
When a party member's (besides your own) HP or MP go below 50%, the party member will automatically take a turn to consume the banana or candy. You don't want that to occur in the Tower of Despair, since you want to use your actions wisely, so the best you can do is remove bananas from your inventory by going to the area in Galados Isle with the UFOs that HP steal bananas.
Determine Speed of Each Party Member
Make sure to determine the Speed stat of each party member before you enter the Tower of Despair. It helps with immediately determining the order of actions during battle, which is important for the timing of when to use Sprinkles and the Safe Spot. If 2 party members have the same Speed, the order might alternate during battle, which may cause you to lose track of when to utilize certain game-changing tactics.
Tips for Beating Tower of Despair
Don't Fast-Forward (Timing is Important)
Don't fast-forward through the battle (by pressing B, ZL, or ZR), since you could potentially miss important beats in battle. Timing is important, as a well-timed use of the Safe Spot or Sprinkles could be game-changing.
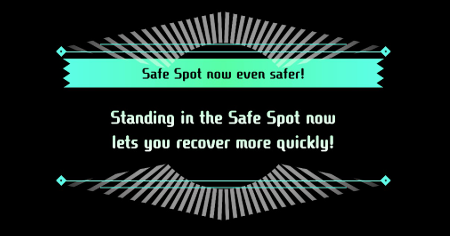
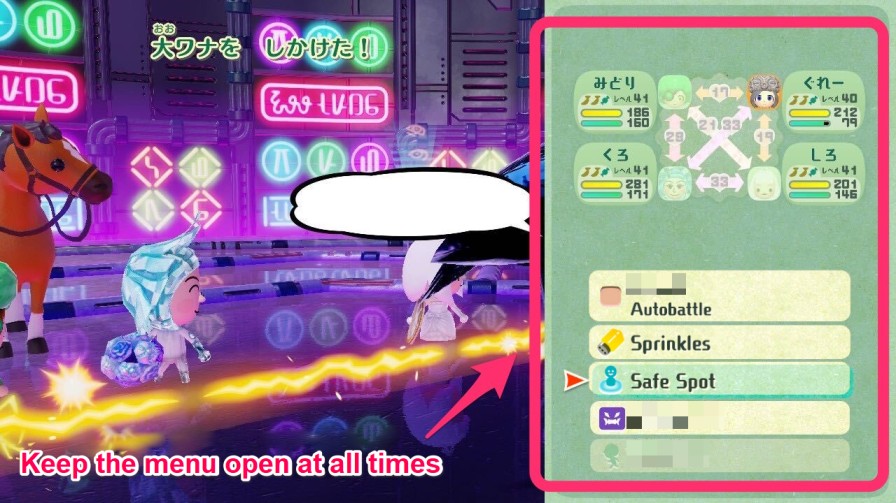
Maximize Use of Safe Spot

The Safe Spot is one of the best recovery actions in the game. It can simultaneously recover HP and MP, and the amount of recovery is much greater than of consuming HP bananas or MP candies (which also take up one turn each). Party members in the Safe Spot can't be damaged by the enemy as well.
How to Use the Safe Spot Efficiently
Identify Order of Actions Immediately
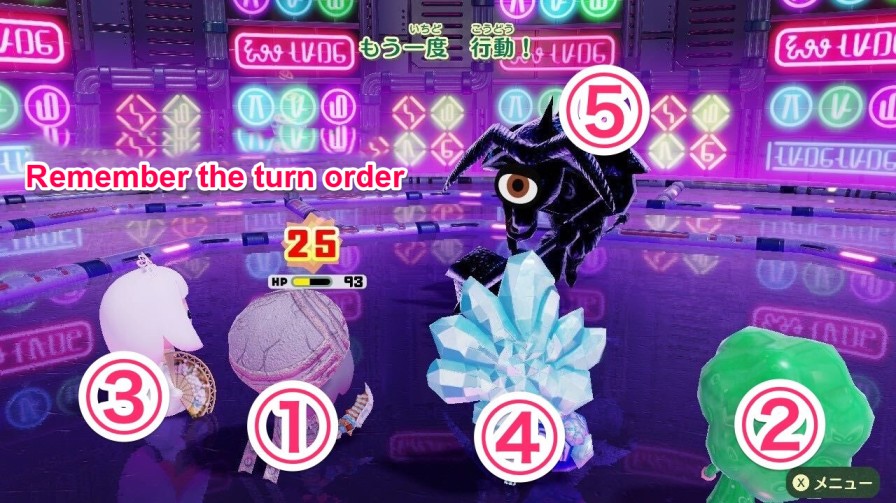
In the first turn of every battle, immediately identify the order of actions between your party members and the enemy's line-up. By knowing the order of actions from the first turn, you can calculate when enemies will attack and when party members must be healed. This is also why you shouldn't fast-forward, especially on the first turn.
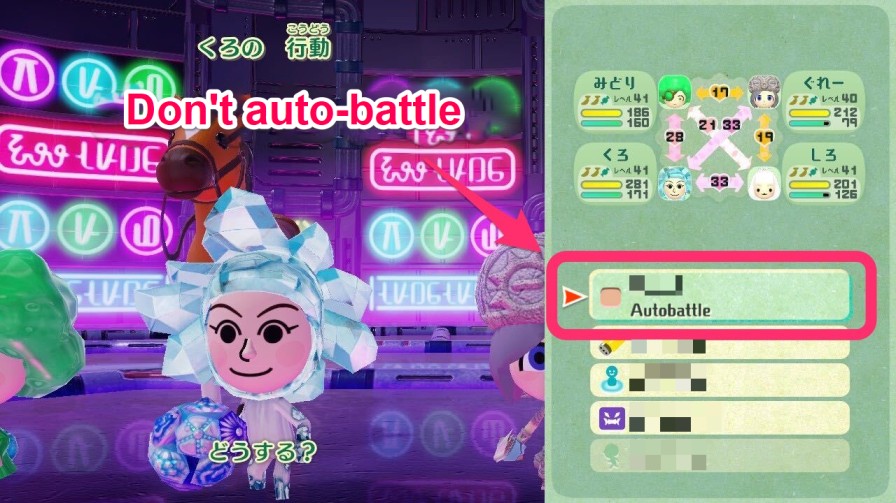
Keep the Menu on During Battle
Even if you know the order of actions and refrain from fast-forwarding, you could still potentially miss the opportunities for utilizing Sprinkles or the Safe Spot if your Menu isn't opened in time. To avoid this, you can keep your Menu open during the entire battle, so you don't miss a moment and so that the battle pauses when you're about to use Sprinkles or the Safe Spot.
Reserve Sprinkles Until 6F
The Tower of Despair is structured into 8 consecutive battles, with the 6th battle (taking place on 5F) being difficult due to the one-hit-kill of the Fiend, so Sprinkles will be needed in this battle. Try to reserve your Sprinkles (especially the Life Sprinkle) until this battle, and use other recovery options (such as the Safe Spot) instead.
Sprinkles: How to Unlock and When to Use
Immediately Defeat Enemies With Instant Death
If an enemy isn't labeled with the Boss
tag, they can be defeated with one-hit kills, which means most of the enemies up to the 6F can be defeated with one-hit kills. It will be extremely useful to have a party member with the skill to deal out a one-hit kill, such as the Cleric.
Tower of Despair Enemies
GF: Elite Goblins x 6
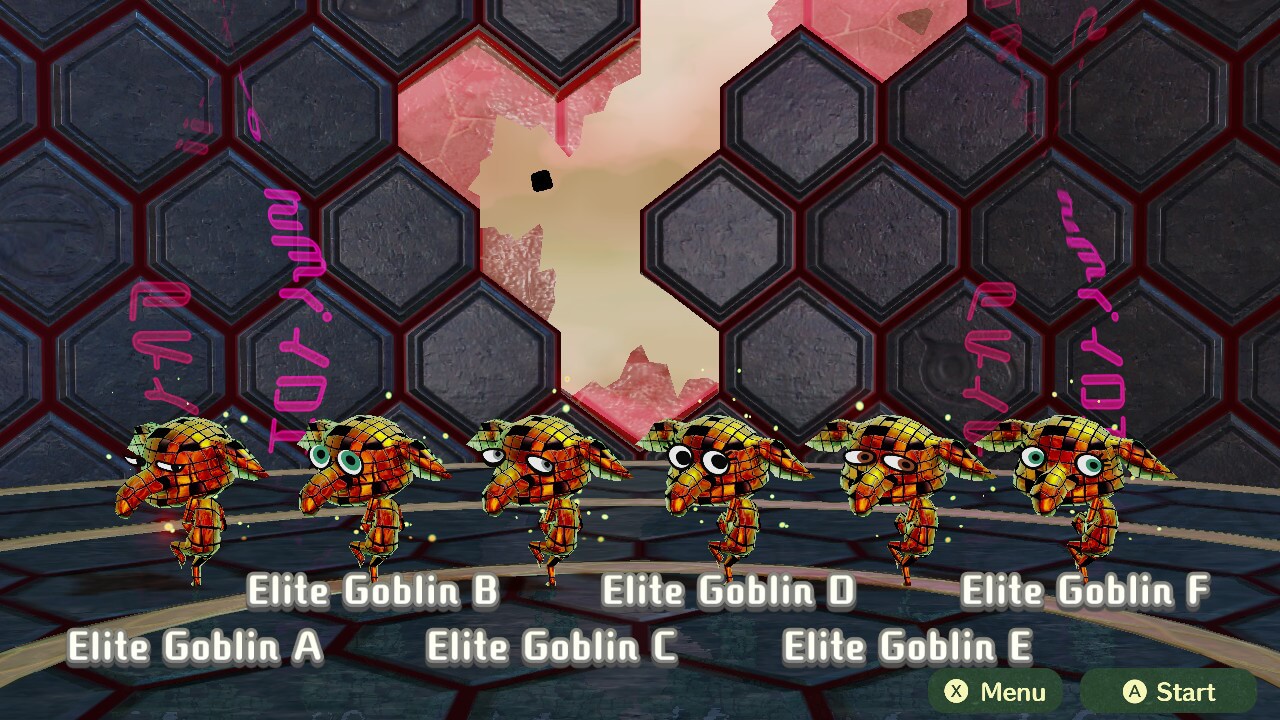
| Actions Pattern | |
|---|---|
| 1 | Normal physical attack on 1 party member |
| 2 | Teases and makes Angry 1 party member |
Elite Goblins shouldn't be defeated all at once, but instead dispatched one at a time. Even if their physical attack is strong, they shouldn't be difficult to defeat, if you efficiently use the Safe Spot.
2F: Heavy Golem
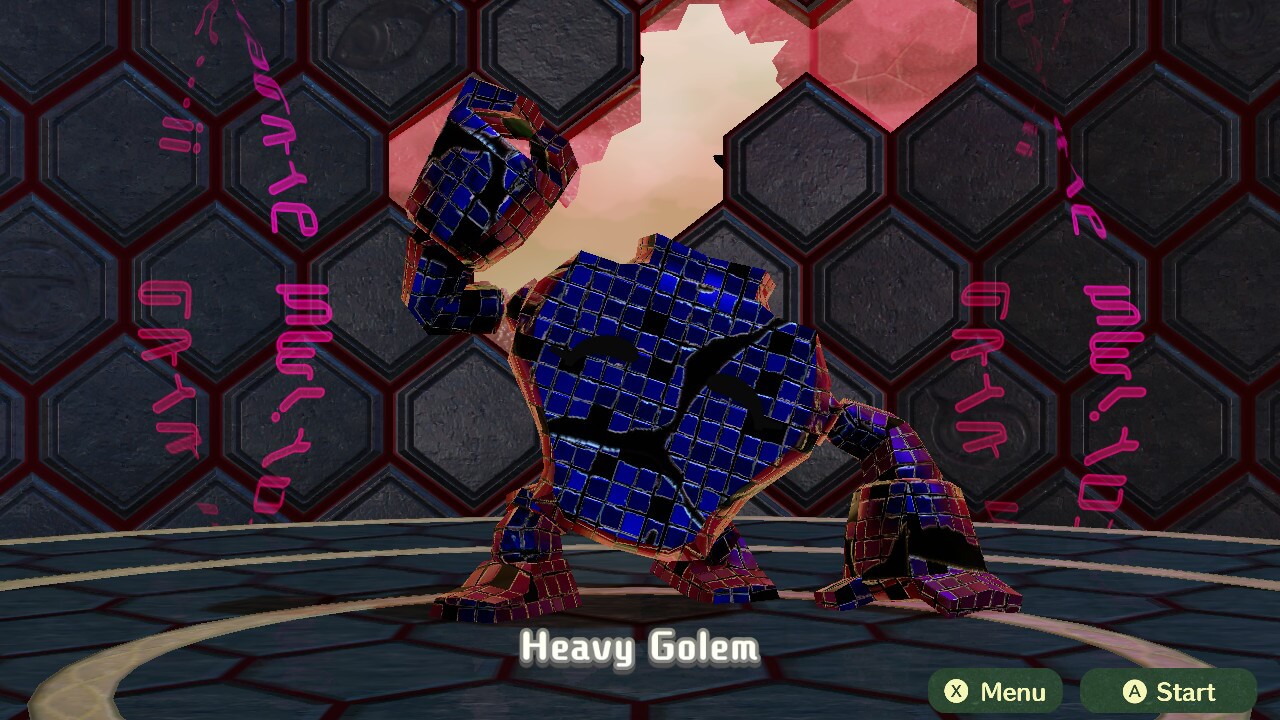
| Actions Pattern | |
|---|---|
| 1 | Normal physical attack on 1 party member and the 2 party members beside it |
The Heavy Golem acts twice in one turn, dealing a direct physical attack to 1 party member. Note that the 2 party members adjacent to the 1 attacked directly will also each take 50% of the initial damage.
3F: Neon Pharaohs x 3
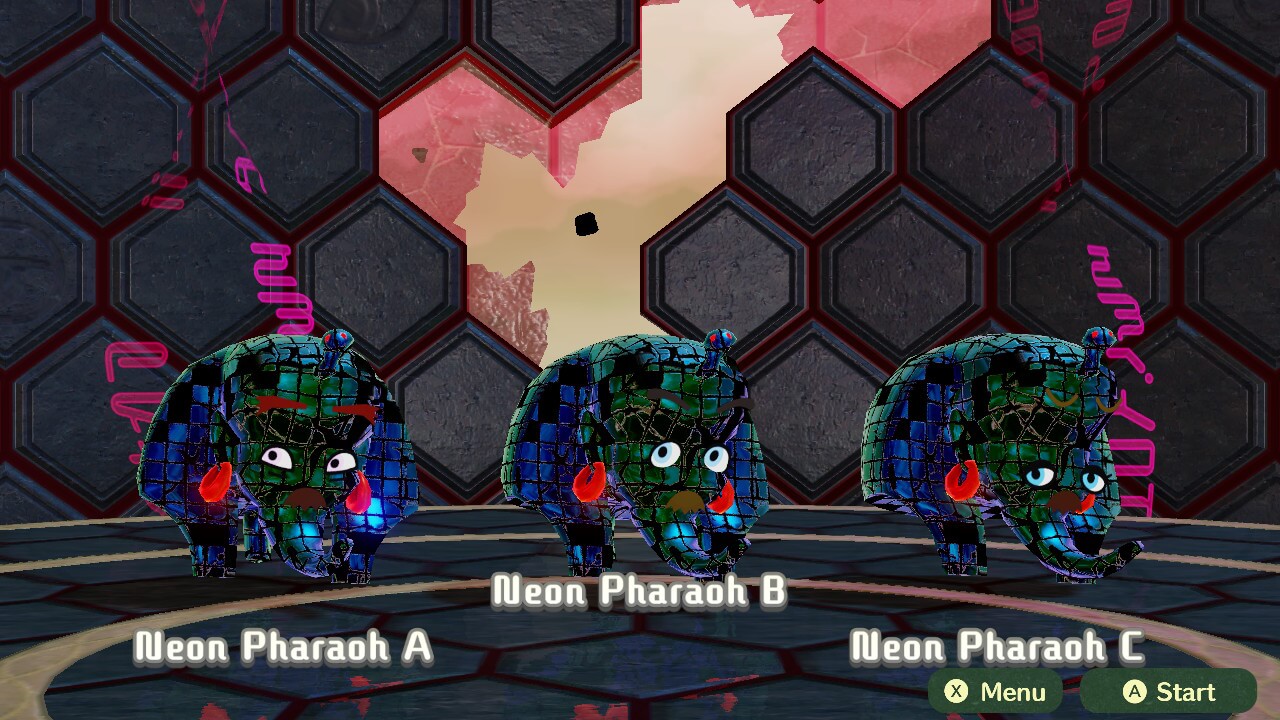
| Actions Pattern | |
|---|---|
| 1 | Curses 1 party member with Pharaoh |
| 2 | Normal physical attack on 2 party members |
Each Neon Pharaoh acts once in a turn, but because of its low Speed, even Warriors and Vampires can attack ahead of it. When afflicted by the Pharaoh's Curse, immediately put the afflicted party member in the Safe Spot, so that they take the next turn to heal. Even if the party member fails to heal the curse, if they're not holding an HP Banana, all it will do is prevent them from acting.
4F: Colossal Serpent
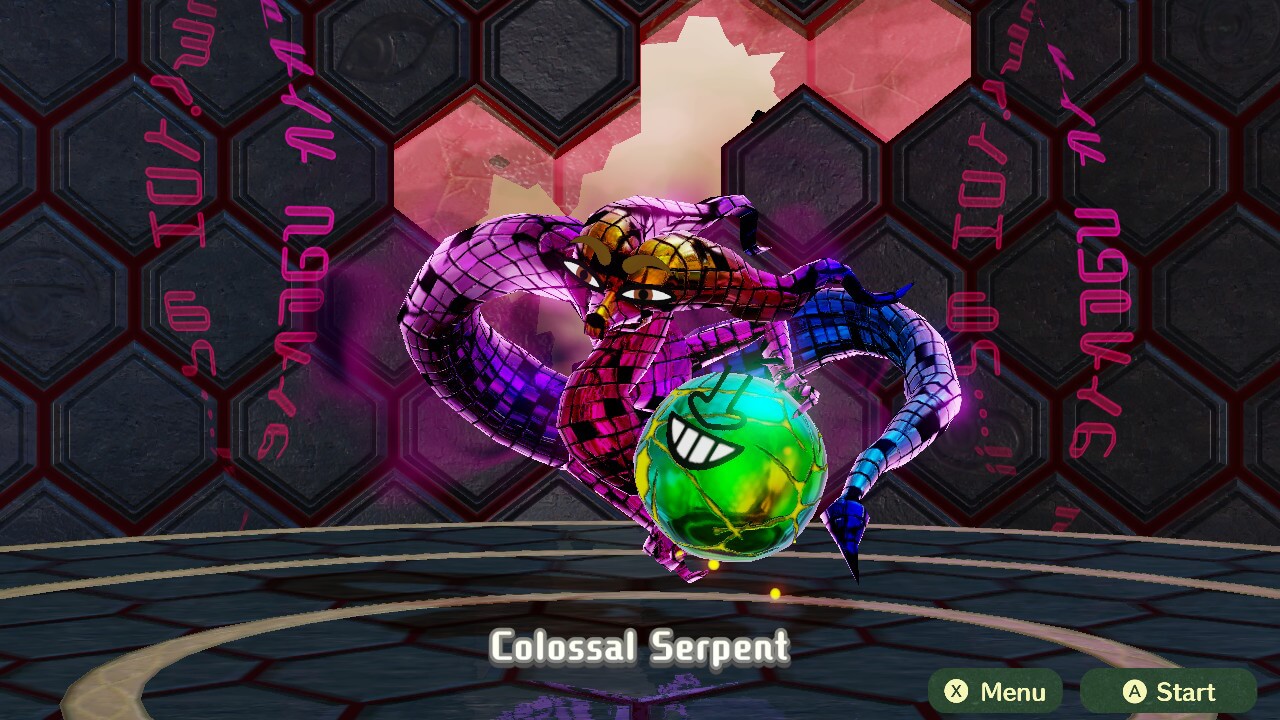
| Actions Pattern | |
|---|---|
| 1 | Magic attack on all party members |
| 2 | Normal physical attack on 1 party member |
The Colossal Serpent acts thrice in a turn, but because of its low Speed, even Warriors and Vampires can attack ahead of it. Its magic attack is powerful, dealing at least 100 points of damage, but it doesn't use it consecutively in one turn. In order to defeat this enemy, just balance out dealing strong attacks with having party members retreat to the Safe Spot to avoid getting badly damaged.
5F: Gourmet Burgers x 4
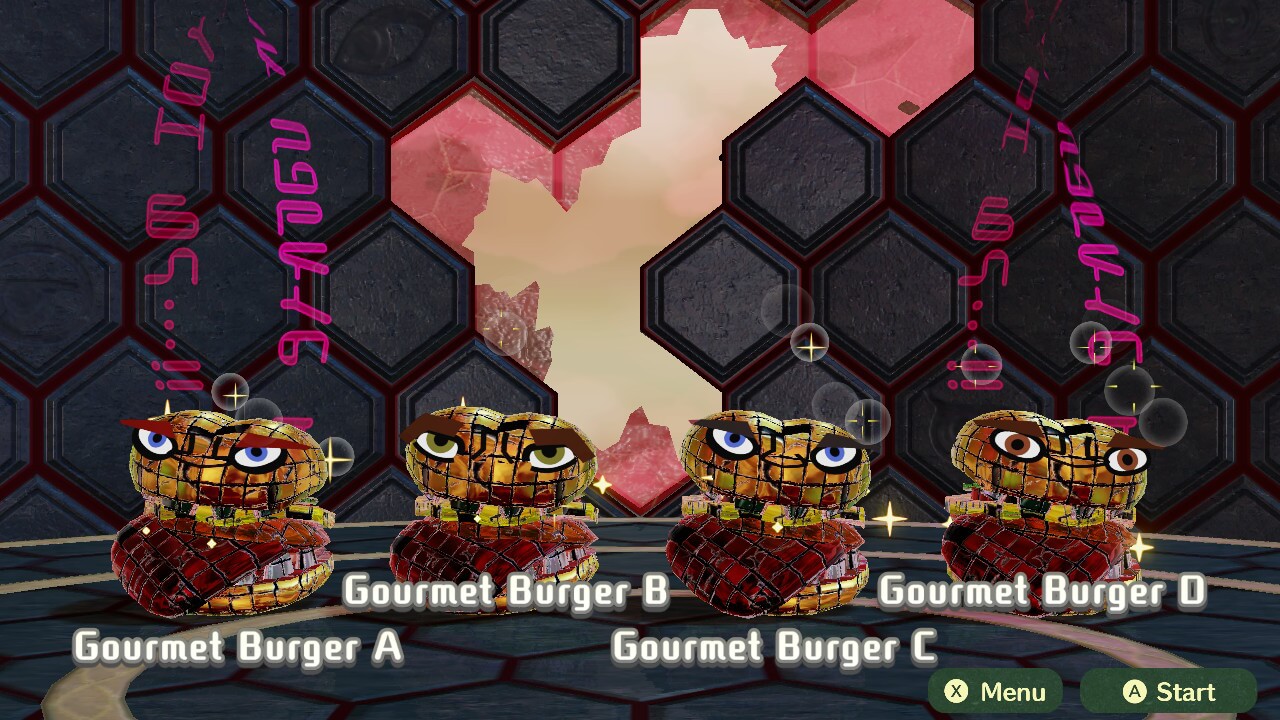
| Actions Pattern | |
|---|---|
| 1 | Eats a party member (the party member is incapacitated until the monster spits it out.) |
| 2 | Normal physical attack on 1 party member |
Each of the Gourmet Burgers acts once per turn. Be wary that they could eat 3 of your party members and only return them 2 turns later. This means that for 1 turn, your only remaining party member must withstand the normal attacks of 4 burgers before your teammates get spat out and rejoin the fight. Other than that, the Burgers don't really do much damage with the normal attacks so just keep taking them out one by one.
6F: Red Fiend, Blue Goddess x 2
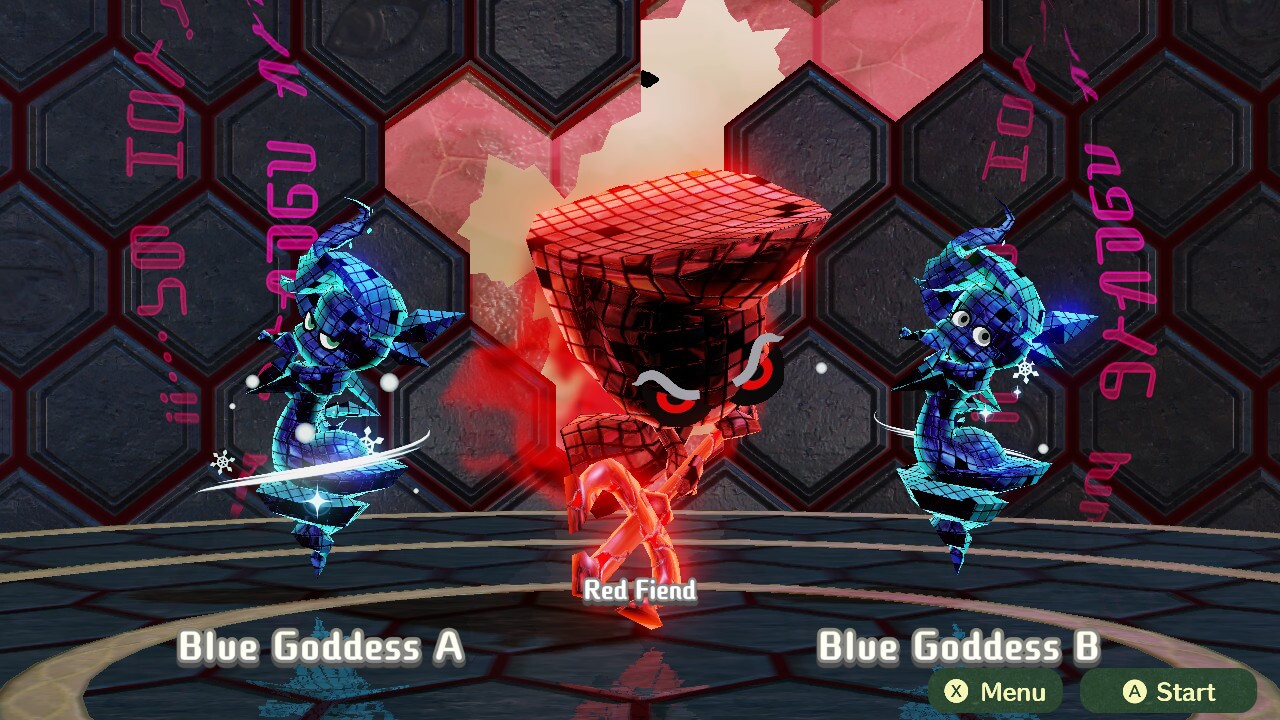
| Actions Pattern (Red Fiend) | |
|---|---|
| 1 | One-hit-kill on 1 party member (999 damage) |
| 2 | Normal physical attack on 1 party member (rarely used) |
| Actions Pattern (Blue Goddess) | |
| 1 | Will make a party member Evil, causing them to interfere with other party members' actions |
| 2 | Normal physical attack on 1 party member |
| 3 | Magic attack on all party members |
The Red Fiend and the 2 Blue Goddess each act once per turn. Despite being a Fiend, the Red Fiend isn't automatically the first move, so don't instinctively put a party member in the Safe Zone, as you could better utilize them as offense. In the Walkthrough Team's experience, the Cat and Scientist party members were able to act before the Red Fiend.
The Red Fiend's one-hit-kill is troublesome as always, but remember that even it is susceptible to a one-hit-kill, especially now that it isn't automatically the first one to act.
Red Fiend is nearly invulnerable to magic
Like other Fiends, the Red Fiend has high defense against magic attacks. To counter this, use the Vampire's Bat Tornado skill, which is the Vampire's strong (and only) physical attack.
Use Sprinkles in this battle
This is the battle you have reserved your Sprinkles for, so consume them at will. It's recommended to use HP/Shield and Hyper Sprinkles on party members in the Safe Spot or the Vampire, as they're resurrected, so that Sprinkles are not wasted on party members afflicted by the Blue Goddesses.
Defeat Blue Goddesses first
While the Scientist should provide your party with Safety Mask, it's still better to defeat the Blue Goddesses first, so they don't interfere with your actions by corrupting your party members.
7F: Light Lord, Light Sage
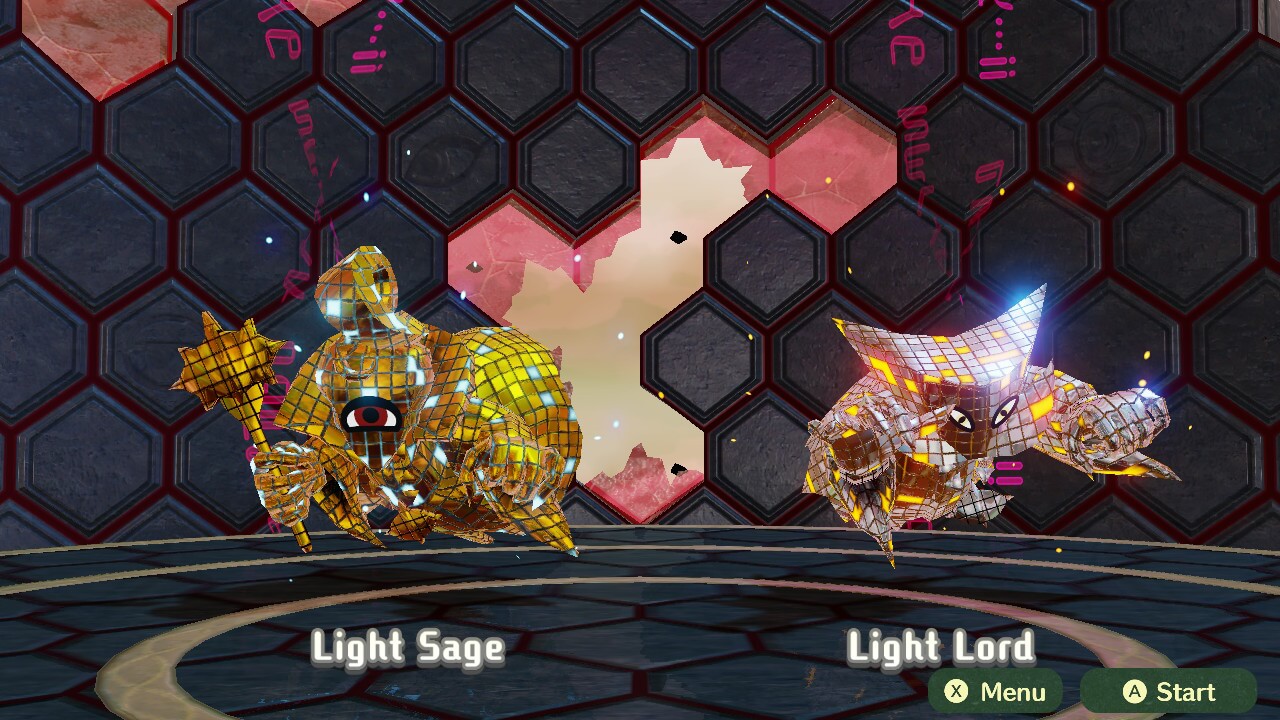
| Actions Pattern (Light Sage) | |
|---|---|
| 1 | Lock on, then unlease powerful magic attack on 2 party members 1 turn after |
| 2 | Magic attack on all party members |
| 3 | Magic attack on 1 party member |
| Actions Pattern (Light Lord) | |
| 1 | Attacks all party members with falling rocks |
| 2 | Puts a party member to sleep and inflicts a Nightmare |
| 3 | Normal physical attack on 1 party member |
Both the Light Lord and the Lighter Lord act twice per turn. You can use HP and MP Sprinkles for recovery, but any Sprinkles you have from the previous floor should be reserved for the next and final floor.
Beware of the Light Sage's attacks
The Light Lord is relatively easy to deal with, but the Light Sage's magic attack is really powerful. The Sage's party-wide magic attack hits hard and its lock-on attack deals very high (and often lethal) damage to two party members. It also attacks twice in one turn, so you could potentially lose your whole party in one turn. The Life Sprinkle would come in handy here, but if you used it in the previous battle, you could also use the Safe Spot to keep a party member safe. It's highly advised to focus on taking out the Light Sage first.
Resurgence is important here
Because of the Light Sage's ability to swiftly knock out your party members, a relationship level of at least 20 between all party members becomes important. It allows them to activate a Resurgence, where they are revived after another party member is knocked out. Furthermore, having relationship level 20 also means you have unlocked Avenge II, which could increase your attack power, which is greatly helpful in defeating the Lighter Lord.
Apex: Boss Snurp
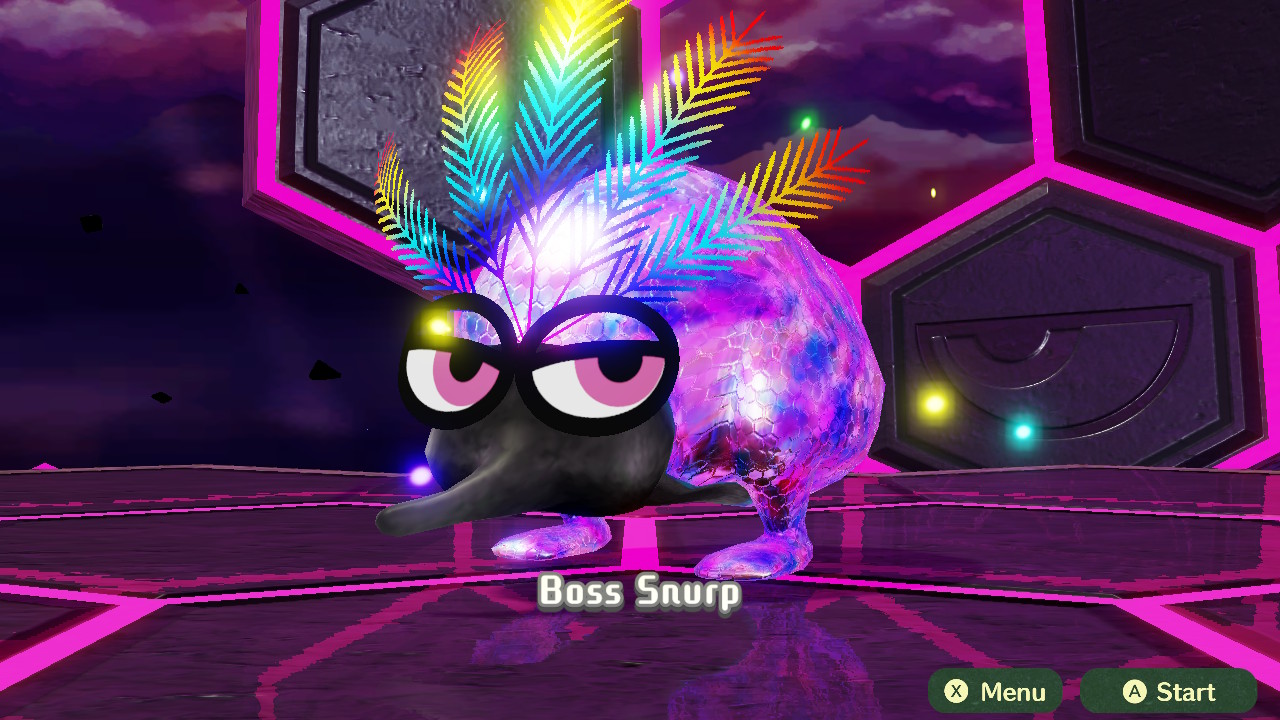
| Actions Pattern (Boss Snurp) | |
|---|---|
| 1 | Normal physical attack on 1 party member and the 2 party members beside it |
| 2 | Summons 2 Juvenile Snurp (From about 65% of HP remaining) |
| 3 | Inflicts random status effect (Happy, Aging, Petrification, Crying, etc.) (From about 34% of HP remaining) |
| Actions Pattern (Juvenile Snurp) | |
| 1 | Attacks a party member and automatically reduces their HP to 1. |
The Boss Snurp only attacks with normal physical attacks twice per turn. When it's reduced to only 34% of its HP, it will begin to attack thrice per turn. Keep in mind that the Boss Snurp's HP, Attack, and Defense stats are all very high.
Miitopia Related Links
Author

Tower of Despair Guide
Please participate in our site
improvement survey
03/2026
improvement survey
03/2026
Would you assist in
improving Game8's site?
improving Game8's site?

×
We are listening to our users' valuable opinions and discussing how to act on them.
The information collected through this survey will be used for the purpose of improving our services. In addition, the information will only be disclosed a part of a statistic in a format that will not allow identification of personal information.
Begin Survey
Not Now
×
Please rate each item regarding Game8.co's Advertisements.
Amount of Ads
Very Dissatisfied
Somewhat Dissatisfied
Fine
Somewhat Satisfied
Highly Satisfied
Placement of Ads
Timing of Ad Display
Ad Loading Speed
Safeness of Ads
Content of Ads
×
Please rate each item regarding Game8.co's Quality of Articles.
Amount of information
Very Dissatisfied
Somewhat Dissatisfied
Fine
Somewhat Satisfied
Highly Satisfied
Frequency of updates
Speed of new information
Accuracy of articles
Understandibility of articles
Readability of sentences
×
Please rate each item regarding Game8.co's Usability of the Site.
Ease of finding information
Very Dissatisfied
Somewhat Dissatisfied
Fine
Somewhat Satisfied
Highly Satisfied
Loading Speed
Use of Color
Font Size
Visibility of Images
Easy to Understand Layout
×
Please rate each item regarding Game8.co's Message Boards, Comments.
Ease of Writing
Very Dissatisfied
Somewhat Dissatisfied
Fine
Somewhat Satisfied
Highly Satisfied
Readability
Ease in Finding Information
Comment Quality
Comment Quantity
Admin Response
×
Please rate each item regarding Game8.co's Site's new design.
Please rate our site's new design
Very Dissatisfied
Somewhat Dissatisfied
Fine
Somewhat Satisfied
Highly Satisfied
Do you think that the website's design change makes the site easier to use?
Has the new design made it easier for you to find information on the site?
Has the new design improved the overall visual appeal of the site?
How would you rate your overall satisfaction with the new design of the site?
×
How likely are you to recommend Game8 to someone you know?
Very Unlikely
0
1
2
3
4
5
6
7
8
9
10
Very Likely
If you have other opinions regarding potential improvement to the website, please share them with us. We would appreciate your honest opinion.
Note: This is a free response section, so you can proceed without entering anything.
Note: Please be sure not to enter any kind of personal information into your response.
Note: Please be sure not to enter any kind of personal information into your response.
×
Thank You
×
Thank you for participating in our survey! Your answers will help us to improve the quality of our website and services.
We hope you continue to make use of Game8.
We hope you continue to make use of Game8.
Close
Rankings
- We could not find the message board you were looking for.
Gaming News


Popular Games

Genshin Impact Walkthrough & Guides Wiki
Honkai: Star Rail Walkthrough & Guides Wiki
Umamusume: Pretty Derby Walkthrough & Guides Wiki
Pokemon Pokopia Walkthrough & Guides Wiki
Resident Evil Requiem (RE9) Walkthrough & Guides Wiki
Monster Hunter Wilds Walkthrough & Guides Wiki
Wuthering Waves Walkthrough & Guides Wiki
Arknights: Endfield Walkthrough & Guides Wiki
Pokemon FireRed and LeafGreen (FRLG) Walkthrough & Guides Wiki
Pokemon TCG Pocket (PTCGP) Strategies & Guides Wiki


Recommended Games
Diablo 4: Vessel of Hatred Walkthrough & Guides Wiki
Fire Emblem Heroes (FEH) Walkthrough & Guides Wiki
Yu-Gi-Oh! Master Duel Walkthrough & Guides Wiki
Super Smash Bros. Ultimate Walkthrough & Guides Wiki
Pokemon Brilliant Diamond and Shining Pearl (BDSP) Walkthrough & Guides Wiki
Elden Ring Shadow of the Erdtree Walkthrough & Guides Wiki
Monster Hunter World Walkthrough & Guides Wiki
The Legend of Zelda: Tears of the Kingdom Walkthrough & Guides Wiki
Persona 3 Reload Walkthrough & Guides Wiki
Cyberpunk 2077: Ultimate Edition Walkthrough & Guides Wiki


All rights reserved
Nintendo. Miitopia and Nintendo Switch are trademarks of Nintendo. 2021 Nintendo.
The copyrights of videos of games used in our content and other intellectual property rights belong to the provider of the game.
The contents we provide on this site were created personally by members of the Game8 editorial department.
We refuse the right to reuse or repost content taken without our permission such as data or images to other sites.
Watched a YouTuber he beat it with only him and his horse.