This survey will take about 1 minute.
Your answers will help us to improve our website.
Miitopia Switch
Karkaton Walkthrough (Chapter 4)
Welcome to Game8's Miitopia Switch Wiki! See our guides below that will help you get started on your adventure!

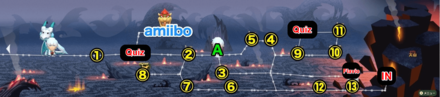
This is a walkthrough for Karkaton (Chapter 4) in Miitopia on the Nintendo Switch. Read on to learn how to progress through Karkaton, the best team for Karkaton, and the Karkaton map list.
List of Contents
Karkaton Walkthrough
Karkaton Progression
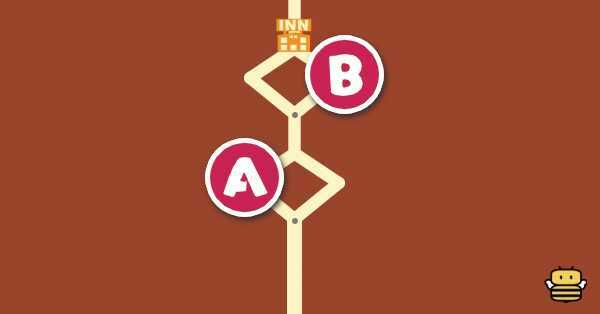
| 1 | Head for Haven Hollow at "A". |
|---|---|
| 2 | Rescue 3 of your teammates' faces at ⑤, ⑦, and ⑪. Head into the main Karkaton area afterwards. |
| 3 | Your party will be divided at "B". Reunite with them at "C". |
| 4 | Defeat Cerberus at ⑲ to rescue 3 more of your teammates' faces. |
| 5 | Your party will be divided again in the Grand Hall at "D". Rescue your teammate's faces at ㉗ and ㉛, then reunite with your other teammates at "E". |
| 6 | Rescue your last teammate's face in the Armory at ㊱. |
| 7 | Head towards the Dark Lord's Throne and clear your way to the final area of the room. |
| 8 | Fight the Dark Lord at the end of the map. |
Best Team for Karkaton
| Recommended Lineup for Chapter 4 | |||
|---|---|---|---|
'Hero'
 Cat Cat
|
Friend 1
 Scientist Scientist
|
Friend 2
 Warrior Warrior
|
Friend 3
 Flower Flower
|
| Energetic | Cool | Energetic | Cool |
Continue using the Cat
Assuming you've used the Cat job for Chapter 3, you can continue to use this job from this Chapter onwards. The damage and utility the Cat can give is huge, making it an ideal choice of job for the late game.
Dish out damage, heal with Safe Spot
At this point of the game you should have a good grasp of how and when to use the Safe Spot. With proper use, you can actually clear the chapter without having to rely on healers. That being said you can bring on the best attackers you've got, preferrably a Warrior for soaking damage and a Scientist for area of effect damage and status ailment protection. If you haven't mastered the use of Safe Spot yet, it's also perfectly fine to bring a healer teammate along instead.
Ten Member Party
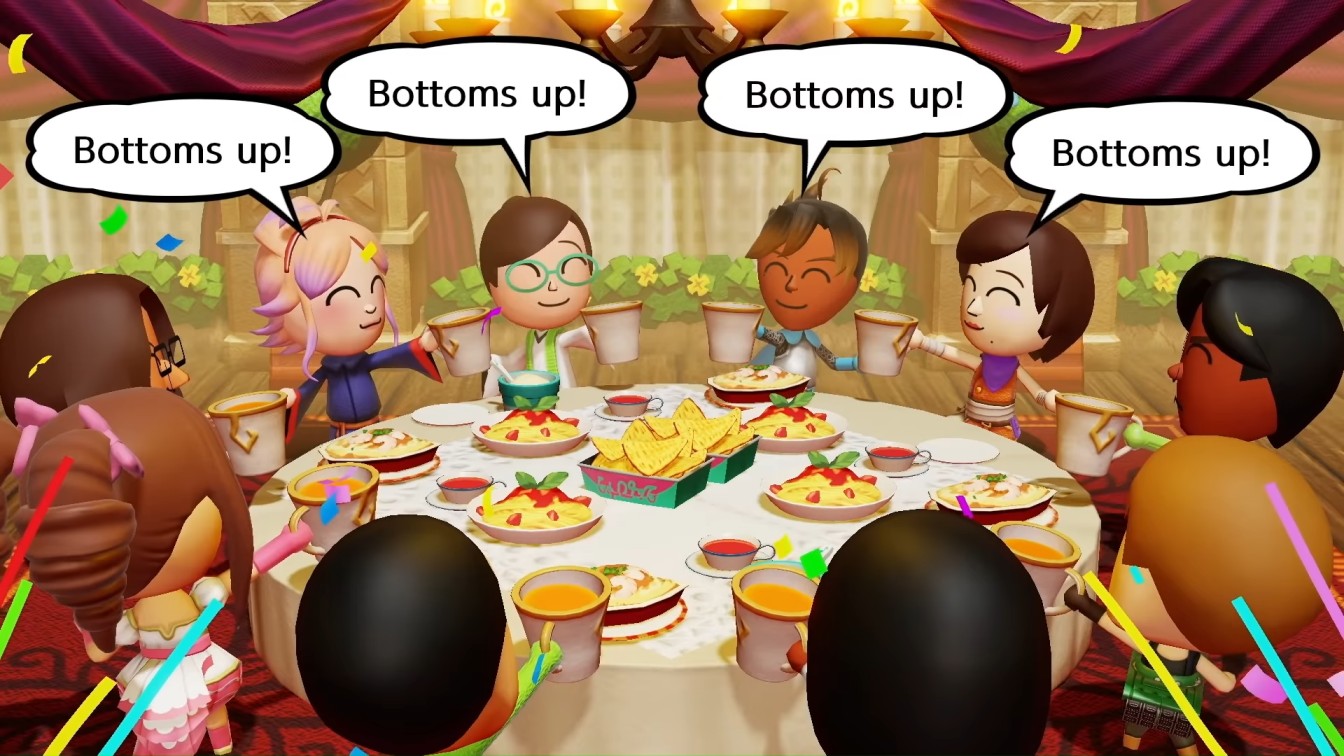
You start Karkaton alone, but as you progress through the region, you'll rescue the faces of the 9 allies who have joined you throughout your Miitopia adventure. By the end of Karkaton, you'll have a 10-member party at your Inn. This means that you can experiment with different line-ups of your 4-person team. You can also stick to the same line-up throughout Karkaton (in the areas unaffected by the party split).
Decide who to put on your main team
For Karkaton itself, it's obviously ideal to stick to 1 line-up and just buff those 4 members' stats by consuming Grub or buying Equipment. Doing so will definitely make defeating the Dark Lord with that line-up very easy. On the other hand, experimenting with and leveling up the different members of your party will also help out later in Otherworld, where all party members will be required to fight. Both are viable options.
Scientist and Princess are useful

It's recommended to have a Scientist or a Princess on the team, as these Jobs have a skill that prevents team members from getting afflicted with status conditions. This type of skill comes in handy in Karkaton, especially in the final fight with the Dark Lord.
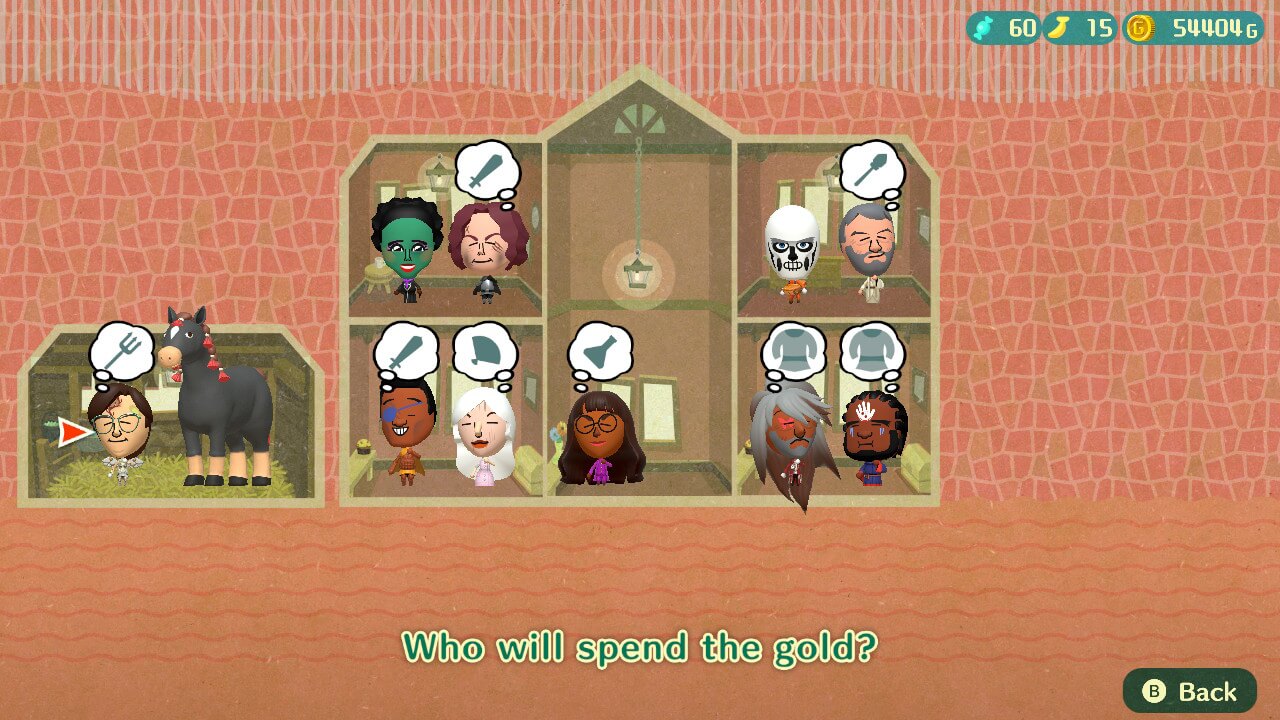
Job Changing is Possible Afterwards
After rescuing all your teammates, you will unlock the ability to change Jobs (for either main character or team member) at any point while in an Inn. Do take note that if you switch to a Job you have not previously used yet, your level will be reset to 1. If you change back to a job you have previously used, your level will be set at whatever level you left the job at.
Karkaton Map List
Karkaton Ascent
Below is a list of maps to guide you through Karkaton Ascent.
| Map Image | Unlock Condition / Enemies / Treasure Locations |
|---|---|
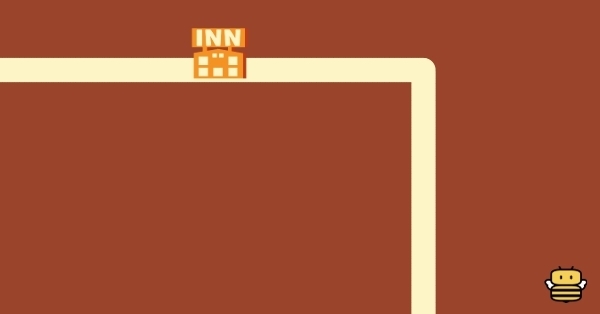
 ① Karkaton Ascent |
Clear Chapter 3
Lightning Cloud / Mage Goblin / Owlet A: Mummy Jerky ★★ (1) B: Penguin Treat ★★ (1) |
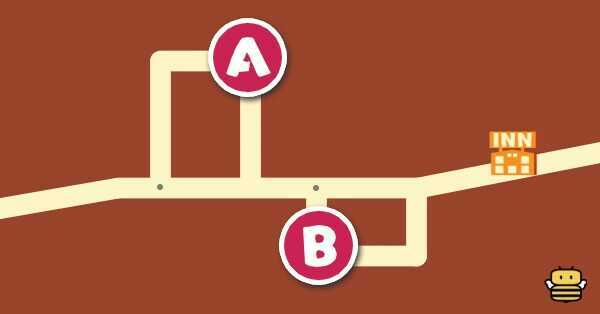
 ② Karkaton Ascent |
Clear ①
Skulleton / Mage Goblin A: 350G B: Game Ticket (3) |
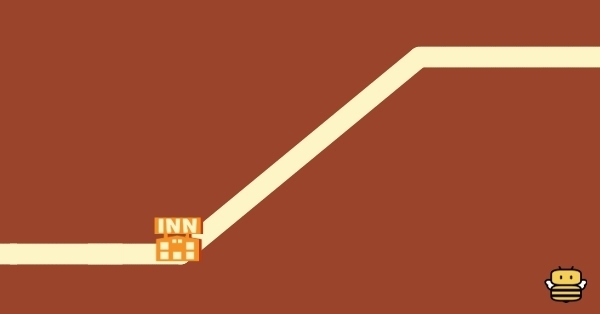
 ③ Karkaton Ascent |
Talk to the Great Safe in Point A
Mage Goblin / Owlet |
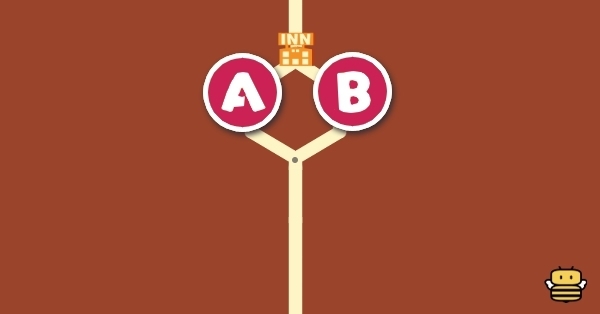
 ④ Karkaton Ascent |
Clear ③
Lightning Cloud / Fiend / Skulleton / Dark Griffin / Blue Minotaur / Mage Goblin / Owlet / Mole A: 1000G B: 500G C: 250G |
 ⑤ Karkaton Ascent |
Clear ④
1st encounter: Magma "Teammate" Slime Subsequent encounters: Skulleton |
 ⑥ Karkaton Ascent |
Clear ③
Lightning Cloud / Skulleton / Mage Goblin A: 270G B: 490G |
 ⑦ Karkaton Ascent |
Clear ⑥
1st encounter: Paincloud "Teammate" Subsequent encounters: Skulleton |
 ⑧ Karkaton Ascent |
Clear ⑦
None A: Armor (Max level: 18) |
 ⑨ Karkaton Ascent |
Clear ③
Lightning Cloud / Skulleton / Mage Goblin A: Game Ticket (1) |
 ⑩ Karkaton Ascent |
Clear the eastern route of ⑨
None A: Armor (Max level: 18) |
 ⑪ Karkaton Ascent |
Clear ② or ⑩
1st encounter: Burning "Teammate" Golem Subsequent encounters: Skulleton |
 ⑫ Karkaton Ascent |
Rescue 3 Party Members
Hobgoblin / Imp A: Game Ticket (3) |
 ⑬ Karkaton Ascent |
Clear ⑫
Gold Butterfly / Skulleton / Dark Griffin / Owlet A: Tomato Spaghetti ★ (2) B: 590G |
Karkaton (Area)
Below is a list of maps to guide you through the main Karkaton area.

| Map Image | Unlock Condition / Enemies / Treasure Locations |
|---|---|
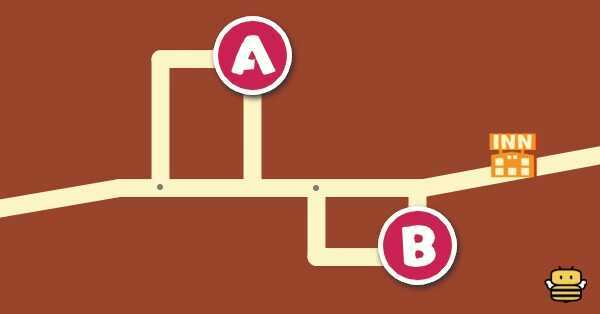
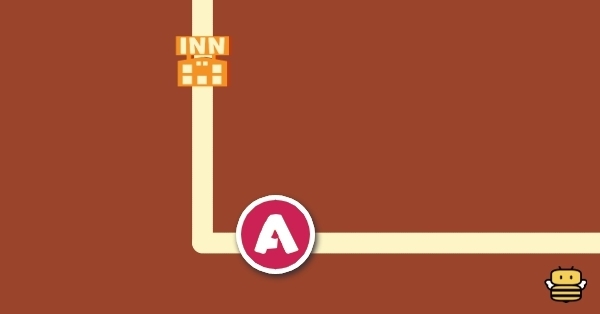
 ⑭ Karkaton |
Clear ⑬
Hobgoblin / Bomb |
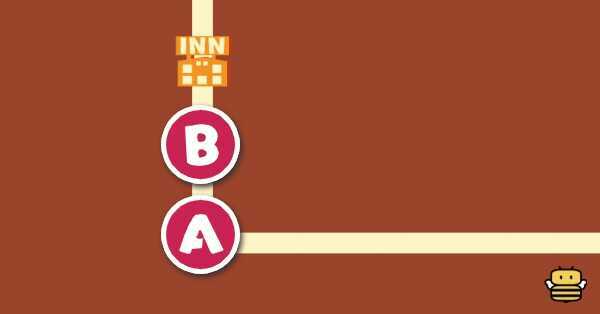
 ⑮ Karkaton |
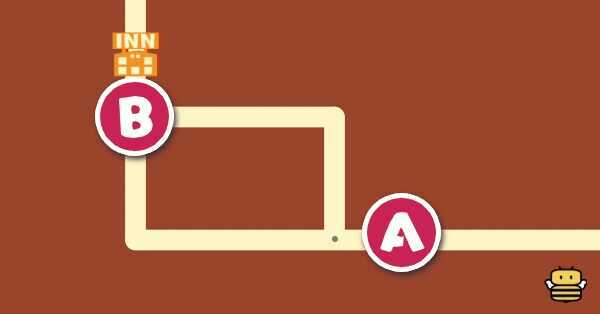
Separate from Party Members at Point B
Hobgoblin / Bomb / Burning Mummy A: MP Candy (1) |
 ⑯ Karkaton |
Clear ⑮
Hobgoblin / Bomb / Burning Mummy A: Game Ticket (3) |
 ⑰ Karkaton |
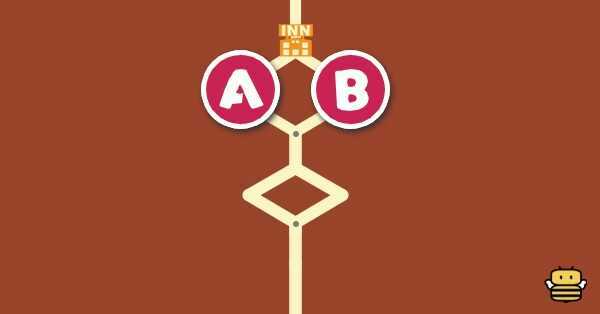
Separate Party Members at (15) and reach Point C
Hobgoblin / Bomb / Burning Mummy A: Game Ticket (1) B: 700G C: BBQ Scorpion ★ (1) |
 ⑱ Karkaton |
Activate the switch at the upper route of ⑯ and clear ⑰
Bomb A: Weapon (Max level: 18) |
 ⑲ Karkaton |
Meet Party Members at Point C
1st encounter: Cerberus Subsequent encounters: Bomb |
Karkaton Peak
Below is a list of maps to guide you through Karkaton Peak.

| Map Image | Unlock Condition / Enemies / Treasure Locations |
|---|---|
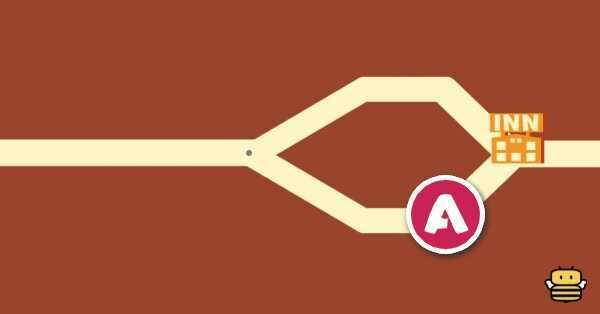
 ⑳ Karkaton Peak |
Clear ⑲
Skulleton A: 1020G |
 ㉑ Karkaton Peak |
Clear ⑳
None A: 4000G |
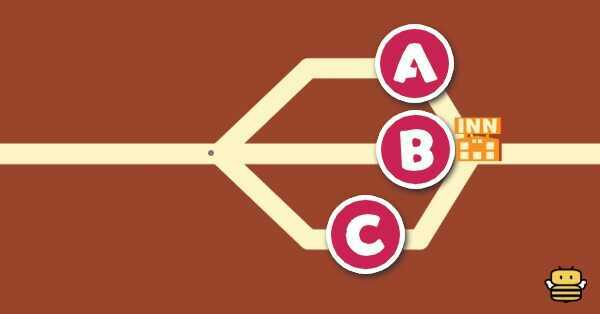
 ㉒ Karkaton Peak |
Clear ⑳
Skulleton / Dark Griffin / Spring Breeze / Bomb A: Goblin Ham ★★ (1) |
 ㉓ Karkaton Peak |
Clear ㉒
Dark Griffin A: HP Banana (3) |
Grand Hall
Below is a list of maps to guide you through Karkaton: Grand Hall.
| Map Image | Unlock Condition / Enemies / Treasure Locations |
|---|---|
 ㉔ Grand Hall |
Separate from Party Members at Point D
Clever Imp / Imp / Naughty Imp A: 890G B: Game Ticket (3) |
 ㉕ Grand Hall |
Clear ㉔
Bansheevil / Clever Imp / Fiend / Imp A: Trap Chest B: Devil's Food Cake ★★ (1) |
 ㉖ Grand Hall |
Clear ㉕
None A: 1470G B: Armor (Max level: 18) |
 ㉗ Grand Hall |
Clear ㉔
1st encounter: "Teammate" Demon / Naughty Imp Subsequent encounters: Bansheevil / Imp |
 ㉘ Grand Hall |
Separate Party Members at ㉔ and reach Point E
Clever Imp / Gold Butterfly / Fiend A: Game Ticket (1) B: MP Candy (1) |
 ㉙ Grand Hall |
Clear ㉘
Skulleton A: Game Ticket (3) B: Trap Chest |
 ㉚ Grand Hall |
Clear ㉘
Bansheevil / Dark Griffin A: Trap Chest B: 1800G |
 ㉛ Grand Hall |
Clear ㉙ or ㉚
1st encounter: Study of "Teammate" Subsequent encounters: Bansheevil / Bomb |
Armory

| Map Image | Unlock Condition / Enemies / Treasure Locations |
|---|---|
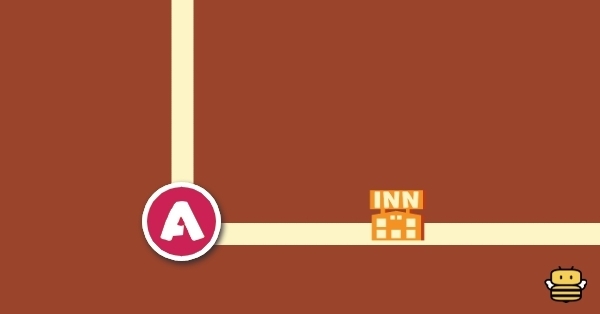
 ㉜ Armory |
Meet Party Members at Point E
Spike Tower / Bomb A: 1000G |
 ㉝ Armory |
Clear ㉜
Gold Butterfly / Spike Tower / Bomb |
 ㉞ Armory |
Meet Party Members at Point E
Silver Cobra A: 1600G |
 ㉟ Armory |
Clear ㉞
Clever Imp / Gold Butterfly / Fiend / Silver Cobra |
 ㊱ Armory |
Clear ㉝ or ㉟
1st encounter: Spirit Sword / Spirit Shield / "Teammate" Armor Subsequent encounters: Clever Imp A: 2200G |
Inner Passage

| Map Image | Unlock Condition / Enemies / Treasure Locations |
|---|---|
 ㊲ Inner Passage |
Clear ㊱
Gold Butterfly / Flaming Wind / Blue Minotaur A: Game Ticket (3) B: Gorilla Protein ★★ (1) |
 ㊳ Inner Passage |
Clear ㊲
Dark Griffin / Spike Tower / Blue Minotaur |
 ㊴ Inner Passage |
Clear ㊳
None A: Weapon (Max level: 18) |
 ㊵ Inner Passage |
Clear ㊲
Silver Cobra / Blue Minotaur |
 ㊶ Inner Passage |
Clear ㊵
None A: Armor (Max level: 18) |
 ㊷ Inner Passage |
Clear ㊲
Clever Imp / Silver Cobra / Flaming Wind / Blue Minotaur A: Game Ticket (3) B: HP Banana (2) C: Cake (1) |
 ㊸ Inner Passage |
Clear ㊷
1st encounter: Dragon Subsequent encounters: Clever Imp / Flaming Wind A: 2400G |
Dark Lord's Throne

| Map Image | Unlock Condition / Enemies / Treasure Locations |
|---|---|
 ㊹ Dark Lord's Throne |
Clear ㊸
Clever Imp / Fiend / Spike Tower / Flaming Wind / Blue Minotaur A: 950G B: 1600G |
 ㊺ Dark Lord's Throne |
Clear ㊹
Silver Cobra / Dark Griffin / Flaming Wind / Blue Minotaur A: Game Ticket (1) B: Game Ticket (3) |
How to Beat the Dark Lord: Boss Guide
Miitopia Related Links
 See Map and Guide List See Map and Guide List
|
|
| Map List for Main Story | |
|---|---|
 Chapter 5-1: Traveler's Hub Chapter 5-1: Traveler's Hub |
 Chapter 5-2: Powdered Peaks Chapter 5-2: Powdered Peaks |
 Chapter 5-3: Peculia Chapter 5-3: Peculia |
 Chapter 5-4: Nimbus Chapter 5-4: Nimbus |
| Post Game Maps | |
 Galados Isle Galados Isle |
 New Lumos New Lumos |
 Tower of Dread Tower of Dread |
 Tower of Despair Tower of Despair |
Author

Karkaton Walkthrough (Chapter 4)
Please participate in our site
improvement survey
03/2026
improvement survey
03/2026
Would you assist in
improving Game8's site?
improving Game8's site?

×
We are listening to our users' valuable opinions and discussing how to act on them.
The information collected through this survey will be used for the purpose of improving our services. In addition, the information will only be disclosed a part of a statistic in a format that will not allow identification of personal information.
Begin Survey
Not Now
×
Please rate each item regarding Game8.co's Advertisements.
Amount of Ads
Very Dissatisfied
Somewhat Dissatisfied
Fine
Somewhat Satisfied
Highly Satisfied
Placement of Ads
Timing of Ad Display
Ad Loading Speed
Safeness of Ads
Content of Ads
×
Please rate each item regarding Game8.co's Quality of Articles.
Amount of information
Very Dissatisfied
Somewhat Dissatisfied
Fine
Somewhat Satisfied
Highly Satisfied
Frequency of updates
Speed of new information
Accuracy of articles
Understandibility of articles
Readability of sentences
×
Please rate each item regarding Game8.co's Usability of the Site.
Ease of finding information
Very Dissatisfied
Somewhat Dissatisfied
Fine
Somewhat Satisfied
Highly Satisfied
Loading Speed
Use of Color
Font Size
Visibility of Images
Easy to Understand Layout
×
Please rate each item regarding Game8.co's Message Boards, Comments.
Ease of Writing
Very Dissatisfied
Somewhat Dissatisfied
Fine
Somewhat Satisfied
Highly Satisfied
Readability
Ease in Finding Information
Comment Quality
Comment Quantity
Admin Response
×
Please rate each item regarding Game8.co's Site's new design.
Please rate our site's new design
Very Dissatisfied
Somewhat Dissatisfied
Fine
Somewhat Satisfied
Highly Satisfied
Do you think that the website's design change makes the site easier to use?
Has the new design made it easier for you to find information on the site?
Has the new design improved the overall visual appeal of the site?
How would you rate your overall satisfaction with the new design of the site?
×
How likely are you to recommend Game8 to someone you know?
Very Unlikely
0
1
2
3
4
5
6
7
8
9
10
Very Likely
If you have other opinions regarding potential improvement to the website, please share them with us. We would appreciate your honest opinion.
Note: This is a free response section, so you can proceed without entering anything.
Note: Please be sure not to enter any kind of personal information into your response.
Note: Please be sure not to enter any kind of personal information into your response.
×
Thank You
×
Thank you for participating in our survey! Your answers will help us to improve the quality of our website and services.
We hope you continue to make use of Game8.
We hope you continue to make use of Game8.
Close
Rankings
- We could not find the message board you were looking for.
Gaming News


![Slay the Spire 2 Review [Early Access] | Still the Deckbuilder to Beat](https://img.game8.co/4433115/44e19e1fb0b4755466b9e516ec7ffb1e.png/thumb)

![Resident Evil Village Review [Switch 2] | Almost Flawless Port](https://img.game8.co/4432790/e1859f64830960ce4248d898f8cd38d9.jpeg/thumb)
Popular Games

Genshin Impact Walkthrough & Guides Wiki
Honkai: Star Rail Walkthrough & Guides Wiki
Umamusume: Pretty Derby Walkthrough & Guides Wiki
Pokemon Pokopia Walkthrough & Guides Wiki
Resident Evil Requiem (RE9) Walkthrough & Guides Wiki
Monster Hunter Wilds Walkthrough & Guides Wiki
Wuthering Waves Walkthrough & Guides Wiki
Arknights: Endfield Walkthrough & Guides Wiki
Pokemon FireRed and LeafGreen (FRLG) Walkthrough & Guides Wiki
Pokemon TCG Pocket (PTCGP) Strategies & Guides Wiki


Recommended Games
Fire Emblem Heroes (FEH) Walkthrough & Guides Wiki
Diablo 4: Vessel of Hatred Walkthrough & Guides Wiki
Yu-Gi-Oh! Master Duel Walkthrough & Guides Wiki
Super Smash Bros. Ultimate Walkthrough & Guides Wiki
Pokemon Brilliant Diamond and Shining Pearl (BDSP) Walkthrough & Guides Wiki
Elden Ring Shadow of the Erdtree Walkthrough & Guides Wiki
Monster Hunter World Walkthrough & Guides Wiki
The Legend of Zelda: Tears of the Kingdom Walkthrough & Guides Wiki
Persona 3 Reload Walkthrough & Guides Wiki
Cyberpunk 2077: Ultimate Edition Walkthrough & Guides Wiki


All rights reserved
Nintendo. Miitopia and Nintendo Switch are trademarks of Nintendo. 2021 Nintendo.
The copyrights of videos of games used in our content and other intellectual property rights belong to the provider of the game.
The contents we provide on this site were created personally by members of the Game8 editorial department.
We refuse the right to reuse or repost content taken without our permission such as data or images to other sites.
Mistakes: - You don’t actually unlock the ability to change job after unlocking all of the party members, you just need to unlock the fir - In stage 2 of Karkaton Ascent, it says there is gold and game tickets, even if it only marks one chest. It has the game tickets. No gold.