Best Team Comp: Party Building Guide
Welcome to Game8's Miitopia Switch Wiki! See our guides below that will help you get started on your adventure!

This is a guide on the best team compositions for each chapter of Miitopia for the Nintendo Switch. Read on to learn what jobs combinations and personalities should comprise your party for each stage of Miitopia!
List of Contents
Things to Know for Best Team Comp
Changes to Party During Main Story
Ten-Member Party

By the end of the main story story, you will have 9 allies join you on your adventure. Choose wisely on the Jobs that you assign on them for the main story.
When does each party member join?
The first 3 allies will join you in Chapter 1 and leave before Chapter 2. You will have another set of 3 allies form your party in Chapter 2, and yet another 3 allies form your party in Chapter 3. In Chapter 4, you will have all 9 allies form your party.
Your Character Changes Jobs Twice
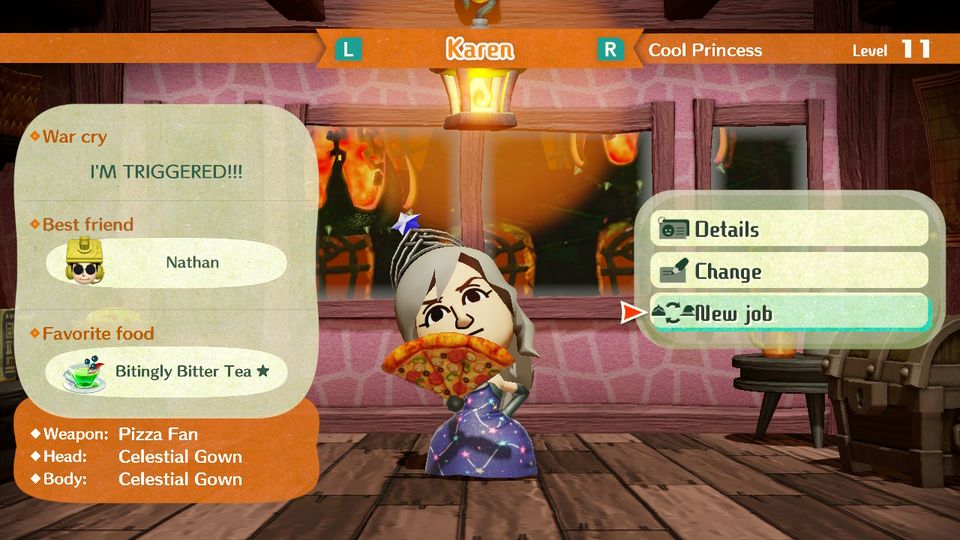
The Dark Lord steals away your powers every time you clear an area from Chapters 1 through 3, forcing you to change jobs twice. Note that when this happens, you cannot choose a Job that you've already chosen before. After clearing Karkaton (Chapter 4), you'll then be able to change your Job at any time.
Levels Don't Reset With Job Change
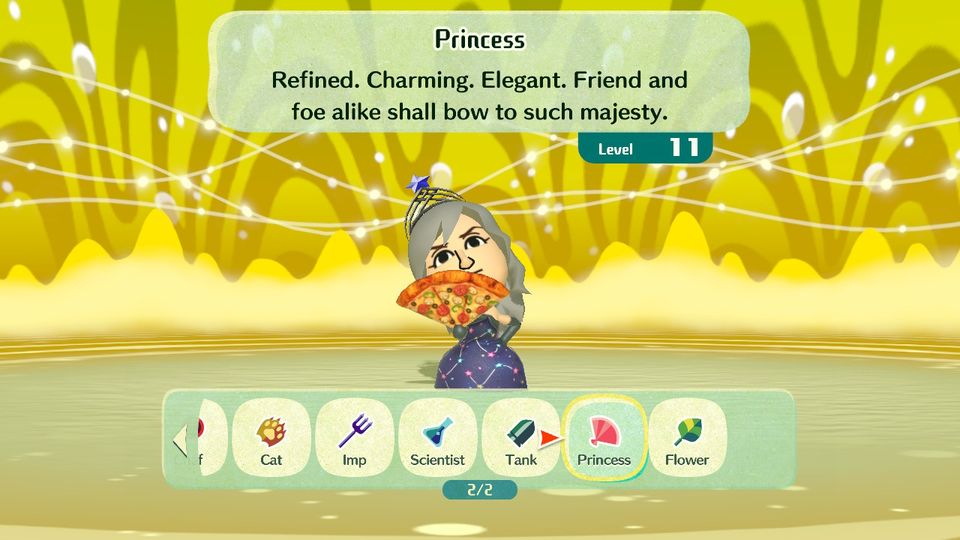
When you change Jobs, your character level will revert back to 0, if it's a Job that character is trying out for the first time. However if the character is reverting back to a Job it previously held, it will start at the level it was when it last held that Job. For example, if you change to a Cleric at Warrior Level 15 then change back to Warrior at some point later, you will start at Level 15 instead of Level 1.
For Obtaining Medals
Note that you will only earn a majority of Medals by going through all the different Jobs.
Obtaining these medals is most efficiently done after the main story, in Galados Isle or New Lumos or by doing Traveler's Hub quests, as the EXP gained is much higher there.
If going for 100% completion, it's recommended to max out the Job levels and equipment after the main story, and focus more on building the best team during the main story. This guide will be focused on party building during the main story.
Best Team Comp (Party Building Guide)
| You can finish the game regardless of the personality you choose, so if you're looking to have fun without worrying about efficiency in the early stages, it's best to just use your preferred personality to go with your playstyle. However, if you want to get the best out of your character, continue reading our guide below for our recommendations. |
Best Team for Greenhorne (Chapter 1)
| Job | Best Personalities/Strengths |
|---|---|
 Pop Star Pop Star
|
Main Character: Cool ・Attacks multiple enemies ・Can make teammate attack twice |
 Warrior Warrior
|
Teammate 1: Cool ・High health and attack power ・You'll want to train a Warrior for the endgame as early as possible |
 Mage Mage
|
Teammate 2: Cool ・Deals strong magic attack ・Useful offensive skills |
 Cleric Cleric
|
Teammate 3: Cool ・Recovery option for teammates |
Alternative Jobs
| Original Party Member | - | Alternative Party Member |
|---|---|---|
 Pop Star Pop Star
(Hero) |
⟶ |
 Chef Chef
|
 Pop Star Pop Star
(Hero) |
⟶ |
 Thief Thief
|
Pop Star is an efficient main character
The Pop Star's normal attack hits multiple enemies, which is good for dealing with the swarms of weak enemies you'll encounter in Greenhorne (such as the Slime Jelly).
Additionally, the Pop Star's Encore skill is learned immediately at level 2 and it allows teammates an extra turn. Since the goal is to conserve Grub and Gold in Greenhorne, you could just give your attackers (Warrior or Mage) the stat buffs, since the Encore skill allows you to devote the Pop Star's turn to making one of them attack.
Teammates that don't waste turns
The A.I. controls your teammates and chooses randomly between the skills the teammate has learned or normal attacks. The Warrior, Mage, and Cleric all have skills that are useful at any given moment, while other choices such as the Thief, Pop Star, and Chef have some learned skills that are either useless or even crippling to team synergy.
Cool is recommended for personality
Cool can use Pressure Point, which increases the firepower of the normal attack, and Avoid that dodges the enemy's attack. In the early stages of the game, when there are a few skills available, Cool is a very reliable personality that has its uses.
Best Team for Neksdor (Chapter 2)
| Job | Best Personalities/Strengths |
|---|---|
 Scientist Scientist
|
Main Character: Cool ・High speed and powerful attacks that hit multiple enemies ・Safety Mask skill prevents party from status effects |
 Warrior Warrior
|
Teammate 1: Cool ・Powerful attacker ・Also provides good defense when relationship level is high enough |
 Mage Mage
|
Teammate 2: Cool ・Deals top-class damage with Magic |
 Cleric Cleric
|
Teammate 3: Cool ・Used to keep HP and MP up |
Alternative Jobs
| Original Party Member | - | Alternative Party Member |
|---|---|---|
 Mage Mage
(Teammate 2) |
⟶ |
 Cat Cat
|
In Neksdor, avoid choosing the Cat for the Hero
The Cat is one of the best choices for the Hero's job, but choosing the Cat as the main hero's job in Neksdor will prohibit the Cat from being chosen in the next chapter, Realm of the Fey. Since there is more EXP to be earned in Realm of the Fey than in Neksdor, it's recommended to choose the Cat in Realm of the Fey instead, so that it will be at a much higher level when it's needed for the Dark Lord fight in the following chapter, Karkaton.
Scientist has useful skills in Neskdor
The Scientist is a great job option for the Hero, as its high Speed and access to powerful area of effect attacks allow you to make quick work of enemy mobs. You'll also learn the Safety Mask skill at higher levels, which allow you to protect yourself and your teammates from status ailments. The Safety Mask skill comes in great use especially against the final boss of Neksdor.
Select teammates for balance
For teammates, you'll want to balance out roles between damaging and defending. A Warrior teammate is ideal for damaging and defending allies at the same time, while a pure offensive teammate (preferrably Mage or Cat) dishes out the damage. A healer teammate like a Cleric is there to keep your HP up. This is to prevent your teammates from wasting turns consuming HP Bananas or MP Candies.
Best Team for Realm of the Fey (Chapter 3)
| Job | Best Personalities/Strengths |
|---|---|
 Cat Cat
|
Main Character: Cool ・High speed and strong attack ・Useful skills for sustaining itself |
 Scientist Scientist
|
Teammate 1: Cool ・Prevents status ailments, which are common in this region ・High speed and strong attack |
 Warrior Warrior
|
Teammate 2: Cool ・Countermeasure against the Fiend |
 Flower Flower
|
Teammate 3: Cool ・Recovery option for party ・Deals decent magic attacks |
Alternative jobs
| Original Party Member | - | Alternative Party Member |
|---|---|---|
 Flower Flower
(Teammate 3) |
⟶ |
 Cleric Cleric
|
 Flower Flower
(Teammate 3) |
⟶ |
 Princess Princess
|
Realm of the Fey Maps & Walkthrough
Last forced change of job
This chapter will have you change your hero's Job for the second and final time. You will be free to change jobs starting from the next chapter.
The Cat is a powerful Job for the endgame
The Cat is one of the best choices for the Hero due to its high Speed and damage potential. Cats can also Steal Grub from enemies and cure their own status ailments, making them ideal standalone characters.
Prepare physical attackers to face the Fiend
In Chapter 3, you may have a difficult time defeating the troublesome enemy known as the Fiend. Fiends have high Speed stats, which always make them attack first. Fiends also have a scythe attack that deal 999 damage, an instant death. Fiends are resistant to Magic, so you need physical attackers such as Warriors or Cats to defeat it.
Keep your teammates healthy
Status ailments start to become more and more common from this point onwards, so having a Scientist can help ease the pressure from these ailments. As always, a healer teammate is needed to prevent other teammates from wasting turns consuming Snacks. You can experiment with the Flower as a healer, as they deal better magic attacks than the Cleric (but are generally more unreliable as an A.I.-controlled teammate).
Best Team for Karkaton (Chapter 4)
| Job | Best Personalities/Strengths |
|---|---|
 Cat Cat
|
Main Character: Energetic ・High speed and strong attack ・Useful skills for sustaining itself |
 Scientist Scientist
|
Teammate 1: Energetic ・Black Hole and Safety Mask are conveniently useful skills ・Outmatches enemies in terms of Speed |
 Warrior Warrior
|
Teammate 2: Cool ・Powerful attacker ・Also provides good defense when relationship level is high enough |
 Flower Flower
|
Teammate 3: Energetic ・Recovery option for party ・Deals decent magic attacks |
Carefully select main party members
You will start Chapter 4 with no party members, but former party members will gradually return to the fold. Though, you should keep the main members of the party locked in and refrain from shuffling the party.
From here until the end of the main story, it's recommended to only give food to the mainstay of the party. Also, at this point in the game, it's handy to utilize the Scientist's Safety Mask skill to prevent status ailments from afflicting the party.
Dish out damage, heal with Safe Spot
At this point of the game you should have a good grasp of how and when to use the Safe Spot. With proper use, you can actually clear the chapter without having to rely on healers. Get into a rhythm of using the Safe Spot to heal and getting out your best attackers to deal strong damage.
The best attackers you can bring to Karkaton are a Warrior for soaking damage and a Scientist for area of effect damage and status ailment protection. If you haven't mastered the use of Safe Spot yet, it's also perfectly fine to bring a healer teammate, such as the Flower, along as well.
How to Efficiently Use the Safe Spot
Adopt the Energetic Personality
Energetic is a good personality because of Cheer, which can recover MP without consuming actions in battle. Cool is still recommended as well, so that party members can avoid taking damage.
Best Team for Traveler's Hub Quests (Chapter 5)
| Job | Best Personalities/Strengths |
|---|---|
 Cat Cat
|
Main Character: Energetic ・High speed and strong attack ・Useful skills for sustaining itself |
 Scientist Scientist
|
Teammate 1: Energetic ・Black Hole and Safety Mask are conveniently useful skills ・Outmatches enemies in terms of Speed |
 Warrior Warrior
|
Teammate 2: Cool ・Powerful attacker ・Also provides good defense when relationship level is high enough |
 Flower Flower
|
Teammate 3: Energetic ・Recovery option for party ・Deals decent magic attacks |
Alternative jobs
| Original Party Member | - | Alternative Party Member |
|---|---|---|
 Flower Flower
(Teammate 3) |
⟶ |
 Cleric Cleric
(in Peculia) |
 Flower Flower
(Teammate 3) |
⟶ |
 Princess Princess
|
Traveler's Hub Story Quest Guide
Buff up party stats for the endgame
The areas of Chapter 5 (Powdered Peaks, Peculia, and Nimbus) are relatively short and easy areas to defeat, so just use the time to buff up the levels/stats of your party in preparation for the Sky Scraper. Continue using the Cat for your Hero and bring along a Warrior and a Scientist, as they are powerful jobs.
Level up healers
The next chapter will require you to use all 10 of your party members, so if you're planning on buffing up the stats of only 4 of those party members in this chapter, it would be wise to buff up the stats of recovery-oriented teammates such as Flowers or Clerics. The Flower from your Realm of the Fey team is recommended, as it can deal magic damage as well. However, in Peculia, don't use the Flower, as their magic attacks are useless against the Fiends present there.
Best Team for Sky Scraper / Otherworld (Chapter 6)
| Job | Best Personalities/Strengths |
|---|---|
 Cat Cat
|
Main Character: Energetic ・High speed and strong attack ・Useful skills for sustaining itself |
 Scientist Scientist
|
Teammate 1: Energetic ・Black Hole and Safety Mask are conveniently useful skills ・Outmatches enemies in terms of Speed |
 Warrior Warrior
|
Teammate 2: Cool ・Powerful attacker ・Also provides good defense when relationship level is high enough |
 Vampire Vampire
|
Teammate 3: Energetic ・Powerful physical and magic attack ・Can self-revive and revive teammates ・Enemies take percentage of damage when attacking Vampires |
Complete the Vampire quest before entering Sky Scraper
At some point before fully unlocking Sky Scraper, there's a chance that a Vampire will appear in the Traveler's Hub with a quest to clear out Manor Macabre. Complete that quest to unlock the Vampire job, which is a top-tier Job to give a teammate.
Vampire Job: How to Unlock, Skills, and Best Personality
Vampires deal strong damage (both physical attack and magic). Enemies also take damage when they land a physical attack on Vampires. Lastly, Vampires can perform a self-revive when they get knocked out and can even Curse other party members so they do the same.
Ready your strongest party
As with the previous chapters, it's recommended to run the Cat, Warrior, and Scientist, as they deal strong damage and protect the party/themselves incredibly well.
Best Team for New Lumos (Post-Game)
| Job | Best Personalities/Strengths |
|---|---|
 Elf Elf
|
Main Character: Energetic ・Strong attack ・Great support and recovery option for team |
 Scientist Scientist
|
Teammate 1: Energetic ・Black Hole and Safety Mask are conveniently useful skills ・Outmatches enemies in terms of Speed |
 Warrior Warrior
|
Teammate 2: Cool ・Powerful attacker ・Also provides good defense when relationship level is high enough |
 Vampire Vampire
|
Teammate 3: Energetic ・Powerful physical and magic attack ・Can self-revive and revive teammates ・Enemies take percentage of damage when attacking Vampires |
Use Vampire and Elf
The Vampire and Elf are highly recommended to use when clearing areas in New Lumos and its succeeding regions (the Tower of Dread and Tower of Despair). Vampires in particular will learn skills that can be useful for grinding your party, so once you've completed the Main Story, make sure to make it a top priority to unlock the Vampire.
Elf Job: How to Unlock, Skills, and Best Personality
Miitopia Related Links
 Back to Top Page Back to Top Page |
|
| Miitopia Guides | |
|---|---|
 Jobs Jobs |
 Personalities Personalities |
 Walkthrough and Maps Walkthrough and Maps |
 Tips and Tricks Tips and Tricks |
 Grub Grub |
 Enemies Enemies |
 Equipment Equipment |
 Team Comp Team Comp |
 List of Bosses List of Bosses |
 Message Boards Message Boards |
Author
Best Team Comp: Party Building Guide
Rankings
- We could not find the message board you were looking for.
Gaming News
Popular Games

Genshin Impact Walkthrough & Guides Wiki

Umamusume: Pretty Derby Walkthrough & Guides Wiki

Crimson Desert Walkthrough & Guides Wiki

Monster Hunter Stories 3: Twisted Reflection Walkthrough & Guides Wiki

Honkai: Star Rail Walkthrough & Guides Wiki

Pokemon Pokopia Walkthrough & Guides Wiki

The Seven Deadly Sins: Origin Walkthrough & Guides Wiki

Wuthering Waves Walkthrough & Guides Wiki

Zenless Zone Zero Walkthrough & Guides Wiki

Arknights: Endfield Walkthrough & Guides Wiki
Recommended Games

Fire Emblem Heroes (FEH) Walkthrough & Guides Wiki

Diablo 4: Vessel of Hatred Walkthrough & Guides Wiki

Cyberpunk 2077: Ultimate Edition Walkthrough & Guides Wiki

Yu-Gi-Oh! Master Duel Walkthrough & Guides Wiki

Super Smash Bros. Ultimate Walkthrough & Guides Wiki

Pokemon Brilliant Diamond and Shining Pearl (BDSP) Walkthrough & Guides Wiki

Elden Ring Shadow of the Erdtree Walkthrough & Guides Wiki

Monster Hunter World Walkthrough & Guides Wiki

The Legend of Zelda: Tears of the Kingdom Walkthrough & Guides Wiki

Persona 3 Reload Walkthrough & Guides Wiki
All rights reserved
Nintendo. Miitopia and Nintendo Switch are trademarks of Nintendo. 2021 Nintendo.
The copyrights of videos of games used in our content and other intellectual property rights belong to the provider of the game.
The contents we provide on this site were created personally by members of the Game8 editorial department.
We refuse the right to reuse or repost content taken without our permission such as data or images to other sites.


![Star Savior Review [First Impressions] | Engaging, Entertaining, and Expensive](https://img.game8.co/4447603/8f500e9bf666bdb8adb1af478e9dfdbd.png/show)


Orange!