Shinra Box Buster Guide: How to Get 50,000 Points on SOLDIER Training

This is a guide to completing the SOLDIER Training difficulty of the Shinra Box Buster minigame in FF7 Remake Intergrade's INTERmission DLC for PS5. Learn how to unlock the minigame, rewards for completion, and tips on destroying the large boxes and which abilities to use to win the game and unlock the Materia Maven Trophy.
List of Contents
How to Unlock Shinra Box Buster
Find the “Training Program” in Chapter 2
 |
|
|---|---|
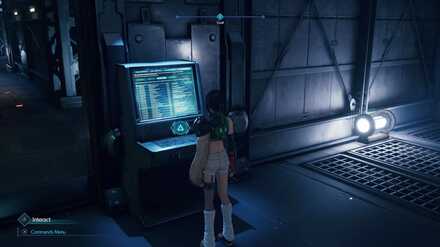
| How to Unlock | Chapter 2: Access the “Training Program” computer in the Training Room on B14 of the Shinra Building |
| Trophy | Materia Maven |
The Shinra Box Buster minigame can be found in Chapter 2 of the INTERmission DLC. It's found in the Training Room of B14 of the Shinra Building, and is part of the normal game flow, so most players should encounter it normally during their playthrough, though it is not required to play.
Shinra Box Buster has two difficulty levels, but this does not depend on the difficulty setting of your playthrough. Simply reach 20,000 points on the first difficulty setting, Basic Training, to unlock the advanced difficulty setting, SOLDIER Training.
Basic Training (Normal)
| Score | Reward |
|---|---|
| 5,000 | ・ATB Assist Materia |
| 10,000 | ・ATB Boost Materia |
| 20,000 | ・ATB Stagger Materia |
SOLDIER Training (Hard)
The SOLDIER Training course is unlocked after winning all the prizes in the Basic Training mode.
| Score | Reward |
|---|---|
| 10,000 | ・Magnify Materia |
| 30,000 | ・Gil Up Materia |
| 50,000 | ・EXP Up Materia |
How to Get 50,000 Points
Video Guide
Although admittedly not a perfect run, our team was able to destroy all crates and earn 50,000 points with around 10 seconds left on the timer. Players who refine the methods in this article should be able to complete the same route with plenty of time, so it's possible to make a few mistakes and still reach the goal.
Map of All Box Locations (SOLDIER Difficulty)

Tips for Scoring 50,000 Points
| Tips for Scoring 50,000 Points |
|---|
|
|
Destroy all the crates
First of all, although this may not be obvious at first, all crates in the course must be destroyed to reach 50,000 points. At this point, you don't have the luxury of skipping small-fry 100 point crates, so don't leave any stragglers behind.
Although it can be possible to backtrack, in general, you're best off destroying every crate in a room before moving on to the next room to save precious time.
Look to the right at the start to find a timer box

Although the camera doesn't show it, turn to the right at the start to find some hidden boxes. Many a player has faced the frustration of playing this minigame for hours only to find they were missing these the whole time!
Master Throw -> Retrieve to navigate the course

Yuffie's primary method of navigating the course is using the Retrieve command, which allows her to move immediately to wherever she has thrown her shuriken.
Instead of walking to each group of boxes, use Throw to the point where you want Yuffie to move, then use Retrieve to jump there.
Due to the finicky nature of Yuffie's shuriken lock-on, she might not always move to your intended target. As long as you are able to handle the next box in your path effectively, it's still possible to break all the boxes in time even if Yuffie varies slightly from your intended route.
Orange Boxes: Physical attacks
For Orange Boxes, Yuffie can destroy them in a single Throw > Release cycle, so use this to your advantage to quickly destroy separated piles of Orange Boxes.
It's also possible to Throw a shuriken at Orange Boxes and leave it in until they break, during which time you can spam Ninjutsu on nearby Purple Boxes.
Purple Crates: Ninjutsu
As Purple Crates are difficult to destroy with physical attacks, it's best to first move close to them with a Throw > Retreive > Throw cycle, then mash square to destroy them with Ninjutsu. Alternatively, it's fine to simply Throw once and use Ninjutsu from a distance as well.
Throw to Orange Boxes, then Ninjutsu to Purple Boxes while waiting

You can save time by handling Orange and Purple Boxes simultaneously. Throw to a group of Orange Boxes, then use Ninjutsu on a group of nearby Purple Boxes. The Orange Boxes will be destroyed by the shuriken in about the same duration, and both groups of boxes can be handled swiftly.
Use Windstorm to Destroy Large Boxes

Windstorm is largely ineffective in its standard usage – however, when Yuffie throws her shuriken at a box and uses Windstorm without removing it, the attack can destroy multiple large boxes in a single attack.
Not only is the attack faster to execute than Art of War, but it also can destroy boxes from a distance, making it essential for destroying the large crates placed on pedestals and distant shelves. It also deals damage to nearby boxes, making it possible to hit a large box with Windstorm and destroy nearby small boxes in the process.
Balance small crates and large crates to save ATB
For the most part, you'll gain ATB by destroying small crates with basic attacks, and spend it on using Windstorm to destroy large crates.
If you focus excessively on the Timer boxes, you're likely to destroy all of your ATB sources early, and will be left with large boxes which you don't have enough ATB to deal with in sequence. Try to maintain a balanced number of remaining small crates and large crates in a room to ensure you can deal with them all before leaving.
Use Banishment III to finish the final room

By this point, you should have the Steel Reaper, so if you haven't acquired its Banishment Ability yet, equip this weapon to ensure you have it during the Minigame.
The final room features an assortment of large crates scattered about, making them difficult to destroy quickly with Windstorm. Banishment gains power the more ATB abilities are used before it, so by this point, it has maxed out its damage to Banishment III. With one cool hit, you'll clear all seven large crates – just be sure to aim true, as it's possible to whiff this attack and leave half the boxes unscathed, which can cripple your time.
How to Unlock the Materia Maven Trophy
Complete Each Score Requirement on Basic Training and SOLDIER Training
| Trophy | How to Obtain |
|---|---|
 Materia Maven Materia Maven
|
Obtain all materia available from Shinra Box Buster challenges. |
In order to get the Materia Maven trophy, players will need to reach each score requirement for the Basic Training and SOLDIER Training. This means players must play Shinra Box Buster at least six times, three times on each difficulty setting.
Trophy List (Intergrade Updated)
FF7 Remake Intergrade Related Links
Intergrade and INTERmission Guide
Intergrade Story Walkthrough
| Chapter 1 | Chapter 2 |
|---|---|
 Chapter 1: Wutai's Finest Chapter 1: Wutai's Finest
|
 Chapter 2: Covert Ops Chapter 2: Covert Ops
|
Intergrade Boss Fights
| Chapter 1 | Levrikon Gigantipede Ramuh |
|---|---|
| Chapter 2 | Scarlet & The Crimson Mare Projector Nero the Sable |
| Shinra Combat Simulator | vs. Shinra's Dark Secrets vs. Midgarian Monsters Weiss the Immaculate Pride and Joy Mk 0.5 (Top Secrets) |
Intergrade Side Content
 Happy Turtle Flyers Happy Turtle Flyers
|
 Shinra Box Buster Shinra Box Buster
|
Fort Condor Minigame
 Fort Condor Guide Fort Condor Guide
|
Condor Coin Farming |
| Fort Condor Units | |
| Fort Condor Boards |
Intergrade Guides
Author
Shinra Box Buster Guide: How to Get 50,000 Points on SOLDIER Training
improvement survey
03/2026
improving Game8's site?

Your answers will help us to improve our website.
Note: Please be sure not to enter any kind of personal information into your response.

We hope you continue to make use of Game8.
Rankings
Gaming News
Popular Games

Genshin Impact Walkthrough & Guides Wiki

Honkai: Star Rail Walkthrough & Guides Wiki

Umamusume: Pretty Derby Walkthrough & Guides Wiki

Pokemon Pokopia Walkthrough & Guides Wiki

Resident Evil Requiem (RE9) Walkthrough & Guides Wiki

Monster Hunter Wilds Walkthrough & Guides Wiki

Wuthering Waves Walkthrough & Guides Wiki

Arknights: Endfield Walkthrough & Guides Wiki

Pokemon FireRed and LeafGreen (FRLG) Walkthrough & Guides Wiki

Pokemon TCG Pocket (PTCGP) Strategies & Guides Wiki
Recommended Games

Fire Emblem Heroes (FEH) Walkthrough & Guides Wiki

Diablo 4: Vessel of Hatred Walkthrough & Guides Wiki

Yu-Gi-Oh! Master Duel Walkthrough & Guides Wiki

Super Smash Bros. Ultimate Walkthrough & Guides Wiki

Pokemon Brilliant Diamond and Shining Pearl (BDSP) Walkthrough & Guides Wiki

Elden Ring Shadow of the Erdtree Walkthrough & Guides Wiki

Monster Hunter World Walkthrough & Guides Wiki

The Legend of Zelda: Tears of the Kingdom Walkthrough & Guides Wiki

Persona 3 Reload Walkthrough & Guides Wiki

Cyberpunk 2077: Ultimate Edition Walkthrough & Guides Wiki
All rights reserved
© SQUARE ENIX CO., LTD. All Rights Reserved.
CHARACTER DESIGN:TETSUYA NOMURA/ROBERTO FERRARI
The copyrights of videos of games used in our content and other intellectual property rights belong to the provider of the game.
The contents we provide on this site were created personally by members of the Game8 editorial department.
We refuse the right to reuse or repost content taken without our permission such as data or images to other sites.


![Slay the Spire 2 Review [Early Access] | Still the Deckbuilder to Beat](https://img.game8.co/4433115/44e19e1fb0b4755466b9e516ec7ffb1e.png/thumb)

![Resident Evil Village Review [Switch 2] | Almost Flawless Port](https://img.game8.co/4432790/e1859f64830960ce4248d898f8cd38d9.jpeg/thumb)


I don't understand where you get that "banishment" thing. I don't have it.