Dark Shrine Treasure Hall Walkthrough and Guide
★ Endings: Normal | Bad | Good | True | UFO
★ Best: Difficulty | Settings | Weapons
┗ Omamori Tier List | Builds
★ Puzzles: My Room | Locker Code | Mural
★ Missables: Door & Box | Ema | Inventory Size
★ Beginner's Guide | Fox Mask | Lore Explained
This is a full Dark Shrine Treasure Hall walkthrough for Silent Hill f. See how to find the Black Sparrow, White Sparrow and Fox Mask Crests, Dark Shrine Treasure Hall puzzle solutions, what enemies are present in the rooms and more here!
| ◀︎ Previous Area | Next Area ▶︎ |
|---|---|
| Shimizu Residence | Ebisugaoka Corrupted (Fog Town) |
List of Contents
Dark Shrine Treasure Hall Walkthrough
- Head to the Next Room
- Heed Revelations and Find the Crests
- Find the Black Sparrow Crest
- Find the White Sparrow Crest
- Find the Fox Mask Crest
- Solve the Mural Puzzle
- Go Through the Door
1. Head to the Next Room and Investigate the Area

Hinako wakes up back to the Dark Shrine after her last ordeal and is tasked once again by the Fox Mask to follow him. Head through the hallways to reach a Hokora Shrine and a nearby gate. Open the gate to find a huge mural that you can interact with.
After interacting with it, go around the room to find some clues and some notes about the mural as this will become a puzzle for the area that you need to solve.
2. Heed Revelations and Find the Crests
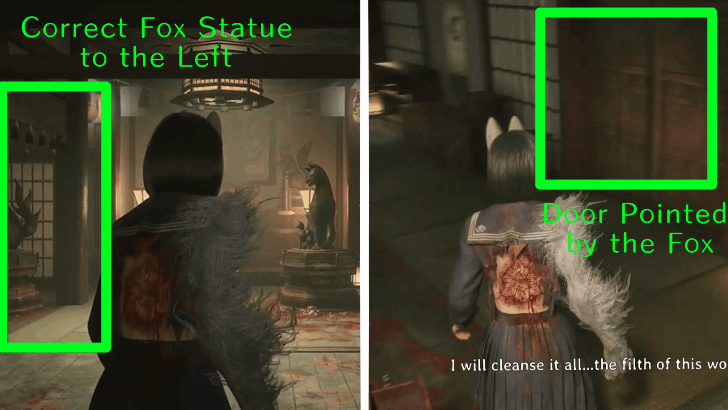
Go to the table right of the mural and read the notes there, tasking you to find three crests to complete the mural. There is a door to the left that you must enter with fox statues afterwards.
Upon entering, look for the fox statue on the left side to pick up a note and the fox will change their pointing position. Follow this direction to the door they are pointing at to proceed.
Areas Further Have No Map Location
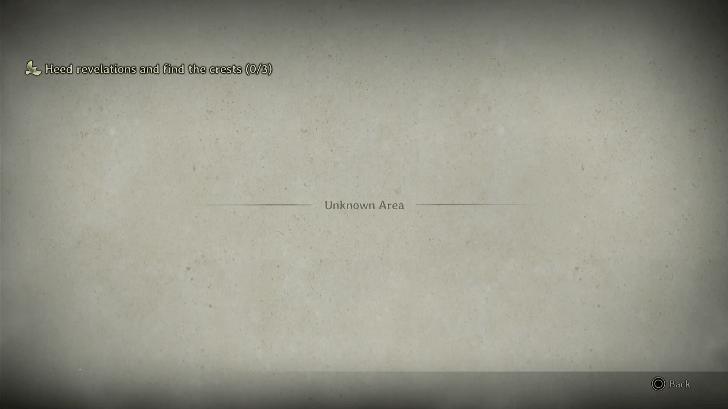
Note that this part of the Dark Shrine has no map available whatsoever, making exploration difficult. You must instead rely on individually exploring the area to get all the unlockables.
3. Find the Black Sparrow Crest
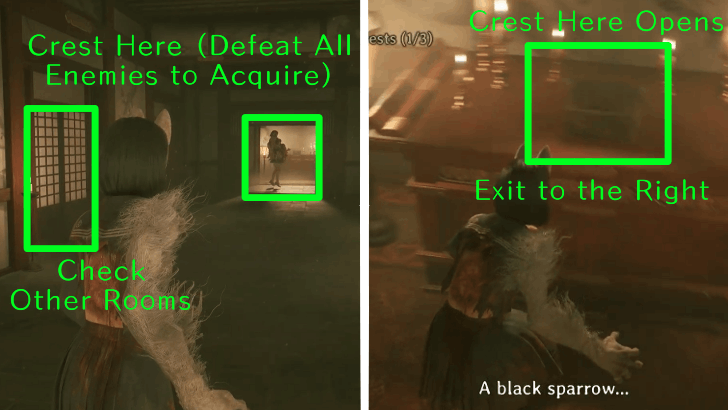
The first Crest is located at the end of this room you entered, with an Oi-Omoi blocking the way in front. Checking the other rooms also reveals some Blade Legs that will ambush you. Take out these monsters with your Fox Arm.
Head straight to the opposite side of the room to get the Black Sparrow Crest, then exit via the blocked wall to the right using your Focus Sense acquired in the last Dark Shrine level. This leads you back to the mural room.
How to Use Black Sparrow Crest
4. Find the White Sparrow Crest
Now, you will need the second crest, a White Sparrow to place on the mural wall. Just like the Black Sparrow Crest, you need to take out some guarding enemies in a separate room.
How to Use White Sparrow Crest
How to Get the White Sparrow Crest
| Steps on How to Get the White Sparrow Crest | |
|---|---|
| 1 |  Take the right door from the mural and you will be back to the Fox Statue room, you can check the different fox statues but don't forget to head to the door ahead of where you came from to reach the crest. |
| 2 | 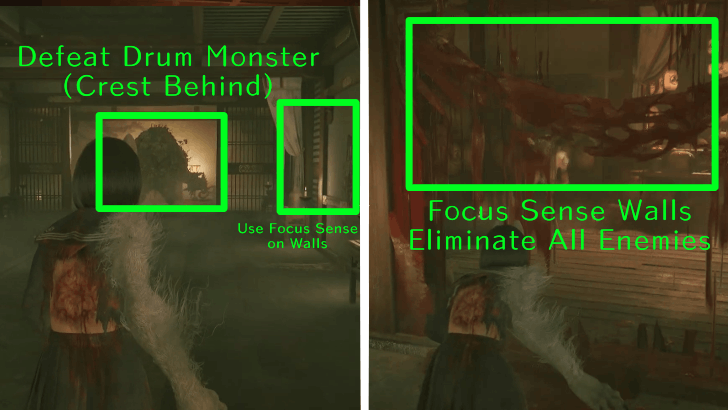 You will enter the crest room this time around but you must take down the Drum Monster in front as well as another group of Blade Legs that appears afterwards. Take them both out then use your Focus Sense on the walls with bloody sigils to reveal another Blade Legs Monster to be also taken out. |
| 3 | 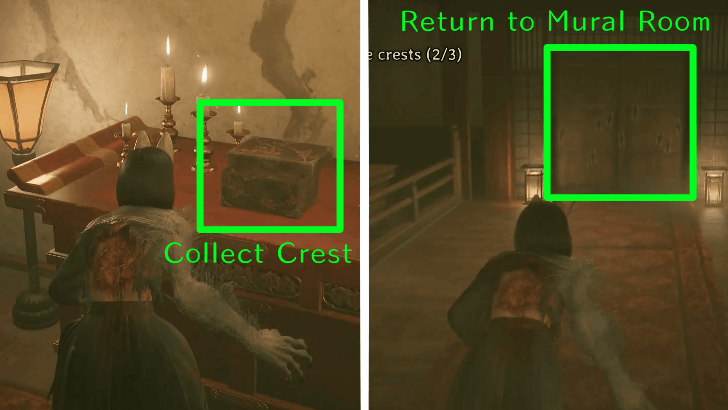
Once every enemy is removed, collect the crest from the table then leave the room via the left door. You will be looped back to the mural, leaving you with one more crest to find. |
5. Find the Fox Mask Crest
The last crest you'll need is a Fox Mask, requiring you to enter the fox statue room one more time to find the correct door to go through and taking out enemies guarding the crest.
How to Get the Fox Mask Crest
| Steps on How to Get the Fox Mask Crest | |
|---|---|
| 1 |
Head to the right door once again to enter the fox statue room, now more warped than it was before. Head to the leftmost corner door from the entrance to reach the correct crest room. |
| 2 | 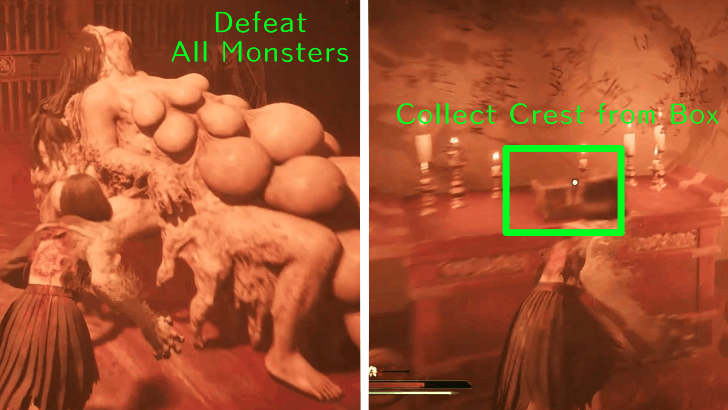 Keep on moving forward inside the room until you reach the crest table, but this time you will be fighting a Birthing Monster and some Blade Legs. Take them out to unlock the chest holding the Fox Mask Crest. |
| 3 |  There will be a cutscene that happens after the fight, but the crest will be collected afterwards. Head right of the room to reach the exit. |
6. Solve the Mural Puzzle
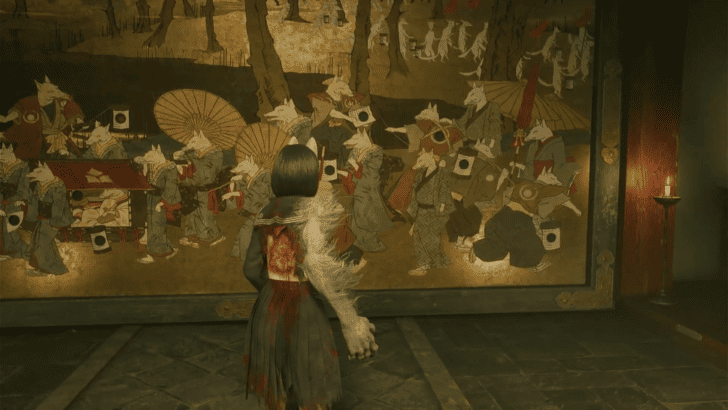
Return to the Mural puzzle and place all the crests you've collected in their correct spots. The solution to this puzzle will vary depending on the ending conditions you've currently met, though the goal is to arrange the crests according to the poem provided in your journal.
Mural Puzzle Solution and Crest Locations
7. Go Through the Door
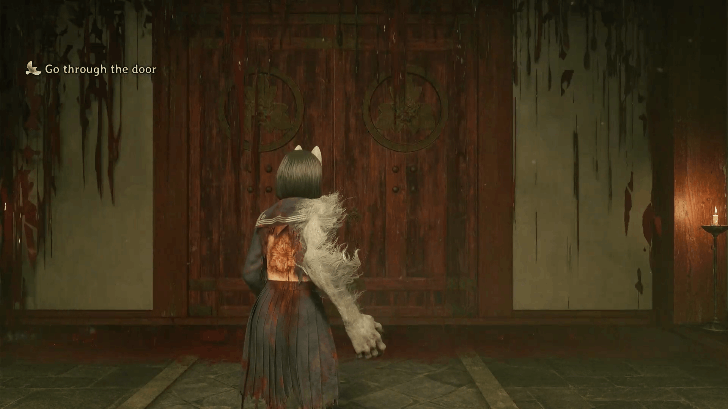
Once the mural puzzle has been solved, it melts into a grand gate that Hinako can pass through. Watch the cutscene that follows after and you will head back to Ebisugaoka.
Ebisugaoka Corrupted Walkthrough
Dark Shrine Treasure Hall Puzzles
All Puzzles in Dark Shrine Treasure Hall
| Puzzle | Description |
|---|---|
| Mural Puzzle | Retrieve the Crests inside the Dark Shrine Rooms and return to the Mural. Use the Journal Entries as a guide when placing the Crests inside the hole slots of the puzzle. |
Dark Shrine Treasure Hall Enemies
All Enemies in Dark Shrine Treasure Hall
|
|
|
|
|
|
|
These are all of the enemies you can encounter through the dark corners of Dark Shrine Treasure Hall. Most of these enemies are required to be taken out to proceed with the area's overarching puzzle.
Dark Shrine Treasure Hall Collectibles and Missables
All Hidden Omamori Locations
| Omamori | Overworld |
|---|---|
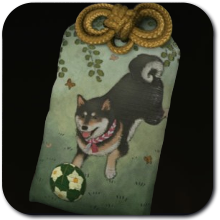 Hound Hound
|
 |
| Obtained by entering the first room on the right after retrieving the arrowhead from the fox statue in the Dark Shrine Treasure Hall, and having it point to the correct hallway. |
All Inari-sama Door and Box Locations
| NG+ Treasure Hall Inari-sama Door | |
|---|---|
 |
|
| Location | After acquiring the two crests, proceed to the final crest room with the Fox statues. Then, head to the east side of the room to open the sealed Inari-sama door. |
All Inari-sama Door and Box Locations
All Ema Locations
| Run | Overworld | Map |
|---|---|---|
| NG+ Only | 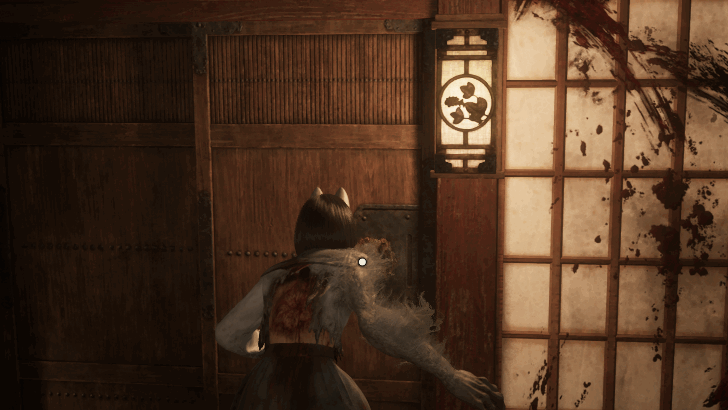 |
 |
| Found after opening an Inari Door in the last Dark Shrine Room, which is located behind a sealed door in the Fox statue room. | ||
Silent Hill f Related Guides

All Chapter Guides and Walkthrough
All Story Chapters
| Silent Hill f Story Walkthrough Chapters | |
|---|---|
| 1 | Ebisugaoka |
| 2 | Shrine Path |
| 3 | Fields (Fog Town) |
| 4 | Corridors |
| 5 | Alleyways (Fog Town) |
| 6 | Middle School |
| 7 | Worship Hall |
| 8 | Mountain Path |
| 9 | Main Hall |
| 10 | Shimizu Residence |
| 11 | Treasure Hall |
| 12 | Corrupted Fog Town |
| 13 | Dark Shrine Final Path |
Author
Dark Shrine Treasure Hall Walkthrough and Guide
Rankings
- We could not find the message board you were looking for.
Gaming News


![Marathon Cryo Archive Map Teased as [REDACTED] on Selection Screen](https://img.game8.co/4442236/6357203e58172f6de57f1991e7c39b22.png/thumb)


Popular Games

Genshin Impact Walkthrough & Guides Wiki
Umamusume: Pretty Derby Walkthrough & Guides Wiki
Pokemon Pokopia Walkthrough & Guides Wiki
Honkai: Star Rail Walkthrough & Guides Wiki
Monster Hunter Stories 3: Twisted Reflection Walkthrough & Guides Wiki
Arknights: Endfield Walkthrough & Guides Wiki
Wuthering Waves Walkthrough & Guides Wiki
Zenless Zone Zero Walkthrough & Guides Wiki
Pokemon TCG Pocket (PTCGP) Strategies & Guides Wiki
Monster Hunter Wilds Walkthrough & Guides Wiki


Recommended Games
Diablo 4: Vessel of Hatred Walkthrough & Guides Wiki
Cyberpunk 2077: Ultimate Edition Walkthrough & Guides Wiki
Fire Emblem Heroes (FEH) Walkthrough & Guides Wiki
Yu-Gi-Oh! Master Duel Walkthrough & Guides Wiki
Super Smash Bros. Ultimate Walkthrough & Guides Wiki
Pokemon Brilliant Diamond and Shining Pearl (BDSP) Walkthrough & Guides Wiki
Elden Ring Shadow of the Erdtree Walkthrough & Guides Wiki
Monster Hunter World Walkthrough & Guides Wiki
The Legend of Zelda: Tears of the Kingdom Walkthrough & Guides Wiki
Persona 3 Reload Walkthrough & Guides Wiki


All rights reserved
©2025 Konami Digital Entertainment
The copyrights of videos of games used in our content and other intellectual property rights belong to the provider of the game.
The contents we provide on this site were created personally by members of the Game8 editorial department.
We refuse the right to reuse or repost content taken without our permission such as data or images to other sites.