 New Game Plus Guide
 All Missables and Points of No Return
 All Ema Locations
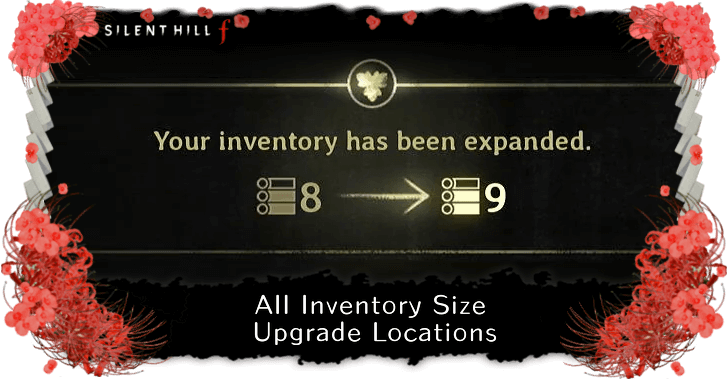 All Inventory Size Upgrade Locations
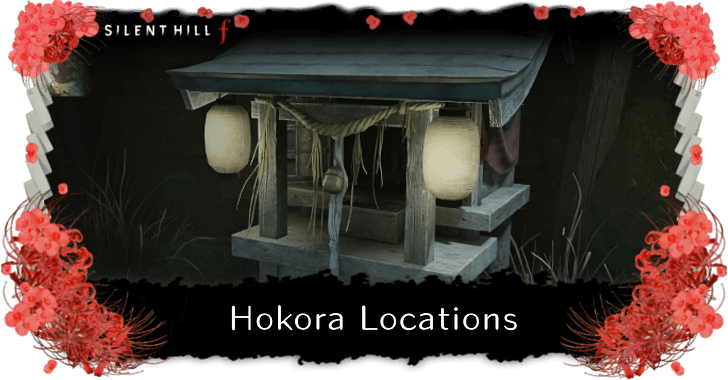 All Hokora Shrine Locations: How to Save
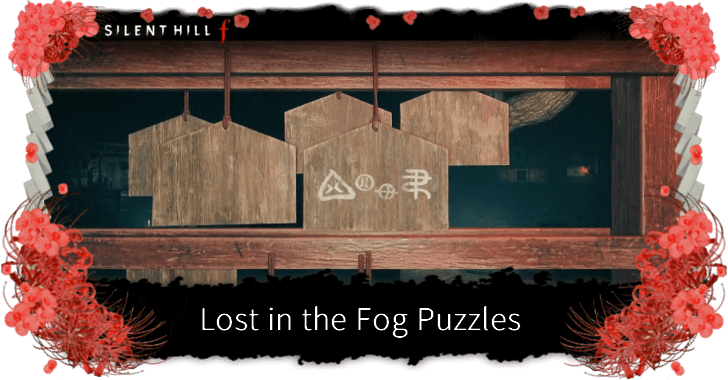 All Lost in the Fog Puzzles and Codes
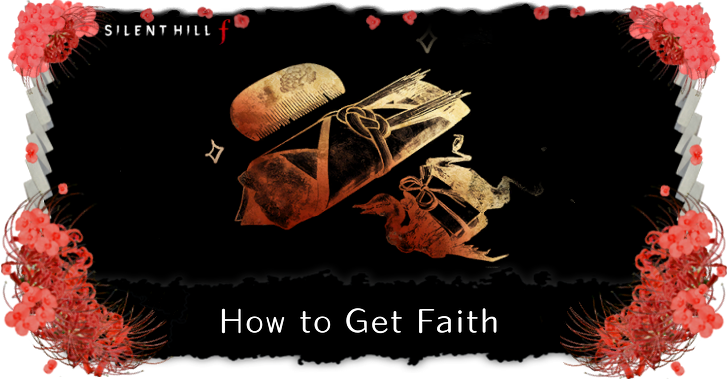 How to Get Faith
 All Final Bosses
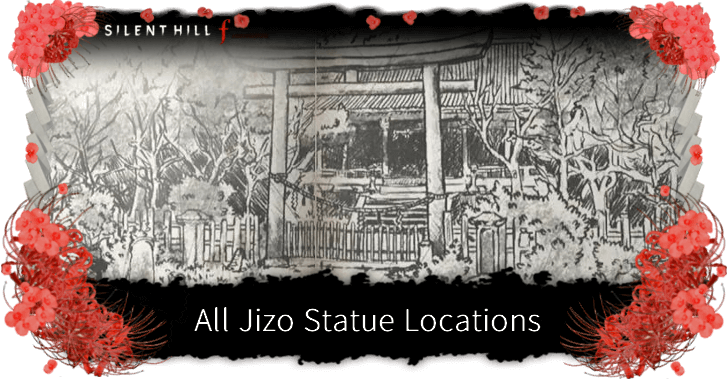 All Jizo Statue Locations
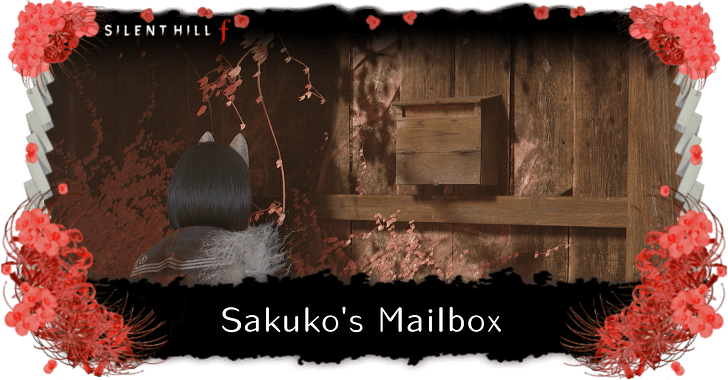 How to Open Sakuko's Mailbox
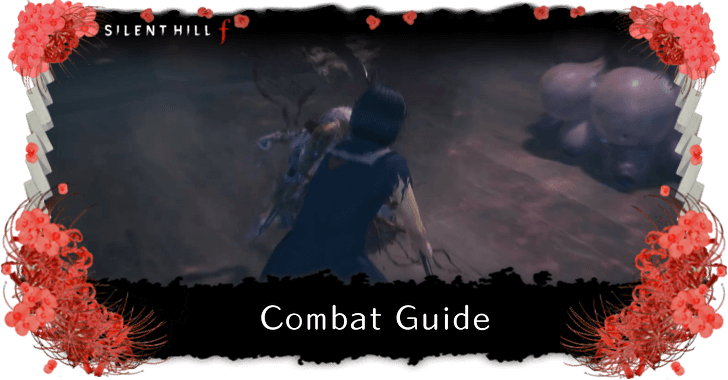 Combat Guide and Tips
 All Inari-sama Door and Box Locations
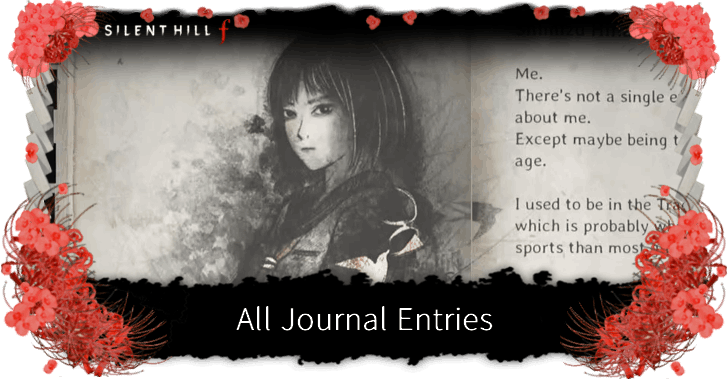 List of All Journal Entries
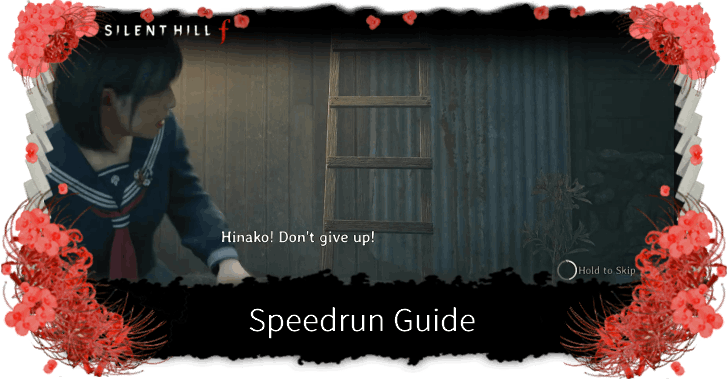 Speedrun Guide
 All Secrets and Easter Eggs
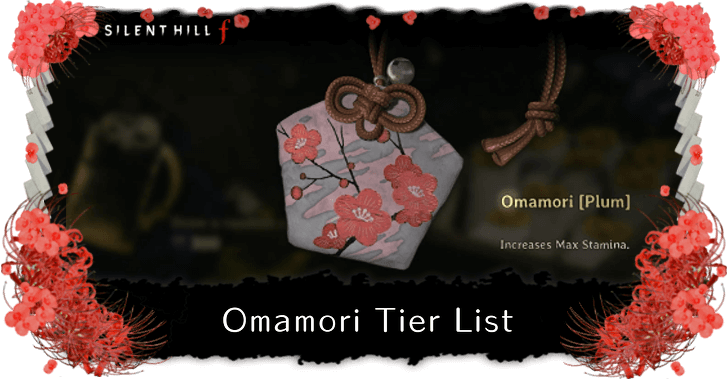 Best Omamori Tier List
 Best Weapons
 Best and Recommended Settings
 Difficulty Differences and Best Difficulty Settings
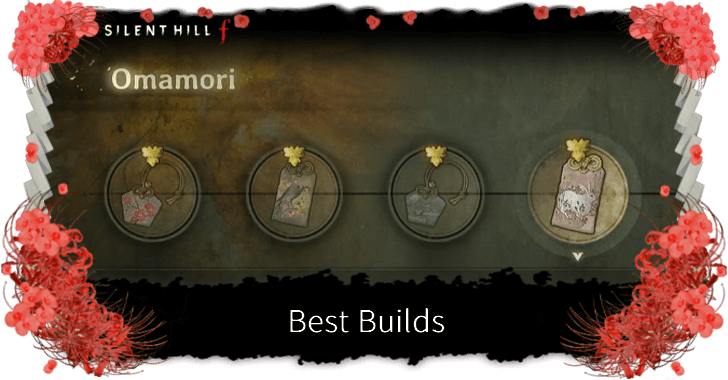 Best Builds
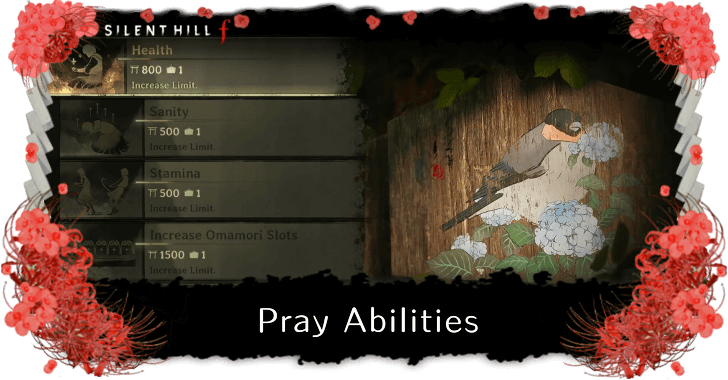 List of Pray Abilities - Best Upgrades
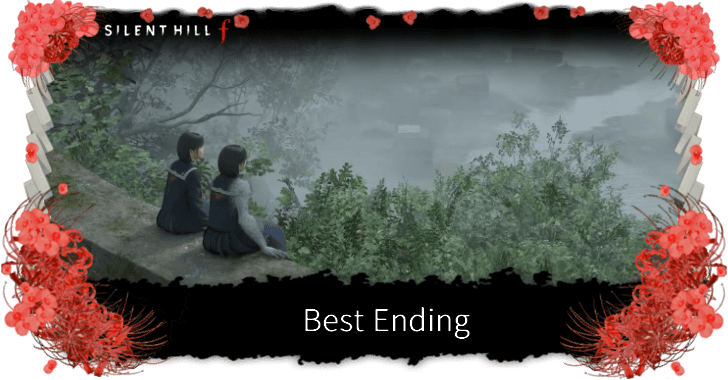 Best Ending
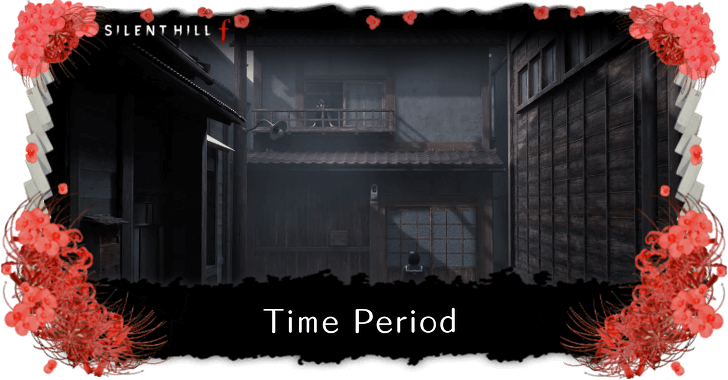 Time Period
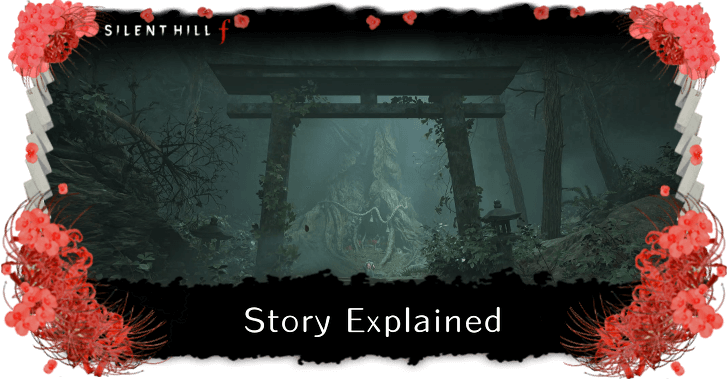 Story Explained
 Wedding Massacre Explained
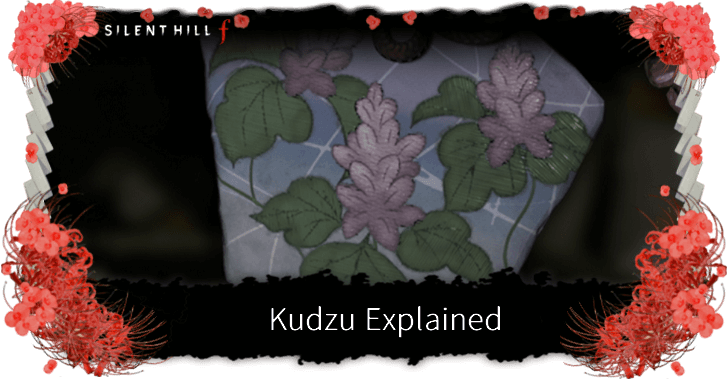 Kudzu Explained
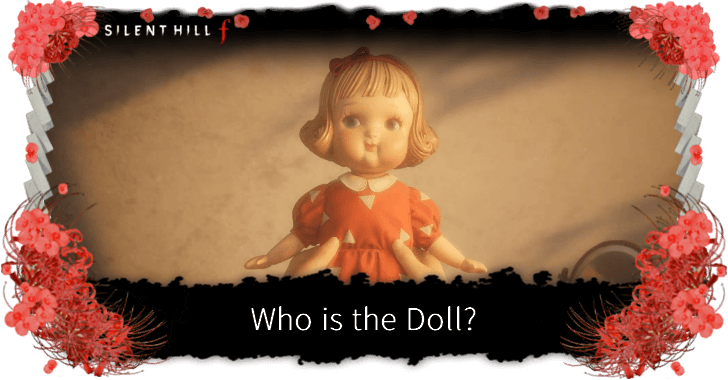 Who Is the Doll?
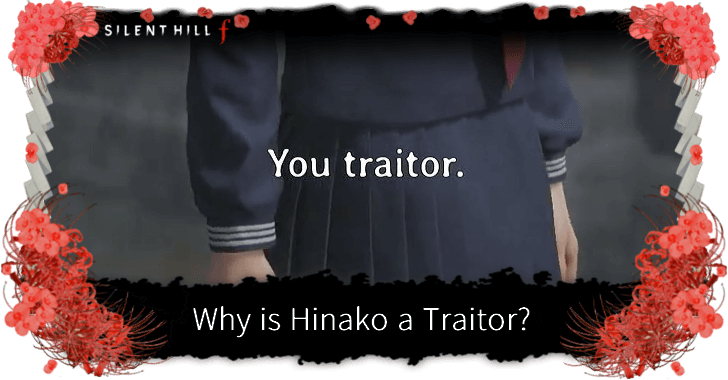 Why Is Hinako a Traitor?
 Is White Claudia in the Red Capsule?
 Is SHf Multiplayer?
 List of Voice Actors
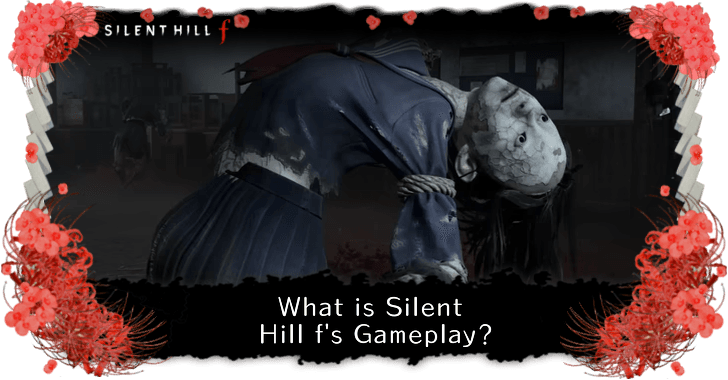 What is SHf's Gameplay?
 How Long to Beat
 Are There Guns?
 List of Known Bugs and Issues
 Bonus Content
 What Does f Stand For?
 Trophy and Achievements Guide
 Untouchable Trophy Guide
 No One Left Behind Trophy Guide
 Sly Like the Fox Trophy Guide
 Where Are You Going? Trophy Guide
 O Divine Tree Trophy Guide
 Good Intentions Trophy Guide
 Agile Escape Trophy Guide
 Omamori Sage Trophy Guide
This survey will take about 1 minute.
Your answers will help us to improve our website.
Silent Hill f
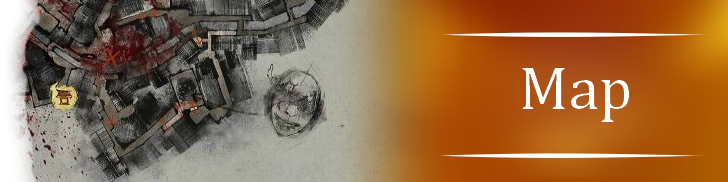
All Puzzle Solutions
★ Endings: Normal | Bad | Good | True | UFO
★ Best: Difficulty | Settings | Weapons
┗ Omamori Tier List | Builds
★ Puzzles: My Room | Locker Code | Mural
★ Missables: Door & Box | Ema | Inventory Size
★ Beginner's Guide | Fox Mask | Lore Explained
Puzzles in Silent Hill f are major key objectives that vary in type and difficulty. See all puzzle solutions, codes, and all of their locations in the game here!
| Story and Puzzle Guides | ||
|---|---|---|
| Story Chapters | Puzzles Guide | Lost in the Fog |
List of Contents
Dark Shrine Path Puzzle Solutions
Altar Puzzle
| Difficulty | Altar Offerings Order (Left to Right) |
|---|---|
| Story |  |
| Hard | 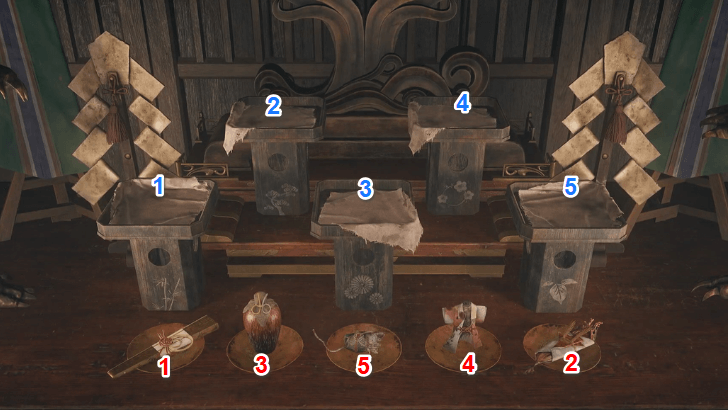 Fan - Branches - Pot - Dress - Rat |
| Lost in the Fog | 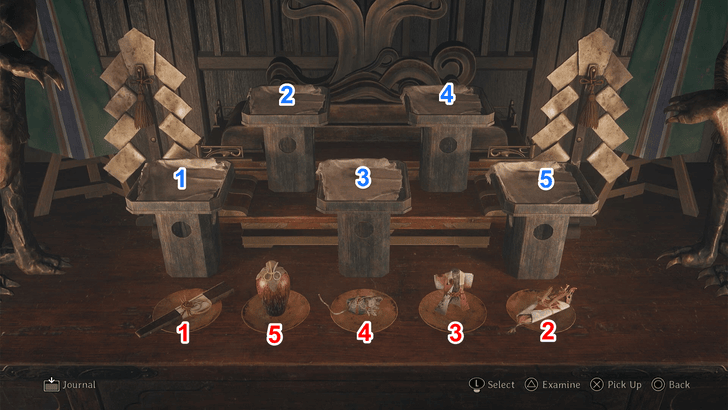 Fan - Branches - Dress - Rat - Pot |
Place the altar offerings on the pedestals in the correct order. The solution changes by difficulty: Story and Hard provide visual clues, while the highest difficulty requires solving a riddle.
Shrine Vault Puzzle
| Story | Hard | Lost in the Fog | |
|---|---|---|---|
| Top | Crane |
Lightning |
Yokai of the Carriage |
| Middle | Serpent |
Decayed Tree |
Yokai of the Umbrella |
| Bottom | Tortoise |
Kudzu |
Yokai of the Kettle |
Find all 3 Emas to acquire the Combination Lock Dial needed for the lock. Refer to the Journal afterwards for the symbols to input on the Shrine Vault lock.
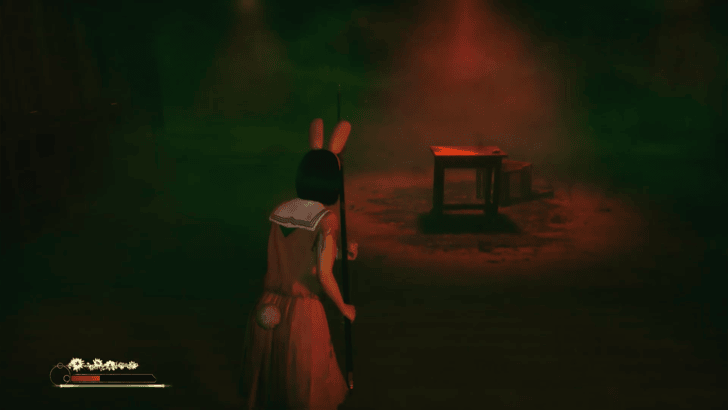
Fields (Fog Town) Puzzle Solutions
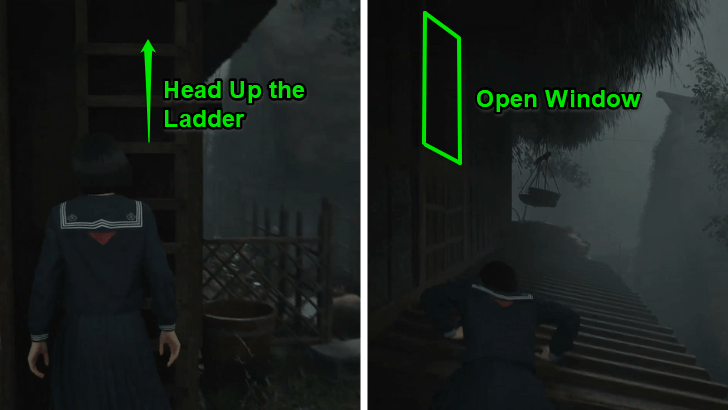
Doctor's House Puzzle
| Overworld View | Map Location |
|---|---|
 |
 |
You can enter the Doctor's House using the ladder found at the side of it. Climb up and enter through the window to find collectibles and an Omamori Pine.
Field Puzzle
| Difficulty | Correct Scarecrow Features |
|---|---|
| Story |
・Female ・Wears a Red Necktie ・Has Clean Short Hair similar to Hinako's ・Wears a Sailor Uniform |
| Hard |
・Female ・Wears a Red Necktie ・Has Medium-length Hair similar to Rinko ・Has a Japanese Half Ponytail style ・Wears a Sailor Uniform ・Has short hair like Hinako's (5th scarecrow only) ・Blade stabbing her back (5th scarecrow only) |
| Lost in the Fog |
・First Scarecrow: Sakuko with a twisted head facing upwards ・Second Scarecrow: Rinko facing down ・Third Scarecrow: Hinako with a contorted head towards the sky ・Fourth Scarecrow: Hinako with a slit mouth ・Fifth Scarecrow: Hinako isolated from the group. Follow the trail of scarecrows on the ground |
Remove flashcards embedded inside the correct scarecrows to escape the fields. The features of the correct scarecrow will vary based on your puzzle difficulty, though you'll be given clues to figure out which one it is. Do note that removing a flashcard from the wrong scarecrow will make it hostile.
Middle School Puzzle Solutions
Stairwell Puzzle
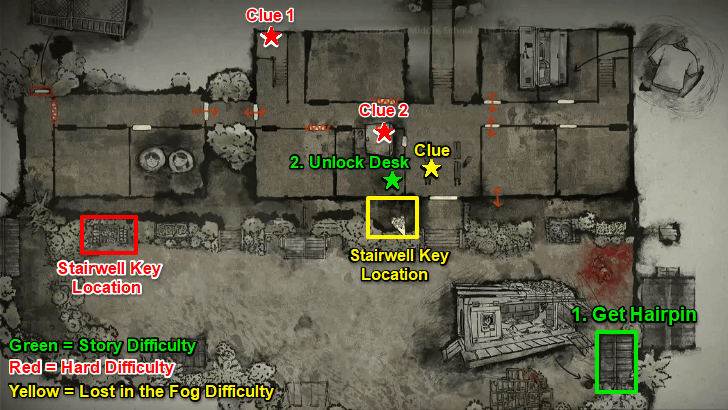
Find the 2F Stairwell Key to progress. Its location changes depending on puzzle difficulty, with clues scattered throughout the school. If you already know the location, you can retrieve the key directly without gathering every clue.
Secret Box Puzzle
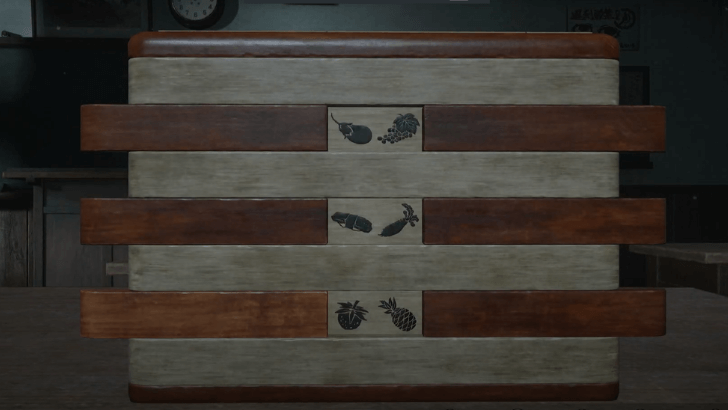 |
|
| Difficulty | Symbols revealed |
|---|---|
| Story | 1. Cherry, Strawberry, and Cake
2. All Books 3. Cherry Blossom Branch |
| Hard | 1. All Fruits 2. All Books and Origami 3. All Flowers and Cherry Blossom Tree |
| Lost in the Fog | 1. All Fruits 2. All Books 3. Four Sakura Blossom Branches |
The Secret Box puzzle requires you to match symbols on the box based on the clues from Rinko's letters. The keywords for the 3 rounds are sweet and tart fruit, journal, and sakura in full bloom.
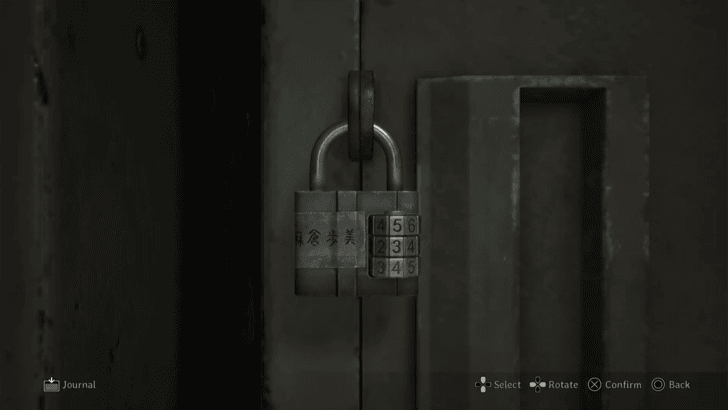
Locker Code Puzzle
 |
|||
| Locker | Locker Code (Story) |
Locker Code (Hard) |
Locker Code (Lost in the Fog) |
|---|---|---|---|
| Asakura Ayumi | 534 | 865 | 399 |
| Aoi Takeshi | 401 | 401 | 401 |
| Tsuchiya Taiko | 377 | 377 | 377 |
| Suga Yosie | 505 | 505 | 505 |
You must unlock Asakura Ayumi's locker to retrieve the key to the cabinet in the faculty room of Ebisugaoka Middle School. Only her locker code varies per difficulty, and can be deciphered using the Girl Code clue found within the school's Old Annex.
The other lockers are optional and will have the same code across all difficulties. Opening them will give you useful items such as a School Bag for extra inventory and an Omamori Wolf in your first playthrough, then replaced with Hokora offering items in consecutive runs.
Worship Hall Puzzle Solutions
Door Puzzle
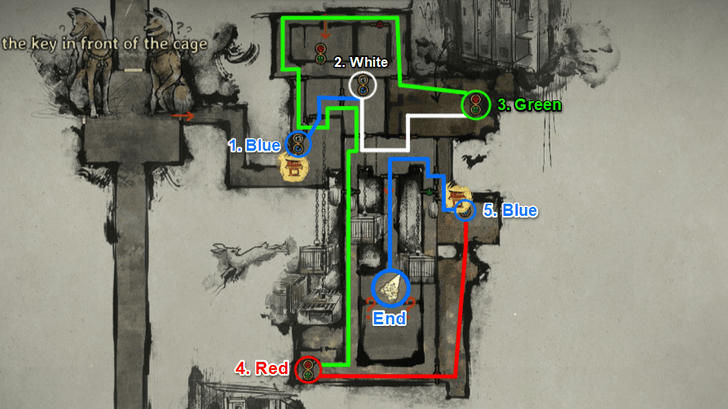
You must activate the Fox Statues to open doors in the Dark Shrine Worship Hall. Navigate around closed doors and make your way to the central area where Sakuko can be found at the end of the hall.
Door Puzzle Solution and Guide
Light Puzzle
| Story | 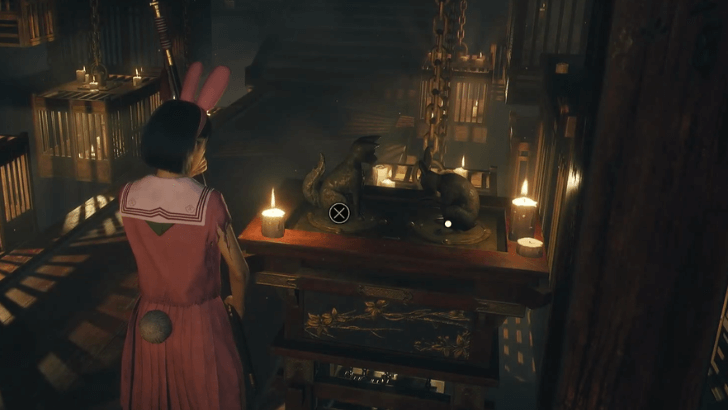 Fox (E) - Rabbit (W) - Fox (E) - Rabbit (W) Fox and Rabbit face each other |
|---|---|
| Hard | 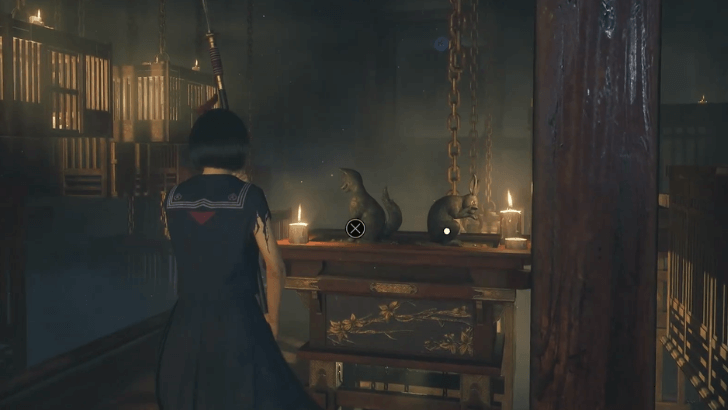 Fox (W) - Rabbit (E) - Fox (W) - Rabbit (E) Fox and Rabbit face away from each other |
| Lost in the Fog | 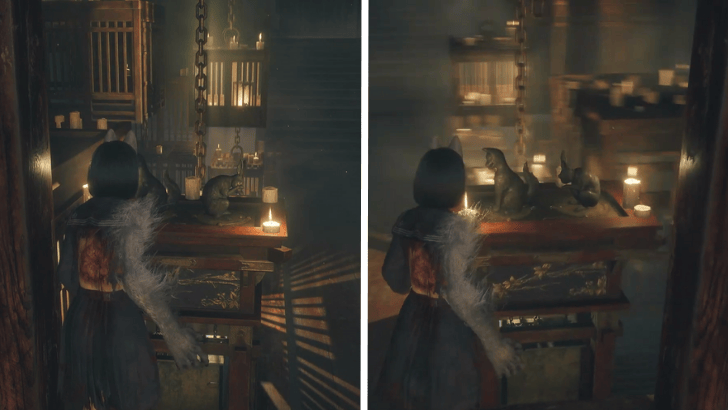 Fox (W) - Rabbit (E) - Fox (W) - Rabbit (W) Left: Fox and Rabbit face away from other Right: Fox and Rabbit Face to the left |
Directional Legends: W = West, E = East
The Light Puzzle requires you to fix the direction the fox and rabbit statues are facing, as they control the height level of the hanging cages in the room. The hanging cages contain the lampshades required for you to retrieve the key from the altar.
Light Puzzle Solution and Guide
Cage Puzzle
| 1 | Forward-Facing Fox Crest |  Map View |
 World View |
|---|---|---|---|
| 2 | Leftward-Facing Fox Crest | 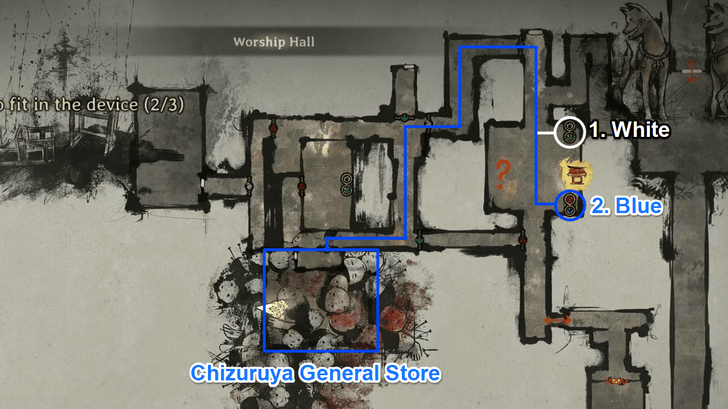 Map View |
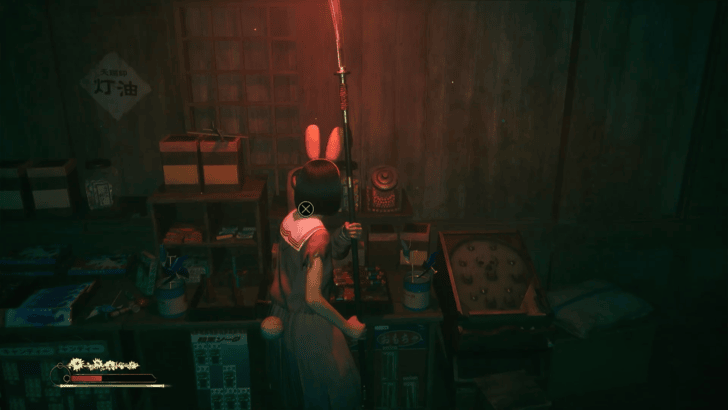 World View |
| 3 | Rightward-Facing Fox Crest | 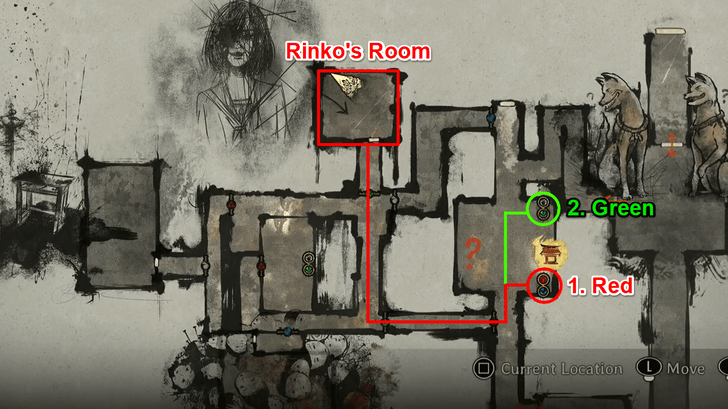 Map View |
 World View |
The Cage Puzzle requires finding the the Forward-Facing Fox Crest, Leftward-Facing Fox Crest, and Rightward-Facing Fox Crest for the device in front of the cage. These fox crests can be acquired in the western chambers of the Dark Shrine Worship Hall.
Cage Puzzle Solution and Guide
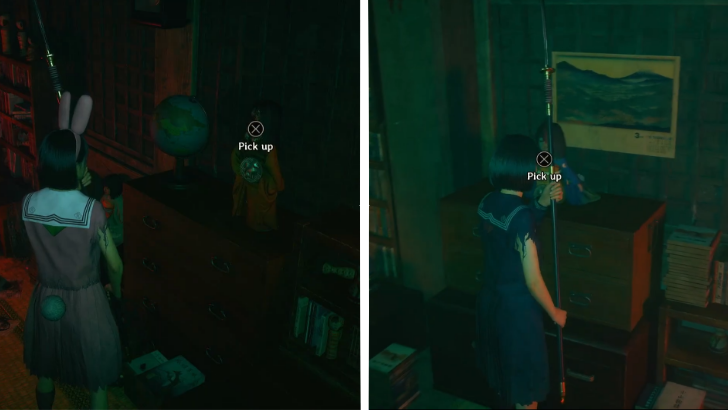
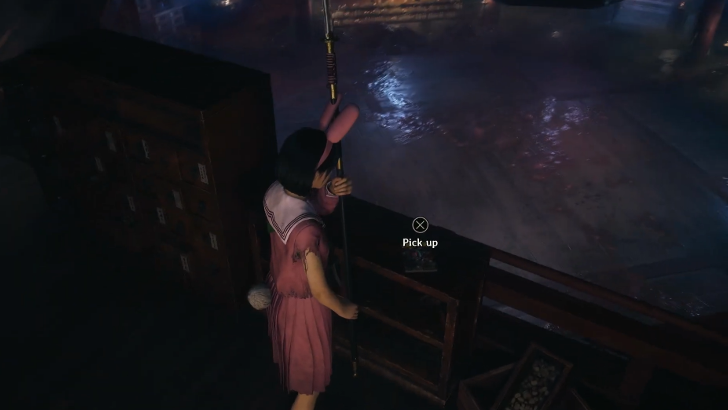
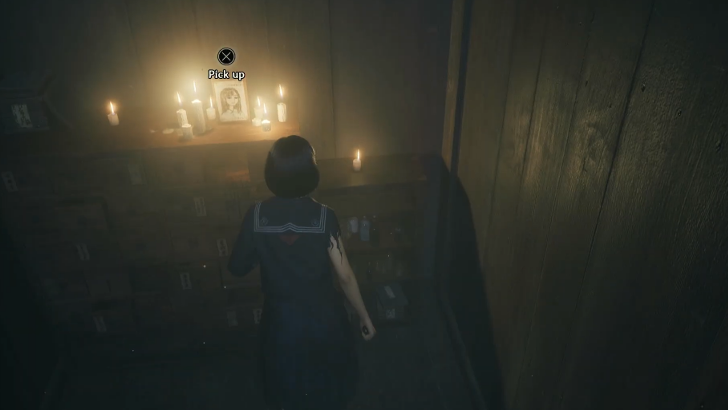
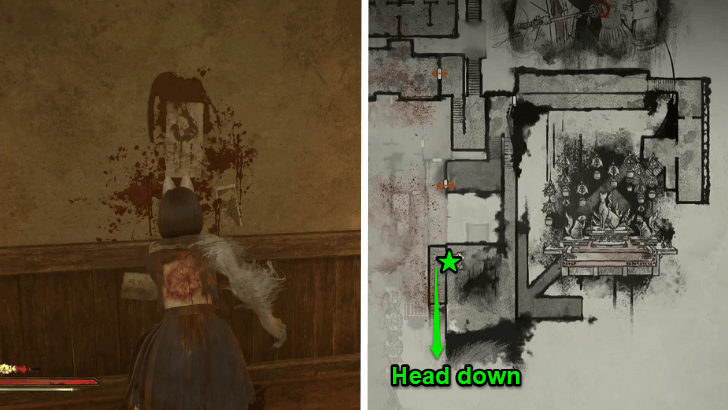
Memories Puzzle
| Item | Map View | World View | |
|---|---|---|---|
| 1 | Brainiac Hero Comic | 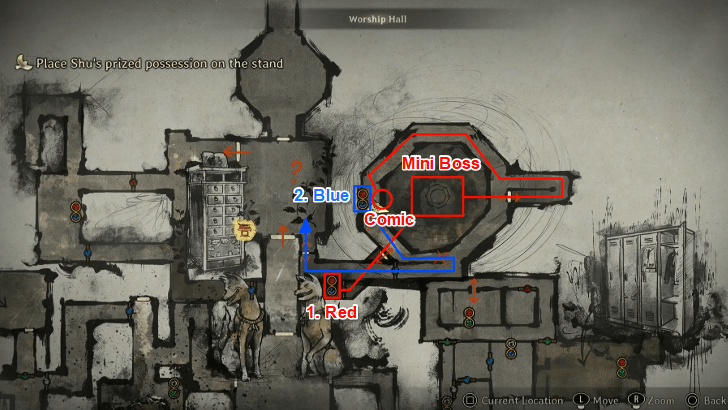 |
 |
| 2 | Drawing of a Young Shimizu Hinako | 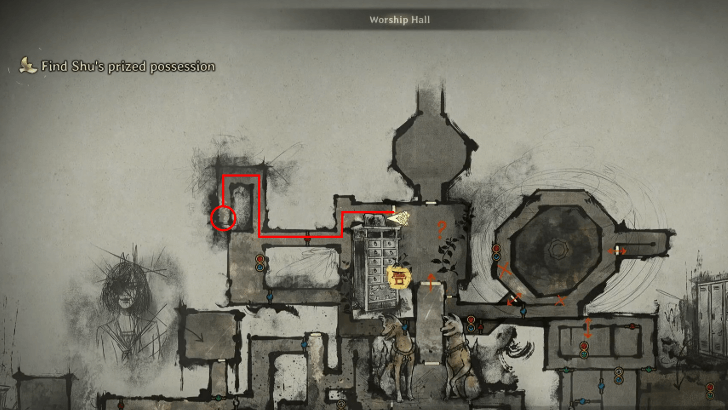 |
 |
| 3 | Raygun |  |
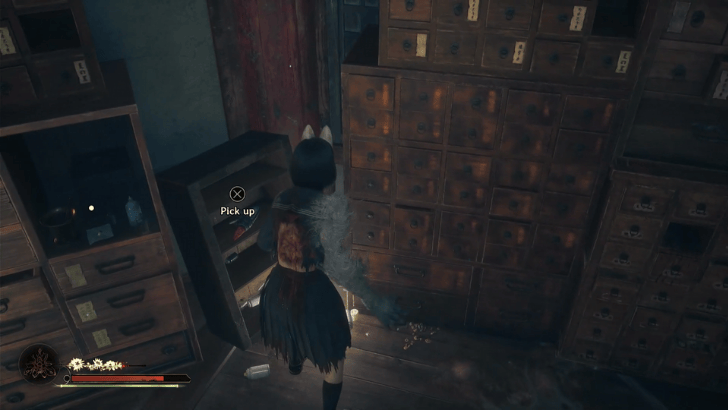 |
The Memories puzzle involves finding Shu's Prized Possessions within the Dark Shrine. The number of items to find increases with difficulty level, with 1 prized possession to locate in Story Mode, 2 for Hard Mode, and 3 total possessions for the highest difficulty.
Memories Puzzle Solution and Guide
Main Hall Puzzle Solutions
Crimson Water Puzzle (New Game+)
 |
|
| Bell Order | Correct Windchime |
|---|---|
| First Bell | 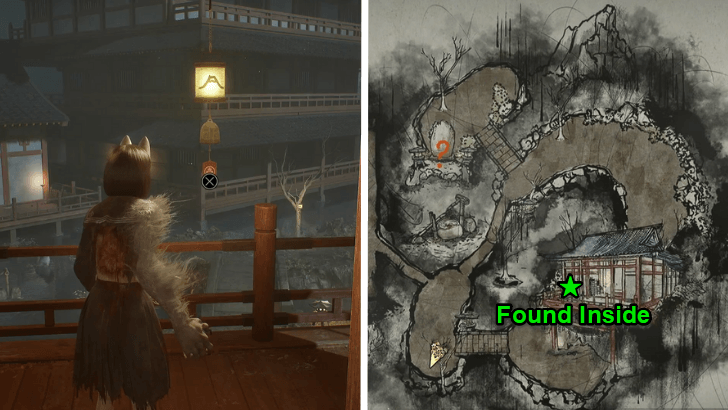 Stone (Volcano) |
| Second Bell | 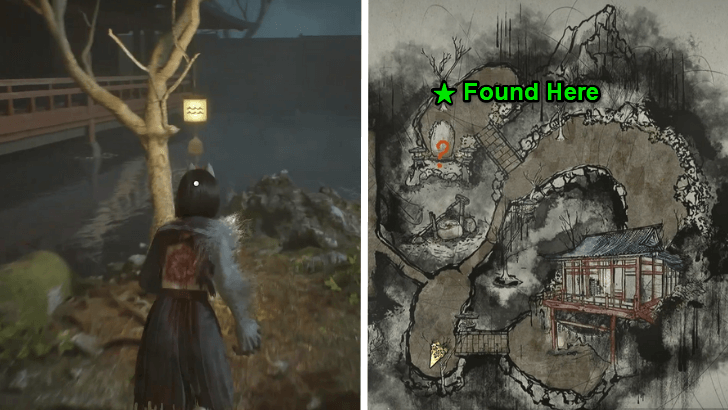 Water (Waves) |
| Third Bell |  Tree |
The Crimson Water puzzle is a New Game Plus puzzle found in the unlocked area, Hermitage of the Crimson Water. You must ring three bells in the correct order to complete the puzzle. When you ring a bell, wait for the bamboo fountain to make a sound before interacting with the next one.
Crimson Water Puzzle Solution and Guide
Shimizu Residence Puzzle Solutions
Scales Puzzle
 |
||
| Ending | Left Side | Right Side |
|---|---|---|
| Coming Home to Roost | Four Other Dolls | Headless Doll |
| Fox's Wedding | Old Man Doll Fox Mask Doll School Girl Doll |
Headless Doll Half-Mask Lady Doll |
| The Fox Wets Its Tail | School Girl Doll Half-Mask Lady Doll |
Old Man Doll Fox Mask Doll Headless Doll |
| Ebisugaoka in Silence | School Girl Doll | Four Other Dolls |
The left and right sides can be switched. The dolls are not tied to a specific side.
The arrangement of the dolls on the scales mainly differ based on which ending is being progressed. The dolls can be interpreted as Hinako's inner turmoil with her priorities and responsibilities as a daughter, friend, and person.
Scales Puzzle Solution and Guide
Ominous Photo Puzzle
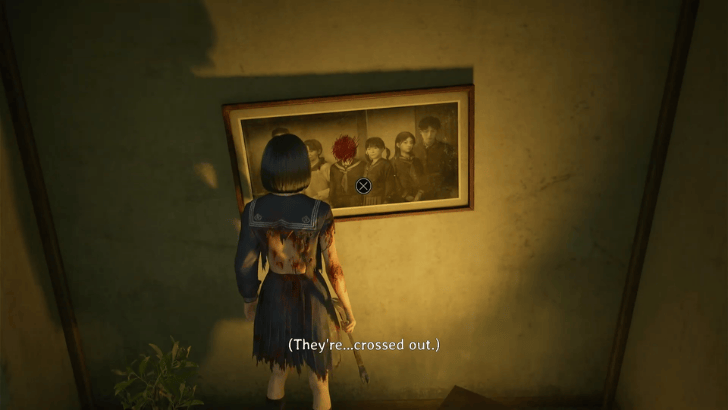 |
||
| Ending | Upright | Upside Down |
|---|---|---|
| Coming Home to Roost | All Photos except Hinako | Hinako |
| Fox's Wedding | Hinako and Her Parents | Rinko, Shu and Sakuko |
| The Fox Wets Its Tail | Hinako, Shu, and Sakuko | Rinko and Hinako's Parents |
| Ebisugaoka in Silence | Hinako | All Photos except Hinako |
The orientation of the photos vary based on the ending being progressed. To solve the puzzle, check the photo with everyone and turn all those blurred out upside down. Do note that you must look for Hinako's portrait in Shimizu Residence II before you can finish this puzzle.
Ominous Photo Puzzle Solution and Guide
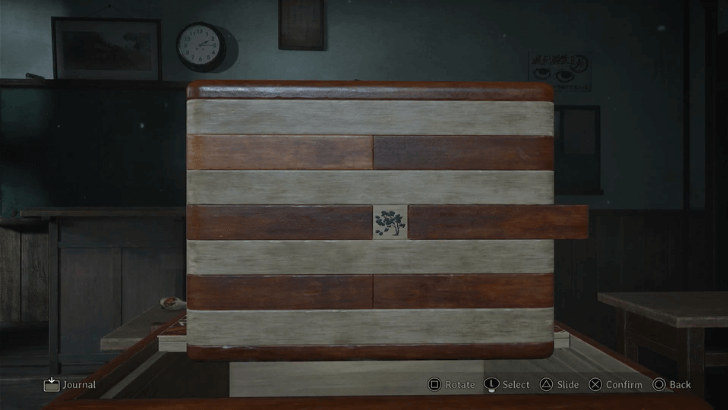
My Room Puzzle
| Ending | Crest Order |
|---|---|
| Coming Home to Roost | 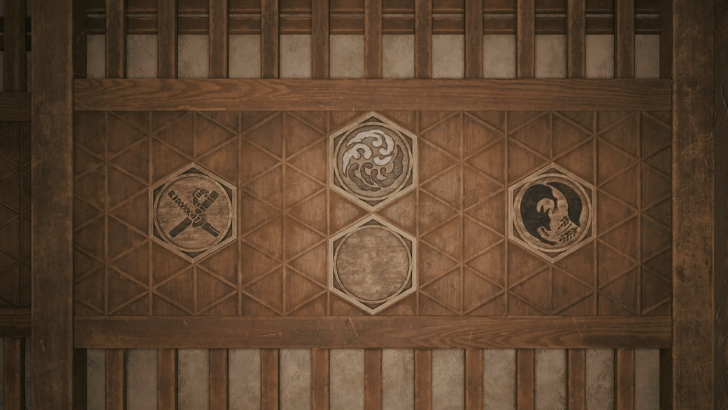 Top: Heavens Left: Swords Right: Fox Bottom: Blank (flip Scales) |
| Fox's Wedding | 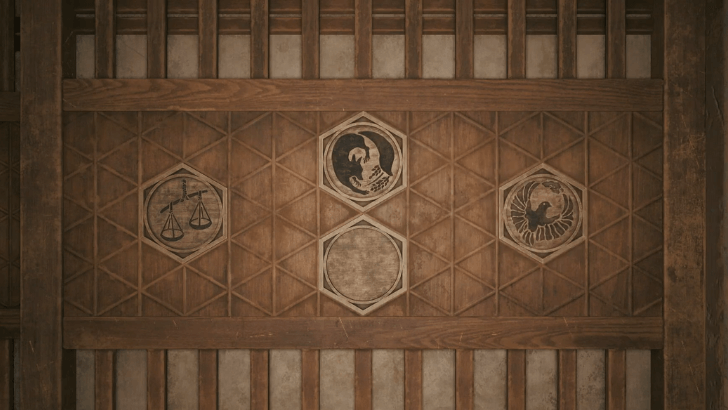 Top: Fox Left: Scales Right: Black Bird (flip Swords) Bottom: Blank (flip Heavens) |
| The Fox Wets Its Tail | 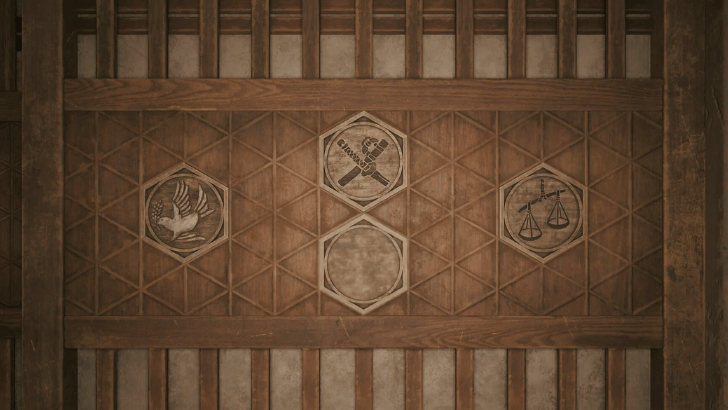 Top: Swords Left: White Bird Right: Scales Bottom: Blank (flip Heavens) |
| Ebisugaoka in Silence | 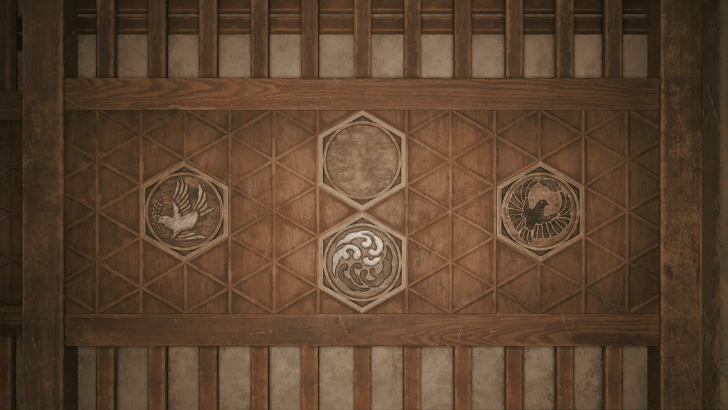 Top: Blank (flip Scales) Left: White Bird Right: Black Bird Bottom: Heavens |
The My Room puzzle requires you to place and arrange Crests on the door to unlock Hinako's room. The order of these Crests change depending on the ending you're on.
My Room Puzzle Solution and Crest Locations
Treasure Hall Puzzle Solutions
Mural Puzzle
| Ending | Mural Arrangement |
|---|---|
| Coming Home to Roost | 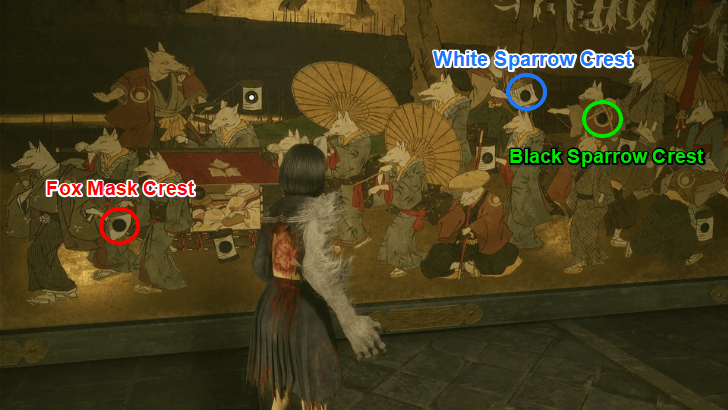 |
| Fox's Wedding | 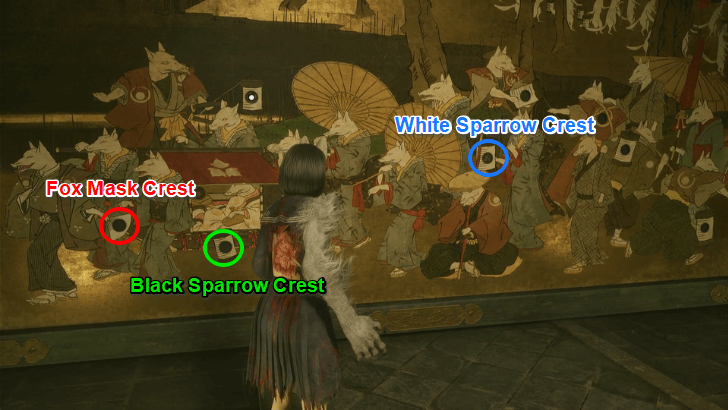 |
| The Fox Wets Its Tail | 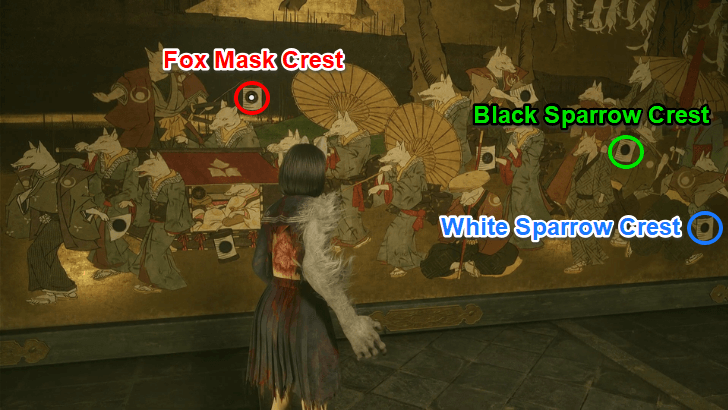 |
| Ebisugaoka in Silence | 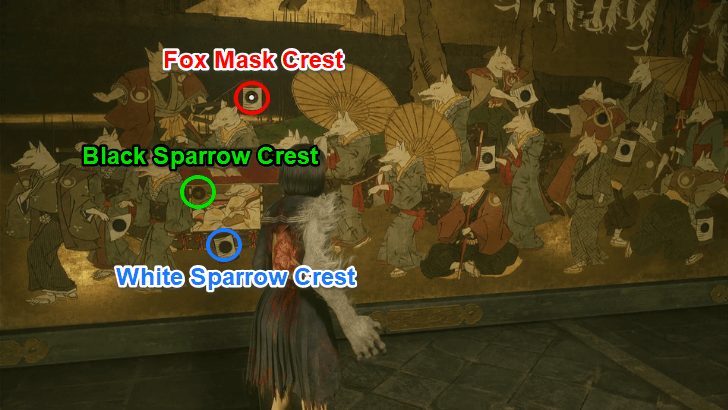 |
The Mural Puzzle requires players to place three Crests inside the holes of the wall to fit according to the provided poem. The poems and Crest positions vary based on the ending.
Mural Puzzle Solution and Crest Locations
What are Puzzles in Silent Hill f?
Required for Story Progression
Puzzles are a core part of Silent Hill f’s gameplay, serving as key obstacles that must be solved to progress through the story. They appear throughout your journey, acting as a challenging checkpoint or a potential roadblock depending on your chosen difficulty.
Difficulty Differences and Best Settings
Silent Hill f Related Guides

Guides by Category
| Silent Hill f Categories | |
|---|---|
 Chapters Chapters |
 Puzzles Puzzles |
 Endings Endings |
 Bosses Bosses |
 Enemies Enemies |
 Omamori Omamori |
 Weapons Weapons |
 Items Items |
 Tips and Tricks Tips and Tricks |
 Characters Characters |
 Costumes Costumes |
 Interactive Map Interactive Map |
 News News |
- |
Recommended Guides
Comment
Author
All Puzzle Solutions
Please participate in our site
improvement survey
03/2026
improvement survey
03/2026
Would you assist in
improving Game8's site?
improving Game8's site?

×
We are listening to our users' valuable opinions and discussing how to act on them.
The information collected through this survey will be used for the purpose of improving our services. In addition, the information will only be disclosed a part of a statistic in a format that will not allow identification of personal information.
Begin Survey
Not Now
×
Please rate each item regarding Game8.co's Advertisements.
Amount of Ads
Very Dissatisfied
Somewhat Dissatisfied
Fine
Somewhat Satisfied
Highly Satisfied
Placement of Ads
Timing of Ad Display
Ad Loading Speed
Safeness of Ads
Content of Ads
×
Please rate each item regarding Game8.co's Quality of Articles.
Amount of information
Very Dissatisfied
Somewhat Dissatisfied
Fine
Somewhat Satisfied
Highly Satisfied
Frequency of updates
Speed of new information
Accuracy of articles
Understandibility of articles
Readability of sentences
×
Please rate each item regarding Game8.co's Usability of the Site.
Ease of finding information
Very Dissatisfied
Somewhat Dissatisfied
Fine
Somewhat Satisfied
Highly Satisfied
Loading Speed
Use of Color
Font Size
Visibility of Images
Easy to Understand Layout
×
Please rate each item regarding Game8.co's Message Boards, Comments.
Ease of Writing
Very Dissatisfied
Somewhat Dissatisfied
Fine
Somewhat Satisfied
Highly Satisfied
Readability
Ease in Finding Information
Comment Quality
Comment Quantity
Admin Response
×
Please rate each item regarding Game8.co's Site's new design.
Please rate our site's new design
Very Dissatisfied
Somewhat Dissatisfied
Fine
Somewhat Satisfied
Highly Satisfied
Do you think that the website's design change makes the site easier to use?
Has the new design made it easier for you to find information on the site?
Has the new design improved the overall visual appeal of the site?
How would you rate your overall satisfaction with the new design of the site?
×
How likely are you to recommend Game8 to someone you know?
Very Unlikely
0
1
2
3
4
5
6
7
8
9
10
Very Likely
If you have other opinions regarding potential improvement to the website, please share them with us. We would appreciate your honest opinion.
Note: This is a free response section, so you can proceed without entering anything.
Note: Please be sure not to enter any kind of personal information into your response.
Note: Please be sure not to enter any kind of personal information into your response.
×
Thank You
×
Thank you for participating in our survey! Your answers will help us to improve the quality of our website and services.
We hope you continue to make use of Game8.
We hope you continue to make use of Game8.
Close
Rankings
- We could not find the message board you were looking for.
Gaming News


Popular Games

Genshin Impact Walkthrough & Guides Wiki
Honkai: Star Rail Walkthrough & Guides Wiki
Umamusume: Pretty Derby Walkthrough & Guides Wiki
Pokemon Pokopia Walkthrough & Guides Wiki
Resident Evil Requiem (RE9) Walkthrough & Guides Wiki
Monster Hunter Wilds Walkthrough & Guides Wiki
Wuthering Waves Walkthrough & Guides Wiki
Arknights: Endfield Walkthrough & Guides Wiki
Pokemon FireRed and LeafGreen (FRLG) Walkthrough & Guides Wiki
Pokemon TCG Pocket (PTCGP) Strategies & Guides Wiki


Recommended Games
Diablo 4: Vessel of Hatred Walkthrough & Guides Wiki
Fire Emblem Heroes (FEH) Walkthrough & Guides Wiki
Yu-Gi-Oh! Master Duel Walkthrough & Guides Wiki
Super Smash Bros. Ultimate Walkthrough & Guides Wiki
Pokemon Brilliant Diamond and Shining Pearl (BDSP) Walkthrough & Guides Wiki
Elden Ring Shadow of the Erdtree Walkthrough & Guides Wiki
Monster Hunter World Walkthrough & Guides Wiki
The Legend of Zelda: Tears of the Kingdom Walkthrough & Guides Wiki
Persona 3 Reload Walkthrough & Guides Wiki
Cyberpunk 2077: Ultimate Edition Walkthrough & Guides Wiki


All rights reserved
©2025 Konami Digital Entertainment
The copyrights of videos of games used in our content and other intellectual property rights belong to the provider of the game.
The contents we provide on this site were created personally by members of the Game8 editorial department.
We refuse the right to reuse or repost content taken without our permission such as data or images to other sites.