How to Make Enemies
RPG MAKER WITH's Enemies' Database allows users to create and edit enemies. Read on to learn more about creating enemies and editing their attributes.
 RPG MAKER WITH's Enemies' Database allows users to create and edit enemies. Read on to learn more about creating enemies and editing their attributes.
List of Contents
How to Make Enemy Characters and Monsters
Enemies Help Your Players Get Stronger
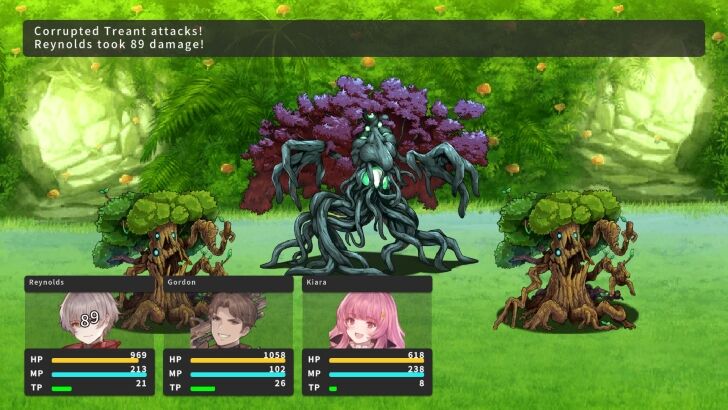
Having enemies in your RPG game gives players a consistent way to earn gold, EXP, and even drop important items. Battling enemies makes up a good chunk of gameplay since your players will mostly spend their time fighting enemies. Enemies can also indicate the level of challenge as players progress through your game.
For instance, an end-game dungeon will most likely feature high-level enemies with large amounts of gold and EXP after defeat. You can also set unique and difficult enemies to drop rare items or equipment to make challenging them more encouraging for players.
Create Enemies in the Database
| 1 | 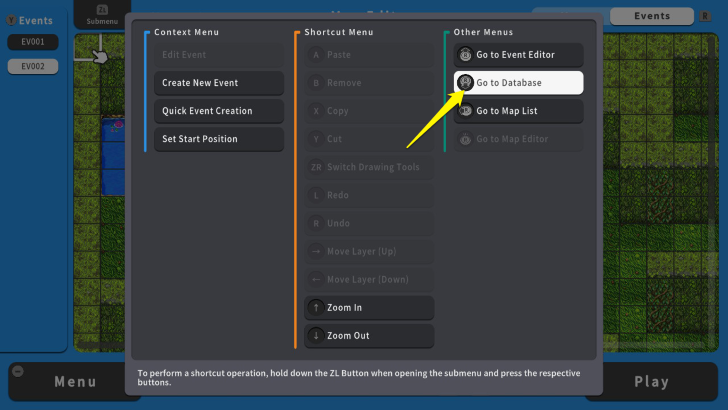 To create enemy characters and monsters, press the ZL Button and select "Go to Database." |
|---|---|
| 2 | 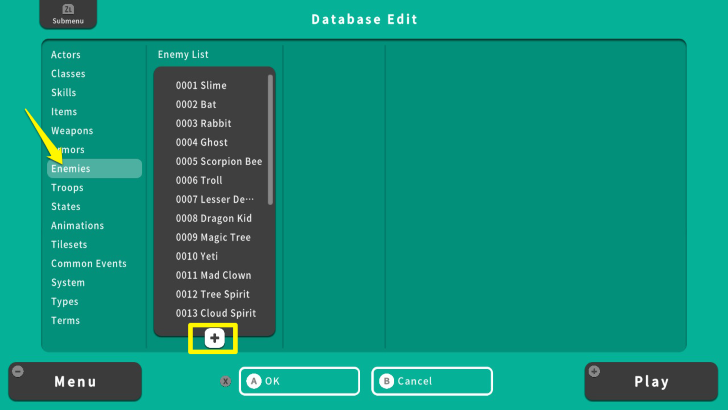 Move your cursor to "Enemies" and select the plus icon under the "Enemy List." |
| 3 | 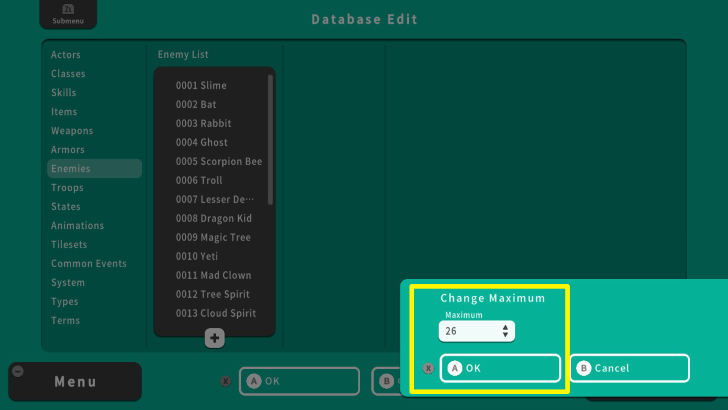 Press the A Button twice and press the Y Button to adjust the maximum number of enemies. In this case, change it to "26." After that, press the X Button and select OK. |
| 4 |  Check the Enemy List again and select "+ 0026." |
| 5 | 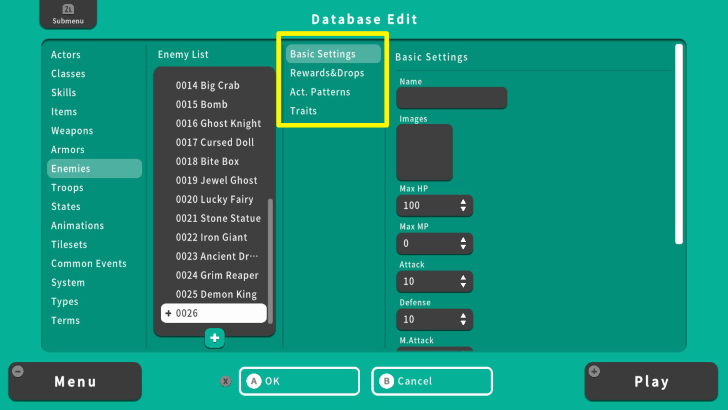 We will edit the "Basic Settings," "Rewards and Drops," "Act. Patterns," and "Traits" to create an enemy. |
Basic Enemy Settings
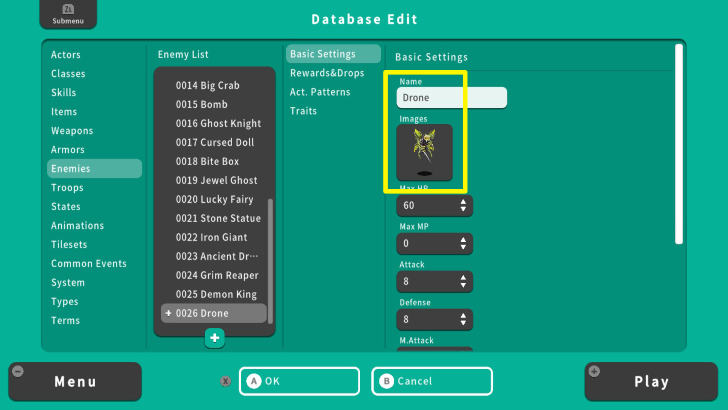
| Name | Sets the name of your enemy character or monster. In this example, the enemy's name is "Drone." |
|---|---|
| Images | Sets the image of an enemy during battle. We used an image of a bee for this enemy. |
Setting An Enemy's Parameter Curves and Balancing
Balance the Enemy's Stats
It is important to balance your enemy's stats. Unbalanced stats can ruin a player's gaming experience. For example, your enemy's Defense is 50 and your character's attack is only 12. This makes the fight difficult or even impossible to win. Thus, balancing the enemy's stats is significant to ensure that players can experience a challenging but winnable battle.
How to Set an Enemy's Stats
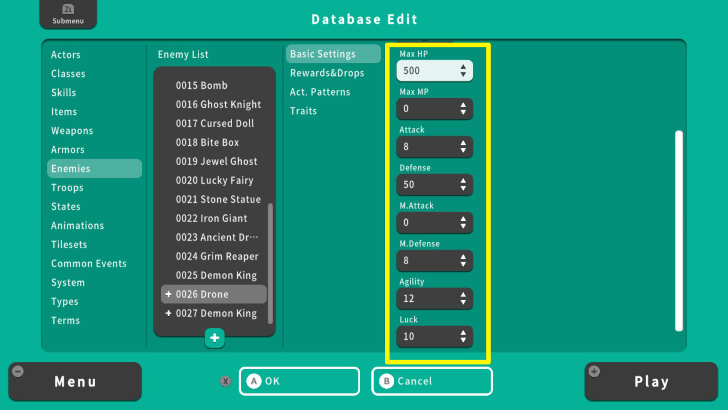
| 1 | 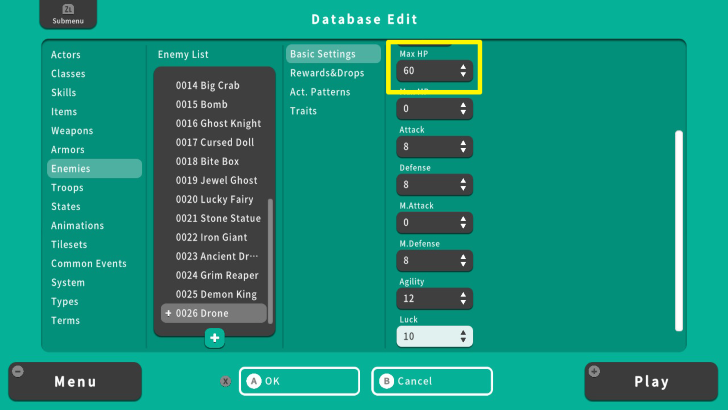 For this example, we will create an enemy for low-level characters. First, set the Maximum Hit Points of this enemy to 60. "Max HP" indicates how much an enemy can withstand attacks. |
|---|---|
| 2 |  Set the "Max MP" of this enemy to 0. Since this enemy will not use a magic attack, there is no point in adding MP. However, you might set Max MP for some enemies, especially the spellcasters. |
| 3 |  Set the "Attack" to 8. This is the damage the enemy will deal against your characters. |
| 4 | 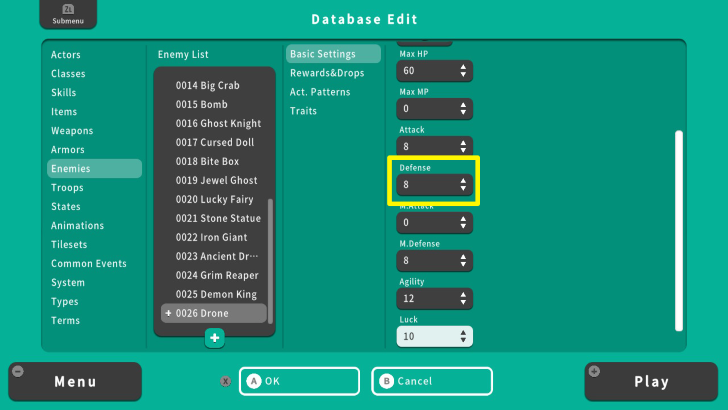 Set the "Defense" to 8 as well. This will reduce the damage dealt by your characters to this enemy. For instance, if your character has an Attack value of 15 and the enemy's Defense is 8, subtract these values, and your character's final damage will be 7. |
| 5 | 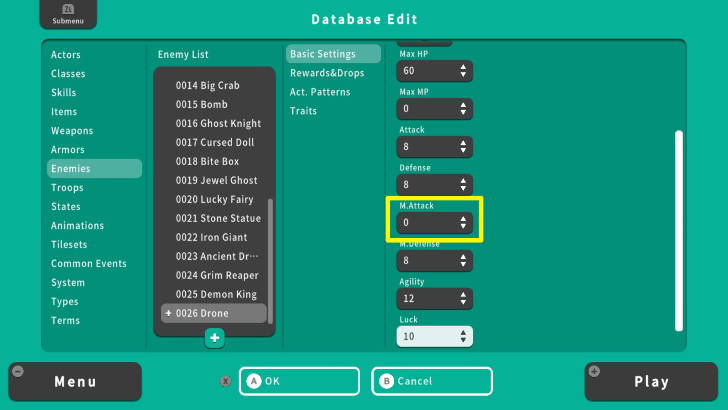 Set the "M. Attack" to 0. Since this enemy does not have spells and MP, they do not need to have a magic attack. |
| 6 | 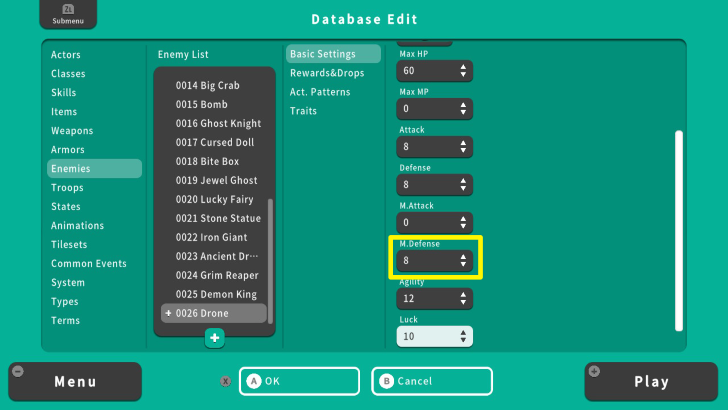 Set the "M. Defense" to 8. This will reduce the magic damage dealt by your characters to this enemy. For example, if your character has 12 magic attack and the enemy's magic defense is 8, the final magic damage will only be 4. |
| 7 | 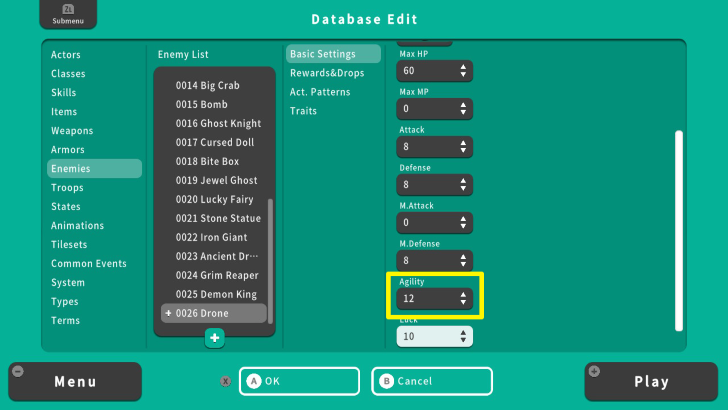 Set the "Agility" to 12. In this case, if your character has 10 Agility, then this enemy will act first during that turn because of its 12 Agility value. |
| 8 | 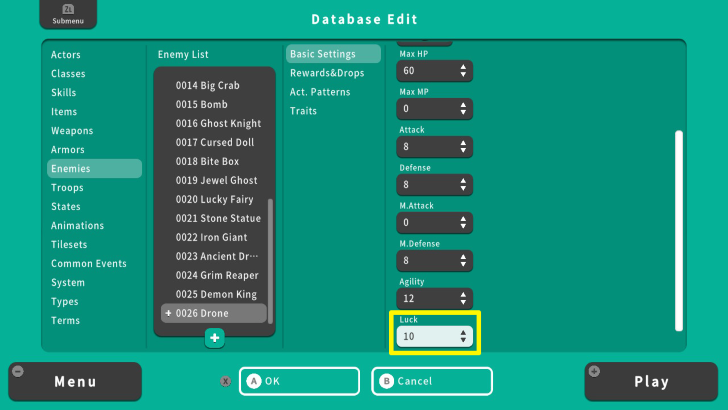 Set the "Luck" to 10. This stat influences the chance of receiving status ailments. An enemy with high luck has a higher chance of resisting status ailments. |
Setting Enemy Drops
Setting EXP and Gold Drops
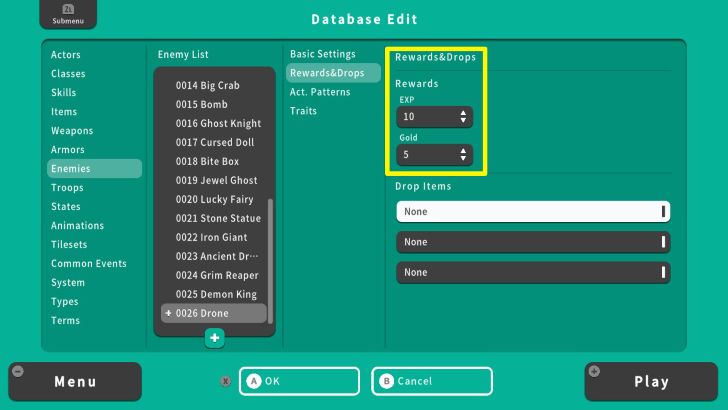
| EXP | Amount of experience points an enemy can give to players after its defeat. Earning EXP points is necessary to increase player levels. |
|---|---|
| Gold | Amount of money an enemy can give to players after its defeat. Earning money allows players to buy equipment and other items. |
Setting Item Drops
| 1 | 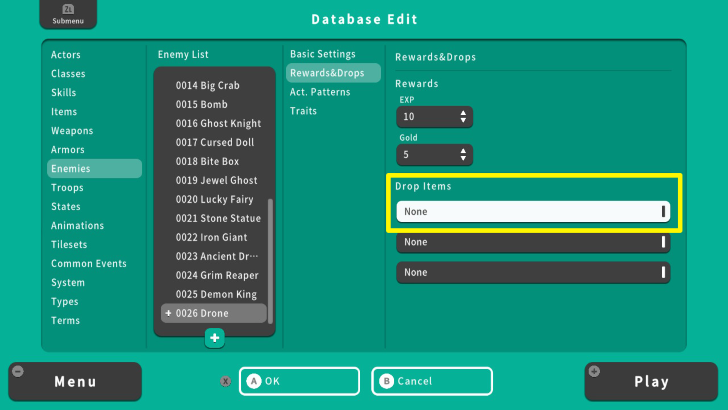 From the Rewards and Drops Menu, select the first box under the "Drop Items" option and press the A Button. |
|---|---|
| 2 |  Select "Items" and press the Right Arrow Button. |
| 3 | 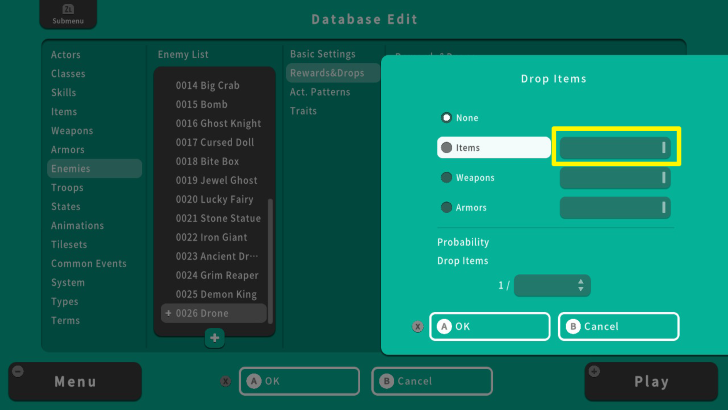 Press the A Button and choose what item will drop after this enemy is defeated. |
| 3 | 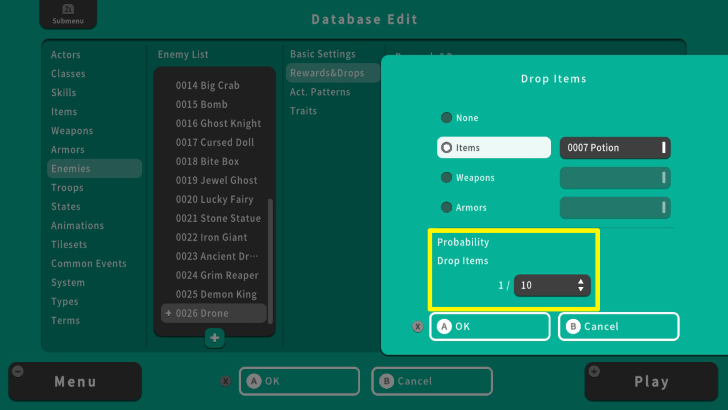 Once done, move your cursor to the "Probability Drop Items." Set it according to your liking. In this example, the enemy has a 1/10 or 10% chance to drop potions after being defeated. |
| 4 | 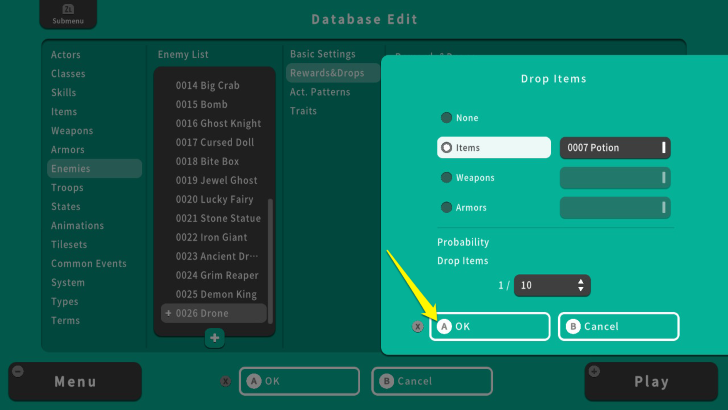 After setting what items, weapons, or armors this enemy will drop, press the X Button and select OK. Remember that the maximum amount of items, weapons, or armor an enemy can drop is 3. |
Other Enemy Settings
Action Patterns
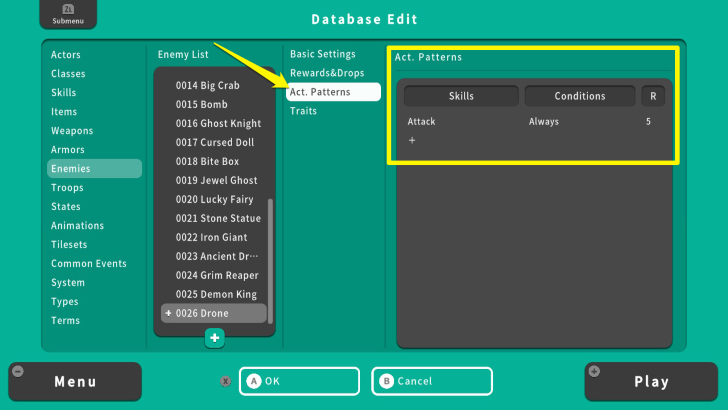
"Action Patterns" influence how an enemy behaves during the battle. For example, the Drone will only and always use "Attack." This is reasonable since the Drone is only a low-level monster. However, higher-level monsters will have more Action Patterns. You can add more by selecting the plus icon and pressing the A Button.
How to Set an Enemy's Action Patterns
Traits
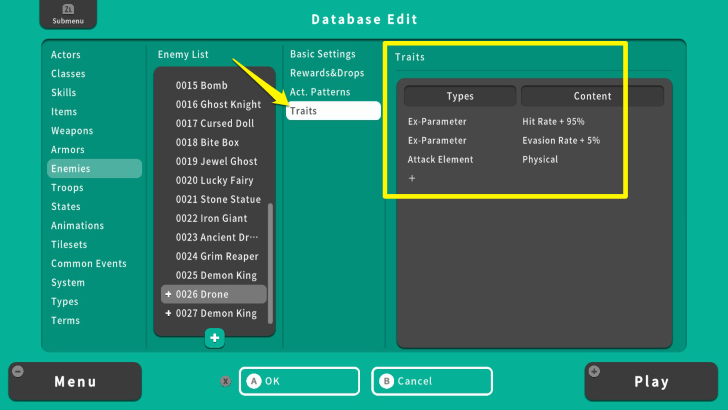
"Traits" are the attributes you can set to monsters. For example, the Drone have "Hit Rate + 95%," "Evasion Rate + 5%," and "Physical." These traits allow the Drone to hit 95% of the time, evade 5% of incoming attacks, and only deal physical damage. Setting traits is useful for creating unique monsters and bosses.
Enemy Creation Tips
Copy an Enemy
| 1 | 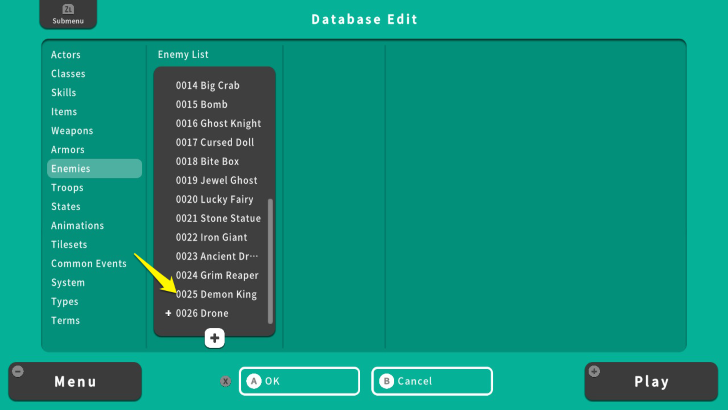 If you want to use an enemy's stats and attributes and modify it, you can copy them in the Enemy Database. On the Enemy List, move your cursor to the monster you want to copy. |
|---|---|
| 2 | 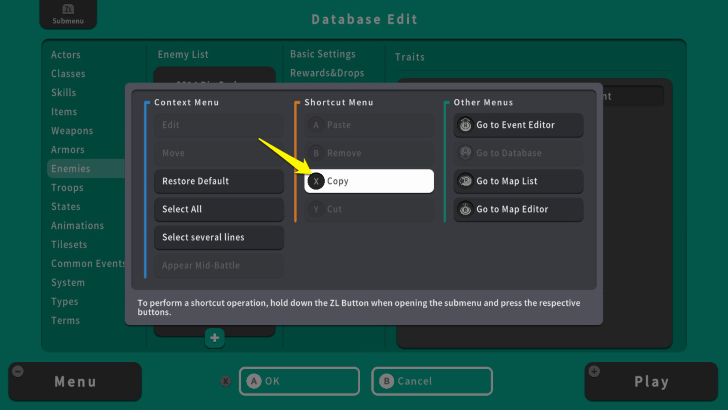 Press the ZL Button and select "Copy." Press the A Button to copy this monster. |
| 3 |  Before pasting it, press the A Button on the plus icon under the Enemy List. |
| 3 | 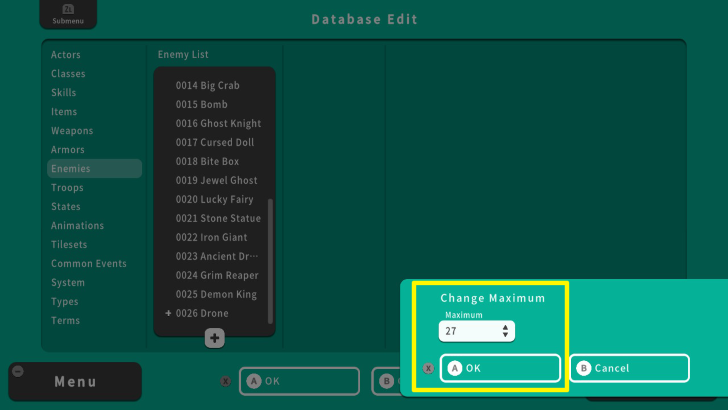 Change the value to 27. Press the X Button and select OK. |
| 4 | 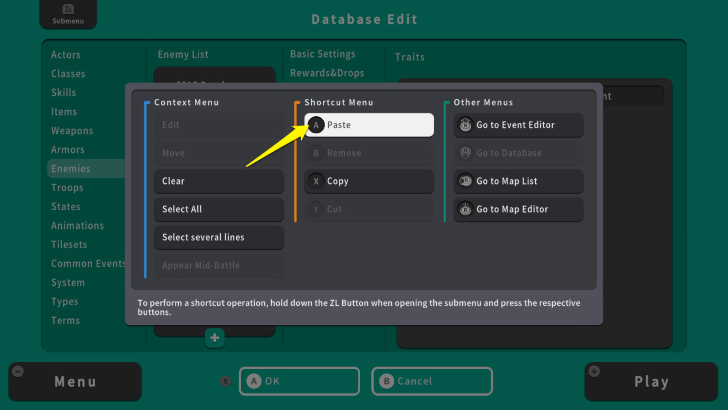 Once done, move your cursor to "0027." Press the ZL Button again and select "Paste" |
| 5 | 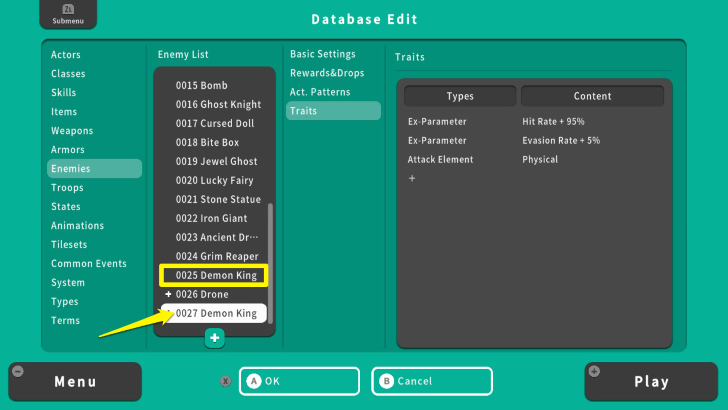 You have successfully copied an enemy. You can now edit its details and make it a unique enemy. |
Change Enemy Color
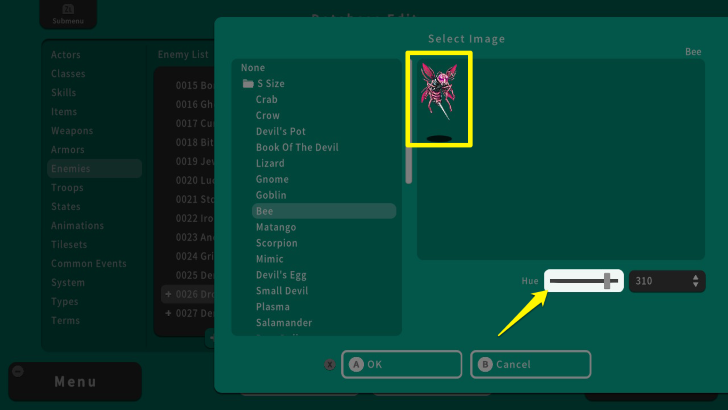
Changing the enemy's color allows you to create a variant of it. For instance, the drone in the previous example is yellow. We use the "Hue " option to change its color to pink by pressing the A Button and adjusting it via the Left Analog Stick or the Left and Right Buttons. Now we can edit its stats and other attributes to make a unique enemy that is still related to the Drone. Adjusting the enemy's Hue allows you to create a variant of the same enemy.
RPG MAKER WITH Related Guides
| Core Guides | |
|---|---|
| Advanced Guide Part 1 | Advanced Guide Part 2 |
| Core Guides | |
|---|---|
| Beginner's Guide Part 1 | Beginner's Guide Part 2 |
| Tips and Tricks | |
|---|---|
| Map, Event, and Switch Naming Tips | How to Use the Flood Fill Tool |
| Core Guides | |
|---|---|
| Intermediate Guide Part 1 | Intermediate Guide Part 2 |
| Tips and Tricks | |
|---|---|
| How to Make a Switch | How to Use Map Foregrounds and Backgrounds |
| How to Change Event Text Color | |
Comment
Author
How to Make Enemies
Rankings
- We could not find the message board you were looking for.
Gaming News
![Neverness to Everness (NTE) Review [Beta Co-Ex Test] | Rolling the Dice on Something Special](https://img.game8.co/4414628/dd3192c8f1f074ea788451a11eb862a7.jpeg/show)


Popular Games

Genshin Impact Walkthrough & Guides Wiki
Honkai: Star Rail Walkthrough & Guides Wiki
Arknights: Endfield Walkthrough & Guides Wiki
Umamusume: Pretty Derby Walkthrough & Guides Wiki
Wuthering Waves Walkthrough & Guides Wiki
Pokemon TCG Pocket (PTCGP) Strategies & Guides Wiki
Abyss Walkthrough & Guides Wiki
Zenless Zone Zero Walkthrough & Guides Wiki
Digimon Story: Time Stranger Walkthrough & Guides Wiki
Clair Obscur: Expedition 33 Walkthrough & Guides Wiki


Recommended Games
Fire Emblem Heroes (FEH) Walkthrough & Guides Wiki
Pokemon Brilliant Diamond and Shining Pearl (BDSP) Walkthrough & Guides Wiki
Diablo 4: Vessel of Hatred Walkthrough & Guides Wiki
Super Smash Bros. Ultimate Walkthrough & Guides Wiki
Yu-Gi-Oh! Master Duel Walkthrough & Guides Wiki
Elden Ring Shadow of the Erdtree Walkthrough & Guides Wiki
Monster Hunter World Walkthrough & Guides Wiki
The Legend of Zelda: Tears of the Kingdom Walkthrough & Guides Wiki
Persona 3 Reload Walkthrough & Guides Wiki
Cyberpunk 2077: Ultimate Edition Walkthrough & Guides Wiki


All rights reserved
©Gotcha Gotcha Games
The copyrights of videos of games used in our content and other intellectual property rights belong to the provider of the game.
The contents we provide on this site were created personally by members of the Game8 editorial department.
We refuse the right to reuse or repost content taken without our permission such as data or images to other sites.