How to Create a Village
RPG MAKER WITH allows you to create villages where your heroes can buy items, rest at an inn, and talk with NPCs. Read on to learn how to use the Map Tree, create different kinds of buildings, and create doors for them.

RPG MAKER WITH allows you to create villages where your heroes can buy items, rest at an inn, and talk with NPCs. Read on to learn how to use the Map Tree, create different kinds of buildings, and create doors for them.
List of Contents
What are Villages and Towns in RPGs?
Towns Allow Players to Get Goods, Services, Information, and Party Members
Villages and towns in RPG games serve as hubs for players to rest, gather information, interact with NPCs, get quests, and stock up on supplies. Players can take a break from combat and restock for future battles. They can also complete quests and progress the game's story by talking to quest-giving NPCs.
Ultimately, towns and villages serve as resting points where your players can get the means to continue playing your game.
How to Create a Village
Create Your Village Through the Editor
| 1 | 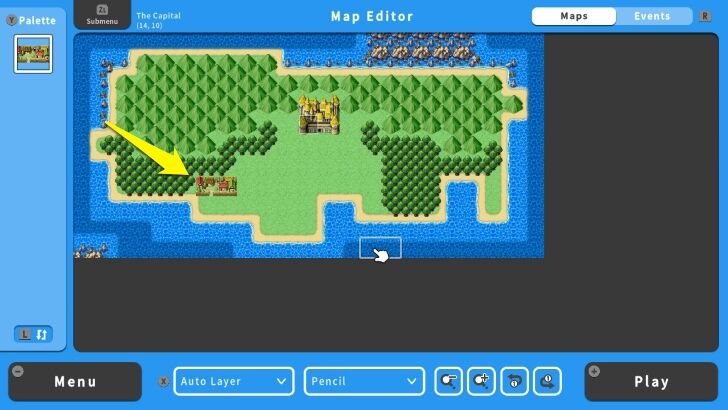 Go to the Overworld Map and add a village in the Map Editor screen. |
|---|---|
| 2 |  Once added, press the ZL Button and select Map List. |
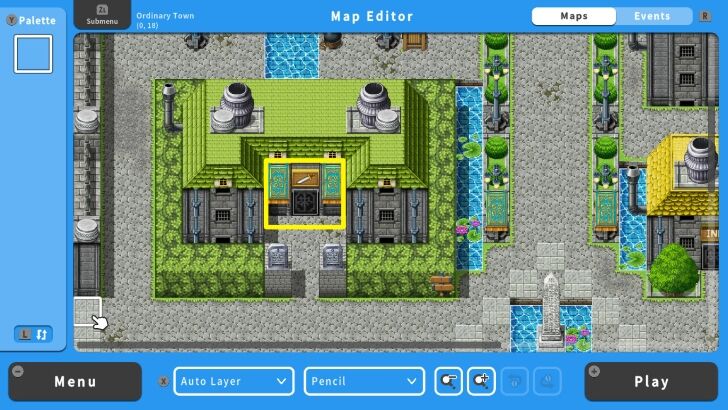
| 3 | 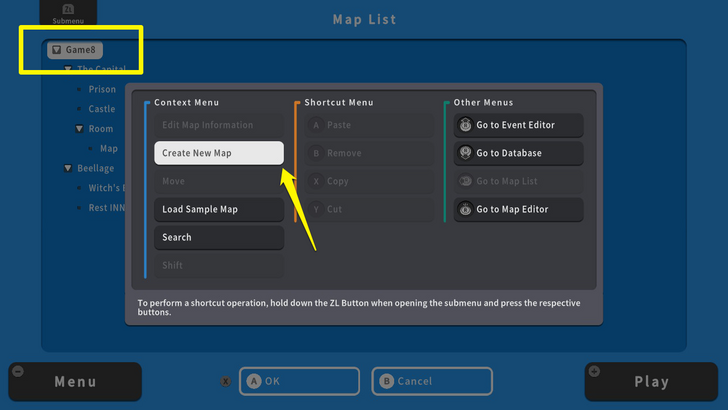 On the Map List, you need to create another Parent Map by selecting the top icon. Then press the ZL Button and select Create New Map. Edit the map information according to your liking. |
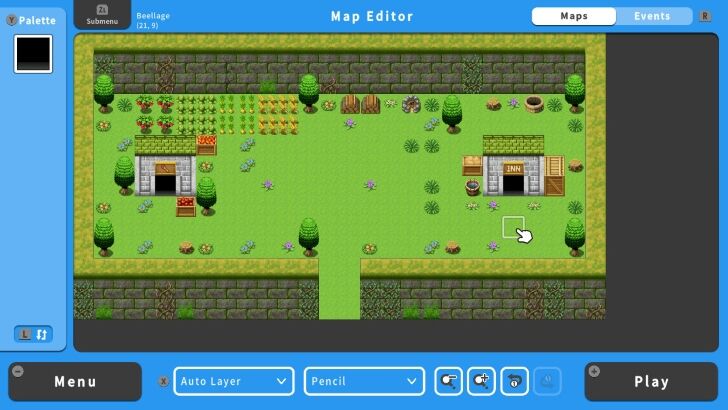
| 4 | 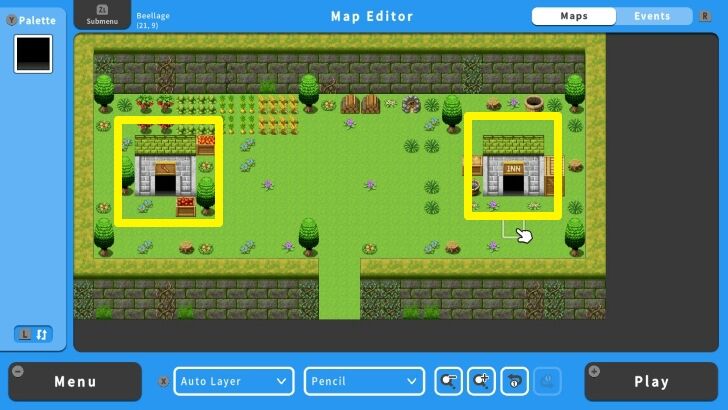 Go to the village's map and outline the structures and decorations. In this example, the village will have an inn and a shop. |
| 5 | 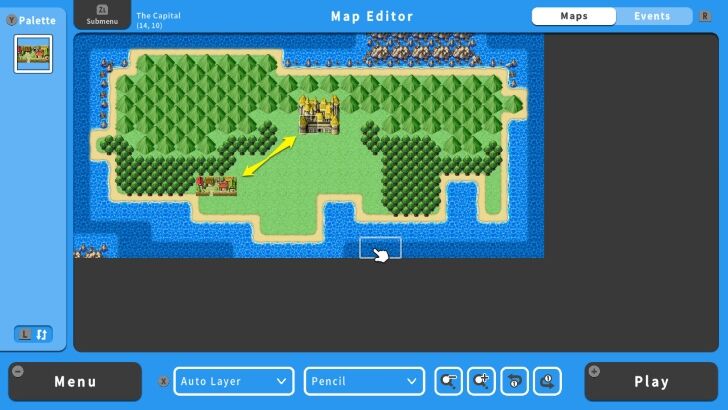 Once you are done building your village, do not forget to connect it to the Overworld Map via the Transfer Event. Please remember to apply this event in your Overworld Map and the village's entrance to ensure your players will be able to travel back and forth between these locations. |
Creating Maps for Inns and Shops
inns and shops are vital parts of towns and villages in any RPG game. These locations allow player characters to recuperate and buy items or equipment for their adventure. For a small fee, players can recover a party's lost HP and MP in inns. On the other hand, players can also spend their hard-earned money to buy higher-level gear and stock up on recovery items to improve their survival against their enemies. Together, inns and shops provide players with a way to save their progress, rest their party, and buy new items and equipment.
| 1 |  On your Map Editor screen, press the ZL Button and select Map List. |
|---|---|
| 2 | 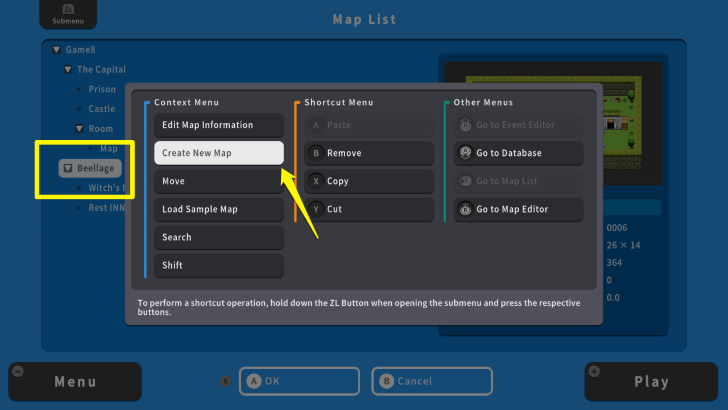 Move your cursor to your village and press the ZL Button again. After that, select Create New Map. |
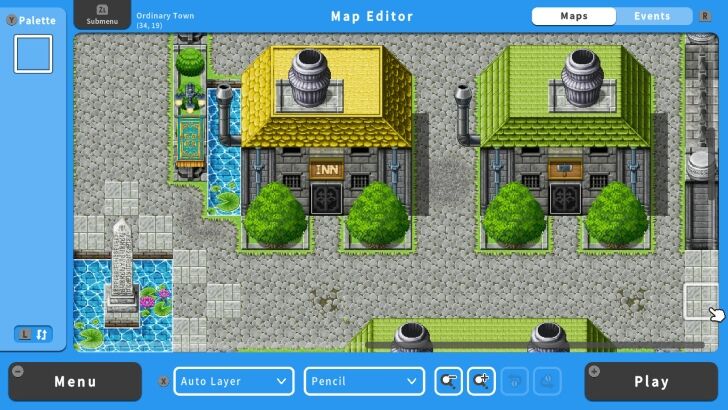
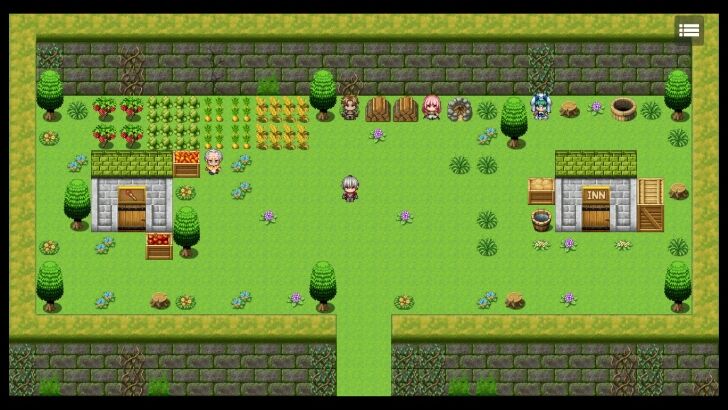
| 3 | 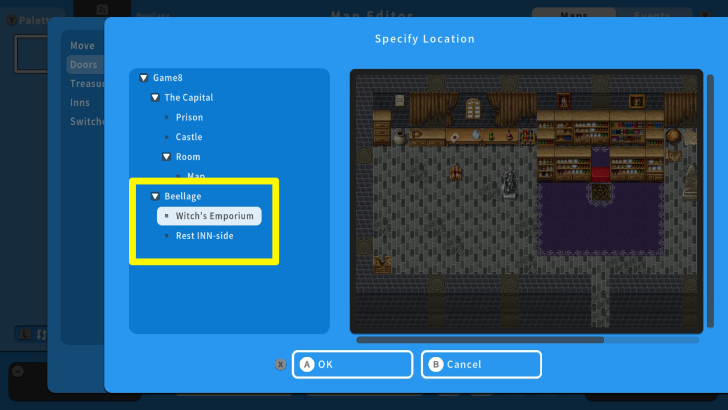 In this example, there are two generated maps. These are "Witch's Emporium" and "Rest INN-side." You can generate these two ahead of time and edit the maps along the way. Notice how the inn and shop were located under the village via the Map Tree. This allows you to organize your maps, saving time and effort editing them in the future. |
| 3 | 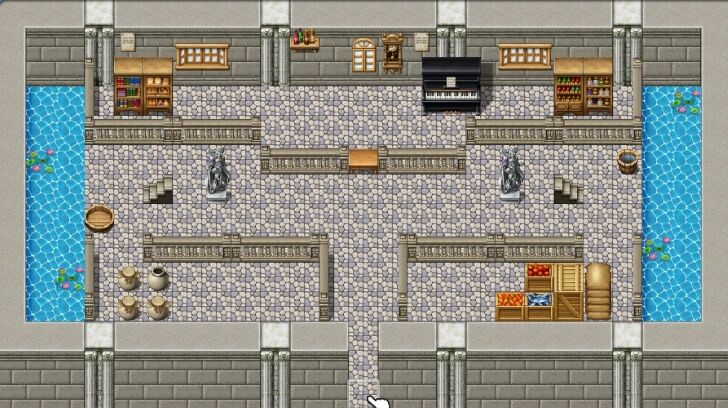 Here is an example of an inn. You can create different designs for your inns and shops as well! |
| 4 | 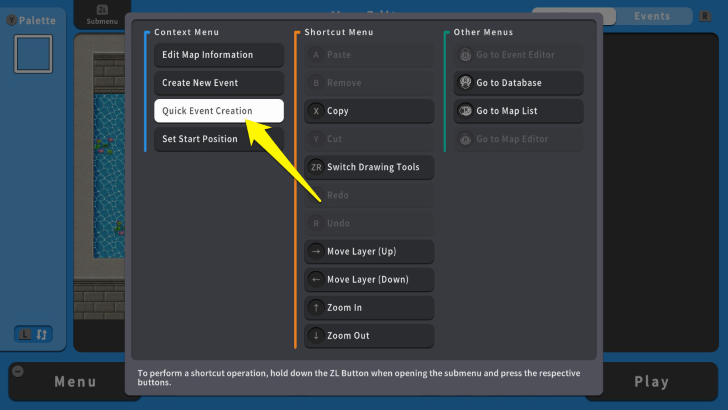 Once you are done, use the Transfer Event to connect them to your village via the "Quick Event Creation" tool. Use the Move Quick Event to connect the inn and shop maps to your village. |
How to Place Doors on Your Buildings
Doors serve as an entry point to buildings in your villages. This helps you create a sense of exploration and mystery for players and manage map sizes in your game. For instance, unlocking a door or discovering a rare item in buildings with doors provides players with a feeling of progress as they unlock new locations in their village.
Moreover, putting every NPC and item in your village with doors reduces clutter. Instead, you can create shops and inns as separate maps, which can be traversed by entering a door. This helps you manage your map better and provides players with more ways to interact in your villages.
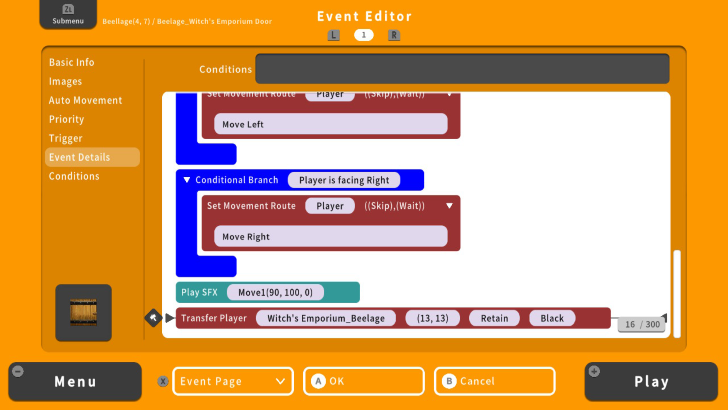
| 1 | 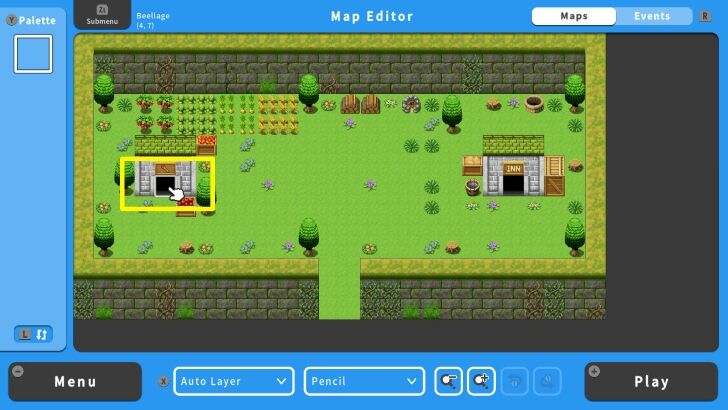 To connect the village to your inn and shop, you will use the "Door Event." Go to your village's map, and move your cursor to the entrance of the shop. |
|---|---|
| 2 | 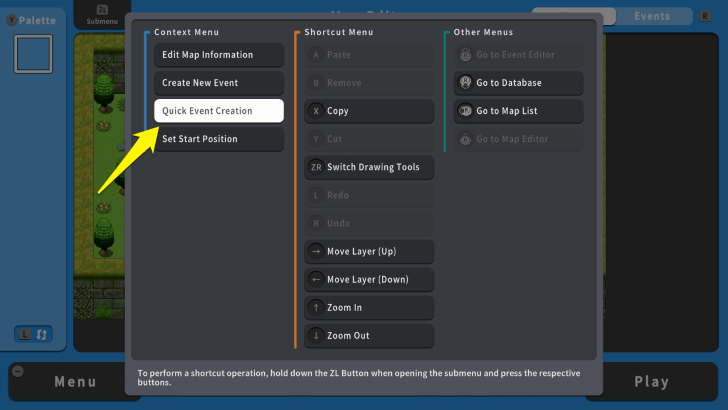 Press the ZL Button and select "Quick Event Creation." |
| 3 |  After doing so, select the "Doors" option. Here you can change the image of the door and its target location. |
| 4 | 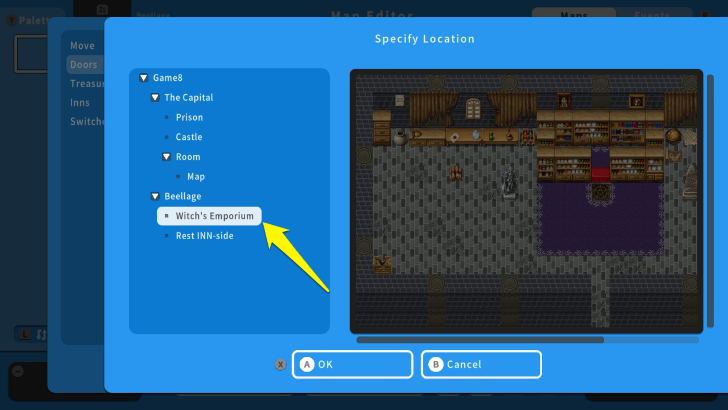 Select "Locations" and press the A Button. From there, move your cursor to the target location. For this example, the target location is "Witch's Emporium." |
| 5 | 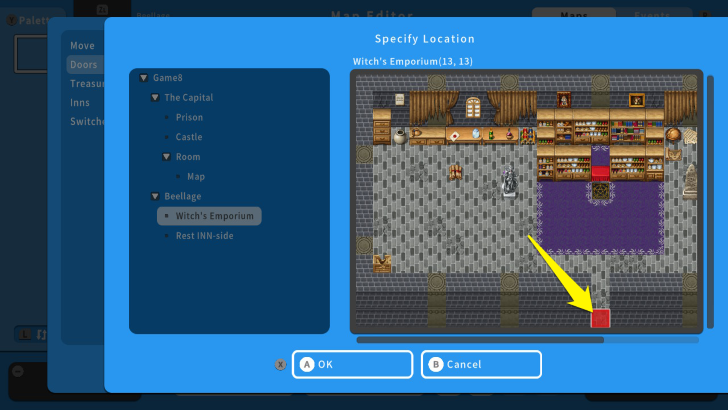 Press the A Button again and move the cursor to the entrance of the shop. |
| 6 | 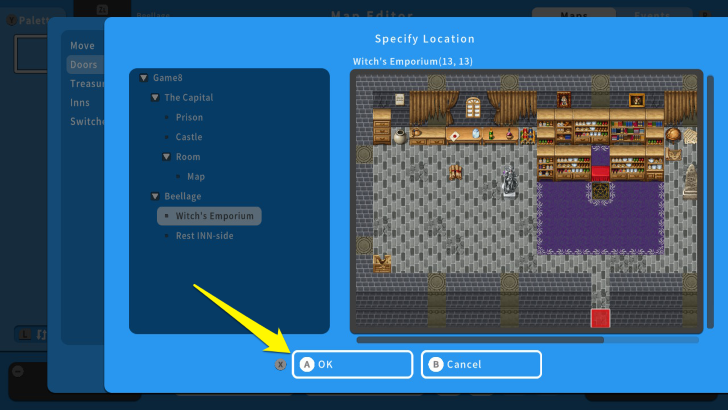 Once you have selected the entrance, press the X Button and select OK. Remember to repeat this process for your inn. |
| 7 |  After using the Doors Event, your shop and inn should have a front door. This allows you to enter them without the use of the "Transfer Event." |
| 8 | 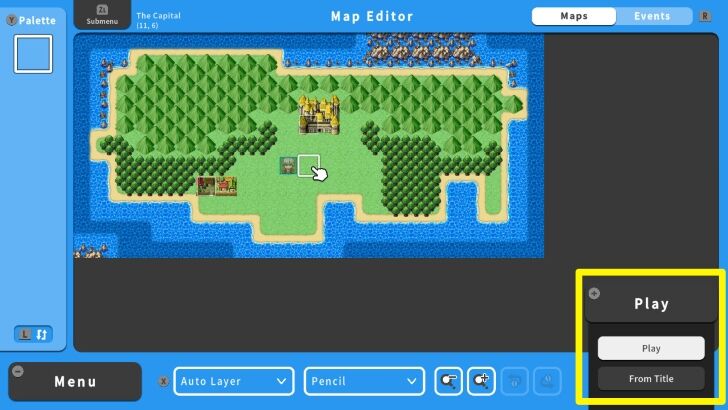 To ensure that the events are working, playtest the game by pressing the + Button and selecting "Play." Save your progress and test your new village. |
Reminders When Creating Villages
Use Door Events for Seamless Travel Between Maps
Use Door Event in your maps. This allows you to go back and forth between two or more locations. Of course, you can also decide not to do this, if you intend players not to return to a particular location once visited. Applying this is more useful for locations that players will visit often.
Populate Your Village
Adding NPCs in your villages improves player immersion. NPCs provide an organic way for players to make sense of your world and how they can complete their missions. For instance, they can meet a wandering villager who might give useful information to an enemy boss from a nearby dungeon. In this way, you can engage players with various NPC conversations, which provides useful information for their adventures.
RPG MAKER WITH Related Guides
All Intermediate Guide Articles
| Core Guides | |
|---|---|
| Intermediate Guide Part 1 |
Intermediate Guide Part 2 |
| Tips and Tricks | |
|---|---|
| How to Make a Switch | How to Use Map Foregrounds and Backgrounds |
| How to Change Event Text Color | |
| Core Guides | |
|---|---|
| Beginner's Guide Part 1 | Beginner's Guide Part 2 |
| Tips and Tricks | |
|---|---|
| Map, Event, and Switch Naming Tips | How to Use the Flood Fill Tool |
| Core Guides | |
|---|---|
| Advanced Guide Part 1 | Advanced Guide Part 2 |
Comment
Author
How to Create a Village
Rankings
- We could not find the article you were looking for.
- We could not find the message board you were looking for.
Gaming News
![Neverness to Everness (NTE) Review [Beta Co-Ex Test] | Rolling the Dice on Something Special](https://img.game8.co/4414628/dd3192c8f1f074ea788451a11eb862a7.jpeg/show)


Popular Games

Genshin Impact Walkthrough & Guides Wiki
Honkai: Star Rail Walkthrough & Guides Wiki
Arknights: Endfield Walkthrough & Guides Wiki
Umamusume: Pretty Derby Walkthrough & Guides Wiki
Wuthering Waves Walkthrough & Guides Wiki
Pokemon TCG Pocket (PTCGP) Strategies & Guides Wiki
Abyss Walkthrough & Guides Wiki
Zenless Zone Zero Walkthrough & Guides Wiki
Digimon Story: Time Stranger Walkthrough & Guides Wiki
Clair Obscur: Expedition 33 Walkthrough & Guides Wiki


Recommended Games
Fire Emblem Heroes (FEH) Walkthrough & Guides Wiki
Pokemon Brilliant Diamond and Shining Pearl (BDSP) Walkthrough & Guides Wiki
Diablo 4: Vessel of Hatred Walkthrough & Guides Wiki
Super Smash Bros. Ultimate Walkthrough & Guides Wiki
Yu-Gi-Oh! Master Duel Walkthrough & Guides Wiki
Elden Ring Shadow of the Erdtree Walkthrough & Guides Wiki
Monster Hunter World Walkthrough & Guides Wiki
The Legend of Zelda: Tears of the Kingdom Walkthrough & Guides Wiki
Persona 3 Reload Walkthrough & Guides Wiki
Cyberpunk 2077: Ultimate Edition Walkthrough & Guides Wiki


All rights reserved
©Gotcha Gotcha Games
The copyrights of videos of games used in our content and other intellectual property rights belong to the provider of the game.
The contents we provide on this site were created personally by members of the Game8 editorial department.
We refuse the right to reuse or repost content taken without our permission such as data or images to other sites.