How to Draw Maps for Specific Locations
RPG MAKER WITH allows the creation of multiple maps and move between them. Read on to learn more about creating a second map and applying the Transfer Event.

RPG MAKER WITH RPG MAKER WITH allows you to create multiple maps and move between them. Read on to learn more about creating more than one map and applying the Transfer Event to connect them.
List of Contents
How to Draw Maps for Specific Locations
In RPG MAKER WITH, every game is built from a series of individual maps that, when connected, create the illusion of a cohesive game world. Each map represents a different area - be it a bustling town, a mysterious forest, or a treacherous dungeon - and these maps are linked together using an event called Map Transfer.
This feature allows players to seamlessly travel between locations, enhancing their immersion in the world you've created.
One of the most common ways to connect these maps is by linking smaller, specific locations to a larger overworld map. This overworld acts as a central hub or "world map" that players can use to explore different areas of your game.
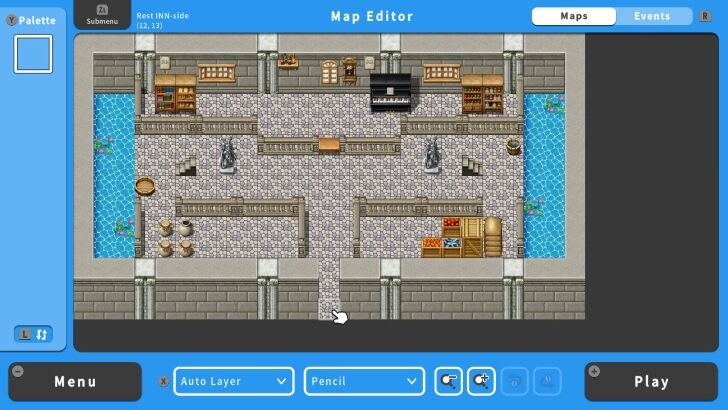
In this guide, we'll design a map for a specific location, and then connect that map to an overworld using Map Transfers so your players will be able to "visit" that place within your game world.
How to Make an New Map
| 1 | 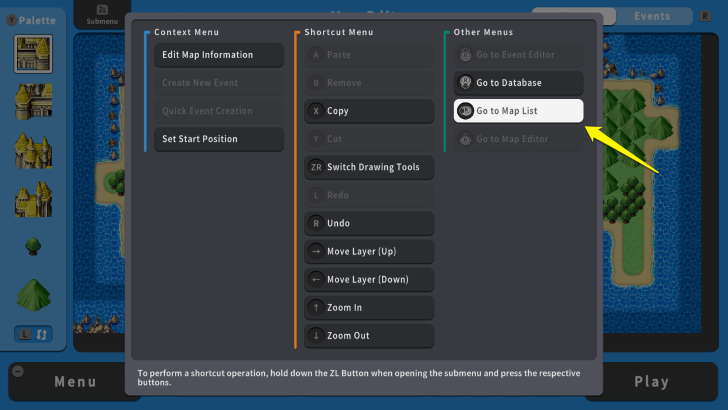 Once you have an overworld map, go to "Map List" by pressing the ZL Button. |
|---|---|
| 2 | 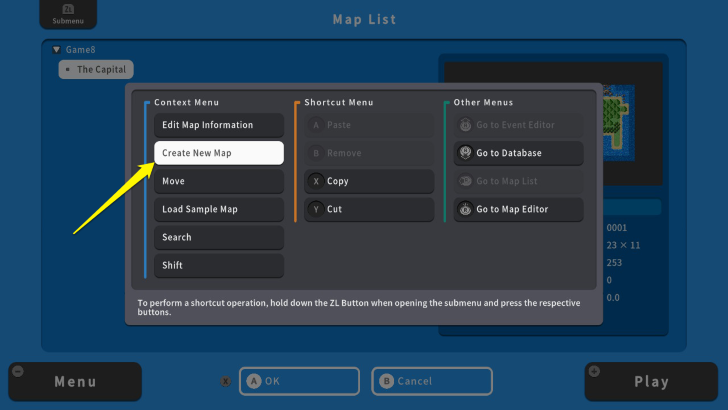 Place the cursor on the first map and press the ZL Button again. From there, select "Create New Map." |
| 3 | 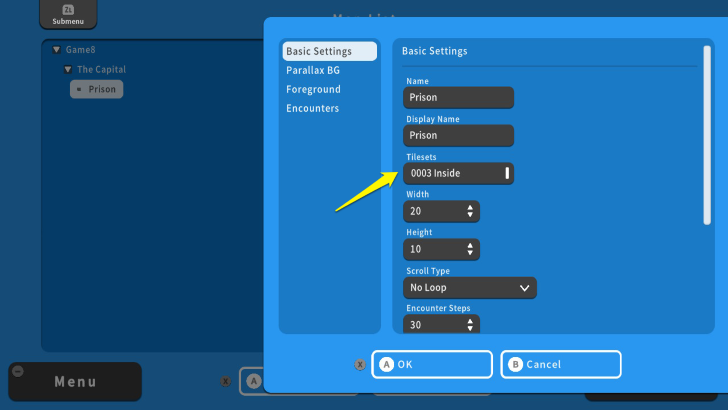 Just like with the overworld map, edit the basic settings. Please remember to change the Tilesets if you are planning to create an interior map within the first map. For this example, the tileset used is "0003inside." |
| 4 | 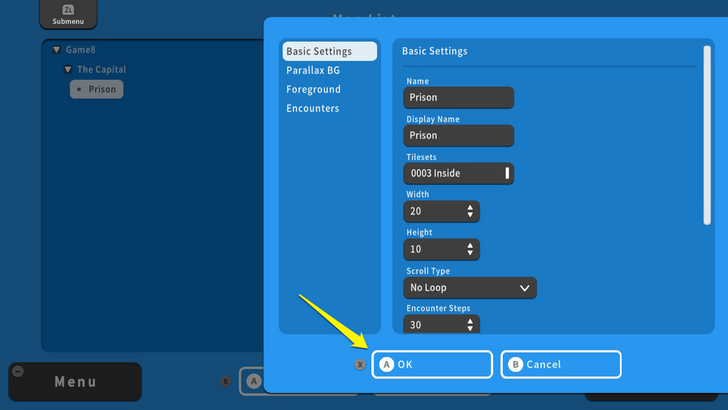 After editing the "Basic Settings," press the X Button and select "OK." |
| 5 | 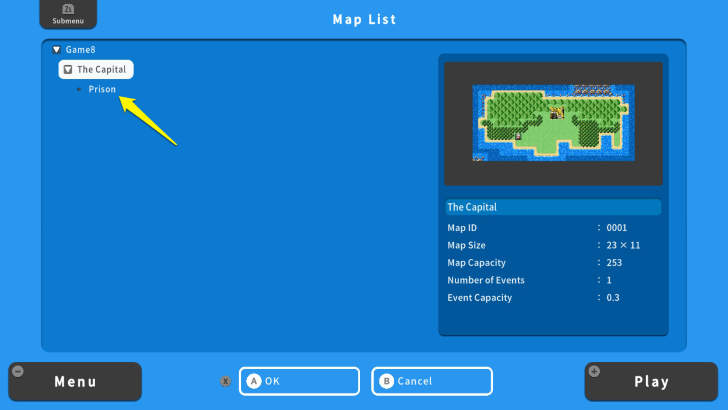 Select the second map by pressing the A Button and move on to design it using the "Map Editor" tools. |
How to Connect One Map to Another
Use the "Map Transfer" Event to Connect Maps
| 1 |  Once you are done with your second map, move the cursor to its entrance and press the ZL Button. |
|---|---|
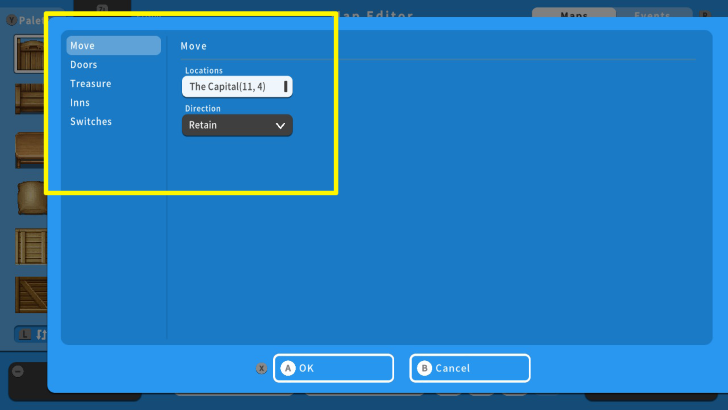
| 2 |  Select "Quick Event Creation," then select the "Move" option. |
| 3 | 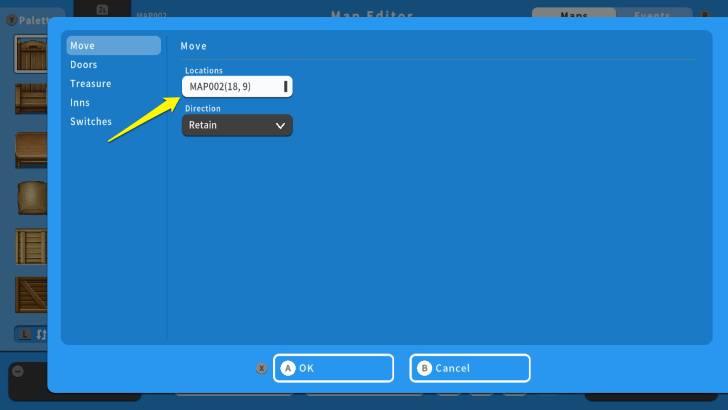 Select the "Locations" option and press the A Button. From there, select the first map. |
| 4 | 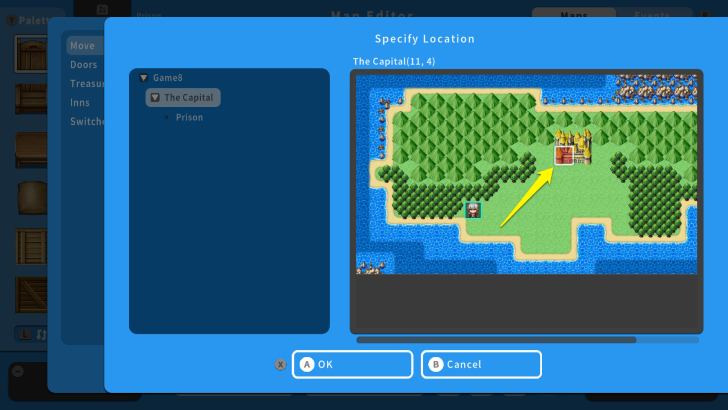 After doing this process, the screen will show the first map. You can select the coordinates where your main character/party will transfer from the second map to the first map. Once you have chosen the coordinate, press the A Button. For this example, the prison room's entrance will be connected to the castle's entrance. |
| 5 | 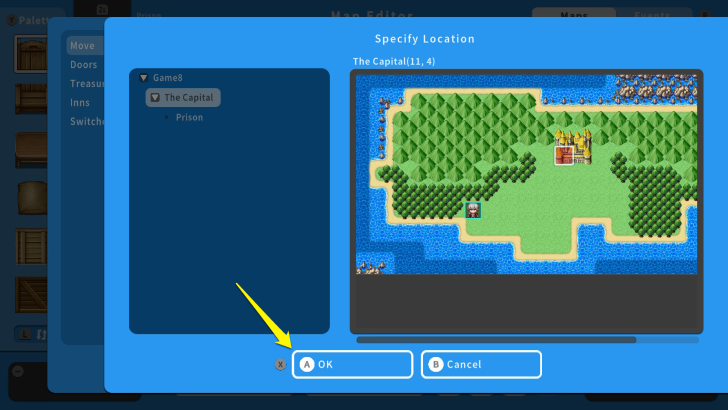 Press the X Button and select OK. Now, the second map is connected to the first map. |
| 6 | 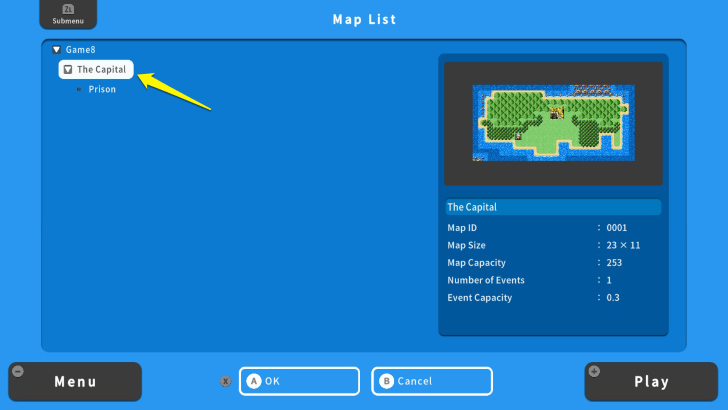 However, it would be best if you also connected the first map to the second map. Go back to the "Map Editor" screen, press the ZL Button and select "Map List." Then select the first map and press the A Button. This will transfer you to the first map. From there, you will apply steps 1 to 5 to the first map. |
| 7 | 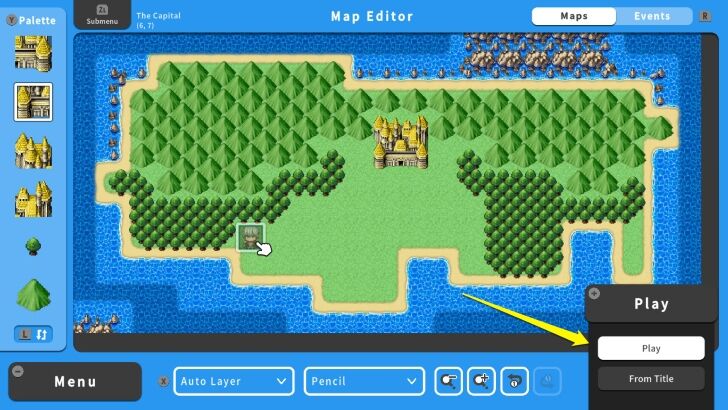 To make sure that the two maps are connected, press the + Button and select Play. In playtest mode, check whether you can move back and forth between these two maps. |
Tips for Connecting Maps
Use Map Transfer Between Two Maps
The "Transfer Event" only allows you to set one-way movement from one map to another. Thus, it is important to remember that setting the "Transfer Event" in both maps allows players to travel back and forth.
Look at the Map Tree
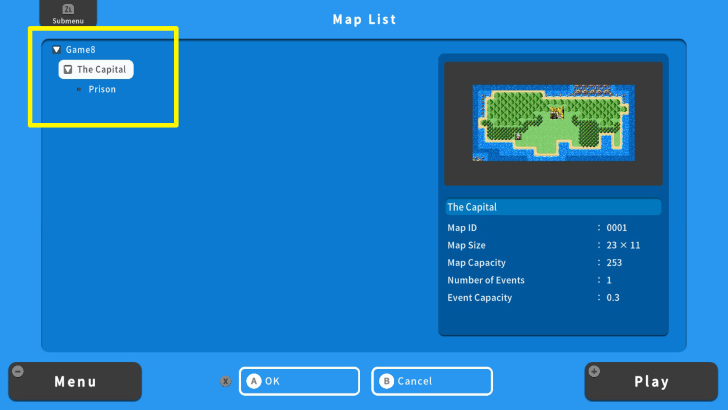
The "Map Tree" shows the relationship between maps. For example, "The Capital" is the "parent map," while the "Prison" is the "child map." As you made more maps, it is better to check the "Map Tree" and organize them accordingly.
RPG Maker WITH Related Guides

| Core Guides | |
|---|---|
| Beginner's Guide Part 1 | Beginner's Guide Part 2 |
| Supplementary Guides | |
|---|---|
| How to Draw an Overworld Map | How to Draw Maps for Specific Locations |
| How to Make an NPC | How to Playtest for Beginners |
| How to Use Tilesets | How to Use Sample Maps |
| Map Layers Explained | How to Use Shortcut Keys |
| How to Make a Title Screen and Credit Roll | How to Set In-Game Terms |
| How to Set System Options | |
| Tips and Tricks | |
|---|---|
| Map, Event, and Switch Naming Tips | How to Use the Flood Fill Tool |

| Core Guides | |
|---|---|
| Intermediate Guide Part 1 | Intermediate Guide Part 2 |
| Tips and Tricks | |
|---|---|
| How to Make a Switch | How to Use Map Foregrounds and Backgrounds |
| How to Change Event Text Color | |

| Core Guides | |
|---|---|
| Advanced Guide Part 1 | Advanced Guide Part 2 |

Comment
Author
How to Draw Maps for Specific Locations
Rankings
- We could not find the article you were looking for.
- We could not find the message board you were looking for.
Gaming News
![Neverness to Everness (NTE) Review [Beta Co-Ex Test] | Rolling the Dice on Something Special](https://img.game8.co/4414628/dd3192c8f1f074ea788451a11eb862a7.jpeg/show)


Popular Games

Genshin Impact Walkthrough & Guides Wiki
Honkai: Star Rail Walkthrough & Guides Wiki
Arknights: Endfield Walkthrough & Guides Wiki
Umamusume: Pretty Derby Walkthrough & Guides Wiki
Wuthering Waves Walkthrough & Guides Wiki
Pokemon TCG Pocket (PTCGP) Strategies & Guides Wiki
Abyss Walkthrough & Guides Wiki
Zenless Zone Zero Walkthrough & Guides Wiki
Digimon Story: Time Stranger Walkthrough & Guides Wiki
Clair Obscur: Expedition 33 Walkthrough & Guides Wiki


Recommended Games
Fire Emblem Heroes (FEH) Walkthrough & Guides Wiki
Pokemon Brilliant Diamond and Shining Pearl (BDSP) Walkthrough & Guides Wiki
Diablo 4: Vessel of Hatred Walkthrough & Guides Wiki
Super Smash Bros. Ultimate Walkthrough & Guides Wiki
Yu-Gi-Oh! Master Duel Walkthrough & Guides Wiki
Elden Ring Shadow of the Erdtree Walkthrough & Guides Wiki
Monster Hunter World Walkthrough & Guides Wiki
The Legend of Zelda: Tears of the Kingdom Walkthrough & Guides Wiki
Persona 3 Reload Walkthrough & Guides Wiki
Cyberpunk 2077: Ultimate Edition Walkthrough & Guides Wiki


All rights reserved
©Gotcha Gotcha Games
The copyrights of videos of games used in our content and other intellectual property rights belong to the provider of the game.
The contents we provide on this site were created personally by members of the Game8 editorial department.
We refuse the right to reuse or repost content taken without our permission such as data or images to other sites.