How to Make a Locked Door
RPG MAKER WITH's events allows users to utilize events for locked-door scenarios. Read on to learn more about creating locked doors.

RPG MAKER WITH's events allows users to utilize events for locked-door scenarios. Read on to learn more about creating locked doors.
List of Contents
How to Make a Locked Door?
Adds a Sense of Mystery and Challenge to Players
Having a locked door in your game gives players a sense of mystery and challenge and encourages exploration.
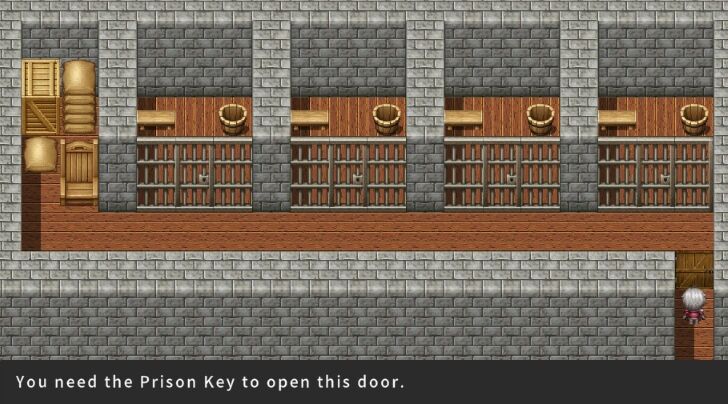
For instance, a locked door hinders a player's progression, urging them to explore the map to get the key. After fighting their way and solving puzzles to get the key, unlocking the door rewards them with useful items or rare equipment. Thus, the locked door enhances the player's game experience by encouraging exploration and adding a level of mystery.
Making a Locked Door
Create a Key for the Locked Door
| 1 |  On your "Map Editor," press the ZL Button and select "Go to Database." |
|---|---|
| 2 | 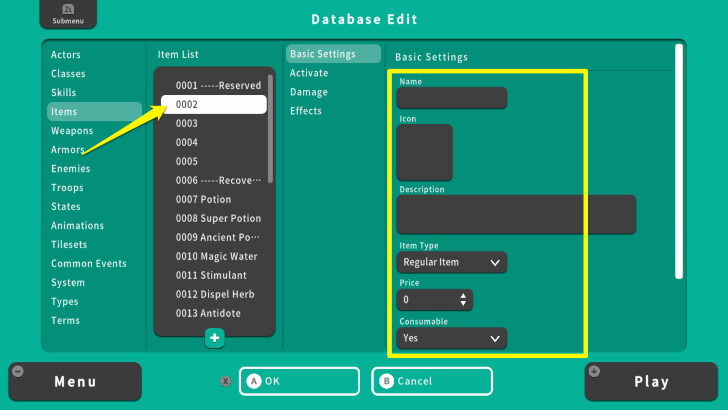 From the Database, select "Items" and move your cursor to "0002." As you can see there are other items, but we will use an empty slot to create the key. |
| 3 | 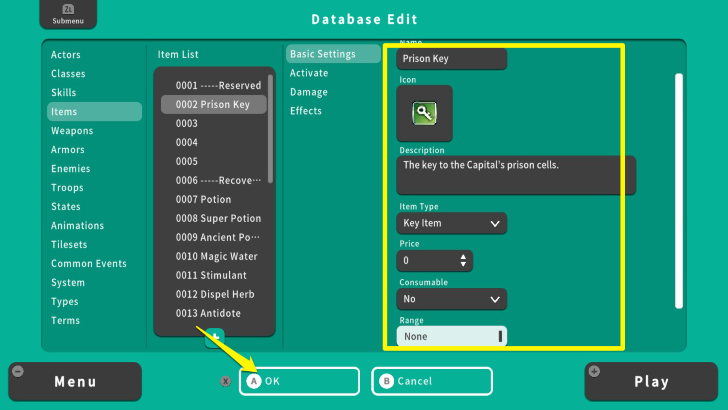 From here, go to the "Basic Settings" and edit the item. Once you are done, press the X Button and select OK. |
| 4 | 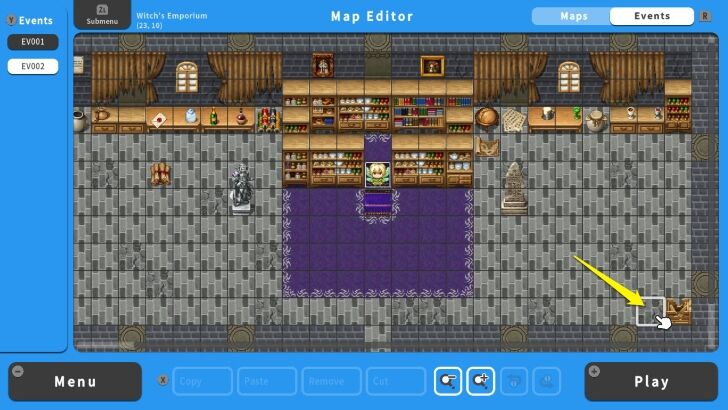 Also, create a treasure chest that contains the key. First, select a location and move the cursor where you want your treasure chest to appear. |
| 5 | 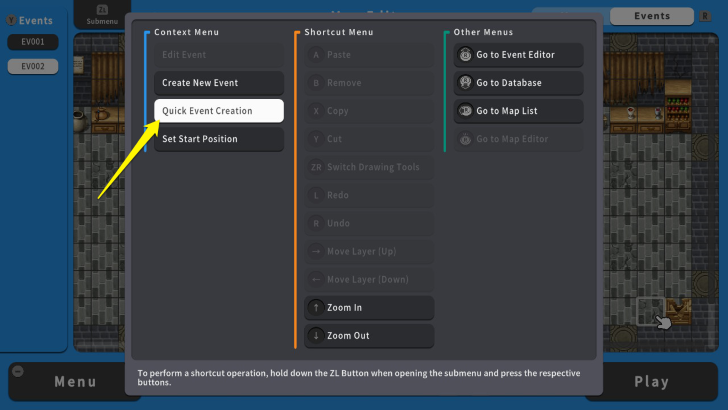 Press the ZL Button and select "Quick Event Creation." |
| 6 | 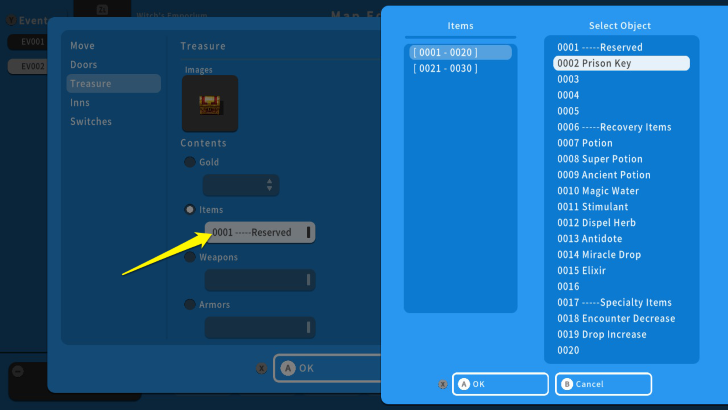 Select "Treasure" and set it to "Items." Right now, the selected item is "0001 Reserved." |
| 7 | 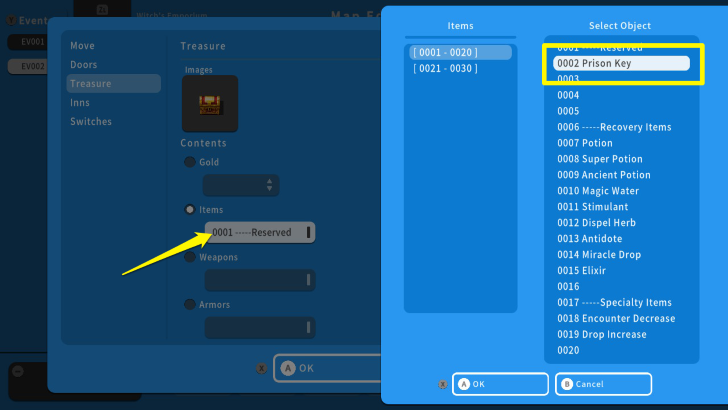 Select the 0001 Reserved and press the A Button. After this, a list will pop up. Select the key you made for this chest. In this example, this is "0002 Prison Key." Once you are done, press the X Button and select OK. |
| 8 | 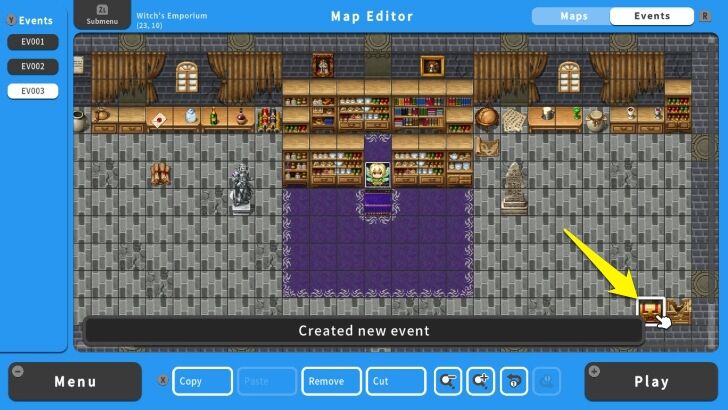 Now, you can move forward with creating the locked door. |
Create a Locked Door
| 1 | 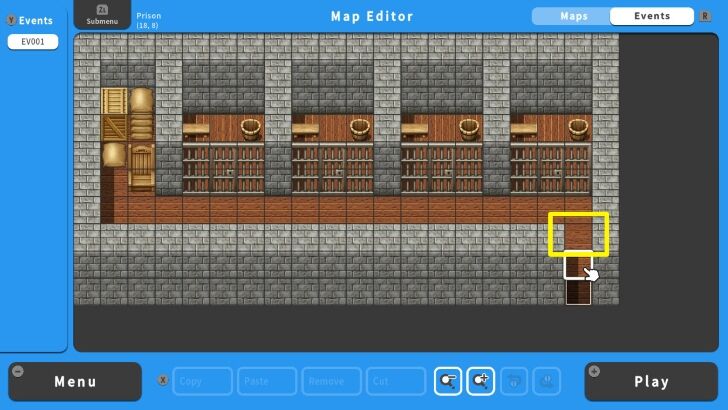 Choose a map and move your cursor where you will put a locked door. In this example, the locked door is the entrance to the Prison. |
|---|---|
| 2 | 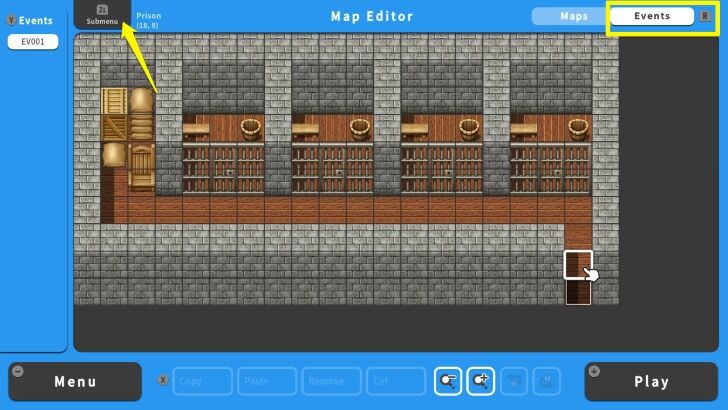 There are two ways to create the event. First, you can either press the ZL Button and select the "Create New Event Option." You can also switch to "Event Mode" by pressing the R Button, then press the A Button. |
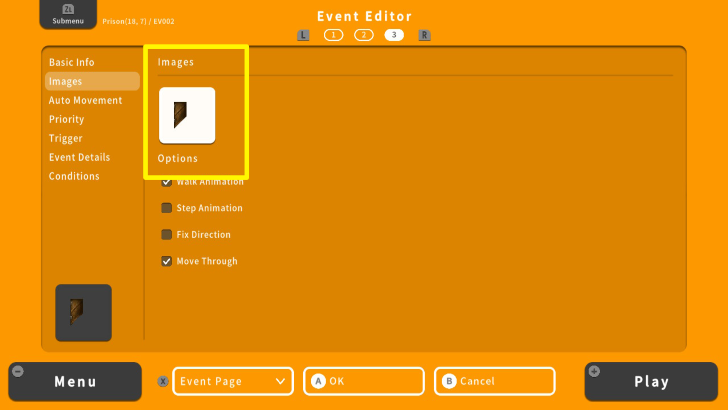
| 3 | 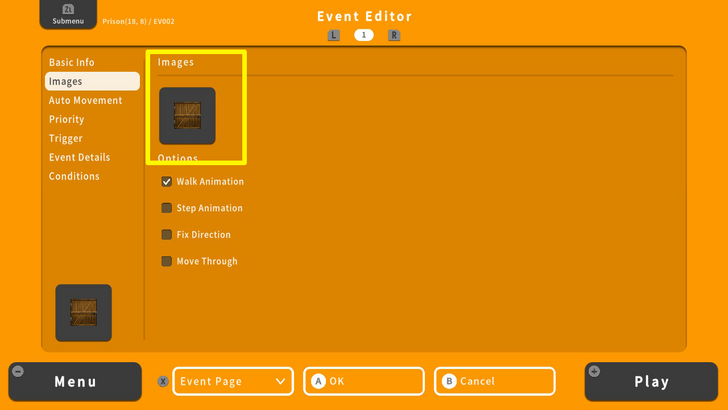 Once you are in the "Event Editor" screen, select "Images" and set a door image. |
| 4 | 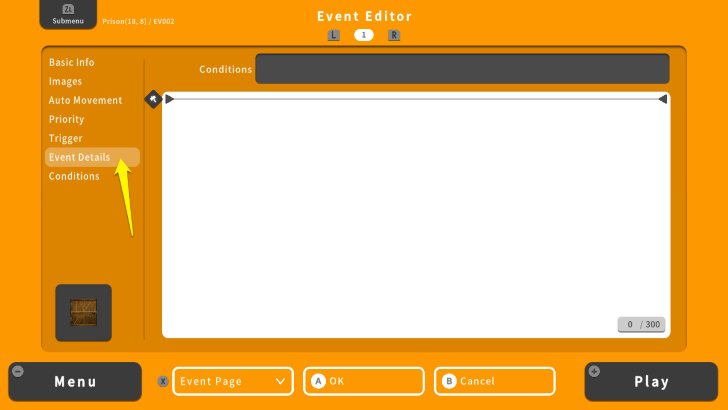 Move to "Event Details" and press the A Button twice. This allows you to input commands for this event. |
| 5 | 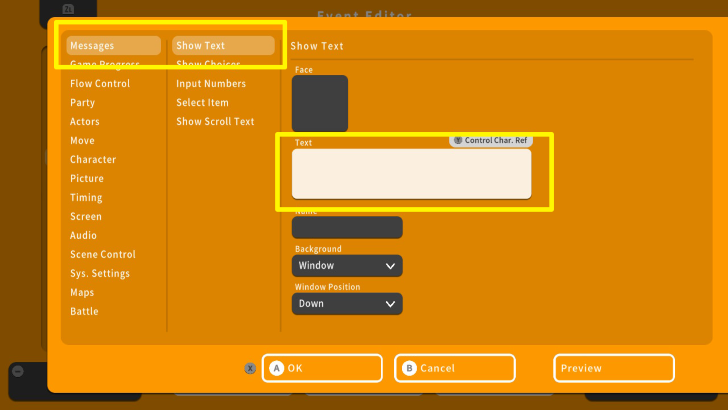 Select "Messages" and press the Left Button or use the Left Analog Stick. After this, select "Text" and press the A Button. |
| 6 | 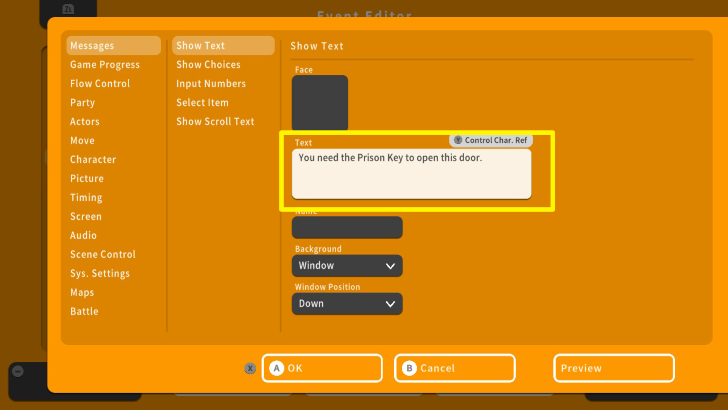 Edit the text according to your liking. Once done, press the X Button and select OK. In this example, the text will hint at what key is needed to open the Prison Door. |
| 7 |  Press the X Button and select "Event Page." After that, press the A Button and select "Add Event Page." |
| 8 | 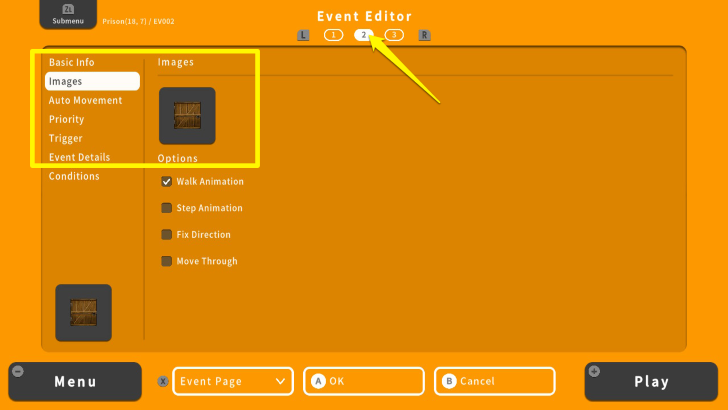 Once you added it, move to the second Event Page by pressing the R Button. Set the same image for this Event. |
| 9 | 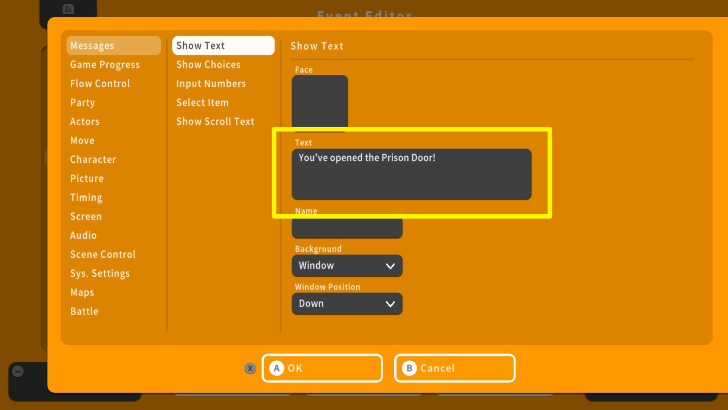 Move to Event Details and add a Show Text command indicating that you opened the door. After that, press the X Button and select OK. |
| 10 | 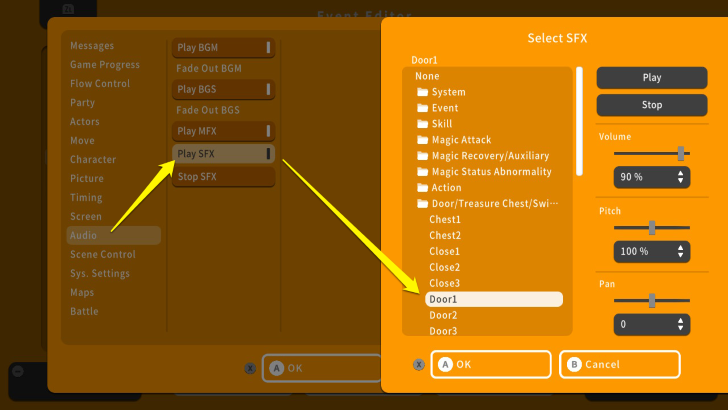 You can also set a sound effect for opening the door. Press the A Button on the Event Details screen. Select "Audio" and "Play SFX." Choose the "Door/Treasure Chest/Switch" folder and select the type of SFX. After this, press the X Button and select OK. |
| 11 | 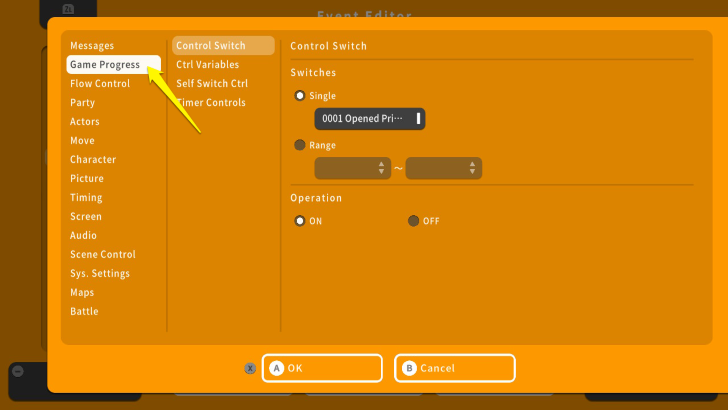 A "Switch" is needed to prevent the door from getting locked again. To do this, press the A Button again on the Event Details screen and select "Game Progress." |
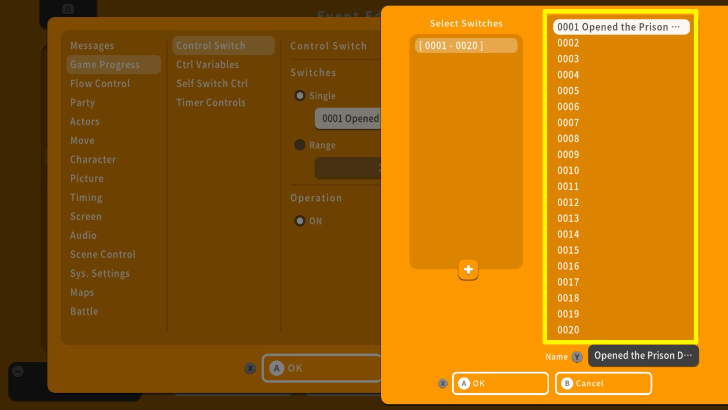
| 12 | 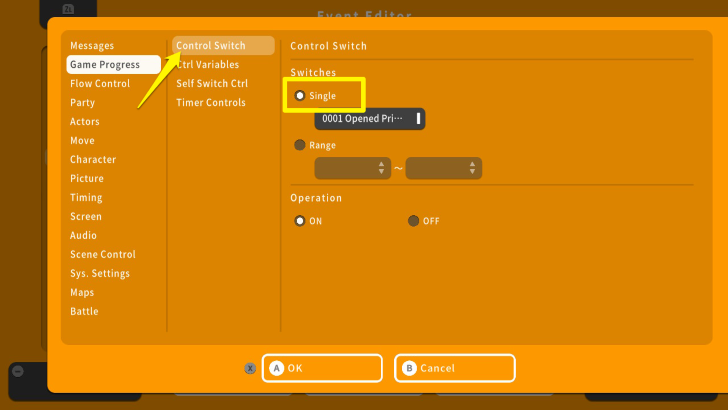 Select "Control Switch" and set it to "Single." |
| 13 | 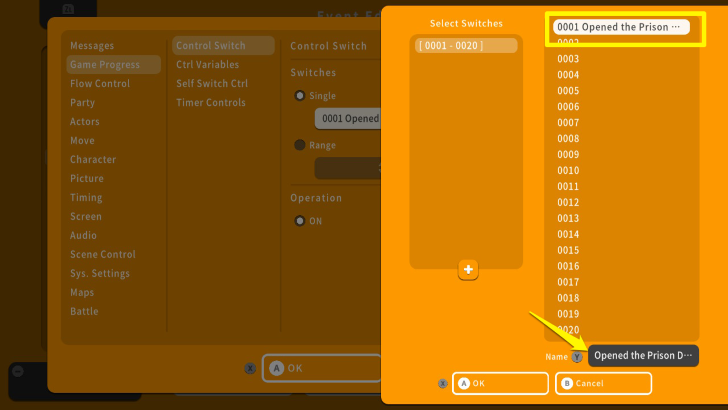 Press the Down Button, and then the A Button. Move your cursor to "0001" and press the Y Button to change its name. In this example, the name is "0001 Opened the Prison Door." |
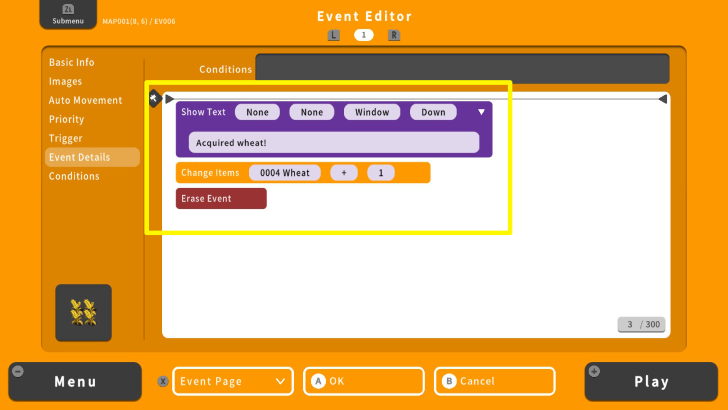
| 14 | 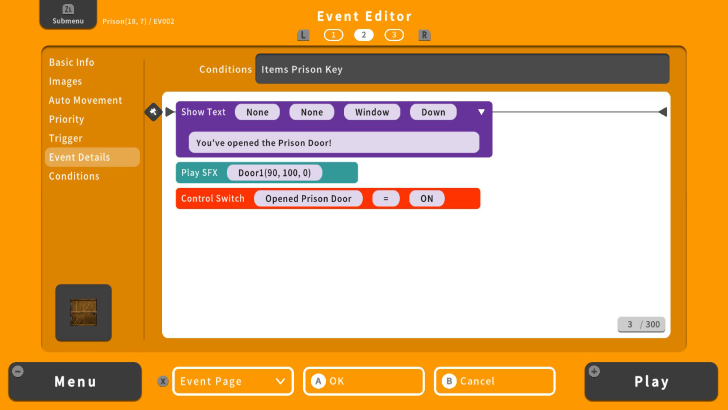 This is what the commands should look like. |
| 15 | 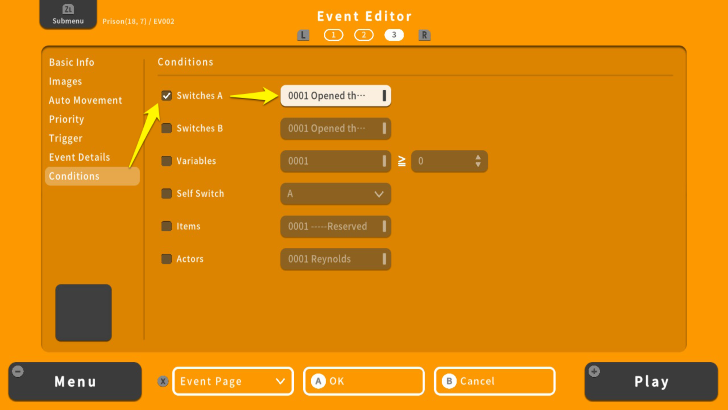 Create another Event Page and move your cursor to "Conditions." Here activate "Switches A" and select the switch you made earlier. |
| 16 | 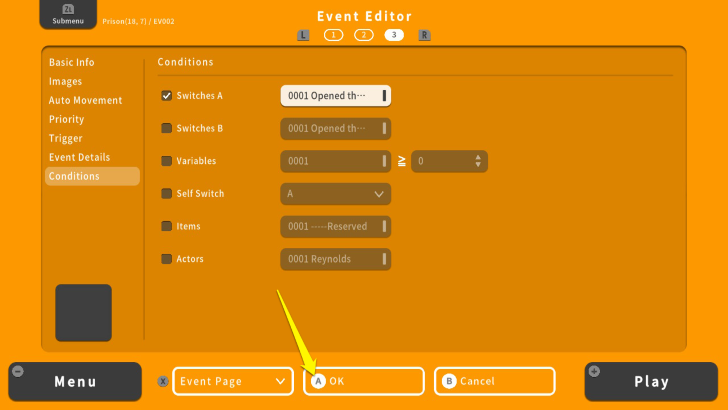 Once done, press the X Button and select OK. |
| 17 | 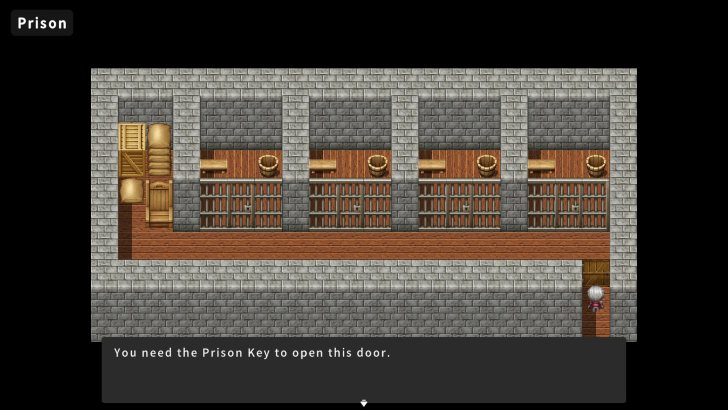 Playtest the game by pressing the + Button. Save your progress and test your locked door. |
Tips for Creating Locked Doors
Name Your Switches
You will need to create and set many switches while creating your game. To make the process of selecting and setting switches easier, it is better to name them according to the related Event.
Map, Event, and Switch Naming Tips
Keep Your Door Open
Using the example in this article, go to the third Event Page and add an image of an open door. This will make your locked door transition to an open door instead of disappearing completely after using the key.
The Key Does Not Have to Be in a Treasure Chest
Though we used the Treasure Event to provide the key, you can use other ways to give items to players. For instance, an object from a map can contain them via an Event. You can set a hidden key on a pot or barrel. This makes players more curious about what items might be hidden inside the objects on your map.
RPG MAKER WITH Related Guides
All Intermediate Guide Articles
| Core Guides | |
|---|---|
| Intermediate Guide Part 1 |
Intermediate Guide Part 2 |
| Tips and Tricks | |
|---|---|
| How to Make a Switch | How to Use Map Foregrounds and Backgrounds |
| How to Change Event Text Color | |
| Core Guides | |
|---|---|
| Beginner's Guide Part 1 | Beginner's Guide Part 2 |
| Tips and Tricks | |
|---|---|
| Map, Event, and Switch Naming Tips | How to Use the Flood Fill Tool |
| Core Guides | |
|---|---|
| Advanced Guide Part 1 | Advanced Guide Part 2 |
Author
How to Make a Locked Door
Rankings
- We could not find the message board you were looking for.
Gaming News
![Animal Crossing: New Horizons Review [Switch 2] | Needlessly Crossing Over to a New Generation](https://img.game8.co/4391759/47d0408b0b8a892e453a0b90f54beb8a.png/show)


Popular Games

Genshin Impact Walkthrough & Guides Wiki
Honkai: Star Rail Walkthrough & Guides Wiki
Arknights: Endfield Walkthrough & Guides Wiki
Umamusume: Pretty Derby Walkthrough & Guides Wiki
Wuthering Waves Walkthrough & Guides Wiki
Pokemon TCG Pocket (PTCGP) Strategies & Guides Wiki
Abyss Walkthrough & Guides Wiki
Zenless Zone Zero Walkthrough & Guides Wiki
Digimon Story: Time Stranger Walkthrough & Guides Wiki
Clair Obscur: Expedition 33 Walkthrough & Guides Wiki


Recommended Games
Fire Emblem Heroes (FEH) Walkthrough & Guides Wiki
Pokemon Brilliant Diamond and Shining Pearl (BDSP) Walkthrough & Guides Wiki
Diablo 4: Vessel of Hatred Walkthrough & Guides Wiki
Super Smash Bros. Ultimate Walkthrough & Guides Wiki
Yu-Gi-Oh! Master Duel Walkthrough & Guides Wiki
Elden Ring Shadow of the Erdtree Walkthrough & Guides Wiki
Monster Hunter World Walkthrough & Guides Wiki
The Legend of Zelda: Tears of the Kingdom Walkthrough & Guides Wiki
Persona 3 Reload Walkthrough & Guides Wiki
Cyberpunk 2077: Ultimate Edition Walkthrough & Guides Wiki


All rights reserved
©Gotcha Gotcha Games
The copyrights of videos of games used in our content and other intellectual property rights belong to the provider of the game.
The contents we provide on this site were created personally by members of the Game8 editorial department.
We refuse the right to reuse or repost content taken without our permission such as data or images to other sites.
This has been a great help, but is there a way to create indoor doors (doors on rooms in an Inn for example) that the player can walk through and the doors open/close? I can’t figure out how to create one.