How to Make Enemy Groups
RPG MAKER WITH's users can create enemy Troops to provide more challenging battles for players. Read on to learn more about creating enemy Troops and how to test them in battle.
RPG MAKER WITH's users can create enemy Troops to provide more challenging battles for players. Read on to learn more about creating enemy Troops and how to test them in battle.
List of Contents
What is an Enemy Group?
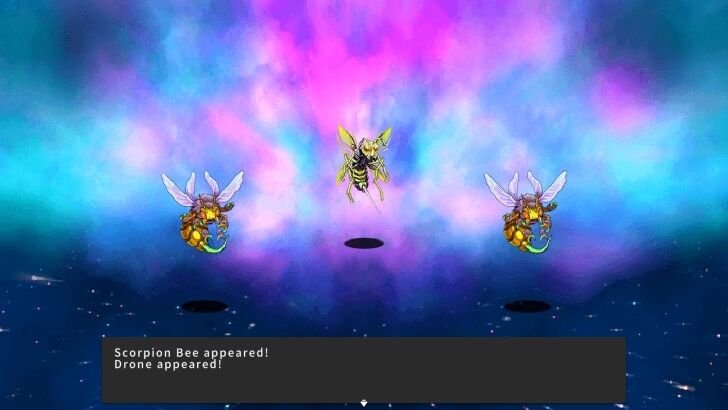
Multiple Enemies You Can Fight at the Same Time
Setting enemy groups or "Enemy Troops" is the primary way of implementing enemies in your game. If you want your players to encounter a specific enemy, they have to be put into a Troop so they an be encountered depending on the Weight set for their Troop (if you are having your players fight enemies through random encounters).
You set Troops via the Enemy Troop Database. For example, you can create an Enemy Troop consisting of a captain and two soldiers.
Setting Enemy Troops is important if you want to provide more challenge to players. You can even make Troops for bosses so they can have multiple minions to fight alongside them against your players.
How to Make Enemy Groups
Troop Settings
| 1 | 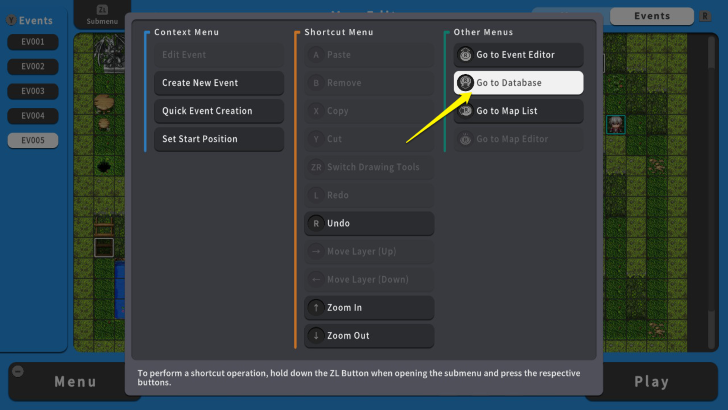 To make enemy groups, press the ZL Button and select "Go to Database." |
|---|---|
| 2 | 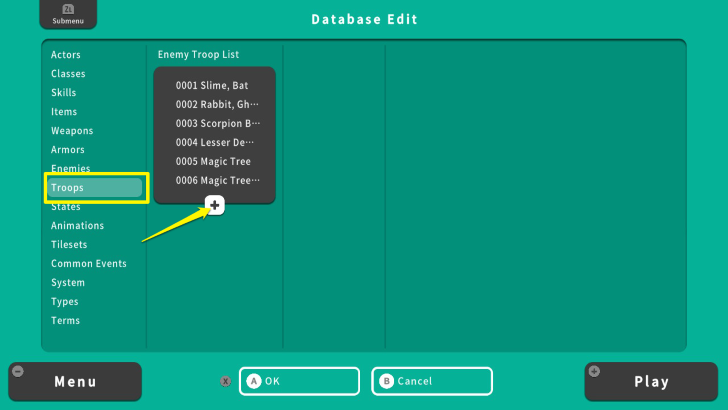 Move your cursor to "Troops" and select the + icon. |
| 3 | 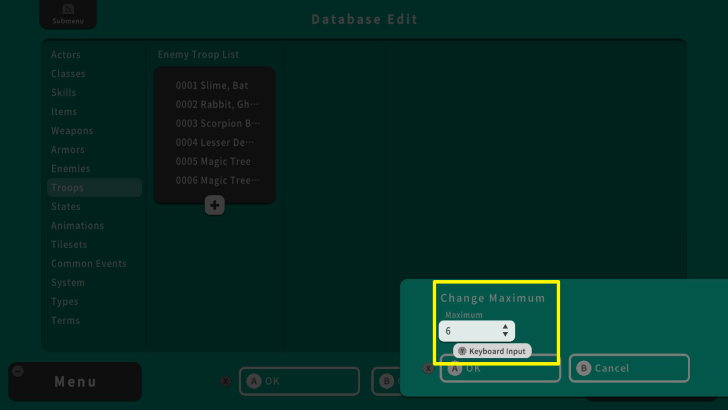 Press the A Button twice and then press the Y Button. Change the value of Maximum from 6 to 7. |
| 4 |  Once you changed the value to 7, press the X Button and select OK. This will add one enemy group to the "Enemy Troop List." |
| 5 | 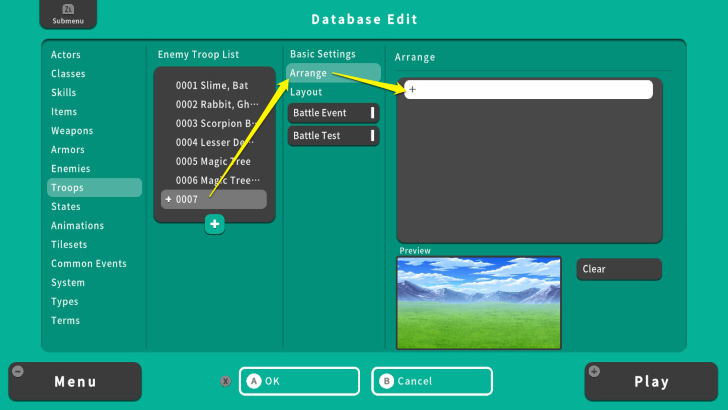 Move your cursor to "Arrange" and select the + icon. |
| 6 | 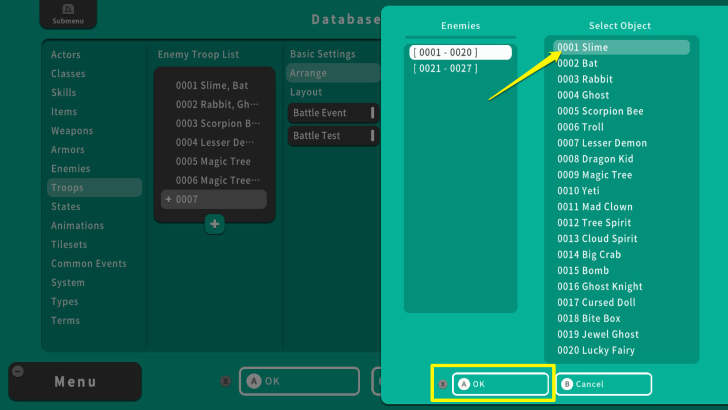 Press the A Button and select one enemy. After choosing an enemy, press the X Button and select OK. |
| 7 | 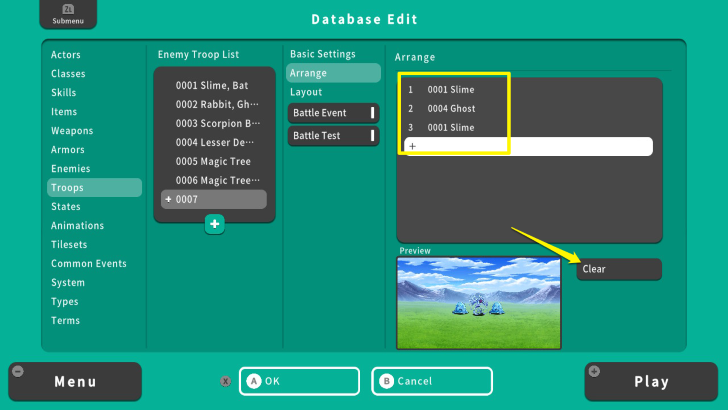 Repeat this process until you have three enemies. You can also use the "Clear" option to remove your chosen enemies. For this example, we have two "Slimes" and one "Ghost." |
| 8 | 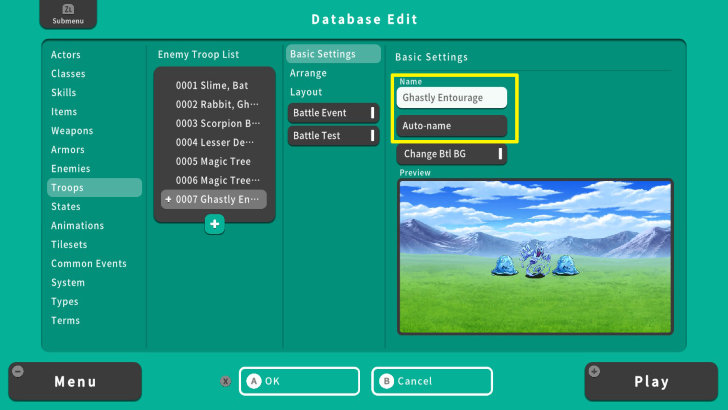 Go to "Basic Settings" to change the Troops' name. We have two options here. You can manually edit the name by selecting the first box or use the "Auto-name" tool to automatically input their names. For this example, we manually put the name "Ghastly Entourage." |
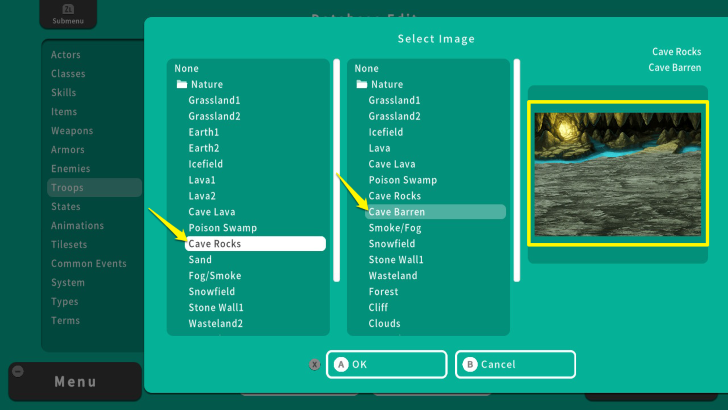
| 9 | 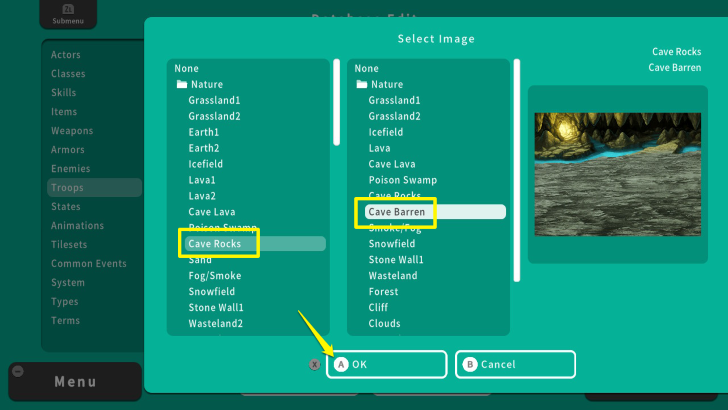 You can also change the Battle Background by pressing the A Button on "Change Btl BG." Here you can select two images that make up your background when battling this Troop. Once done, press the X Button and select OK. For this example, we used "Cave Rocks" and "Cave Barren." |
| 10 | 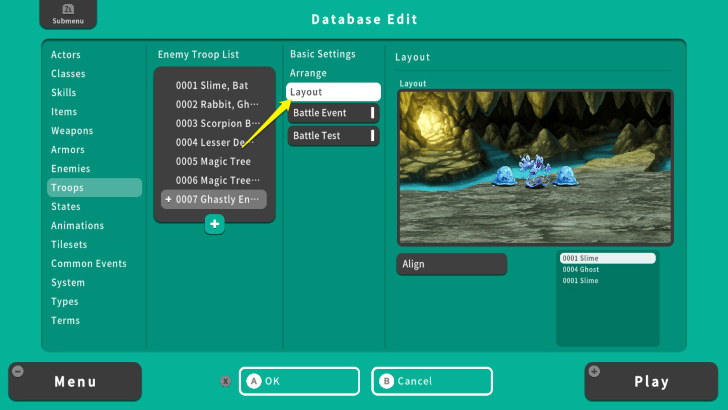 After setting the Battle Background, move your cursor to "Layout." Here you can manually or automatically align the enemies' positions in battle. |
| 11 | 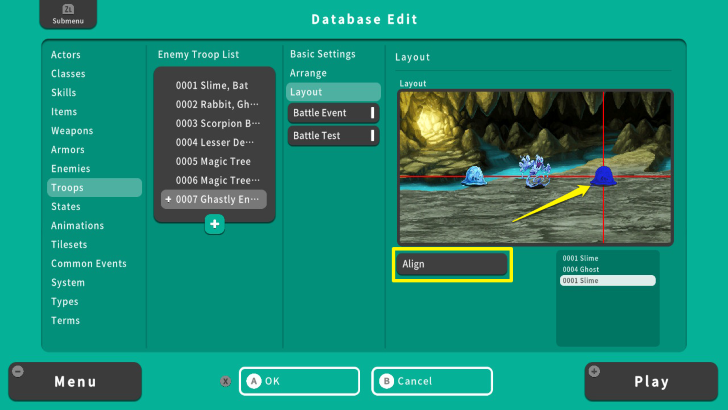 To manually edit their positions, move your cursor to "Align" and press the UP Button. Then select a monster and press the A Button. A horizontal and vertical red line will appear that guides you where to put your enemies by using either the Left Analog Stick or the Arrow Buttons. You can also move these enemies back to their original position by pressing the A Button on the Align option. For this example, we added more space between these monsters. |
| 12 | 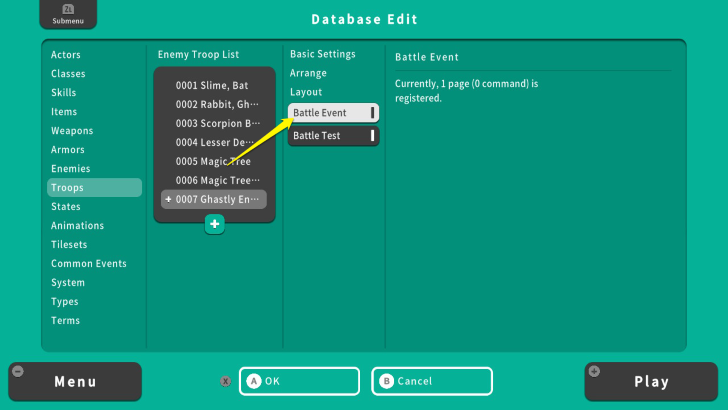 Move your cursor now to "Battle Events" and press the A Button. This allows you to set an event while battling this enemy Troop. |
| 13 | 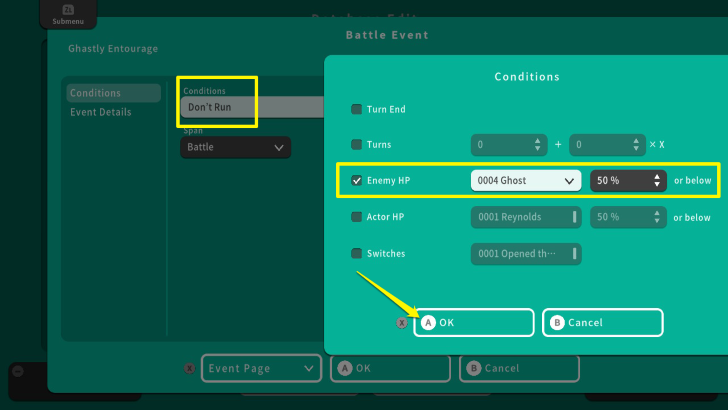 From the Battle Event Menu, select "Conditions." The default setting is "Don't Run," but you can change the condition to activate an event. Once done, press the X Button and select OK. For this example, the event will activate once the Ghost has 50% or below HP. |
| 14 | 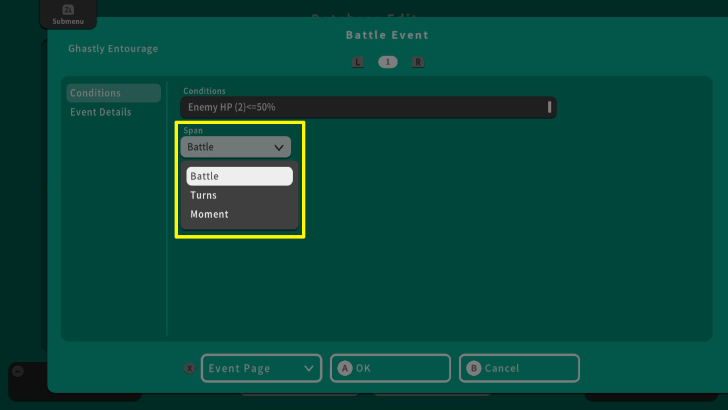 You can also edit the "Span" of an event. You can choose from "Battle," "Turns," and "Moments." For this example, we set the Span to "Battle," which means that the event will only trigger once in a battle. |
| 15 | 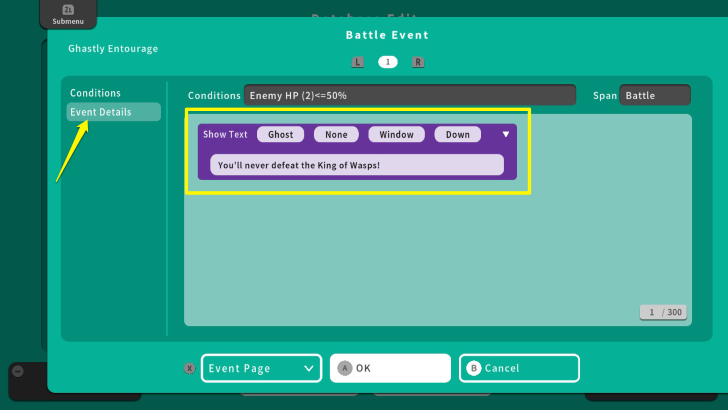 To set an actual event, select "Event Details." Press the A Button to open the Event Editor, then add an Event command. For this example, we created an event where the Ghost will say the phrase, "You'll never defeat the King of Wasps!" once its HP drops below 50%. |
| 16 | 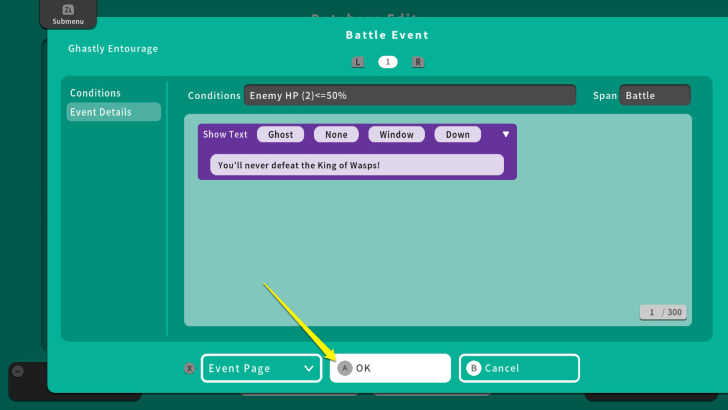 After this, press the X Button and select OK. Remember that you can create various events to make your Troop battle unique, like inflicting HP damage on your party. |
Battle Test
| 1 | 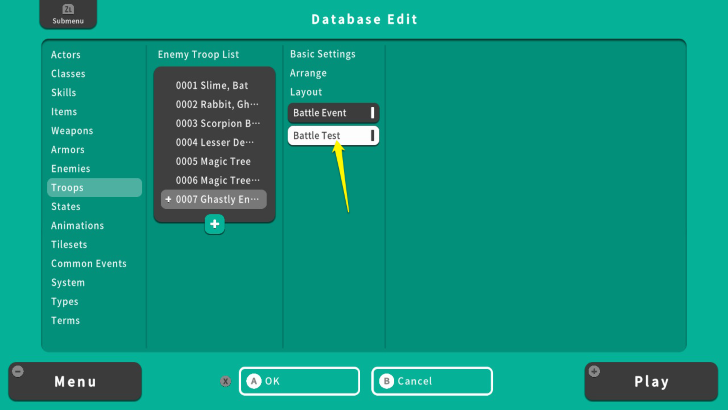 Under the Battle Event Menu, select "Battle Test" and press the A Button. |
|---|---|
| 2 | 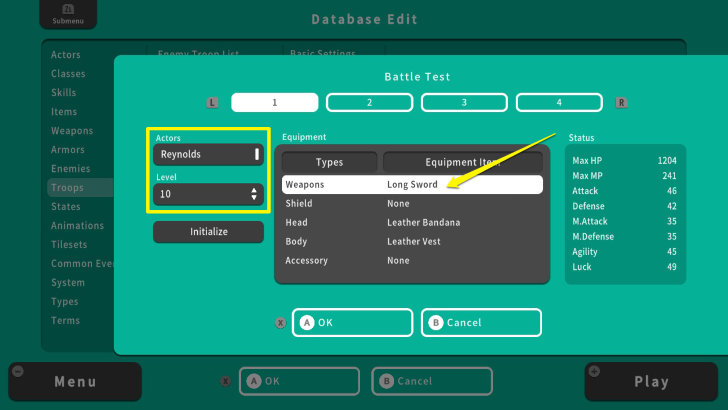 Here you can set up the party who will face the enemy Troop you created. You can set the "Actor," "Level," and "Equipment." |
| 3 | 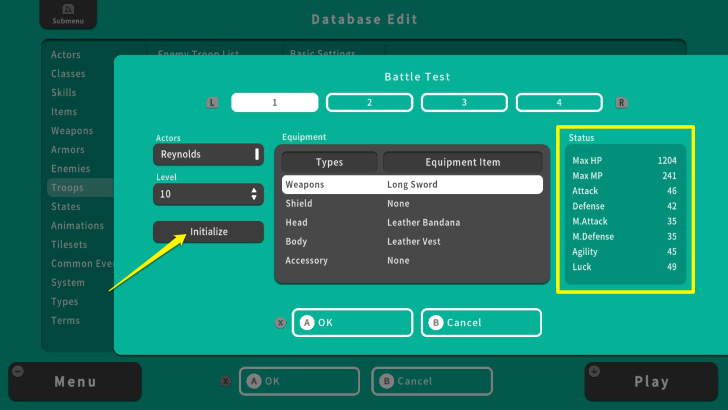 You can also see the actor's current stats and revert all the changes by using "Initialize." |
| 4 | 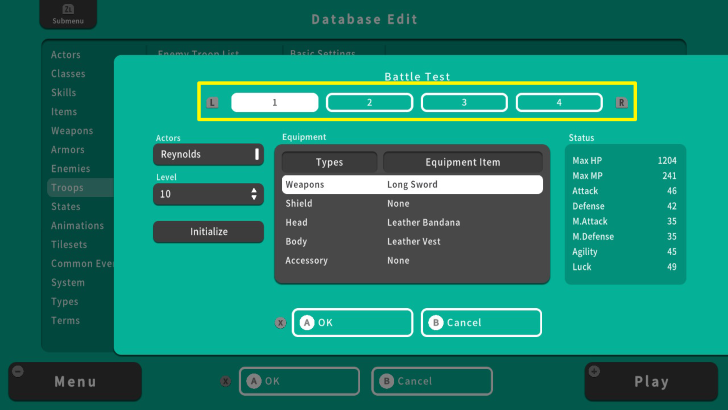 There is also the option to add a party member, by pressing the L or R Buttons. We will add another party member to test the Troop battle. |
| 5 | 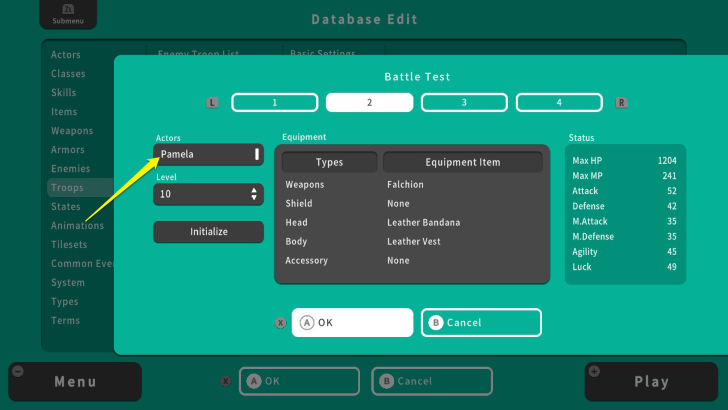 Press the A Button on the Actors option, and select a party member. Once selected, press the X Button and select OK. This will also load the current level, skills, and equipment set on this character according to its Database information. For this example, we added "Pamela." |
| 6 | 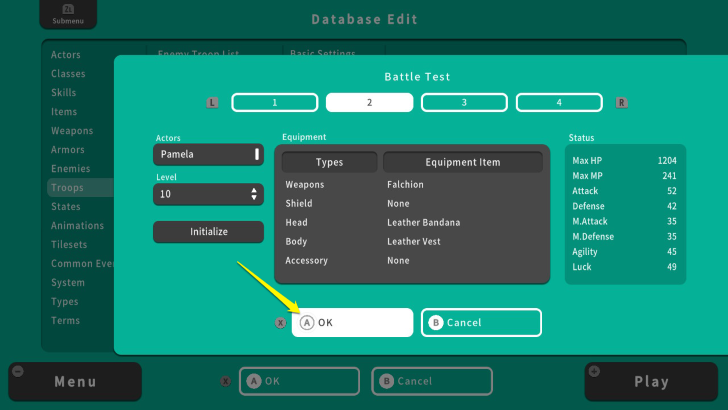 Once you are done preparing your party, press the X Button and select OK. |
| 7 | 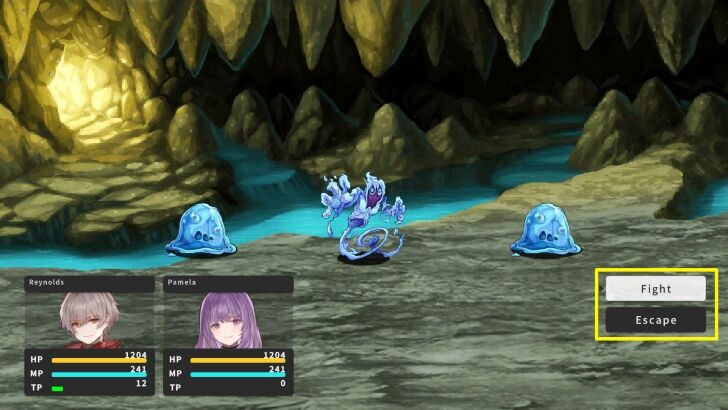 This will lead you to battle the enemy Troop you created. You can either "Fight" or "Escape." Choosing fight means that you will continue the battle, while Escape will lead you back to the Database. In this case, we will continue the battle to check the event we previously set. |
| 8 | 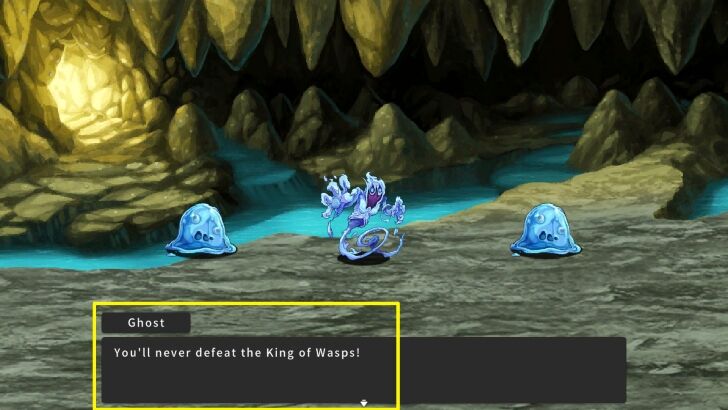 After the party dealt enough damage on the Ghost enemy, the Event successfully initiated. |
| 9 | 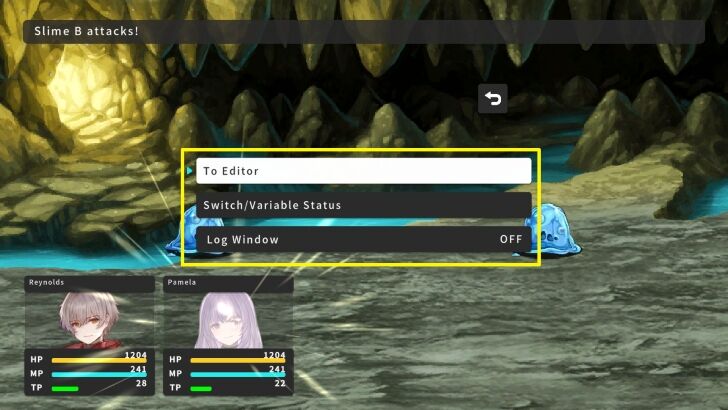 If you are satisfied with your Troops or you need to edit some details, you can press the + Button and select "To Editor." Meanwhile, the "Switch/Variable Status" allows you to monitor what switches or variables are active or inactive during a battle. Lastly, the "Log Window" displays every action made during a battle. |
Enemy Group Creation Tips
Align the Battle Background with Your Map
Make sure that your Troop's Battle Background is similar to your map. This ensures that the player's immersion will not be broken. For instance, the Battle Background for the battle Troop we made is compatible with a map that looks like a cave. In doing so, the battle with your enemy Troops makes sense to players.
Use the Layout Function
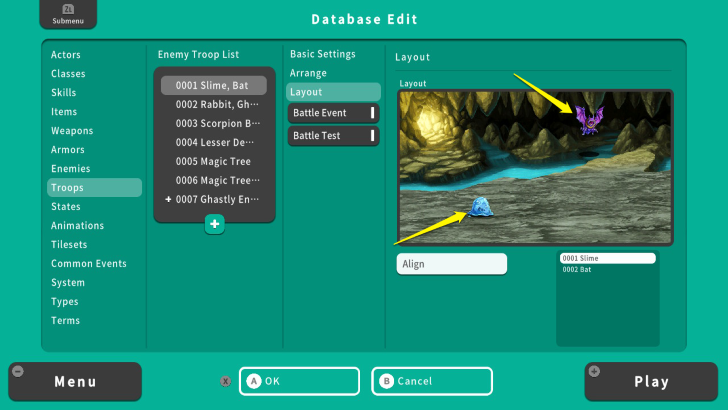
Using the Layout function allows you to position enemies manually to improve immersion. This is good if you have flying enemies or just want to change their position during a battle. For instance, positioning the "Bat" higher will make it appear flying over the horizon. On the other hand, the "Slime's" position made it appear closer to the party. This allows you to improve player immersion while battling enemies.
RPG MAKER WITH Related Guides
| Core Guides | |
|---|---|
| Advanced Guide Part 1 | Advanced Guide Part 2 |
| Core Guides | |
|---|---|
| Beginner's Guide Part 1 | Beginner's Guide Part 2 |
| Tips and Tricks | |
|---|---|
| Map, Event, and Switch Naming Tips | How to Use the Flood Fill Tool |
| Core Guides | |
|---|---|
| Intermediate Guide Part 1 | Intermediate Guide Part 2 |
| Tips and Tricks | |
|---|---|
| How to Make a Switch | How to Use Map Foregrounds and Backgrounds |
| How to Change Event Text Color | |
Comment
Author
How to Make Enemy Groups
Rankings
- We could not find the message board you were looking for.
Gaming News
![Animal Crossing: New Horizons Review [Switch 2] | Needlessly Crossing Over to a New Generation](https://img.game8.co/4391759/47d0408b0b8a892e453a0b90f54beb8a.png/show)


Popular Games

Genshin Impact Walkthrough & Guides Wiki
Honkai: Star Rail Walkthrough & Guides Wiki
Arknights: Endfield Walkthrough & Guides Wiki
Umamusume: Pretty Derby Walkthrough & Guides Wiki
Wuthering Waves Walkthrough & Guides Wiki
Pokemon TCG Pocket (PTCGP) Strategies & Guides Wiki
Abyss Walkthrough & Guides Wiki
Zenless Zone Zero Walkthrough & Guides Wiki
Digimon Story: Time Stranger Walkthrough & Guides Wiki
Clair Obscur: Expedition 33 Walkthrough & Guides Wiki


Recommended Games
Fire Emblem Heroes (FEH) Walkthrough & Guides Wiki
Pokemon Brilliant Diamond and Shining Pearl (BDSP) Walkthrough & Guides Wiki
Diablo 4: Vessel of Hatred Walkthrough & Guides Wiki
Super Smash Bros. Ultimate Walkthrough & Guides Wiki
Yu-Gi-Oh! Master Duel Walkthrough & Guides Wiki
Elden Ring Shadow of the Erdtree Walkthrough & Guides Wiki
Monster Hunter World Walkthrough & Guides Wiki
The Legend of Zelda: Tears of the Kingdom Walkthrough & Guides Wiki
Persona 3 Reload Walkthrough & Guides Wiki
Cyberpunk 2077: Ultimate Edition Walkthrough & Guides Wiki


All rights reserved
©Gotcha Gotcha Games
The copyrights of videos of games used in our content and other intellectual property rights belong to the provider of the game.
The contents we provide on this site were created personally by members of the Game8 editorial department.
We refuse the right to reuse or repost content taken without our permission such as data or images to other sites.