How to Make a Game in 10 Minutes
RPG MAKER WITH can feel overwhelming for beginners. Stuck on your project? Ready to start creating? Check out our guide to learn how to jump into a quick project and create a game in just 10 minutes with RPG MAKER WITH.
RPG MAKER WITH can feel overwhelming for beginners. Stuck on your project? Ready to start creating? Check out our guide to learn how to jump into a quick project and create a game in just 10 minutes with RPG MAKER WITH.
List of Contents
How to Make a Game in 10 Minutes
Get Started with RPG MAKER WITH by Starting Small

Creating your first game with RPG MAKER WITH might seem straightforward, but as a beginner, you might quickly feel overwhelmed by the array of tools at your disposal and unsure of where to begin. It’s easy to get stuck before you've even placed your first tile.
Why not start with something small and manageable? In fact, you can create a simple game in just 10 minutes using RPG MAKER WITH. It might sound ambitious, but by following a few easy steps, you'll see that it’s entirely possible. All you need to do is launch RPG MAKER WITH and get started.
Using Sample Maps for Our 10-Minute Game
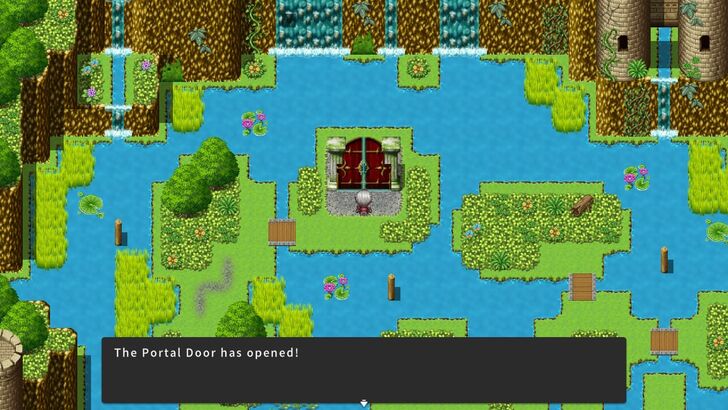
In this guide, we'll create a maze for the player to navigate. At the end of the maze, there's a locked door that requires a Key to open. Once the player finds and uses the Key, the door opens, and the game is finished.
| 1 | 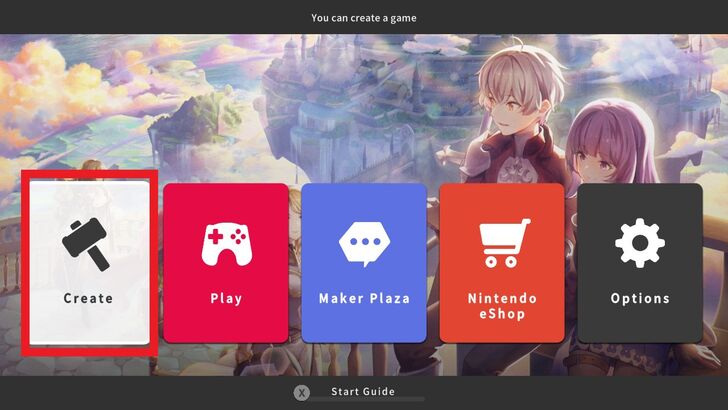 From the RPG MAKER WITH Main Menu, select Create. |
|---|---|
| 2 | 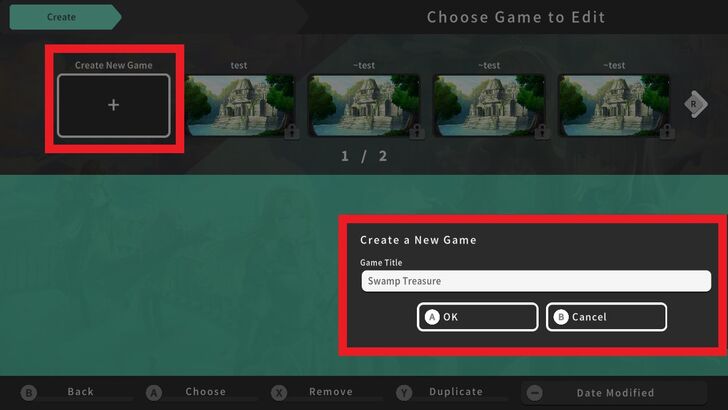 Select an empty slot and enter a title for the game. |
| 3 | 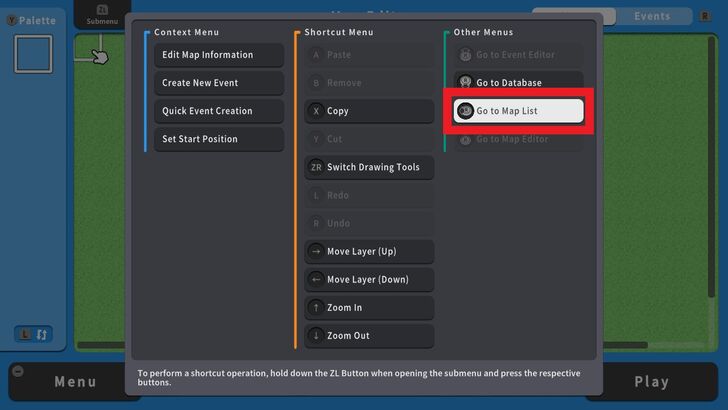 After, a blank map will appear. Instead of building from scratch, let's simplify things by using Sample Maps. Press the ZL Button and select Go to Map List to choose from pre-made options. |
| 4 | 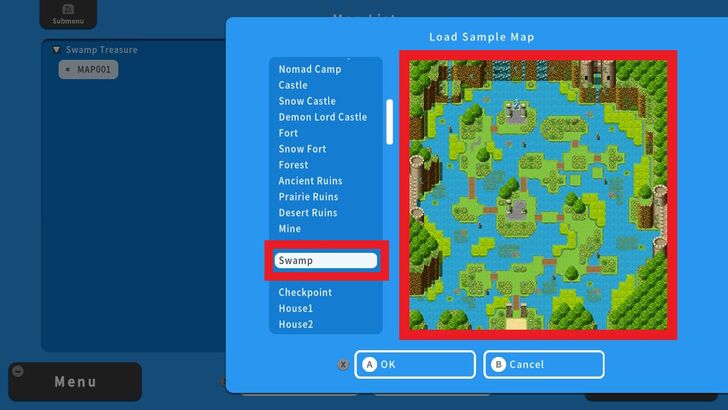 Place the cursor on Map 001, press the ZL Button and select Load Sample Maps. You can now choose from RPG MAKER WITH's library of Sample Maps. For this example, we will use Swamp since it has a maze-like pattern. |
Creating a Key and Treasure Chest Using Quick Events
Now that we have a map for our game, we'll start creating the items needed for its mechanics. We're going to create a Treasure Chest containing a Key.
| 1 | 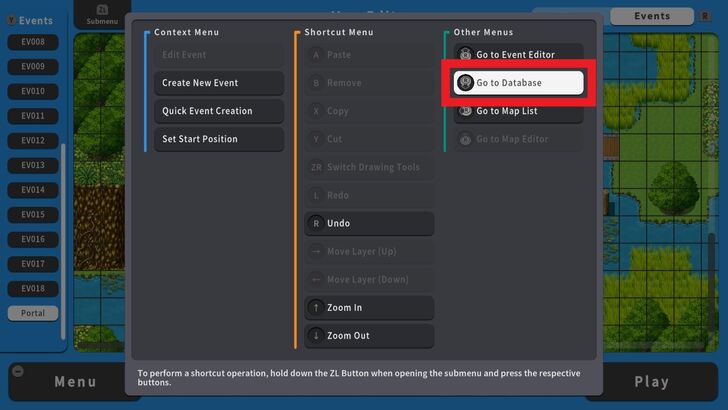 To start creating a Key, press the ZL Button and select Go to Database. |
|---|---|
| 2 |  Select an empty slot, go to Basic Settings and set the Name, choose an Icon and fill out the Description. Press OK and we have now created a Key. |
| 3 | 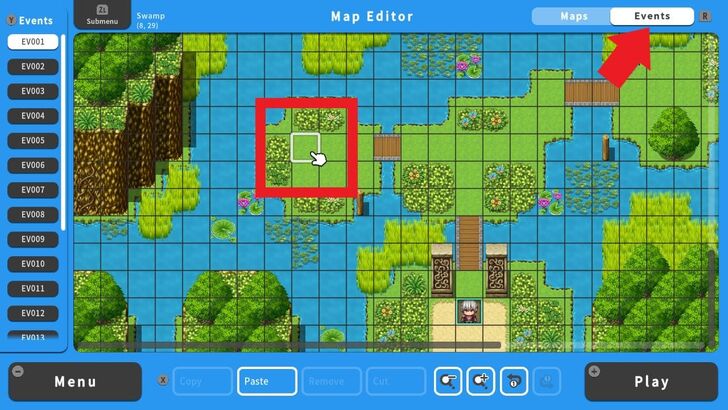 Now we're going to create a Treasure Chest that will contain our Key. To do this, switch to the Event Editor screen by pressing the R Button. Afterward, select a tile. This will be the location of the Treasure Chest. |
| 4 |  Next, press the ZL Button and select Quick Event Creation. |
| 5 | 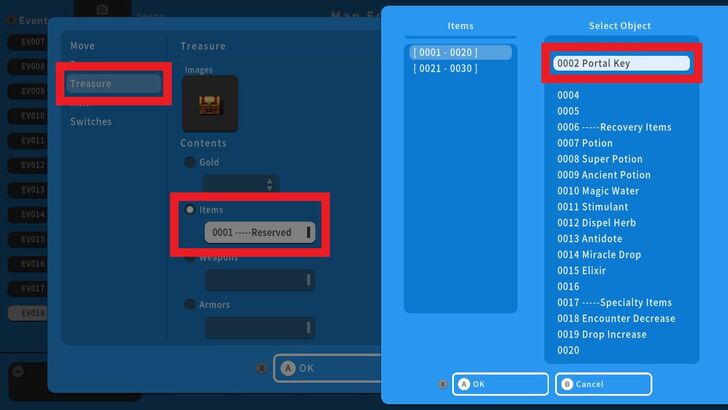 Go to Treasure. Select an Image for the Treasure Chest and go to Items. Select the Key and Press OK. We have now created a Treasure Chest with a Key inside. |
Creating the Locked Door Using Conditional Branches
The next step involves creating a locked door that will be opened using a Key. In this step, we will teach you how to create Conditional Branches and set conditions for victory.
| 1 | 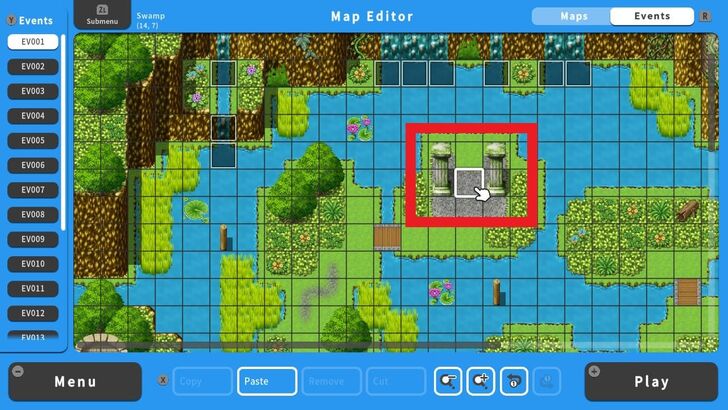 Now let's create a locked door. Select a tile to place the locked door. |
|---|---|
| 2 | 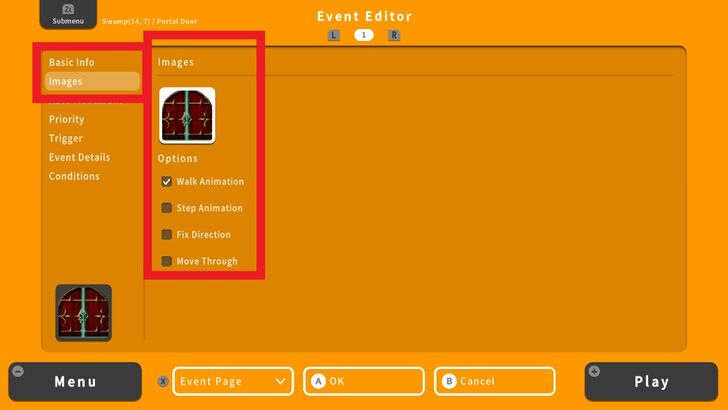 Enter the Basic Info and select an Image for the locked door. |
| 3 | 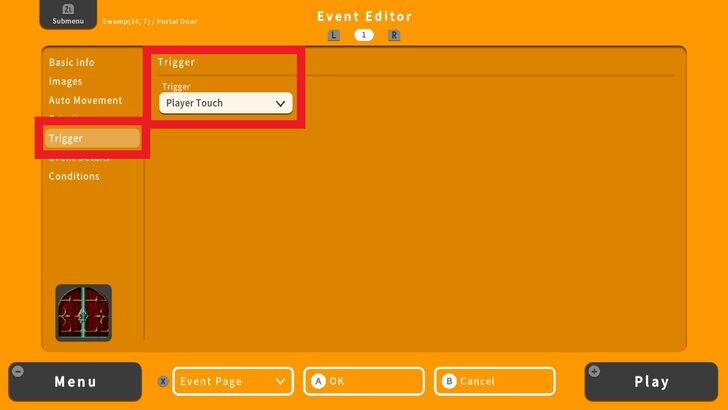 Go to Trigger and set it to Player Touch. This means that the player simply needs to touch the door to open it. |
| 4 | 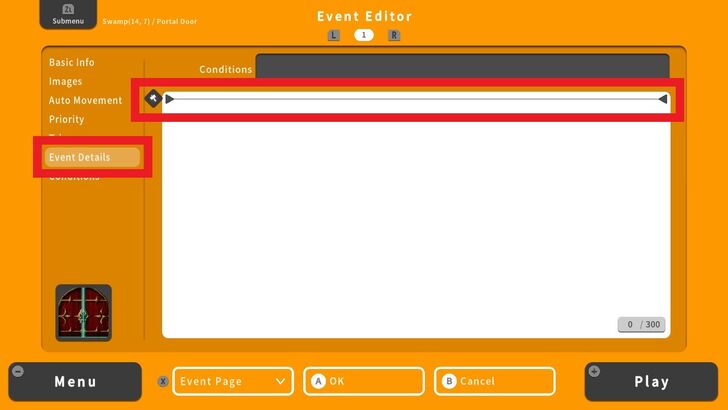 Next, head to Event Details and press the A Button to add a command line. We're going to create the conditions if the player has the Key. If not, |
| 5 | 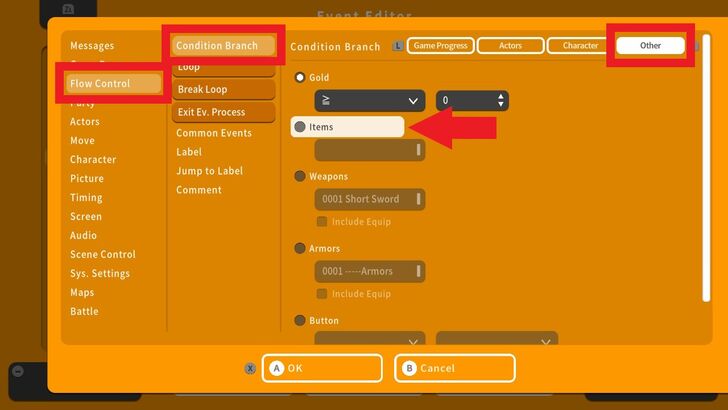 Navigate to Flow Control, choose Condition Branch and press the R Button to go to the Other tab and select Items. |
| 6 |  Choose the Key from the object list. Hover below and check Create Else Br. and Press OK. |
| 7 |  Next, place the cursor above Else and press the A Button. Go to Audio, choose Play SFX, and select from RPG MAKER WITH's library of available SFX. This sound effect will activate once the condition for opening the door is fulfilled. |
| 8 |  Add a command line below the Play SFX command by pressing the A Button. Head to Messages and choose Show Text. Fill out the Text. This message will show if the player has fulfilled the conditions for opening the door. Press OK. |
| 9 | 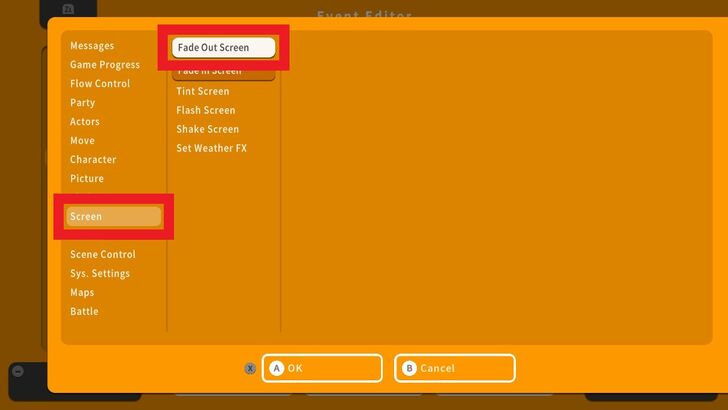 Add another command line below the Show Text command. Navigate to Screen and select Fade Out Screen. This signals the game's ending once the condition is fulfilled. Press OK. |
| 10 |  Now we're going to create a scrolling text that will show after the screen fades out. Head to Messages and choose Show Scroll Text. Fill out the Text and press OK. |
| 11 | 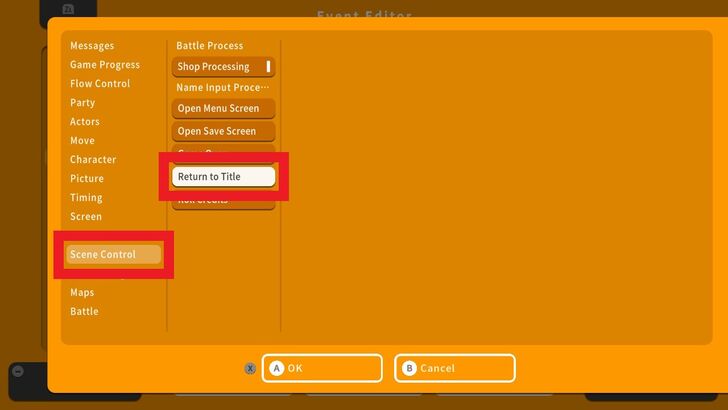 Add another command line below the scrolling text command. Go to Screen Control and select Return to Title. This means that after the scroll text, the player will return to the game's Title Screen. Press OK. |
| 12 | 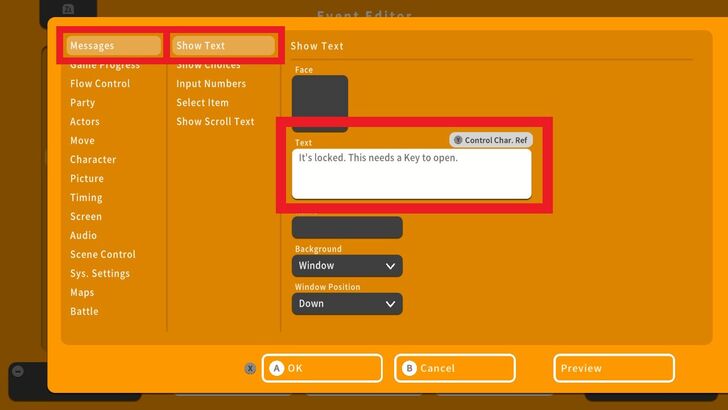 Add another command line below Else. Navigate to Messages, go to Show Text, and choose Text. Enter the Text. This Message will pop up if the player doesn't have the Key. |
| 13 | 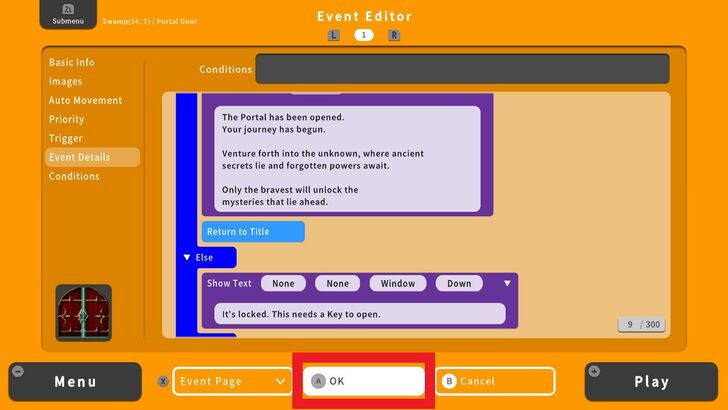 We have now completed creating the Conditional Branch for our game. Press OK to move on to the next step. |
| 14 | 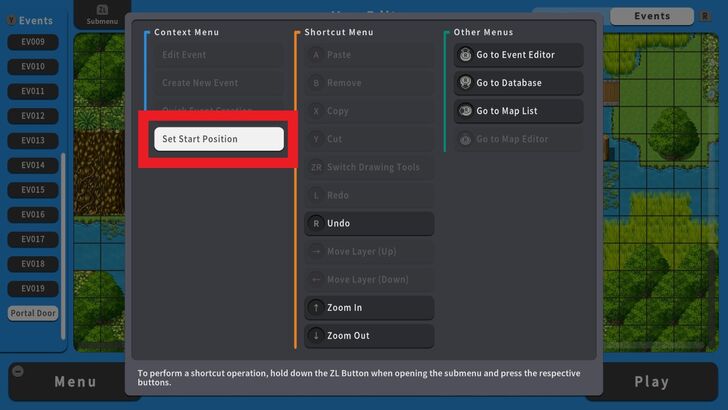 Let us now set the starting position for the player. From the Event Editor screen, select a tile press the ZL Button, and choose Set Start Position. |
Playtesting
We have completed the game's mechanics by creating its main components: the Map, a Key, and a locked door. But before we let others jump into our game, we should make it a habit to do a playtest to ensure that everything will play out smoothly.
| 1 | 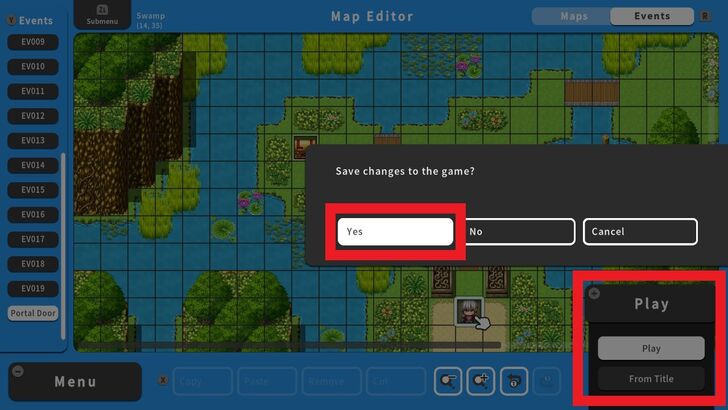 Press the + Button and select Play. Save, and let's try out our game! |
|---|---|
| 2 | 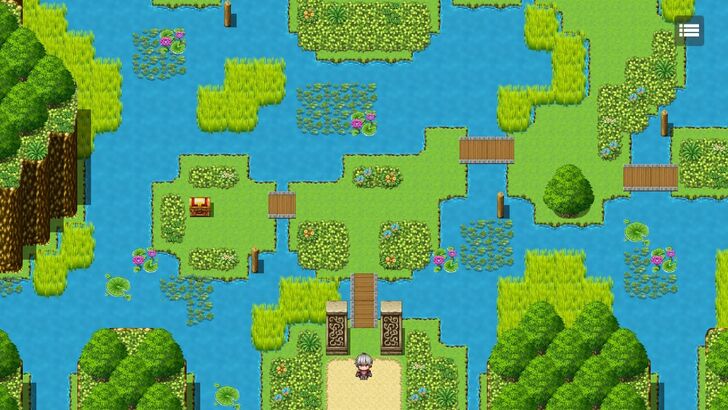 The Playtest is now loaded and our starting position is correct. Next, let's try to test what will happen if the player doesn't have the Key. |
| 3 | 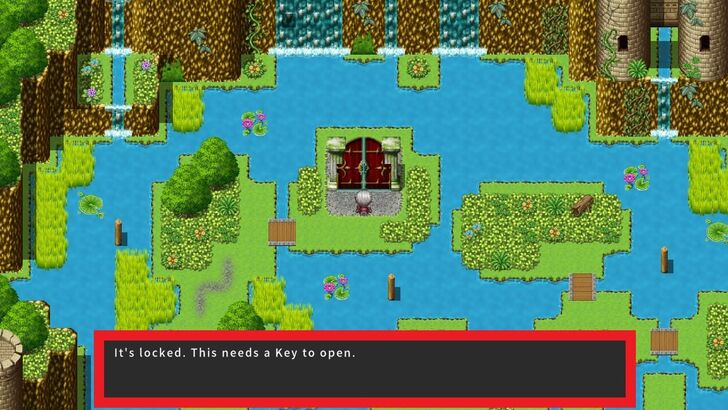 Success! The door remained locked. Let us now try obtaining the Key and opening the locked door. |
| 4 | 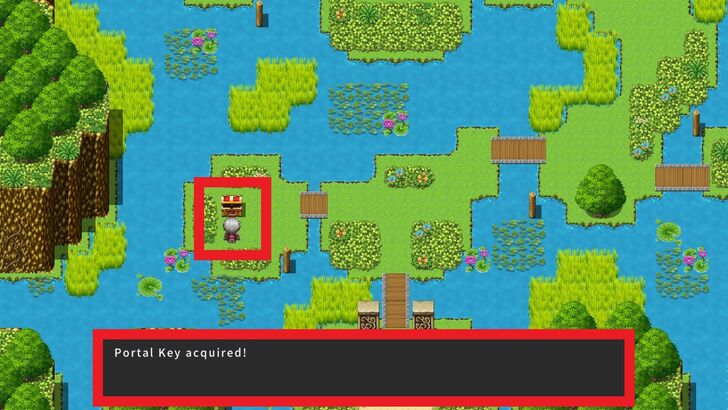 Key Obtained. Next, we'll open the locked door. |
| 5 | 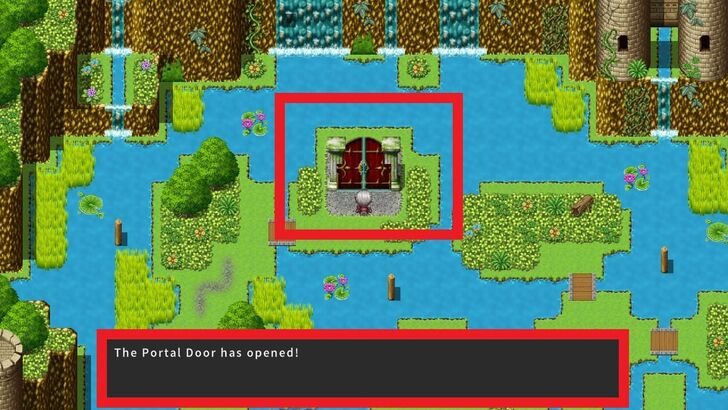 Success! The door opened. |
| 6 |  Success! The screen faded out and the scroll text message appeared. After this, we should return to the Title Screen. |
| 7 | 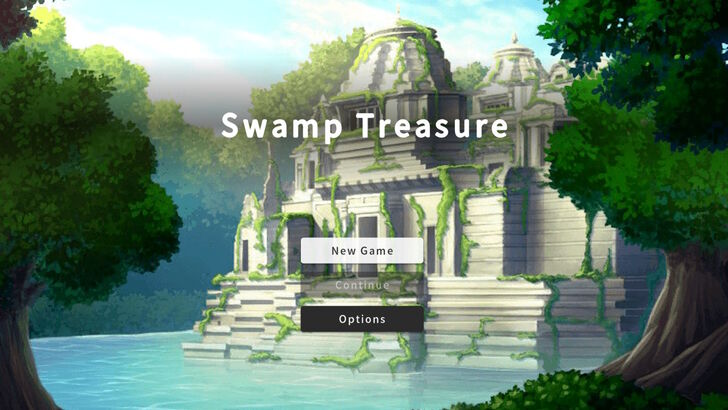 Success! We have returned to the Title Screen and the game is working perfectly. |
Where to Go From Here?
Get Started on a New Game!
Congratulations on creating your first game with RPG MAKER WITH! Now, you have two exciting paths ahead: you can either expand on your current project or dive into an entirely new one.
If you're ready to embark on a grander adventure, we’ve got a series of in-depth guides designed just for you. These guides will walk you through crafting a more expansive game - complete with a majestic castle, a bustling starting village, a treacherous dungeon teeming with enemies, and an epic final boss.
By following our step-by-step tutorials, you'll not only bring another game to life but also gain a deeper mastery of RPG MAKER WITH's tools. Ready to take your game-making skills to the next level? Let’s get started!
Beginner's Guide Part 1: Getting Started With Your RPG!
RPG MAKER WITH Related Guides
| All Basic Information Guides | |
|---|---|
| How to Make a Game in 10 Minutes | How to Use the Home Screen |
| How to Use the Editor | How to Use Tips |
| How to Check RAM and Save Data | How to Export and Upload Game Assets |
| How to Play Games Made by Other People | List of Common Terms in RPG MAKER WITH |
| How to Play the Trial Version | |
| Core Guides | |
|---|---|
| Beginner's Guide Part 1 | Beginner's Guide Part 2 |
| Tips and Tricks | |
|---|---|
| Map, Event, and Switch Naming Tips | How to Use the Flood Fill Tool |

| Core Guides | |
|---|---|
| Intermediate Guide Part 1 | Intermediate Guide Part 2 |
| Tips and Tricks | |
|---|---|
| How to Make a Switch | How to Use Map Foregrounds and Backgrounds |
| How to Change Event Text Color | |

| Core Guides | |
|---|---|
| Advanced Guide Part 1 | Advanced Guide Part 2 |
Comment
Author
How to Make a Game in 10 Minutes
Rankings
- We could not find the message board you were looking for.
Gaming News
![Neverness to Everness (NTE) Review [Beta Co-Ex Test] | Rolling the Dice on Something Special](https://img.game8.co/4414628/dd3192c8f1f074ea788451a11eb862a7.jpeg/show)


Popular Games

Genshin Impact Walkthrough & Guides Wiki
Honkai: Star Rail Walkthrough & Guides Wiki
Arknights: Endfield Walkthrough & Guides Wiki
Umamusume: Pretty Derby Walkthrough & Guides Wiki
Wuthering Waves Walkthrough & Guides Wiki
Pokemon TCG Pocket (PTCGP) Strategies & Guides Wiki
Abyss Walkthrough & Guides Wiki
Zenless Zone Zero Walkthrough & Guides Wiki
Digimon Story: Time Stranger Walkthrough & Guides Wiki
Clair Obscur: Expedition 33 Walkthrough & Guides Wiki


Recommended Games
Fire Emblem Heroes (FEH) Walkthrough & Guides Wiki
Pokemon Brilliant Diamond and Shining Pearl (BDSP) Walkthrough & Guides Wiki
Diablo 4: Vessel of Hatred Walkthrough & Guides Wiki
Super Smash Bros. Ultimate Walkthrough & Guides Wiki
Yu-Gi-Oh! Master Duel Walkthrough & Guides Wiki
Elden Ring Shadow of the Erdtree Walkthrough & Guides Wiki
Monster Hunter World Walkthrough & Guides Wiki
The Legend of Zelda: Tears of the Kingdom Walkthrough & Guides Wiki
Persona 3 Reload Walkthrough & Guides Wiki
Cyberpunk 2077: Ultimate Edition Walkthrough & Guides Wiki


All rights reserved
©Gotcha Gotcha Games
The copyrights of videos of games used in our content and other intellectual property rights belong to the provider of the game.
The contents we provide on this site were created personally by members of the Game8 editorial department.
We refuse the right to reuse or repost content taken without our permission such as data or images to other sites.