Rookie Course Walkthrough: List of Holes and How to Unlock

This guide covers all the holes found in Rookie Course, a course in Mario Golf: Super Rush. Check this walkthrough to learn about the different hazards, obstacles, and weather conditions found on this course as well as tips and strategies for each hole!
List of Contents
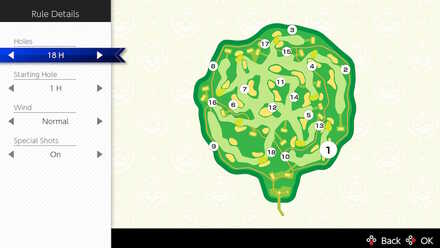
Rookie Course Map and Overview
| Rookie Course Course Map | |
|---|---|
 |
|
| Description: | A basic course perfect for beginners. |
| How to Unlock | - |
Rookie Course Weather Conditions
| Weather Conditions | |
|---|---|
 •Windy: Changes the direction of the shot depending on wind speed. |
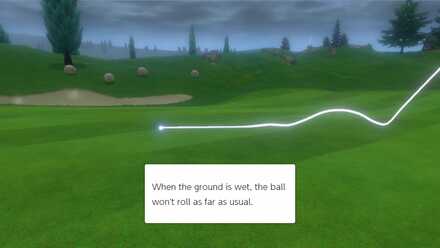 •Rainy: When the ground is wet, the ball won't roll as far as usual. |
Weather Conditions and Effects
Rookie Course List of Holes
Hole 1
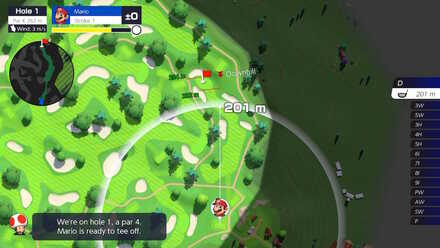
| Length | 262 m |
|---|---|
| Par | 4 |
| Slope | 6.6 m |
| Difficulty Rating | ★★☆☆☆ |
Tips for this Hole
The distance to the hole is short on this one, so prioritize control in your shots and don't set the power meter in the red. Avoid overshooting into a bunker or getting blocked by trees.
Hole 2
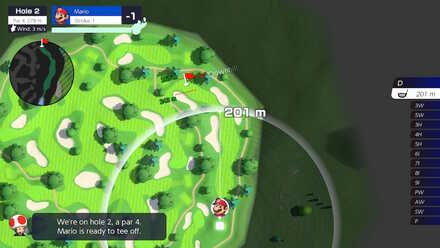
| Length | 278 m |
|---|---|
| Par | 4 |
| Slope | 3.3 m |
| Difficulty Rating | ★★☆☆☆ |
Tips for this Hole
Use the Driver for your first two shots, the first shot should land between the two bunkers. On the second shot, hold back on power with the Driver and land on the green as close to the hole as possible. Putt the ball in for a Birdie.
Hole 3
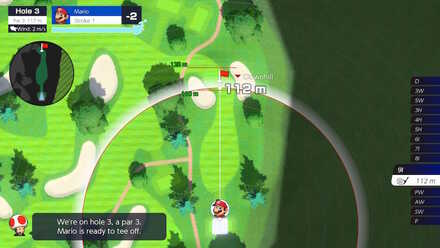
| Length | 117 m |
|---|---|
| Par | 3 |
| Slope | 3.2 m |
| Difficulty Rating | ★☆☆☆☆ |
Tips for this Hole
This is a very short hole, so use the 8I and hold back on power a bit, having the ball land before the hole. Account for wind carefully, and with luck you have a decent chance at a hole-in-one! If not, a Birdie on the second shot is still very doable.
Hole 4
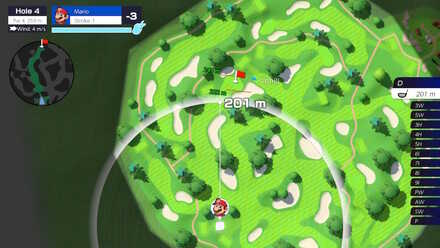
| Length | 259 m |
|---|---|
| Par | 4 |
| Slope | 4.1 m |
| Difficulty Rating | ★★☆☆☆ |
Tips for this Hole
On the first stroke, use the Driver to shoot over the bunker, but be careful that the tree to the right doesn't block your shot. On the second stroke, use the SW and make a standard shot to land on the Green close to the hole. Putt in for another Birdie on the third stroke.
Hole 5
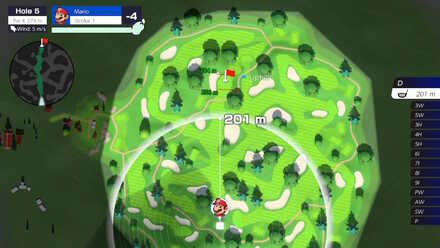
| Length | 274 m |
|---|---|
| Par | 4 |
| Slope | 4.4 m |
| Difficulty Rating | ★★★☆☆ |
Tips for this Hole
Shoot the ball so that it lands just past the two bunkers on the first stroke. Next, use the AW and account for wind. With luck you can get an Eagle here on stroke 2. If not, aim for a birdie on stroke 3 and putt the ball in.
Hole 6
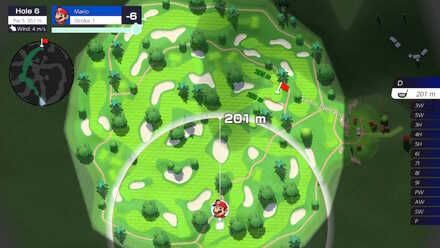
| Length | 351 m |
|---|---|
| Par | 5 |
| Slope | No Slope |
| Difficulty Rating | ★★☆☆☆ |
Tips for this Hole
Don't pass the sharp curve route highlighted in green on the minimap. Instead, take the relatively straightforward path at the tee box's 1 o'clock. Stop before the two trees blocking the path to the hole, then your second stroke will aim to fly above those trees and the bunker in order to land on the green. Landing in the green for the third stroke, will allow you to putt for an Eagle.
Hole 7
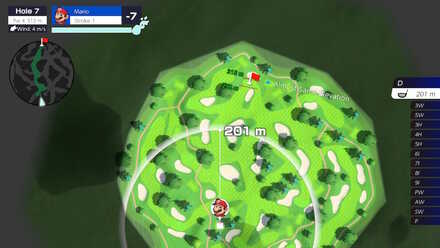
| Length | 312 m |
|---|---|
| Par | 4 |
| Slope | 1.0 m |
| Difficulty Rating | ★★☆☆☆ |
Tips for this Hole
Use the Driver to land between the two bunkers on stroke 1. On stroke 2, use the 7I or 8I to land on the Green, being careful of the bunkers near the hole. On stroke 3, putt in for a Birdie.
Hole 8
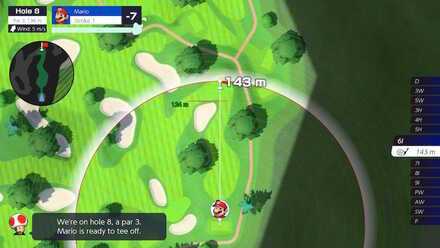
| Length | 136 m |
|---|---|
| Par | 3 |
| Slope | 4.6 m |
| Difficulty Rating | ★☆☆☆☆ |
Tips for this Hole
The distance to the hole is very short here, so account for wind and use the 6I holding back on power so the ball rolls in close to the hole. If you are lucky, you may get a hole-in-one on stroke 1, but if not a Birdie on stroke 2 is the goal.
Hole 9
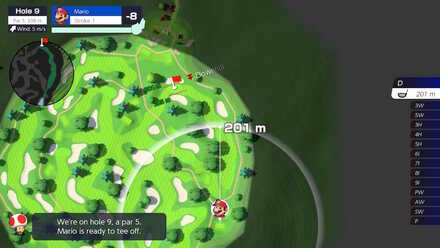
| Length | 338 m |
|---|---|
| Par | 5 |
| Slope | 5.0 m |
| Difficulty Rating | ★★☆☆☆ |
Tips for this Hole
On stroke 1, use the Driver and try to get close to the center of two bunkers, being careful of the trees to the left. Stroke 2 can be tricky, since you will want to curve the shot by moving the analog stick after setting the power. Use the 7I and try to land on the Green with a curved shot. If done correctly, you have the chance at an Eagle Putt on stroke 3.
Hole 10
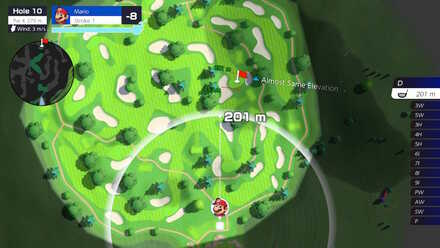
| Length | 270 m |
|---|---|
| Par | 4 |
| Slope | 0.8 m |
| Difficulty Rating | ★★★☆☆ |
Tips for this Hole
On stroke 1, use the Driver to land between the bunker and the tree. On stroke 2 use the AW for either a potential Eagle, or to land on the Green. Putt in on stroke 3 for a Birdie.
Hole 11
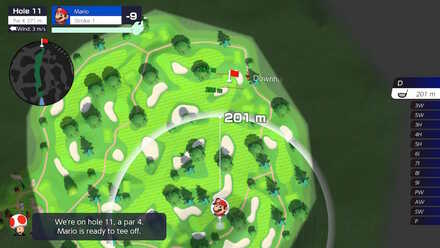
| Length | 271 m |
|---|---|
| Par | 4 |
| Slope | 4.1 m |
| Difficulty Rating | ★★★☆☆ |
Tips for this Hole
Use the driver on stroke 1 to get as close to the hole as possible, being careful of the tree to your left. On stroke 2, use the AW to land on the Green. On stroke 3, putt in for another Birdie.
Hole 12
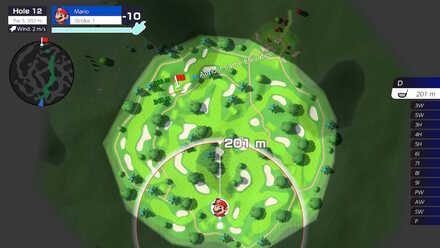
| Length | 392 m |
|---|---|
| Par | 5 |
| Slope | 1.6 m |
| Difficulty Rating | ★★★☆☆ |
Tips for this Hole
Hole 12 has a long distance, so don't hold back on power here. Use the Driver on stroke 1 to get between the first set of bunkers. On stroke 2, use the 5I to land on the Fairway past the tree and bunker straight ahead. On stroke 3, use the SW and a standard shot, account for wind and set the power carefully for a potential Eagle. If not, on stroke 4, putt in for a Birdie.
Hole 13
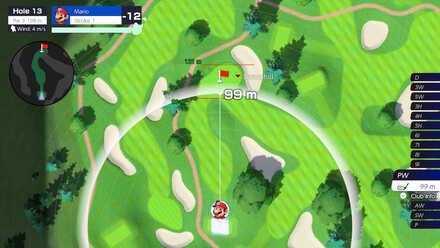
| Length | 108 m |
|---|---|
| Par | 3 |
| Slope | 2.9 m |
| Difficulty Rating | ★☆☆☆☆ |
Tips for this Hole
Hole 13 is another very short distance hole. Use the 9I, account for wind, and carefully set the power for a potential hole-in-one. If not, you can get a Birdie Putt on stroke 2.
Hole 14
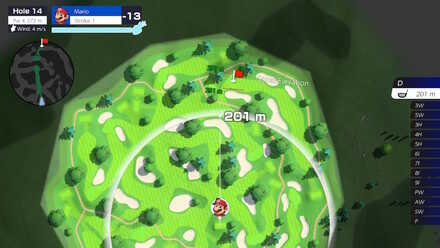
| Length | 272 m |
|---|---|
| Par | 4 |
| Slope | No Slope |
| Difficulty Rating | ★★★☆☆ |
Tips for this Hole
Depending on your character's power, you might be able to clear the bunker on stroke 1, but if not, have the ball land on the Fairway just short of the bunker. From the point just before the bunker, use the PW with a standard shot for a potential Eagle. If not, land on the Green and aim for a Birdie on stroke 3.
Hole 15
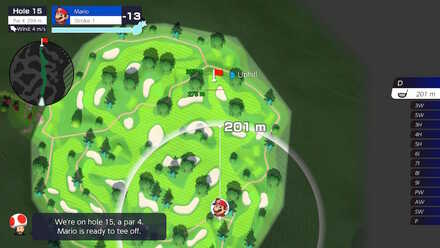
| Length | 294 m |
|---|---|
| Par | 4 |
| Slope | 7.1 m |
| Difficulty Rating | ★★☆☆☆ |
Tips for this Hole
Use the Driver on stroke 1 to land between the bunkers. On stroke 2 use the PW with a standard shot for a potential Eagle. If not, land on the Green and aim for a Birdie.
Alternatively, if your character has a high power stat, you can use a special shot on stroke 1 to land on the Green and go for an Eagle Putt on Stroke 2.
Hole 16
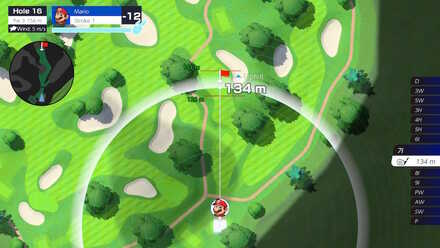
| Length | 156 m |
|---|---|
| Par | 3 |
| Slope | 4.7 m |
| Difficulty Rating | ★☆☆☆☆ |
Tips for this Hole
Hole 16 is very short in distance, so you have a chance at a hole-in-one on stroke 1 using the 6I. If not, land on the Green for a Birdie on stroke 2.
Hole 17
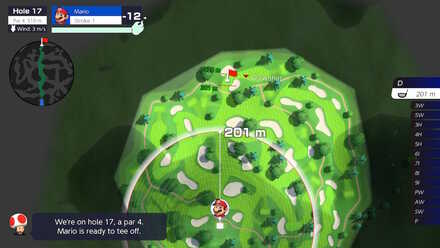
| Length | 310 m |
|---|---|
| Par | 4 |
| Slope | 2.2 m |
| Difficulty Rating | ★★☆☆☆ |
Tips for this Hole
Aim for the center of the intersection on the fairway on stroke 1 with the Driver. On stroke 2, use the 9I and aim for an Eagle, accounting for weather conditions. If not, take the Birdie Putt on stroke 3.
Hole 18
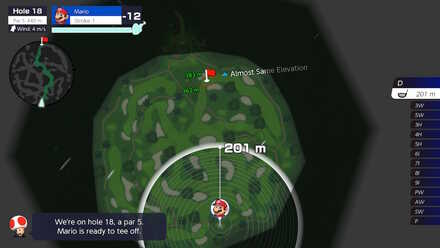
| Length | 440 m |
|---|---|
| Par | 5 |
| Slope | No Slope |
| Difficulty Rating | ★★★☆☆ |
Tips for this Hole
On stroke 1, aim to land between the first set of bunkers using the Driver or 3W if you are worried about landing in the bunker. On Stroke 2, shoot over the bunker in front of you, being careful of the tree to the left, to land on the Green. On stroke 3, you can get a nice Eagle Putt to end the course.
Rookie Course Obstacles and Hazards
| Obstacles and Hazards | |
|---|---|
 Trees Trees |
Trees can stand in the way of your shot. Appears on each hole of the Rookie Course. |
 Bunkers
 |
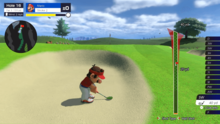
Landing in a bunker will hinder your control and will require more power in the next shot to get back out. Appears on each hole of the Rookie Course. |
Mario Golf Super Rush Related Guides
| Main Courses | ||
|---|---|---|
 Rookie Course Rookie Course |
 Bonny Greens Bonny Greens |
 Ridgerock Lake Ridgerock Lake |
 Balmy Dunes Balmy Dunes |
 Wildweather Woods Wildweather Woods |
 Bowser Highlands Bowser Highlands |
 New Donk City New Donk City |
 Blustery Basin Blustery Basin |
 Spiky Palms Spiky Palms |
| Battle Golf Stadium Courses | |
|---|---|
 Strategic Strategic |
 Technical Technical |
Author
Rookie Course Walkthrough: List of Holes and How to Unlock
Rankings
- We could not find the message board you were looking for.
Gaming News
Popular Games

Genshin Impact Walkthrough & Guides Wiki

Honkai: Star Rail Walkthrough & Guides Wiki

Umamusume: Pretty Derby Walkthrough & Guides Wiki

Pokemon Pokopia Walkthrough & Guides Wiki

Resident Evil Requiem (RE9) Walkthrough & Guides Wiki

Monster Hunter Wilds Walkthrough & Guides Wiki

Wuthering Waves Walkthrough & Guides Wiki

Arknights: Endfield Walkthrough & Guides Wiki

Pokemon FireRed and LeafGreen (FRLG) Walkthrough & Guides Wiki

Pokemon TCG Pocket (PTCGP) Strategies & Guides Wiki
Recommended Games

Diablo 4: Vessel of Hatred Walkthrough & Guides Wiki

Cyberpunk 2077: Ultimate Edition Walkthrough & Guides Wiki

Fire Emblem Heroes (FEH) Walkthrough & Guides Wiki

Yu-Gi-Oh! Master Duel Walkthrough & Guides Wiki

Super Smash Bros. Ultimate Walkthrough & Guides Wiki

Pokemon Brilliant Diamond and Shining Pearl (BDSP) Walkthrough & Guides Wiki

Elden Ring Shadow of the Erdtree Walkthrough & Guides Wiki

Monster Hunter World Walkthrough & Guides Wiki

The Legend of Zelda: Tears of the Kingdom Walkthrough & Guides Wiki

Persona 3 Reload Walkthrough & Guides Wiki
All rights reserved
© Nintendo / CAMELOT. Mario Golf and Nintendo Switch are trademarks of Nintendo. © 2021 Nintendo.
The copyrights of videos of games used in our content and other intellectual property rights belong to the provider of the game.
The contents we provide on this site were created personally by members of the Game8 editorial department.
We refuse the right to reuse or repost content taken without our permission such as data or images to other sites.


![Monster Hunter Stories 3 Review [First Impressions] | Simply Rejuvenating](https://img.game8.co/4438641/2a31b7702bd70e78ec8efd24661dacda.jpeg/show)


![Monster Hunter Stories 3 Review [First Impressions] | Simply Rejuvenating](https://img.game8.co/4438641/2a31b7702bd70e78ec8efd24661dacda.jpeg/thumb)


