Blustery Basin Course Walkthrough: List of Holes and How to Unlock
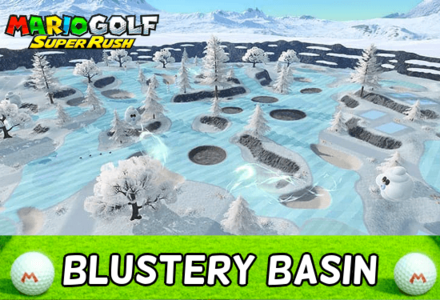
This guide covers all the holes found in Blustery Basin, a course in Mario Golf: Super Rush. Check here to learn about the different hazards, obstacles, and weather conditions found on this course as well as tips and strategies for each hole!
List of Contents
Course Map and Overview
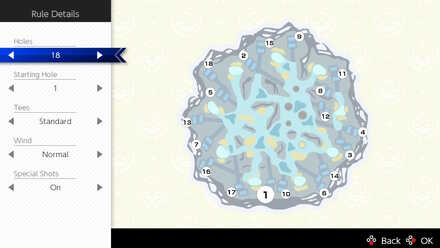
| Blustery Basin Course Map | |
|---|---|
 |
|
| Description: | A snowy, mountainous course prone to strong crosswinds from Ty-foos and blizzards that affect how the ball rolls |
| How to Unlock | Released on update 3.0.0 |
Weather Conditions
| Weather Conditions: |
|---|
 •Windy: Changes the direction of the shot depending on wind speed. |
Weather Conditions and Effects
List of Holes
Hole 1
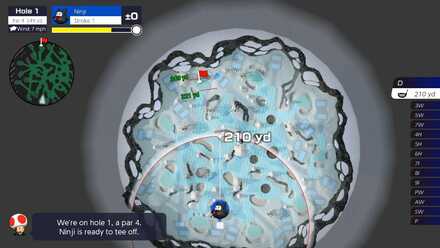
| Length | 308m |
|---|---|
| Par | 4 |
| Slope | 3.8 m |
| Difficulty Rating | ★★★☆☆ |
Tips for this Hole
On your first stroke, watch out for the trees on your right and aim for the freeway before the bunker. If you aim carefully, you can get an eagle on stroke 2 or aim for the green and get a birdie.
Hole 2
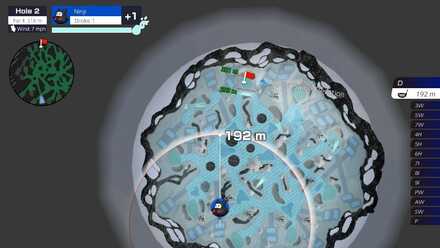
| Length | 318 m |
|---|---|
| Par | 4 |
| Slope | 1.9 m |
| Difficulty Rating | ★★☆☆☆ |
Tips for this Hole
If you have high enough power, you can aim past the large ice pool. If not, aim slightly to the left. With luck, you can get the ball in the hole on your second stroke or aim for the green and get it in on the third.
Hole 3
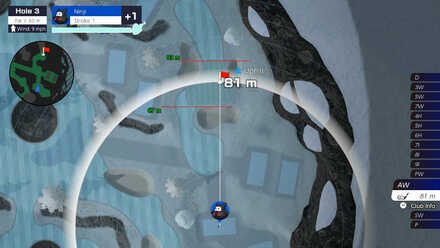
| Length | 80 m |
|---|---|
| Par | 3 |
| Slope | 6.3 m |
| Difficulty Rating | ★☆☆☆☆ |
Tips for this Hole
If you are lucky, it is possible to get a hole-in-one in this hole. Just make sure to watch out for the Ty-foo right above the hole.
Hole 4
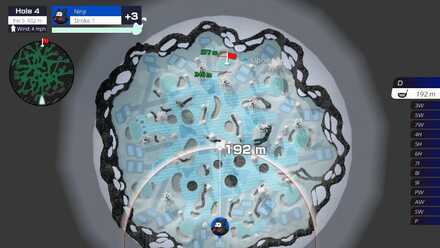
| Length | 402 m |
|---|---|
| Par | 5 |
| Slope | 4.2 m |
| Difficulty Rating | ★★★★☆ |
Tips for this Hole
Aim to the left of the tall tree on your first stroke. With a little luck, you can get your ball on the green by stroke 2 and get an eagle putt.
Hole 5
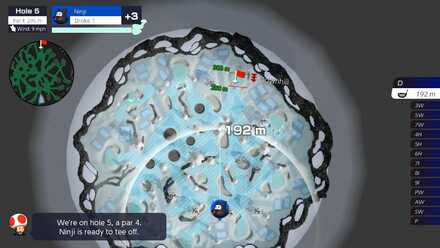
| Length | 295 m |
|---|---|
| Par | 4 |
| Slope | 10.1 m |
| Difficulty Rating | ★★★☆☆ |
Tips for this Hole
Aim your shot slightly to the left to pass in between the two collection of trees. If you aim carefully, you can get your ball on the green by stroke 2 and get a birdie.
Hole 6
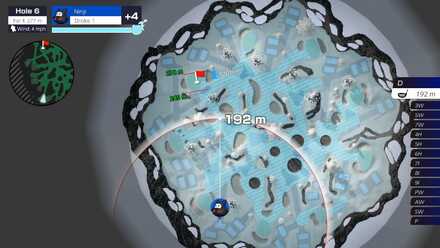
| Length | 277 m |
|---|---|
| Par | 4 |
| Slope | 12.8 m |
| Difficulty Rating | ★★★☆☆ |
Tips for this Hole
Aim for the patch of grass before the bunker on your first stroke. If you cannot get a lucky eagle shot, land on the green and aim for a birdie on the next stroke.
Hole 7
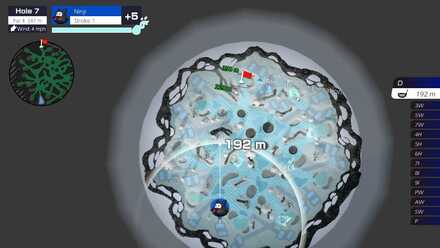
| Length | 347 m |
|---|---|
| Par | 4 |
| Slope | 0.9 m |
| Difficulty Rating | ★☆☆☆☆ |
Tips for this Hole
On your first stroke, aim your ball to the patch of grass behind the Ty-foo. If you aim carefully, you can get the ball into the hole on the second stroke or land on the green for a birdie.
Hole 8
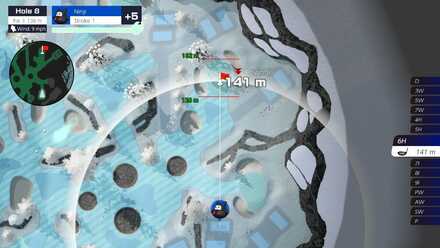
| Length | 138 m |
|---|---|
| Par | 3 |
| Slope | 7 m |
| Difficulty Rating | ★☆☆☆☆ |
Tips for this Hole
Because the hole is short, it is easy to get a hole-in-one with careful aiming.
Hole 9
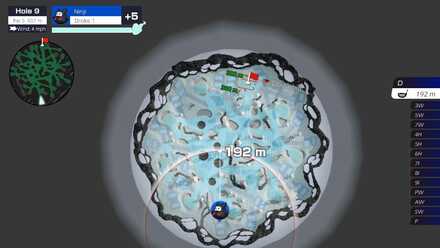
| Length | 407 |
|---|---|
| Par | 5 |
| Slope | 3 m |
| Difficulty Rating | ★★★☆☆ |
Tips for this Hole
Aim your shot slightly to the right to weave your ball in between the trees. Use your second stroke to land your ball closer to the green and get an eagle on your thrid stroke or a birdie on your fourth.
Hole 10
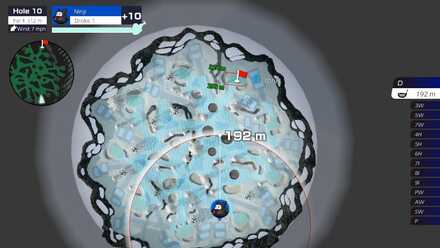
| Length | 312 m |
|---|---|
| Par | 4 |
| Slope | 17.5 m |
| Difficulty Rating | ★☆☆☆☆ |
Tips for this Hole
On your frist stroke, aim for the patch of grass in the middle of the ice pools. From here, you can easily get on the green on your second stroke and get a birdie putt on your third.
Hole 11
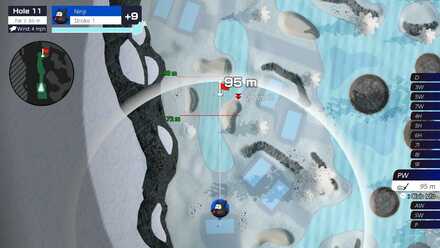
| Length | 86 m |
|---|---|
| Par | 3 |
| Slope | 8.2 m |
| Difficulty Rating | ★★☆☆☆ |
Tips for this Hole
Hole 11 is short, so it is possible to get a hole-in-one with careful aiming. Just watch out for the Ty-foo above the hole and be careful not to overshoot your ball and land in the bunker.
Hole 12
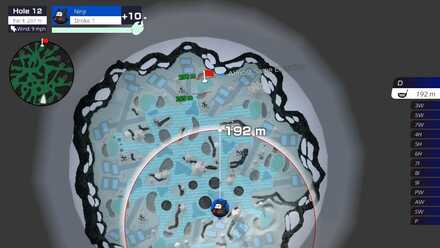
| Length | 297 m |
|---|---|
| Par | 4 |
| Slope | 1.6 m |
| Difficulty Rating | ★★★☆☆ |
Tips for this Hole
Aim your ball past the first Ty-foo and right of the bunker. Get your ball on the green on your second stroke to get a birdie. You may need to curve your shot here if it is blocked by the tree. You can also aim straight for the hole on your second stroke to get an eagle.
Hole 13
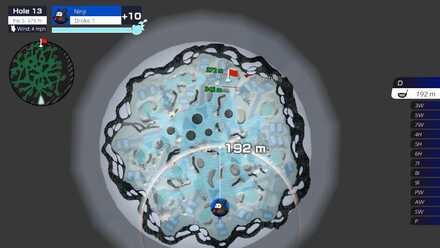
| Length | 374 m |
|---|---|
| Par | 5 |
| Slope | 4.5 m |
| Difficulty Rating | ★★★★☆ |
Tips for this Hole
Curve your ball to the right to get around the first tree and land on the fairway. If possible, land your ball on or near the green on your second stroke to get an eagle on your third. You can also use your second stroke to get closer to the green and get a birdie instead on your fourth.
Tips for this Hole
Hole 14
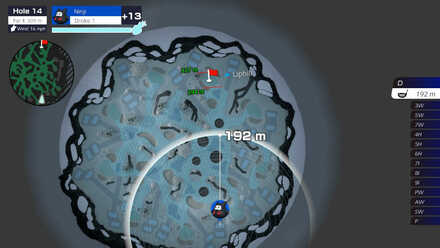
| Length | 309 m |
|---|---|
| Par | 4 |
| Slope | 3.1 m |
| Difficulty Rating | ★★☆☆☆ |
Tips for this Hole
Aim your shot in between the two trees in front of you and land near the ice pools. If you are lucky, you can get the ball on the green on your second stroke and get a birdie.
Hole 15
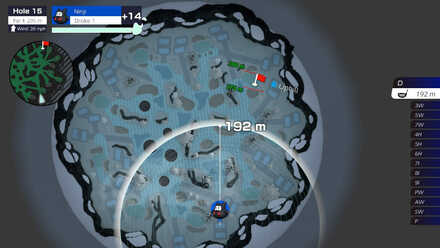
| Length | 295 m |
|---|---|
| Par | 4 |
| Slope | 9.2 m |
| Difficulty Rating | ★★☆☆☆ |
Tips for this Hole
Aim for the grass patch to the right of the bunker, but watch out for the tree blocking the path. With careful aim, you can get an eagle on stroke 2 or get the ball on the green and get a birdie.
Hole 16
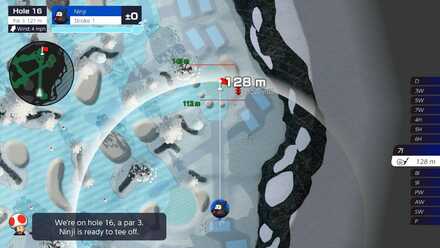
| Length | 121 m |
|---|---|
| Par | 3 |
| Slope | 14 m |
| Difficulty Rating | ★☆☆☆☆ |
Tips for this Hole
This is another short hole where you could possibly get a hole-in-one. Just watch out for the Ty-foo above the hole and the bunkers surrounding the green.
Hole 17
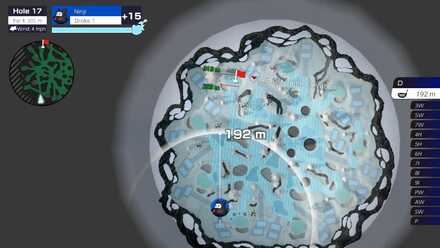
| Length | 305 m |
|---|---|
| Par | 4 |
| Slope | No slope |
| Difficulty Rating | ★★☆☆☆ |
Tips for this Hole
Aim for the grass patch straight ahead. You could use one of the Snow Pokeys to stop your ball and prevent you from overshooting. From here, you can easily get on the green on your next stroke or possibly get an eagle.
Hole 18
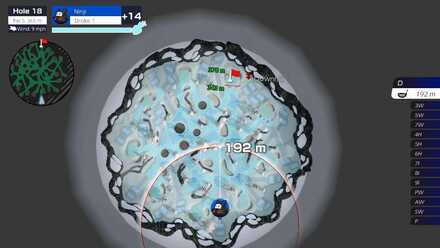
| Length | 365 m |
|---|---|
| Par | 5 |
| Slope | 6.2 m |
| Difficulty Rating | ★★★☆☆ |
Tips for this Hole
Aim straight ahead on your first stroke while watching out for the Snow Pokeys in your path. If you are lucky, you can get the ball on the green on your second stroke and get an eagle putt.
Obstacles and Hazards
| Obstacles and Hazards | |
|---|---|
 |
Landing in a bunker will hinder your control and will require more power in the next shot to get back out. Appears on all holes of the Blustery Basin course. |
 Trees
Trees |
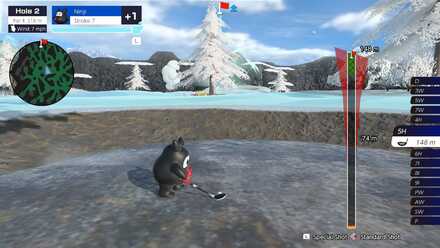
Trees can stand in the way of your shot. |
 |
Ice Pools increase the roll distance of balls that land on them and also make balls bounce off them. The slippery surface makes it difficult to run over them. Appears on hole 2, 4, 7, 9, 10, 12, 13, 14. |
 Ty-Foos Ty-Foos |
Ty-Foos can blow your shot off course with their powerful breath. Appears on hole 1, 2, 3, 4, 5, 7, 9, 10, 11, 12, 13, 14, 15, 16, 17, 18. |
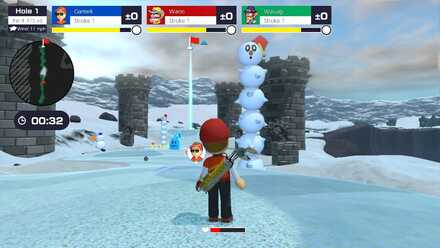 |
Snow Pokeys are tall obstacles that can can block your shots. Hitting it will drop coins and make the entire obstacle collapse. Appears on hole 1, 4, 5, 7, 12, 13, 15, 17, 18. |
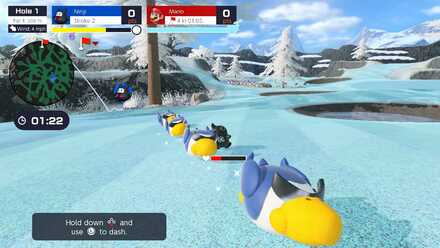 |
Cooligans slide around the fairways to block shots and knock down players. Hitting one will also drop a coin. Appears on hole 1, 2, 4, 5, 6, 7, 9, 10, 12, 13, 14, 15, 18. |
Mario Golf Super Rush Related Guides
| Main Courses | ||
|---|---|---|
 Rookie Course Rookie Course |
 Bonny Greens Bonny Greens |
 Ridgerock Lake Ridgerock Lake |
 Balmy Dunes Balmy Dunes |
 Wildweather Woods Wildweather Woods |
 Bowser Highlands Bowser Highlands |
 New Donk City New Donk City |
 Blustery Basin Blustery Basin |
 Spiky Palms Spiky Palms |
| Battle Golf Stadium Courses | |
|---|---|
 Strategic Strategic |
 Technical Technical |
Author
Blustery Basin Course Walkthrough: List of Holes and How to Unlock
Rankings
- We could not find the message board you were looking for.
Gaming News
Popular Games

Genshin Impact Walkthrough & Guides Wiki

Honkai: Star Rail Walkthrough & Guides Wiki

Umamusume: Pretty Derby Walkthrough & Guides Wiki

Pokemon Pokopia Walkthrough & Guides Wiki

Resident Evil Requiem (RE9) Walkthrough & Guides Wiki

Monster Hunter Wilds Walkthrough & Guides Wiki

Wuthering Waves Walkthrough & Guides Wiki

Arknights: Endfield Walkthrough & Guides Wiki

Pokemon FireRed and LeafGreen (FRLG) Walkthrough & Guides Wiki

Pokemon TCG Pocket (PTCGP) Strategies & Guides Wiki
Recommended Games

Diablo 4: Vessel of Hatred Walkthrough & Guides Wiki

Cyberpunk 2077: Ultimate Edition Walkthrough & Guides Wiki

Fire Emblem Heroes (FEH) Walkthrough & Guides Wiki

Yu-Gi-Oh! Master Duel Walkthrough & Guides Wiki

Super Smash Bros. Ultimate Walkthrough & Guides Wiki

Pokemon Brilliant Diamond and Shining Pearl (BDSP) Walkthrough & Guides Wiki

Elden Ring Shadow of the Erdtree Walkthrough & Guides Wiki

Monster Hunter World Walkthrough & Guides Wiki

The Legend of Zelda: Tears of the Kingdom Walkthrough & Guides Wiki

Persona 3 Reload Walkthrough & Guides Wiki
All rights reserved
© Nintendo / CAMELOT. Mario Golf and Nintendo Switch are trademarks of Nintendo. © 2021 Nintendo.
The copyrights of videos of games used in our content and other intellectual property rights belong to the provider of the game.
The contents we provide on this site were created personally by members of the Game8 editorial department.
We refuse the right to reuse or repost content taken without our permission such as data or images to other sites.


![Monster Hunter Stories 3 Review [First Impressions] | Simply Rejuvenating](https://img.game8.co/4438641/2a31b7702bd70e78ec8efd24661dacda.jpeg/show)


![Monster Hunter Stories 3 Review [First Impressions] | Simply Rejuvenating](https://img.game8.co/4438641/2a31b7702bd70e78ec8efd24661dacda.jpeg/thumb)


