Bowser Highlands Course Walkthrough: List of Holes and How to Unlock
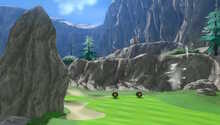
This guide covers all the holes found in Bowser Highlands, a course in Mario Golf: Super Rush. Check this walkthrough to learn about the different hazards, obstacles, and weather conditions found on this course as well as tips and strategies for each hole!
List of Contents
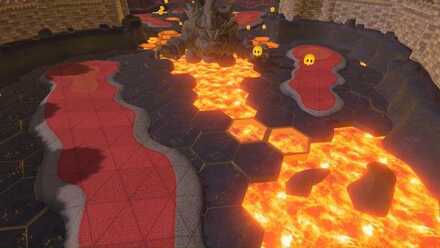
Bowser Highlands Course Map and Overview
| Bowser Highlands Course Map | |
|---|---|
 |
|
| Description: | A hazardous course designed by Bowser to challenge Mario. |
| How to Unlock | Play 18 Holes on Wildweather Woods. |
Bowser Highlands Adventure Walkthrough
Bowser Highlands Course Weather Conditions
| Weather Conditions: |
|---|
 •Windy: Changes the direction of the shot depending on wind speed. |
Weather Conditions and Effects
Bowser Highlands Course List of Holes
Hole 1
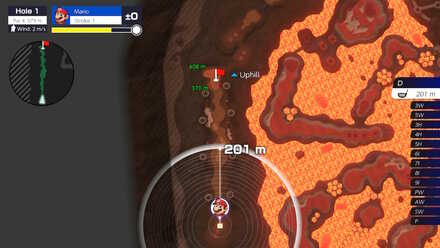
| Length | 379 m |
|---|---|
| Par | 4 |
| Slope | 2.2 m |
| Difficulty Rating | ★★★☆☆ |
Tips for this Hole
On stroke 1, use the Driver to land on the Fairway toward the center. This patch of Fairway slopes a bit so use backspin on your first stroke. On stroke 2, use the driver again and aim for the Green. Take the Birdie Putt on stroke 3.
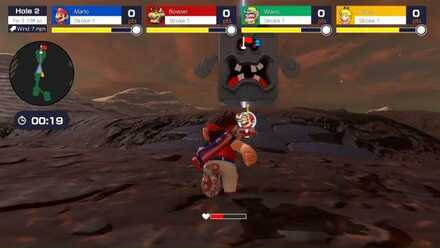
Hole 2
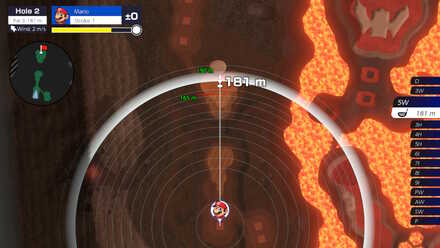
| Length | 181 m |
|---|---|
| Par | 3 |
| Slope | 3.6 m |
| Difficulty Rating | ★☆☆☆☆ |
Tips for this Hole
This is a short distance hole, so use the 5W to aim straight for the Green, avoiding the Whomp standing in the center. Take a careful Birdie Putt on stroke 2.
Hole 3

| Length | 518 m |
|---|---|
| Par | 5 |
| Slope | 1.4 m |
| Difficulty Rating | ★★★☆☆ |
Tips for this Hole
Use the Driver and aim for the patch of Fairway to the right on stroke 1. Aim for the Green on stroke 2. You may need to be using a character with a high power stat here. Once on the Green take an Eagle Putt on stroke 3.
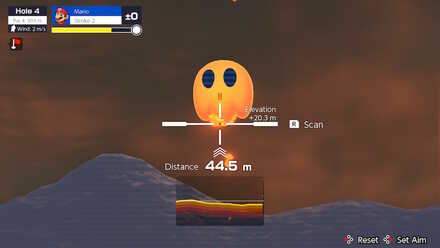
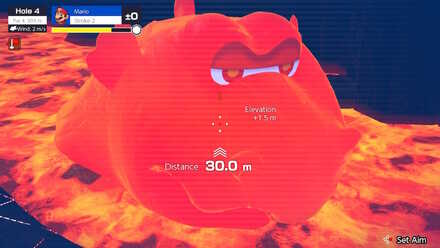
Hole 4
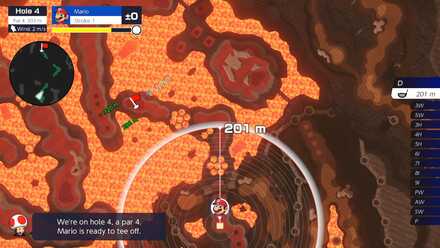
| Length | 393 m |
|---|---|
| Par | 4 |
| Slope | 2.8 m |
| Difficulty Rating | ★★★★☆ |
Tips for this Hole
Aim for the bit of Fairway straight ahead with the Driver. Don't worry about the bridge. Your shot should pass straight over it. On stroke 2, use the 5W and make it over to the Green. Take a careful putt accounting for the slope for another Birdie.
Hole 5
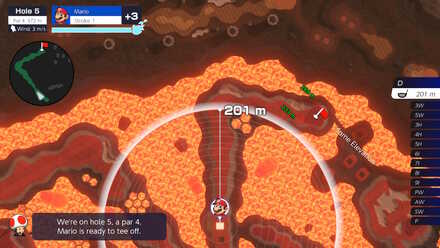
| Length | 372 m |
|---|---|
| Par | 4 |
| Slope | No slope |
| Difficulty Rating | ★★★☆☆ |
Tips for this Hole
Aim straight with the Driver on stroke 1 and use the 5H on stroke 2 to make it onto the Green. Take a Birdie Putt on stroke 3.
If you are using a character with a high power stat such as Bowser, use a special shot on this hole on stroke 1 to land directly on the Green and go for an Eagle Putt on stroke 2.
Hole 6
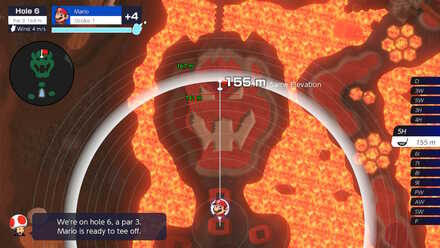
| Length | 164 |
|---|---|
| Par | 3 |
| Slope | 1.2 m |
| Difficulty Rating | ★☆☆☆☆ |
Tips for this Hole
This is a short distance hole, so use the 7W and aim straight for the hole and avoid the Bowser-shaped bunkers. Take a Birdie on stroke 2.
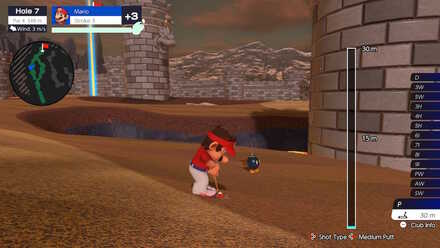
Hole 7
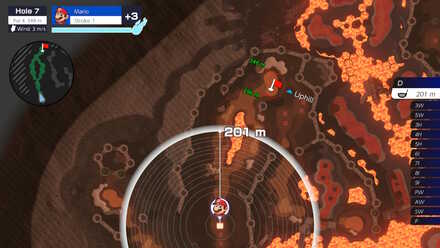
| Length | 348 m |
|---|---|
| Par | 4 |
| Slope | 2.3 m |
| Difficulty Rating | ★★★☆☆ |
Tips for this Hole
Aim for the Fairway on the left with the Driver for stroke 1. On stroke 2, make use the 5H and make it to the Green for a Birdie on stroke 3.
Hole 8

| Length | 361 |
|---|---|
| Par | 4 |
| Slope | 6.5 m |
| Difficulty Rating | ★★★☆☆ |
Tips for this Hole
Use the Driver to land on the Fairway straight ahead for stroke 1. On stroke 2, use the 4H to make it on to the Green for another Birdie Putt on Stroke 3.
Alternatively, if your character has enough power, it's possible to land on the Green with a high shot curved slightly to the left on stroke 1. If done correctly, you can get an Eagle Putt on stroke 2.
Hole 9
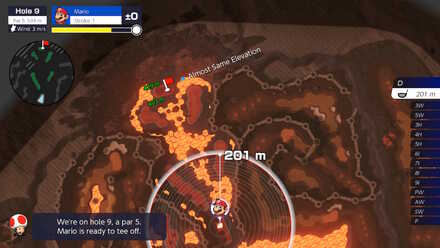
| Length | 504 m |
|---|---|
| Par | 5 |
| Slope | No slope |
| Difficulty Rating | ★★★★☆ |
Tips for this Hole
For stoke 1, aim to the right platform with the Driver. On stroke 2, aim straight for the Green with a full-powered shot. You may need to use a character with a high power stat to do so. On stroke 3, aim for the hole for an Eagle.
Note that the golden pipe behind the hole is, sadly, just a decoration.
Hole 10
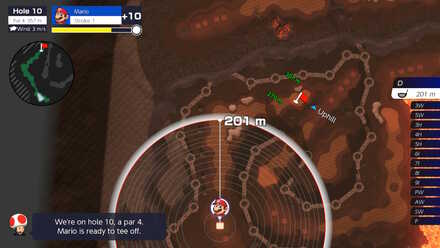
| Length | 357 m |
|---|---|
| Par | 4 |
| Slope | 4.2 m |
| Difficulty Rating | ★★★☆☆ |
Tips for this Hole
For stroke 1, use the Driver and aim straight ahead. Use the 7W to hit the ball over the Whomp and land on the Green and take a Birdie Putt on stroke 3.
Hole 11
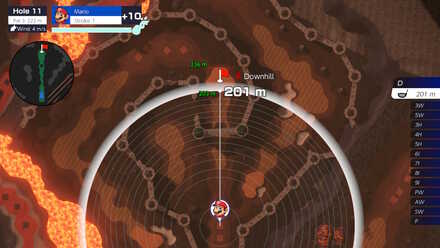
| Length | 222 m |
|---|---|
| Par | 3 |
| Slope | 6.0 m |
| Difficulty Rating | ★★★★★ |
Tips for this Hole
Without touching the analog stick whatsoever, use the Driver for a high power shot over the wall and land near the Green. Getting a Birdie here can be tricky depending on if your character had enough power to make it to the Green here or not. Regardless, with a careful putt, you can take a Birdie here.
Hole 12
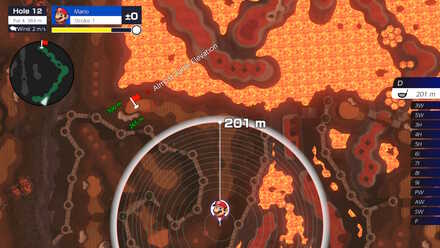
| Length | 384 m |
|---|---|
| Par | 4 |
| Slope | No slope |
| Difficulty Rating | ★★★☆☆ |
Tips for this Hole
Aim straight ahead with the Driver for stroke 1. For stroke 2, use the 4H to land on the Green and take a Birdie Putt on stroke 3.
Alternatively, if you are using a character with a high power stat such as Bowser, use a special shot on stroke 1, aiming your shot to thread the needle between the two broken walls to land directly on the Green and go for an Eagle Putt on stroke 2.
Hole 13
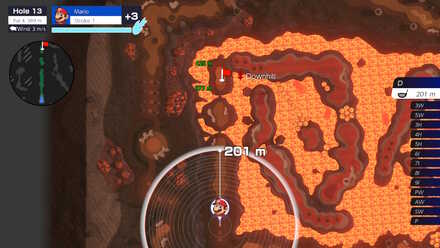
| Length | 389 m |
|---|---|
| Par | 4 |
| Slope | 21.4 m |
| Difficulty Rating | ★★★☆☆ |
Tips for this Hole
This hole is a straight shot, so use the Driver and aim down the Fairway for stroke 1 and land near the Bunker. Use the Driver on stroke 2 for a potential Eagle, or a Birdie on stroke 3.
Hole 14
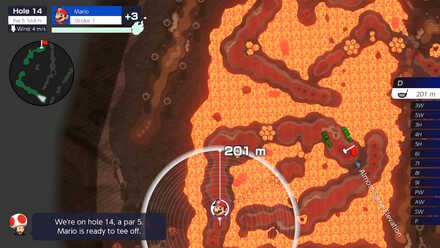
| Length | 564 m |
|---|---|
| Par | 5 |
| Slope | 1.5 m |
| Difficulty Rating | ★★★★☆ |
Tips for this Hole
Aim to the strip of fairway to the right with the Driver on stroke 1. On stroke 2, you should be able to land on the Green and take an Eagle Putt on stroke 3.
Hole 15

| Length | 369 m |
|---|---|
| Par | 4 |
| Slope | 4.5 m |
| Difficulty Rating | ★★★☆☆ |
Tips for this Hole
Aim your first shot with the Driver to land near the Bunker. On stroke 2, use the 5W to make it onto the Green and putt in for a Birdie on stroke 3.
Hole 16
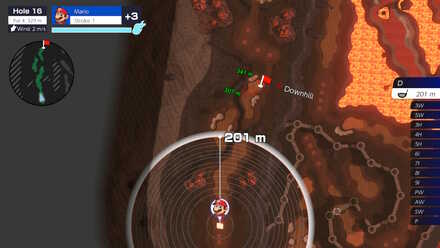
| Length | 329 m |
|---|---|
| Par | 4 |
| Slope | 3.6m |
| Difficulty Rating | ★★★☆☆ |
Tips for this Hole
Aim your first shot with the Driver to land near the small bridge. On stroke 2, use the 7I to make it onto the Green and putt in for a Birdie on stroke 3.
Hole 17
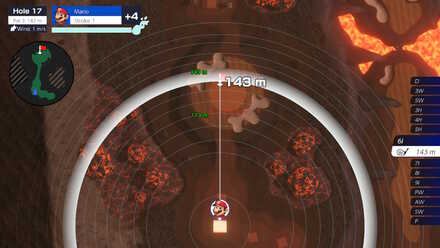
| Length | 142 m |
|---|---|
| Par | 3 |
| Slope | 12.6 m |
| Difficulty Rating | ★☆☆☆☆ |
Tips for this Hole
This is another short distance hole, so use the 7I to make it onto the Green and putt in for a Birdie on stroke 2.
Hole 18
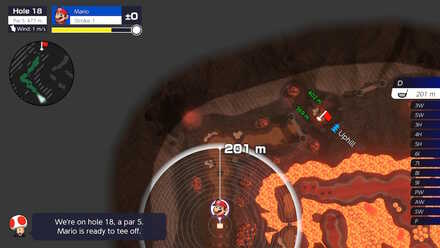
| Length | 477 m |
|---|---|
| Par | 5 |
| Slope | 11.2 m |
| Difficulty Rating | ★★★★★ |
Tips for this Hole
Use the Driver to land near the bunker next to the Whomps for stroke 1. On stroke 2, use the Driver again and aim to land before the gate. Use the 9I to make it onto the Green. Your shot should pass under the gate. Once on the Green, make a putt on stroke 4 for one last Birdie to end the course.
Alternatively, if you are using Bowser, you can clear straight to the fairway by cutting over the corner on stroke 1. On stroke 2, use a special shot to clear straight over the gate and land on the Green. Go for an Eagle Putt on stroke 3.
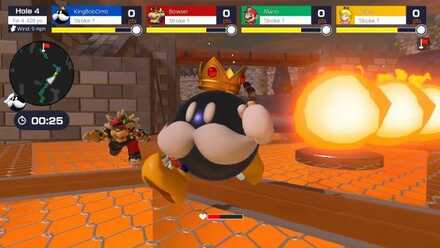
Bowser Highlands Course Obstacles and Hazards
| Obstacles and Hazards | |
|---|---|
 |
Adds a +1 to your strokes in addition to the next shot. Appears on hole 4, 5, 6, 7, 8, 9, 13, 14, 15. |
 |
Landing in a bunker will hinder your control and will require more power in the next shot to get back out. Appears on hole 1, 3, 6, 7, 10, 12, 13, 14, 15, 16, 17, 18. |
 |
If your shot hits a Bob-omb in standard golf, it will explode and send the ball flying off course. Appears on hole 1, 3, 7, 8, 17. |
 |
Whomps stand in the way of shots and can knock the ball off course. Appears on hole 2, 3, 10, 18. |
 |
Thwomps move up and down and can block shots, knocking the ball off course. Appears on hole 11, 18. |
 |
Chain Chomps around a fixed area and can interrupt shots while aiming. Appears on hole 11 12, 18. |
 |
Can block shots changing their course. Appears on hole 4, 5, 6, 9, 14. |
 |
Giant dragon-like monsters, which function as another large blockade for the player's shots. Appears on hole 4, 5, 14. |
 |
Can interrupt you when you are lining up a shot. Appears on hole 4, 14 |
Mario Golf Super Rush Related Guides

| Main Courses | ||
|---|---|---|
 Rookie Course Rookie Course |
 Bonny Greens Bonny Greens |
 Ridgerock Lake Ridgerock Lake |
 Balmy Dunes Balmy Dunes |
 Wildweather Woods Wildweather Woods |
 Bowser Highlands Bowser Highlands |
 New Donk City New Donk City |
 Blustery Basin Blustery Basin |
 Spiky Palms Spiky Palms |
| Battle Golf Stadium Courses | |
|---|---|
 Strategic Strategic |
 Technical Technical |
Author

Bowser Highlands Course Walkthrough: List of Holes and How to Unlock
Rankings
- We could not find the message board you were looking for.
Gaming News

![Monster Hunter Stories 3 Review [First Impressions] | Simply Rejuvenating](https://img.game8.co/4438641/2a31b7702bd70e78ec8efd24661dacda.jpeg/show)


![Monster Hunter Stories 3 Review [First Impressions] | Simply Rejuvenating](https://img.game8.co/4438641/2a31b7702bd70e78ec8efd24661dacda.jpeg/thumb)
Popular Games

Genshin Impact Walkthrough & Guides Wiki
Honkai: Star Rail Walkthrough & Guides Wiki
Umamusume: Pretty Derby Walkthrough & Guides Wiki
Pokemon Pokopia Walkthrough & Guides Wiki
Resident Evil Requiem (RE9) Walkthrough & Guides Wiki
Monster Hunter Wilds Walkthrough & Guides Wiki
Wuthering Waves Walkthrough & Guides Wiki
Arknights: Endfield Walkthrough & Guides Wiki
Pokemon FireRed and LeafGreen (FRLG) Walkthrough & Guides Wiki
Pokemon TCG Pocket (PTCGP) Strategies & Guides Wiki


Recommended Games
Diablo 4: Vessel of Hatred Walkthrough & Guides Wiki
Cyberpunk 2077: Ultimate Edition Walkthrough & Guides Wiki
Fire Emblem Heroes (FEH) Walkthrough & Guides Wiki
Yu-Gi-Oh! Master Duel Walkthrough & Guides Wiki
Super Smash Bros. Ultimate Walkthrough & Guides Wiki
Pokemon Brilliant Diamond and Shining Pearl (BDSP) Walkthrough & Guides Wiki
Elden Ring Shadow of the Erdtree Walkthrough & Guides Wiki
Monster Hunter World Walkthrough & Guides Wiki
The Legend of Zelda: Tears of the Kingdom Walkthrough & Guides Wiki
Persona 3 Reload Walkthrough & Guides Wiki


All rights reserved
© Nintendo / CAMELOT. Mario Golf and Nintendo Switch are trademarks of Nintendo. © 2021 Nintendo.
The copyrights of videos of games used in our content and other intellectual property rights belong to the provider of the game.
The contents we provide on this site were created personally by members of the Game8 editorial department.
We refuse the right to reuse or repost content taken without our permission such as data or images to other sites.