E-2 Double Trouble Gems and Boo Location Guide
Play Time | Graphics Comparison| New Features
★ Mansion Guides | Interactive Maps | 100%
☆ Locations: Gems | Boos | Ghosts | Gold Bones
★ ScareScraper Multiplayer Guide | Solo?!
┗ High Score Boards ▶︎ Missions | SkyScraper
This is a walkthrough for all gems in E2 Double Trouble, as well as how to clear the level and find the boo in Luigi's Mansion 2 HD for the Nintendo Switch. Read on for a detailed guide for E-2 Double Trouble, including how to get 3 stars, gem locations, the location of the boo, as well as the secret door location.
| Previous Mansion | Current Mansion | Next Mansion | ||||||||||||||||||
|---|---|---|---|---|---|---|---|---|---|---|---|---|---|---|---|---|---|---|---|---|
| Secret Mine | Treacherous Mansion | King Boo's Illusion | ||||||||||||||||||
| E-1 | E-2 | E-3 | E-4 | E-5 | E-Boss | E-Bonus | ||||||||||||||
List of Contents
E-2 Double Trouble Gems and Boo Location Map
| Jump to a Section! | ||||
|---|---|---|---|---|
These are all of the Gems available within this Mansion, however some Gems are exclusive to specific Missions.
Interactive Map of All Mansions
E-2 Double Trouble Walkthrough
| Jump to a Section! | ||||
|---|---|---|---|---|
E-2 Double Trouble How to Get 3-Stars
| Min. Clear Time | Min. Ghosts Captured | Max. Health Lost | Min. Treasure |
|---|---|---|---|
| 25:20 | 19 | 20 or Less | 2600 |
These numbers are values we got based on our runs. If you got 3-Stars with better scores, take pride in it and share a picture in our Missions Record Boards!
E-2 Double Trouble Objectives
| Goal | Search the main floor of the Treacherous Mansion for the Toad assistant, and bring him back to the Bunker. It turns out E. Gadd assigned two Toad assistants to take care of the exhibits. Find the other Toad, and send both Toads back to the Bunker. |
|---|---|
| Description | I assigned a Toad assistant to take care of the valuable exhibits in the Treacherous Mansion. Let's find him. He might know a thing or two about the Dark Moon piece. |
- Reach the Front Entrance
- Activate the Jungle Exhibit E-Gate
- Activate the Ancient Exhibit E-Gate
- Reach the Inner Courtyard
- Activate the Ice Age Exhibit E-Gate
- Search the Gargoyle Roof
- Activate the Dark Age Exhibit E-Gate
- Free the Toad Assistant in the Jungle Exhibit
- Free the Toad Assistant in the Ice Age Exhibit
- Send the Toads to the Bunker
Reach the Front Entrance
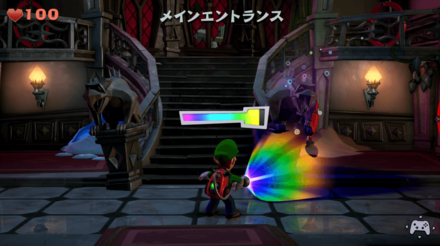
Once the mission starts, Luigi is transported to the Veranda. Before unlocking the mansion's front door, search the area for treasure first. Move down the steps and flash the gold crows at the south edge of the path. Flash the gargoyles along the railings and peek through the windows. Search the chest at the west edge of the porch and follow the steps down to the grass.
Flash the crows perched on the gravestones, vacuum the purple weeds by the well, and head down the steps along the area's south edge. Use the Poltergust to pull the weeds growing out of the wall, flash any bats that fly out of the opening, then collect the treasure stashed at the bottom of the steps. Afterwards, head back up to the porch and unlock the front door.
Once inside the Front Entrance, use the Dark-Light Device to reveal the hidden chain hanging from one of the gargoyles at the bottom of the stairs. After capturing the Spirit Balls, use the Poltergust to pull the chain and reveal a safe hidden under the stairs. Flash the safe to open it, then flash the Strong Slammer hiding inside. Capture the Strong Slammer, then vacuum the gem from the safe.
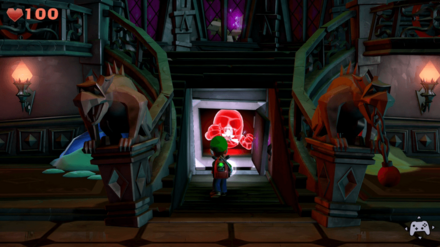
After retrieving the gem, use the Poltergust to pull the chain again and move the stairs back into place. Head up the stairs and use the window to peek into the Inner Courtyard. Head back down the stairs and use the door in the east wall to find the East Gallery.
Activate the Jungle Exhibit E-Gate
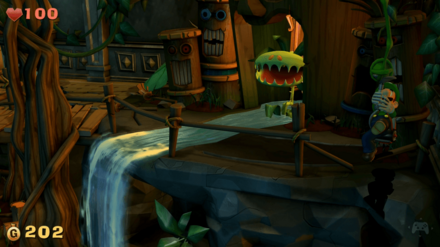
As Luigi moves through the East Gallery, look for the gold mouse that emerges near the end of the rug. Flash the mouse and collect the treasure, then use the door on the east wall to find the Jungle Exhibit.
Once inside the Jungle Exhibit, cross the wooden walkway and use the Poltergust to pull the giant leaf near the Jungle Room's northeast corner. This will spawn some enemies.Once they appear, run away to lure the Strong Greenies out of the flytrap's attack range. The Strong Greenies are equipped with spears, so each ghost is only vulnerable immediately after performing a lunge attack. Dodge the attack, flash the ghost, then latch on and capture it. Afterwards vacuum the leaf again to get the treasure from the chest.
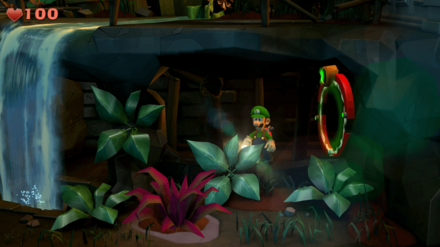
Luigi is unable to defeat the flytrap at this time. After capturing both Strong Greenies, dash past the flytrap and vacuum the knotted vine near the room's southeast corner. Ride down to the ground, then hold the L-Button to detach Luigi from the vine. Vacuum the nearby purple weed, then pass under the waterfall and flash the E-Gate mounted on the wall. Rather than using the E-Gate, move back out from under the waterfall and search the re st of the room.
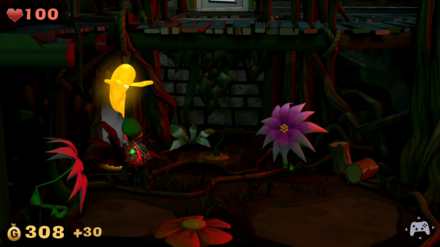
Locate the logs and the sprout in the west half of the room. For now, flash the purple flowers and collect the treasure. Afterwards, step on the orange flower to launch Luigi back up to the walkway. Once Luigi lands, use the door in the north wall to enter the Grand East.
Activate the Ancient Exhibit E-Gate
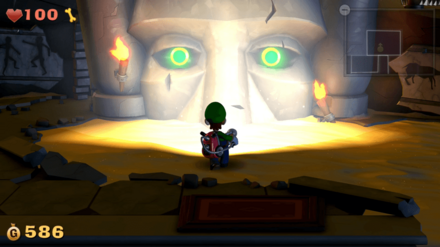
Once on the Grand East, flash the gargoyle on the wall and search the nearby chest. Head north and move straight past the three-way intersection at the center of the area. Vacuum the sand piled near the end of the path, then open the chest to find some treasure. Use the large hole in the west wall to peek into the Restrooms. Open the door in the north wall and enter the Ancient Exhibit.
Upon reaching the Ancient Exhibit, note the sprout on the southwest corner of the room. Luigi has to find a water supply to water the plant. For now, however, move onto the sand at the center of the room. Stand in front of the giant carving and charge the Strobulb. Hit both of the carving's eyes with a single flash. As the sand drains out of the room, Luigi is carried down to a hidden tomb.
Move to the giant carving's mouth and latch onto the hanging chain. Perform three A-Pulls to crumble the stone and reveal the Ancient Exhibit E-Gate. A cutscene will then trigger. After the cutscene, lure the Greenies into open flames. Stand near a torch, allow the Strong Greenies to approch, then flash the Strobulb and run away. Capture all four Strong Greenies, then use the Strobulb to activate the E-Gate. Move to the room's southeast corner and follow the patch back to the surface. Leave the Ancient Exhibit and return to the Grand East.
Reach the Inner Courtyard
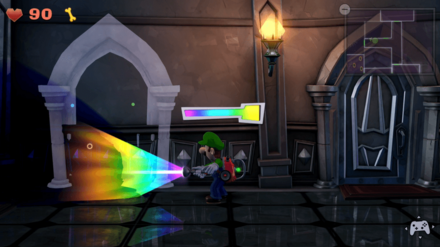
Return to the three-way intersection at the center of the Grand East. Move west to find a door to the Restrooms. Vacuum the wall just east of the door to reveal a gold spider. Flash the spider, collect the treasure, then head through the door.
Once inside the Restrooms, use the Poltergust to pull the chain hanging from the water tank. When the Strong Slammer is launched out of the stall, flash it with the Strobulb and capture it. An unseen ghost is preventing Luigi from opening the safe at this time. Vacuum the coins above the sinks and return to the Grand East.
Move to the west end of the Grand East and use the Dark-Light Device to reveal the missing door on the north wall. After capturing the Spirit Balls, head through the door to find the west half of the Restrooms. Collect the treasure near the west wall, then use the Poltergust to pull the chain hanging from the water tank. The blast of water launches a gem into the air. Collect the gem when it lands, then move back toward the door in the south wall.

As Luigi approaches the door, an unseen ghost laughs. Head into the stall to investigate the sound. The Strong Greenie flushes the toilet, launching Luigi into the air. Once Luigi recovers, capture the Strong Greenie. After clearing the area, head back to the east half of the Restrooms and flash the safe. Then, use the door just west of the Restrooms to enter the inner Courtyard.
Upon reaching the Inner Courtyard, answer the Duel Scream, then flash the crows perched on the statue at the center of the room. Afterwards, use the door in the west wall of the room to reach the Grand West.
Activate the Ice Age Exhibit E-Gate
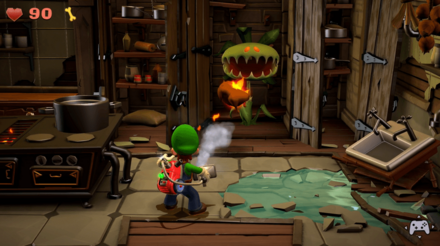
Once in the Grand West, head through the door in the north wall to make a quick visit to the Kitchen. Inside the Kitchen, open the pantry on the north wall to find a flytrap. Run out of range before the plant attacks, then move over to the stove until the turkey pops out of the large pot. Vacuum the flaming turkey and launch it into the flytrap's mouth. When the plant withers, collect the treasure that flies into the room.
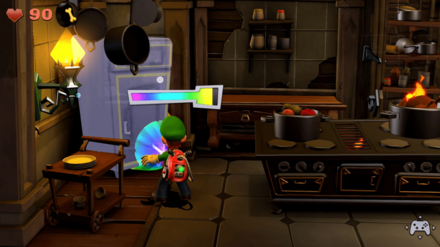
Before leaving the Kitchen, use the Dark-Light Device to reveal the refrigerator in the room's northwest corner. After capturing the Spirit Balls, interact with the refrigerator to trigger a bonus challenge. During the challenge, Luigi must collect eight red coins within the time limit.
After completing the bonus challenge, finish searching the Kitchen. Then, use the door in the south wall to return to the Grand West. As Luigi explores the Grand West, avoid the false door just west of the Kitchen door. If Luigi attempts to open it, the door slams him against the wall.
Before heading to the Ice Age Exhibit, take a moment to search the Grand West. Upon exiting the Kitchen, move straight to the west wall, then slide a few steps to the south. Use the Dark-Light Device to reveal a missing chest at the south end of the Great West. After collecting the Spirit Balls, open the chest to find a Gold Greenie. Capture the ghost before it escapes, then collect the treasure it drops. Flash the nearby gargoyle, then move to the north end of the Grand West.
Vacuum the snow mounds outside the north end of the area, then search the chest and flash the nearby gargoyle. Afterwards, open the door in the north wall to find the Ice Age Exhibit. Once inside the Ice Age Exihibit, examine the large chunk of ice in the west wall. When Luigi peeks through the crack, he can see another Toad Assistant trapped in a framed sketch. Vacuum the fans above the nearby duct until they stop producing treasure, then vacuum the snow mounds on the ground.
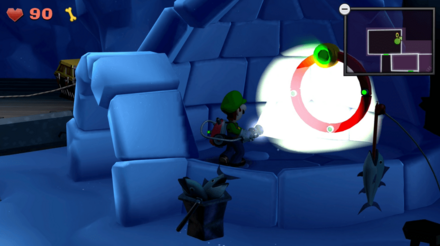
Use the Poltergust to pull the fish hanging in the room's southeast corner to find another nice stash of treasure, then head into the igloo to find the Ice Age Exhibit E-Gate. Flash the E-Gate, then step out of the igloo. Vacuum the woolly mammoth's trunk and pull it. The beast will then come to life and launches Luigi up to the Gargoyle Roof.
How to Beat the Bonus Challenge
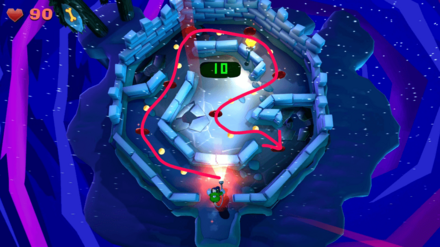
When the challenge begins, collect the red coin directly in front of Luigi, then follow the trail to the left. Continue to the top of the maze, then follow the trail as it winds back towards the bottom. Collect all eight red coins before the time runs out to reveal a chest at the center of the maze. Open the chest and collect the treasure to complete the challenge and return to the Kitchen.
Search the Gargoyle Roof
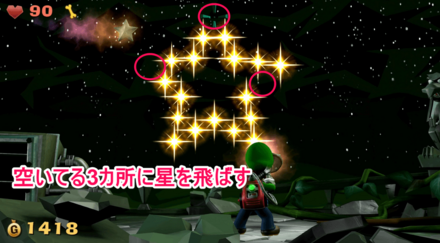
Once at the Gargoyle Roof, search the area to find three stars that are missing from the constellation in the background. One star is sitting in the northeast corner, another star is held by the gargoyle in the southwest corner, and one star flies through the area at irregular intervals.
Vacuum the star in the northeast corner, then aim it at the constellation. When the targeting reticle appears, launch the star in to the indicated spot. Vacuum the flying star as it passes over Luigi, then repeat the process to fill another slot. Finally, flash the gargoyle in the southwest corner to free its star. Vacuum the last star, then launch it into the constellation's remaining slot.
Once the constellation is complete, a gem falls on the Gargoyle Roof. After collecting the gem, use the Dark-Light Device to reveal the missing gargoyle in the area's southeast corner. After capturing the Spirit Balls, flash the gargoyle to receive treasure. Afterwards, climb into the duct in the northwest corner and slide back down to the Ice Age Exhibit.
Activate the Dark Age Exhibit E-Gate
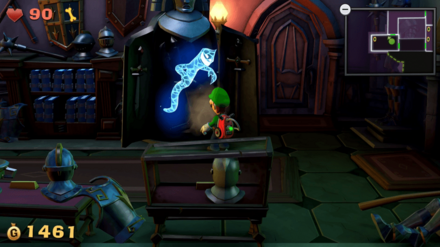
Upon returning to the Ice Age Exhibit, use the door in the south wall and return to the Grand West. Go south of the Grand West and open the door at the end of the path to find the Dark Age Exhibit. Once inside the Dark Age Exhibit, open the weapon cabinet along the north wall to reveal a Strong Hider. After Luigi recovers from the scare, search the nearby objects for hidden enemies. It's best to deal with the Strong Hiders first, but if the Strong Greenie peeks out from under its bucket, take the oppurtunity to flash it while it's vulnerable.
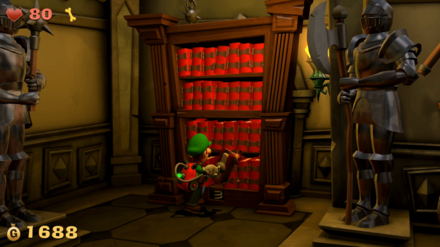
After capturing all three ghosts, search the chest along the west wall to find a red book. Vacuum the book and carry it to the bookcase near the northwest corner. Place the book in the empty slot to reveal the Dark Age Exhibit E-Gate. Before using the E-Gate, visit the West Gallery first.
Search the West Gallery for any suspicious activity. Flash the gargoyle on the north wall, then return to the Dark Age Exhibit and activate the E-Gate.
Free the Toad Assistant in the Jungle Exhibit
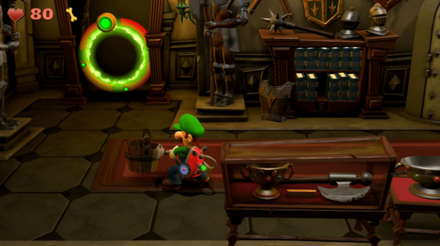
Now that all necessary E-Gates have been activated, Luigi is now ready to rescue both of the imprisoned Toad Assistants. When Luigi captured the Strong Greenie in the Dark Age Exhibit earlier, the ghost left its bucket. Vacuum the bucket, then carry it through the Dark Age Exhibit E-Gate. The E-Gates allow Luigi to transport important objects between connected rooms, which is plays a very important role in the next objectives.
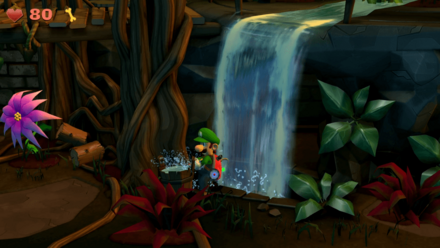
To rescue the first Toad Assistant, Luigi must bring the bucket to the Jungle Exhibit. Move past the stairs and carry the bucket through the E-Gate on the east wall. Once inside the Jungle Exhibit, move toward the center of the room. Pass under the waterfall to fill the bucket, then use the bucket to water the sprout beneath the wooden walkway. Wait for the gnarled plant to grow, then vacuum the spiked seed pod. Move onto the orange flower to launch Luigi up to the walkway.
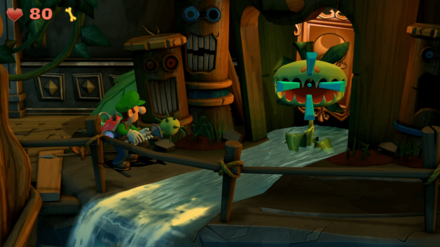
Upon landing, follow the walkway east and launch the seed pod into the flytrap's mouth. After the plant withers away, use the Dark-Light Device to free the Toad Assistant from the framed sketch.
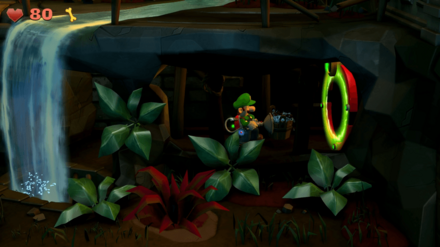
Vacuum the Toad Assistant and launch him to the bottom of the Jungle Exhibit. Use the knotted vine in the southeast corner to lower Luigi down from the ledge. Regroup with the Toad, then vacuum the bucket Luigi left by the gnarled plant. Carry the bucket through the Jungle Exhibit E-Gate. Once on the Front Entrance, use the E-Gate just east of the stairs to reach the Ancient Exhibit.

Once in the Ancient Exhibit, move to the room's southeast corner and follow the path out of the tomb. Upon reaching the top of the path, use the bucket to water the sprout in the room's southwest corner. When the purple flower appears, flash it with the Strobulb to find the gem. After collecting the gem, follow the path back down and use the Ancient Exhibit E-Gate. Once in the Front Entrance, use the E-Gate on the east wall to return to the Jungle Exhibit.
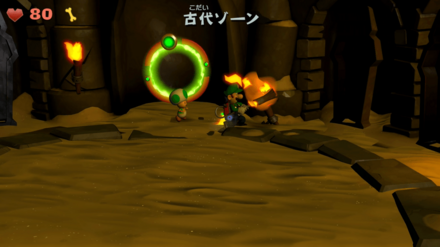
Once inside the Jungle Exhibit, step out from behind the waterfall and vacuum one of the logs near the north wall. Carry the log back under the waterfall and through the E-Gate. Once in the Front Entrance, use the E-Gate just east of the stairs to return to the Ancient Exhibit. Upon arriving in the Ancient Exhibit, use the nearby torch to ignite the log. Carry the flaming log back through the E-Gate. In the Front Entrance, use the E-Gate just west of the steps to enter the Ice Age Exhibit.
Free the Toad Assistant in the Ice Age Exhibit
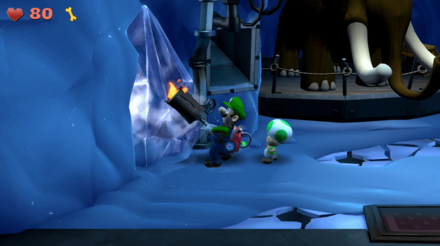
Upon entering the Ice Age Exhibit, use the flaming log to melt the ice on the west side of the room. Step into the revealed alcove and melt the ice along the north wall. When it's finished, drop the flaming log and use the Dark-Light Device to draw the Toad Assistant out of the framed sketch. Once the second Toad is freed, answer the Duel Scream, then use the Dark-Light Device to reveal the chest in the alcove's north wall. After capturing the Spirit Balls, search the chest to find a stash of treasure. Afterwards, lead the Toad Assistants out of the alcove.
As Luigi leaves the alcove, three Strong Greenies appear in the Ice Age Exhibit. When capturing these ghosts, be sure to avoid the fishing holes on the floor. After capturing the ghosts, calm the panicked Toads. Afterwards, use the door in the south wall to enter the Grand West.
Send the Toads to the Bunker
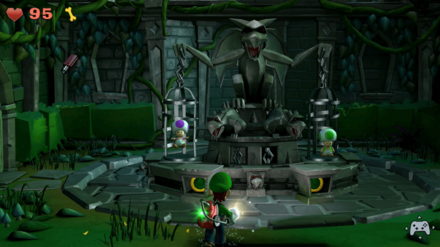
In the Grand West, move to the three-way intersection at the center of the room, then head east. Open the door at the end of the path and lead the Toads into the Inner Courtyard. Once inside the Inner Courtyard, move to the center of the room and launch a Toad into each of the cages hanging from the statue. When both Toads are in place, a Boo appears at the base of the statue along with a few more enemies.
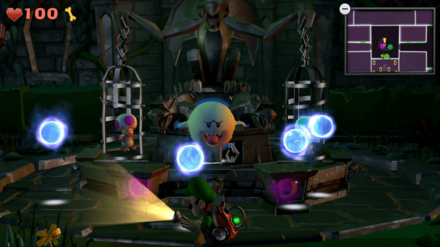
During this battle, Luigi must defeat a Boo and two Strong Sneakers. It's usually best to deal with at least one Strong Sneaker before attacking Boopa Troopa. However, this leaves Boopa Troopa free to fill the room with Spirit Balls and perform its fast charge attacks. As Luigi wears down the Strong Sneakers, allow his target to drag him out of dangerous areas. Once at least one Strong Sneakers is captured, the battle becomes a little easier. Use the Dark-Light Device to search for Boopa Troopa, any remaining Strong Sneakers, and any missing objects. The battle ends when all three ghosts are captured.
After clearing the room of ghosts, launch the Toads back into the cages. When both Toads are in place, two panels open on the base of the statue. Flash the revealed green circular panels with a single flash to trigger a cutscene. After the spiral staircase emerges from the ground, lead the Toads up the steps. Then, activate the Pixelator on the north wall to transport both Toad Assistants out of the area. Once the Toads are gone, answer the Duel Scream to complete the mission and return to the Bunker.
E-2 Double Trouble Gem Locations
| Jump to a Section! | ||||
|---|---|---|---|---|
| Available Gems | |||||||||||||||||||
|---|---|---|---|---|---|---|---|---|---|---|---|---|---|---|---|---|---|---|---|
|
|
|
|
|
||||||||||||||||
|
|
|
|
|
||||||||||||||||
|
|
|
|
|
|
|||||||||||||||
Grayed out Gems are unavailable on this mission.
Gem #4 (Football Diamond)

| Gem |
|
|---|---|
| Where to Find | Front Entrance |
At the Front Entrance, use the Dark-Light Device to reveal the statue on the right side at the bottom of the stairs, and then pull the chain to reveal the secret vault. Once you open the vault and defeat all the enemies, you can obtain the Football Diamond inside.
Gem #5 (Drop Diamond)
| Gem |
|
|---|---|
| Where to Find | Restrooms |
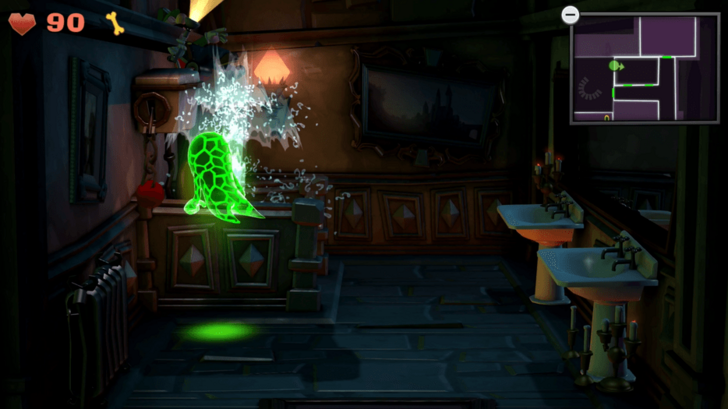
In Grand East, use the Dark-Light Device to reveal a hidden door in the west area. The door will lead you to Restrooms, and once you pull the chain to flush the toilet, it will burst out the Drop Diamond.
Gem #6 (Stone Diamond)
| Gem |
|
|---|---|
| Where to Find | Gargoyle Roof |
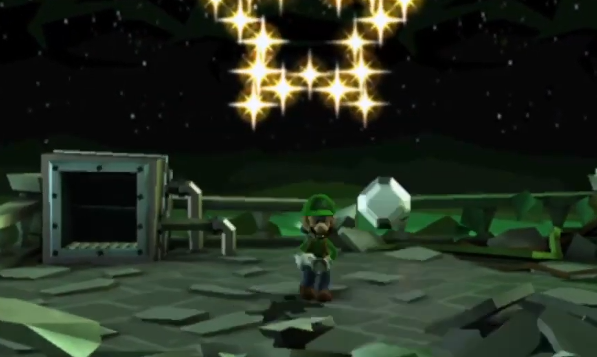
On the Gargoyle Roof, suck up shooting stars from the sky and the gargoyles to complete the star constellation in the sky. Once the star constellation is completed, it will drop the Stone Diamond on the roof.
Gem #7 (Rhombus Diamond)
| Gem |
|
|---|---|
| Where to Find | Anceint Exhibit |
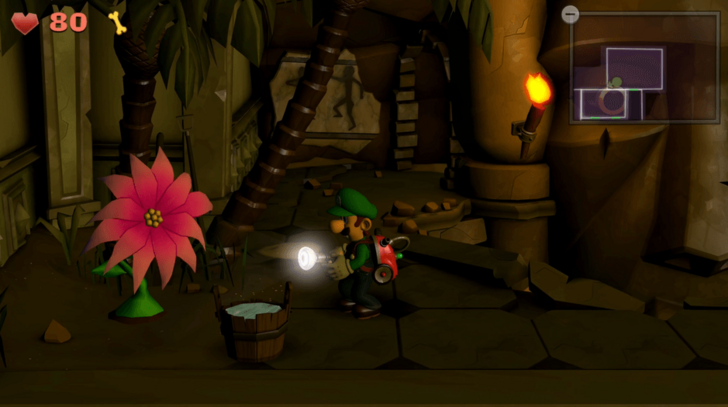
Once you've got a bucket of water from Jungle Exhibit, head towards the Ancient Exhibit. In the Ancient Exhibit, bring the bucket of water on the upper floor through the cave in the east, and then water the flower. Then use the Strobulb on the flower to make it drop the Rhombus Diamond.
Gem Locations: How to Find All Gems
E-2 Double Trouble Boo Location
| Jump to a Section! | ||||
|---|---|---|---|---|
Boopa Troopa Location

| Boo | Where to Find |
|---|---|
| Boopa Troopa | Inner Courtyard |
Enter the inner courtyard, shoot the toads in the cages of the statue in the middle of the area, and a Boo will appear.
All Boo Locations: Where to Find All Boos
E-2 Double Trouble Secret Door
| Jump to a Section! | ||||
|---|---|---|---|---|
| Location | How to Find the Secret Door |
|---|---|
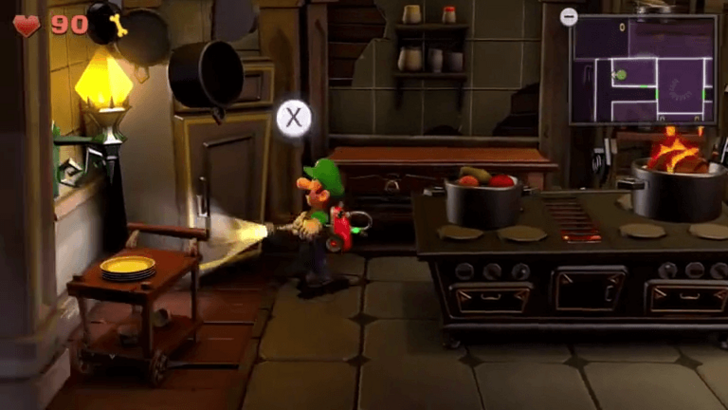 |
Go the the west side of the Kitchen, then use the Dark-Light Device on the northwest corner of the area to reveal the hidden refrigerator. |
How to Beat the Challenge
When the challenge starts, grab the Red Coin directly in front of you, then follow the trail to the left. Continue to the top of the maze, then follow the trail as it winds back toward the bottom.
All Secret Door Locations and Rewards
E-2 Double Trouble Enemies
| Jump to a Section! | ||||
|---|---|---|---|---|
Enemies Encountered in E-2 Double Trouble
 Strong Greenie Strong Greenie
|
 Strong Slammer Strong Slammer
|
 Strong Hider Strong Hider
|
 Strong Sneaker Strong Sneaker
|
 Mouse Mouse
|
 Gold Mouse Gold Mouse
|
 Gold Spider Gold Spider
|
 Bat Bat
|
 Gold Crow Gold Crow
|
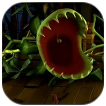 Flytrap Flytrap
|
Luigi's Mansion 2: Dark Moon Related Guides

All Mission Guides
Post-Game
| Post-Game Guide | ||
|---|---|---|
| ScareScraper Guide | Ending and Post-Game Content | 100% Checklist |
Comment
Author
E-2 Double Trouble Gems and Boo Location Guide
Rankings
Gaming News
Popular Games

Genshin Impact Walkthrough & Guides Wiki

Honkai: Star Rail Walkthrough & Guides Wiki

Umamusume: Pretty Derby Walkthrough & Guides Wiki

Pokemon Pokopia Walkthrough & Guides Wiki

Resident Evil Requiem (RE9) Walkthrough & Guides Wiki

Monster Hunter Wilds Walkthrough & Guides Wiki

Wuthering Waves Walkthrough & Guides Wiki

Arknights: Endfield Walkthrough & Guides Wiki

Pokemon FireRed and LeafGreen (FRLG) Walkthrough & Guides Wiki

Pokemon TCG Pocket (PTCGP) Strategies & Guides Wiki
Recommended Games

Diablo 4: Vessel of Hatred Walkthrough & Guides Wiki

Cyberpunk 2077: Ultimate Edition Walkthrough & Guides Wiki

Fire Emblem Heroes (FEH) Walkthrough & Guides Wiki

Yu-Gi-Oh! Master Duel Walkthrough & Guides Wiki

Super Smash Bros. Ultimate Walkthrough & Guides Wiki

Pokemon Brilliant Diamond and Shining Pearl (BDSP) Walkthrough & Guides Wiki

Elden Ring Shadow of the Erdtree Walkthrough & Guides Wiki

Monster Hunter World Walkthrough & Guides Wiki

The Legend of Zelda: Tears of the Kingdom Walkthrough & Guides Wiki

Persona 3 Reload Walkthrough & Guides Wiki
All rights reserved
© Nintendo. Games are property of their respective owners. Nintendo of America Inc. Headquarters are in Redmond, Washington, USA
The copyrights of videos of games used in our content and other intellectual property rights belong to the provider of the game.
The contents we provide on this site were created personally by members of the Game8 editorial department.
We refuse the right to reuse or repost content taken without our permission such as data or images to other sites.


![Monster Hunter Stories 3 Review [First Impressions] | Simply Rejuvenating](https://img.game8.co/4438641/2a31b7702bd70e78ec8efd24661dacda.jpeg/thumb)


