A-4 Visual Tricks Gems and Boo Location Guide
Play Time | Graphics Comparison| New Features
★ Mansion Guides | Interactive Maps | 100%
☆ Locations: Gems | Boos | Ghosts | Gold Bones
★ ScareScraper Multiplayer Guide | Solo?!
┗ High Score Boards ▶︎ Missions | SkyScraper
This is a walkthrough for all gems in A4 Visual Tricks, as well as how to clear the level and find the boo in Luigi's Mansion 2 HD for the Nintendo Switch. Read on for a detailed guide for A-4 Visual Tricks, including how to get 3 stars, gem locations, location of the boo, as well as the secret door location.
| Previous Mansion | Current Mansion | Next Mansion | ||||||||||||||||||
|---|---|---|---|---|---|---|---|---|---|---|---|---|---|---|---|---|---|---|---|---|
| - | Gloomy Manor | Haunted Towers | ||||||||||||||||||
| A-1 | A-2 | A-3 | A-4 | A-5 | A-Boss | A-Bonus | ||||||||||||||
List of Contents
A-4 Visual Tricks Gems and Boo Location Map
| Jump to a Section! | ||||
|---|---|---|---|---|
These are all of the Gems available within this Mansion, however some Gems are exclusive to specific Missions.
Interactive Map of All Mansions
A-4 Visual Tricks Walkthrough
| Jump to a Section! | ||||
|---|---|---|---|---|
A-4 Objectives
| Goal | Someone has been releasing Spirit Balls and making things disappear! Retrieve the Dark-Light Device from the Lab, and find the culprit. |
|---|---|
| Description | Criminy! Someone's been casting illusions in the Gloomy Manor! We'll need my Dark-Light Device to see through this hooey. I'm pretty sure I left it in the Lab. |
A-4 How to Get 3 Stars
| Min. Clear Time | Min. Ghosts Captured | Max. Health Lost | Min. Treasure |
|---|---|---|---|
| 18:55 | 12 | 20 or Less | 1200 |
These numbers are values we got based on our runs. If you got 3-Stars with better scores, take pride in it and share a picture in our Missions Record Boards!
Find the Dark-Light Device
Once you arrive in the Entrance, you'll notice that one of the suits of armor is missing. Run through the Guard Hall into the Foyer. Take the door on the left to get to the Common Hall. Go down the Common Hall to reach the Lab. The door will vanish when you approach it. Answer the DS call, then go back to the Foyer and go up the stairs.
When the flames on the candles change color, it means a hidden ghost is nearby. Go back to the center of the Foyer, and you'll find a Hider and a Slammer. Use your Strobulb on the Hider before it hides into an object. After capturing both ghosts, two more hiders will join in. Once all 4 ghosts are captured, you can go up the stairs without worries.
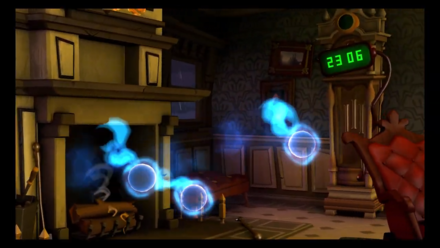
Go through the door on the left at the end of the stairs to reach the Master Hall. Head to the Parlor, the room directly above the Lab. Once you enter the Parlor, interact with objects in the room to trigger a cutscene. Spirit Balls will fly in from the fireplace and the clock will have disappeared. Inspect the now-extinguished fireplace to get to the Lab.
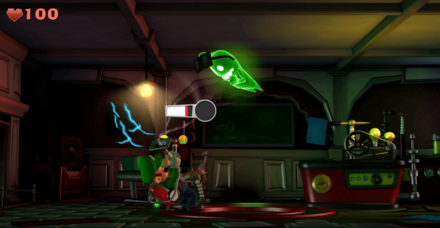
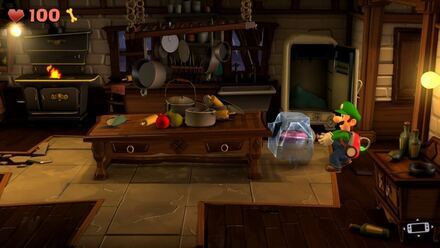
The Dark-Light Device is found on the upper east corner of the room. A Greenie will grab the Dark-Light Device when you try to get it. It will take the device through the chalkboard. Use the Poltergust on the chalkboard to vacuum the Greenie back to the Lab.
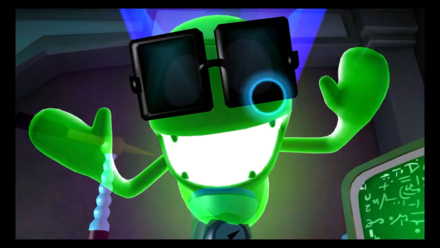
Vacuum the sunglasses from the Greenie before you use your Strobulb to stun it, then capture as you normally would. Two more Greenies will appear, capture them all the same to get the Dark-Light Device. After answering the call from E. Gadd, use the Dark-Light Device to reveal Spirit Balls in the area. Capture all the Spirit Balls to reveal the door.
Capture Whoever is Releasing the Spirit Balls
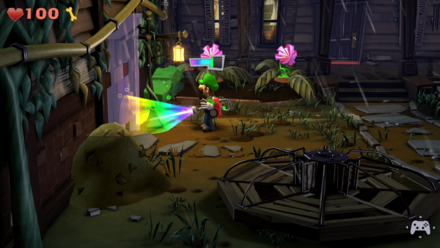
After exiting the Lab, answer the call from E. Gadd. Go back to the Foyer and head for the Entrance. Inspect the vases for a Gold Bone. Go to the Front Yard and use the Dark-Light Device on the fountain to reveal the Spirit Balls. Capture the Spirit Balls and get lots of treasure.
Head to the Garage and you'll find a Gold Greenie to capture hiding in the car. Go back in the Entrance and use the Dark-Light device on the painting on the east wall to get lots of treasure.
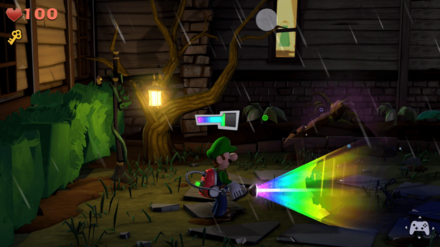
Use your Strobulb on the door in the Mudroom to get to the Mudroom Exterior. You'll notice that doghouse is now missing. Shine your Dark-Light Device on the doghouse to reveal some more Spirit Balls. Capture the Spirit Balls to reveal a bonus challenge in the doghouse. Complete the challenge by capturing the Spirit Balls inside the doghouse for bonus treasure.
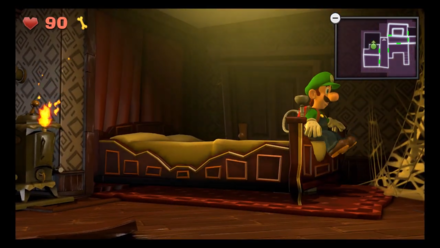
Head up the Foyer and go to the westernmost door leading to the Master Hall. Go to Bedroom past the Master Hall and interact with the bed to be taken to the Study.
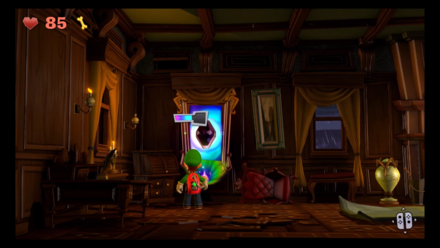
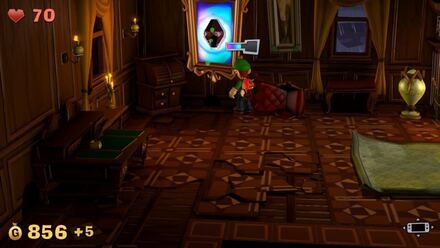
Use the Dark-Light Device on the painting on the northwest wall in the Study to get the Spindle Amethyst. Roll up the carpet with the Poltergust to reveal a floor switch. Step on it extinguish the flames of the fireplace, then you can use it to get down to the Studio.
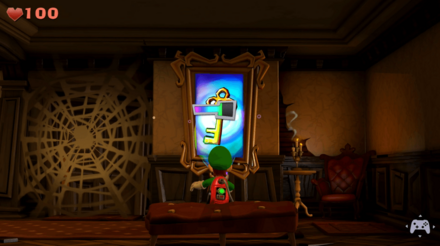
Exit to the Common Hall and go up the hall to the giant web. Use the Dark-Light Device on the painting to get the Key. Use the Dark-Light Device again on the wall next to the painting, to reveal the Spirit Balls. Capture them to reveal the door to the Patio.
Explore and interact with objects in the area to get treasure. Shine the Dark-Light Device on the west portion of the Patio to reveal a hidden door. Go through Under the Stairs to reach the Star Amethyst behind the aquarium in the Foyer.
Head back to the Patio and use the Dark-Light Device on the fountain to reveal Spirit Balls. Capture the balls to get the Octagon Amethyst.
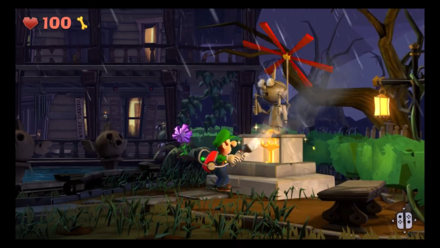
Shine the Dark-Light Device on the missing E. Gadd statue, then capture the Spirit Balls that emerge. Blow on the propellor atop the statue. This will reveal a hidden compartment containing a Key. Get the key to open the door to the Kitchen from the Patio.
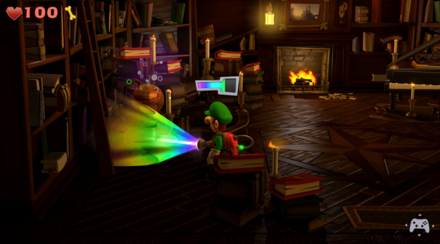
Inside the Kitchen is a couple of Greenies and Hiders. Capture the ghosts to get to the next room. Go to the Library. Shine the Dark-Light Device on the Globe by the ladder to spawn some Spirit Balls. Capture these to reveal the globe. Vacuum the globe in the library using the Poltergust, and fire it towards the fireplace to reveal a hidden gem inside it.
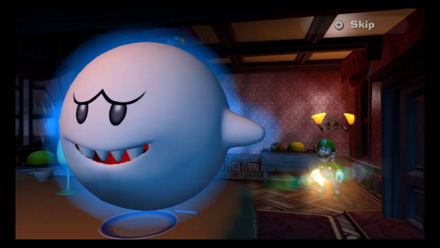
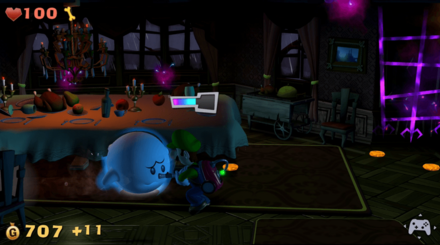
Head back into the kitchen and ride the dumbwaiter to the Dining Room to reveal the Boo. After the cutscene, shine the Dark-Light Device on the missing table, then catch all the Spirit Balls that emerge. Undoing the Boo's work will spawn it. Use the Dark-Light Device to find the Boo when it hides, then suck it up with the Poltergust. Capturing the Boo will complete the mission.
A-4 Visual Tricks Gem Locations
| Jump to a Section! | ||||
|---|---|---|---|---|
| Available Gems | |||||||||||||||||||
|---|---|---|---|---|---|---|---|---|---|---|---|---|---|---|---|---|---|---|---|
|
|
|
|
|
||||||||||||||||
|
|
|
|
|
||||||||||||||||
|
|
|
|
|
|
|||||||||||||||
Grayed out Gems are unavailable on this mission.
Gem #1 (Circle Amethyst)

| Gem |
|
|---|---|
| Where to Find | Mudroom Exterior |
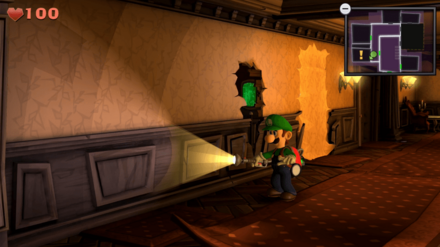
Head to the Entrance after obtaining the Strobobulb. Go into the east room, and flash the light there to unlock the door to the Mudroom Exterior. Head Norwest, then aim up and use the Poltergust to vacuum it from the tree.
Gem #2 (Triangle Amethyst)
| Gem |
|
|---|---|
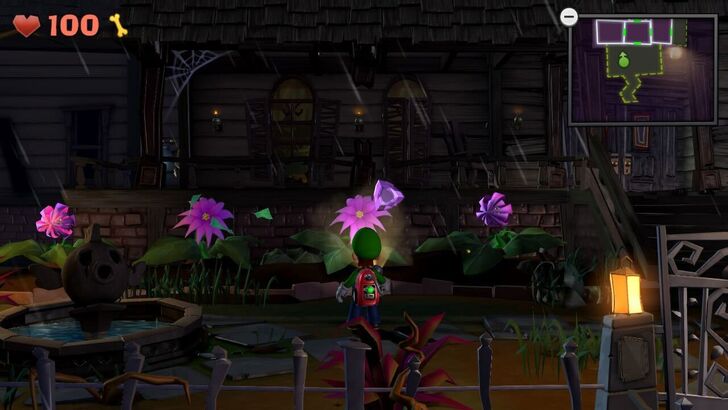
| Where to Find | Front Yard |
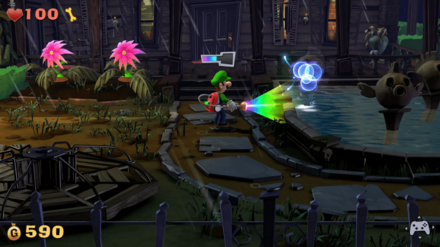
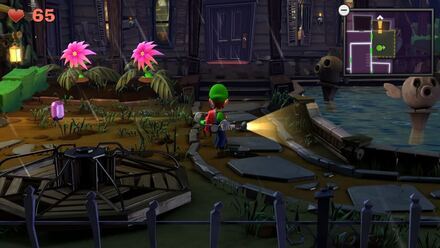
Head out to the Front Yard, use the Strobulb on the second flower from the right, and the flower will drop the Triangle Amethyst
Gem #3 (Rectangle Amethyst)
| Gem |
|
|---|---|
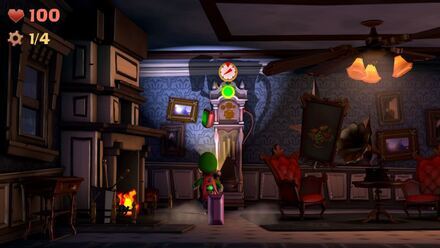
| Where to Find | Parlor |
Head towards the Master Hall, and proceed towards the door located on the southwest portion of the map. From there, head inside the room and aim your Strobulb towards the clock inside the Parlor to acquire the Rectangle Amethyst.
Gem #4 (Football Amethyst)
| Gem |
|
|---|---|
| Where to Find | Studio |
Head towards the Study, and roll up the carpet to reveal a switch that turns off the fireplace in the room. Proceed towards the fireplace to reach the Studio. Proceed towards the window curtain on the northwest, and suck up the left portion of the curtain using the Poltergust.
Gem #6 (Stone Amethyst)
| Gem |
|
|---|---|
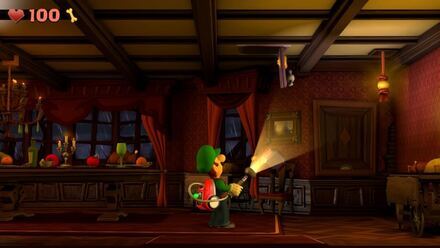
| Where to Find | Dining Room |
Head to the Dining Room, and proceed towards the east portion area of the room. Aim your Strobulb to the ceiling, and look for a safe. Once you've flashed the safe, the gem will fall down from it.
Gem #7 (Rhombus Amethyst)
| Gem |
|
|---|---|
| Where to Find | Kitchen |
Interact with the fridge in the kitchen to open it. Suck up the block of ice using the Poltergust, and place it above the fire stove to melt it. From there, acquire the gem from the melted ice.
Gem #8 (Star Amethyst)
| Gem |
|
|---|---|
| Where to Find | Foyer |
Flash your Strobulb on the west portion of the Patio to reveal a hidden door. Suck up the Spirit Balls that emerged, and proceed inside the room. From there, use the Poltergust to vacuum the gem inside the aquarium located on the west end of the room.
Gem #9 (Octagon Amethyst)
| Gem |
|
|---|---|
| Where to Find | Patio |
Shine the Dark-Light Device on the left side of the fountains to reveal the missing one. Suck up the Spirit Balls using the Poltergust, and claim the gem that fell on the grass.
Gem #10 (Oval Amethyst)
| Gem |
|
|---|---|
| Where to Find | Library |
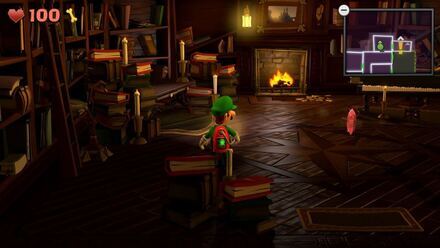
Flash the Strobulb on the west portion of the Library to reveal a globe. Suck up the Spirit Balls that are flying around the room. Vacuum the globe in the library using the Poltergust, and fire it towards the fireplace to reveal a hidden gem inside it.
Gem #11 (Spindle Amethyst)
| Gem |
|
|---|---|
| Where to Find | Study |
Vacuum the curtains located on the portrait at the west part of the wall facing you. From there, flash the Strobulb on the portrait to reveal a hidden gem inside it.
Gem Locations: How to Find All Gems
A-4 Visual Tricks Boo Location
| Jump to a Section! | ||||
|---|---|---|---|---|
Unnamed Boo Location
| Boo | Where to Find |
|---|---|
| Unnamed Boo | Dining Room |
Enter the dining room and use the Dark-Light Device in the middle of the room where the dining table originally was. Suck up all the spirit balls to reveal the Boo.
All Boo Locations: Where to Find All Boos
A-4 Visual Tricks Secret Door
| Jump to a Section! | ||||
|---|---|---|---|---|
| Location | How to Find the Secret Door |
|---|---|
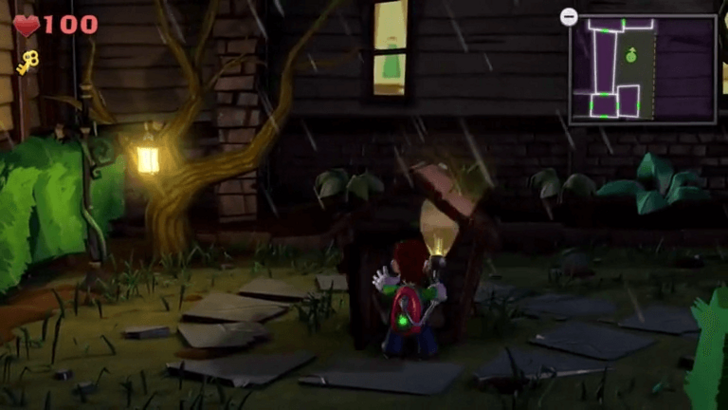 |
Use the Dark-Light Device to reveal the dog house. |
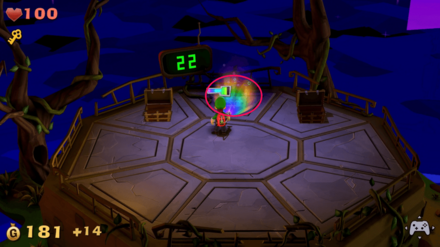
How to Beat the Challenge
When the challenge begins, there are two chests in front of you. Rather then search the chests, use the Dark-Light Device to find the nearby hidden chest. Capture all of the Spirit Balls to reveal the hidden chest before time runs out, then open all three chests.
All Secret Door Locations and Rewards
A-4 Visual Tricks Boo Enemies
| Jump to a Section! | ||||
|---|---|---|---|---|
Enemies Encountered in A-4 Visual Tricks
 Greenie Greenie
|
 Slammer Slammer
|
 Hider Hider
|
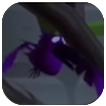
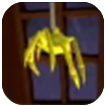 Gold Spider Gold Spider
|
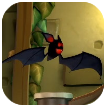 Bat Bat
|
 Crow Crow
|
Luigi's Mansion 2: Dark Moon Related Guides
All Mission Guides
Post-Game
| Post-Game Guide | ||
|---|---|---|
| ScareScraper Guide | Ending and Post-Game Content | 100% Checklist |
Comment
Author

A-4 Visual Tricks Gems and Boo Location Guide
Rankings
- We could not find the message board you were looking for.
Gaming News

![Monster Hunter Stories 3 Review [First Impressions] | Simply Rejuvenating](https://img.game8.co/4438641/2a31b7702bd70e78ec8efd24661dacda.jpeg/show)


![Monster Hunter Stories 3 Review [First Impressions] | Simply Rejuvenating](https://img.game8.co/4438641/2a31b7702bd70e78ec8efd24661dacda.jpeg/thumb)
Popular Games

Genshin Impact Walkthrough & Guides Wiki
Honkai: Star Rail Walkthrough & Guides Wiki
Umamusume: Pretty Derby Walkthrough & Guides Wiki
Pokemon Pokopia Walkthrough & Guides Wiki
Resident Evil Requiem (RE9) Walkthrough & Guides Wiki
Monster Hunter Wilds Walkthrough & Guides Wiki
Wuthering Waves Walkthrough & Guides Wiki
Arknights: Endfield Walkthrough & Guides Wiki
Pokemon FireRed and LeafGreen (FRLG) Walkthrough & Guides Wiki
Pokemon TCG Pocket (PTCGP) Strategies & Guides Wiki


Recommended Games
Diablo 4: Vessel of Hatred Walkthrough & Guides Wiki
Cyberpunk 2077: Ultimate Edition Walkthrough & Guides Wiki
Fire Emblem Heroes (FEH) Walkthrough & Guides Wiki
Yu-Gi-Oh! Master Duel Walkthrough & Guides Wiki
Super Smash Bros. Ultimate Walkthrough & Guides Wiki
Pokemon Brilliant Diamond and Shining Pearl (BDSP) Walkthrough & Guides Wiki
Elden Ring Shadow of the Erdtree Walkthrough & Guides Wiki
Monster Hunter World Walkthrough & Guides Wiki
The Legend of Zelda: Tears of the Kingdom Walkthrough & Guides Wiki
Persona 3 Reload Walkthrough & Guides Wiki


All rights reserved
© Nintendo. Games are property of their respective owners. Nintendo of America Inc. Headquarters are in Redmond, Washington, USA
The copyrights of videos of games used in our content and other intellectual property rights belong to the provider of the game.
The contents we provide on this site were created personally by members of the Game8 editorial department.
We refuse the right to reuse or repost content taken without our permission such as data or images to other sites.