Luigi's Mansion 2 Gems
Play Time | Graphics Comparison| New Features
★ Mansion Guides | Interactive Maps | 100%
☆ Locations: Gems | Boos | Ghosts | Gold Bones
★ ScareScraper Multiplayer Guide | Solo?!
┗ High Score Boards ▶︎ Missions | SkyScraper
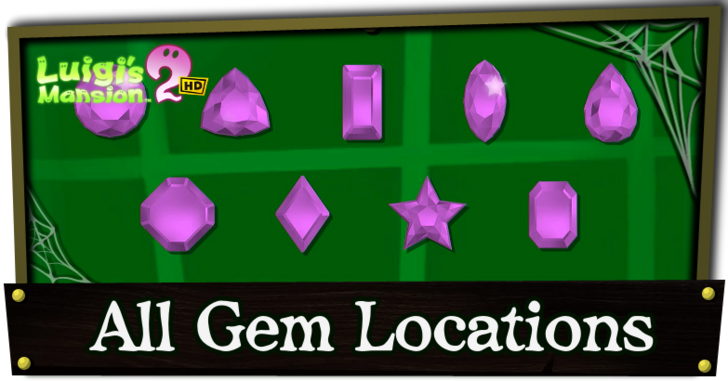
Check out the locations of each of the thirteen gems that can be collected in each mansion in Luigi's Mansion 2 HD. See where to find each gem and the rewards for finding all gems in this comprehensive gem locations guide!
All Gem Locations in Luigi's Mansion 2
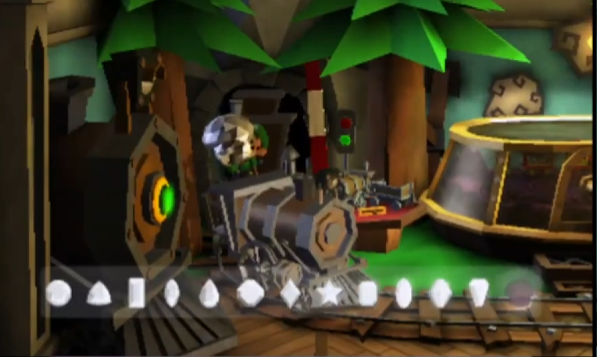
| ★ Press the icons on the right side to show collectibles and points of interest on the map. ★ Toggle the Full On icon to expand the map. |
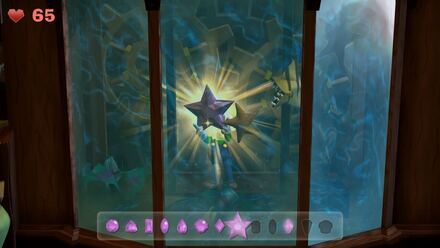
The Interactive Map both shows the location of key points on the map, and doubles as a collectible checker.
- Click an icon on the right side to show all the pins of a specific type, or click the magnifying glass button to search for a specific pin by name.
- Click a pin on the map to see its name and description, and a relevant picture or video if available.
- From here, click Mark as Acquired to indicate that you've gotten a collectible already. This will change its icon on the map to show that it has been collected, and add 1 to that pin type's Counter.
- To undo this, click on the same pin and click Restore to unclaimed.
- To check how many pins you have marked so far, check the Counter in the bottom left, and click the icon that looks like a checklist to see counters for all pin types.
- If the collected pins start to get in the way, you can hide them all by clicking the green Show Pins button on the left side.
| Icon | How to Use |
|---|---|
 | Show Names This button reveals the Name of every icon currently shown. |
 | Show Pins This button will toggle between showing and hiding all the pins which you have already marked as acquired. |
 | Fullscreen This button will change the map display to fill the screen. |
 | Search Mode Toggle This button will display a searchbar which you can use to search for an individual pin by its name. |
 | Icon Mode Toggle In Search Mode, this button will toggle you back to Icon Mode, removing the search bar and displaying the icons again. |
 | All Pins This button is shown along with the Icons on the right when there are over 6 types of pins. Click it for a full selection of all available pin types. |
 | Counter Tracks the number of pins you have of a certain type. The pin type shown is set to the page and currently cannot be changed; however, all pin type counters can be viewed by clicking the checklist icon on the right side. |
| View All Counters This icon is found on the right side of the Counter. When a map has more than one pin type, click this icon to see Counters for all pin types. | |
| Zoom In / Zoom Out This icon is found on the top left side of the map. You can press these buttons, or use your scroll wheel while hovering, to Zoom In and Out of the interactive map. |
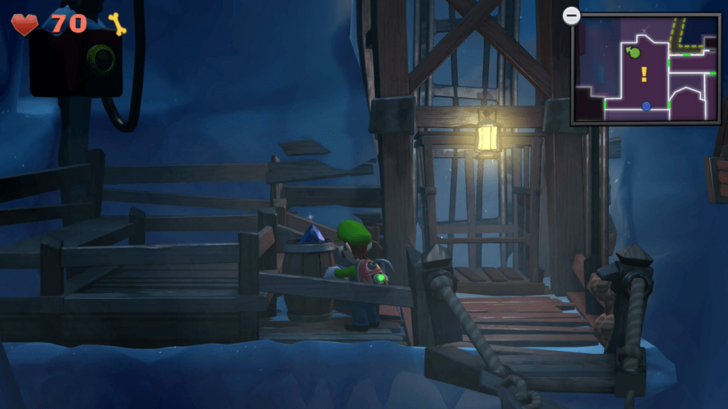
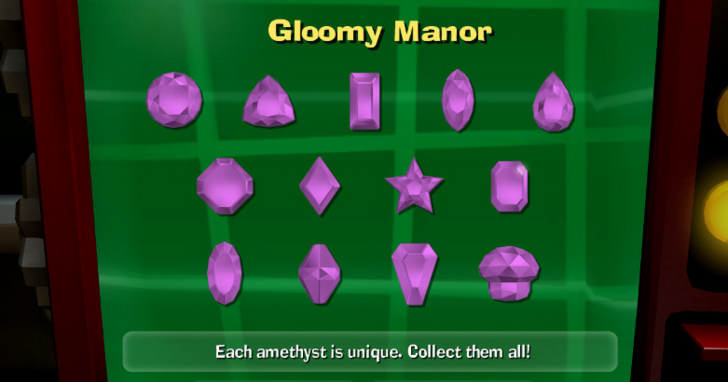
Gloomy Manor Gems
| Jump to a Section! | |||||
|---|---|---|---|---|---|
| Gloomy Manor | Haunted Towers | Old Clockworks | |||
| Secret Mine |
Treacherous Mansion |
||||
| ✔️ | Gem | Image | Mission | Also Found In | How to Find |
|---|---|---|---|---|---|
|
|
 |
A-1 Poltergust 5000 | All A missions, Bonus |
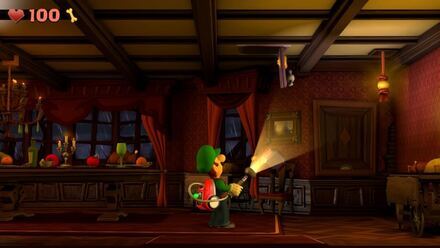
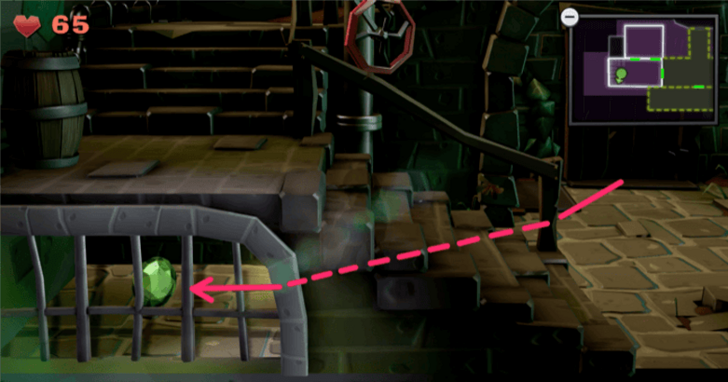
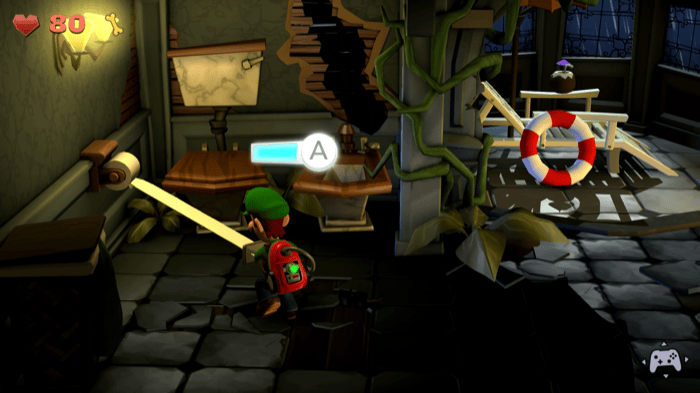
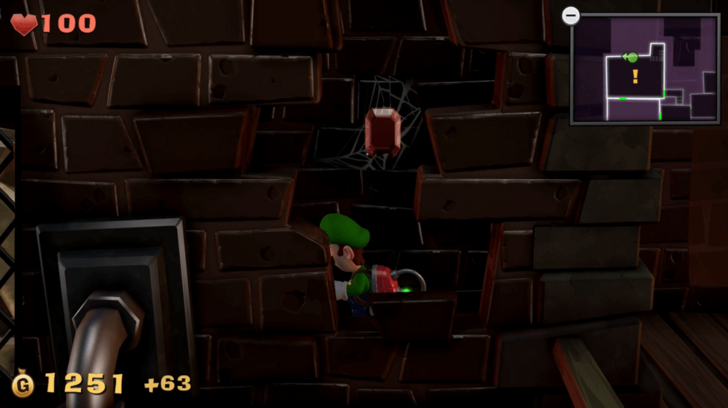
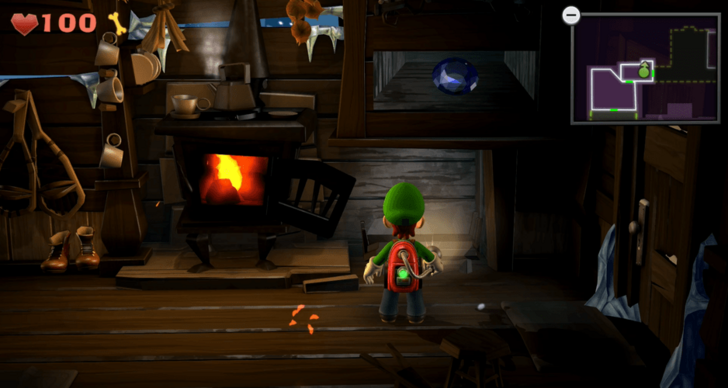
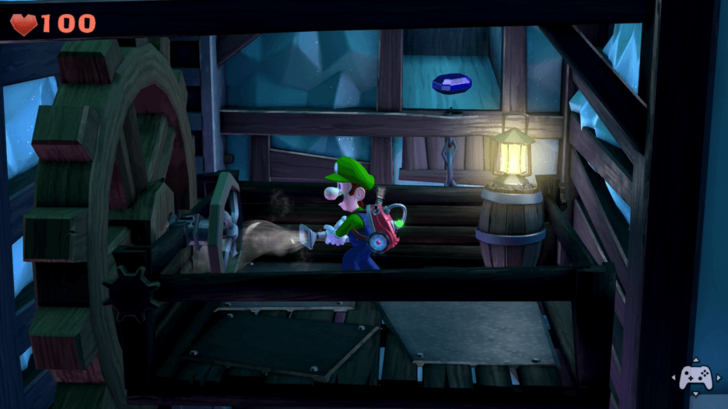
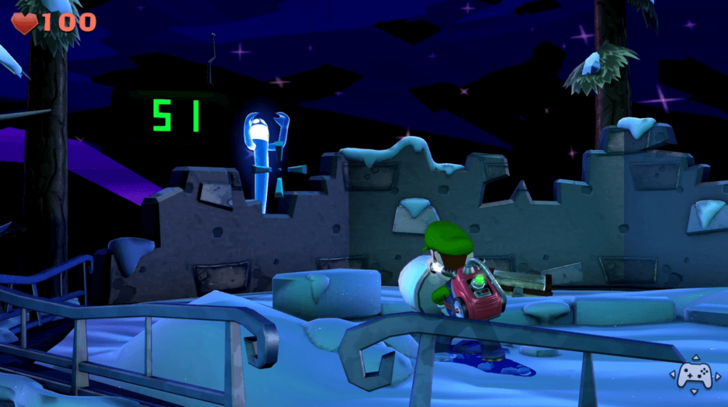
Room: Mudroom Exterior Head to the Entrance after obtaining the Strobobulb. Go into the east room, and flash the light there to unlock the door to the Mudroom Exterior. Head Norwest, then aim up and use the Poltergust to vacuum it from the tree. |
|
|
|
 |
A-1 Poltergust 5000 | All A missions, Bonus |
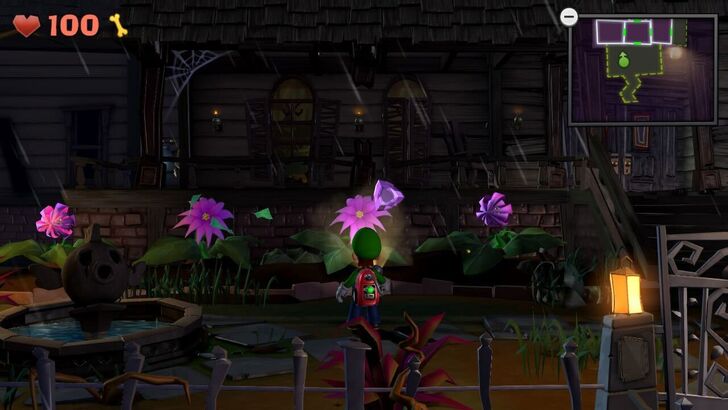
Room: Front Yard Head out to the Front Yard, use the Strobulb on the second flower from the right, and the flower will drop the Triangle Amethyst |
|
|
|
 |
A-2 Gear Up | A-2 to A-5, Bonus |
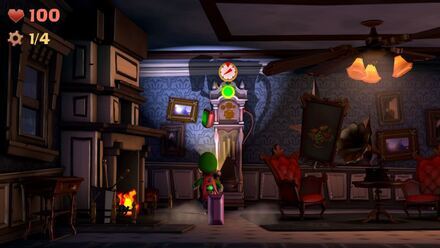
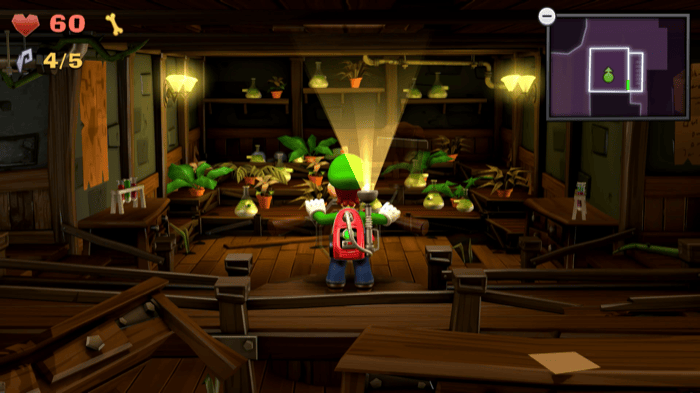
Room: Parlor Head towards the Master Hall, and proceed towards the door located on the southwest portion of the map. From there, head inside the room and aim your Strobulb towards the clock inside the Parlor to acquire the Rectangle Amethyst. |
|
|
|
 |
A-2 Gear Up | A-2 to A-5, Bonus |
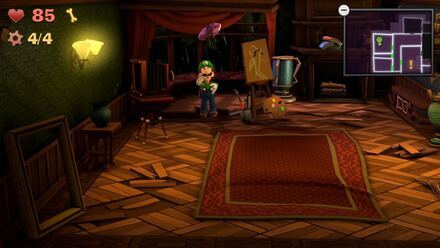
Room: Studio Head towards the Study, and roll up the carpet to reveal a switch that turns off the fireplace in the room. Proceed towards the fireplace to reach the Studio. Proceed towards the window curtain on the northwest, and suck up the left portion of the curtain using the Poltergust. |
|
|
|
 |
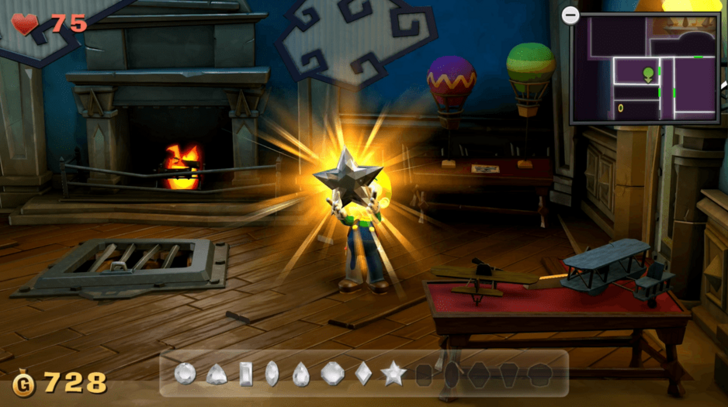
A-3 Quiet Please! | A-3, Bonus |
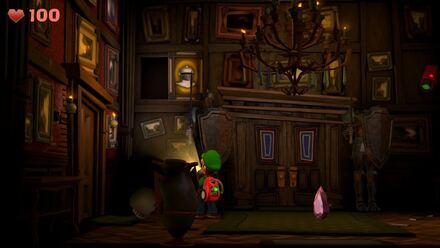
Room: Entrance Interact with the suit of armor on your right to make its helmet fall off. From there, suck up the helmet using the Poltergust and aim it towards the portait located at the northwest portion of the wall facing you. Hit the portrait to reveal the gem hidden behind it. |
|
|
|
 |
A-3 Quiet Please! | A-3 to A-5, Bonus |
Room: Dining Room Head to the Dining Room, and proceed towards the east portion area of the room. Aim your Strobulb to the ceiling, and look for a safe. Once you've flashed the safe, the gem will fall down from it. |
|
|
|
 |
A-3 Quiet Please! | A-3 to A-5, Bonus |
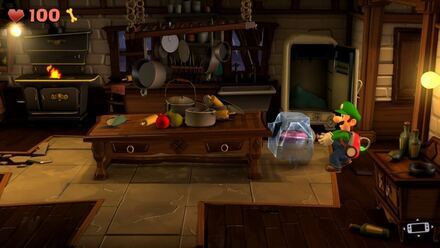
Room: Kitchen Interact with the fridge in the kitchen to open it. Suck up the block of ice using the Poltergust, and place it above the fire stove to melt it. From there, acquire the gem from the melted ice. |
|
|
|
 |
A-4 Visual Tricks | A-3 to A-5, Bonus |
Room: Foyer Flash your Strobulb on the west portion of the Patio to reveal a hidden door. Suck up the Spirit Balls that emerged, and proceed inside the room. From there, use the Poltergust to vacuum the gem inside the aquarium located on the west end of the room. |
|
|
|
 |
A-4 Visual Tricks | A-3 to A-5, Bonus |
Room: Patio Shine the Dark-Light Device on the left side of the fountains to reveal the missing one. Suck up the Spirit Balls using the Poltergust, and claim the gem that fell on the grass. |
|
|
|
 |
A-4 Visual Tricks | A-4 to A-5, Bonus |
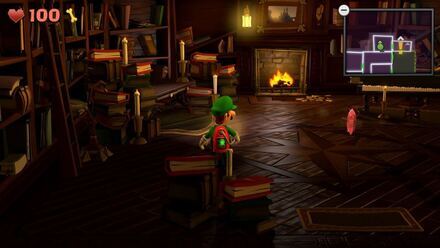
Room: Library Flash the Strobulb on the west portion of the Library to reveal a globe. Suck up the Spirit Balls that are flying around the room. Vacuum the globe in the library using the Poltergust, and fire it towards the fireplace to reveal a hidden gem inside it. |
|
|
|
 |
A-4 Visual Tricks | A-2 to A-5, Bonus |
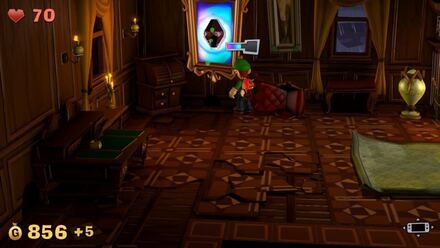
Room: Study Vacuum the curtains located on the portrait at the west part of the wall facing you. From there, flash the Strobulb on the portrait to reveal a hidden gem inside it. |
|
|
|
 |
A-5 Sticky Situation | A-5, Bonus |
Room: Rafter Proceed towards the southeast portion of the area until you reach a mirror at the corner of the area. Vacuum the gem above the mirror to acquire it. |
|
|
|
 |
A-5 Sticky Situation | A-5, Bonus |
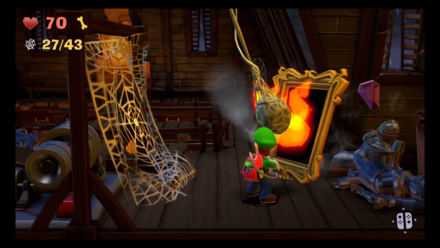
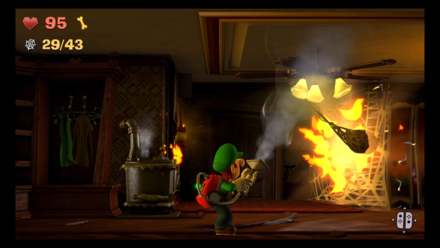
Room: Bedroom Ignite the stove, then use the Poltergust to make the ceiling fan rotate in the Bedroom. The ball of web attached to it will spin around and get caught on fire. Once the web burns away from the dressing screen, go behind it to acquire the gem. |
Gloomy Manor Gems and Missions Guide
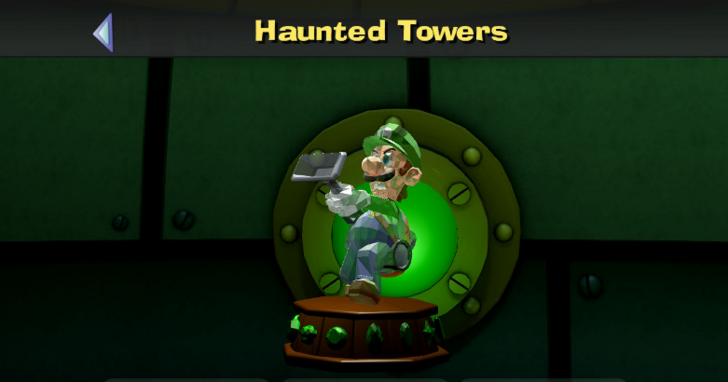
Haunted Towers Gems
| Jump to a Section! | |||||
|---|---|---|---|---|---|
| Gloomy Manor | Haunted Towers | Old Clockworks | |||
| Secret Mine |
Treacherous Mansion |
||||
| ✔️ | Gem | Image | Mission | Also Found In | How to Find |
|---|---|---|---|---|---|
|
|
 |
B-1 A Job for a Plumber | All B missions, Bonus |
Room: Tower Lobby Head towards the area behind the first flight of stairs in the Tower Lobby. From there, acquire the gem you find in the area. |
|
|
|
 |
B-1 A Job for a Plumber | B-1, Bonus |
Room: Laboratories Use a bulb to access the floor above you. Float towards the west portion of the area, and descend down the opening of the tank. From there, vacuum the webs surrounding the gem and acquire it. |
|
|
|
 |
B-2 The Pinwheel Gate | B-2 to B-5, Bonus |
Room: Garden Use the Poltergust to water the flower located on the southeast portion of the area. After the flower blooms, flash it with the Strobulb to reveal the hidden gem. |
|
|
|
 |
B-2 The Pinwheel Gate | B-2 to B-5, Bonus |
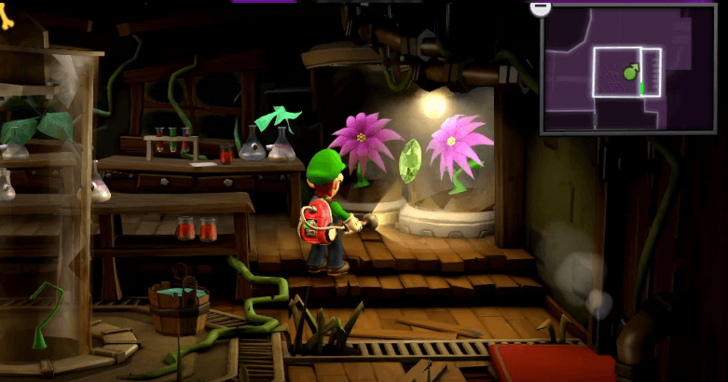
Room: Botany Lab Use the Poltergust to water the flower located on the northeast portion of the area. After watering the flower on the left and waiting for it to bloom, flash it with the Strobulb to reveal the hidden gem. |
|
|
|
 |
B-2 The Pinwheel Gate | B-2 to B-5, Bonus |
Room: Seedling Laboratory Proceed towards the shooter mechanism in the area, and shoot the mouse dashing around the room. Hitting it will grant you the hidden gem. |
|
|
|
 |
B-2 The Pinwheel Gate | B-2 to B-5, Bonus |
Room: West Garden Once you've gained access to the Maintenance area, fix the pipes by the stairs, then shoot a seed pod towards the giant flytrap in the area. From there, proceed towards the chest to acquire the hidden gem. |
|
|
|
 |
B-3 Graveyard Shift | B-3, Bonus |
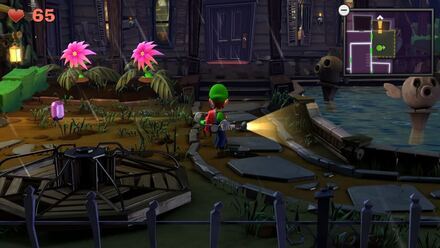
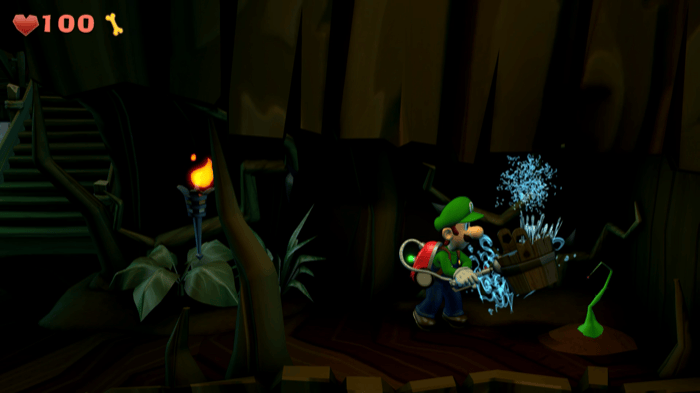
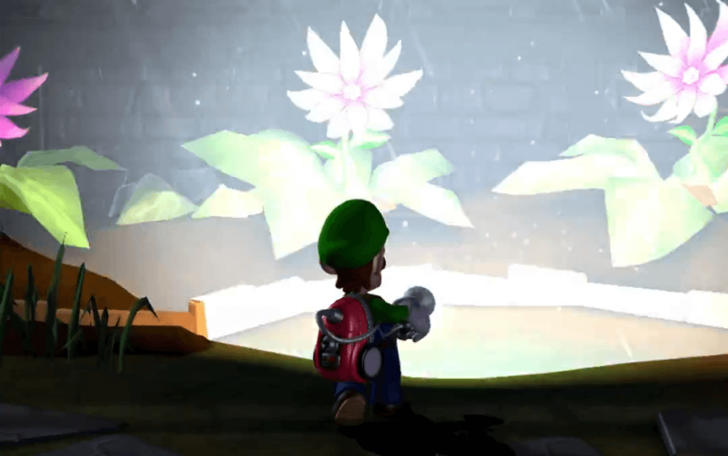
Room: Hollow Tree After the cutscene where Luigi goes down with a web, suck up a web ball, set it on fire with the torch, and head to the west cave to burn down the cobwebs. Then, grab the bucket, fill it with water in the pond in the middle, water the flower in the east cave, use the Strobulb on the flower, and it will drop the Rhombus Emerald. |
|
|
|
 |
B-3 Graveyard Shift | B-3 to B-5, Bonus |
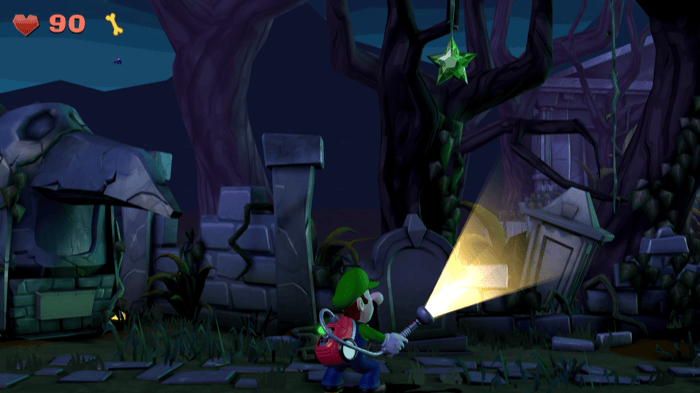
Room: Old Graveyard Upon entering the old graveyard, use the Poltergust to suck the Star Emerald that is hanging on a vine. |
|
|
|
 |
B-4 Pool Party | B-4, Bonus |
Room: Skybridge Head towards the Skybridge, avoid the attacks of the deadly plants, and after sucking up the third plant, it will drop the Octagon Emerald. |
|
|
|
 |
B-4 Pool Party | B-4, Bonus |
Room: Rumpus Room Head up to the Rumpus Room, walk around the big doll on the west side that is watching you until its head falls off, and the Oval Emerald will drop. |
|
|
|
 |
B-4 Pool Party | B-4 to B-5, Bonus |
Room: Solarium Head towards the Solarium, use the Dark-Light Device on the table in the north where a chest originally was, and open the chest to obtain the Spinde Emerald. |
|
|
|
 |
B-4 Pool Party | B-4 |
Room: Conservatory Head towards the conservatory, suck up a bulb from a flower, use it to float towards the upper right platform, use the Dark-Light Device to reveal a hidden door, complete the time challenge, and open the chest to obtain the Coffin Emerald. |
|
|
|
 |
B-4 Pool Party | B-4 to B-5, Bonus |
Room: West Bathroom Enter the west bathroom after getting a key for it, defeat all the enemies inside, pull the toilet paper on the west wall, and a Mushroom Emerald will drop. |
Haunted Towers Gems and Missions Guide
Old Clockworks Gems
| Jump to a Section! | |||||
|---|---|---|---|---|---|
| Gloomy Manor | Haunted Towers | Old Clockworks | |||
| Secret Mine |
Treacherous Mansion |
||||
| ✔️ | Gem | Image | Mission | Also Found In | How to Find |
|---|---|---|---|---|---|
|
|
 |
C-1 A Timely Entrance | C-1 to C-4, Bonus |
Room: Clockworks Court In Clockworks Court, head towards the east side, use the Dark-Light Device to reveal a toolbox at the end of the rail, and open the toolbox to obtain the Circle Ruby. |
|
|
|
 |
C-1 A Timely Entrance | C-1 to C-4, Bonus |
Room: Warehouse Enter the warehouse, use the Dark-Light Device to reveal a green barrel near the door on the north, place the barrel on the machine to unwrap its green wrap, and a Triangle Ruby will drop. The green barrel is on top of a box, on the right side of the door that leads to the Roundhouse. |
|
|
|
 |
C-1 A Timely Entrance | C-1 to C-4, Boss, Bonus |
Room: Clock Tower Gate Upon entering the Clock Tower Gate, head towards the north side by the broken window, use the Dark-Light Device to reveal a toolbox, and open it to obtain a Rectangle Ruby. |
|
|
|
 |
C-2 Underground Expedition | C-2 to C-4, Bonus |
Room: Storm Cellar Head down to the Storm Cellar, defeat all the enemies, suck up the sheet that is covering the painting on the southwest corner, use the Dark-Light Device on the painting above the bed, and a Football Ruby will drop. |
|
|
|
 |
C-2 Underground Expedition | C-2 to C-4, Bonus |
Room: Canyon Stairs Head to the Canyon Stairs, go up the platform on the east, and use the Poltergust to suck the Drop Ruby that is stuck up on the east wall. |
|
|
|
 |
C-2 Underground Expedition | C-2, Bonus |
Room: Quarry Head down to the lower floor of the Quarry, pull the cart to reveal a hidden cave behind, and use the Poltergust to suck the Stone Ruby that is stuck on the ceiling. |
|
|
|
 |
C-3 Roundhouse Brawl | C-3 |
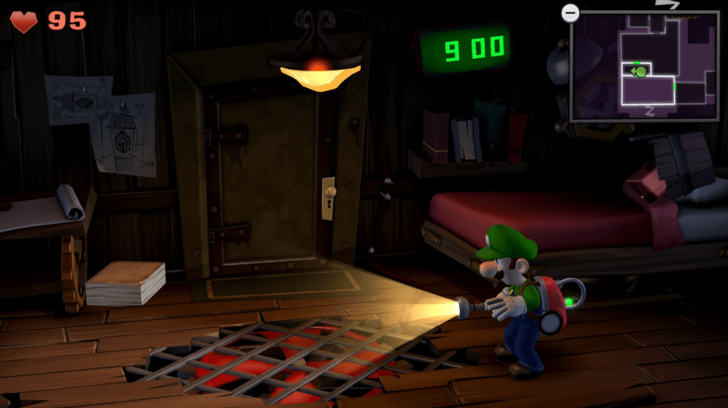
Room: Clockmaker's Chamber Head up to the Clockmaker's Chambers, suck the carpet in the middle, use the Poltergust to blow some air until the clock on the wall reaches 9:00, and defeat the enemy holding the Rhombus Ruby to obtain the gem. |
|
|
|
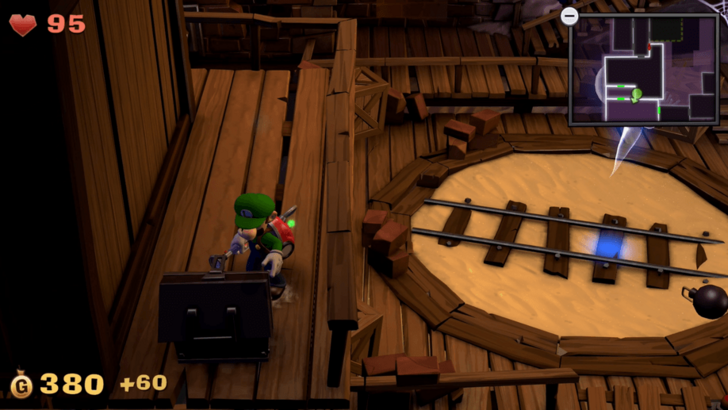 |
C-3 Roundhouse Brawl | C-3 to C-4, Bonus |
Room: Roundhouse After the cutscene, upon entering the Roundhouse, go across the railings on the left side to get to the north side. Then, go across the railings on the right side to get to the south side, head towards the south east, and open the toolbox at the very end of the balcony to obtain the Star Ruby. |
|
|
|
 |
C-3 Roundhouse Brawl | C-3 to C-4, Bonus |
Room: Roundhouse Head down to the lower floor of the Roundhouse, go down a couple of stairs, then head west and use the Poltergust to suck the Octagon Ruby stuck up on the north wall. |
|
|
|
 |
C-5 Piece at Last | C-5 |
Room: Gear Chamber Head down to the lower floors of the Gear Chamber, defeat all the beetles coming out of the hole on the north wall, use the Dark-Light Device to reveal a hidden wooden plank, go through the hidden room in the hole on the north wall, and finish the time challenge. Open the chest to obtain the Oval Ruby. |
|
|
|
 |
C-5 Piece at Last | C-5, Bonus |
Room: Maintenance Hub Head to the Maintenance Hub, use the strobulb to swing across to the left side, head down the lower floor, use the Dark-Light Device to reveal a toolbox in the middle beneath the big gear, and open it to obtain the Spindle Ruby. |
|
|
|
 |
C-5 Piece at Last | C-5 |
Room: Service Elevator Once you found the missing Toad, head back to the Sevice Elevator, pull the sheet covering the big mirror in the east, aim and shoot the Toad towards the gem opposite the mirror, and the Toad will grab the Coffin Ruby for you. |
|
|
|
 |
Showtime | Boss, Bonus |
Room: Movements Head into Movements, go to the window in the west, and use the Poltergust to suck the Mushroom Ruby just outside the window. |
Old Clockworks Gems and Missions Guide
Secret Mine Gems
| Jump to a Section! | |||||
|---|---|---|---|---|---|
| Gloomy Manor | Haunted Towers | Old Clockworks | |||
| Secret Mine |
Treacherous Mansion |
||||
| ✔️ | Gem | Image | Mission | Also Found In | How to Find |
|---|---|---|---|---|---|
|
|
 |
D-1 Cold Case | All D missions, Bonus |
Room: Smokehouse Head into the Smokehouse, defeat all the enemies inside, use the Dark-Light Device to reveal a coat hanging on the north wall by the door, pull it down, and a Circle Sapphire will drop. |
|
|
|
 |
D-1 Cold Case | All D missions, Bonus |
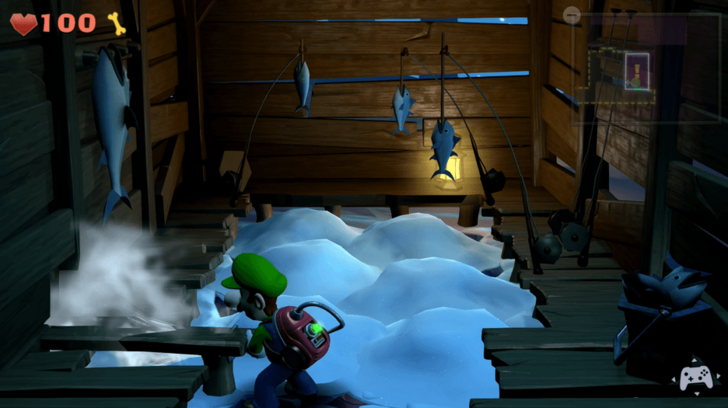
Room: Fishing Hut Head towards the Fishing Hut after the cutscene with the Boo, suck up the snow by the entrance on the left, and you will obtain a Triangle Sapphire. |
|
|
|
 |
D-1 Cold Case | D-1 |
Room: Under the Ice After the cutscene with the Toad, go to the upper floor of Under the Ice with the Toad, shoot the Toad towards the hole in the north wall, and Toad will slide down the lower floor with the Rectangle Sapphire. |
|
|
|
 |
D-1 Cold Case | All D missions, Bonus |
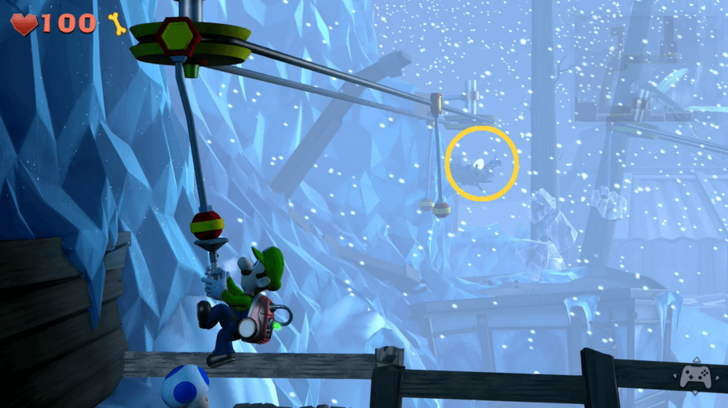
Room: High Wires Head to the High Wires, use the Poltergust to swing onto the platform with a nest on the west wall, use the Strobulb to scare the birds, and use the Poltergust again to suck the Football Sapphire. |
|
|
|
 |
D-1 Cold Case | All D missions, Bonus |
Room: Airway Head to the Airway via the Terminal and use the telescope to see that the gem was dropped into a barrel by a bat. Head to the Airway via the Basin, go across the rope bridge, and interact with the barrel on the other side to obtain the Drop Sapphire. |
|
|
|
 |
D-2 Hit Rock Bottom | D-2 to D-3, Bonus |
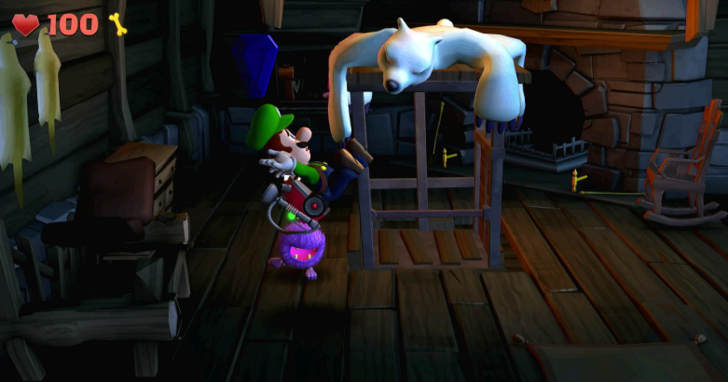
Room: Chalet Approach Head out to Chalet Approach, use your Poltergust to get the flaming turkey on top of the grill in the west, use it on the frozen painting just down the stairs on the east, and use the Dark-Light Device on the painting to obtain the Stone Sapphire. |
|
|
|
 |
D-2 Hit Rock Bottom | D-2 to D-3, Bonus |
Room: Prospector's Crossing Head into Prospector's Crossing, use the Dark-Light Device to reveal a hidden pickaxe near the hanging lantern, use the Poltergust on the pickaxe to reveal hidden blocks of wood behind the wall, and use the wooden blocks to break the ice where the Rhombus Sapphire is stuck. |
|
|
|
 |
D-2 Hit Rock Bottom | D-2 to D-3, Bonus |
Room: Skip Slope Slide down the Skip Slope, head towards the left side, and try to grab the Star Sapphire as you're sliding down. |
|
|
|
 |
D-2 Hit Rock Bottom | D-2 to D-3, Bonus |
Room: Shaft Head down the Shaft by using the Poltergust to turn the gear on the lift, once you reach the bottom, pull the chain, then head up until you see a hole containing the Octagon Sapphire. |
|
|
|
 |
D-2 Hit Rock Bottom | D-2 to D-3, Bonus |
Room: Deep Hall After you have transported some rocks from Pit Mine, use the Poltergust on the rocks and set it on fire in the fire pit, then aim the flaming rock on the ceiling just above the fire pit, and the Oval Sapphire will drop. |
|
|
|
 |
D-3 Across the Chasm | D-3, Bonus |
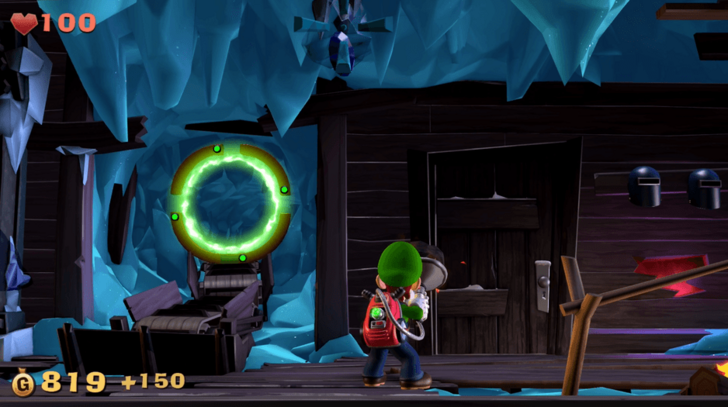
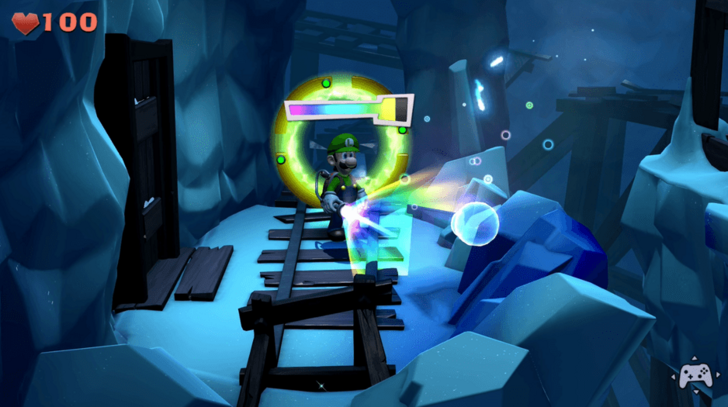
Room: Crossroads Head into Crossroads, go through the portal, use the Dark-Light Device to reveal the drawer opposite the door, and suck up all the snow to obtain the Spindle Sapphire. |
|
|
|
 |
D-3 Across the Chasm | D-3, Bonus |
Room: Crystal Quarry E-Gate Head into Crystal Quarry, use the Strobulb to open the portal, and once you go through the portal, it will lead you to the Chalet along with the Coffin Sapphire. |
|
|
|
 |
D-3 Across the Chasm | D-3 |
Room: High Wires After you melt down the frozen swings in the Gondola, head towards High Wires. Use the Poltergust to reach the platform on the west, then go across the fallen tree to the north until you reach a door with a crescent moon symbol. After entering the door, complete the time challenge, and you will receive the Mushroom Sapphire as a reward. |
Secret Mine Gems and Missions Guide
Treacherous Mansion Gems
| Jump to a Section! | |||||
|---|---|---|---|---|---|
| Gloomy Manor | Haunted Towers | Old Clockworks | |||
| Secret Mine |
Treacherous Mansion |
||||
| ✔️ | Gem | Image | Mission | Also Found In | How to Find |
|---|---|---|---|---|---|
|
|
 |
E-1 Front-Door Key | E-1, Bonus |
Room: Underground Lab Head into the Underground Lab, defeat all the enemies and the Boo, use the iron helmet to shoot the glass bottle up on the wall on the east, and grab the Circle Diamond as it drops down. |
|
|
|
 |
E-1 Front-Door Key | E-1, Bonus |
Room: Haunted Catacombs Head into the Haunted Catacombs past the Underground Lab, head towards the very northeast corner, and use the Dark-Light Device on the painting on the wall to grab a flaming web ball. Then head towards the west until you find a web and burn it down to obtain the Triangle Diamond hidden behind. |
|
|
|
 |
E-1 Front-Door Key | E-1, Bonus |
Room: Cliffside Head towards Cliffside through the door on the southeast corner in Haunted Catacombs. Then use the Poltergust to suck the Rectangle Diamong hanging on a vine. |
|
|
|
 |
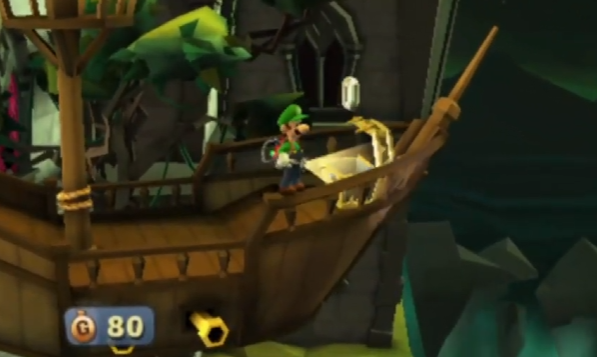
E-2 Double Trouble | E-2 to E-3, E-5, Bonus |
Room: Front Entrance At the Front Entrance, use the Dark-Light Device to reveal the statue on the right side at the bottom of the stairs, and then pull the chain to reveal the secret vault. Once you open the vault and defeat all the enemies, you can obtain the Football Diamond inside. |
|
|
|
 |
E-2 Double Trouble | E-2 to E-3, E-5, Bonus |
Room: Restrooms In Grand East, use the Dark-Light Device to reveal a hidden door in the west area. The door will lead you to Restrooms, and once you pull the chain to flush the toilet, it will burst out the Drop Diamond. |
|
|
|
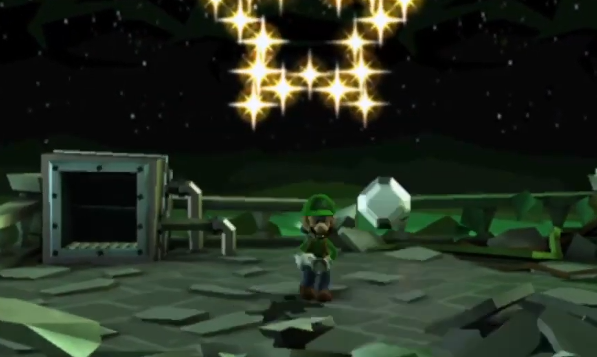 |
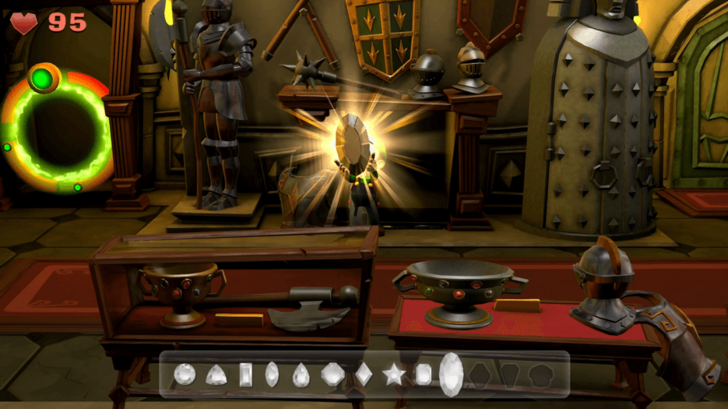
E-2 Double Trouble | E-2, Bonus |
Room: Gargoyle Roof On the Gargoyle Roof, suck up shooting stars from the sky and the gargoyles to complete the star constellation in the sky. Once the star constellation is completed, it will drop the Stone Diamond on the roof. |
|
|
|
 |
E-2 Double Trouble | E-2 to E-3, E-5, Bonus |
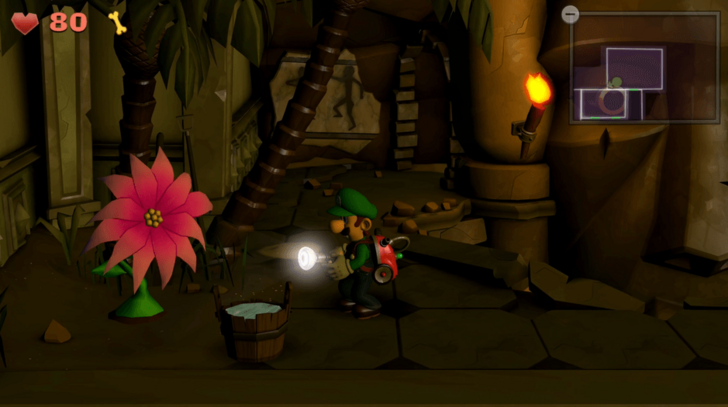
Room: Anceint Exhibit Once you've got a bucket of water from Jungle Exhibit, head towards the Ancient Exhibit. In the Ancient Exhibit, bring the bucket of water on the upper floor through the cave in the east, and then water the flower. Then use the Strobulb on the flower to make it drop the Rhombus Diamond. |
|
|
|
 |
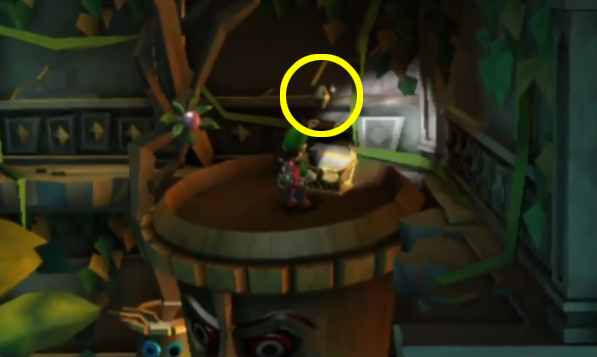
E-3 A Train to Catch | E-3, E-5, Bonus |
Room: Aviation Exhibit Head into the Aviation Room, pull down the heavy bags tied to the hot air balloon, defeat all the enemies, and the Star Diamond will drop from the hot air balloon. |
|
|
|
 |
E-3 A Train to Catch | E-3, E-5, Bonus |
Room: Nautical Exhibit Once you've got a bucket of water from Jungle Exhibit, head towards the Nautical Exhibit. In the Nautical Exhibit, place the bucket of water opposite the steering wheel on the upper right to reveal a hidden room. In the hidden room, open the chest on the end of the ship to obtain the Octagon Diamond. |
|
|
|
 |
E-3 A Train to Catch | E-3, E-5, Bonus |
Room: Dark Age Exhibit Using your Poltergust, suck up a bulb from Study to float on the upper right platform in Front Entrance and get the book in the gargoyle's mouth. Suck the book into the Dark Age Exhibit and place it on the bookshelf in the middle, and then the Oval Diamond will be revealed. |
|
|
|
 |
E-3 A Train to Catch | E-3 |
Room: Jungle Exhibit Using your Poltergust, suck up a bulb from Study and bring it into the Jungle Exhibit. In the Jungle Exhibit, use the bulb to float on the upper left platform and then suck the golden bulb. After collecting all the coins by using the golden bulb, head to the upper right platform to open the chest and obtain the Spindle Diamond. |
|
|
|
 |
E-3 A Train to Catch | E-3 |
Room: Ice Age Exhibit Using your Poltergust, suck up a bulb from Study and bring it into the Ice Age Exhibit. In the Ice Age Exhibit, use the bulb to float on the upper left platform and then suck the golden bulb. After collecting all the coins by using the golden bulb, head back to the upper left platform to open the chest and obtain the Coffin Diamond. |
|
|
|
 |
E-3 A Train to Catch | E-3, E-5, Bonus |
Room: Train Exhibit Head into the Train Exhibit, defeat all the enemies, use the Dark-Light Device to reveal a hidden rail track in the middle, then ride the train around the room, and once the train stops, you have already obtained the Mushroom Diamond. |
Treacherous Mansion Gems and Missions Guide
How to FInd Gems in Luigi's Mansion 2 HD
Flash the Strobulb to Open Objects
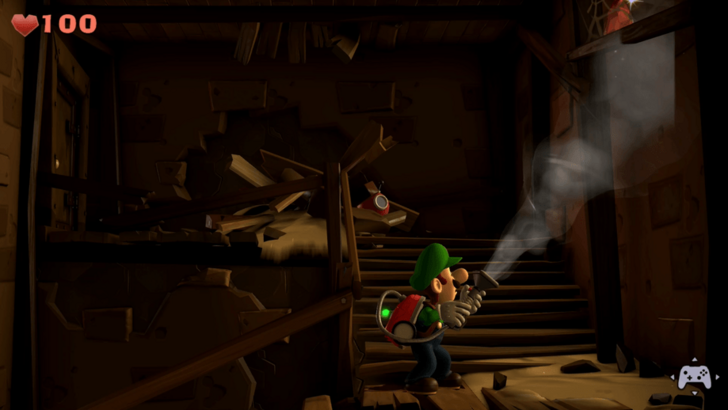
Some gems can be found inside plants or objects that can be opened using your Strobulb. Explore the area, and try using the Strobulb on anything that may need some light.
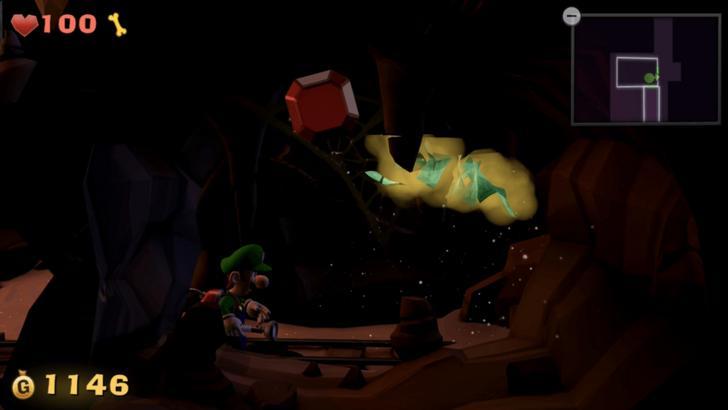
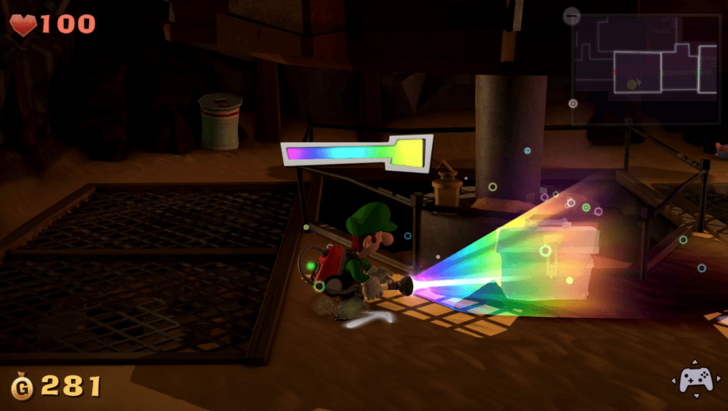
Use the Dark-Light Device
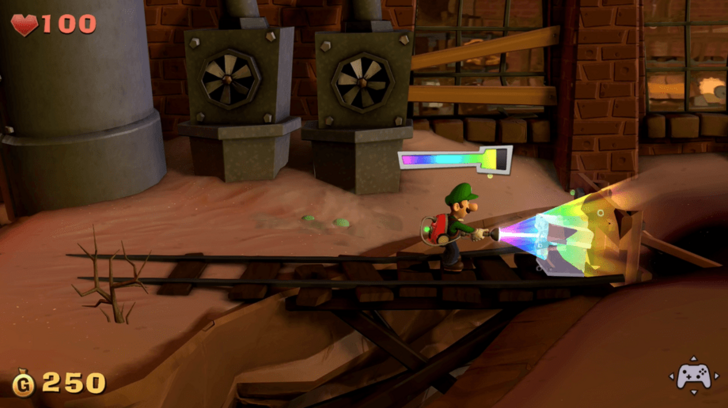
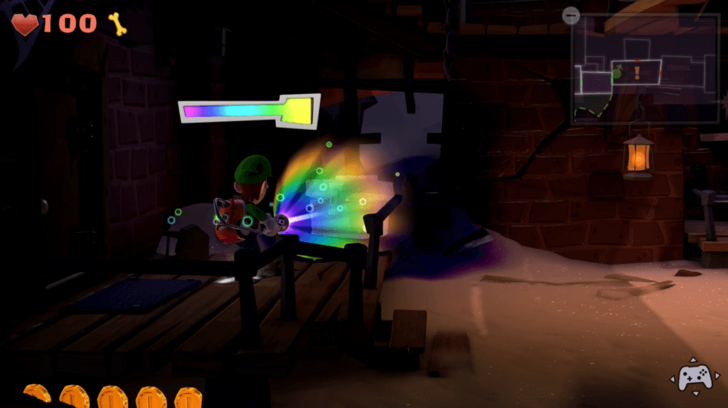
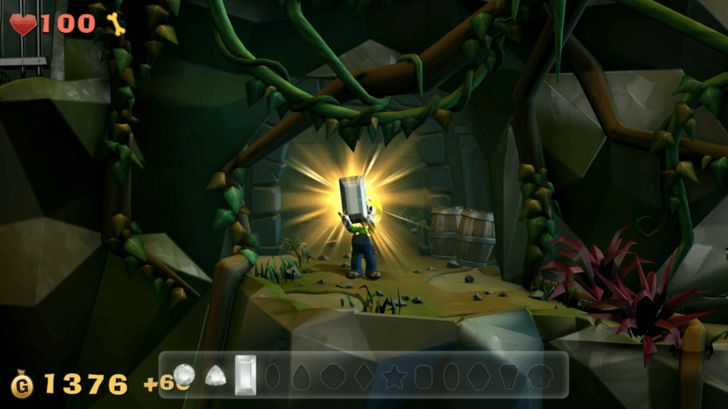
Hidden passageways, Secret Doors, and invisible items can be revealed using the Dark-Light Device. Vacuum up the Spirit Balls after using the device in order to reveal the hidden object. Investigating the object you reveal may lead you to a gem.
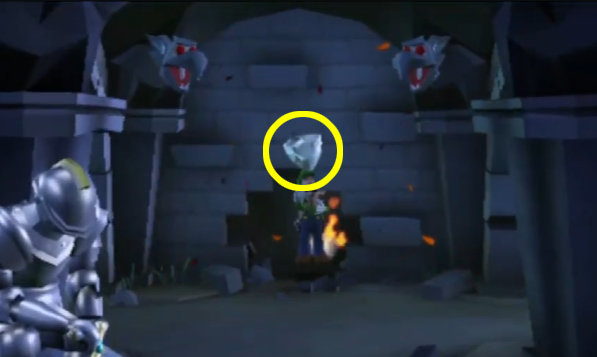
Gems trapped in portraits can also be obtained by using the Dark-Light Device.
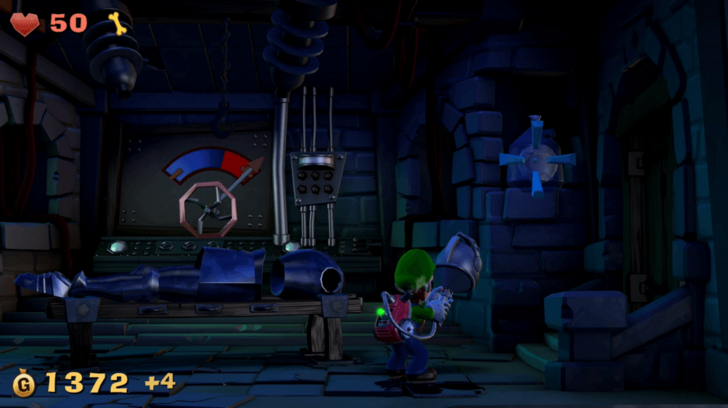
Dark-Light Device Upgrades and How to Unlock
Solve Puzzles
Puzzles can be found as you go through missions. Most puzzles involve grabbing an object with your Poltergust and either shooting it at a target or using the object on the environment.
Certain missions may also have Secret Doors hidden within that reward gems after solving their bonus challenge puzzles. These secret passageways are notable for their shaking doors, which can suck in Luigi and teleport him to the bonus stage.
All Secret Door Locations and Rewards
Vacuum Conspicuous Items
Some gems can be found by vacuuming items hiding them such as curtains or table cloths found throughout the game. Sometimes gems can also just be found in plain sight, stuck on trees or behind cobwebs. Be sure to look around the rooms thoroughly, and use your Poltergust on any suspicious spots.
Find 13 Gems Per Mansion
There are a total of 13 gems that can be found in each mansion, scattered among the mansion's missions. Each mansion has a different type of gem you can find, but the gem shapes remain consistent per mansion.
Gem Completion Rewards
Luigi Statues
Collecting 13 gems of a mansion gets you a Luigi statue, which can be viewed in your vault. There are a total of 5 Luigi statues that you can get—one for each mansion.
Collecting all these statues is a step towards getting an E. Gadd medal necessary for 100% completion. Other things you need to collect for this medal are ghosts, Boos, and treasure.
Luigi's Mansion 2 HD Related Guides

Luigi's Mansion 2 HD (Dark Moon)
Top Page
Luigi's Mansion 2 HD Wiki
| All Categories | |
|---|---|
 Mansions Mansions |
 Tips and Tricks Tips and Tricks |
 Maps Maps |
 ScareScraper ScareScraper |
 Enemies Enemies |
 Equipment Equipment |
 Characters Characters |
 Bosses Bosses |
Popular Articles
Game News Articles
-
![]()
Pre-Order Bonuses
Updated 6/17/2024
Know what else you can get when you pre-order Luigi's Mansion 2 HD!
-
![]()
Release Time
Updated 6/27/2024
Read to know exactly when does Luigi's Mansion 2 HD drops!
-
![]()
Switch vs Original Comparisons
Updated 6/14/2024
How does this remake match up with the original game? Find out here!
-
![]()
Available Platforms
Updated 6/14/2024
See all available platforms for Luigi's Mansion 2 HD!
-
![]()
Changes and New Features
Updated 6/28/2024
A lot of new features have been added to take advantage of the Switch!
-
![]()
Is There New Game Plus?
Updated 6/14/2024
Dying to do another run of the mansions? Learn if Luigi's Mansion has a New Game plus!
-
![]()
Will There Be DLC?
Updated 6/14/2024
Can't get enough of Luigi's Mansion? See here to know if there will be DLC!
-
![]()
amiibo Support and Compatibility
Updated 6/18/2024
Find out if you Luigi's Mansion has amiibo support!


Comment
Author

Luigi's Mansion 2 Gems
Rankings
- We could not find the message board you were looking for.
Gaming News

![Monster Hunter Stories 3 Review [First Impressions] | Simply Rejuvenating](https://img.game8.co/4438641/2a31b7702bd70e78ec8efd24661dacda.jpeg/show)


![Monster Hunter Stories 3 Review [First Impressions] | Simply Rejuvenating](https://img.game8.co/4438641/2a31b7702bd70e78ec8efd24661dacda.jpeg/thumb)
Popular Games

Genshin Impact Walkthrough & Guides Wiki
Honkai: Star Rail Walkthrough & Guides Wiki
Umamusume: Pretty Derby Walkthrough & Guides Wiki
Pokemon Pokopia Walkthrough & Guides Wiki
Resident Evil Requiem (RE9) Walkthrough & Guides Wiki
Monster Hunter Wilds Walkthrough & Guides Wiki
Wuthering Waves Walkthrough & Guides Wiki
Arknights: Endfield Walkthrough & Guides Wiki
Pokemon FireRed and LeafGreen (FRLG) Walkthrough & Guides Wiki
Pokemon TCG Pocket (PTCGP) Strategies & Guides Wiki


Recommended Games
Diablo 4: Vessel of Hatred Walkthrough & Guides Wiki
Cyberpunk 2077: Ultimate Edition Walkthrough & Guides Wiki
Fire Emblem Heroes (FEH) Walkthrough & Guides Wiki
Yu-Gi-Oh! Master Duel Walkthrough & Guides Wiki
Super Smash Bros. Ultimate Walkthrough & Guides Wiki
Pokemon Brilliant Diamond and Shining Pearl (BDSP) Walkthrough & Guides Wiki
Elden Ring Shadow of the Erdtree Walkthrough & Guides Wiki
Monster Hunter World Walkthrough & Guides Wiki
The Legend of Zelda: Tears of the Kingdom Walkthrough & Guides Wiki
Persona 3 Reload Walkthrough & Guides Wiki


All rights reserved
© Nintendo. Games are property of their respective owners. Nintendo of America Inc. Headquarters are in Redmond, Washington, USA
The copyrights of videos of games used in our content and other intellectual property rights belong to the provider of the game.
The contents we provide on this site were created personally by members of the Game8 editorial department.
We refuse the right to reuse or repost content taken without our permission such as data or images to other sites.