Weather Guide: How to Change the Weather
★ Missions: Normal | Basic | Affinity
☆ Tier List: Characters, Classes, Skells
★ Best Divisions | How to Change Divisions
☆ Character Customization and Fashion Gear
★ 104 FN Site Locations | 99 Lobster Locations
☆ All Heart to Heart Locations
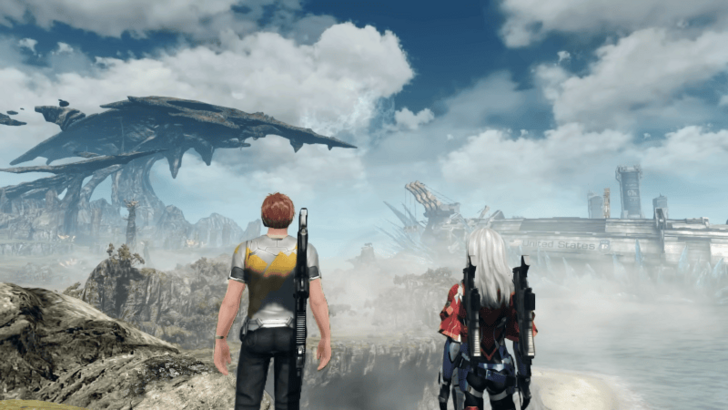
You can change the weather by fast traveling or by resting at the barracks in Xenoblade Chronicles X. Read on to learn how to change the weather, the different weather types, their buffs and debuffs, and the enemies that only appear under specific conditions.
List of Contents
How to Change the Weather
Fast Travel

Although you cannot manually set the weather, there are ways to influence it. One of the quickest methods is fast traveling.
By warping to different locations or even within the same region, the weather has a chance to change upon arrival. If the desired weather doesn’t appear, simply fast travel again and check the conditions.
Rest at the Barracks
Another effective way to cycle through weather changes is by resting at the Barracks. Advancing the in-game time can sometimes trigger different weather patterns.
If an enemy or quest requires a specific weather condition, resting repeatedly until the correct weather appears can save time compared to waiting naturally.
All Weather Types and Location
All Weather Types
| Weather | Description |
|---|---|
| Clear | Standard weather with no significant effects |
| Cloudy | Overcast skies, common in multiple areas. |
| Dense Fog | Reduces visibility |
| Rain | Moderate rainfall |
| Lightning | Characterized by lightning strikes, specific regions experience this. |
| Heavy Rain | Intense rainfall |
| Heat Wave | Elevated temperatures |
| Sandstorm | Reduces visibility and affects ranged weapon accuracy |
| Thunderstorm | Combines heavy rain with lightning, specific to certain regions. |
| Electromagnetic Storm | Features electrical disturbances |
| Rising Energy Mist | Unique mist effect |
| Energy Mist | Standard mist |
| Brimstone Rain | Distinctive weather pattern, specific to certain areas. |
| Aurora | Displays colorful lights in the sky, seen in multiple regions. |
| Crimson Aurora | A red-hued aurora |
| Spores | Airborne particles reduce visibility |
| Meteor Shower | Features falling meteors |
| Rainbow | Appears after rain, can be seen in various areas. |
Region Specific Weather Conditions
| Region | Weather |
|---|---|
| Primordia | Clear, Rain, Heavy Rain, Thunderstorm, Rainbow, Meteor Shower, Aurora |
| Noctilum | Clear, Rain, Thunderstorm, Rainbow, Energy Mist, Dense Fog |
| Oblivia | Clear, Rain, Electromagnetic Storm, Heat Wave, Sandstorm, Meteor Shower, Aurora, Rainbow |
| Sylvalum | Cloudy, Spore Clouds, Rising Energy Mist, Crimson Aurora |
| Cauldros | Clear, Cloudy, Electromagnetic Storm, Brimstone Rain, Rainbow |
Different regions have unique weather patterns, and some weather types are exclusive to certain locations. For example, Oblivia is known for its Sandstorms and Electromagnetic Storms, while Cauldros experiences Brimstone Rain.
Knowing where and when these weather conditions occur can help players track down specific enemies and optimize their strategies.
Weather Buffs and Debuffs
List of Buffs and Debuffs Per Weather Condition
| Weather | Ground Effect | Skell Effect | Enemy Effect |
|---|---|---|---|
| Clear | - | - | - |
| Cloudy | - | - | - |
| Dense Fog | ↓ Critical Chance Down III ↓ Melee Accuracy Down III ↓ Ranged Accuracy Down IV |
↓ Critical Chance Down I ↓ Melee Accuracy Down I ↓ Ranged Accuracy Down I |
↓ Ranged Accuracy Down II ↓ Melee Accuracy Down II ↓ Critical Chance Down II |
| Rain | ↓ Beam Attack Down I ↓ Critical Chance Down I |
- | ↓ Beam Attack Down I ↓ Critical Chance Down I |
| Lightning | ↑Electric Attack Up III ↑ Beam Attack Up I |
↑ Electric Attack Up I ↑ Beam Attack Up I |
↑ Electric Attack Up I ↑ Beam Attack Up I |
| Heavy Rain | ↓ Ranged Accuracy Down III ↓ Beam Attack Down III ↓ Critical Chance Down II |
↓ Ranged Accuracy Down I ↓ Beam Attack Down I ↓ Critical Chance Down I |
↓ Ranged Accuracy Down II ↓ Beam Attack Down II ↓ Critical Chance Down II |
| Heat Wave | ↑Thermal Attack Up III ↓Melee Attack Down V ↓ Ranged Accuracy Down II |
↑ Thermal Attack Up I | ↑ Thermal Attack Up I ↓Ranged Accuracy Down II ↓ Melee Attack Down III |
| Sandstorm | ↓ Beam Attack Down IV ↓ Melee Accuracy Down III ↓ Ranged Accuracy Down IV ↓ Ranged Attack Down V |
↓ Beam Attack Down II ↓ Melee Accuracy Down I ↓ Ranged Accuracy Down I ↓ Ranged Attack Down II |
↓ Ranged Accuracy Down III ↓ Melee Accuracy Down III ↓ Ranged Attack Down III ↓ Beam Damage Down III |
| Thunderstorm | ↑ Electric Attack Up III ↓ Beam Attack Down I ↓ Ranged Accuracy Down I |
↑ Electric Attack Up I | ↑ Electric Attack Up I ↓ Ranged Accuracy Down ↓ Beam Damage Down I |
| Electromagnetic Storm | ↑ Electric Attack Up V Weather Damage: Lightning I ↓ Ranged Accuracy Down IV ↓ Ranged Attack Down V |
↑ Electric Attack Up III Weather Damage: Lightning I ↓ Ranged Accuracy Down II ↓ Ranged Attack Down III |
↑ Electric Attack Up III ↓ Ranged Accuracy Down II ↓ Ranged Attack Down III Weather Damage: Lightning I |
| Rising Energy Mist | ↑ Ether Attack Up III ↓ Potential Down III |
↑ Ether Attack Up I ↓ Potential Down I Skell Fuel Recovery I |
↑ Ether Attack Up I ↓ Potential Down I |
| Energy Mist | ↑ Ether Attack Up V ↓ Potential Down IV |
↑ Ether Attack Up IV ↓ Potential Down III Skell Fuel Recovery II |
↑ Ether Attack Up V ↓ Potential Down III |
| Brimstone Rain | ↑ Thermal Attack Up V ↓ Melee Attack Down III ↓ Ranged Accuracy Down II Weather Damage: Heat III |
↑ Thermal Attack Up III | ↑ Thermal Attack Up II ↓ Ranged Accuracy Down I ↓ Melee Attack Down II |
| Aurora | ↑ Critical Chance Up III ↑ Ether Attack Up III ↑Potential Up III |
↑ Critical Chance Up I ↑ Ether Attack Up I ↑ Potential Up I |
↑Critical Chance Up I ↑Potential Up I ↑ Ether Attack Up I |
| Crimson Aurora | ↑ Critical Chance Up IV ↑ Ether Attack Up V ↑ Gravity Attack Up III ↑Potential Up IV |
↑ Critical Chance Up II ↑Ether Attack Up III ↑ Gravity Attack Up I ↑ Potential Up I |
↑ Critical Chance Up II ↑ Potential Up I ↑ Ether Attack Up III ↑ Gravity Attack Up I |
| Spores | ↓ Melee Attack Down IV ↓ Potential Down IV ↓ Ranged Attack Down IV |
↓Melee Attack Down II ↓Potential Down III ↓ Ranged Attack Down II |
↓Melee Attack Down I ↓ Ranged Attack Down I ↓ Potential Down III |
| Meteor Shower | ↑ Critical Chance Up III ↑ Gravity Attack Up II |
↑ Critical Chance Up I ↑ Gravity Attack Up II |
↑ Critical Chance Up I ↑ Gravity Attack Up I |
| Rainbow | ↑ Critical Chance Up V ↑ Potential Up III |
↑Critical Chance Up III ↑ Potential Up I |
↑Critical Chance Up III ↑Potential Up II |
Weather conditions don’t just change the atmosphere, they can also affect gameplay in various ways. Some weather effects boost attack power for certain elements, while others reduce accuracy, critical hit chance, or other combat stats.
Both players and enemies are affected by these buffs and debuffs, so adapting strategies based on the current weather is essential.
Weather Specific Enemies
Enemies That Only Appear During Certain Weather Conditions
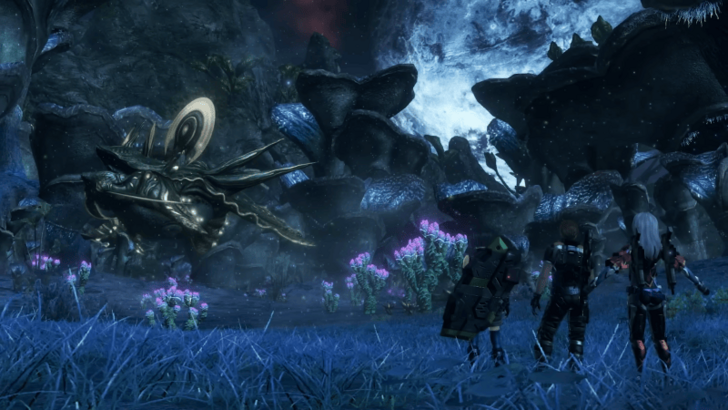
Certain enemies only spawn under specific weather conditions, making them difficult to track down unless you know when and where to look.
For instance, Alithios, The Indignant only appears during Thunderstorms, while Awakened Liceor can only be found during Rising Energy Mists.
Xenoblade Chronicles X: Definitive Edition Related Guides

Tips and Tricks: Beginner's Guide
All Tips and Tricks Guides
Author
Xenoblade Chronicles X: Definitive Edition Walkthrough & Guides Wiki
Weather Guide: How to Change the Weather
Rankings
- We could not find the message board you were looking for.
Gaming News

![Monster Hunter Stories 3 Review [First Impressions] | Simply Rejuvenating](https://img.game8.co/4438641/2a31b7702bd70e78ec8efd24661dacda.jpeg/show)
![Monster Hunter Stories 3 Review [First Impressions] | Simply Rejuvenating](https://img.game8.co/4438641/2a31b7702bd70e78ec8efd24661dacda.jpeg/thumb)

![The Seven Deadly Sins: Origin [First Impressions] | A Promising Start](https://img.game8.co/4440581/584e0bfb87908f12c4eab6e846eb1afd.png/thumb)
Popular Games

Genshin Impact Walkthrough & Guides Wiki
Umamusume: Pretty Derby Walkthrough & Guides Wiki
Pokemon Pokopia Walkthrough & Guides Wiki
Honkai: Star Rail Walkthrough & Guides Wiki
Monster Hunter Stories 3: Twisted Reflection Walkthrough & Guides Wiki
Arknights: Endfield Walkthrough & Guides Wiki
Wuthering Waves Walkthrough & Guides Wiki
Zenless Zone Zero Walkthrough & Guides Wiki
Pokemon TCG Pocket (PTCGP) Strategies & Guides Wiki
Monster Hunter Wilds Walkthrough & Guides Wiki


Recommended Games
Diablo 4: Vessel of Hatred Walkthrough & Guides Wiki
Cyberpunk 2077: Ultimate Edition Walkthrough & Guides Wiki
Fire Emblem Heroes (FEH) Walkthrough & Guides Wiki
Yu-Gi-Oh! Master Duel Walkthrough & Guides Wiki
Super Smash Bros. Ultimate Walkthrough & Guides Wiki
Pokemon Brilliant Diamond and Shining Pearl (BDSP) Walkthrough & Guides Wiki
Elden Ring Shadow of the Erdtree Walkthrough & Guides Wiki
Monster Hunter World Walkthrough & Guides Wiki
The Legend of Zelda: Tears of the Kingdom Walkthrough & Guides Wiki
Persona 3 Reload Walkthrough & Guides Wiki


All rights reserved
© Nintendo / MONOLITHSOFT. Xenoblade Chronicles and Nintendo Switch are trademarks of Nintendo.
The copyrights of videos of games used in our content and other intellectual property rights belong to the provider of the game.
The contents we provide on this site were created personally by members of the Game8 editorial department.
We refuse the right to reuse or repost content taken without our permission such as data or images to other sites.
I’ve hit a bug where the weather in all regions is stuck clear, I’ve tried fast travel, changing time, save and load, nothing.