Guild Raid Guide
Guild Raid is one of the game modes under Guilds, where Guild members join together to battle a boss. Read on to learn who the guild raid bosses are, what teams you can use to beat them, and rewards you can get from guild raids.
Guild Raid Bosses
Sonya
| Strengths | Weaknesses |
|---|---|
|
• High Physical Damage • Guaranteed Critical Hits • Bonus Damage (based on her DEX stat) • Potential for Skill Reactivation |
• Single-Target • Dependence on Allies for Skill to work well • Squishy |
Luke
| Strengths | Weaknesses |
|---|---|
|
• High damage output and critical hit potential • Dispelling and damage over time • CRIT RES boost to Luke and an ally |
• Reliance on STR • Long Cooldowns • Vulnerable to high STR enemies |
Sample Teams for Guild Raid
For guild raids, there are two recommended team setups. 1 DPS or 2 DPS. In the 1 DPS setup, you use a single DPS with support characters. In a 2 DPS setup, the general turn order is DPS 1, Support with cooldown reduction like Fenrir, and DPS 2, with two additional supports. Most teams included Mertillier as mandatory support, while the other support slots can be flexible.
Sonya Raid
Single DPS
| Attacker | Buffer | Buffer | Buffer | Buffer |
|---|---|---|---|---|
 Witch Illya Witch Illya
|
 Fenrir Fenrir
|
 Sivi Sivi
|
 Merlyn Merlyn
|
 Mertillier Mertillier
|
Witch Illya and Sivi provide the bulk of the offensive output. They both bring powerful physical attacks. Fenrir and Mertillier fill the roles of healing and debuffing. Merlyn boosts the team's stats and offers healing when needed. Fenrir and Sivi's passive defenses provide a sturdy frontline, while Merlyn boosts defense and critical chance. Mertillier and Fenrir also provide key cooldown reductions to help the team cycle through their best abilities faster.
Your DPS should have the highest HP so that Sonya's "Axe Bomber" will target her instead of the other team members. Make sure that your team works on giving the highest damage. Your buffers should be increasing your ATK to maximize your damage. PM. DEF Break may not be needed in this raid, so focus on improving your ATK. If you don't have Witch Illya, you can also use Florence.
Double DPS
| Attacker | Buffer | Attacker | Buffer | Buffer |
|---|---|---|---|---|
 Florence Florence
|
Merlyn
|
Witch Illya
|
 Luke Luke
|
Mertillier
|
You can add two of your highest hitters with their support for the double DPS team. In this example, we modified the single DPS team and added Florence and Luke, replacing Sivi and Fenrir. Florence has the potential for massive damage when critical hits are consistently landing. Luke is a good single-target nuke with a possible debuff on Sonya and amplifies damage.
Luke Raid
| Buffer | Buffer | Attacker | Buffer | Buffer |
|---|---|---|---|---|
|
Luke
|
Sivi
|
Witch Illya
|
Fenrir
|
Mertillier
|
In this sample team, Witch Illya is your main attacker while the others buff her and increase CRIT hit. Mertillier would increase Witch Illya's ATK by 85% and DEF by 65%, and Sivi would increase damage dealt by 30%. Fenrir also increases ATK. Luke will decrease Guild Boss Luke's ATK by 50% and increase the damage taken by 15%.
Luke is a character who relies on STR, has long cooldowns, and is vulnerable to high STR enemies. Her base STR is 626,163, so use characters with higher STR than Luke for your DPS. This includes Cordie, Paladea, Sivi, Florence, Witch Illya, and others.
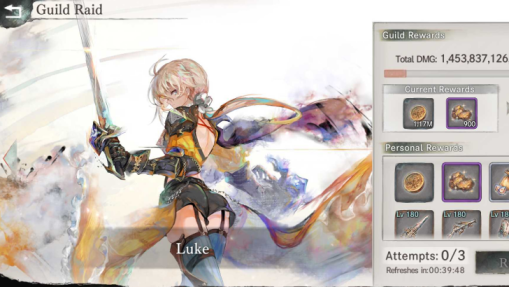
Guild Raid Rewards
Sonya Raid
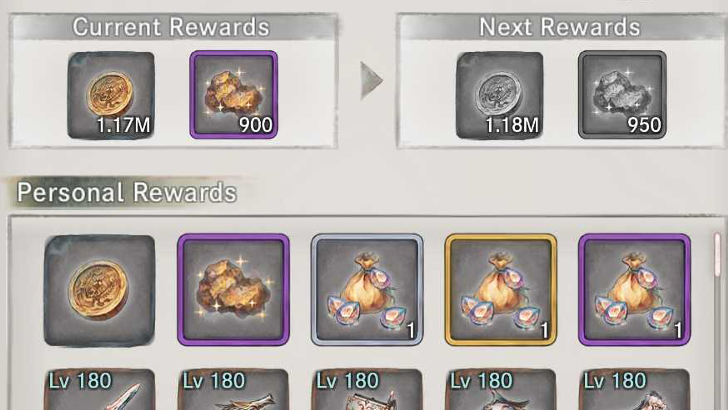
| Random Rewards |
|---|
| Gear 100% |
| Diamond Bag (S) Diamond Bag (M) Diamonds Bag (L) |
Please note that Diamond Bags are of fixed probability.
| Personal Rewards | |||
|---|---|---|---|
| Bar Count | Personal Rewards Damage | Gold | Holy Fragment |
| 0 | Varies depending on the amount of damage | 5 | |
| 1 | 2500 | 10 | |
| 2 | 2500 | 20 | |
| 3 | 5000 | 30 | |
| 4 | 15000 | 40 | |
| 5 | 25000 | 50 | |
| 6 | 50000 | 60 | |
| 7 | 150000 | 70 | |
| 8 | 250000 | 80 | |
| 9 | 500000 | 90 | |
| 10 | 1500000 | 100 | |
| 11 | 2500000 | 110 | |
| 12 | 5000000 | 120 | |
| 13 | 15000000 | 130 | |
| 14 | 25000000 | 140 | |
| 15 | 50000000 | 160 | |
| 16 | 150000000 | 180 | |
| 17 | 250000000 | 200 | |
| 18 | 500000000 | 220 | |
| 19 | 1500000000 | 240 | |
| 20 | 2500000000 | 260 | |
| 21 | 5000000000 | 280 | |
| 22 | 15000000000 | 300 | |
| 23 | 25000000000 | 320 | |
| 24 | 50000000000 | 340 | |
| 25 | 150000000000 | 360 | |
| Guild Rewards | |||
|---|---|---|---|
| Bar Count | Guild Rewards Damage | Gold | Holy Fragment |
| 0 | 25000 | 25 | |
| 1 | 12500 | 50000 | 50 |
| 2 | 12500 | 100000 | 75 |
| 3 | 25000 | 150000 | 100 |
| 4 | 75000 | 200000 | 125 |
| 5 | 125000 | 250000 | 150 |
| 6 | 250000 | 300000 | 175 |
| 7 | 750000 | 350000 | 200 |
| 8 | 1250000 | 400000 | 225 |
| 9 | 2500000 | 450000 | 250 |
| 10 | 7500000 | 500000 | 275 |
| 11 | 12500000 | 550000 | 300 |
| 12 | 25000000 | 600000 | 325 |
| 13 | 75000000 | 650000 | 350 |
| 14 | 125000000 | 700000 | 375 |
| 15 | 250000000 | 750000 | 400 |
| 16 | 750000000 | 800000/td> | 450 |
| 17 | 1250000000 | 850000 | 500 |
| 18 | 2500000000 | 900000 | 550 |
| 19 | 7500000000 | 950000 | 600 |
| 20 | 12500000000 | 1000000 | 650 |
| 21 | 25000000000 | 1050000 | 700 |
| 22 | 75000000000 | 1100000 | 750 |
| 23 | 125000000000 | 1150000 | 800 |
| 24 | 250000000000 | 1160000 | 850 |
| 25 | 750000000000 | 1170000 | 900 |
Luke Raid
| Random Rewards |
|---|
| Gear 100% |
| Diamond Bag (S) Diamond Bag (M) Diamonds Bag (L) |
Please note that Diamond Bags are of fixed probability.
| Personal Rewards | |||
|---|---|---|---|
| Bar Count | Personal Rewards Damage | Gold | Holy Fragment |
| 0 | Varies depending on the amount of damage | 5 | |
| 1 | 2500 | 10 | |
| 2 | 2500 | 20 | |
| 3 | 5000 | 30 | |
| 4 | 15000 | 40 | |
| 5 | 25000 | 50 | |
| 6 | 50000 | 60 | |
| 7 | 150000 | 70 | |
| 8 | 250000 | 80 | |
| 9 | 500000 | 90 | |
| 10 | 1500000 | 100 | |
| 11 | 2500000 | 110 | |
| 12 | 5000000 | 120 | |
| 13 | 15000000 | 130 | |
| 14 | 25000000 | 140 | |
| 15 | 50000000 | 160 | |
| 16 | 150000000 | 180 | |
| 17 | 250000000 | 200 | |
| 18 | 500000000 | 220 | |
| 19 | 1500000000 | 240 | |
| 20 | 2500000000 | 260 | |
| 21 | 5000000000 | 280 | |
| 22 | 15000000000 | 300 | |
| 23 | 25000000000 | 320 | |
| 24 | 50000000000 | 340 | |
| 25 | 150000000000 | 360 | |
| Guild Rewards | |||
|---|---|---|---|
| Bar Count | Guild Rewards Damage | Gold | Holy Fragment |
| 0 | 25000 | 25 | |
| 1 | 12500 | 50000 | 50 |
| 2 | 12500 | 100000 | 75 |
| 3 | 25000 | 150000 | 100 |
| 4 | 75000 | 200000 | 125 |
| 5 | 125000 | 250000 | 150 |
| 6 | 250000 | 300000 | 175 |
| 7 | 750000 | 350000 | 200 |
| 8 | 1250000 | 400000 | 225 |
| 9 | 2500000 | 450000 | 250 |
| 10 | 7500000 | 500000 | 275 |
| 11 | 12500000 | 550000 | 300 |
| 12 | 25000000 | 600000 | 325 |
| 13 | 75000000 | 650000 | 350 |
| 14 | 125000000 | 700000 | 375 |
| 15 | 250000000 | 750000 | 400 |
| 16 | 750000000 | 800000/td> | 450 |
| 17 | 1250000000 | 850000 | 500 |
| 18 | 2500000000 | 900000 | 550 |
| 19 | 7500000000 | 950000 | 600 |
| 20 | 12500000000 | 1000000 | 650 |
| 21 | 25000000000 | 1050000 | 700 |
| 22 | 75000000000 | 1100000 | 750 |
| 23 | 125000000000 | 1150000 | 800 |
| 24 | 250000000000 | 1160000 | 850 |
| 25 | 750000000000 | 1170000 | 900 |
MementoMori Related Guides

Beginner's Guides
Gear Guides
Farming Guides
Game Mechanics
Intermediate Guides
Gacha Guides
Trial Guides
| Trial Guides | |
|---|---|
| List of All Trials and Their Rewards | Cave of Space-Time Guide |
| Tower of Infinity Guide | Fountain of Prayers Guide |
| Tower of Souls Guide | Temple of Illusions Guide |
Guild Guides
PvP Guides
| PVP Guides | |
|---|---|
| When Should You Start Playing PvP | Battle League PvP Guide |
| Legend League PvP Guide | PvP Team Building Guide |
FAQs
Comment
Author

Guild Raid Guide
Rankings
- We could not find the message board you were looking for.
Gaming News


![Resident Evil Village Review [Switch 2] | Almost Flawless Port](https://img.game8.co/4432790/e1859f64830960ce4248d898f8cd38d9.jpeg/thumb)


Popular Games

Genshin Impact Walkthrough & Guides Wiki
Resident Evil Requiem (RE9) Walkthrough & Guides Wiki
Honkai: Star Rail Walkthrough & Guides Wiki
Monster Hunter Wilds Walkthrough & Guides Wiki
Umamusume: Pretty Derby Walkthrough & Guides Wiki
Pokemon TCG Pocket (PTCGP) Strategies & Guides Wiki
Arknights: Endfield Walkthrough & Guides Wiki
Wuthering Waves Walkthrough & Guides Wiki
Zenless Zone Zero Walkthrough & Guides Wiki
Digimon Story: Time Stranger Walkthrough & Guides Wiki


Recommended Games
Fire Emblem Heroes (FEH) Walkthrough & Guides Wiki
Yu-Gi-Oh! Master Duel Walkthrough & Guides Wiki
Super Smash Bros. Ultimate Walkthrough & Guides Wiki
Diablo 4: Vessel of Hatred Walkthrough & Guides Wiki
Pokemon Brilliant Diamond and Shining Pearl (BDSP) Walkthrough & Guides Wiki
Elden Ring Shadow of the Erdtree Walkthrough & Guides Wiki
Monster Hunter World Walkthrough & Guides Wiki
The Legend of Zelda: Tears of the Kingdom Walkthrough & Guides Wiki
Persona 3 Reload Walkthrough & Guides Wiki
Cyberpunk 2077: Ultimate Edition Walkthrough & Guides Wiki


All rights reserved
Game Copyright© Bank of Innovation, Inc. All rights reserved.
The content we provide on this site were created personally by members of the Game8 editorial department.
We refuse the right to reuse or repost content taken without our permission such as data or images to other sites.
© Bank of Innovation, Inc. (Provider)