Kingdom of Galia Chapter 22 Quest Guide
|
Chapter 21 ←Prev |
Chapter 23 Next→ |
MementoMori's main quests are split into chapters, and in each chapter, there are some especially difficult boss fights. Read this walkthrough to find out which teams you can use to clear Chapter 22, what enemies you'll face, and strategies for defeating them.
List of Contents
Kingdom of Galia Chapter 22 Guide
Best Team to Clear Chapter 22
If you have this team or one similar to it, you should be able to clear the entire chapter without issues.
| Debuffer | Debuffer | Attacker | Buffer | Attacker |
|---|---|---|---|---|
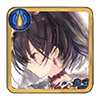
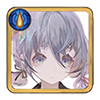
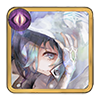 Lunalynn Lunalynn
Lvl. 290 - 308 |
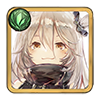
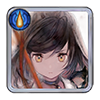
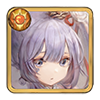
 Mimi Mimi
Lvl. 290 - 308 |
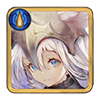
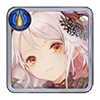
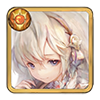
 Florence Florence
Lvl. 290 - 308 |
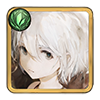
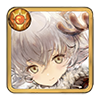
 Merlyn Merlyn
Lvl. 290 - 308 |
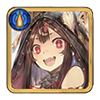
 Cordie Cordie
Lvl. 290 - 308 |
| Recommended BP: 90 to 102 million | ||||
By this stage, you will be relying on Lunalynn to stall by silencing the enemy while Cordie finishes the enemy team off. If you've been using Florence as your main attacker up until this point, this is where she starts falling off in terms of potential damage compared to Cordie so if you haven't made the switch from Florence to Cordie, do so now.
You might want to keep Florence around just to help with Soltina stages, as she'll be in almost all the tough stages in Chapter 22. Other than that, though, focus all your investment on Cordie. Best to clear this stage with level 13 PM DEF Break runes. Clearing it is possible if you only have level 12s and 11s, but you'll take a bit longer.
Position Lunalynn next to Merlyn if you want to increase her chances of inflicting Silence on the enemy team.
Alternative Party Members
Attackers
 Sivi Sivi
|
 Fia Fia
|
Just like back in Chapter 21, if you have Fia or Sivi, try using them to progress through the stage. The best reason to have them is that both Fia and Sivi can pay back the damage they get from this chapter's powerful enemies with interest, on top of having self-healing powers that increase their sustainability.
Support
 Amleth Amleth
|
 Nina Nina
|
Tanks like Amleth and witches that can steal or dispel buffs like Nina are welcome additions to your party, which you can use to swap out for Mimi whenever you think you don't need the extra damage.
Kingdom of Galia Quest 22-8 Walkthrough
| Notable Enemy/Enemies | ||||
|---|---|---|---|---|
 Sabrina Sabrina
|
 Belle Belle
|
 Mertillier Mertillier
|
 Illya Illya
|
 Iris Iris
|
Minimum Viable Team
You need at least a team this strong or similar to it to be able to defeat this boss.
| Attacker | Buffer | Attacker | Debuffer | Debuffer |
|---|---|---|---|---|
|
Cordie
Lvl. 290 |
Merlyn
Lvl. 290 |
Florence
Lvl. 290 |
Mimi
Lvl. 290 |
Lunalynn
Lvl. 290 |
| Minimum Recommended BP: 90 million | ||||
Tips and Strategies
Silence Sabrina and Belle or Take Them Out First
Position Cordie in front of Sabrina and Belle to increase the chance of hitting them with her nuke. In case she doesn't take them out, however, your only other hope is for Lunalynn to score a critical hit on them and inflict Silence. If your Cordie deals enough damage, the enemy team should be down by turn two or three.
Kingdom of Galia Quest 22-10 Walkthrough
| Notable Enemy/Enemies | ||||
|---|---|---|---|---|
 Moddey Moddey
|
 Sonya Sonya
|
 Soltina Soltina
|
 Skuld Skuld
|
 Cherna Cherna
|
Minimum Viable Team
You need at least a team this strong or similar to it to be able to defeat this boss.
| Debuffer | Debuffer | Attacker | Buffer | Attacker |
|---|---|---|---|---|
|
Lunalynn
Lvl. 290 |
Mimi
Lvl. 290 |
Florence
Lvl. 290 |
Merlyn
Lvl. 290 |
Cordie
Lvl. 290 |
| Minimum Recommended BP: 90 million | ||||
Tips and Strategies
Position Florence in Front of Soltina
Bring along Florence for this quest to help break Soltina's barriers. She only becomes a problem if she ends up taking most of Cordie's shots on turn 1. This is why it's better to position Cordie in the corners of the formation, where she would be in front of more important targets.
Take Out Skuld, Cherna, and Sonya ASAP
These three witches are almost always the main damage dealers in any team they're in, with Sonya capable of making critical hits that can take out Cordie within one turn. If you let any of them survive past turn 1, there's a good chance you'll lose. If you need to, replace Lunalynn with a tank if you can't consistently Silence any one of them.
Kingdom of Galia Quest 22-16 Walkthrough
| Notable Enemy/Enemies | ||||
|---|---|---|---|---|
|
Soltina
|
Sonya
|
 Carol Carol
|
 Petra Petra
|
Iris
|
Minimum Viable Team
You need at least a team this strong or similar to it to be able to defeat this boss.
| Attacker | Debuffer | Attacker | Buffer | Debuffer |
|---|---|---|---|---|
|
Florence
Lvl. 295 |
Mimi
Lvl. 295 |
Cordie
Lvl. 295 |
Merlyn
Lvl. 295 |
Lunalynn
Lvl. 295 |
| Minimum Recommended BP: 95 million | ||||
Tips and Strategies
Take Out Sonya and Carol
Though we already know what Sonya does, Carol has an AoE attack that can take out 3 of your witches in a single turn. Thankfully taking them out in the first turn is doable. Position Cordie in the middle to improve your chances of targeting Carol and Sonya.
Kingdom of Galia Quest 22-25 Walkthrough
| Notable Enemy/Enemies | ||||
|---|---|---|---|---|
 Fortina Fortina
|
 Primavera Primavera
|
 Olivia Olivia
|
 Rosalie Rosalie
|
 Libra Libra
|
Minimum Viable Team
You need at least a team this strong or similar to it to be able to defeat this boss.
| Debuffer | Debuffer | Attacker | Buffer | Attacker |
|---|---|---|---|---|
|
Lunalynn
Lvl. 300 |
Mimi
Lvl. 300 |
Florence
Lvl. 300 |
Merlyn
Lvl. 300 |
Cordie
Lvl. 300 |
| Minimum Recommended BP: 100 million | ||||
Tips and Strategies
Avoid Positioning in Front of Primavera
There's a good chance that the Primavera of this stage will make the first attack because of her speed, so keep your main attackers on the opposite end of the formation so they can stay alive. She's the only real threat in this stage, though, so you should have an easy time getting through as long as Cordie stays alive.
Kingdom of Galia Quest 22-27 Walkthrough
| Notable Enemy/Enemies | ||||
|---|---|---|---|---|
 Tropon Tropon
|
 Amour Amour
|
Nina
|
Belle
|
Soltina
|
Minimum Viable Team
You need at least a team this strong or similar to it to be able to defeat this boss.
| Debuffer | Debuffer | Attacker | Buffer | Attacker |
|---|---|---|---|---|
|
Lunalynn
Lvl. 300 - 308 |
Mimi
Lvl. 300 - 308 |
Cordie
Lvl. 300 - 308 |
Merlyn
Lvl. 300 - 308 |
Florence
Lvl. 300 - 308 |
| Minimum Recommended BP: 100 - 102 million | ||||
Tips and Strategies
The Wall of Chapter 22
This is not only a Soltina stage but a stage with Belle and Amour in it too. Belle, if given the chance to attack, can easily take out your party. Meanwhile, Amour, when defeated, deals 15 percent of the total damage she's taken during the battle to the witch in front of her. So position your main attackers away from Amour, but near where Belle is so you can get a good chance of attacking (and taking her out) first.
Have Florence in front of Soltina to break her barriers, and prepare to retry until you finally amange to take out Belle, Amour, and Nina in one turn. Or at least Belle and Amour.
MementoMori Related Guides

Comment
Author

Kingdom of Galia Chapter 22 Quest Guide
Rankings
- We could not find the message board you were looking for.
Gaming News


![Resident Evil Village Review [Switch 2] | Almost Flawless Port](https://img.game8.co/4432790/e1859f64830960ce4248d898f8cd38d9.jpeg/thumb)


Popular Games

Genshin Impact Walkthrough & Guides Wiki
Resident Evil Requiem (RE9) Walkthrough & Guides Wiki
Honkai: Star Rail Walkthrough & Guides Wiki
Monster Hunter Wilds Walkthrough & Guides Wiki
Umamusume: Pretty Derby Walkthrough & Guides Wiki
Pokemon TCG Pocket (PTCGP) Strategies & Guides Wiki
Arknights: Endfield Walkthrough & Guides Wiki
Wuthering Waves Walkthrough & Guides Wiki
Zenless Zone Zero Walkthrough & Guides Wiki
Digimon Story: Time Stranger Walkthrough & Guides Wiki


Recommended Games
Fire Emblem Heroes (FEH) Walkthrough & Guides Wiki
Yu-Gi-Oh! Master Duel Walkthrough & Guides Wiki
Super Smash Bros. Ultimate Walkthrough & Guides Wiki
Diablo 4: Vessel of Hatred Walkthrough & Guides Wiki
Pokemon Brilliant Diamond and Shining Pearl (BDSP) Walkthrough & Guides Wiki
Elden Ring Shadow of the Erdtree Walkthrough & Guides Wiki
Monster Hunter World Walkthrough & Guides Wiki
The Legend of Zelda: Tears of the Kingdom Walkthrough & Guides Wiki
Persona 3 Reload Walkthrough & Guides Wiki
Cyberpunk 2077: Ultimate Edition Walkthrough & Guides Wiki


All rights reserved
Game Copyright© Bank of Innovation, Inc. All rights reserved.
The content we provide on this site were created personally by members of the Game8 editorial department.
We refuse the right to reuse or repost content taken without our permission such as data or images to other sites.
© Bank of Innovation, Inc. (Provider)