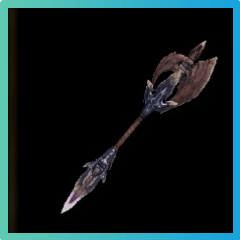
Beo Glaive II | Weapon Stats and Required Materials
★ 2025/2/28: Monster Hunter Wilds is now available!
Join the hunt at our Monster Hunter Wilds Wiki!
This is a guide to the Beo Glaive II weapon and its upgrades in the game Monster Hunter World (MHW) and the Iceborne expansion. Find out the details and stats of this weapon and what materials are needed to upgrade it!
List of Contents
Beo Glaive II Base Stats
| Beo Glaive II | ||||
|---|---|---|---|---|
 |
||||
| Rarity | Attack | Affinity | Elem. | |
| 10 | 775 | 0 | Ice 420 | |
| Def. | Elderseal | Custom | Slots | |
| - | - | - | ②①ー | |
| Kinsect Bonus | Blunt Boost | |||
| Sharpness |

|
|||
How to Get and Craft Beo Glaive II
Required Materials for Beo Glaive II
|
Rimed Hide x2 Beotodus Grandfin x2 Cryo Sac x2 Large Wyvern Gem x1 |
Weapon Tree for Beo Glaive II
Bone Tree
|
★Bone Rod Ⅰ
┗Bone Rod Ⅱ ┣Bone Rod Ⅲ ┃ ┣Hard Bone Rod Ⅰ ┃ ┃┗Hard Bone Rod Ⅱ ┃ ┃ ┗Hard Bone Rod Ⅲ ┃ ┃ ┗Aerial Rod Ⅰ ┃ ┃ ┣Aerial Rod Ⅱ ┃ ┃ ┃┗Aerial Magus Ⅰ ┃ ┃ ┃ ┗Aerial Magus Ⅱ ┃ ┃ ┃ ┣Aerial Magus Ⅲ
┃ ┃ ┃ ┗Icescepter
┃ ┃ ┃ ┗Wise Fylos
┃ ┃ ┗Hazak Entoma Ⅰ
┃ ┃ ┗Hazak Entoma Ⅱ ┃ ┃ ┣Deathstaff Vaal Entoma
┃ ┃ ┗Hydros Arcana
┃ ┗Flammenkaefer
┃ ┗Flammenkaefer+ ┃ ┗Gnashing Flammenkaefer ┃ ┗Gnashing Flammenkaefer+ ┃ ┣Lohenspire
┃ ┗Donnerspitze
┃ ┗Donnerspitze+ ┃ ┗Fulguration's Tower
┣Aqua Rod Ⅰ
┃┗Aqua Rod Ⅱ ┃ ┣Aqua Rod Ⅲ ┃ ┃┗Water Glaive Ⅰ ┃ ┃ ┗Water Glaive Ⅱ ┃ ┃ ┗Water Glaive Ⅲ ┃ ┃ ┗Water Glaive Ⅳ ┃ ┃ ┣Laguna Glaive Ⅰ ┃ ┃ ┃ ┗Laguna Glaive Ⅱ
┃ ┃ ┗Rex Rod Ⅰ
┃ ┃ ┣Rex Rod Ⅱ
┃ ┃ ┗Accursed Rod
┃ ┗Diablos Rod Ⅰ
┃ ┗Diablos Rod Ⅱ ┃ ┗Tyrannis Glaive Ⅰ ┃ ┗Tyrannis Glaive Ⅱ ┃ ┣Tyrannis Glaive Ⅲ ┃ ┃┣Thanatos Glaive
┃ ┃┗Sulfurteinn Spiran
┃ ┃ ┗The Trickling Spiral 899 | (
┃ ┗Beo Glaive Ⅰ
┃ ┗Beo Glaive Ⅱ
┗Pulsar Rod Ⅰ
┗Pulsar Rod Ⅱ ┣Pulsar Rod Ⅲ ┃┗Kadachi Pillar Ⅰ ┃ ┗Kadachi Pillar Ⅱ ┃ ┗Kadachi Pillar Ⅲ ┃ ┗Kadachi Fury Ⅰ ┃ ┣Kadachi Fury Ⅱ
┃ ┗Kadachi Vipertail Ⅰ
┃ ┗Kadachi Vipertail Ⅱ
┗Garon Rod Ⅰ
┗Garon Rod Ⅱ ┗Temptation's Trident ┗Vice ┗Vice+ ┣Cruelty ┗Nether Vajra ┗Deadline
|
Related Links
List of Weapons

All Weapon Guides

| Kinsects | ||
|---|---|---|
 Kinsects Kinsects |
Kinsect Tree and Complete Kinsect List | Best and Recommended Kinsects |
Defender Weapons
Comment
Author
Beo Glaive II | Weapon Stats and Required Materials
improvement survey
03/2026
improving Game8's site?

Your answers will help us to improve our website.
Note: Please be sure not to enter any kind of personal information into your response.

We hope you continue to make use of Game8.
Rankings
Gaming News
Popular Games

Genshin Impact Walkthrough & Guides Wiki

Honkai: Star Rail Walkthrough & Guides Wiki

Umamusume: Pretty Derby Walkthrough & Guides Wiki

Pokemon Pokopia Walkthrough & Guides Wiki

Resident Evil Requiem (RE9) Walkthrough & Guides Wiki

Monster Hunter Wilds Walkthrough & Guides Wiki

Wuthering Waves Walkthrough & Guides Wiki

Arknights: Endfield Walkthrough & Guides Wiki

Pokemon FireRed and LeafGreen (FRLG) Walkthrough & Guides Wiki

Pokemon TCG Pocket (PTCGP) Strategies & Guides Wiki
Recommended Games

Diablo 4: Vessel of Hatred Walkthrough & Guides Wiki

Cyberpunk 2077: Ultimate Edition Walkthrough & Guides Wiki

Fire Emblem Heroes (FEH) Walkthrough & Guides Wiki

Yu-Gi-Oh! Master Duel Walkthrough & Guides Wiki

Super Smash Bros. Ultimate Walkthrough & Guides Wiki

Pokemon Brilliant Diamond and Shining Pearl (BDSP) Walkthrough & Guides Wiki

Elden Ring Shadow of the Erdtree Walkthrough & Guides Wiki

Monster Hunter World Walkthrough & Guides Wiki

The Legend of Zelda: Tears of the Kingdom Walkthrough & Guides Wiki

Persona 3 Reload Walkthrough & Guides Wiki
All rights reserved
©CAPCOM CO., LTD. 2018, 2019 ALL RIGHTS RESERVED.
The copyrights of videos of games used in our content and other intellectual property rights belong to the provider of the game.
The contents we provide on this site were created personally by members of the Game8 editorial department.
We refuse the right to reuse or repost content taken without our permission such as data or images to other sites.
 Great Swords
 Long Swords
 Swords and Shields
 Dual Blades
 Hammers
 Hunting Horns
 Lances
 Gunlances
 Switch Axe
 Charge Blade
 Insect Glaive
 Bows
Bows Light Bowguns
 Heavy Bowguns


![Monster Hunter Stories 3 Review [First Impressions] | Simply Rejuvenating](https://img.game8.co/4438641/2a31b7702bd70e78ec8efd24661dacda.jpeg/thumb)


