Best Builds for Charge Blade (Base Game)
★ 2025/2/28: Monster Hunter Wilds is now available!
Join the hunt at our Monster Hunter Wilds Wiki!
This article is the best build for the Charge Blade in Monster Hunter World (MHW) Base Game. Read on to learn all the best armor sets to use for the Charge Blade and the best skills to help you progress!
List of Contents
Monster Hunter World Best Charge Blade Skills
| Skill | Description | Priority |
|---|---|---|
| Health Boost | Increases health. | High |
| Weakness Exploit | Increases the affinity of attacks that exploit a monster weak spot. | Medium |
| Capacity Boost | Increases the gunlance's shell capacity and charge blade's phial capacity. | Medium |
| Artillery | Strengthens explosive attacks like gunlance shells, Wyvern's Fire, charge blade phial attacks, and sticky ammo. | Low |
| Focus | Increases the fill rate for weapons with gauges and the charge rate for weapons with charge attacks. | Low |
Look for Skills When Forging Armor
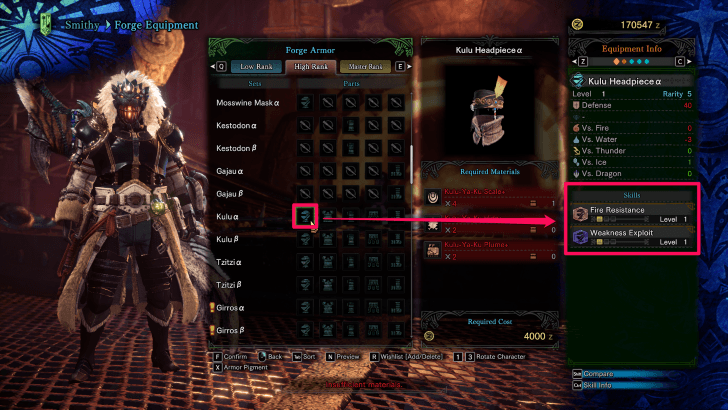
As you progress through the ranks, you will find yourself crafting gear to match the level of monsters you fight. As such, players building towards the endgame should keep these skills in mind when forging gear.
Monster Hunter World Charge Blade Best Builds
Master's Touch Charge Blade Build
| Weapon | Decorations | |
|---|---|---|
 Kjarr Strongarm "Ice"
|
--- | |
| Armor | Decorations | |
| Head | Kaiser Crown Gamma |
Critical Jewel 2
x1 Magazine Jewel 2 x1 |
| Armor | Damascus Mail Beta | --- |
| Vambraces | Kaiser Vambraces Alpha | --- |
| Waist | Damascus Coil Beta | Expert Jewel 1 x1 |
| Legs | Kaiser Greaves Gamma |
Tenderizer Jewel 2
x1 Expert Jewel 1 x1 |
| Charm | Handicraft Charm III | None |
Skills
| Skills | |
|---|---|
| Critical Eye 7 | Weakness Exploit 3 |
| Focus 3 | Handicraft 3 |
| Critical Boost 1 | Capacity Boost 1 |
| Guard 1 | --- |
Dragonking Diablos Charge Blade Build
| Weapon | Decorations | |
|---|---|---|
 Diablos Tyrannis II
|
--- | |
| Armor | Decorations | |
| Head | Dragonking Eyepatch Alpha | Magazine Jewel 2 x1 |
| Armor | Nergigante Mail Gamma |
Elementless Jewel 2
x1 Mighty Jewel 2 x1 Ironwall Jewel 1 x1 |
| Vambraces | Kushala Grip Gamma | Artillery Jewel 1 x3 |
| Waist | Kushala Cocoon Gamma | Attack Jewel 1 x2 |
| Legs | Nergigante Greaves Gamma |
Charger Jewel 2
x1 Tenderizer Jewel 2 x1 |
| Charm | Handicraft Charm III | None |
Skills
| Skills | |
|---|---|
| Handicraft 5 | Attack Boost 5 |
| Focus 3 | Artillery 3 |
| Weakness Exploit 3 | Guard 1 |
| Maximum Might 2 | Capacity Boost 1 |
| Non-elemental Boost 1 | Master's Touch |
Diablos Handicraft Charge Blade Build
| Weapon | Decorations | |
|---|---|---|
|
Diablos Tyrannis II
|
--- | |
| Armor | Decorations | |
| Head | Nergigante Mail Alpha | Ironwall Jewel 1 x1 |
| Armor | Damascus Mail Beta | Artillery Jewel 1 x3 |
| Vambraces | Drachen Vambraces Alpha |
Sharp Jewel 2
x1 Magazine Jewel 2 x1 |
| Waist | Empress Coil Gamma | x1 |
| Legs | Kushala Cocoon Gamma |
Elementless Jewel 2
x1 Charger Jewel 2 x1 |
| Charm | Handicraft Charm III | None |
Skills
| Skills | |
|---|---|
| Handicraft 5 | Attack Boost 4 |
| Focus 4 | Artillery 3 |
| Health Boost 3 | Critical Eye 3 |
| Maximum Might 2 | Capacity Boost 1 |
| Guard 1 | Protective Polish 1 |
| Non-elemental Boost 1 | - |
Xeno'jiiva Divinity Charge Blade Build
| Weapon | Decorations | |
|---|---|---|
|
Diablos Tyrannis II
|
--- | |
| Armor | Decorations | |
| Head | Kushala Glare Gamma | Charger Jewel 2 x1 |
| Armor | Damascus Mail Beta | Artillery Jewel 1 x3 |
| Vambraces | Xeno'jiiva Claws Gamma |
Mighty Jewel 2
x2 Attack Jewel 1 x1 |
| Waist | Xeno'jiiva Spine Gamma |
Elementless Jewel 2
x1 Attack Jewel 1 x1 |
| Legs | Xeno'jiiva Spurs Gamma |
Magazine Jewel 2
x1 Attack Jewel 1 x2 |
| Charm | Handicraft Charm III | None |
Skills
| Skills | |
|---|---|
| Handicraft 5 | Attack Boost 4 |
| Focus 3 | Artillery 3 |
| Critical Boost 2 | Maximum Might 2 |
| Power Prolonger 1 | Capacity Boost 1 |
| Special Ammo Boost 1 | Non-elemental Boost 1 |
| Razor Sharp/Spare Shot (Xeno'jiiva Divinity) | - |
MHW Related Links
Best Builds (Base Game)

Best Builds Per Weapon
| Weapons | |||
|---|---|---|---|
Comment
Author

Best Builds for Charge Blade (Base Game)
Rankings
- We could not find the message board you were looking for.
Gaming News


![Monster Hunter Stories 3 Review [First Impressions] | Simply Rejuvenating](https://img.game8.co/4438641/2a31b7702bd70e78ec8efd24661dacda.jpeg/thumb)
Popular Games

Genshin Impact Walkthrough & Guides Wiki
Honkai: Star Rail Walkthrough & Guides Wiki
Umamusume: Pretty Derby Walkthrough & Guides Wiki
Pokemon Pokopia Walkthrough & Guides Wiki
Resident Evil Requiem (RE9) Walkthrough & Guides Wiki
Monster Hunter Wilds Walkthrough & Guides Wiki
Wuthering Waves Walkthrough & Guides Wiki
Arknights: Endfield Walkthrough & Guides Wiki
Pokemon FireRed and LeafGreen (FRLG) Walkthrough & Guides Wiki
Pokemon TCG Pocket (PTCGP) Strategies & Guides Wiki


Recommended Games
Diablo 4: Vessel of Hatred Walkthrough & Guides Wiki
Cyberpunk 2077: Ultimate Edition Walkthrough & Guides Wiki
Fire Emblem Heroes (FEH) Walkthrough & Guides Wiki
Yu-Gi-Oh! Master Duel Walkthrough & Guides Wiki
Super Smash Bros. Ultimate Walkthrough & Guides Wiki
Pokemon Brilliant Diamond and Shining Pearl (BDSP) Walkthrough & Guides Wiki
Elden Ring Shadow of the Erdtree Walkthrough & Guides Wiki
Monster Hunter World Walkthrough & Guides Wiki
The Legend of Zelda: Tears of the Kingdom Walkthrough & Guides Wiki
Persona 3 Reload Walkthrough & Guides Wiki


All rights reserved
©CAPCOM CO., LTD. 2018, 2019 ALL RIGHTS RESERVED.
The copyrights of videos of games used in our content and other intellectual property rights belong to the provider of the game.
The contents we provide on this site were created personally by members of the Game8 editorial department.
We refuse the right to reuse or repost content taken without our permission such as data or images to other sites.