Chapter 4: Habitat Walkthrough and Implant Bio Locations
★Game8's Dead Space Remake is now live!
★ game8 Review of the Callisto Protocol - Is it Worth Playing?
☆ All Implant Bios Locations
★ Use the guns in our Best Weapons Guide!
☆ How to Use Contraband Pack & List of Contents
★ Clips of All Death Animations
☆ Season Pass Guide - Price and All Contents!

Habitat is the fourth chapter of The Callisto Protocol's main story. Read on for a detailed walkthrough, list of rewards, tips for completion, Habitat Implant Bio Locations, as well as other strategies!
| Previous Chapter | Next Chapter |
|---|---|
| Aftermath | Lost |
List of Contents
Habitat Walkthrough
Habitat Summary
| Habitat Objectives |
|---|
Habitat Detailed Walkthrough
| Objectives | |
|---|---|
| 1 | 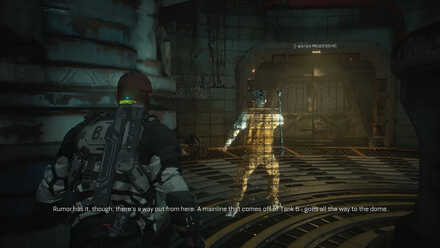 Move the blue crate just by the yellow door to reveal a vent, crawl inside the vent. When you reach the other side, drop down to a Water Treatment chamber. Get to the other side of the chamber where another valve and vent is located. Turn the valve to stop the hot air in the vents, then climb into the vent. Will there be enemies in the water treatment chamber? Yes. Watch for ripples and be ready for sudden attacks. |
| 2 | 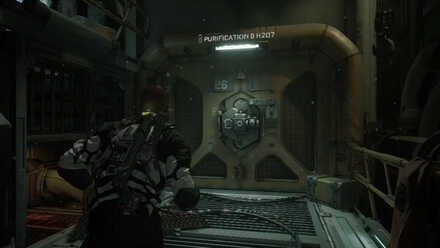 Go through the vent on the floor by the locked door into a dark barely-lit room. A new enemy type will be seen and heard going around the platform. Go straight for the Gate Fuses and put them into the designated panels to turn on the lights. The Gate Fuses will give off a faint green glow that is visible in the dark room. Once both fuses are in place, get inside Access Hall H271. |
| 3 | 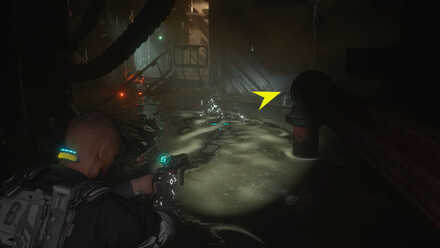 Climb up the ladder to an area with three distinct catwalks. Go to the first catwalk, look for items, then climb up the ladder to get the Gate Fuse. Go back to the end of the catwalk and use the Gate Fuse to open the door to Access Hall H206. |
| 4 | 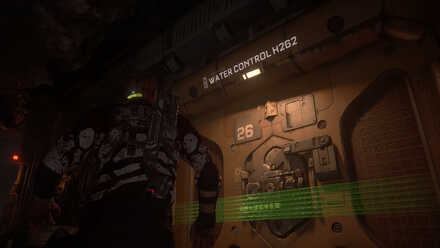 Go into Maintenance Hall F263, it doesn't matter which door you go through, both doors lead to the same hallway. If you're low on supplies, drop by Office F244 and Lounge F231 for ammo, credits, and health injectors. The guard you seek will be in Utility F265. After a brief encounter with an enemy, get the implant bio from the guard to activate the console. Head on back to Water Control. |
| 5 | 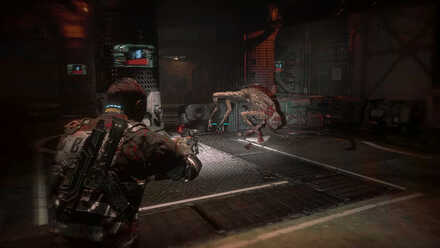 Once the tank reads Water Draining Complete, you'll be able to activate a small bridge. Cross it, climb up the ladder, and get down the hatch. Keep climbing down the hatch until it triggers the gate valve cutscene. |
| 6 | 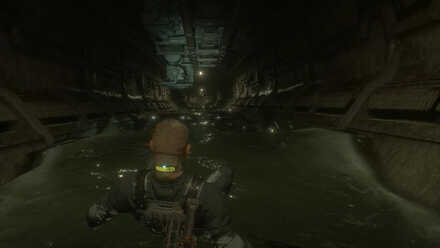 Once you reach the top of the chain, grab some health injectors from the mounted box then head on down to Access Hall F813. The access hall will have multiple vents where enemies can surprise attack you from. Most of these enemies will begin mutating quickly, so make fast work of them. |
| 7 | 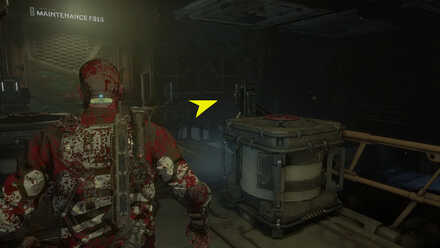 |
| 8 |  |
| 9 | 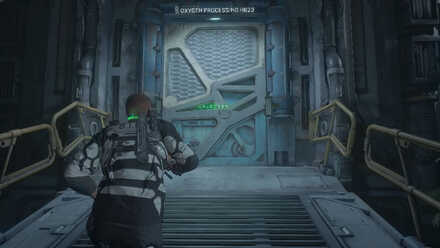 Go through the door to the left of the Reforge station and head to Oxygen Processing H627. Take the Health Injector then go left, crawling under the pipes, then up the vent at the end of the corridor. When you reach the end of the vent, go down and take the implant bio of one Sgt. Bill Pekelo. Use the code to lift the lockdown protocols. |
| 10 | 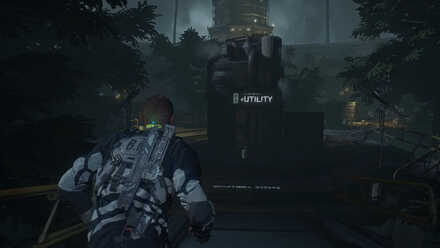 If you missed the Skunk Gun schematics in the Basement during the Aftermath, you can still pick it up here. Once you pickup the schematics, go down the hatch. |
| 11 | 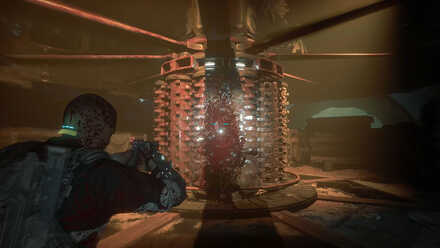 Once all enemies are dealt with, find the small space in the corner to crawl through and meet up with Elias. Climb the ladder, and watch the cutscene towards the next chapter. |
| Previous Chapter | Next Chapter |
|---|---|
| Aftermath | Lost |
Habitat Obtainable Weapons
Skunk Gun
| Skunk Gun | |
|---|---|
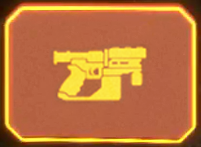 A prototype one-handed shotgun currently being tested in Black Iron. Developed by the Io Armaments Skunkworks Division. |
|
| Type | Sidearm |
| Acquisition Type | Printed at the Reforge Station |
| Print Price | 800 Credits |
| Base Ammo Capacity | 2 |
If you miss the Skunk Gun in the previous chapter, worry not because you can still get the Skunk Gun once you go inside Utlity H630 when you reach the dome to the Tram Station.
Skunk Gun and List of Upgrades
Habitat Enemies Encountered
Rushers
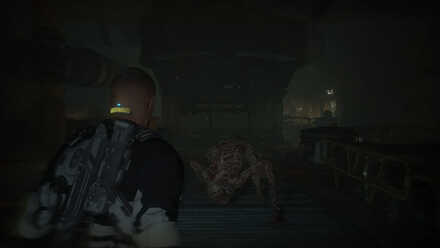
These nightmare creatures are quick on all fours. They have the ability to run on walls and ceilings giving them access to vents for ambushes making them a real problem in dark areas.
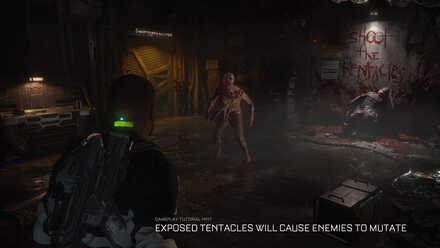
Mutated Biophages
| Pre-Mutation | Post-Mutation |
|---|---|
 |
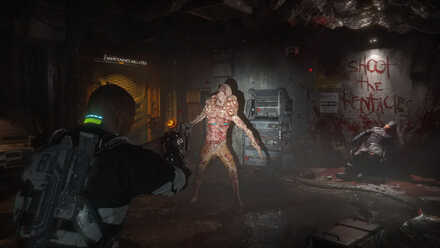 |
Once you see a Biophage expose tentacles, be ready to shoot them immediately. Shooting the tentacles kill biophages much more quickly. Once they are given the chance to mutate, they become tankier and more dangerous.
Habitat Tips and Strategies
Shoot the Tentacles
When you see an enemy sprout tentacles, it is an indication that said enemy will start mutating into a stronger foe. Once you see tentacles, it is important that you shoot at the tentacles directly. If an enemy is down, you can also stomp on the tentacles to kill the enemy.
Do not engage the Security Droid
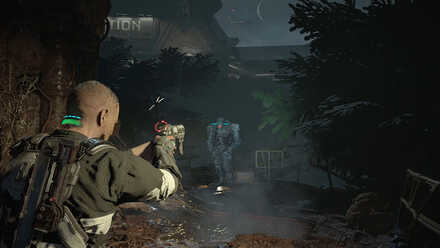
There are not a lot of crates where you can safely hide from the security droid if you decide to shoot it. Even at a good distance, if you shoot it, it reveals your position and you will die from returning fire. You can just wait for it to turn around then you make your way to your destination.
Habitat Implant Bio Locations
Dr. Caitlyn Maher: Corruptors (Audio Log)
| 1 | 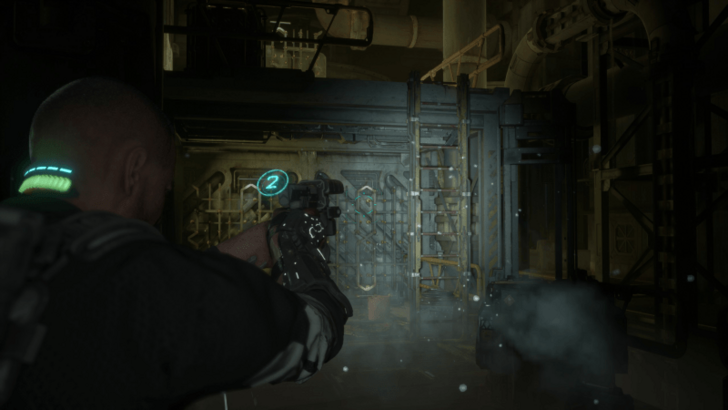 After leaving the vents from the sewage-filled area, turn right to see a platform with a ladder leading up beside some spike grids. |
|---|---|
| 2 | 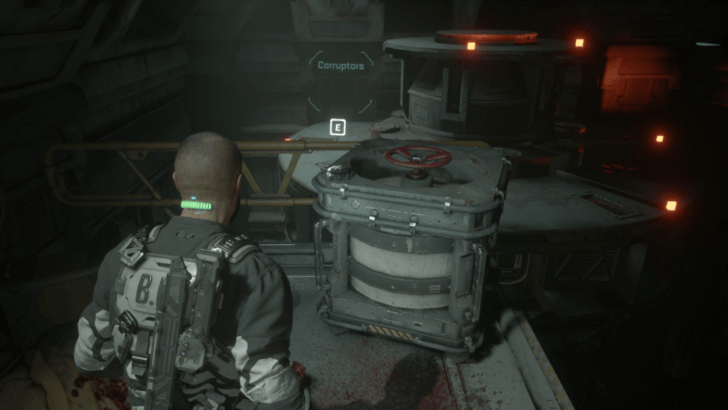 Continue climbing up another set of ladders and move to the far end of the catwalk to see a corpse, some ammo, and the Data-Bios on top of a container. |
Ofc. Bruno Vorenus: Crosswired (Implant Bio)
| 1 | 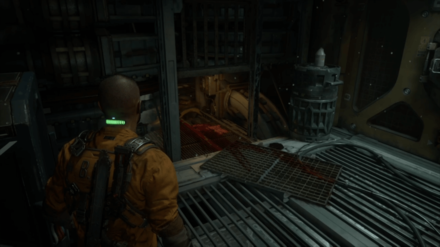 Beside the door to Purification B H207 is a small bloody crawlspace. Head through it to reach a large dark room and clear out all of the enemies inside. |
|---|---|
| 2 | 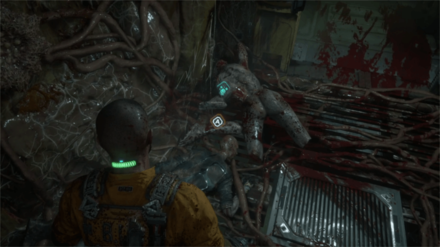 After clearing out the enemies, go to the door leading to Access Hall H271 and interact with the corpse beside the door to get this Implant Bio. |
Dr. Jae Moon-Bell: Cocoons (Audio Log)
| 1 | 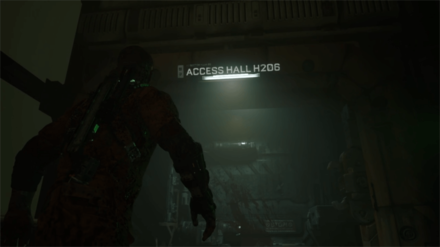 After reaching Access Hall H206, walk past the door to Water Control H262 to reach Storage Hall H239. |
|---|---|
| 2 | 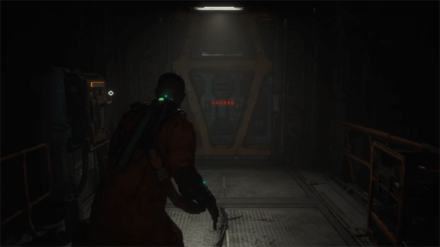 Enter and progress through Storage Hall H239 until you reach a locked door. Swap the two Gate Fuses to unlock the door. |
| 3 | 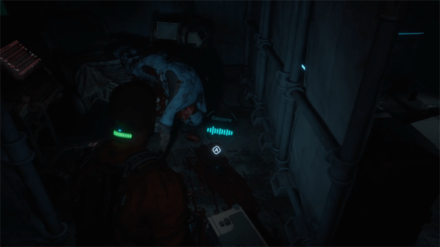 Go through the locked door and continue heading forward until you reach a medical room. Go to the far end of the room and check the ground below the corpse to get this Data-Bio. |
Ofc. James Reese: Suicide Guard (Implant Bio)
| 1 | 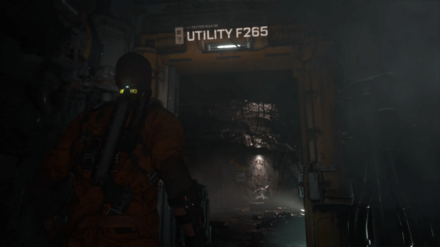 Progress through the chapter until you reach Utility F265. Enter the room and defeat the mutated enemy that ambushes you inside. |
|---|---|
| 2 | 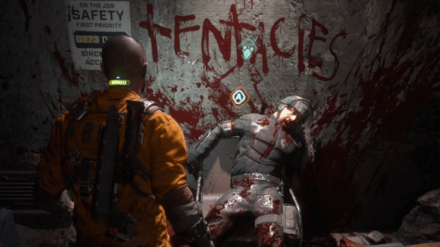 After defeating the monsters, walk up to the corpse beneath the bloody graffiti and interact with it to get this Implant Bio. |
Ofc. James Reese: Security (Audio Log)
| 1 | 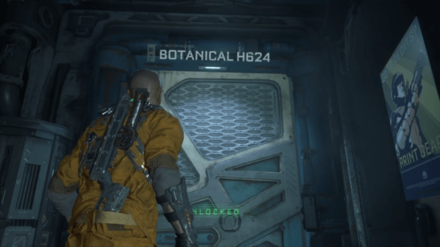 After reaching Oxygen Processing H623, turn left to find the door to Botanical H624. |
|---|---|
| 2 | 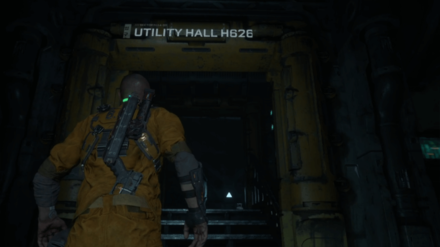 Proceed through Botanical H624 until you reach Utility Hall H626 at the end of the room. |
| 3 | 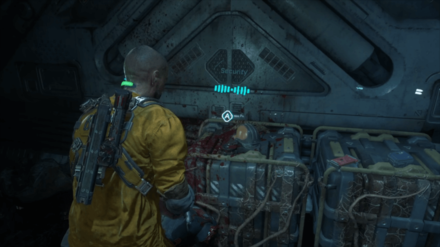 Turn right as you enter the utility hall to see a narrow space. Squeeze through it to find this Audio Log beside the corpse on the ground. |
Sgt. Bill Pekelo (Implant Bio)
| 1 | 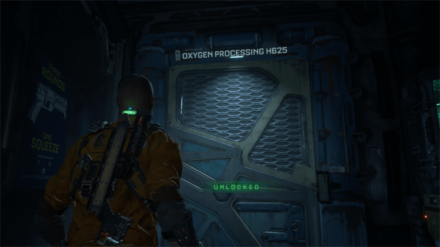 From Oxygen Processing H623, turn right to find the door to Oxygen Processing H625. Enter the room and clear out all the enemies inside. |
|---|---|
| 2 | 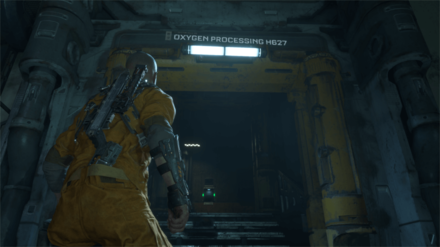 After defeating the enemies, head to the end of the hallway to find Oxygen Processing H627. |
| 3 | 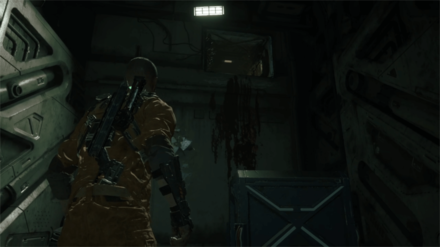 Proceed through Oxygen Processing H627 until you find a bloody vent at the end of the corridor. |
| 4 | 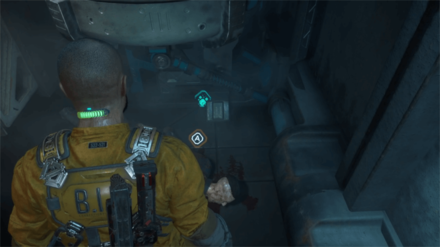 Climb through the vent to reach a small room. Interact with the corpse on the ground to get this Implant Bio. |
Ofc. Kyle Serra: Evacuation (Audio Log)
| 1 | 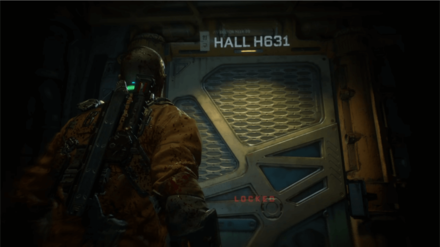 After reaching Utility H630, turn left to find the door to Hall H631. Interact with the door panel to unlock it and clear out the enemies inside. |
|---|---|
| 2 | 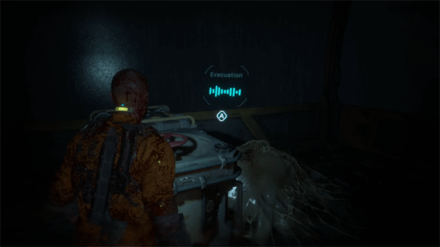 After defeating the enemies, head to the far end of the room to find the Audio Log across the Tram Depot Entrance. |
The Callisto Protocol Related Guides

List of Chapters
| Chapter | Summary |
|---|---|
 Cargo Cargo
(Chapter 1) |
Jacob and Max are flying from Europa to Callisto on a standard supply run when they learn that they have been boarded by the Outer Way terrorist organization. |
 Outbreak Outbreak
(Chapter 2) |
Jacob finds himself a prisoner of Black Iron Prison. When he wakes up, Black Iron is in complete chaos. Now he has to find a way out of this hellhole. |
 Aftermath Aftermath
(Chapter 3) |
Jacob must help Elias free the one prisoner that can get them out Callisto. Jacob must venture deeper into the facility to access SHU, the maximum-security unit where that prisoner is held captive. |
 Habitat Habitat
(Chapter 4) |
Jacob has to rendezvous with Elias at the Tram Station in the Habitat Dome. These creatures have begun mutating, evolving into stronger enemies. |
 Lost Lost
(Chapter 5) |
Jacob is out of Black Iron Prison, but now he finds himself in the barren wastelands of Callisto. Dani has a plan to get to the hangar, but everything doesn't always go according to plan. |
 Below Below
(Chapter 6) |
Jacob wakes up underneath all the rubble of the fallen hangar and learns the existence of Arcas, the first colony. Now he has to bring power back to the station to use the transport platform to Arcas. |
 Colony Colony
(Chapter 7) |
Jacob arrives at the Arcas colony and learns of the truth behind the Callisto Outbreak. Now he must race back to the warden's tower or face the consequences. |
 Tower Tower
(Chapter 8) |
Jacob finds himself a prisoner of Black Iron Prison yet again. Only one thing remains: he has to race against time to save Dani and get off Callisto. |
Author

Chapter 4: Habitat Walkthrough and Implant Bio Locations
Rankings
- We could not find the message board you were looking for.
Gaming News

Popular Games

Genshin Impact Walkthrough & Guides Wiki
Honkai: Star Rail Walkthrough & Guides Wiki
Monster Hunter Wilds Walkthrough & Guides Wiki
Arknights: Endfield Walkthrough & Guides Wiki
Umamusume: Pretty Derby Walkthrough & Guides Wiki
Wuthering Waves Walkthrough & Guides Wiki
Pokemon TCG Pocket (PTCGP) Strategies & Guides Wiki
Digimon Story: Time Stranger Walkthrough & Guides Wiki
Palworld Walkthrough & Guides Wiki
Zenless Zone Zero Walkthrough & Guides Wiki


Recommended Games
Fire Emblem Heroes (FEH) Walkthrough & Guides Wiki
Pokemon Brilliant Diamond and Shining Pearl (BDSP) Walkthrough & Guides Wiki
Diablo 4: Vessel of Hatred Walkthrough & Guides Wiki
Super Smash Bros. Ultimate Walkthrough & Guides Wiki
Yu-Gi-Oh! Master Duel Walkthrough & Guides Wiki
Elden Ring Shadow of the Erdtree Walkthrough & Guides Wiki
Monster Hunter World Walkthrough & Guides Wiki
The Legend of Zelda: Tears of the Kingdom Walkthrough & Guides Wiki
Persona 3 Reload Walkthrough & Guides Wiki
Cyberpunk 2077: Ultimate Edition Walkthrough & Guides Wiki


All rights reserved
© 2022 Krafton, Inc. All Rights Reserved. STRIKING DISTANCE STUDIOS and THE CALLISTO PROTOCOL are trademarks or service marks of Striking Distance Studios, Inc. KRAFTON is a registered trademark or service mark of KRAFTON, Inc.
The copyrights of videos of games used in our content and other intellectual property rights belong to the provider of the game.
The contents we provide on this site were created personally by members of the Game8 editorial department.
We refuse the right to reuse or repost content taken without our permission such as data or images to other sites.