Chapter 3: Aftermath Walkthrough and Data Bios Locations
★Game8's Dead Space Remake is now live!
★ game8 Review of the Callisto Protocol - Is it Worth Playing?
☆ All Implant Bios Locations
★ Use the guns in our Best Weapons Guide!
☆ How to Use Contraband Pack & List of Contents
★ Clips of All Death Animations
☆ Season Pass Guide - Price and All Contents!
Aftermath is the third chapter of The Callisto Protocol's main story. Read on for a detailed walkthrough, list of rewards, tips for completion, Aftermath Data Bios Locations, as well as other strategies!
| Previous Chapter | Next Chapter |
|---|---|
| Outbreak | Habitat |
List of Contents
Aftermath Walkthrough
Aftermath Summary
| Aftermath Objectives |
|---|
Aftermath Detailed Walkthrough
| Objectives | |
|---|---|
| 1 | 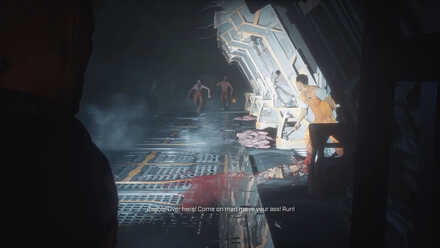 If you have not gathered enough Callisto Credits by this point, open the crate by the Reforge and it will have 800 credits. This is also a good time to upgrade the Stun Baton if you have the budget. |
| 2 | 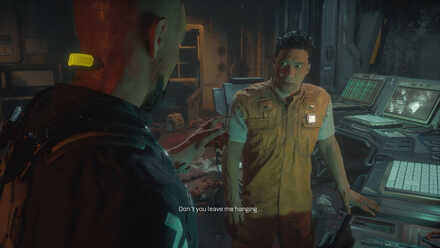 |
| 3 | 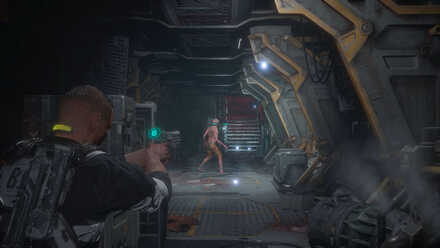 Take Lift D513 and exit at the dark corridors of Block A2. Here the game will tell you that you can sneak up on enemies and Quick Kill them using the Shiv. Go up the stairs and more enemies will be coming out from the shadows. Head towards Recreation A225, and go left past Administration A215 then climb the vent at the end. ▶How to Perform a Quick Kill |
| 4 | 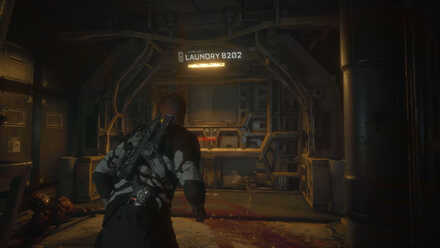 There will be two enemies in the area. You can deal with them in any way you see fit. Once the door is unlocked, go to the end of the hall until you reach a dead end with two doors, one on either side. If you want to get the missable Implant Bios, go down B2 on your right first. If you're in a hurry, take the door to B3 on your left. ▶Duncan Cole: Secret Room 1 Data Bios Location |
| 5 |  |
| 6 | 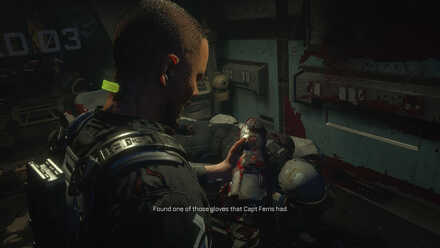 Two enemies will try and ambush you, one skinny regular enemy and one slightly tanky enemy. Once the enemies are taken care of, get the GRP Battery from the table. Be sure to grab the Gate Fuse from the entrance door so you can proceed to Med Office C105. More enemies will attack once you retrieve the Gate Fuse. ►GRP Upgrades and How to Get |
| 7 | 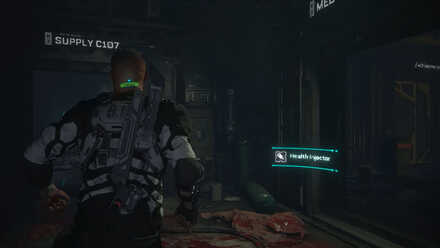 |
| 8 | 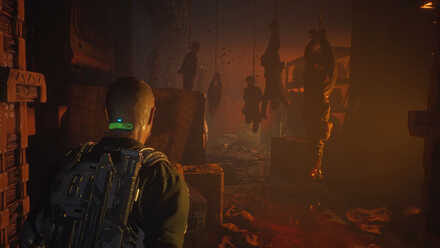 |
| 9 | 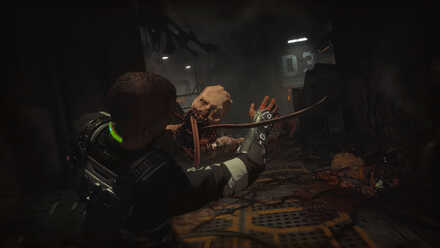 You'll need a Gate Fuse to get out of the basement. Fortunately, this is just on the other side. Unfortunately, there are a lot of enemies on that side including Spitters. Once you deal with the enemies, look for the Gate Fuse on the floor by the gate to Workshop D302 to open the doors. You can also get the Implant Bios of one Ofc. Kerry Brown near the industrial fan and the schematics for the Skunk Gun inside Workshop D302. ►How to Get the Skunk Gun |
| 10 | 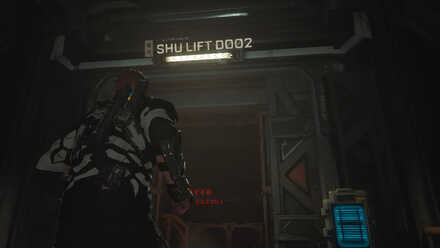 |
| 11 | 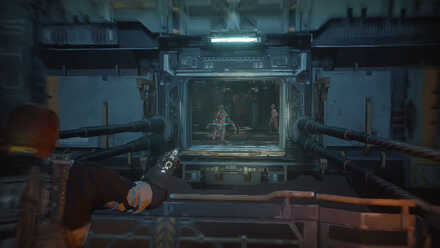 |
| 12 | Save your bullets and use the GRP to send enemies to the multiple gears and grinders. Once the gears have stopped moving, it's safe to go across and locate the SHU Control Room. |
| 13 | 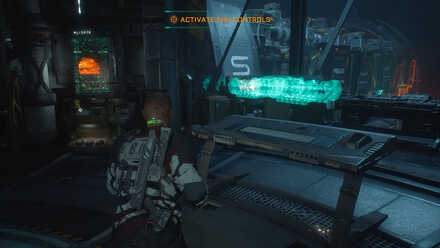 Go back down the stairs and take the elevator down to SHU Cell Wing A, There will be enemies as you get off the elevator, so be prepared to fight. |
| 14 | 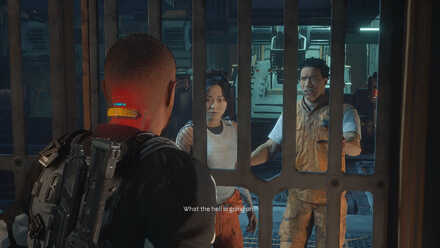 |
| 15 | 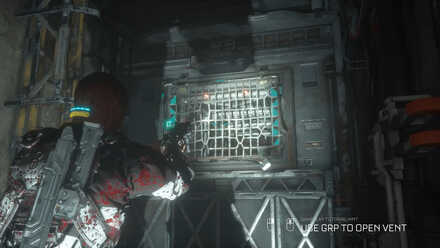 |
| 16 | 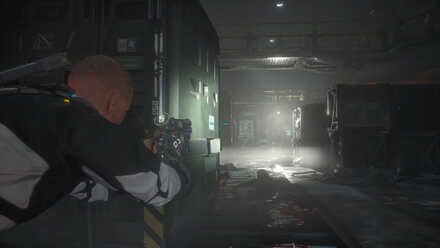 |
| 17 | 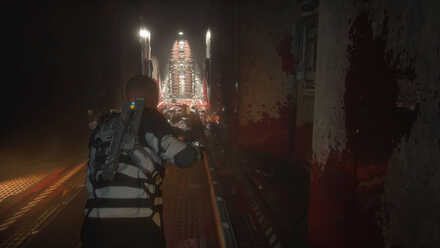 |
| Previous Chapter | Next Chapter |
|---|---|
| Outbreak | Habitat |
Aftermath Obtainable Weapons
BI-55 Hand Cannon
| Hand Cannon | |
|---|---|
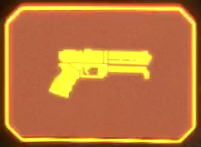 A custom - and powerful - service pistol configuration unique to Black Iron. Based on the UJC Modular Weapons Platform. |
|
| Type | Sidearm |
| Acquisition Type | Printed at the Reforge Station |
| Print Price | 800 Credits |
| Base Ammo Capacity | 6 |
Elias will hand you the base model for this sidearm near the start of Aftermath. You will have to print this gun at the Reforge Station in the safe room, but this gun will be a staple as you try to escape Black Iron.
Hand Cannon Upgrades and How to Get
GRP (Gravity Restraint Projector)
| GRP | |
|---|---|
 A miniaturized graviton field generator used by UJC Correctional Officers to pacify inmates and manipulate objects. |
|
| Type | Auxiliary Ranged |
| Acquisition Type | Story Progression |
The GRP is a nifty glove you find in the Medical Bay. This device allows you to restrain enemies and objects with gravity, allowing you to push or pull them towards you. This is auxiliary weapon is best used to hurl enemies into environmental hazards.
GRP Upgrades and How to Get
Skunk Gun
| Skunk Gun | |
|---|---|
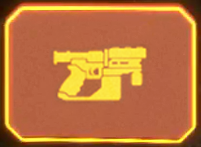 A prototype one-handed shotgun currently being tested in Black Iron. Developed by the Io Armaments Skunkworks Division. |
|
| Type | Sidearm |
| Acquisition Type | Printed at the Reforge Station |
| Print Price | 800 Credits |
| Base Ammo Capacity | 2 |
The Skunk Gun is earliest found in this chapter. Don't worry if you miss this gun, because you can still acquire it in the next chapter. This gun's schematics can be found in the D3 Basement inside Workshop D302.
Skunk Gun and List of Upgrades
Aftermath Enemies Encountered
Regular Biophages
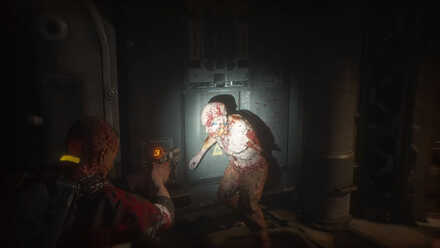
Now that you have a gun, these enemies will be much easier to take out from a distance. Keep dodging their attacks and they should pose no real problem unless you get swarmed.
Spitters
This new enemy type has a ranged attack where it will spit acidic sludge towards you. You can shoot at its head to temporarily prevent it from doing its range attack as you close the distance and finish it off with Melee attacks.
Bloated Biophages

This new enemy type is first seen inside the Medical Facility when you get the GRP. This enemy is much like a regular Biophage with the exception that it can take more punishment and can block more often.
Aftermath Tips and Strategies
Use the GRP to Your Advantage
Hurl enemies at environmental hazards to save bullets. Most stages will have grinders, gears, and industrial fans where you can throw enemies towards.
Deal with Spitters First

These enemies will constantly spit acid towards you as you evade melee attackers. Spitters are nots as agile as melee attackers, it is recommended that you try and use cover, and kill the Spitter first as you evade other enemies. Alternatively you can lure them to the big industrial fan!
Shoot the Robot's Head
Use the crates as quick cover to shoot the robot's head. If you managed to upgrade the Hand Cannon, it should take about 2-3 direct hits to the head to terminate the security droid.
Aftermath Data Bios Locations
Sgt. Eric Jane: Locked Door
| 1 | 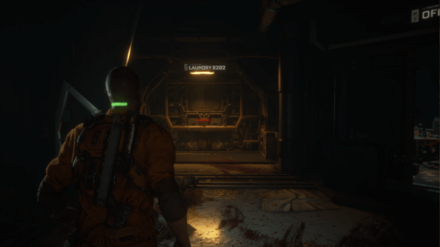 After reaching the area with a broken Security Unit, clear out the enemies in the room and go up to Laundry B202's door. |
|---|---|
| 2 | 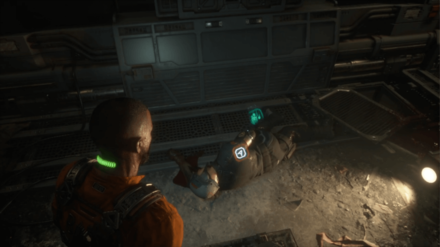 Elias will tell you to find a guard's corpse to get security credentials for the door. Go back to the corpse near the broken Security Unit and interact with it to get this Implant Bio. |
Ofc. Pruitt Matos: Laundry
| 1 | 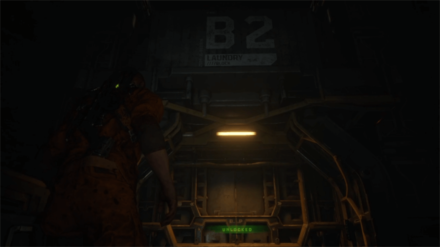 After entering Laundry B202, go to the end of the room and turn right at the intersection to reach the B2 Laundry Block. |
|---|---|
| 2 | 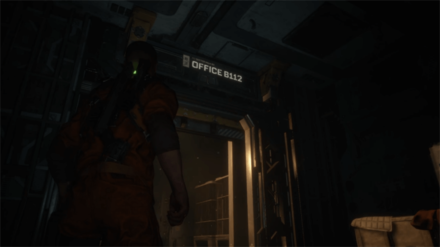 Enter the B2 Laundry Block and hug the left side until you find Office B112. |
| 2 | 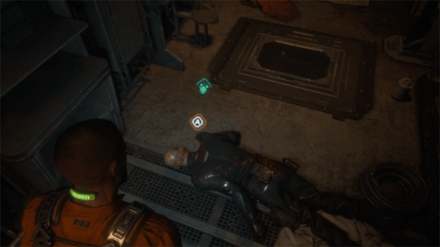 Go inside the office and interact with the corpse on the ground to get this Implant Bio. |
Duncan Cole: Secret Room 1
| 1 | 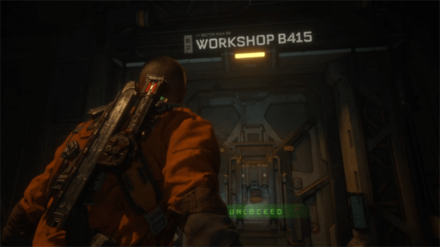 After entering the B3 Maintenance Block, move past the door to Maintenance B414 to reach Workshop B415. |
|---|---|
| 2 |  Unlock and enter the workshop, then go through the vent on the right side of the room. |
| 3 |  After exiting the vent, continue heading down the underground path until you find a hidden room. |
| 4 | 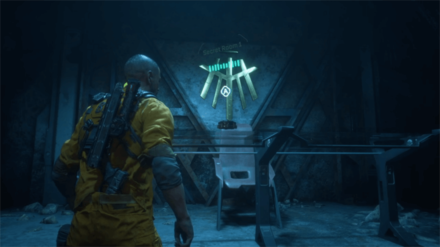 Go to the table at the far end of the room to get this Data-Bio. |
Dr. Ewan Hayes: MedLab Outbreak
| 1 |  Go through Maintenance B414 to reach Medical Ward C101 and pry the doors open. |
|---|---|
| 2 | 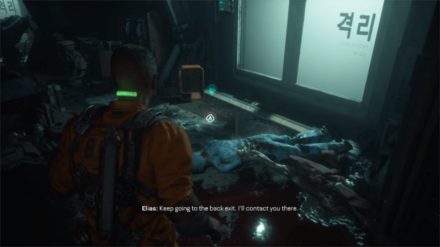 After entering the medical ward, interact with the corpse in scrubs on the ground to get this Implant Bio. |
Ofc. Dachs Symmons: Hanged Guard
| 1 |  After getting the GRP, continuing making your way through the chapter until you reach Maintenance C110. |
|---|---|
| 2 |  Pry open the maintenance room's doors and interact with the corpse at the center of the hanging bodies to get this Implant Bio. |
Ofc. Kerry Brown
| 1 |  After riding the falling elevator down the shaft, make your way through the basement until you reach a spinning fan lit by orange lights. |
|---|---|
| 2 |  Go around the corner and reach the back of the fan to find a corpse containing the Implant Bio. An enemy will ambush you from the vent below after reaching the corpse, so take them out before you pick it up. |
Tadhg Song
| 1 |  After riding the gondola and clearing out the SHU Gearroom, climb up the area using the platforms near the sides of the entrance. |
|---|---|
| 2 |  Interact with the corpse at the far end of the upper floor to get this Implant Bio. |
Dani Nakamura
| 1 | 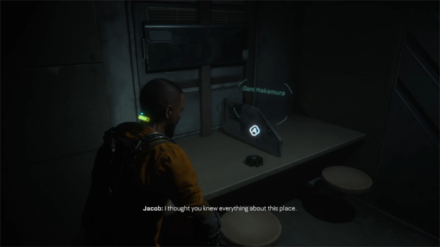
After getting locked inside Dani Nakamura's cell, check the table to find her Data Bio. |
|---|
The Callisto Protocol Related Guides

List of Chapters
| Chapter | Summary |
|---|---|
 Cargo Cargo
(Chapter 1) |
Jacob and Max are flying from Europa to Callisto on a standard supply run when they learn that they have been boarded by the Outer Way terrorist organization. |
 Outbreak Outbreak
(Chapter 2) |
Jacob finds himself a prisoner of Black Iron Prison. When he wakes up, Black Iron is in complete chaos. Now he has to find a way out of this hellhole. |
 Aftermath Aftermath
(Chapter 3) |
Jacob must help Elias free the one prisoner that can get them out Callisto. Jacob must venture deeper into the facility to access SHU, the maximum-security unit where that prisoner is held captive. |
 Habitat Habitat
(Chapter 4) |
Jacob has to rendezvous with Elias at the Tram Station in the Habitat Dome. These creatures have begun mutating, evolving into stronger enemies. |
 Lost Lost
(Chapter 5) |
Jacob is out of Black Iron Prison, but now he finds himself in the barren wastelands of Callisto. Dani has a plan to get to the hangar, but everything doesn't always go according to plan. |
 Below Below
(Chapter 6) |
Jacob wakes up underneath all the rubble of the fallen hangar and learns the existence of Arcas, the first colony. Now he has to bring power back to the station to use the transport platform to Arcas. |
 Colony Colony
(Chapter 7) |
Jacob arrives at the Arcas colony and learns of the truth behind the Callisto Outbreak. Now he must race back to the warden's tower or face the consequences. |
 Tower Tower
(Chapter 8) |
Jacob finds himself a prisoner of Black Iron Prison yet again. Only one thing remains: he has to race against time to save Dani and get off Callisto. |
Author

Chapter 3: Aftermath Walkthrough and Data Bios Locations
Rankings
- We could not find the message board you were looking for.
Gaming News


![The Seven Deadly Sins: Origin [First Impressions] | A Promising Start](https://img.game8.co/4440581/584e0bfb87908f12c4eab6e846eb1afd.png/thumb)
![The Liar Princess and the Blind Prince Review [PC] | Lovely to Look at but Tedious to Play](https://img.game8.co/4442586/8d95f5faf05780f1765ce7e0938bd825.jpeg/thumb)
![Marathon Cryo Archive Map Teased as [REDACTED] on Selection Screen](https://img.game8.co/4442236/6357203e58172f6de57f1991e7c39b22.png/thumb)
Popular Games

Genshin Impact Walkthrough & Guides Wiki
Umamusume: Pretty Derby Walkthrough & Guides Wiki
Pokemon Pokopia Walkthrough & Guides Wiki
Honkai: Star Rail Walkthrough & Guides Wiki
Monster Hunter Stories 3: Twisted Reflection Walkthrough & Guides Wiki
Arknights: Endfield Walkthrough & Guides Wiki
Wuthering Waves Walkthrough & Guides Wiki
Zenless Zone Zero Walkthrough & Guides Wiki
Pokemon TCG Pocket (PTCGP) Strategies & Guides Wiki
Monster Hunter Wilds Walkthrough & Guides Wiki


Recommended Games
Diablo 4: Vessel of Hatred Walkthrough & Guides Wiki
Cyberpunk 2077: Ultimate Edition Walkthrough & Guides Wiki
Fire Emblem Heroes (FEH) Walkthrough & Guides Wiki
Yu-Gi-Oh! Master Duel Walkthrough & Guides Wiki
Super Smash Bros. Ultimate Walkthrough & Guides Wiki
Pokemon Brilliant Diamond and Shining Pearl (BDSP) Walkthrough & Guides Wiki
Elden Ring Shadow of the Erdtree Walkthrough & Guides Wiki
Monster Hunter World Walkthrough & Guides Wiki
The Legend of Zelda: Tears of the Kingdom Walkthrough & Guides Wiki
Persona 3 Reload Walkthrough & Guides Wiki


All rights reserved
© 2022 Krafton, Inc. All Rights Reserved. STRIKING DISTANCE STUDIOS and THE CALLISTO PROTOCOL are trademarks or service marks of Striking Distance Studios, Inc. KRAFTON is a registered trademark or service mark of KRAFTON, Inc.
The copyrights of videos of games used in our content and other intellectual property rights belong to the provider of the game.
The contents we provide on this site were created personally by members of the Game8 editorial department.
We refuse the right to reuse or repost content taken without our permission such as data or images to other sites.