Shara Ishvalda Weakness and Strategy Guide
★ 2025/2/28: Monster Hunter Wilds is now available!
Join the hunt at our Monster Hunter Wilds Wiki!
Learn how to beat the final boss Shara Ishvalda in the Iceborne expansion for Monster Hunter World (MHW)! This guide explains everything about Shara Ishvalda's weakness, carves, rewards, and a complete strategy guide for beating and capturing it. Find out what parts are breakable and severable, and what drops and Monster materials are available.
| All Shara Ishvalda Articles | ||
|---|---|---|
|
|
⍺+ | β+ |
|
List of Contents
Shara Ishvalda Weakness, Body Parts, and Resistances
Shara Ishvalda Characteristics
 |
|||||
| Roar | Wind | Tremor | Blight | Status | |
|---|---|---|---|---|---|
| Big | High | Big | None | None | |
| Breakable Parts | |||||
| Head, Hindlegs, Wings (Second Form) | |||||
Locations and Areas Visited
Shara Ishvalda appears in one, unique place only: the Origin Isle. Bring a Farcaster because you cannot come back to camp unless you get carted.
Weakness, Body Parts, Extracts
Head
| Sever | Break | Bomb | Fire | Extract |
|---|---|---|---|---|
| 70 | 75 | 35 | 10 | Red |
| Water | Thunder | Ice | Dragon | |
| 20 | 0 | 25 | 5 |
Face
| Sever | Break | Bomb | Fire | Extract |
|---|---|---|---|---|
| 50 | 55 | 45 | 5 | Red |
| Water | Thunder | Ice | Dragon | |
| 15 | 0 | 20 | 5 |
Torso
| Sever | Break | Bomb | Fire | Extract |
|---|---|---|---|---|
| 48 | 44 | 20 | 5 | Orange |
| Water | Thunder | Ice | Dragon | |
| 15 | 0 | 20 | 5 |
Upper Head
| Sever | Break | Bomb | Fire | Extract |
|---|---|---|---|---|
| 55 | 60 | 35 | 5 | Red |
| Water | Thunder | Ice | Dragon | |
| 15 | 0 | 20 | 5 |
Hindlegs
| Sever | Break | Bomb | Fire | Extract |
|---|---|---|---|---|
| 44 | 48 | 25 | 5 | White |
| Water | Thunder | Ice | Dragon | |
| 15 | 0 | 20 | 5 |
Lower Head
| Sever | Break | Bomb | Fire | Extract |
|---|---|---|---|---|
| 50 | 50 | 30 | 5 | Red |
| Water | Thunder | Ice | Dragon | |
| 15 | 0 | 20 | 5 |
Forelegs
| Sever | Break | Bomb | Fire | Extract |
|---|---|---|---|---|
| 25 | 25 | 10 | 5 | White |
| Water | Thunder | Ice | Dragon | |
| 5 | 0 | 15 | 5 |
Lower Body
| Sever | Break | Bomb | Fire | Extract |
|---|---|---|---|---|
| 10 | 10 | 10 | 5 | Orange |
| Water | Thunder | Ice | Dragon | |
| 5 | 0 | 10 | 5 |
Wings
| Sever | Break | Bomb | Fire | Extract |
|---|---|---|---|---|
| 48 | 48 | 45 | 5 | Red |
| Water | Thunder | Ice | Dragon | |
| 15 | 0 | 20 | 5 |
Tail
| Sever | Break | Bomb | Fire | Extract |
|---|---|---|---|---|
| 25 | 25 | 10 | 5 | Orange |
| Water | Thunder | Ice | Dragon | |
| 5 | 0 | 15 | 5 |
Forelegs
| Sever | Break | Bomb | Fire | Extract |
|---|---|---|---|---|
| 10 | 10 | 10 | 5 | White |
| Water | Thunder | Ice | Dragon | |
| 5 | 0 | 10 | 5 |
Higher values indicate higher damage.
Vulnerability to Status Effects and Items
| Poison | ★★ | Flash | ❌ |
|---|---|---|---|
| Paral | ★ | Shock | ❌ |
| Sleep | ❌ | Pitfall | ❌ |
| Stun | ★ | Ivy | ❌ |
| Blast | ★★ | Dung | ❌ |
| Exhaust | - | Meat | ❌ |
| Mount | ★★ | Screamer | ❌ |
How to Beat Shara Ishvalda
First Phase

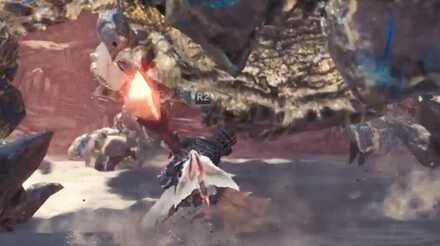
Shara Ishvalda begins the hunt with his rock armor state. In this state, Shara Ishvalda's movements are slow and his attacks take a long time to wind up making it extremely easy to avoid most of his attacks.
Head and Torso

It is best that you focus your attacks on the head and the torso during the rock armor state. These parts are the weakest part of Shara Ishvalada during the first state and it can be softened by using your clutch claws. However, if he goes down and the back part is vulnerable, it is recommended that you attack this part instead because of its weakness against a heavy-hitting weapon like the charge blade and the great sword.
Sandstorm

Try to move away from the sandstorms that Shara Ishvalda will make during this phase. This will be followed up by a small explosion and it can prevent you from seeing any incoming attacks from Shara Ishvalda himself.
Using Environmental Hazards


On the north side of the map, there is a wall with a slightly different color from the rest. This wall can be knocked down and be used to damage Shara Ishvalda by flinching him with your clutch claws. If executed perfectly, this will also stun Shara Ishvalda for a few seconds giving you an opportunity to attack.
Opportunity to Attack

Shara Ishvalda will sometimes bury his head on to the ground as one of his attacks. This will give you enough time to perform your most damaging combos if you are able to dodge. Focus on attacking the head or the torso to maximize the damage that you can do during this time.
Second Phase

During the second phase, Shara Ishvalda will start using powerful sonic blasts that can deal massive damage if you get hit directly. In this phase, you should prioritize dodging over attacking since Shara Ishvalda's movements will now be a lot faster than before.
Avoid Standing Infront

Try not to stay in front of Shara Ishvalda and constantly keep on moving to avoid his barrage of attacks. It is recommended that you focus on attacking the forelegs and soften it using your clutch claws.
Large Explosion
While fighting Shara Ishvalda, he will sometimes go to the edge of the map and charge up his most powerful attack. This takes a long time to charge up, immediately keep your distance by moving to the corner of the map, and wait for it to finish before starting to engage again.
Use the Falling Rocks

There are 3 collapsable rocks available in the area during the second phase. You can use this to deal massive damage to Shara Ishvalda and stun him for a few seconds if it lands. Be sure to use these rocks immediately as soon as the second phase starts since they can be destroyed by Shara Ishvalda wind attacks.
Shara Ishvalda Attack Patterns
| Attack | Attack Power | Guardable | Exhaustion |
|---|---|---|---|
| Bite | 60 | ◯ | 40 |
| Headbutt | 65 | ◯ | 35 |
| Crush | 95 | ◯ | 60 |
| Side Wing Attack | 75 | ◯ | 60 |
| Wing Slam Attack | 85(60) | ◯ | 45(30) |
| Double Wing Slam | 95 | ◯ | 60 |
| Earth Dispell | 60(70) | ◯ | 40(80) |
| Earth Attack 1 | 60(70) | ◯ | 40(80) |
| Earth Attack 2 | 60 | ◯ | 40 |
| Front Leg Slam | 70 | ◯ | 55 |
| Front Leg Scrub | 60 | ◯ | 35 |
| Front Leg Vibration | 50 | ◯ | 40 |
| Wing Trap Attack | 80 | ◯ | 55 |
| Wing Scratch | 60 | ◯ | 404 |
| Rear Wing Scratch | 70 | ◯ | 55 |
| Wipe Off | 60 | ◯ | 50 |
| Charge | 70(30) | ◯ | 40(10) |
| Rush | 85(60) | ◯ | 50(30) |
| Ground Blast (Wing) | 80 | ◯ | 55 |
| Ground Explosion | 75 | ◯ | 40 |
| Ground Vibration Wave | 80(100) | Guard Up | 40 |
| Ground Blast | 75 | ◯ | 40 |
| Turret Attack | 140 | x | 0 |
| Tremor | 0 | ◯ | 0 |
| Wing Pressure | 0 | ◯ | 0 |
| Dragon Wing Pressure | 0 | ◯ | 0 |
| Roar | 0 | ◯ | 0 |
| Roar (Naked) | 50 | ◯ | 60 |
Shara Ishvalda Carves and Rewards
Carvings and Hunt Rewards
| Obtain Rate (%) | |
|---|---|
| MR |
Shara Ishvalda Tenderplate
/ Break Head Twice 95 Shara Ishvalda Gem / Body 4, Break Head Twice 5 Shara Ishvalda Tenderscale / Body 33 Shara Ishvalda Boulderplate / Body 27 Shara Ishvalda Petalstone / Body 21 Shara Ishvalda Tenderclaw / Body 15 |
Rewards for Each Body Part
| Obtain Rate (%) | |
|---|---|
| MR |
Shara Ishvalda Tenderclaw
/ Wings 100 Shara Ishvalda Tenderscale / Head of Original Form, 64 Shara Ishvalda Tenderplate / Head of Original Form, 33 Shara Ishvalda Gem / Head of Original Form, 3 Shara Ishvalda Petalstone / Forelegs 70 Shara Ishvalda Boulderplate / Forelegs 30 |
Breakable Body Parts
| Defense Value | How to Break | |
|---|---|---|
| Head Shell (Upper Left) | 190 | Set durability to 0, 4 times. |
| Head Shell (Upper Right) | 190 | Set durability to 0, 4 times. |
| Head Shell (Bottom) | 230 | Set durability to 0, 6 times. |
| Torso | 500 | Set durability to 0, once. |
| Left Wing | 350 | Set durability to 0, once. |
| Right Wing | 350 | Set durability to 0, twice. |
| Left Front Leg | 180 | Set durability to 0, twice. |
| Right Front Leg | 180 | Set durability to 0, twice. |
| Hindlegs | 450 | --- |
| Head (Naked) | 580 | Set durability to 0, then reduce durability by 1300. |
| Torso (Naked) | 710 | --- |
| Left Wing (Naked) | 450 | --- |
| Right Wing (Naked) | 450 | --- |
| Left Front Leg (Naked) | 360 | Set durability to 0, once. |
| Right Front Leg (Naked) | 360 | Set durability to 0, once. |
| Tail | 500 | --- |
Shiny Drops
| Obtain Rate (%) | |
|---|---|
| MR Drops |
Shara Ishvalda Petalstone
/ 50 Shara Ishvalda Tenderclaw / 28 Old Dragon Treasure / 22 |
Plunderblade Rewards
Plunderblade
| Obtain Rate (%) | |
|---|---|
| MR |
Shara Ishvalda Tenderscale
/ 45 Shara Ishvalda Boulderplate / 30 Shara Ishvalda Tenderclaw / 24 Shara Ishvalda Gem / 1 |
Palarang
| Obtain Rate (%) | |
|---|---|
| MR |
Shara Ishvalda Tenderscale
/ 50 Shara Ishvalda Boulderplate / 28 Old Dragon Treasure / 22 |
Quests Where Shara Ishvalda Appears
| Type | Quest Name |
|---|---|
| Assigned | M★6 - Paean of Guidance |
| Event | M★6 - The Naked Truth |
| Optional | M★6 - Faraway Lorelei |
Related Links
All Monster Guides

Iceborne Monsters
 Alatreon Alatreon
|
 Banbaro Banbaro
|
 Barioth Barioth
|
 Beotodus Beotodus
|
 Brachydios Brachydios
|
 Fatalis Fatalis
|
 Glavenus Glavenus
|
 Master Rank Kulve Taroth Master Rank Kulve Taroth
|
 Namielle Namielle
|
 Nargacuga Nargacuga
|
 Rajang Rajang
|
 Safi'jiiva Safi'jiiva
|
 Shara Ishvalda Shara Ishvalda
|
 Tigrex Tigrex
|
 Velkhana Velkhana
|
 Yian Garuga Yian Garuga
|
 Zinogre Zinogre
|
Monster Variants
Arch-Tempered Elder Dragons
 Arch-Tempered Velkhana Arch-Tempered Velkhana |
 Arch-Tempered Namielle Arch-Tempered Namielle
|
Monsters by Game
| All Monsters by Game | |
|---|---|
 Iceborne Iceborne |
 Monster Hunter World Monster Hunter World |
Comment
Author
Shara Ishvalda Weakness and Strategy Guide
improvement survey
03/2026
improving Game8's site?

Your answers will help us to improve our website.
Note: Please be sure not to enter any kind of personal information into your response.

We hope you continue to make use of Game8.
Rankings
- We could not find the message board you were looking for.
Gaming News
Popular Games

Genshin Impact Walkthrough & Guides Wiki

Honkai: Star Rail Walkthrough & Guides Wiki

Umamusume: Pretty Derby Walkthrough & Guides Wiki

Pokemon Pokopia Walkthrough & Guides Wiki

Resident Evil Requiem (RE9) Walkthrough & Guides Wiki

Monster Hunter Wilds Walkthrough & Guides Wiki

Wuthering Waves Walkthrough & Guides Wiki

Arknights: Endfield Walkthrough & Guides Wiki

Pokemon FireRed and LeafGreen (FRLG) Walkthrough & Guides Wiki

Pokemon TCG Pocket (PTCGP) Strategies & Guides Wiki
Recommended Games

Diablo 4: Vessel of Hatred Walkthrough & Guides Wiki

Cyberpunk 2077: Ultimate Edition Walkthrough & Guides Wiki

Fire Emblem Heroes (FEH) Walkthrough & Guides Wiki

Yu-Gi-Oh! Master Duel Walkthrough & Guides Wiki

Super Smash Bros. Ultimate Walkthrough & Guides Wiki

Pokemon Brilliant Diamond and Shining Pearl (BDSP) Walkthrough & Guides Wiki

Elden Ring Shadow of the Erdtree Walkthrough & Guides Wiki

Monster Hunter World Walkthrough & Guides Wiki

The Legend of Zelda: Tears of the Kingdom Walkthrough & Guides Wiki

Persona 3 Reload Walkthrough & Guides Wiki
All rights reserved
©CAPCOM CO., LTD. 2018, 2019 ALL RIGHTS RESERVED.
The copyrights of videos of games used in our content and other intellectual property rights belong to the provider of the game.
The contents we provide on this site were created personally by members of the Game8 editorial department.
We refuse the right to reuse or repost content taken without our permission such as data or images to other sites.
 Acidic Glavenus
 Blackveil Vaal Hazak
 Brute Tigrex
 Coral Pukei-Pukei
 Ebony Odogaron
 Frostfang Barioth
 Fulgur Anjanath
 Furious Rajang
 Gold Rathian
 Nightshade Paolumu
 Raging Brachydios
 Ruiner Nergigante
 Savage Deviljho
 Scarred Yian Garuga
 Seething Bazelgeuse
 Shrieking Legiana
 Silver Rathalos
 Stygian Zinogre
 Viper Tobi-Kadachi


![Monster Hunter Stories 3 Review [First Impressions] | Simply Rejuvenating](https://img.game8.co/4438641/2a31b7702bd70e78ec8efd24661dacda.jpeg/thumb)


