How to beat Seymour Flux Tips and Guide

This is a walkthrough for the boss fight Seymour Flux from the game Final Fantasy X (FF 10, FF X). Read on for tips and strategy about how to beat Seymour Flux , including Seymour Flux 's stats and other useful information.
List of Contents
Seymour Flux Information
Seymour Flux Basic Information
| Name | Seymour Flux | ||
|---|---|---|---|
| HP(Overkill) | 70000(3500) | MP | 512 |
| AP(Overkill) | 10000(15000) | Gil | 6000 |
| Drop (7/8) | Lv. 4 Key Sphere | Drop (1/8) | Lv. 4 Key Sphere |
| steal (3/4) | Elixir 1 | Steal (1/4) | Elixir 1 |
| Abilities | Banish | Lance of Atrophy | |
| Reflect | Flare | ||
| Protect | Dispell (All) | ||
Seymour Flux Stats
| Srength | 30 | Agility | 38 |
|---|---|---|---|
| Defense | 40 | Luck | 15 |
| Magic | 15 | Evasion | 0 |
| Magic Defense | 40 | Accuracy | 100 |
Seymour Flux Elemental Resistances
| Fire | Lightning | Water | Ice | Holy |
|---|---|---|---|---|
| 100% | 100% | 100% | 100% | 100% |
Seymour Flux Status Resistances
| Sleep | Silence | Darkness |
|---|---|---|
| GUARD | 50 | GUARD |
| Poison | Petrify | Slow |
| 90 | GUARD | GUARD |
| Zombie | Power Break | Magic Break |
| GUARD | GUARD | GUARD |
| Armor Break | Mental Break | Threaten |
| GUARD | GUARD | GUARD |
| Death | Provoke | Doom |
| GUARD | GUARD | GUARD |
| Distill | Sensor | Scan |
| 0 | 0 | 0 |
| Gravity | Delay | Eject |
| GUARD | GUARD | GUARD |
| Zanmato Lv. | ||
| 4 | ||
Seymour Flux Equipment Ability Drops
| Weapon & Armor slots | 2-4 |
|---|---|
| Weapon and Armor Ability Drops | 1-2 |
| Weapon Ability Drops | |
| Piercing | Dark Strike |
| Armor Ability Drops | |
| SOS Shell | |
Weapon & Armor Slots Drops depicts the amount of possible slots the enemy's equipment drops will have while the Ability Drops depicts the possible amount of abilities the dropped weapon may have.
Mortiorchis Information
Mortiorchis Basic Information
| Name | Mortiorchis | ||
|---|---|---|---|
| HP(Overkill) | 4000 | MP | 512 |
| AP(Overkill) | - | Gil | - |
| Drop (7/8) | - | Drop (1/8) | - |
| steal (3/4) | - | Steal (1/4) | - |
| Abilities | |||
| none | |||
Mortiorchis Stats
| Srength | 40 | Agility | 38 |
|---|---|---|---|
| Defense | 100 | Luck | 15 |
| Magic | 40 | Evasion | 0 |
| Magic Defense | 1 | Accuracy | 100 |
Mortiorchis Elemental Resistances
| Fire | Lightning | Water | Ice | Holy |
|---|---|---|---|---|
| 100% | 100% | 100% | 100% | 100% |
Mortiorchis Status Resistances
| Sleep | Silence | Darkness |
|---|---|---|
| GUARD | GUARD | GUARD |
| Poison | Petrify | Slow |
| GUARD | GUARD | GUARD |
| Zombie | Power Break | Magic Break |
| GUARD | GUARD | GUARD |
| Armor Break | Mental Break | Threaten |
| GUARD | GUARD | GUARD |
| Death | Provoke | Doom |
| GUARD | GUARD | GUARD |
| Distill | Sensor | Scan |
| 0 | 0 | 0 |
| Gravity | Delay | Eject |
| GUARD | GUARD | GUARD |
| Zanmato Lv. | ||
| 4 | ||
Mortiorchis Equipment Ability Drops
Mortiorchis does not drop any equipments.
Seymour Flux Boss Battle Guide
Details
Similar to his 2nd battle, Seymour Flux has 3 phases with varying moves. Learning what to do during each phases is the key to victory.
Preparation
| Overdrives | All Aeon's Overdrive Should be Ready. |
|---|---|
| Items | Holy Water or Remedies |
| Magics | Bio |
Moveset
| Mortiorchis | |
|---|---|
| Full Life (Phase 1) |
Revives its target to full health Mortiorchis will use this against targets with the Zombie status to inflict instant death. |
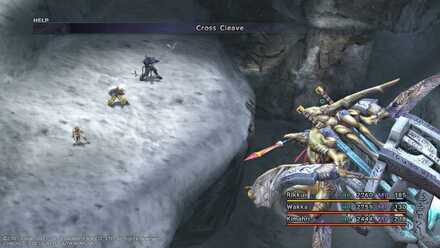
| Cross Cleave (Phase 1) |
Damages the whole party and inflicts delay. |
| (Slowga) | Slows all enemies |
| Mortibsorption | Drains HP from Seymour equal to its max HP when its HP falls below 0. It's Max Hp gets reduced by 1000 whenever it dies. |
| Total Annihilation | Deals Massive damage to the whole party. Seymour will be idle for several turns before this move is used. |
| Seymour | |
|---|---|
| Lance of Atrophy (phase 1) |
Damages its target and inflicts zombie. |
| Banish | Ejects its target only used against Aeons. |
| Dispel | Removes positive status effects on its target. |
| Flare (phase 2) |
Deals massive damage to its target uses on itself when it has reflect up to bounce it to your party. |
| Reflect (phase 2) |
Reflects all magics except Dispel and Ultima. |
| Protect | Reduces physical damage taken. |
Phase 1 Strategy

Make Lulu use Bio on Seymour (extremely important). Don't buff your team yet, Seymour will use the Lance of Atrophy Full-Life combo to instantly kill one member. If your characters are fast enough, use Holy Water to remove the zombie status then buff your team. If not,revive the fallen character then bring out Tidus for Hastega.

When seymour dispels your party, Seymour will use Cross Cleave. It severely damages the team and inflicts delay. Have everyone use guard when Seymour's turn is about to come to survive the damage. Do not reapply buffs, guard instead.
Phase 2 Strategy
Seymour will cast Reflect on himself, Mortiorchis will then use Flare on Seymour to bounce it back to your party. Mortiorchis will keep using Flare unless Seymour charges for Total Annihilation. use Yuna's Dispel to remove the reflect and make Mortiorchis use Flare on Seymour damaging him instead. Keep on hacking away at Seymour until he switches to Phase 3.
Phase 3 Strategy Strategy 1

Seymour's Strongest move will be used during Phase 3. It will be used after Seymour Charges up. Bring out your most durable characters then use Kimahri's Mighty Guard(obtained from Biran) to survive the damage. If everyone dies despite the protection then grinding for more stats will be necessary.
Phase 3 Aeon Strategy
Another way is to use haste on Yuna then summon your Aeons. Seymour will delay Total Annihilation to banish the Aeon everytime they're summoned. A goodway to use this strategy is if all Aeons' Overdrive are maxed out. Summon the Aeon, use its overdrive, then let Seymour Banish it. Repeat this for all the other Aeons until Seymour falls.
Final Fantasy X - Related Articles
| Arena Area Conquest Monsters | Stratoavis | Malboro Menace |
|---|---|
| Kottos | Coeurlregina |
| Jormungand | Cactuar King |
| Espada | Abyss Worm |
| Chimerageist | Don Tonberry |
| Catoblepas | Abaddon |
| Vorban | |
| Omega Dungeon | Ultima Weapon | Omega Weapon |
|---|---|
| Arena Species Conquest Monsters | Fenrir | Ornitholestes |
|---|---|
| Pteryx | Hornet |
| Vidatu | One-Eye |
| Jumbo Flan | Nega Elemental |
| Tanket | Fafnir |
| Sleep Sprout | Bomb King |
| Juggernaut | Ironclad |
| Arena Original Monsters | Earth Eater | Greater Sphere |
|---|---|
| Catastrophe | Th'uban |
| Neslug | Ultima Buster |
| Shinryu | Nemesis |
| Dark Aeons and Penance | Dark Valefor | Dark Ifrit |
|---|---|
| Dark Ixion | Dark Shiva |
| Dark Bahamut | Dark Yojimbo |
| Dark Anima | Dark Cindy |
| Dark Sandy | Dark Mindy |
| Penance | |
Author
How to beat Seymour Flux Tips and Guide
improvement survey
03/2026
improving Game8's site?

Your answers will help us to improve our website.
Note: Please be sure not to enter any kind of personal information into your response.

We hope you continue to make use of Game8.
Rankings
- We could not find the message board you were looking for.
Gaming News
Popular Games

Genshin Impact Walkthrough & Guides Wiki

Honkai: Star Rail Walkthrough & Guides Wiki

Umamusume: Pretty Derby Walkthrough & Guides Wiki

Pokemon Pokopia Walkthrough & Guides Wiki

Resident Evil Requiem (RE9) Walkthrough & Guides Wiki

Monster Hunter Wilds Walkthrough & Guides Wiki

Wuthering Waves Walkthrough & Guides Wiki

Arknights: Endfield Walkthrough & Guides Wiki

Pokemon FireRed and LeafGreen (FRLG) Walkthrough & Guides Wiki

Pokemon TCG Pocket (PTCGP) Strategies & Guides Wiki
Recommended Games

Fire Emblem Heroes (FEH) Walkthrough & Guides Wiki

Diablo 4: Vessel of Hatred Walkthrough & Guides Wiki

Yu-Gi-Oh! Master Duel Walkthrough & Guides Wiki

Super Smash Bros. Ultimate Walkthrough & Guides Wiki

Pokemon Brilliant Diamond and Shining Pearl (BDSP) Walkthrough & Guides Wiki

Elden Ring Shadow of the Erdtree Walkthrough & Guides Wiki

Monster Hunter World Walkthrough & Guides Wiki

The Legend of Zelda: Tears of the Kingdom Walkthrough & Guides Wiki

Persona 3 Reload Walkthrough & Guides Wiki

Cyberpunk 2077: Ultimate Edition Walkthrough & Guides Wiki
All rights reserved
©SQUARE ENIX CO., LTD. All Rights Reserved.
The copyrights of videos of games used in our content and other intellectual property rights belong to the provider of the game.
The contents we provide on this site were created personally by members of the Game8 editorial department.
We refuse the right to reuse or repost content taken without our permission such as data or images to other sites.


![Slay the Spire 2 Review [Early Access] | Still the Deckbuilder to Beat](https://img.game8.co/4433115/44e19e1fb0b4755466b9e516ec7ffb1e.png/thumb)

![Resident Evil Village Review [Switch 2] | Almost Flawless Port](https://img.game8.co/4432790/e1859f64830960ce4248d898f8cd38d9.jpeg/thumb)


I haven’t tested it yet, but it seems that if you use Yojimbo’s overdrive, it one shots him