
This survey will take about 1 minute.
Your answers will help us to improve our website.
FFX
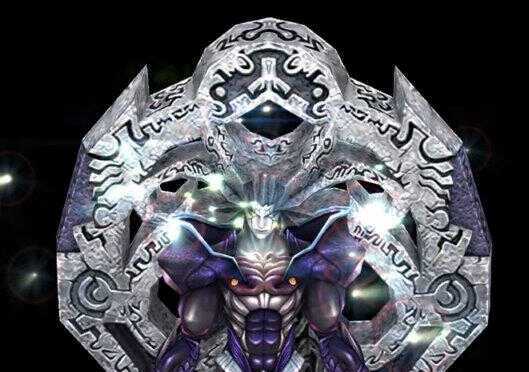
How to beat Seymour: Natus Tips and Guide

This is a walkthrough for the boss fight Seymour Evolution from the game Final Fantasy X (FF 10, FF X). Read on for tips and strategy about how to beat Seymour Evolution , including Seymour Evolution's stats and other useful information.
List of Contents
Seymour: Natus Information
Seymour: Natus Basic Information
| Name | Seymour: Natus | ||
|---|---|---|---|
| HP(Overkill) | 36000 | MP | 200 |
| AP(Overkill) | 6300(9450) | Gil | 3500 |
| Drop (7/8) | Lv. 2 Key Sphere | Drop (1/8) | Lv. 2 Key Sphere |
| steal (3/4) | Tetra Elemental X2 | Steal (1/4) | Tetra Elemental X3 |
| Abilities | Banish | Break | |
| Multi-Blizzara | Multi-Thundara | ||
| Multi-Watera | Multi-Fira | ||
| Flare | Protect | ||
Seymour: Natus Stats
| Srength | 30 | Agility | 21 |
|---|---|---|---|
| Defense | 1 | Luck | 15 |
| Magic | 25 | Evasion | 0 |
| Magic Defense | 1 | Accuracy | 100 |
Seymour: Natus Elemental Resistances
| Fire | Lightning | Water | Ice | Holy |
|---|---|---|---|---|
| 100% | 100% | 100% | 100% | 100% |
Seymour: Natus Status Resistances
| Sleep | Silence | Darkness |
|---|---|---|
| GUARD | GUARD | GUARD |
| Poison | Petrify | Slow |
| 50 | GUARD | GUARD |
| Zombie | Power Break | Magic Break |
| GUARD | 0 | GUARD |
| Armor Break | Mental Break | Threaten |
| GUARD | GUARD | GUARD |
| Death | Provoke | Doom |
| GUARD | 0 | GUARD |
| Distill | Sensor | Scan |
| 0 | 0 | 0 |
| Gravity | Delay | Eject |
| GUARD | GUARD | GUARD |
| Zanmato Lv. | ||
| 4 | ||
Seymour: Natus Equipment Ability Drops
| Weapon & Armor slots | 2-3 |
|---|---|
| Weapon and Armor Ability Drops | 1-2 |
| Weapon Ability Drops | |
| Piercing | Firestrike |
| Lightning Strike | Water Strike |
| Ice Strike | |
| Armor Ability Drops | |
| SOS Shell | |
Weapon & Armor Slots Drops depicts the amount of possible slots the enemy's equipment drops will have while the Ability Drops depicts the possible amount of abilities the dropped weapon may have.
Mortibody Information
Mortibody Basic Information
| Name | Mortibody | ||
|---|---|---|---|
| HP(Overkill) | 4000 | MP | 50 |
| AP(Overkill) | - | Gil | - |
| Drop (7/8) | - | Drop (1/8) | - |
| steal (3/4) | - | Steal (1/4) | - |
| Abilities | Desperado | Mortisorption | |
| Shattering Claw | Fire (All) | ||
| Thunder (All) | Water (All) | ||
| Blizzard (All) | Cura | ||
Mortibody Stats
| Srength | 22 | Agility | 28 |
|---|---|---|---|
| Defense | 50 | Luck | 20 |
| Magic | 20 | Evasion | 0 |
| Magic Defense | 1 | Accuracy | 100 |
Mortibody Elemental Resistances
| Fire | Lightning | Water | Ice | Holy |
|---|---|---|---|---|
| 100% | 100% | 100% | 100% | 100% |
Mortibody Status Resistances
| Sleep | Silence | Darkness |
|---|---|---|
| GUARD | GUARD | GUARD |
| Poison | Petrify | Slow |
| GUARD | GUARD | GUARD |
| Zombie | Power Break | Magic Break |
| GUARD | 0 | GUARD |
| Armor Break | Mental Break | Threaten |
| 50 | GUARD | GUARD |
| Death | Provoke | Doom |
| GUARD | GUARD | GUARD |
| Distill | Sensor | Scan |
| GUARD | 0 | 0 |
| Gravity | Delay | Eject |
| GUARD | 0 | GUARD |
| Zanmato Lv. | ||
| 4 | ||
Mortibody Equipment Ability Drops
Mortibody does not drop any equipments.
Seymour: Natus Boss Battle Guide
Details
Seymour fights with Mortibody. Mortibody uses moves which Seymour Combos with dealing massive / lethal damages. Mortibody can be slain but it will ressurect itself by draing health from Seymour. (It Drains 4000 HP to 1000 HP Lowering by 1000 Everytime it Resurrects).
Opening Moves
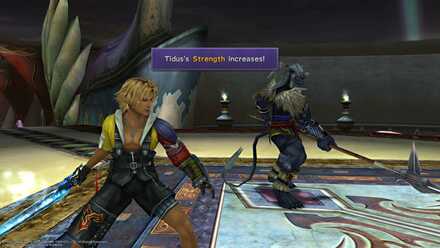
Tidus and Auron can talk to Seymour to raise their Strength for the battle. Yuna can also talk to Seymour to increase her Magic defense Bring out Lulu and make her cast Bio to deal huge damage to Seymour overtime.
Phase 1 Moveset

| Teamwide Tier 1 Black Magics (Mortibody) | Uses a Tier 1 Black Magic against the whole party. |
|---|---|
| Desperado (Mortibody) | Damages and dispels the party. |
| Multi-Cast Tier 2 Black magic | Casts a lvl 2 black magic on 2 different targets. |
Phase 1 Strategy
Desperado, a teamwide attack that also dispels the entire party.
Bring out Rikku and Tidus. Make Tidus cast Haste on Rikku so she can keep using Al Bhed Potion negating the damage Mortibody does. Mortibody can remove buffs so you might need to reapply haste. Also, do not kill Mortibody. We will need its resurrection damage for Phase 2.
Phase 2 Moveset
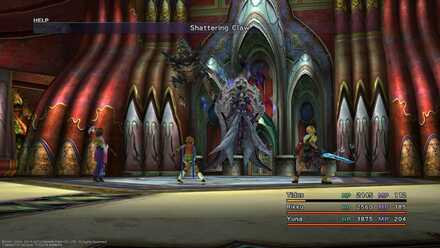
| Shattering Claw (Mortibody) | Deals physical damage to a single target. Shatters the target if its petrified. |
|---|---|
| Break (Seymour) | Inflicts petrification to its target. |
Phase 2 Strategy
Seymour will initiate Phase 2 when his HP drops to 24000. You will want to quickly deal damage to Seymour to skip this phase since a potential shatter can leave your team with only 2 characters for the remainder of the fight.
Summon your Aeons that have Overdrives and use it on Seymour. With the Aeon's Overdrive damage plus the 4000 damage drain from Mortibody, we can quickly bring Seymour to Phase 3.
Phase 3 Moveset

| Cura (Mortibody) | Heals its target for medium amount of health Mortibody will keep on healing Seymour during phase 3. |
|---|---|
| Flare | Deals massive non-elemental damage to its target. |
Phase 3 Strategy
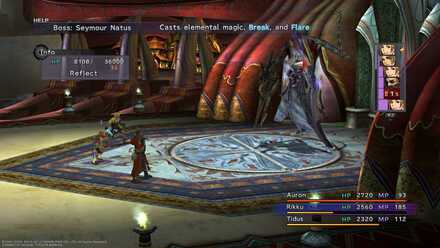
Bring out Yuna and cast reflect on Seymour so Mortibody can't heal Seymour with Cura. Keep 2 attackers on the field actively damaging Seymour and 1 character dedicated to healing or reviving team members.
Final Fantasy X - Related Articles
| Arena Area Conquest Monsters | Stratoavis | Malboro Menace |
|---|---|
| Kottos | Coeurlregina |
| Jormungand | Cactuar King |
| Espada | Abyss Worm |
| Chimerageist | Don Tonberry |
| Catoblepas | Abaddon |
| Vorban | |
| Omega Dungeon | Ultima Weapon | Omega Weapon |
|---|---|
| Arena Species Conquest Monsters | Fenrir | Ornitholestes |
|---|---|
| Pteryx | Hornet |
| Vidatu | One-Eye |
| Jumbo Flan | Nega Elemental |
| Tanket | Fafnir |
| Sleep Sprout | Bomb King |
| Juggernaut | Ironclad |
| Arena Original Monsters | Earth Eater | Greater Sphere |
|---|---|
| Catastrophe | Th'uban |
| Neslug | Ultima Buster |
| Shinryu | Nemesis |
| Dark Aeons and Penance | Dark Valefor | Dark Ifrit |
|---|---|
| Dark Ixion | Dark Shiva |
| Dark Bahamut | Dark Yojimbo |
| Dark Anima | Dark Cindy |
| Dark Sandy | Dark Mindy |
| Penance | |
Author
How to beat Seymour: Natus Tips and Guide
Please participate in our site
improvement survey
03/2026
improvement survey
03/2026
Would you assist in
improving Game8's site?
improving Game8's site?

×
We are listening to our users' valuable opinions and discussing how to act on them.
The information collected through this survey will be used for the purpose of improving our services. In addition, the information will only be disclosed a part of a statistic in a format that will not allow identification of personal information.
Begin Survey
Not Now
×
Please rate each item regarding Game8.co's Advertisements.
Amount of Ads
Very Dissatisfied
Somewhat Dissatisfied
Fine
Somewhat Satisfied
Highly Satisfied
Placement of Ads
Timing of Ad Display
Ad Loading Speed
Safeness of Ads
Content of Ads
×
Please rate each item regarding Game8.co's Quality of Articles.
Amount of information
Very Dissatisfied
Somewhat Dissatisfied
Fine
Somewhat Satisfied
Highly Satisfied
Frequency of updates
Speed of new information
Accuracy of articles
Understandibility of articles
Readability of sentences
×
Please rate each item regarding Game8.co's Usability of the Site.
Ease of finding information
Very Dissatisfied
Somewhat Dissatisfied
Fine
Somewhat Satisfied
Highly Satisfied
Loading Speed
Use of Color
Font Size
Visibility of Images
Easy to Understand Layout
×
Please rate each item regarding Game8.co's Message Boards, Comments.
Ease of Writing
Very Dissatisfied
Somewhat Dissatisfied
Fine
Somewhat Satisfied
Highly Satisfied
Readability
Ease in Finding Information
Comment Quality
Comment Quantity
Admin Response
×
Please rate each item regarding Game8.co's Site's new design.
Please rate our site's new design
Very Dissatisfied
Somewhat Dissatisfied
Fine
Somewhat Satisfied
Highly Satisfied
Do you think that the website's design change makes the site easier to use?
Has the new design made it easier for you to find information on the site?
Has the new design improved the overall visual appeal of the site?
How would you rate your overall satisfaction with the new design of the site?
×
How likely are you to recommend Game8 to someone you know?
Very Unlikely
0
1
2
3
4
5
6
7
8
9
10
Very Likely
If you have other opinions regarding potential improvement to the website, please share them with us. We would appreciate your honest opinion.
Note: This is a free response section, so you can proceed without entering anything.
Note: Please be sure not to enter any kind of personal information into your response.
Note: Please be sure not to enter any kind of personal information into your response.
×
Thank You
×
Thank you for participating in our survey! Your answers will help us to improve the quality of our website and services.
We hope you continue to make use of Game8.
We hope you continue to make use of Game8.
Close
Rankings
- We could not find the message board you were looking for.
Gaming News


![Slay the Spire 2 Review [Early Access] | Still the Deckbuilder to Beat](https://img.game8.co/4433115/44e19e1fb0b4755466b9e516ec7ffb1e.png/thumb)

![Resident Evil Village Review [Switch 2] | Almost Flawless Port](https://img.game8.co/4432790/e1859f64830960ce4248d898f8cd38d9.jpeg/thumb)
Popular Games

Genshin Impact Walkthrough & Guides Wiki
Honkai: Star Rail Walkthrough & Guides Wiki
Umamusume: Pretty Derby Walkthrough & Guides Wiki
Pokemon Pokopia Walkthrough & Guides Wiki
Resident Evil Requiem (RE9) Walkthrough & Guides Wiki
Monster Hunter Wilds Walkthrough & Guides Wiki
Wuthering Waves Walkthrough & Guides Wiki
Arknights: Endfield Walkthrough & Guides Wiki
Pokemon FireRed and LeafGreen (FRLG) Walkthrough & Guides Wiki
Pokemon TCG Pocket (PTCGP) Strategies & Guides Wiki


Recommended Games
Fire Emblem Heroes (FEH) Walkthrough & Guides Wiki
Diablo 4: Vessel of Hatred Walkthrough & Guides Wiki
Yu-Gi-Oh! Master Duel Walkthrough & Guides Wiki
Super Smash Bros. Ultimate Walkthrough & Guides Wiki
Pokemon Brilliant Diamond and Shining Pearl (BDSP) Walkthrough & Guides Wiki
Elden Ring Shadow of the Erdtree Walkthrough & Guides Wiki
Monster Hunter World Walkthrough & Guides Wiki
The Legend of Zelda: Tears of the Kingdom Walkthrough & Guides Wiki
Persona 3 Reload Walkthrough & Guides Wiki
Cyberpunk 2077: Ultimate Edition Walkthrough & Guides Wiki


All rights reserved
©SQUARE ENIX CO., LTD. All Rights Reserved.
The copyrights of videos of games used in our content and other intellectual property rights belong to the provider of the game.
The contents we provide on this site were created personally by members of the Game8 editorial department.
We refuse the right to reuse or repost content taken without our permission such as data or images to other sites.