This survey will take about 1 minute.
Your answers will help us to improve our website.
Silent Hill 2 Remake
Lakeview Hotel Walkthrough and Guide
★ Complete all Story Chapters to get New Game+
☆ Solve all Puzzles and see all Codes
★ Get all Endings and explanations
☆ Beat all Bosses, like Pyramid Head
★ Collect all Weapons and Items
☆ Read our Beginner's Guide for tips

Here's a Silent Hill 2 Remake Lakeview Hotel walkthrough and guide that tackles key steps like finding three figurines for a puzzle, or getting through the Employee Section. See our guide for all Lakeview Hotel maps, puzzle solutions, and more!
| ◀︎ Previous Area | Next Area ▶︎ |
|---|---|
| Labyrinth | Lakeview Hotel Otherworld |
List of Contents
Lakeview Hotel Walkthrough
- Sail to Lakeview Hotel
- Find the Snow White Figurine
- Find the Cinderella Figurine
- Solve the Hotel Book Puzzle
- Open the Suitcase
- Reach the Employee Section
- Open the Break Room Safe
- Find the Little Mermaid Figurine
- Solve the Music Box Puzzle
- Watch the Video Tape in Room 312
Sail to Lakeview Hotel
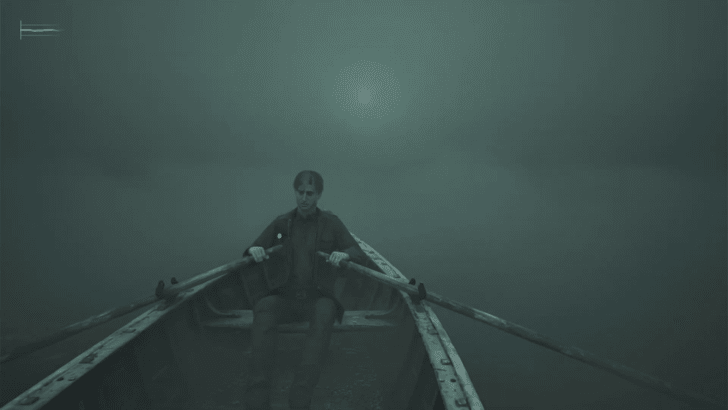
Ride the boat on the pier, then row towards the light in the fog until a cutscene shows James reaching the Lakeview Hotel Docks. Go all the way up the stairs to find the Lakeview Garden Map on a bulletin board to your right, and pick up the Rotten Apple from a bench in the garden.
Head to the Lakeview Hotel to find the Lakeview Hotel Map on a nearby bulletin board. Behind the reception desk, there is a save point and a key cabinet with the Room 312 Key and the Ornamental Key. The latter opens the Music Box Puzzle in the Lobby, which requires you to find its missing parts and solve it to progress further into the hotel.
Find the Snow White Figurine

Head to the Utility Room on the first floor east wing of the hotel and grab the Sunrise Wing Key on top of the table. Next, climb up to the second floor, unlock the double doors to the right, and make your way to the Hall by passing through the Cloakroom balcony.
You can find the Room 202 Key on a sofa at the left side of the room. You can also find a Ripe Apple by navigating to the far right corner of the hall. Make your way over to Room 202 and unlock the door, where you will be greeted by the Mirror Puzzle.
Mirror Puzzle Solution
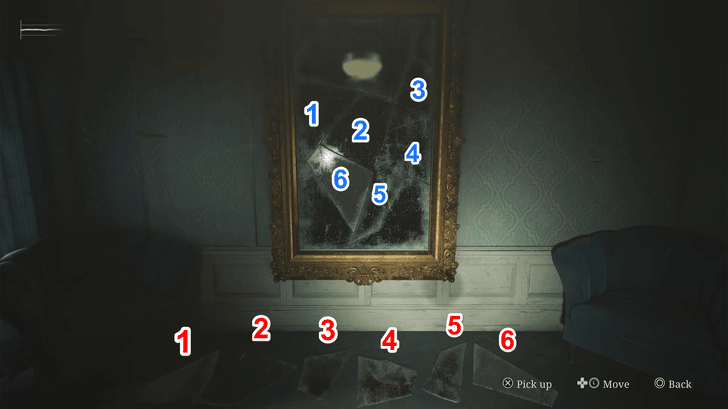
Place a Ripe Apple or Rotten Apple on the platter in front of the mirror, find another Mirror Shard inside the bedroom, and piece together the shards on the mirror frame. Completing it will make the Snow White Figurine appear in Room 201 where you may collect it.
Find the Cinderella Figurine

Head to the west wing of the second floor to access the staircase leading up to the third floor. Open the door to the Conference Room and find a Cleaning Staff Note with Room Key 107 on top of the locked fireplace. Head back down to the first floor and open the door to Room 107, then exit into the garden. Make your way toward the gazebo at the far left corner of the garden and find the Fireplace Key on top of a knocked over janitor's mop bucket.
Return to the third floor Conference Room and use the key on the fireplace to get the Cinderella Figurine. This will summon a Mandarin into the room which you will have to defeat. Afterward, head through the broken wall into Room 316, push a dresser to reveal a breakable wall and pass through to Room 318 where you can pick up a Paint Can from the coffee table.
Solve the Hotel Book Puzzle

Go back down to the second floor and make your way to the Sunrise Wing and head inside the Reading Room where you will find four books. Inspect the bookshelf, and with the painting on the wall serving as your clue, insert the books in their proper locations. Doing so will unlock a hidden room with a Suitcase and a Vanity Mirror inside. Around the room, you will see three photos which will serve as your clue to opening the case.
Open the Suitcase
In order to get the Suitcase Code, you must first replace the lightbulb on the vanity mirror. Considering that you already have the Paint Can in your inventory from Room 318, locate the other items needed for the Vanity Mirror.
Suitcase Code and Vanity Mirror Puzzle Guide
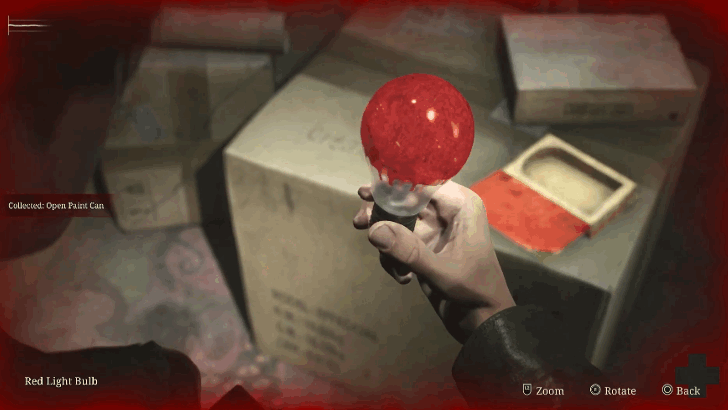
Collect Items to Make a Red Light Bulb
Walk over to the third floor Utility Room to grab a Boltcutter from the metal shelves. Head down the outdoor staircase between Rooms 318 and 319, enter Room 217, and go to the balcony. On Light combat difficulty, the broken glass pane holding the can opener container will immediately shatter. Otherwise, you will have to shoot through it. Afterward, head to the Lake Shore Restaurant on the first floor to collect the Can Opener.
Head out into the Lakeview Hotel Gardens and open a locked gate to your right with the Boltcutter. Pass through and walk toward a fountain with a fish statue holding a Light Bulb in its mouth. Combine the Can Opener and Paint Can to create an Open Paint Can, then combine it with the Light Bulb to get a Red Light Bulb.
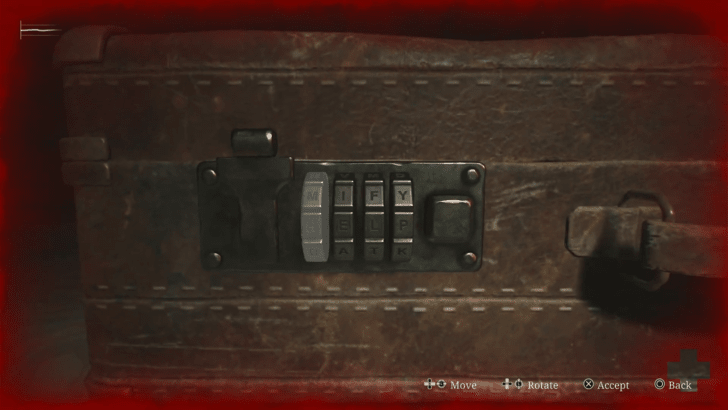
Return to the Suitcase
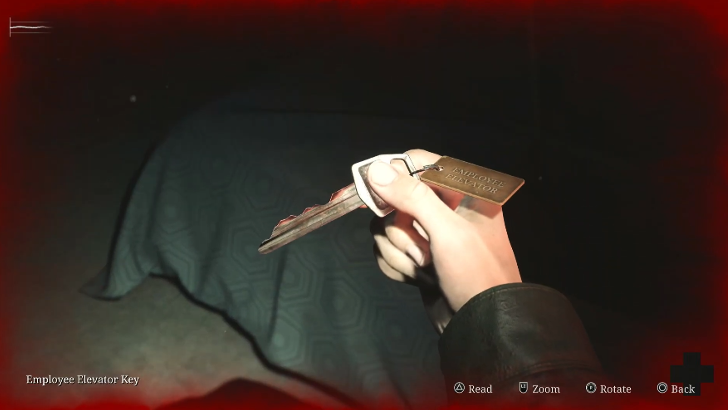
Return to the Suitcase and insert the Red Light Bulb into the socket on the Vanity Mirror to reveal the Suitcase Code which will differ depending on puzzle difficulty. Use it to open the Suitcase and get the Employee Elevator Key.
Reach the Employee Section
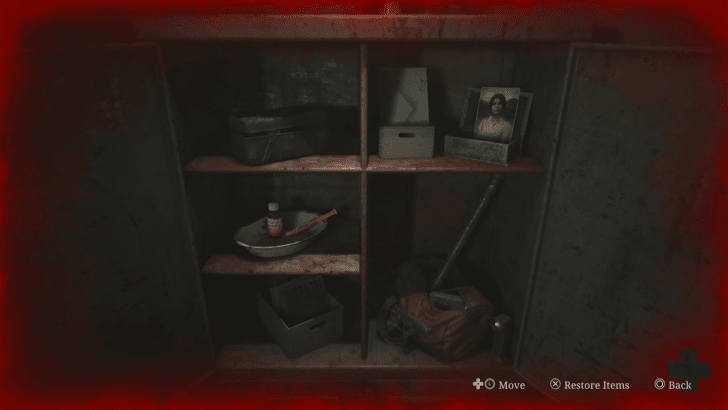
Enter the Employee Elevator room on the second floor and find a save point on the wall. Place all of your belongings inside the Cabinet in order to ride the elevator. Otherwise, alarms will blare and refuse to let you descend.
After clearing your inventory and being granted permission to ride the elevator, head down to the Break Room of the first floor Employee Section. Once there, find the Employee Section Map on the bulletin board. There will be enemies in this section, so do your best to avoid encounters with them.
Open the Break Room Safe
The Break Room contains a safe which is opened with the code from the Gem Box in the Manager's Office. The box is opened using three gemstones found in the Employee Section. You can find the Red Gemstone inside an ornate box in the Manager's Room which you can access by pushing a shelf in the TV Room that covers a hole in the wall.
Make your way to the Cafeteria, jump through the broken window, and pass through a wall to the Kitchen where you can find the Green Gemstone on a table in front of a window. Next, locate the Blue Gemstone inside the Freezer Room by entering through the Pantry.
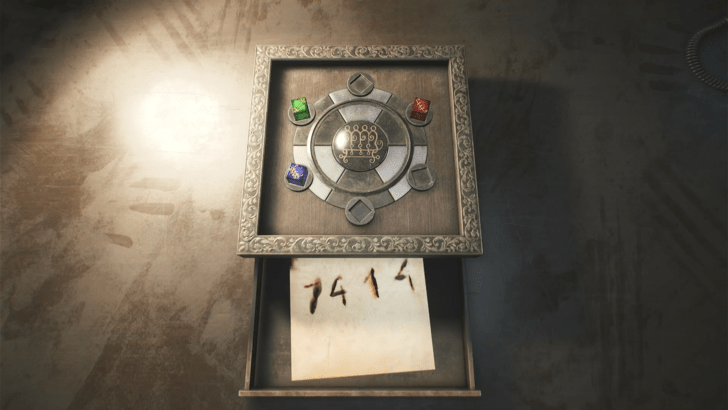
Gem Box Solution and Break Room Safe Code
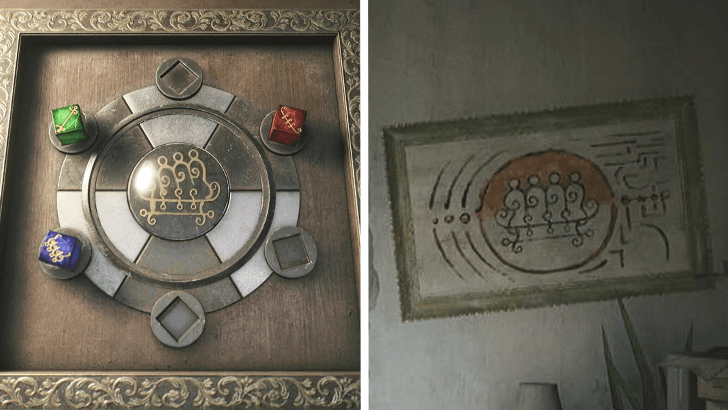
Head back to the Gem Box and place them in the correct order that replicates the pattern on the painting on the wall to get the Hotel Safe Code: 7414. Head back and open the safe to get the Video Tape and Basement Key.
Find the Little Mermaid Figurine

Unlock the door labeled Basement to access the stairwell, and descend to the hotel Basement. There will be a Mandarin patrolling around the hallway, so be sure to evade it while exploring. Run toward the Maintenance Room and enter the gap in the wall to find a Pump Valve. Next, head into the Liquor Storage room, pass through a hole in the wall, and use the Pump Valve to decrease the pressure on the steam pipe and access the Boiler Room.
Find the Venus Tears Bar Key on a pipe next to the boiler and use it on the Venus Bar Kitchen door. Take the Pump Valve again and place it on the steam pipe next to the Venus Bar door and decrease the pressure to gain access into the bar, where you will find The Little Mermaid Figurine in front of the broken jukebox. Exit through the bar's front doors and head back to the second floor to retrieve your items.
Solve the Music Box Puzzle
| Music Box Riddles | Figurine Placement and Disk Alignment |
|---|---|
 |
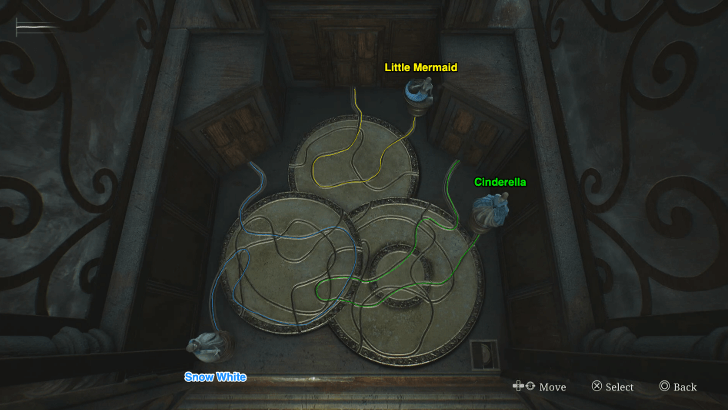 |
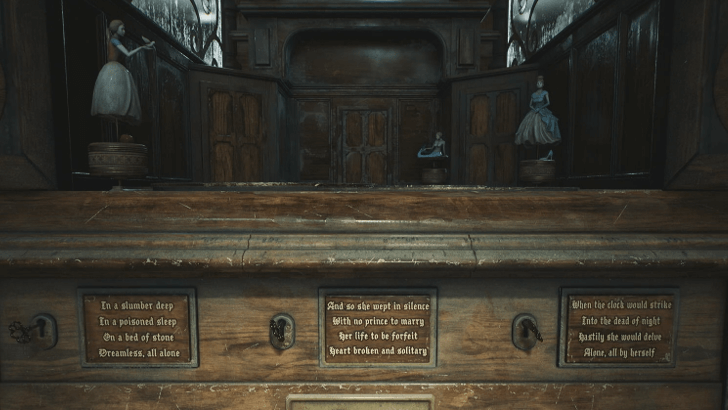
After retrieving your belongings from the Employee Elevator cabinet, go to the Music Box on the first floor. Place all three figurines in the box; note that each figurine automatically fits into a spot inside. Then, rotate the disks to create a path directing each figurine to the door it's standing beside. Once the correct path has been set, press the button to have each figurine move along the path.
If done correctly, they will reach the doors but move backwards as the doors are still locked. You will be sent to the Music Box's facade where you may read the poems for each figurine, and turn the corresponding key a certain number of times based on the hints provided by each rhyme to unlock the doors.
Press the gold button once the keys have been turned, and after the figurines enter their doors you will receive a 3F Corridor Key.
Watch the Video Tape in Room 312
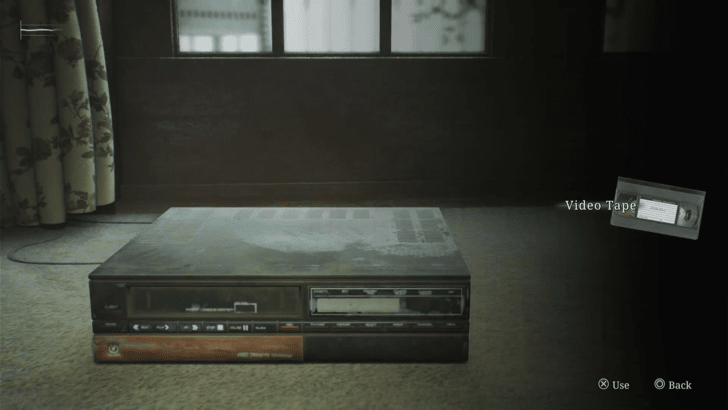
Head up to the third floor and unlock the padlock to the 3F Corridor to gain access to Room 312. Once inside, insert the Video Tape into the VCR next to the TV and watch as the cutscene plays out. After being confronted by Laura, the scenery inside the room abruptly shifts, transporting James into the Lakeview Hotel Otherworld.
Lakeview Hotel Otherworld Walkthrough
Lakeview Hotel Alternate Endings
| New Game Plus Endings at Lakeview Hotel |
|---|
|
|
If you are on a New Game Plus file, there are several Alternate Endings tied to items collected throughout the game that have important steps to do in Lakeview Hotel.
Note that doing the steps for the UFO, Dog, and Bliss ending will trigger their respective ending cutscenes when performed, with no final boss fight.
Ending Guides and Explanations
UFO Ending
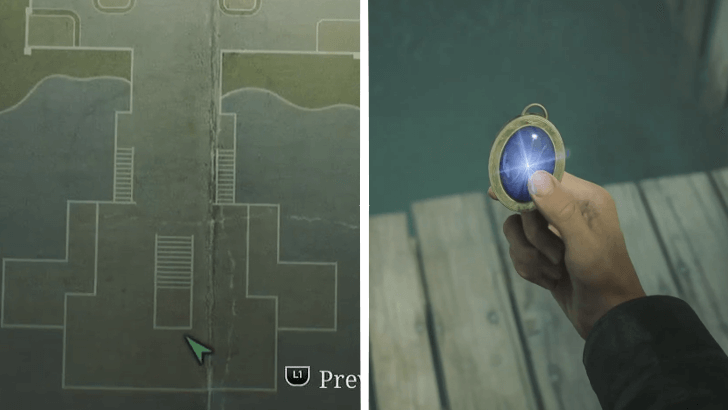
After getting off the boat and onto the Lakeview Hotel docks, immediately examine the Blue Gem and watch it glow. This is the third location you must use the gem at, in order to get the UFO Ending.
Use the Blue Gem in Room 312
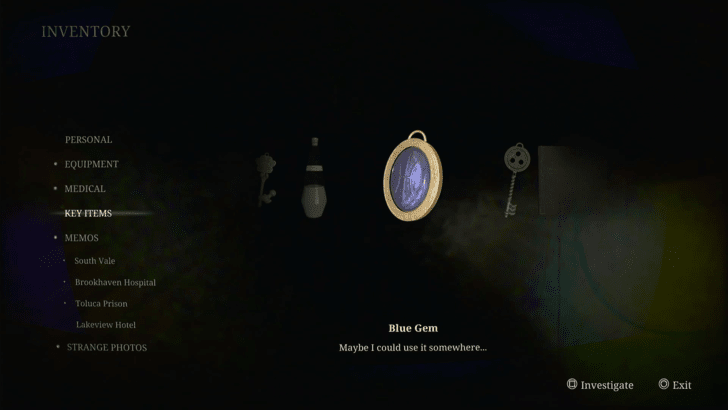
After you have examined the Blue Gem in all three of its required locations, you may finally examine it once more in Room 312 immediately after entering the room to get the UFO ending.
Rebirth Ending
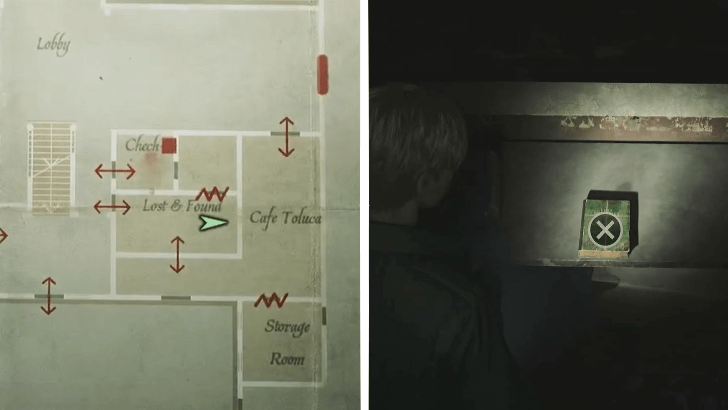
In a New Game Plus save file, you can find the Lost Memories book inside the Lost & Found room behind the check-in counter. Obtain it along with the other required items to get the Rebirth ending. Note that collecting all four items required for the Rebirth ending will lock players out of other endings.
Dog Ending
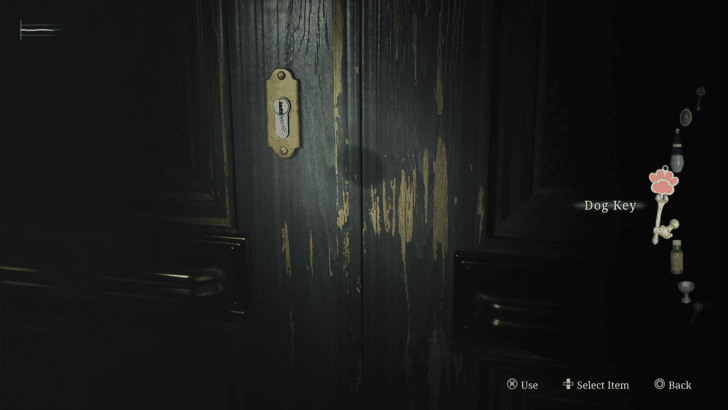
If you are in possession of the Dog Key, the appropriate time to use it will be to open the Observation Room beside Room 312 after you have unlocked the third floor corridor. Doing this will reveal the Dog ending with its accompanying cutscene.
Bliss Ending
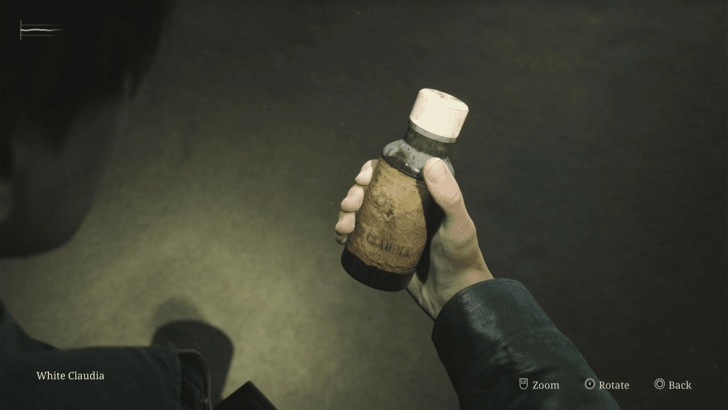
If you have the White Claudia in your inventory, drink it inside Room 312, then insert the Video Tape into the VCR. A cutscene will play afterward, granting you the Bliss ending.
Lakeview Hotel Maps
All Lakeview Hotel Maps
 Lakeview Hotel Garden |
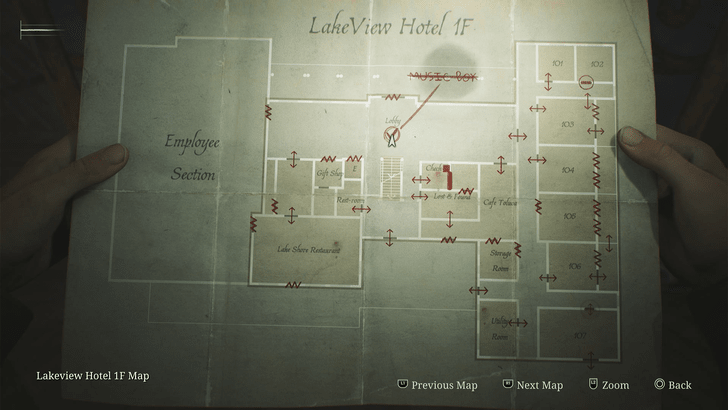 Lakeview Hotel 1F |
 Lakeview Hotel 2F |
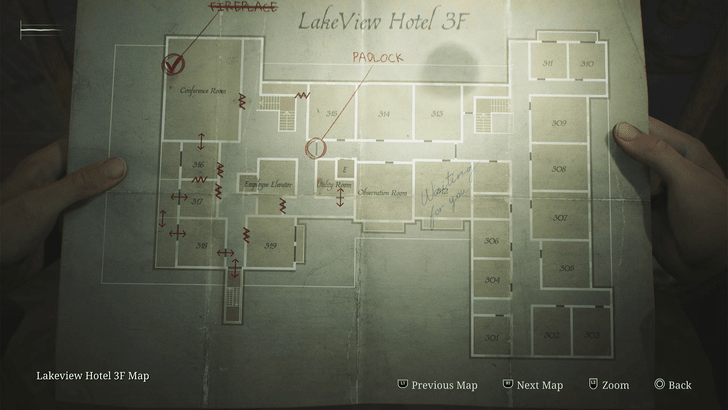 Lakeview Hotel 3F |
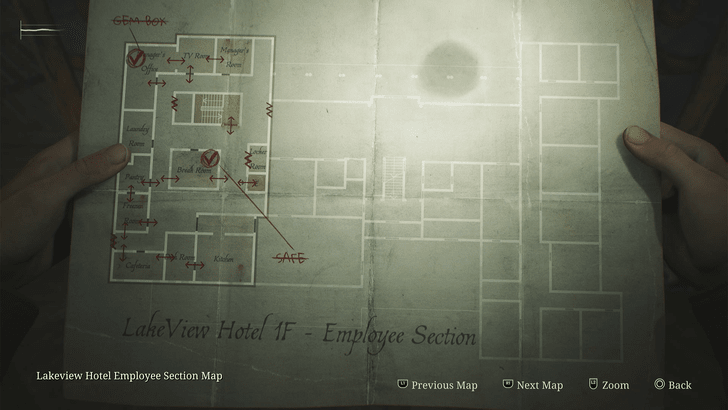 Employee Section |
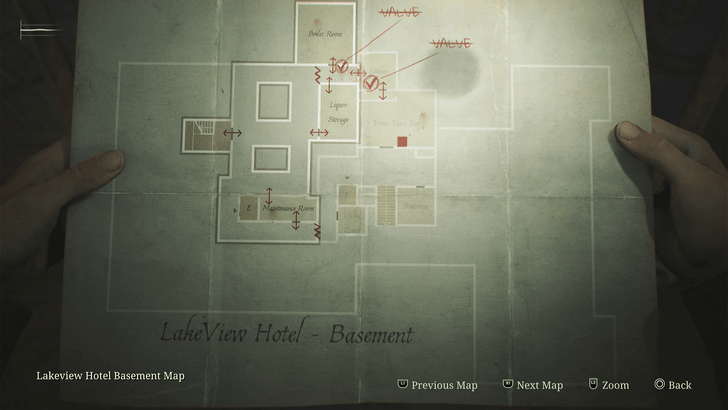 Basement |
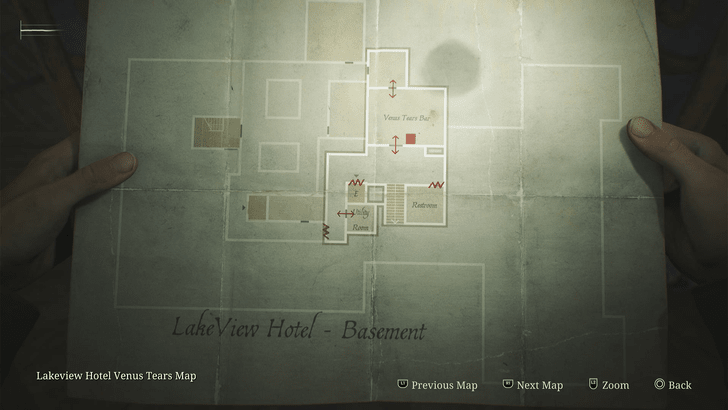 Basement (Venus Tears) |
||
Lakeview Hotel Puzzles
All Puzzles
| Hotel Book Puzzle | Mirror Puzzle | Hotel Safe Code |
| Music Box Puzzle | Suitcase Code |
Silent Hill 2 Remake Related Guides

Story Walkthrough and All Chapters
All Story Chapters
Comment
3  Anonymous 3 months
i dont know your problem i played it ONLY with this guide and it went smooth as butter. do you mean it misses the dog ending ufo etc pp ? then you have to look especially for it ..
Author

Lakeview Hotel Walkthrough and Guide
Please participate in our site
improvement survey
03/2026
improvement survey
03/2026
Would you assist in
improving Game8's site?
improving Game8's site?

×
We are listening to our users' valuable opinions and discussing how to act on them.
The information collected through this survey will be used for the purpose of improving our services. In addition, the information will only be disclosed a part of a statistic in a format that will not allow identification of personal information.
Begin Survey
Not Now
×
Please rate each item regarding Game8.co's Advertisements.
Amount of Ads
Very Dissatisfied
Somewhat Dissatisfied
Fine
Somewhat Satisfied
Highly Satisfied
Placement of Ads
Timing of Ad Display
Ad Loading Speed
Safeness of Ads
Content of Ads
×
Please rate each item regarding Game8.co's Quality of Articles.
Amount of information
Very Dissatisfied
Somewhat Dissatisfied
Fine
Somewhat Satisfied
Highly Satisfied
Frequency of updates
Speed of new information
Accuracy of articles
Understandibility of articles
Readability of sentences
×
Please rate each item regarding Game8.co's Usability of the Site.
Ease of finding information
Very Dissatisfied
Somewhat Dissatisfied
Fine
Somewhat Satisfied
Highly Satisfied
Loading Speed
Use of Color
Font Size
Visibility of Images
Easy to Understand Layout
×
Please rate each item regarding Game8.co's Message Boards, Comments.
Ease of Writing
Very Dissatisfied
Somewhat Dissatisfied
Fine
Somewhat Satisfied
Highly Satisfied
Readability
Ease in Finding Information
Comment Quality
Comment Quantity
Admin Response
×
Please rate each item regarding Game8.co's Site's new design.
Please rate our site's new design
Very Dissatisfied
Somewhat Dissatisfied
Fine
Somewhat Satisfied
Highly Satisfied
Do you think that the website's design change makes the site easier to use?
Has the new design made it easier for you to find information on the site?
Has the new design improved the overall visual appeal of the site?
How would you rate your overall satisfaction with the new design of the site?
×
How likely are you to recommend Game8 to someone you know?
Very Unlikely
0
1
2
3
4
5
6
7
8
9
10
Very Likely
If you have other opinions regarding potential improvement to the website, please share them with us. We would appreciate your honest opinion.
Note: This is a free response section, so you can proceed without entering anything.
Note: Please be sure not to enter any kind of personal information into your response.
Note: Please be sure not to enter any kind of personal information into your response.
×
Thank You
×
Thank you for participating in our survey! Your answers will help us to improve the quality of our website and services.
We hope you continue to make use of Game8.
We hope you continue to make use of Game8.
Close
Rankings
- We could not find the message board you were looking for.
Gaming News


![Monster Hunter Stories 3 Review [First Impressions] | Simply Rejuvenating](https://img.game8.co/4438641/2a31b7702bd70e78ec8efd24661dacda.jpeg/thumb)
Popular Games

Genshin Impact Walkthrough & Guides Wiki
Honkai: Star Rail Walkthrough & Guides Wiki
Umamusume: Pretty Derby Walkthrough & Guides Wiki
Pokemon Pokopia Walkthrough & Guides Wiki
Resident Evil Requiem (RE9) Walkthrough & Guides Wiki
Monster Hunter Wilds Walkthrough & Guides Wiki
Wuthering Waves Walkthrough & Guides Wiki
Arknights: Endfield Walkthrough & Guides Wiki
Pokemon FireRed and LeafGreen (FRLG) Walkthrough & Guides Wiki
Pokemon TCG Pocket (PTCGP) Strategies & Guides Wiki


Recommended Games
Diablo 4: Vessel of Hatred Walkthrough & Guides Wiki
Cyberpunk 2077: Ultimate Edition Walkthrough & Guides Wiki
Fire Emblem Heroes (FEH) Walkthrough & Guides Wiki
Yu-Gi-Oh! Master Duel Walkthrough & Guides Wiki
Super Smash Bros. Ultimate Walkthrough & Guides Wiki
Pokemon Brilliant Diamond and Shining Pearl (BDSP) Walkthrough & Guides Wiki
Elden Ring Shadow of the Erdtree Walkthrough & Guides Wiki
Monster Hunter World Walkthrough & Guides Wiki
The Legend of Zelda: Tears of the Kingdom Walkthrough & Guides Wiki
Persona 3 Reload Walkthrough & Guides Wiki


All rights reserved
©2024 Konami Digital Entertainment
The copyrights of videos of games used in our content and other intellectual property rights belong to the provider of the game.
The contents we provide on this site were created personally by members of the Game8 editorial department.
We refuse the right to reuse or repost content taken without our permission such as data or images to other sites.
Bro are you serious, why would you put the UFO part after you said do the video tape. You messed us all up