This survey will take about 1 minute.
Your answers will help us to improve our website.
Silent Hill 2 Remake
Labyrinth Walkthrough and Guide
★ Complete all Story Chapters to get New Game+
☆ Solve all Puzzles and see all Codes
★ Get all Endings and explanations
☆ Beat all Bosses, like Pyramid Head
★ Collect all Weapons and Items
☆ Read our Beginner's Guide for tips
Here's a full Labyrinth walkthrough for the Silent Hill 2 Remake. Check out our guide for Rotating Cube puzzle solutions, tips on beating the area's bosses, Labyrinth maps, and more!
| ◀︎ Previous Area | Next Area ▶︎ |
|---|---|
| Toluca Prison | Lakeview Hotel |
List of Contents
Labyrinth Walkthrough
- Explore the Labyrinth
- Fight Abstract Daddy
- Find the Rotating Cube Puzzle
- Access the Rotten Area
- Access the Desolate Area
- Access the Ruined Area
- Head to the Cemetery
- Defeat Eddie
- Exit the Labyrinth
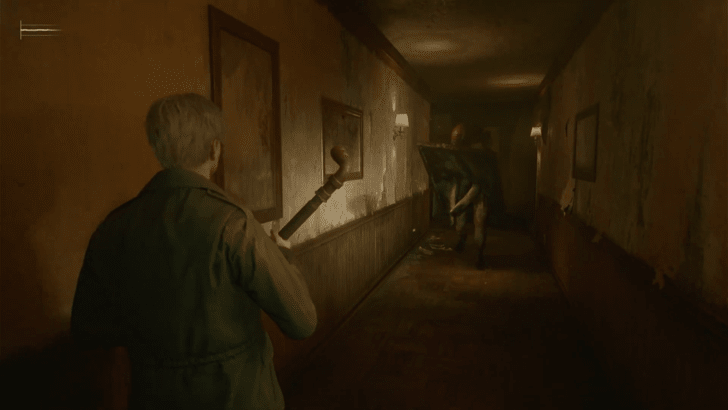
Explore the Labyrinth

After landing in the hallway of Labyrinth, keep walking straight until you reach a metal chute, jump down, walk forward after landing, jump down another chute, and finally ride an elevator which descends deeper into what feels like forever. A save point will be waiting for you after you reach your destination.
Enter through the only door, walk down a straightforward hallway, and enter the door covered in newspapers to your right after hearing Angela's distressed voice. Enter through the first blue door next to the kitchen, and enter another blue door to the left where a cutscene with Angela will play.
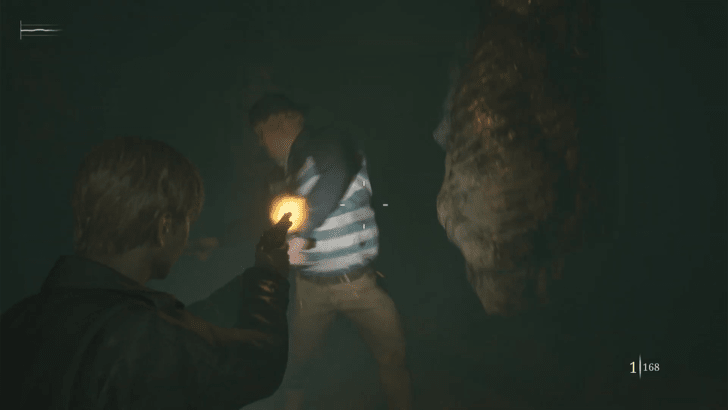
Fight Abstract Daddy
After Abstract Daddy pushes James through the wall, do your best to deal damage to him with all the weapons in your arsenal. This monster only has one easily telegraphed attack, which is to lunge forward and grab, so make sure that you dodge at the exact time he lunges, and get a hit in. He will disappear after substantially taking damage, which shifts the layout of the hallway.
Walk down a linear path and follow Angela as you see her run down the hallway, and into a room with a TV. Break the TV to summon Abstract Daddy once more, and repeat the process of damaging him enough to disappear. Walk down the hallways, encounter him again and damage to disappear, then continue on until you reach a TV, and smash it to change the hallway's layout.
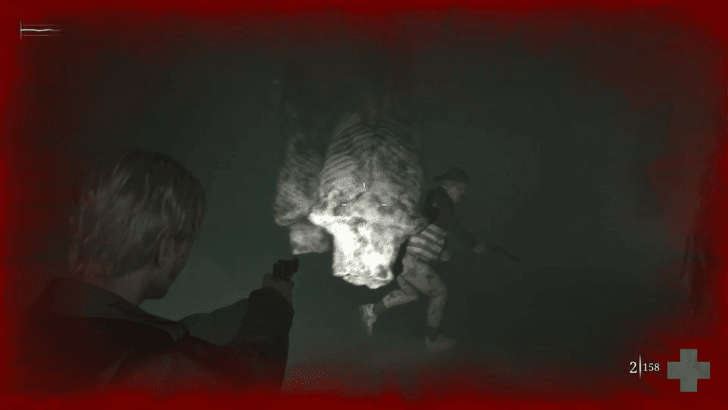
Keep going until you reach an area where the walls look like sewn-up flesh. Abstract Daddy will reappear and be defeated once and for all in this room, triggering another cutscene with Angela.
Abstract Daddy Boss Fight Guide
Find the Rotating Cube Puzzle

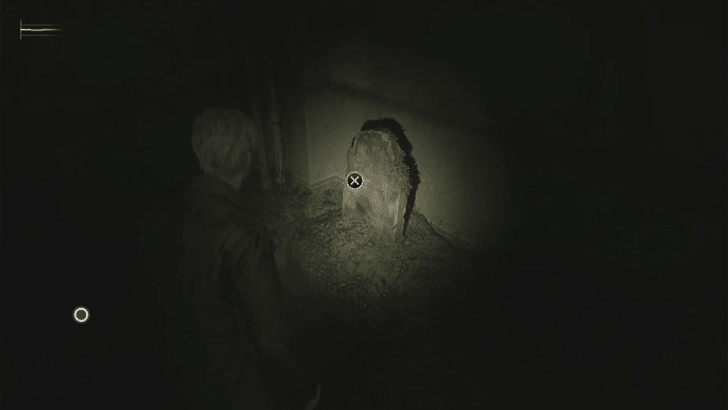
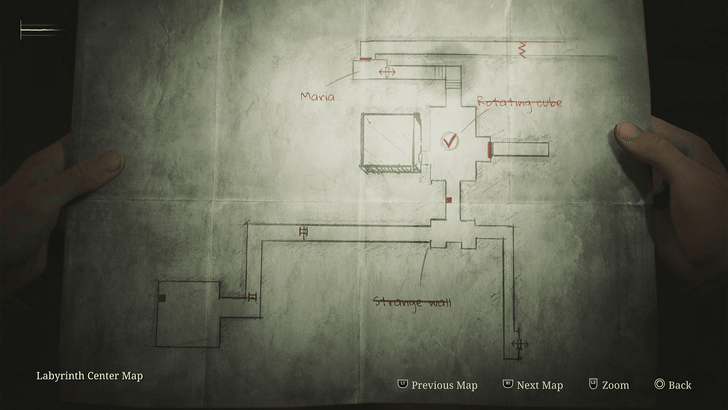
Exit the apartment room entirely and be led into another long hallway. If you check your map at this point, you will notice that it reveals itself slowly as you explore the area called Labyrinth Center. Moving forward, you will see a Strange Wall that blocks your path.
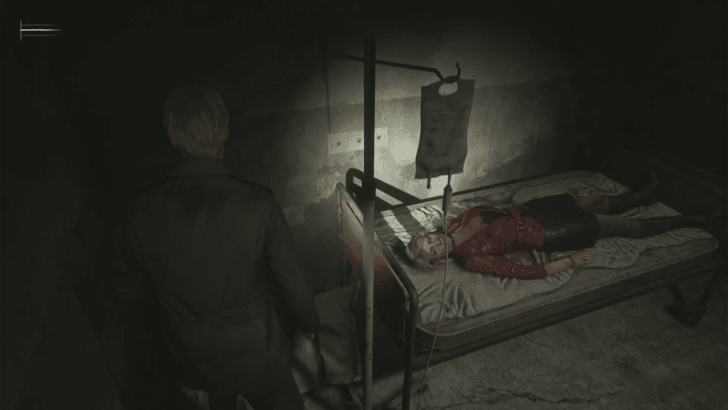
Continue toward the hall to the right where you will see a save point, and move forward past the chasm on your left until you arrive in front of a door at the bottom of the stairs. Going through the door will reveal a cutscene with Maria inside a cell. Afterward, return outside to unveil the Rotating Cube underneath a white cloth.
Access the Rotten Area

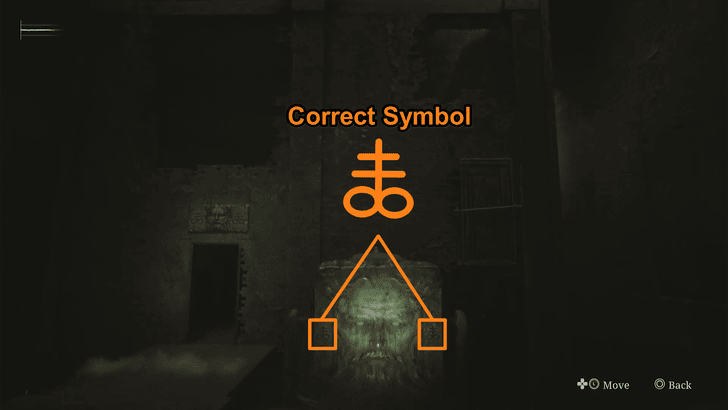
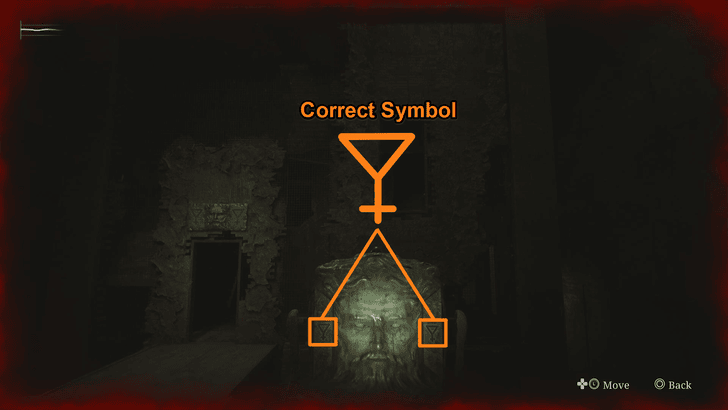
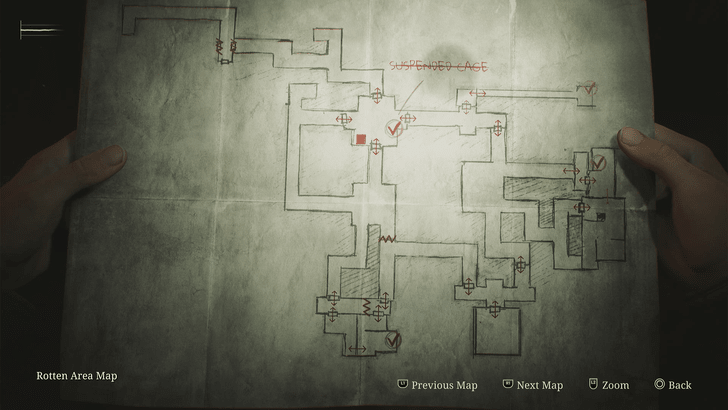
Rotate the cube until you reach a triangle with an upside-down cross opposite to its peak to access the Rotten Area. Climb up the stairs, into a long hallway, and enter through the green door on the left side. The map of the Rotten Area will now begin to form as you explore.
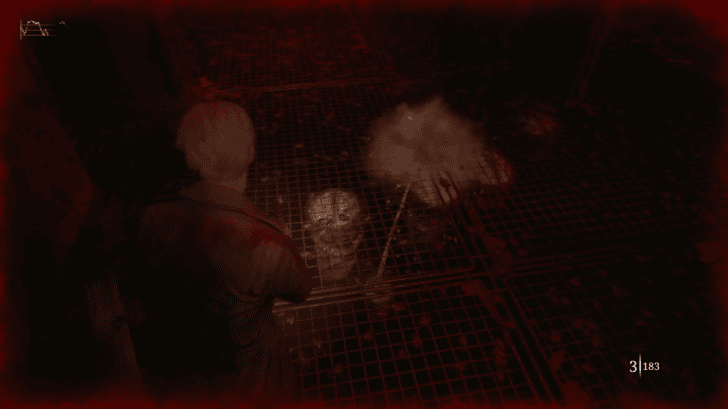
Walk down another hallway and turn right to reach a room with a save point and a Suspended Cage. Be careful while navigating around this area as a Mandarin will be hanging beneath the wire grates and attacking James as he walks on it.
Lower the Suspended Cage
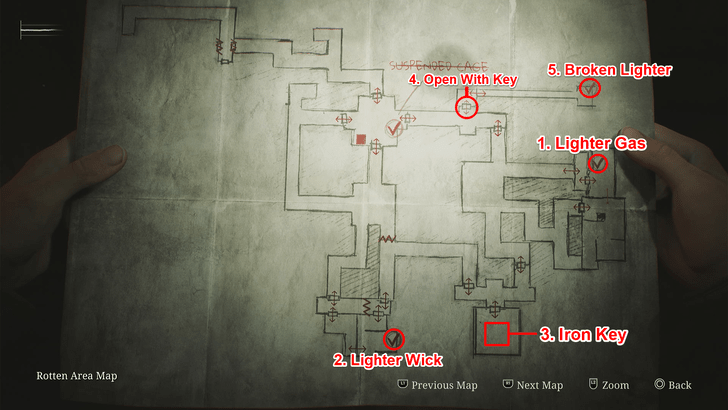
To lower the Suspended Cage, you will need to acquire the following materials:
- ① Lighter Gas inside a refrigerator from a room at the eastern part of the Rotten Area.
- ② Lighter Wick and ③ Iron Key from the southern area.
- ⑤ Broken Lighter inside a room (unlocked with the Iron Key) in the east hallway.
Combine all three of these items to create a Lighter and set fire to the sheet holding the Suspended Cage which creates a hole through the floor when it drops. Jump down the hole to end up in the Labyrinth Center, and make your way back to the Rotating Cube.
Access the Desolate Area
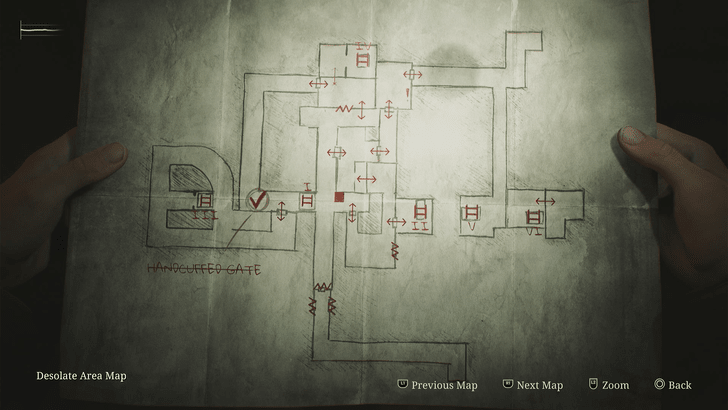
Back on the cube puzzle, rotate the cube once more to reach an infinity symbol with crosses sprouting from it. Enter the building and climb up the stairs again until you reach a doorway leading into a warmly lit hallway, then proceed forward into the Desolate Area.
The map of the area will now begin to reveal itself the more you navigate around, and will trap you inside after you pass through the brown door at the end of the hallway. As you proceed, you will find a save point to your right and a ladder to your left labelled Ladder I.
Unlock the Handcuffed Gate
 |
| Unlock the Handcuffed Gate |
|---|
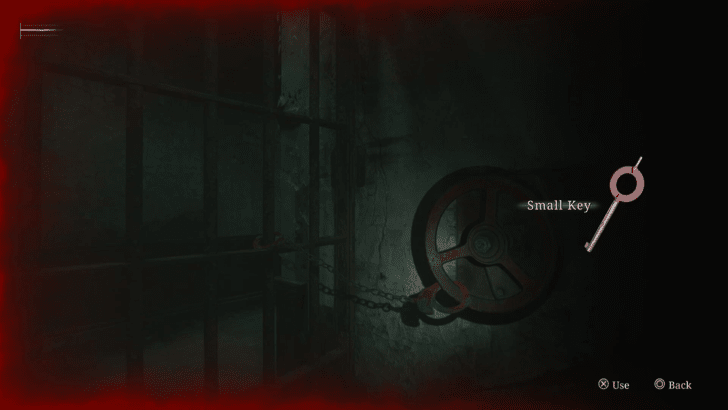
| Down Ladder 2 → Up Ladder 1 → Down Ladder 3 → Get Small Key → Up Ladder 1 → Unlock Gate |
Locate Ladder II by going down the hallway past the save point and entering the room to your right, pass through the wall until you reach another hallway, and enter the first room to your right. Climb down to the Flooded Level, walk over to Ladder I on the other side, and climb back up to the Desolate Area. Enter the first door to your left, walk over to Ladder III, then climb back down to the Flooded Level.
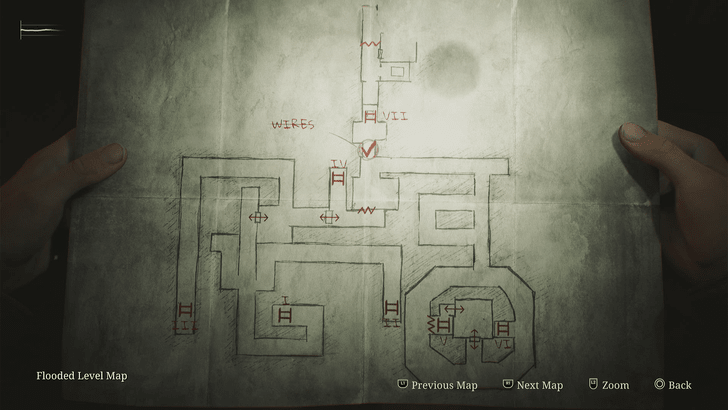
Walk down the hall until you reach the room that contains a Small Key and use it to unlock the Handcuffed Gate to turn the valve. Make it to the room at the end of the hallway and wheel a cart up against the wall to pass through the next room and climb down Ladder IV. Move forward and head to the left, then crawl through the wall which will collapse upon entry and prevent you from turning back.
Cut Through the Wire Fence
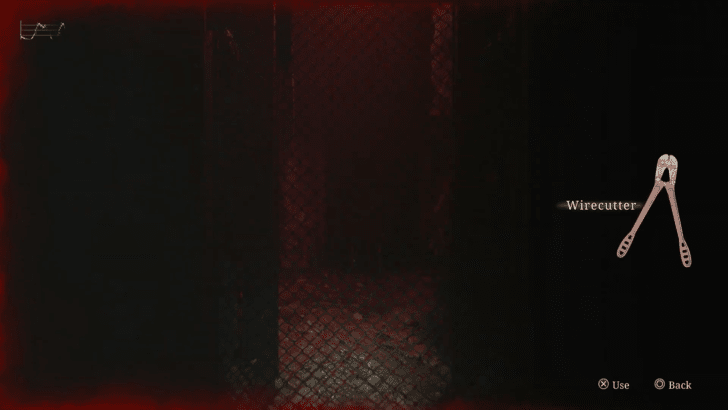
You will see a Wire Fence blocking your path, so head down the hallway to the right, turn right again, head left until you reach Ladder VI, then continue around until you see double doors to your right. Go inside and break through the wall to access Ladder V. Be quick around this part as Pyramid Head will begin to hunt you down in the Flooded Level. Climb up Ladder V, head down the hallway, and turn left into a room where you can find a Wirecutter.
Head back down via Ladder V and outrun Pyramid Head as you make your way to the Wire Fence, and cut through with the Wirecutter to descend Ladder VII. Walk down the hall and enter the room to the right to jump down another chute and land back in the Labyrinth Center.
Access the Ruined Area
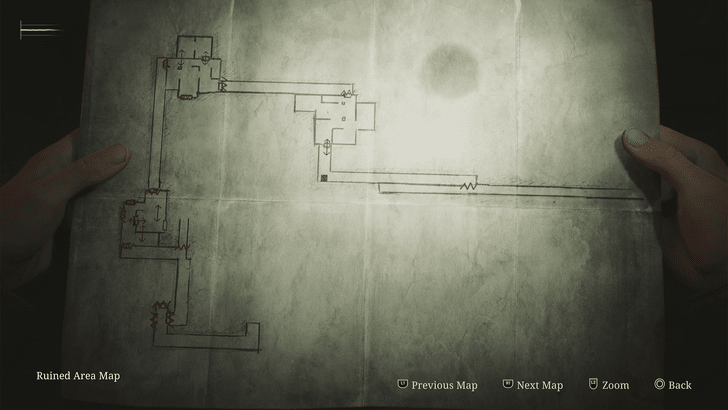
Rotate the cube once more until you reach a triangle with an upside-down cross on its peak. Enter the cube and take the only flight of stairs downward and into a new area. After walking down another long hallway and entering the only open door to your left, the map to the Ruined Area will manifest in your inventory.
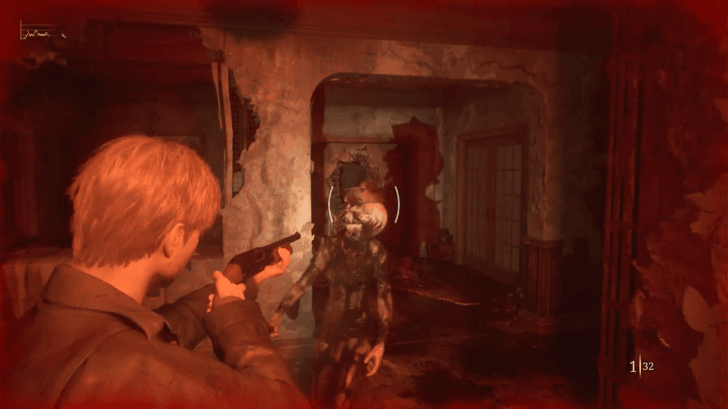
Navigating the paths in this area is straightforward, but be cautious, as each room entered will trigger a wave of enemies that must be defeated before you can proceed to the next location.
Escape the Ruined Area
Walk down the hallway, turn left, and enter through the first door. Head over to the metal door with a skewed rectangular grate on your left, which will activate a loud alarm and summon enemies to your area. Defeat all enemies in the room to open the door, or alternatively, survive long enough until the alarm stops and effectively sedate any monsters remaining to open the metal door.
With no other option, pass through the door and into another hallway toward the next room. Repeat the same step in this room: walk toward the metal door to activate the floor and survive enemies. Head out once it's over and walk toward the next room which will summon a Mandarin once activated.
Survive the Mandarin
You may attack the Mandarin with your melee weapon or firearms until it is incapacitated, but it may be a better option to save your bullets and dodge its tentacled attacks until the alarm stops. Afterward, exit the room through the metal door and be greeted with a save point.
Continuing down this path will lead you to a Strange Wall and lock you in the hallway with nowhere else to go. Upon turning back, Pyramid Head breaks through the wall and chases you down the hallway. Do your best to outrun him, and upon reach a certain point, the scenery will shift drastically and transport you back to the Labyrinth Center.
Head to the Cemetery
Enter the hallway and head to the door on your left, where a cutscene plays showing Maria’s death once again. Exit the room and back to the area with the Rotating Cube, though in its place, you will find the Great Knife. Unsheath it from the pedestal and drag it toward the Strange Wall which will slowly inch away as you move forward.
Climb up the ladder at the end of the hallway and walk straight, climb down another ladder, and finally reach the Cemetery. You may inspect all tombstones around the area and access a save point at the right corner of the room, but after examining James' tombstone at the far left corner of the room, jump down the open grave and into a new area.
Return to Maria's Body for Maria Ending
After exiting the room where James sees Maria dead, you can return to view her body again. This is a key requirement for obtaining the Maria ending but should be avoided if you are aiming for the Leave or In Water ending.
Defeat Eddie
Upon landing, walk down the hallway and enter through a bloody metal door where you encounter a cutscene with Eddie. Follow him into the walk-in freezer to start the battle.
Eddie is Agile During the First Phase
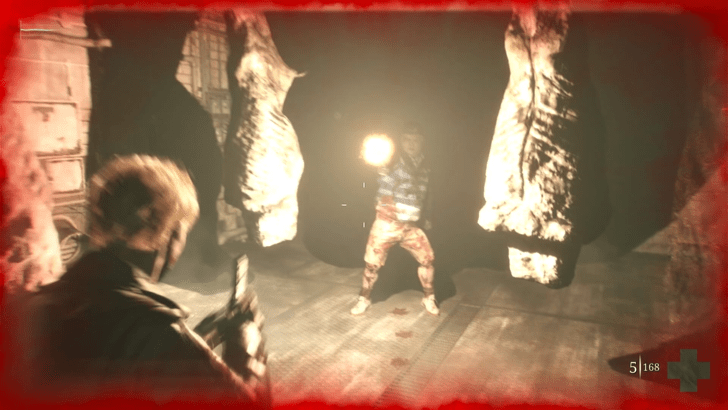
Eddie is evasive during the first phase and will disappear into the carcasses after he fires his shots. Getting closer to him will also get you hit with a melee attack while he is on guard, so be sure to keep your distance and attack with your ranged weapons; ideally, use the Handgun for its speed. Although, you can still hit him with your melee weapon while he reloads his revolver or by colliding into him as he runs.
A Fog is Cast in the Second Phase
Once he is substantially damaged, he will stagger and shoot the pipes in the ceiling, casting a fog around the room. In this second phase, his attacks will be harder to predict, making you rely on the sound of his voice as he mocks James. Give chase if he reemerges and shoot your shot, and attempt to hit him with your melee weapon mostly by bumping into him as he runs, or being in direct confrontation with him.
Carcasses Move in the Third Phase
He will begin the third and last phase after getting significantly hurt and activates the conveyor belt that moves around all the carcasses. He will be a lot slower now, which can allow you to sneak behind him and land a melee attack if you locate him. Mostly keep shooting with your gun when possible until he is shot for the final time, falling dead on the floor.
Exit the Labyrinth
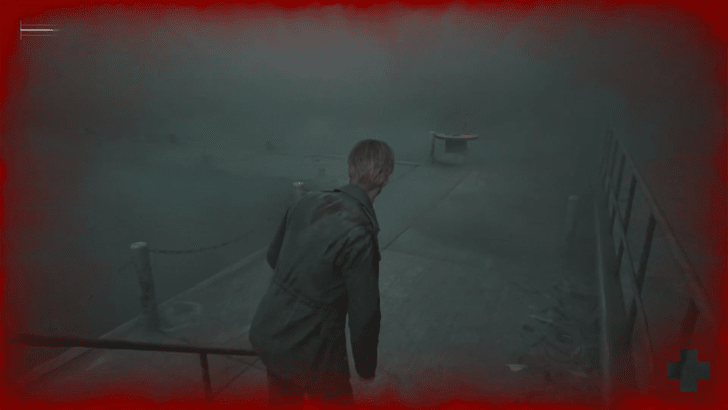
After defeating Eddie, the door leading outside the walk-in freezer will now be open. Exit into the docks of Toluca Lake where you can find a save point on top of a wire spool, and ride a boat at the end of the pier to sail toward Lakeview Hotel.
Labyrinth Maps
All Labyrinth Maps
 Labyrinth Center |
 Rotten Area |
 Desolate Area |
 Flooded Level |
 Ruined Area |
Labyrinth Puzzles
All Puzzles
| Rotating Cube Puzzle |
Silent Hill 2 Remake Related Guides

Story Walkthrough and All Chapters
All Story Chapters
Author

Labyrinth Walkthrough and Guide
Please participate in our site
improvement survey
03/2026
improvement survey
03/2026
Would you assist in
improving Game8's site?
improving Game8's site?

×
We are listening to our users' valuable opinions and discussing how to act on them.
The information collected through this survey will be used for the purpose of improving our services. In addition, the information will only be disclosed a part of a statistic in a format that will not allow identification of personal information.
Begin Survey
Not Now
×
Please rate each item regarding Game8.co's Advertisements.
Amount of Ads
Very Dissatisfied
Somewhat Dissatisfied
Fine
Somewhat Satisfied
Highly Satisfied
Placement of Ads
Timing of Ad Display
Ad Loading Speed
Safeness of Ads
Content of Ads
×
Please rate each item regarding Game8.co's Quality of Articles.
Amount of information
Very Dissatisfied
Somewhat Dissatisfied
Fine
Somewhat Satisfied
Highly Satisfied
Frequency of updates
Speed of new information
Accuracy of articles
Understandibility of articles
Readability of sentences
×
Please rate each item regarding Game8.co's Usability of the Site.
Ease of finding information
Very Dissatisfied
Somewhat Dissatisfied
Fine
Somewhat Satisfied
Highly Satisfied
Loading Speed
Use of Color
Font Size
Visibility of Images
Easy to Understand Layout
×
Please rate each item regarding Game8.co's Message Boards, Comments.
Ease of Writing
Very Dissatisfied
Somewhat Dissatisfied
Fine
Somewhat Satisfied
Highly Satisfied
Readability
Ease in Finding Information
Comment Quality
Comment Quantity
Admin Response
×
Please rate each item regarding Game8.co's Site's new design.
Please rate our site's new design
Very Dissatisfied
Somewhat Dissatisfied
Fine
Somewhat Satisfied
Highly Satisfied
Do you think that the website's design change makes the site easier to use?
Has the new design made it easier for you to find information on the site?
Has the new design improved the overall visual appeal of the site?
How would you rate your overall satisfaction with the new design of the site?
×
How likely are you to recommend Game8 to someone you know?
Very Unlikely
0
1
2
3
4
5
6
7
8
9
10
Very Likely
If you have other opinions regarding potential improvement to the website, please share them with us. We would appreciate your honest opinion.
Note: This is a free response section, so you can proceed without entering anything.
Note: Please be sure not to enter any kind of personal information into your response.
Note: Please be sure not to enter any kind of personal information into your response.
×
Thank You
×
Thank you for participating in our survey! Your answers will help us to improve the quality of our website and services.
We hope you continue to make use of Game8.
We hope you continue to make use of Game8.
Close
Rankings
- We could not find the message board you were looking for.
Gaming News


![Monster Hunter Stories 3 Review [First Impressions] | Simply Rejuvenating](https://img.game8.co/4438641/2a31b7702bd70e78ec8efd24661dacda.jpeg/thumb)
Popular Games

Genshin Impact Walkthrough & Guides Wiki
Honkai: Star Rail Walkthrough & Guides Wiki
Umamusume: Pretty Derby Walkthrough & Guides Wiki
Pokemon Pokopia Walkthrough & Guides Wiki
Resident Evil Requiem (RE9) Walkthrough & Guides Wiki
Monster Hunter Wilds Walkthrough & Guides Wiki
Wuthering Waves Walkthrough & Guides Wiki
Arknights: Endfield Walkthrough & Guides Wiki
Pokemon FireRed and LeafGreen (FRLG) Walkthrough & Guides Wiki
Pokemon TCG Pocket (PTCGP) Strategies & Guides Wiki


Recommended Games
Diablo 4: Vessel of Hatred Walkthrough & Guides Wiki
Cyberpunk 2077: Ultimate Edition Walkthrough & Guides Wiki
Fire Emblem Heroes (FEH) Walkthrough & Guides Wiki
Yu-Gi-Oh! Master Duel Walkthrough & Guides Wiki
Super Smash Bros. Ultimate Walkthrough & Guides Wiki
Pokemon Brilliant Diamond and Shining Pearl (BDSP) Walkthrough & Guides Wiki
Elden Ring Shadow of the Erdtree Walkthrough & Guides Wiki
Monster Hunter World Walkthrough & Guides Wiki
The Legend of Zelda: Tears of the Kingdom Walkthrough & Guides Wiki
Persona 3 Reload Walkthrough & Guides Wiki


All rights reserved
©2024 Konami Digital Entertainment
The copyrights of videos of games used in our content and other intellectual property rights belong to the provider of the game.
The contents we provide on this site were created personally by members of the Game8 editorial department.
We refuse the right to reuse or repost content taken without our permission such as data or images to other sites.
Thanks for the walkthrough. It helped me clearing the section.