This survey will take about 1 minute.
Your answers will help us to improve our website.
Silent Hill 2 Remake
Hotel Book Puzzle Guide
★ Complete all Story Chapters to get New Game+
☆ Solve all Puzzles and see all Codes
★ Get all Endings and explanations
☆ Beat all Bosses, like Pyramid Head
★ Collect all Weapons and Items
☆ Read our Beginner's Guide for tips
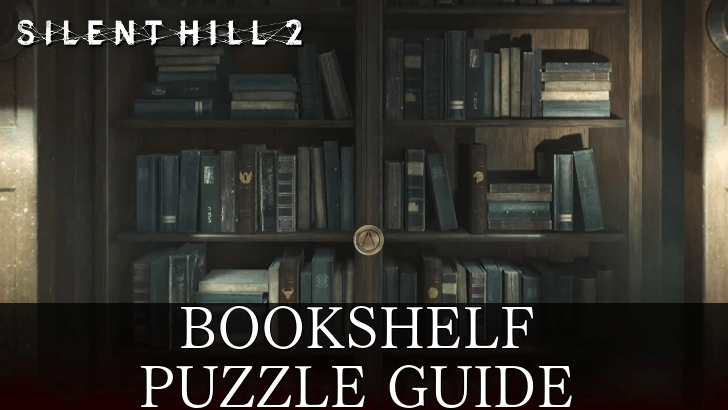
The Hotel Book Puzzle in the Silent Hill 2 Remake is located in the second floor Reading Room of Lakeview Hotel, and is solved by placing missing books on the bookshelf. See how to solve this puzzle, where it's located, and more in this guide!
| All Book Puzzles in Silent Hill 2 Remake | |
|---|---|
| Director's Books Puzzle Guide | Hotel Book Puzzle Guide |
List of Contents
Hotel Book Puzzle Guide
Get The Books in the Reading Room

There will be several red books strewn about the Reading Room when players enter it in the Lakeview Hotel, as well as a bookshelf with empty spaces. To start the puzzle, collect all of the red books in the room.
There should be a total of four books: Pride Before The Fall, Revelations: A New Understanding, Stalwart To The End, and The One Who Soared.
Look at the Painting on the Wall

Next, pay attention to the painting on the wall opposite the bookshelf. The characters in the painting will correspond to what books go in which slot on the bookshelf, as these characters are present on the books' spines.
Note that the spears in the painting are piercing the man downwards, and the spears in the emblem on the shelf are upright instead, meaning the image needs to be flipped to provide an accurate hint.
| Book Name | Symbol |
|---|---|
| The One Who Soared | Eagle |
| Revelations: A New Understanding | Winged Man |
| Stalwart To The End | Bull |
| Pride Before The Fall | Lion |
Books on the Shelf

Order the books based on the symbols on their spines: the Winged Man in the upper-left slot, the Eagle in the upper-right, the Bull in the bottom-left, and the Lion in the bottom-right.
Hotel Book Puzzle Location
Found in Lakeview Hotel Second Floor

The Hotel Book Puzzle can be found in the Lakeview Hotel's Reading Room, on the second floor. Note that to access its location on the second floor, players will need to get the Sunrise Wing Key in the Utility Room.
Hotel Book Puzzle Rewards
Bookshelf Reveals A New Area

Completing the Reading Room Book Puzzle causes the bookshelf to move out of the way to allow access to an unnamed room between the Restroom and Room 208. Inside the room is a mirror with a broken bulb, and a locked suitcase.
Suitcase Code and Vanity Mirror Puzzle Guide
Silent Hill 2 Remake Related Guides
All Puzzle Solutions and Guides
Puzzle Guides
| Puzzle Guides |
|---|
| All Codes for Safes, Keypads, and Locks |
List of All Puzzles
| Eastern South Vale | ||
|---|---|---|
| Neely's Bar Jukebox | Grand Market Keypad | |
| Wood Side Apartments | ||
| Coin Puzzle | Apartment Safe Code | |
| Blue Creek Apartments | ||
| Clock Puzzle | Seesaw Puzzle | |
| Moth Puzzle | - | |
| Western South Vale | ||
| Jacks Inn Motel Safe Code | Bowling Alley Safe Code | |
| Brookhaven Hospital | ||
| Hospital Padlock Code | Nurses Station Keypad | |
| X-ray Puzzle | Bracelet Puzzle | |
| Director's Books Puzzle | Hospital Safe Code | |
| 3rd Floor Hospital Door Code | - | |
| Brookhaven Hospital (Otherworld) |
||
| Elevator Quiz Answers (Trick or Treat) |
Decorative Box Code | |
| Chained Box | - | |
| Historical Society | ||
| Bug Room Code | ||
| Toluca Prison | ||
| Weights and Scales | Prison Witness Room Generator | |
| Hangman Puzzle | - | |
| Labyrinth | ||
| Rotating Cube Puzzle | ||
| Lakeview Hotel | ||
| Music Box Puzzle | Hotel Book Puzzle | |
| Hotel Safe Code | Suitcase Code and Vanity Mirror Puzzle | |
| Mirror Puzzle | - | |
Comment
Author
Hotel Book Puzzle Guide
Please participate in our site
improvement survey
03/2026
improvement survey
03/2026
Would you assist in
improving Game8's site?
improving Game8's site?

×
We are listening to our users' valuable opinions and discussing how to act on them.
The information collected through this survey will be used for the purpose of improving our services. In addition, the information will only be disclosed a part of a statistic in a format that will not allow identification of personal information.
Begin Survey
Not Now
×
Please rate each item regarding Game8.co's Advertisements.
Amount of Ads
Very Dissatisfied
Somewhat Dissatisfied
Fine
Somewhat Satisfied
Highly Satisfied
Placement of Ads
Timing of Ad Display
Ad Loading Speed
Safeness of Ads
Content of Ads
×
Please rate each item regarding Game8.co's Quality of Articles.
Amount of information
Very Dissatisfied
Somewhat Dissatisfied
Fine
Somewhat Satisfied
Highly Satisfied
Frequency of updates
Speed of new information
Accuracy of articles
Understandibility of articles
Readability of sentences
×
Please rate each item regarding Game8.co's Usability of the Site.
Ease of finding information
Very Dissatisfied
Somewhat Dissatisfied
Fine
Somewhat Satisfied
Highly Satisfied
Loading Speed
Use of Color
Font Size
Visibility of Images
Easy to Understand Layout
×
Please rate each item regarding Game8.co's Message Boards, Comments.
Ease of Writing
Very Dissatisfied
Somewhat Dissatisfied
Fine
Somewhat Satisfied
Highly Satisfied
Readability
Ease in Finding Information
Comment Quality
Comment Quantity
Admin Response
×
Please rate each item regarding Game8.co's Site's new design.
Please rate our site's new design
Very Dissatisfied
Somewhat Dissatisfied
Fine
Somewhat Satisfied
Highly Satisfied
Do you think that the website's design change makes the site easier to use?
Has the new design made it easier for you to find information on the site?
Has the new design improved the overall visual appeal of the site?
How would you rate your overall satisfaction with the new design of the site?
×
How likely are you to recommend Game8 to someone you know?
Very Unlikely
0
1
2
3
4
5
6
7
8
9
10
Very Likely
If you have other opinions regarding potential improvement to the website, please share them with us. We would appreciate your honest opinion.
Note: This is a free response section, so you can proceed without entering anything.
Note: Please be sure not to enter any kind of personal information into your response.
Note: Please be sure not to enter any kind of personal information into your response.
×
Thank You
×
Thank you for participating in our survey! Your answers will help us to improve the quality of our website and services.
We hope you continue to make use of Game8.
We hope you continue to make use of Game8.
Close
Rankings
- We could not find the message board you were looking for.
Gaming News


![Monster Hunter Stories 3 Review [First Impressions] | Simply Rejuvenating](https://img.game8.co/4438641/2a31b7702bd70e78ec8efd24661dacda.jpeg/thumb)
Popular Games

Genshin Impact Walkthrough & Guides Wiki
Honkai: Star Rail Walkthrough & Guides Wiki
Umamusume: Pretty Derby Walkthrough & Guides Wiki
Pokemon Pokopia Walkthrough & Guides Wiki
Resident Evil Requiem (RE9) Walkthrough & Guides Wiki
Monster Hunter Wilds Walkthrough & Guides Wiki
Wuthering Waves Walkthrough & Guides Wiki
Arknights: Endfield Walkthrough & Guides Wiki
Pokemon FireRed and LeafGreen (FRLG) Walkthrough & Guides Wiki
Pokemon TCG Pocket (PTCGP) Strategies & Guides Wiki


Recommended Games
Diablo 4: Vessel of Hatred Walkthrough & Guides Wiki
Cyberpunk 2077: Ultimate Edition Walkthrough & Guides Wiki
Fire Emblem Heroes (FEH) Walkthrough & Guides Wiki
Yu-Gi-Oh! Master Duel Walkthrough & Guides Wiki
Super Smash Bros. Ultimate Walkthrough & Guides Wiki
Pokemon Brilliant Diamond and Shining Pearl (BDSP) Walkthrough & Guides Wiki
Elden Ring Shadow of the Erdtree Walkthrough & Guides Wiki
Monster Hunter World Walkthrough & Guides Wiki
The Legend of Zelda: Tears of the Kingdom Walkthrough & Guides Wiki
Persona 3 Reload Walkthrough & Guides Wiki


All rights reserved
©2024 Konami Digital Entertainment
The copyrights of videos of games used in our content and other intellectual property rights belong to the provider of the game.
The contents we provide on this site were created personally by members of the Game8 editorial department.
We refuse the right to reuse or repost content taken without our permission such as data or images to other sites.