Lakeview Hotel Otherworld Walkthrough and Guide
★ Complete all Story Chapters to get New Game+
☆ Solve all Puzzles and see all Codes
★ Get all Endings and explanations
☆ Beat all Bosses, like Pyramid Head
★ Collect all Weapons and Items
☆ Read our Beginner's Guide for tips
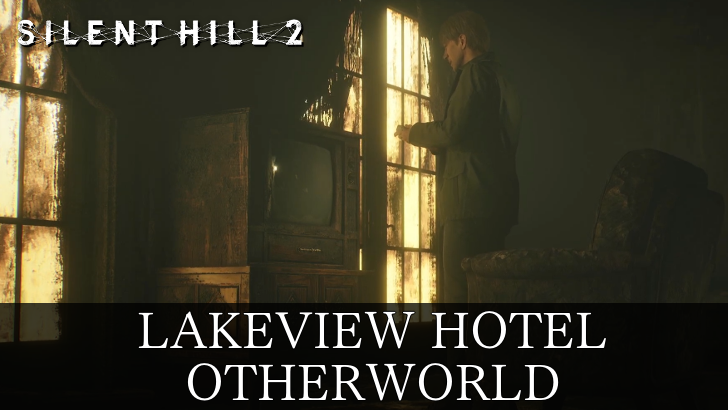
This is a walkthrough and guide for the final chapter of the SIlent Hill 2 Remake, the Lakeview Hotel Otherworld. Check out our guide for all Lakeview Hotel Otherworld maps, boss fights, and more!
| ◀ Previous Area |
|---|
| Lakeview Hotel |
List of Contents
Lakeview Hotel Otherworld Walkthrough
- Escape the Third Floor
- Escape the Second Floor
- Exit the Basement
- Navigate the Employee Section
- Defeat Two Pyramid Heads
- Exit the Lakeview Hotel Otherworld
- Defeat Mary (Final Boss)
- Reach the Conclusion
Escape the Third Floor

Exit the now dilapidated and collapsing Room 312 into the hallway, then enter Room 314. From there, cross into Room 313 and head into the bathroom to exit the area through a gap in the wall.
The staircase will be blocked off, so turn right, walk toward the very end of the hallway and find a cart in Room 302. Wheel it out into the hallway, causing it to fall through the floor. Jump through the hole, onto the second floor.
Escape the Second Floor

Head straight down the hallway, then pass through the Restroom to find a save point in the Reading Room. Exit the Reading Room and jump into the Cloakroom, then walk to the Hall.
Climb into the Nurse's Office from an open space at the rightmost wall of the Hall. Exit the room by passing through a gap in the wall, then walk toward the Elevator marked E on the map and descend to the Basement.
Exit the Basement
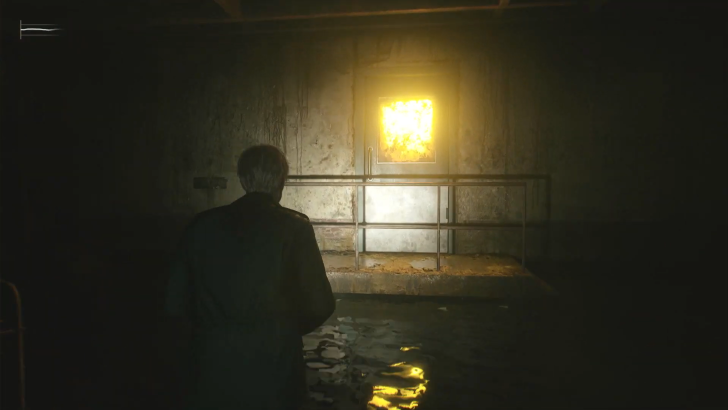
Pry open the elevator doors and head into Venus Tears Bar to find a save point. Pass through the Kitchen, go through the wall on your left into the Liquor Storage, and climb over the upper gap in the wall near the door to exit. Walk toward a metal door emitting a warm light for a cutscene with Angela past the door.
Navigate the Employee Section
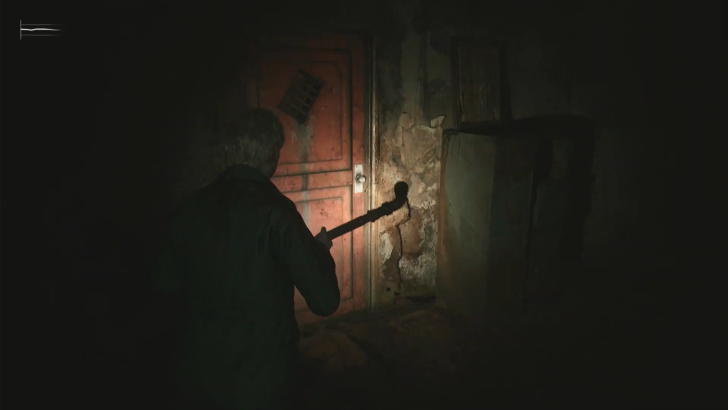
The environment will shift after James exits the door, leading you to a stairwell that you can use to ascend to the first floor Employee Section. Make your way to the Manager's Office, and enter through a red metal door in the TV Room.
Keep walking down a linear path until you reach an area with 9 save points arranged into a grid. Entering through the big metal doors on your right will trigger a cutscene where a fight with two Pyramid Heads ensues.
Open the Manager's Office Safe for Stillness Ending

In a New Game Plus save file, the Manager's Office in the first floor Employee Section has a safe at the left side of the room.
Use the Key of Sorrow, which is only available after unlocking the In Water Ending, and the safe code: 314 to open the safe and obtain a Toluca Postcard. The postcard is a necessary item for the Stillness Ending.
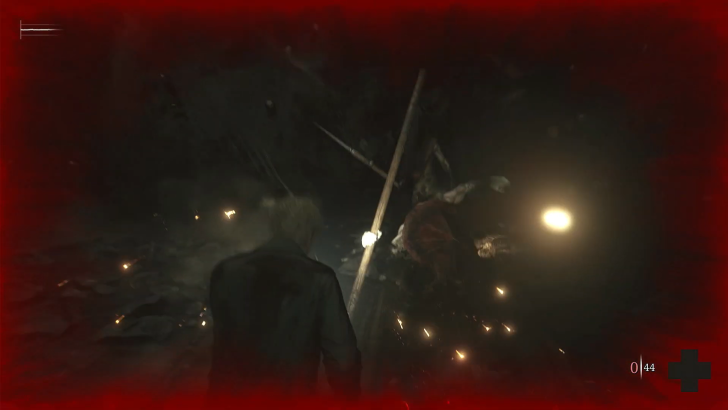
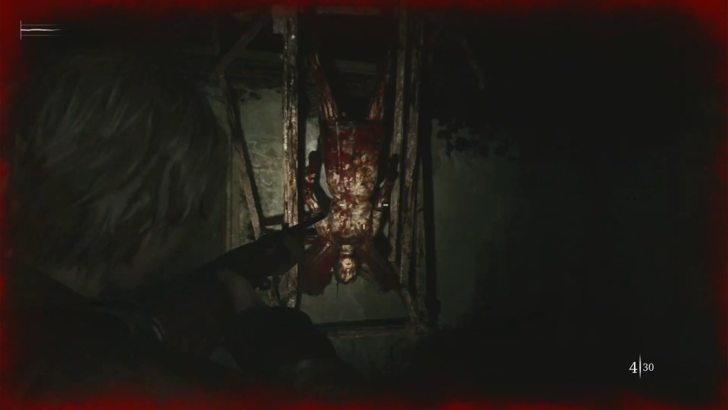
Defeat Two Pyramid Heads

At the start of the fight, both Pyramid Heads will lunge at James with their spears. It's a slow attack that has significant windows for you to exploit, so maintain some distance to dodge and attack. Make sure not to lose sight of both enemies, lest you be caught off-guard by one.
The preferrable method of dealing damage to either boss will be using firearms, such as the Handgun or Hunting Rifle. However, if you would prefer to conserve ammo, looking for openings for melee attacks is risky but possible.
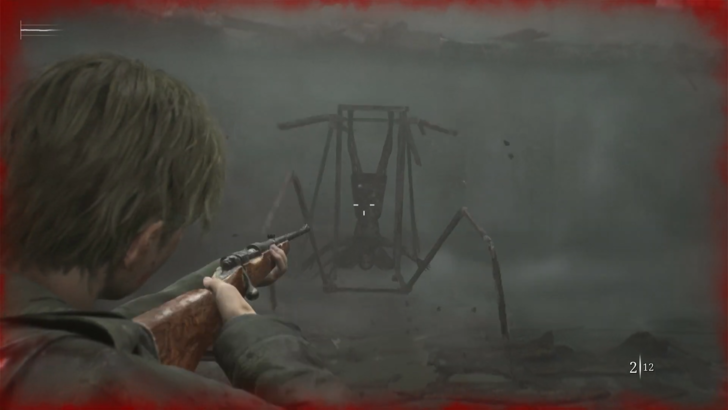
Pyramid Heads Get More Attacks Later On
As you deal damage to the Pyramid Heads, their repertoire of attacks expands. They can now perform quicker stabs, unleash a wide, sweeping attack, or slam the spear down onto the ground in front of them.
Keep calm and continue to maintain a safe distance to avoid letting them chain attacks on you. As they alternate attacks, wait for one to finish, then retaliate while keeping your eyes on the other one as well.
Exit the Lakeview Hotel Otherworld
Successfully overcoming the Pyramid Heads will cause them to impale themselves on their spears, after which the Scarlet Egg and Rust-Colored Egg can be retrieved from their hands. Insert the eggs into the slots on the doors.
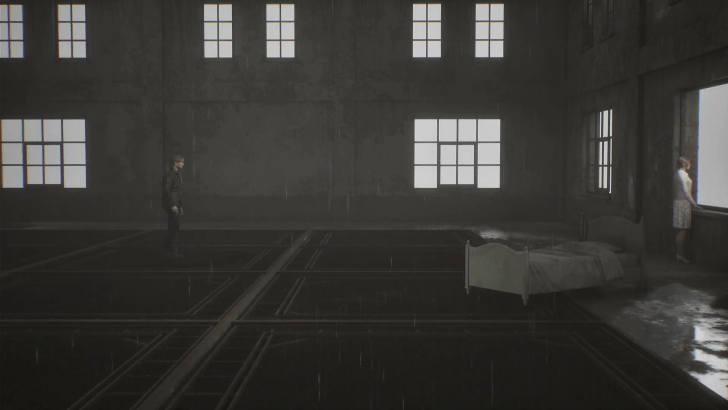
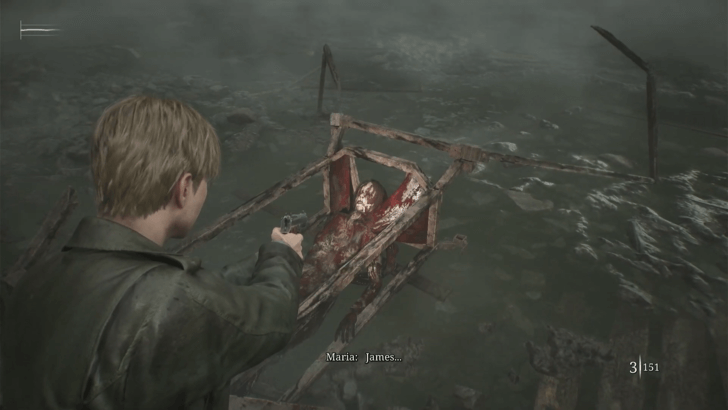
Walk through the hallway behind the doors to hear Mary monologuing, and open the door at the end to find a flooded area. Collect the supplies strewn about, then go up the stairs to find a ladder. Head up to find Mary by a window.
Mary's Monologue Affects the Ending
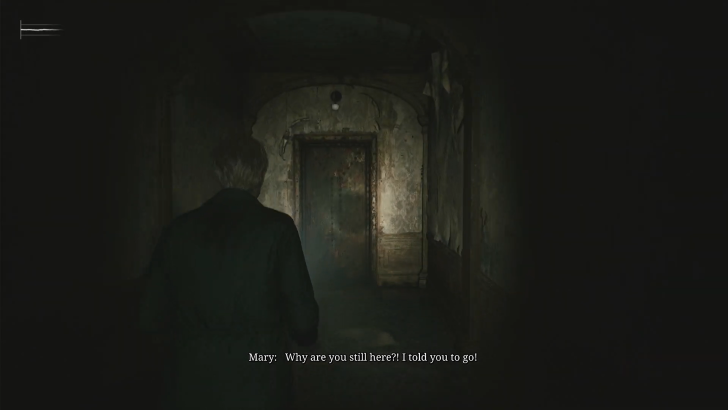
Listening to Mary talking in the hallway can affect the ending that you get. If you listen to the whole monologue, you will hear Mary apologize at the very end, making the Leave Ending more likely.
Conversely, going through the door at the end of the hallway before she stops talking makes other endings, namely the Maria Ending, more likely to happen.
Ending Guides and Explanations
Collect All Ritual Items for Rebirth Ending

If you instead make it to the area where James is reunited with Mary while carrying all four ritual items, a different cutscene will play upon meeting Mary. The boss fight still ensues, but afterward, the Rebirth Ending will play.
Defeat Mary (Final Boss)
Mary Has Quick Attacks in Phase One

After the cutscene, Mary transforms into an ashen, caged figure. During the first phase, her erratic movements make her attacks hard to predict, though she primarily lashes out with a scorpion-like tail. Dodge her attacks and shoot when you have openings, but be prepared as her strikes are frequent with little recovery time.
She also has the ability to turn into a swarm of Moths to reposition herself and deal minor damage to James, but can be dodged. Use health items as needed to survive her relentless assault. After dealing significant damage, she becomes incapacitated for a brief period, giving you an opportunity to inflict further damage.
Mary Attacks From the Ceiling in Phase Two
After dealing significant damage, the second phase begins when the bars of Mary's cage transforms into legs, causing the floor beneath James to collapse into a dark underground area.
In this phase, Mary will descend from the ceiling periodically and continue her whip attacks, but they are relatively slower, giving you more chances to strike back. When she is out of sight, her moths will attack and deal minor damage to you unless dodged, until her next appearance.
Mary Attacks Slower in Phase Three
Once she enters her third and final phase, Mary shatters all the walls, returning the terrain to an open area. Now more mobile, her attacks include a long-distance lunge if you get too far, and two stomps when you are within her reach.
These attacks take longer to initiate after the other, giving you plenty of opportunities to deal damage. Continue attacking and healing as needed until she is defeated.
How to Beat Final Boss (Maria/Mary)
Reach the Conclusion
Approach Mary's body as she lies on the floor, barely alive, and deliver the final blow. Depending on the requirements you have met throughout the game, the corresponding ending will play.
Lakeview Hotel Otherworld Maps
All Lakeview Hotel Otherworld Maps
 3F |
 2F |
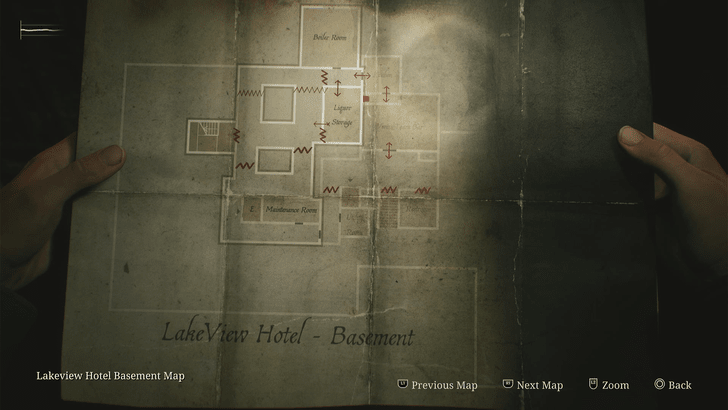 Basement |
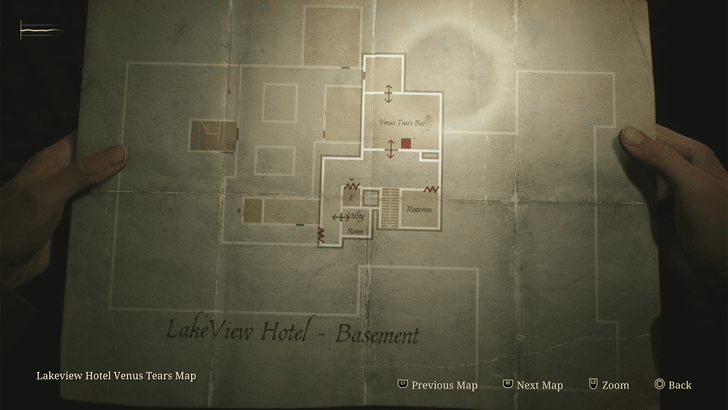 Basement (Venus Tears) |
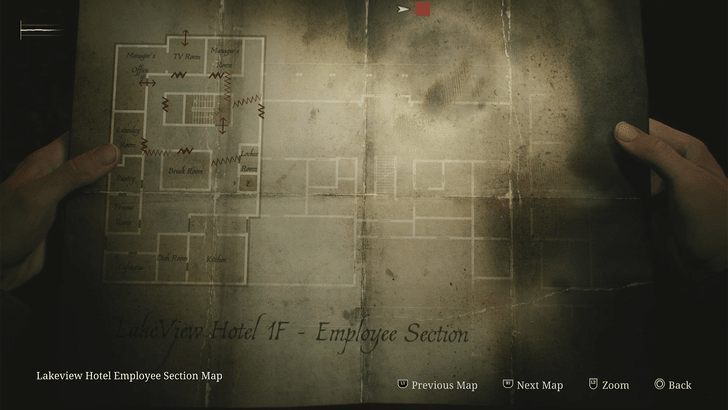 1F Employee Section |
Silent Hill 2 Remake Related Guides

Story Walkthrough and All Chapters
All Story Chapters
| Story Walkthrough Chapters | ||
|---|---|---|
| Eastern South Vale | Wood Side Apartments | Blue Creek Apartments |
| Western South Vale | Brookhaven Hospital | Brookhaven Hospital Otherworld |
| South Vale Otherworld | Historical Society | Toluca Prison |
| Labyrinth | Lakeview Hotel | Lakeview Hotel Otherworld |
Comment
Author

Lakeview Hotel Otherworld Walkthrough and Guide
Rankings
- We could not find the message board you were looking for.
Gaming News


![Monster Hunter Stories 3 Review [First Impressions] | Simply Rejuvenating](https://img.game8.co/4438641/2a31b7702bd70e78ec8efd24661dacda.jpeg/thumb)
Popular Games

Genshin Impact Walkthrough & Guides Wiki
Honkai: Star Rail Walkthrough & Guides Wiki
Umamusume: Pretty Derby Walkthrough & Guides Wiki
Pokemon Pokopia Walkthrough & Guides Wiki
Resident Evil Requiem (RE9) Walkthrough & Guides Wiki
Monster Hunter Wilds Walkthrough & Guides Wiki
Wuthering Waves Walkthrough & Guides Wiki
Arknights: Endfield Walkthrough & Guides Wiki
Pokemon FireRed and LeafGreen (FRLG) Walkthrough & Guides Wiki
Pokemon TCG Pocket (PTCGP) Strategies & Guides Wiki


Recommended Games
Diablo 4: Vessel of Hatred Walkthrough & Guides Wiki
Cyberpunk 2077: Ultimate Edition Walkthrough & Guides Wiki
Fire Emblem Heroes (FEH) Walkthrough & Guides Wiki
Yu-Gi-Oh! Master Duel Walkthrough & Guides Wiki
Super Smash Bros. Ultimate Walkthrough & Guides Wiki
Pokemon Brilliant Diamond and Shining Pearl (BDSP) Walkthrough & Guides Wiki
Elden Ring Shadow of the Erdtree Walkthrough & Guides Wiki
Monster Hunter World Walkthrough & Guides Wiki
The Legend of Zelda: Tears of the Kingdom Walkthrough & Guides Wiki
Persona 3 Reload Walkthrough & Guides Wiki


All rights reserved
©2024 Konami Digital Entertainment
The copyrights of videos of games used in our content and other intellectual property rights belong to the provider of the game.
The contents we provide on this site were created personally by members of the Game8 editorial department.
We refuse the right to reuse or repost content taken without our permission such as data or images to other sites.