Master Rank Kulve Taroth Weakness and Strategy Guide
★ 2025/2/28: Monster Hunter Wilds is now available!
Join the hunt at our Monster Hunter Wilds Wiki!
Learn how to beat Master Rank Kulve Taroth in the Iceborne expansion for Monster Hunter World (MHW)! This guide explains everything about Master Rank Kulve Taroth's weakness, carves, rewards, and a complete strategy guide for beating and capturing it. Find out what parts are breakable and severable, and what drops and Monster materials are available.
| All Master Rank Kulve Taroth Articles | ||
|---|---|---|
|
|
⍺+ | β+ |
|
List of Contents
Master Rank Kulve Taroth Weakness, Body Parts, and Resistances
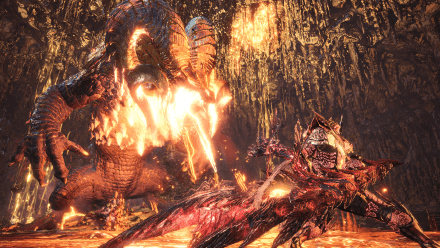
Master Rank Kulve Taroth Characteristics
 |
|||||
| Roar | Wind | Tremor | Blight | Status | |
|---|---|---|---|---|---|
| Big | None | None | Fire | None | |
| Breakable Parts | |||||
| Horns, Gold Plating, Tail | |||||
Vulnerability to Status Effects and Items
| Poison | ★ | Flash | ❌ |
|---|---|---|---|
| Paral | ★ | Shock | ❌ |
| Sleep | ※★ | Pitfall | ❌ |
| Stun | ★ | Ivy | ❌ |
| Blast | ★ | Dung | ❌ |
| Exhaust | ★ | Meat | ❌ |
| Mount | ★ | Screamer | ❌ |
How to Beat Master Rank Kulve Taroth
Things To Do Before The Hunt
・ Join a Gathering Hub with at least 12 players for the hunt
・ Check if the event is available on the Quest Board
・ Prepare the equipment sets you will need for the hunt
Summary of the Hunt

| First Run (Tracking Level 1 to 3) | |
|---|---|
| Area 1 | ① Participate in low level tracking as much as possible ② Depart at the same time as the other parties for efficiency ③ Raise the tracking level by collecting traces and lost items of Kulve Taroth ④ Do not return on your own, wait until you are automatically removed from the hunt ⑤ Wait for the return of the other parties to raise the tracking level |
| Second Run (Tracking Level 4 to 6) | |
| Area 1-3 | ⑥ Destroy Kulvee Taroth's parts by attacking and using environmental hazards from area 1 ⑦ After removing the armor, replenish items and change equipment ⑧ Continue the assault on Kulve Taroth until she becomes enraged |
| Area 4 | ⑨ Put Kulve Taroth to sleep and prepare Large Barrel Bombs ⑩ Complete the hunt and try to remove the horns |
First Run Tips
Gathering Points
| Action | Points Received |
|---|---|
| Collect traces | 10 pts |
| Investigate marks | 2 pts |
| Collect shiny drops | 5 pts |
| Part destruction | 13 pts |
Points Required Per Level
| Tracking Level | Points Required | Total Points | |||
|---|---|---|---|---|---|
| Lv 1 | None | None | |||
| Lv 2 | 325 | 325 | |||
| Lv 3 | 325 | 650 | |||
| Lv 4 | 650 | 1300 | |||
| Lv 5 | 650 | 1950 | |||
| Lv 6 | 650 | 2600 | |||
| No. of Players | Points Per Person (Lv 1-6) | ||||
| 12 | 216.6 | ||||
| 14 | 185.7 | ||||
| 16 | 162.5 | ||||
Second Run Tips
Once the hunt starts, immediately pick up the nearby slinger ammo inside the camp before you slide down towards the wedge beetles. Use the collapsable rocks against Kulve Taroth if the initial spawn is on the far right side of the map, move quickly as Kulve Taroth will pass through this area shortly after the start of the hunt. However, if Kulve Taroth's initial spawn is in the center, you can take your time and wair for Kulve Taroth to be in position before you use the nearby collapsable rocks.
Available Parts to Destroy
| Destructible Parts | |
|---|---|
| Left Front Leg | Right Front Leg |
| Left Chest | Right Chest |
| Left Hind Leg | Right Hind Leg |
| Left Side of the Tail | Right Side of the Tail |
Destroying the Chest

If you deal enough damage to the chest, it will become red-hot and the metal will soften. This will increase the efficiency of your attacks and make most of his body parts vulnerable. Focus on attacking this part as soon as she comes out of the hole and use Large Barrel Bombs for maximum damage.
Area 1 Movement Pattern

In Area 1, Kulve Taroth teleports when she enters a hold in the area and she will emerge on another hole on the opposite side of the map. You can always predict where she will appear as shown in the image above.
Terrain Advantage
If you or any of your teammates are using the hammer or the dual blades as a weapon, you can fight near the slopes to extend your combos for better damage efficiency.
Second Run Tips (Area 3)

There are three collapsable rocks in area 3 that you can utilize to deal with massive damage to Kulve Taroth without having to attack her directly.
However, if you already have a high tracking level, there is no need for this environmental hazard to be used.
Second Run Tips (Area 4)
After moving to the final area, make sure that your team is using sleep or blast affinity weapons since they are extremely useful against Kulve Taroth. Keep in mind that Kulve Taroth has a high tolerance against sleep, make sure that only use it on this final phase since it will be pretty hard to do it again for a second time.
Enraged Kulve Taroth

Once Kulve Taroth is enraged, she will become more vulnerable however, her attacks will become more powerful. It is a good idea to use Temporal Mantle to keep on the pressure without having to worry about dodging, except when avoiding the magma breath.
Master Rank New Moveset
| Normal State | |
|---|---|
| Magma Breath becomes more powerful | Continuous Breath Attacks |
| Enraged State | |
| Enhanced Lava Attack | Front Leg Slam |
Front Leg Slam
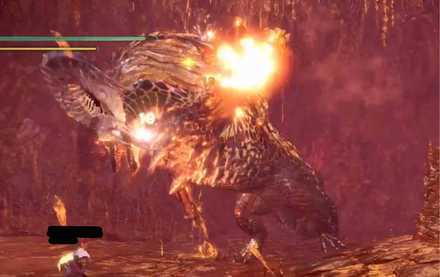
Master Rank Kulve Taroth has added a new front leg attack. Although it can deal high damage, it can be pretty easy to avoid. Since the preliminary movement takes a long time to wind up, you will have time to move away even if you make mistakes.
Faster Movement
Master Rank Kulve Taroth will now move faster than the regular variant of Kulve Taroth. Using the collapsable rocks in area 1 will become so much harder because of this. You will have to time your slinger shot more carefully during this hunt.
Never Return in the Middle of the Quest
Returning to the base will lose all progress that you have managed to complete during the hunt. This can also decrease the number of appraisal weapons that you will receive at the end. It is best that you wait until Master Rank Kulve Taroth leaves and you return to base naturally.
Rocks in Area 1
It is necessary to destroy fifteen or more parts by the time Master Rank Kulve Taroth reaches area 3. in order to make this happen, you must utilize the collapsable rocks in area 1 and use Large Barrel Bombs to deal enough damage.
Weapons from Kulve Taroth
During the enraged state, Kulve Taroth is vulnerable and extremely powerful. Destroying parts during this state will drastically increase the rare appraisal weapons that you can receive at the end of the hunt.
Breaking Kulve Taroth Parts
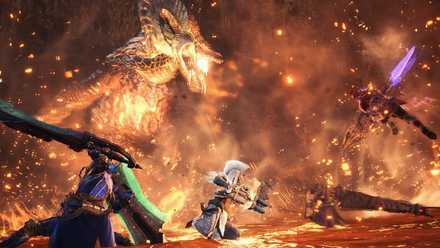
It is said that your team is required to destroy 15 or more parts from Master Rank Kulve Taroth before she enters the enraged state. Breaking multiple parts early in the hunt can easily be achieved since they will automatically regenerate every time Master Rank Kulve Taroth enters a hole in area 1, because of these you can break these parts again to reach the requirement before reaching area 3.
Enraged State
If your team is not able to reach the conditions before Kulve Taroth moves to the next area, the quest will immediately fail and you will have to start all over again. However, if your tracking level is 4 or higher, it is almost impossible to fail the quest since you will have to deal minimal damage to move to the next area with Kulve Taroth.
States and Conditions
| Enraged State | ・Destroy 15 parts |
|---|---|
| Armor Release | ・Destroy 10 parts ・Deal a certain amount of damage |
| Failure Conditions | ・Inflict a certain amount of damage before destroying 15 parts |
Conditions for 8 Rare Drops

Rainbow framed rewards will have a higher chance of getting a rarity 8 appraisal weapons. If you are collecting these weapons, try to achieve the conditions mentioned above to get as many rewards as possible in every Master Rank Kulve Taroth hunt you do.
Quests Where Master Rank Kulve Taroth Appears
| Type | Quest Name |
|---|---|
| Event | M★6 - The Eternal Gold Rush |
Related Links
All Monster Guides

Iceborne Monsters
 Alatreon Alatreon
|
 Banbaro Banbaro
|
 Barioth Barioth
|
 Beotodus Beotodus
|
 Brachydios Brachydios
|
 Fatalis Fatalis
|
 Glavenus Glavenus
|
 Master Rank Kulve Taroth Master Rank Kulve Taroth
|
 Namielle Namielle
|
 Nargacuga Nargacuga
|
 Rajang Rajang
|
 Safi'jiiva Safi'jiiva
|
 Shara Ishvalda Shara Ishvalda
|
 Tigrex Tigrex
|
 Velkhana Velkhana
|
 Yian Garuga Yian Garuga
|
 Zinogre Zinogre
|
Monster Variants
Arch-Tempered Elder Dragons
 Arch-Tempered Velkhana Arch-Tempered Velkhana |
 Arch-Tempered Namielle Arch-Tempered Namielle
|
Monsters by Game
| All Monsters by Game | |
|---|---|
 Iceborne Iceborne |
 Monster Hunter World Monster Hunter World |
Comment
Author
Master Rank Kulve Taroth Weakness and Strategy Guide
improvement survey
03/2026
improving Game8's site?

Your answers will help us to improve our website.
Note: Please be sure not to enter any kind of personal information into your response.

We hope you continue to make use of Game8.
Rankings
- We could not find the message board you were looking for.
Gaming News
Popular Games

Genshin Impact Walkthrough & Guides Wiki

Honkai: Star Rail Walkthrough & Guides Wiki

Umamusume: Pretty Derby Walkthrough & Guides Wiki

Pokemon Pokopia Walkthrough & Guides Wiki

Resident Evil Requiem (RE9) Walkthrough & Guides Wiki

Monster Hunter Wilds Walkthrough & Guides Wiki

Wuthering Waves Walkthrough & Guides Wiki

Arknights: Endfield Walkthrough & Guides Wiki

Pokemon FireRed and LeafGreen (FRLG) Walkthrough & Guides Wiki

Pokemon TCG Pocket (PTCGP) Strategies & Guides Wiki
Recommended Games

Diablo 4: Vessel of Hatred Walkthrough & Guides Wiki

Fire Emblem Heroes (FEH) Walkthrough & Guides Wiki

Yu-Gi-Oh! Master Duel Walkthrough & Guides Wiki

Super Smash Bros. Ultimate Walkthrough & Guides Wiki

Pokemon Brilliant Diamond and Shining Pearl (BDSP) Walkthrough & Guides Wiki

Elden Ring Shadow of the Erdtree Walkthrough & Guides Wiki

Monster Hunter World Walkthrough & Guides Wiki

The Legend of Zelda: Tears of the Kingdom Walkthrough & Guides Wiki

Persona 3 Reload Walkthrough & Guides Wiki

Cyberpunk 2077: Ultimate Edition Walkthrough & Guides Wiki
All rights reserved
©CAPCOM CO., LTD. 2018, 2019 ALL RIGHTS RESERVED.
The copyrights of videos of games used in our content and other intellectual property rights belong to the provider of the game.
The contents we provide on this site were created personally by members of the Game8 editorial department.
We refuse the right to reuse or repost content taken without our permission such as data or images to other sites.
 Acidic Glavenus
 Blackveil Vaal Hazak
 Brute Tigrex
 Coral Pukei-Pukei
 Ebony Odogaron
 Frostfang Barioth
 Fulgur Anjanath
 Furious Rajang
 Gold Rathian
 Nightshade Paolumu
 Raging Brachydios
 Ruiner Nergigante
 Savage Deviljho
 Scarred Yian Garuga
 Seething Bazelgeuse
 Shrieking Legiana
 Silver Rathalos
 Stygian Zinogre
 Viper Tobi-Kadachi


![Everwind Review [Early Access] | The Shaky First Step to A Very Long Journey](https://img.game8.co/4440226/ab079b1153298a042633dd1ef51e878e.png/thumb)

![Monster Hunter Stories 3 Review [First Impressions] | Simply Rejuvenating](https://img.game8.co/4438641/2a31b7702bd70e78ec8efd24661dacda.jpeg/thumb)


