Divine Beast Vah Rudania Dungeon Walkthrough
★ Sequel: Tears of the Kingdom Guide here!
★ Get a head start with our Beginner's Guide
┗ The Best Recipes to Cook | Rupee Farming
★ Shrines Locations | Korok Seeds Locations
★ Explore after the story with our Post Game Guide
This is a dungeon walkthrough for Divine Beast Vah Rudania in The Legend of Zelda: Breath of the Wild (BotW). To learn how to find and activate all terminals, get all the Treasure Chests, and get Daruk's Protection, please read on.
List of Contents
How to Find Divine Beast Vah Rudania
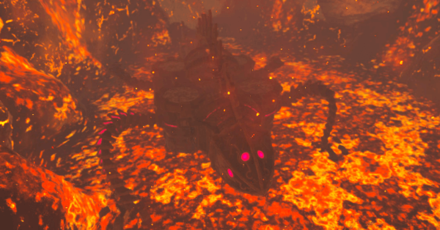
Inside Death Mountain's Crater
| Divine Beast Vah Rudania Location | |
|---|---|
 |
 |
Divine Beast Vah Rudania can be found inside Death Mountain's crater. You can enable its waypoint after you weaken it alongside Daruk's descendant, Yunobo. Death Mountain is located in the Eldin Tower region.
Divine Beast Vah Rudania Rewards
Dungeon Rewards
| Divine Beast Vah Rudania Rewards | ||
|---|---|---|
| Heart Container | Daruk's Protection | |
Divine Beast Vah Rudania Dungeon Walkthrough
Guide Overview
| Divine Beast Vah Rudania Guide |
|---|
|
|
Activate the Guidance Stone
| Objective | |
|---|---|
| 1 | 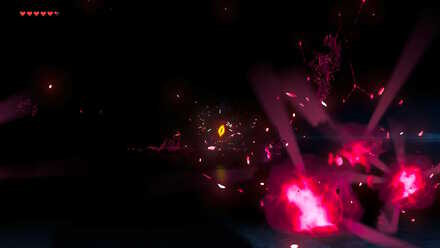 The entrance will shut once you go in, leaving the room pitch black. Shoot the two eyeballs on opposite sides of the wall, and one more on the ceiling. |
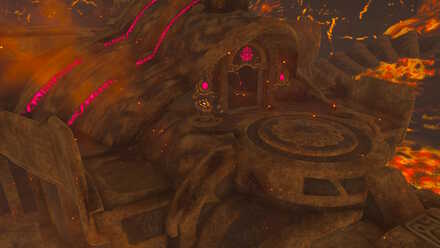
| 2 | 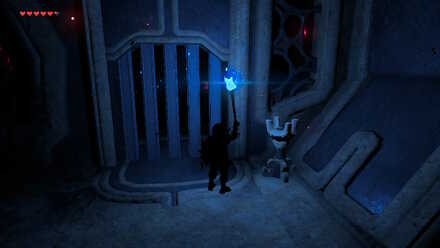 Light your torch with the Blue Flame and move forward to the top right corner of the room. Light the lantern by the side to open the locked gate. |
| 3 | 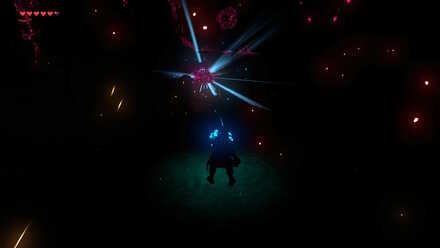 In the next room, there will be a Guardian Scout I. You will be able to see it easily because its body lights up in the dark. There will also be four more eyeballs. Three in the room you are currently in, and one more in the room to the right. Destroy them with your bow. |
| 4 | 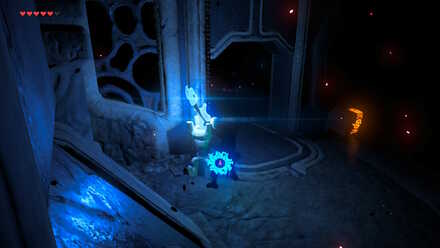 Light your torch with the blue flame and move forward to the top left corner of the room. Light the lantern by the side to open the locked gate leading to the Guidance Stone. |
| 5 |  Examine the Guidance Stone to get the map of Vah Rudania. At this point, you will also be able to rotate the Beast's body by 90 degrees by opening the map. The ceiling will also open up, brightening up the place. |
Activate Terminal 1
| Objective | |
|---|---|
| 6 | 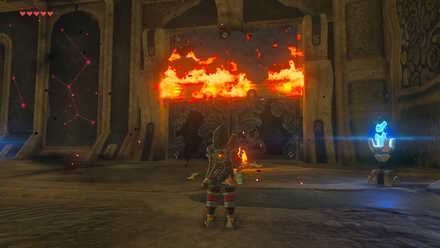 Go back to the first room, and on the right side is a metal gate, barred by a wooden plank. Use a Fire Arrow (or better yet, light an arrow with the Blue Flame) to burn the plank on the gate. |
| 7 | 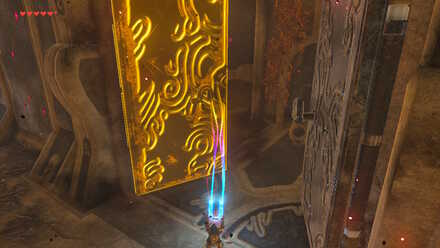 Use Magnesis on the gates to pull them open, revealing a terminal. |
| 8 | 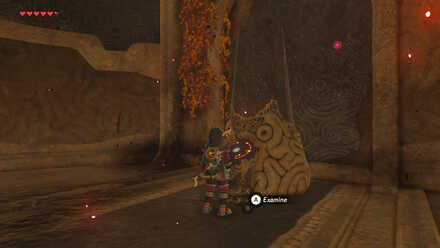 Examine the first terminal to activate it. |
Activate Terminal 2
| Objective | |
|---|---|
| 9 | 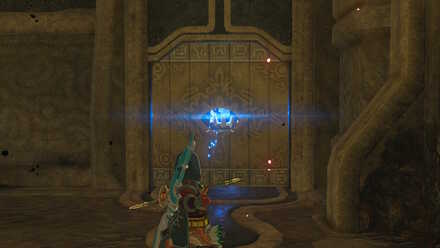 In the same room as the first terminal, go to the lower left part of the room to find a sealed gate with a hole. Across the hole is an unlit lantern. Shoot a Blue Flame-lit arrow through it to open the gate. |
| 10 | 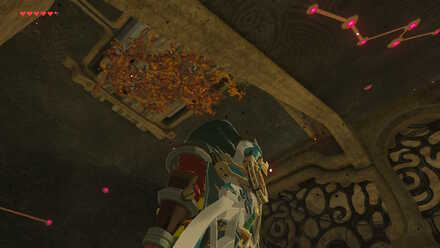 In the room inside, walls of flames cover the path to the second terminal. Look to the ceiling to the left to see leaves that you can burn. A metal crate will fall. |
| 11 | 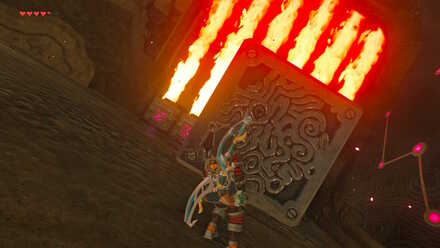 To use the metal crate effectively, rotate Vah Rudania first by 90 degrees. To do so, press the minus button (-) to open the map, and use the left control stick to choose where the Beast will move. Press A to confirm, and press B to execute. |
| 12 |  Now, you can use Magnesis on the metal crate to block the wall of flames, so you can pass through. |
| 13 |  The terminal will be on the wall, so rotate the beast again by 90 degrees. |
| 14 | 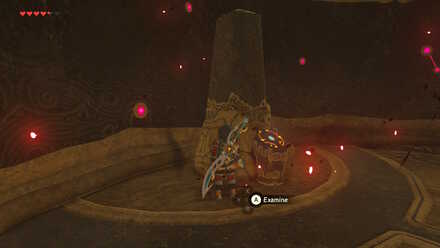 Activate the second terminal. The wall of flames will also be disabled at this point. |
Activate Terminal 3
| Objective | |
|---|---|
| 15 | 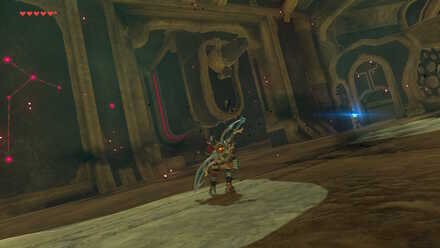 Go back to the main rooms, and move on to the second room. You will see the third terminal against the left wall. |
| 16 | 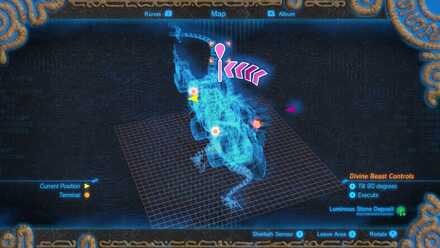 Position yourself in front of the terminal, and open up your map to rotate the Beast. |
| 17 | 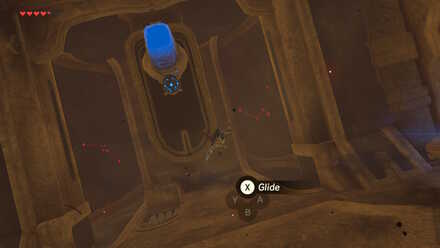 While the Beast rotates, time your jump to be able to get to the second terminal. If you fail, just rotate the Beast and try again. |
| 18 | 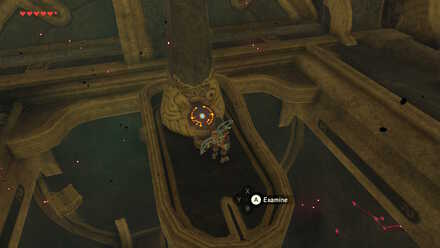 When you get to the platform, activate the third terminal. |
Activate Terminal 4
| Objective | |
|---|---|
| 19 | 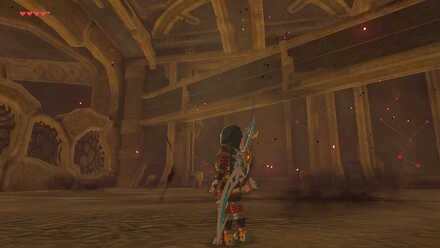 Look up to see a long pillar extending to the other side. Go back to the first room, and rotate Vah Rudania to get to the ramp. |
| 20 | 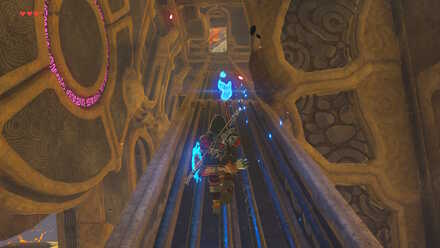 Before you go up the ramp, light a Torch with a Blue Flame then carry it with you to the ramp that leads outside. |
| 21 | 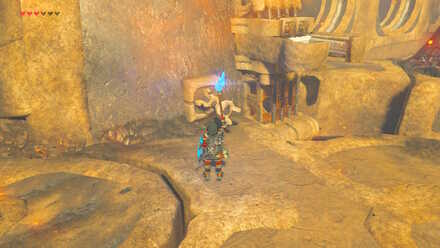 Once you get outside, turn left and look below to see an unlit lantern. Go down, and light it. This will open up the gate that keeps a small ball from sliding through a tunnel. This small ball is crucial to unlocking the gate that leads to the next terminal. |
| 22 | 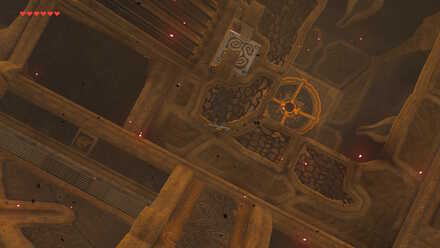 Get back to the ramp, rotating the Beast if you need to, and walk to the end where you can see a hole for a ball at the bottom. |
| 23 |  Use Magnesis to lift the blocker, so that the ball can go through. Make sure that the ball goes securely inside the hole below so that the locked gate can open. |
| 24 |  Activate the fourth terminal. |
Activate Terminal 5
| Objective | |
|---|---|
| 25 | 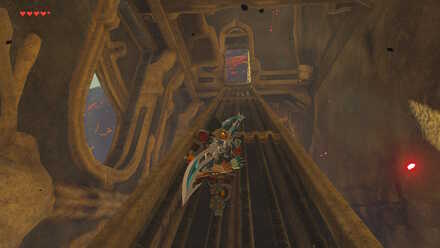 Rotate the Beast to be able to go back to the first room. Get back on the ramp and go up to get to the last terminal. |
| 26 | 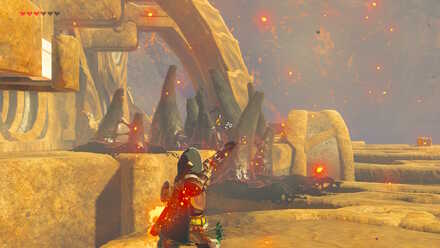 Go back to the lantern, and destroy the two eyeballs just in front of you. |
| 27 | 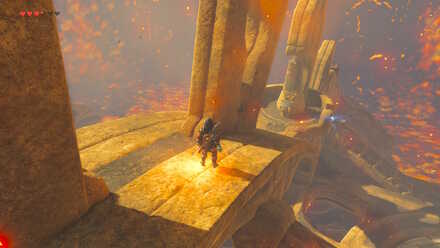 From the lantern, get on the third platform found on the side of the Beast, and rotate the Beast to get to the terminal's platform. |
| 28 | 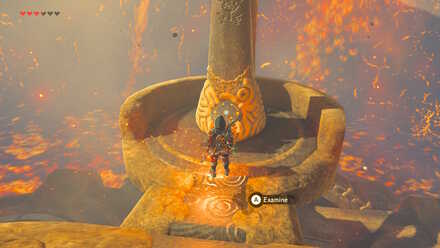 Carefully make your way to the fifth and last terminal, and activate it. |
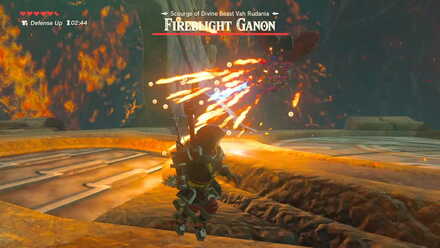
Defeat Fireblight Ganon
| Objective | |
|---|---|
| 29 | 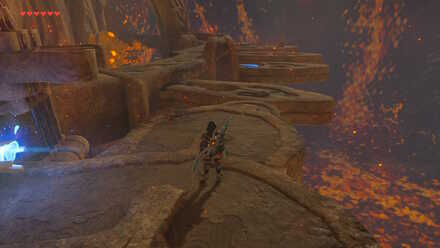 The main control unit is found on top of Vah Rudania. To get there, simply get to the Beast's side and jump off to its back. |
| 30 | 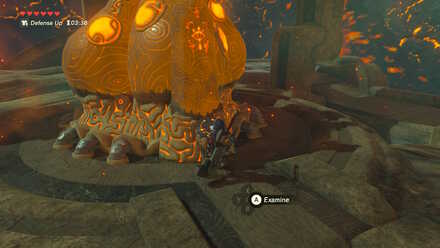 Make sure you are prepared at this point because you will be facing Fireblight Ganon. You are free to leave to prepare and come back when you are ready. |
| 31 |  Defeat Fireblight Ganon who wields flames and a sword. |
| 32 | 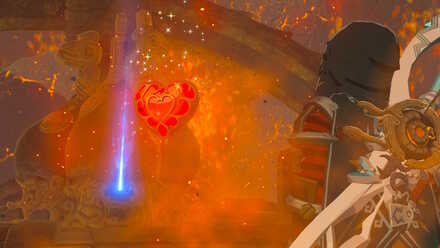 After the battle, you will receive a Heart Container, as well as the divine power, Daruk's Protection. |
| 33 | 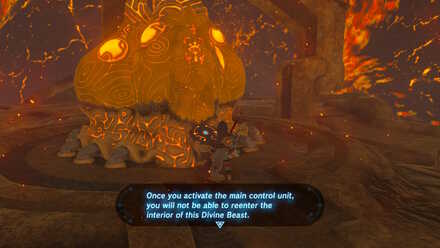 Use the terminal to go back to Goron City. Report back to Goron Boss Bludo to tell him the news. |
How to Beat Fireblight Ganon
Fireblight Ganon Attacks
 Forward Slash |
 Side Slash |
 Spin Attack |
 Small Fireballs |
 Protective Barrier |
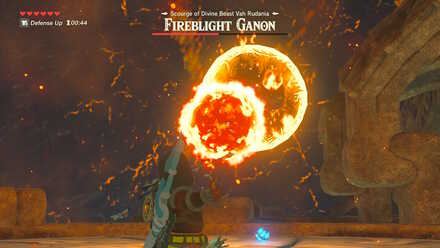 Big Fireball |
Small Fireballs |
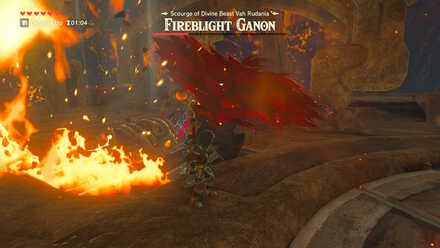 Flame Slash |
 Laser |
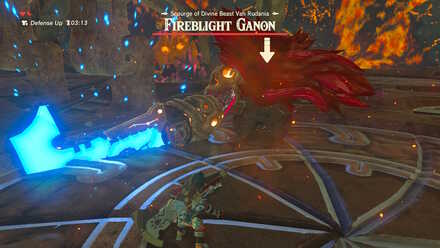
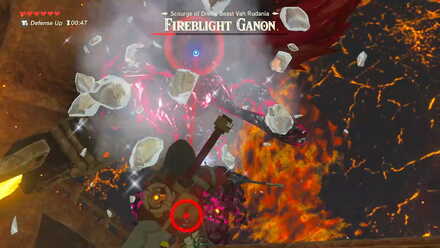
Like all Ganon fights, this battle has two phases. Fireblight Ganon's attack pattern will change after you get him down to 50%, so watch his moves carefully. In the second phase, Fireblight Ganon will float out of melee range, so knock him down with Bows and Remote Bombs. Like Guardians, try to aim for his eye.
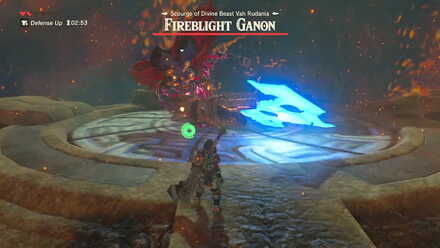
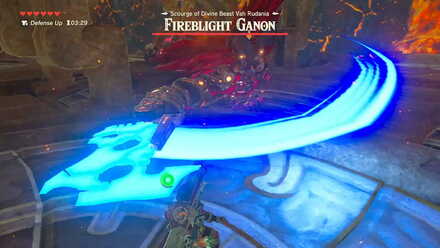
We recommend using Ice Arrows to exploit his weakness and deal huge amounts of damage! Using Ice arrows can also stun him, interrupting his attacks.
How to Get the Treasure Chests in Divine Beast Vah Rudania
|
|
Treasure Chest 1
| Treasure Chest 1 Walkthrough | |
|---|---|
| 1 | 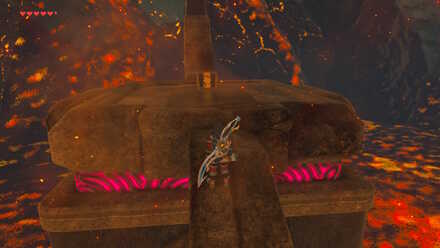 Before you go inside Vah Rudania, you can turn around and make your way to the end of Vah Rudania's tail. You can find a Treasure Chest containing an Ancient Screw. |
Treasure Chest 2
| Treasure Chest 2 Walkthrough | |
|---|---|
| 1 |  In the first room, there are 3 Treasure Chests that you can get by destroying the eyeballs on the walls and ceiling. They contain a Dragonbone Boko Club, a Torch with high durability, and 5 Ice Arrows |
Treasure Chest 3
| Treasure Chest 3 Walkthrough | |
|---|---|
| 1 | 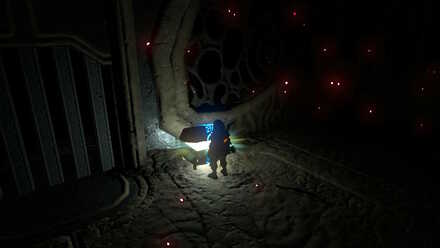 By destroying the eyeballs in the second room, you will get three more Treasure Chests containing a Knight's Bow, and 2 sets of Arrow x5. The last Chest can be found in the room to the right. |
Treasure Chest 4
| Treasure Chest 4 Walkthrough | |
|---|---|
| 1 | 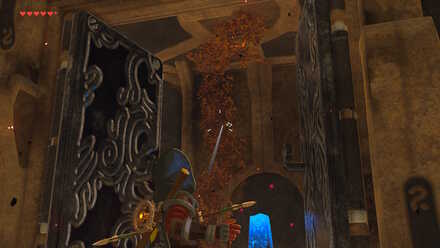 Look up the first terminal to see a Treasure Chest covered by leaves. Light the leaves on fire to bring the Chest down, which contains an Ancient Gear. |
Treasure Chest 5
| Treasure Chest 5 Walkthrough | |
|---|---|
| 1 | 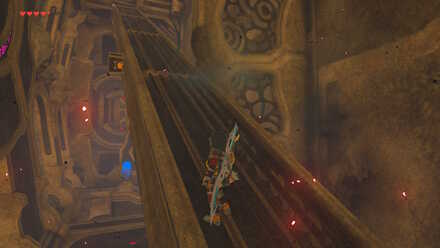 On the left side of the ramp found in the first room is a Treasure Chest containing a Knight's Bow. To get it, rotate the Beast while you are on the ramp, and slowly walk to the left while it rotates. |
Treasure Chest 6
| Treasure Chest 6 Walkthrough | |
|---|---|
| 1 | 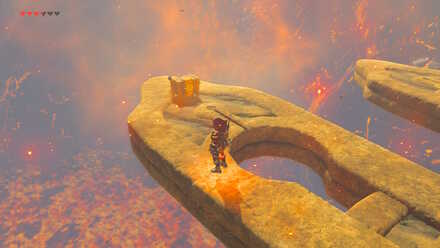 Go up the ramp, turn left, and go down. You will see a Treasure Chest containing an Ancient Core. Carefully walk to it to get it. To get out, simply rotate the Beast. |
Treasure Chest 7
| Treasure Chest 7 Walkthrough | |
|---|---|
| 1 | 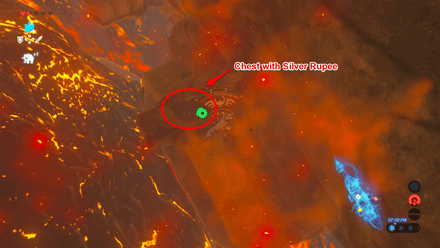 Go up the ramp and exit the Beast and make you way to its front legs, destroy the eyeball in the way. From there, carefully glide down while the Beast is on its side. You will see a small door you can pass through to a room with a Treasure Chest containing a Silver Rupee. Open the locked gate, and you will exit back inside Vah Rudania. |
Divine Beast Vah Rudania Tips and Tricks
Stock Up on Ice Arrows
Prepare your bows and arrows on the way. You should be able to get a lot of Ice Arrows from Treasure Chests in the North Abandoned Mine and inside Vah Rudania.
How to Get More Ice Arrows
Use the Remote Bomb
You can equip the remote bomb rune by holding the Up button and then selecting the remote bomb with the right joystick.
Afterward, you can use the bomb by pressing the L button then throw the Remote Bomb by using the R button on Fireblight Ganon when he is in his flame ball form, as this form sucks the remote bomb onto him. Once he sucks the bomb, detonate it by using the L button.
Stock Up on Food and Elixirs
Make sure to cook food and elixirs to gain an advantage in battle. If you have a small number of hearts, consider packing defense-boosting food, or getting a bed and massage to get extra temporary hearts and stamina.
The Best Recipes You Need to Cook
You are Free to Leave the Area Anytime
During your stay in Vah Rudania, you can leave and come back anytime, as you can fast-travel to it. Take note that every time you leave, you will always arrive at the Travel Gate. Press the minus button (-) to open up the map, and press X to leave the area.
If you find yourself in a tough situation against Fireblight Ganon, you can retreat and prepare for your return.
Get Everything Before You Leave for Good
After defeating Fireblight Ganon, and using the main terminal to leave, you cannot come back inside the Divine Beast anymore, so if you want to get all the chests, do so before leaving for good. Check the next section for locations of all the Treasure Chests in Divine Beast Vah Rudania.
Zelda: BotW Related Guides

All BotW Dungeons by Type
| BotW Dungeons | |
|---|---|
| Shrines | Divine Beasts |
| Hyrule Castle | |
List of All Divine Beasts
| Divine Beasts | |
|---|---|
| Divine Beast Vah Ruta | Divine Beast Vah Rudania |
| Divine Beast Vah Medoh | Divine Beast Vah Naboris |
| Divine Beast Tamer's Trial | |
Comment
Author

The Legend of Zelda: Breath of the Wild Walkthrough & Guides Wiki
Divine Beast Vah Rudania Dungeon Walkthrough
Rankings
- We could not find the message board you were looking for.
Gaming News
![Neverness to Everness (NTE) Review [Beta Co-Ex Test] | Rolling the Dice on Something Special](https://img.game8.co/4414628/dd3192c8f1f074ea788451a11eb862a7.jpeg/show)


Popular Games

Genshin Impact Walkthrough & Guides Wiki
Honkai: Star Rail Walkthrough & Guides Wiki
Arknights: Endfield Walkthrough & Guides Wiki
Umamusume: Pretty Derby Walkthrough & Guides Wiki
Wuthering Waves Walkthrough & Guides Wiki
Pokemon TCG Pocket (PTCGP) Strategies & Guides Wiki
Abyss Walkthrough & Guides Wiki
Zenless Zone Zero Walkthrough & Guides Wiki
Digimon Story: Time Stranger Walkthrough & Guides Wiki
Clair Obscur: Expedition 33 Walkthrough & Guides Wiki


Recommended Games
Fire Emblem Heroes (FEH) Walkthrough & Guides Wiki
Pokemon Brilliant Diamond and Shining Pearl (BDSP) Walkthrough & Guides Wiki
Diablo 4: Vessel of Hatred Walkthrough & Guides Wiki
Super Smash Bros. Ultimate Walkthrough & Guides Wiki
Yu-Gi-Oh! Master Duel Walkthrough & Guides Wiki
Elden Ring Shadow of the Erdtree Walkthrough & Guides Wiki
Monster Hunter World Walkthrough & Guides Wiki
The Legend of Zelda: Tears of the Kingdom Walkthrough & Guides Wiki
Persona 3 Reload Walkthrough & Guides Wiki
Cyberpunk 2077: Ultimate Edition Walkthrough & Guides Wiki


All rights reserved
© 2020 Nintendo. The Legend of Zelda, Wii U, and Nintendo Switch are trademarks of Nintendo.
The copyrights of videos of games used in our content and other intellectual property rights belong to the provider of the game.
The contents we provide on this site were created personally by members of the Game8 editorial department.
We refuse the right to reuse or repost content taken without our permission such as data or images to other sites.