
This survey will take about 1 minute.
Your answers will help us to improve our website.
Rune Factory 5 (RF5)
Rigbarth Maze Walkthrough and Guide
★ Follow along with our Story Walkthrough.
☆ Build your bonds by giving the best gifts for each character!
★ Learn how dishes are prepared in our Cooking Guide.
☆ Wield the strongest types of weapons in combat.
★ Earn SEED Points to develop and improve town.
☆ Capture Wanted Monsters to increase your SEED Rank!

Rigbarth Maze is a post-game dungeon in Rune Factory 5 (RF5). Read on to learn more about how to unlock and clear Rigbarth Maze, important items to pick up, and strategies for defeating the bosses!
| Previous | Next |
|---|---|
| Calamity's Edge | - |
How to Unlock Rigbarth Maze
Complete the main story

Rigbarth Maze is a post-game dungeon, which means you have to complete the main story first before you can unlock it. The monsters inside Rigbarth Maze are also more powerful than the ones you encountered in SEED Floating Fortress so be sure to prepare before challenging this last dungeon.
Complete Walkthrough and Story Guide
Unlock the dungeon through Saint Eliza
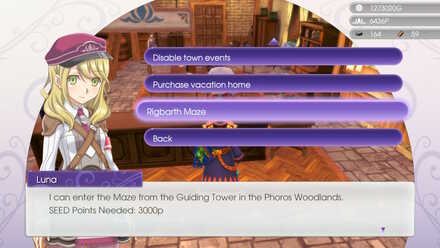
After defeating the final boss and watching the ending scenes, go back to the Rigbarth Outpost and talk to Eliza. She will now have a new option for Extra Directives—Directives that are unlocked by beating the story—at the bottom of the list.
Select Extra Directives and scroll down to the bottom to find the Rigbarth Maze option, which costs 3,000 SEED Points. Purchase the Directive to reveal a portal on the tower at the center of Phoros Woodlands.
Post Game Content and 100 Percent Guide
Enter the Guiding Tower

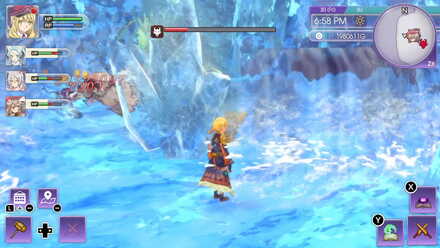
Warp to Phoros Woodlands: Entrance and head east until you reach the tower icon on your map. There's a save point at the entrance if you need it. Once you're ready, press A on the portal and enter the Rigbarth Maze.
Rigbarth Maze 1F to 4F
| Jump to a section! | |
|---|---|
| 1F to 4F | 5F to 9F |
| 10F to 14F | 15F to 20F |
Walkthrough Summary
| 1 | Follow the path to the southeast corner of the map to reach the portal to 2F ★ Clear the platform on the west side and open the chest nearby to obtain Magical Potions. ★ Before you enter the tunnel on the east side of the map, clear the platform north to obtain The Protein and Magical Potions. |
|---|---|
| 2 | Head south to the room at the center of the map and defeat the Blazing Hecatonchire ★ From the room before the boss, head south and clear the room to obtain a Heart Drink and Magical Potions. |
| 3 | Proceed south and turn right to find the yellow switch |
| 4 | Take the other path to find the blue switch |
| 5 | Go back to the room with the pond and run south to reach the portal to 3F |
| 6 | Follow the path to the southeast corner to 4F ★ Clear the room on the northeast corner for a chest containing a Leveliser and Orichalcum. |
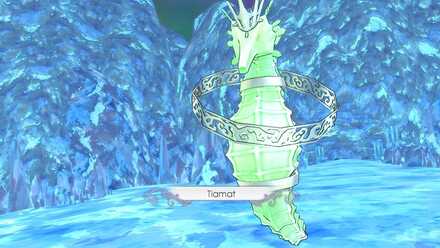
| 7 | Head south and defeat Tiamat |
| 8 | Use the portal nearby to move to 5F |
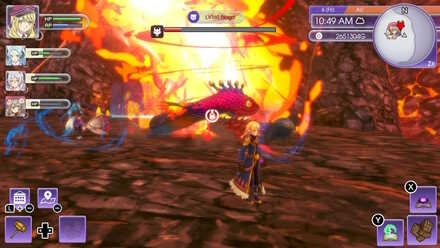
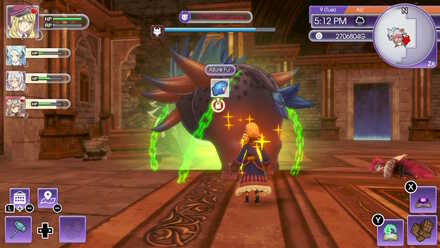
How to Beat Blazing Hetacochire
 |
| Battle Tips |
|---|
| ・Back away when it starts stomping ・Ground slam attack has a second shockwave |
Ground slam attack has a second shockwave
Most of Blazing Hecatonchire's attacks are telegraphed and can be avoided by staying and attacking from behind. However, when the boss slams the ground and makes a small shockwave, quickly dash out as this will be followed immediately by a much larger shockwave.
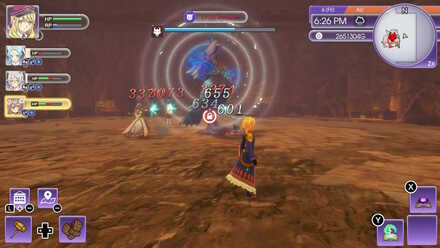
Defeating the Yellow Dragons
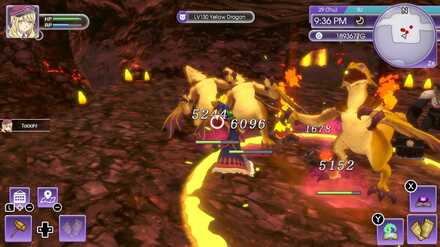
The Yellow Dragons that you encounter starting on Rigbarth Maze 3F have ridiculous defense stat that even your 1500 ATK character will deal 0 damage with regular attacks.
The best way to pierce through their crazy DEF is to use a strong fist weapon like the Fists of Light.
| Weapon | Materials |
|---|---|
| Fists of Light Skill Level: 53 |
Orichalcum Light Crystal x2 Big Crystal |
You can craft this weapon even without the recipe as long as your Forging skill is around 53.
With a fist weapon equipped, punch one of the dragons once and you should be able to grab it by pressing the A button. Slam the dragon to the ground by pressing the A button again to deal thousands of damage to the dragon and the enemies near the impact point. Take note that grab attacks consume RP.
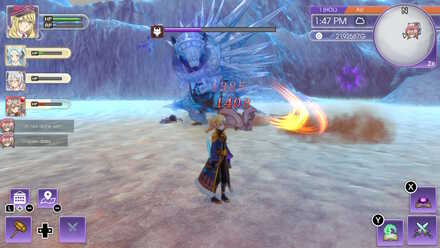
How to Beat Tiamat
 |
| Battle Tips |
|---|
| ・Occasionally heals itself ・Use the ice pillars to block the tsunami |
Use the ice pillars to block the tsunami
Like Leviathan from Meline Crystal Caverns - Depths, Tiamat can also summon a tsunami that will hit the entire platform, which it will telepgraph by spinning around. You can avoid this by hiding behind the icicles that it creates using its tail slam attacks.
Rigbarth Maze 5F to 9F
| Jump to a section! | |
|---|---|
| 1F to 4F | 5F to 9F |
| 10F to 14F | 15F to 20F |
Walkthrough Summary
| 1 | Go around the east side and head north to reach the portal to 6F ★ Defeating the enemies at the southeast corner reveals a chest with a Vital Gummi and an Intelligencer. ★ Clearing the room with the swinging guillotines spawns a chest on the nearby room containing a Pumpkin Flan of the Stars. |
|---|---|
| 2 | Defeat Murder Beast |
| 3 | Pass through the door on the west side to reach 7F |
| 4 | Reach for the portal on the southeast corner to reach 8F ★ Clear the enemies near the southwest curve to reveal a chest with The Protein. |
| 5 | Take the west tunnel and hit the pink switch behind the breakable wall ★ The east tunnel leads to another breakable wall where you can find a chest containing Magical Potions and an Object X. |
| 6 | Go back to the middle path and head south |
| 7 | Break the west wall and hit the green switch |
| 8 | Go back to the middle path and break the east wall to find the red switch |
| 9 | Move two rooms south and defeat Hell's Pincers |
| 10 | Enter the portal on the south end of the map ot reach 9F ★ The chest in front of the portal contains Invinciroids. |
| 11 | From the circular path at the center of the map, enter the large room at the northeast corner and hit the red switch |
| 12 | Clear the large room at the northwest corner to reveal the blue switch |
| 13 | Follow the path on the southwest corner to find the yellow switch ★ Go to the southeast room to find a chest with a Leveliser. |
| 14 | Go past the nearby lowered yellow gate and head south to reach the portal to 10F |
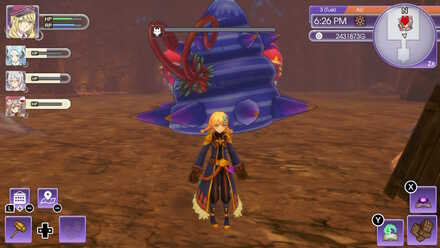
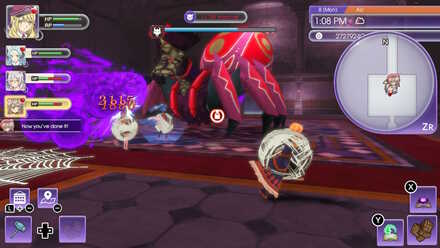
How to Beat Murder Beast
 |
| Battle Tips |
|---|
| ・Avoid the needles on its back ・Swipe attack hits multiple times |
Swipe attack hits multiple times
Since you won't be able to melee this boss from behind because of its spikes, you'll have to attack it up front. Attacking Murder Beast head on still isn't safe, though, as it can execute a double swipe that hits multiple times.
Quickly dash away when it raises its arms to avoid getting murdered by both swipes, or wait for Murder Beast to release all the spikes on its back so you can wrap around it.
How to Beat Hell's Pincers
 |
| Battle Tips |
|---|
| ・Use its shell to block the wave attack |
Use its shell to block the wave attack
Once Hell's Pincers' health bar goes down by a quarter, it will start hurling its shell at you. Without its shell, the boss will have increased speed, so prepare to dodge a lot.
Before it takes its shell back, Hell's Pincers will unleash a wave attack across the room. The waves will have a gap that you can pass through but in case you're far from that gap, you can take cover behind the shell to break the waves.
Be careful of enemies with faint attacks
Monsters with Faint attacks will start appearing at 5F. Faint attacks have a chance to instant KO your character regaradless of your HP and DEF stats. You can take them out from afar using spells, but if you only have melee weapons with you, make sure to have Faint Res.
Eat a Curry Manju
The most efficient way to survive faint attacks is to eat a Curry Manju. This dish gives 100% Faint Res until the effect wears off, which is more than enough time to get to a safer floor.
| Ingredients | Result |
|---|---|
| Flour + Curry Rice (Rice + Curry Powder + Carrot + Potato) |
Curry Manju HP +5000, HP +47%, RP +1000, Fire Res +10%, Dark Res +10%, Faint Res +100% |
You can use any curry dish in place of Curry Rice, but the ingredients for Curry Rice is easier to procure than the other curries.
Wear equipment with Faint Res
Use one of these materials below in upgrading your equipment to give it Faint Res. Take note that your Forging/Crafting level should meet the Difficulty level of these materials or you'll need a ton of RP for the upgrade process.
| Material | Effects |
|---|---|
| Warrior's Proof | STR +58 INT +5 Faint Res +15% |
| Proof of Rank | STR +15 INT +48 Faint Res +15% |
| Big Bird's Comb | ATK +22 Faint Res +50% |
Also, remember that these equipment only reduces the chance of getting one shotted, so still try to avoid taking hits from Faint attacks!
Rigbarth Maze 10F to 14F
| Jump to a section! | |
|---|---|
| 1F to 4F | 5F to 9F |
| 10F to 14F | 15F to 20F |
Walkthrough Summary
| 1 | Proceed to the platform at the center and defeat Naga |
|---|---|
| 2 | Take the south portal to 11F |
| 3 | Head southeast to reach the portal to 12F |
| 4 | Proceed to the next room and defeat Garon |
| 5 | Take the south portal to 13F |
| 6 | Take the south path until you reach the portal to 14F ★ Clear the platform right before the south portal to reveal a chest containing a Leveliser. |
| 7 | Enter the room and defeat Shoebert |
| 8 | Head south to find the portal to 15F |
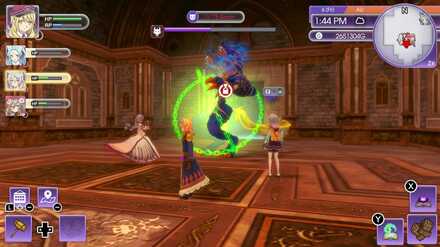
How to Beat Naga
 |
| Battle Tips |
|---|
| ・Has quick frontal attacks ・Stay away when it starts coiling |
Stay away when it starts coiling
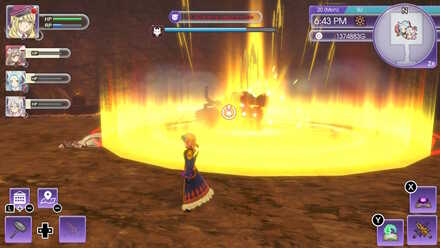
Among all of Naga's attacks, the one you should watch out for the most is its flame pillar attack. Naga will start this attack by coiling quickly and creating a large flame pillar that deals damage on contact. This pillar will also create big fireballs that will crash down the platform.
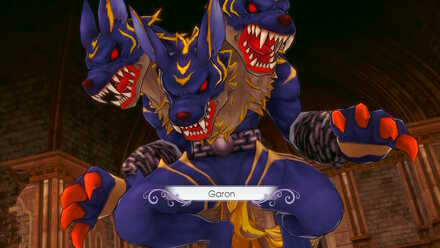
How to Beat Garon
 |
| Battle Tips |
|---|
| ・Has quick dash attacks ・Prevent it from jumping using a spell seal |
Prevent it from jumping using a spell seal
Once Garon's health drops to below 50%, it will start using a jump attack. This attack isn't dangerous at all and a big circle will appear to tell you where Garon will land.
The reason why you should wait for this attack is because you can throw a spell seal to lock Garon in place, allowing you to unleash combos and ultimate attacks for a brief period.
Dragonic Stones start appearing at 13F
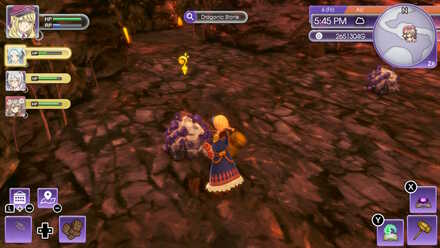
Dragonic Stone ore deposits will start to appear at Rigbarth Maze 13F. These minerals are used in forging and crafting endgame equipment so be sure to check all mining spots from this floor onward!
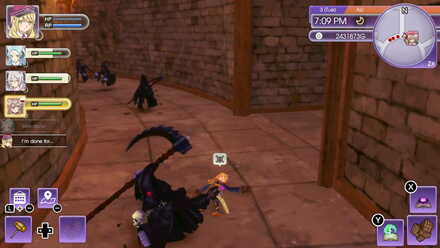
How to Beat Shoebert
 |
| Battle Tips |
|---|
| ・Bring high level allies to draw aggro ・Bring Cure All and other restorative items ・Watch out for its screech attack |
Watch out for its screech attack
Stay away from Shoebert every time it pauses as it can suddenly unleash a multi-hit screech attack that can inflict Paralyze, Fatigue, and Sick.
It is also recommended to bring high leveled party members to draw aggro so you can melee Shoebert safely. Shoebert has quick and high damaging attacks that are difficult to avoid if you're too close.
Rigbarth Maze 15F to 20F
| Jump to a section! | |
|---|---|
| 1F to 4F | 5F to 9F |
| 10F to 14F | 15F to 20F |
Walkthrough Summary
| 1 | Head north to the other portal on the west side of the map to reach 16F ★ Take out the enemies on the lake area to reveal a chest containing a Leveliser. |
|---|---|
| 2 | Walk inside the next room and defeat Arachne |
| 3 | Take the south portal to 17F |
| 4 | Follow the path until you reach the gate with Death Witches and High Pixies, smash the left wall with your hammer, then continue southeast ★ You'll find a chest on the east side containing the recipe for Golden Salmon Meuniere. |
| 5 | Defeat Giga Dragon Mummy before proceeding to the portal to 18F |
| 6 | Proceed to the central room and defeat Death Lance |
| 7 | Continue south to 19F |
| 8 | From the central area, head to the eastmost room first and defeat all enemies inside to find the blue switch ★ The treasure rooms on this floor require specific Giant Crops to unlock. |
| 9 | Do the same to the westmost room to find the red switch |
| 10 | Head all the way to the southmost room and clear the area to find the yellow switch |
| 11 | Go to the central room and take the portal to 20F |
| 12 | Defeat Reincarnation |
| 13 | Open the Resplendent Chests and exit the dungeon |
How to Beat Arachne
 |
| Battle Tips |
|---|
| ・Can inflict Poison ・Webs reduce movement speed |
Webs reduce movement speed
Arachne can create webs on the floor that will slow down anyone who steps on it. Avoid these webs as they will make it harder to dodge Arachne's quick attacks, especially the Poison Breath attack.
Shade Stones are found at 17F
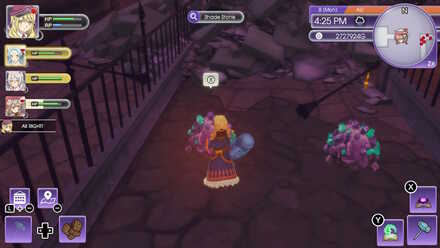
You will start finding Shade Stone ore deposits at the central area of 17F, behind a cracked wall. Upgrading a weapon with a Shade Stone makes your weapon decrease the target's resistances on hit.
How to Beat Giga Dragon Mummy
 |
| Battle Tips |
|---|
| ・Arena continuously drains RP |
Arena continuously drains RP
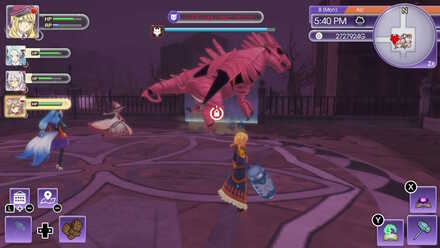
The arena where you fight Giga Dragon Mummy continuously drains your RP. As your RP will go down very quickly, use it all up as soon as possible so it doesn't go to waste. Keep in mind that once your RP drops down to 0, avoid using ultimate attacks or charge attacks as these will take a chunk of your HP instead.
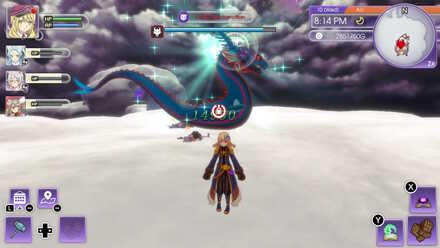
How to Beat Death Lance
 |
| Battle Tips |
|---|
| ・Throw a spell seal to stop it from charging ・Stay back and prepare to dodge when it glows |
Throw a spell seal to stop it from charging
Death Lance will charge around the room for the most part and will be difficult to hit with any attack. When the lock icon disappears, quickly throw spell seals to restrain Death Lance so you can unleash your attacks freely.
It also has a faster and more powerful charge attack that will make it zoom to the other side of the room. When Death Lance starts to glow (yellow aura), quickly back away and prepare to dodge the attack.
Offer Giant Crops to the gates at 19F
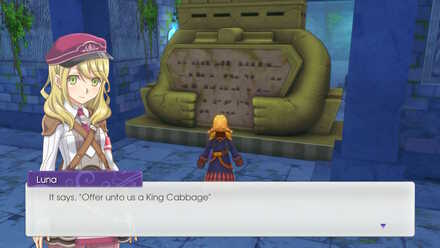
On the four corners of 19F are treasure rooms blocked by gates that requires you to offer a Giant Crop each. Once you have grown the required Giant Crop, harvest and offer it to the corresponding gate to unlock the treasure room.
| Location | Required Giant Crop | Treasures |
|---|---|---|
| Northwest | Doom Pumpkin | Art of Attack, Art of Defense, and Art of Magic recipes |
| Golden Doom Pumpkin | TBD | |
| Northeast | King Cabbage | Iron Geta recipe |
| Golden King Cabbage | TBD | |
| Southwest | Tyrant Turnip | Rune Vest recipe |
| Golden Tyrant Turnip | TBD | |
| Southeast | Princely Potato | Indigo Ribbon recipe |
| Golden Princely Potato | TBD |
After opening the treasure chest behind one of the gates locked by the regular Giant Crops, another gate will appear on your next visit that will require the Golden version of that Giant Crop.
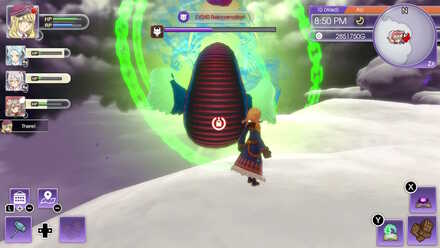
How to Beat Reincarnation
 |
| Battle Tips |
|---|
| ・Heals after each screech attack ・Throw spell seals every chance you get |
Heals after each screech attack
Reincarnation will be at lv240, which is much higher than the last bosses (Death Lance is lv210). Most of its attacks are the same as Uroboros in Cloudheim, but you should watch out for its screech attack the most.
Not only can it deal damage and inflict Paralyze, it will also heal Reincarnation each time, and it will be used very often. If your weapon can't outdamage its healing, escape the battle and craft a stronger weapon.
Throw spell seals every chance you get
Most of Reincarnation's powerful attacks also make it vulnerable to spell seals. Restrain it on every chance you get to stop its attack and get a few seconds to unleash yours.
Obtain Resplendent Chests for defeating Reincarnation
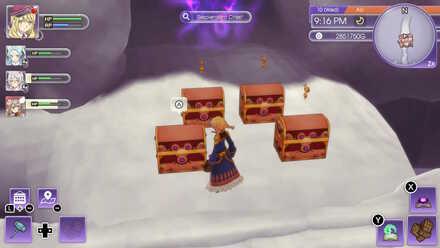
Four Resplendent Chests will appear next to the exit each time you beat Reincarnation. These chests contain endgame items, including materials and equipment.
Tips for Clearing Rigbarth Maze
Prioritize upgrading armor
Since you already beat the final story boss, chances are you already have a weapon powerful enough to deal decent damage to the enemies in the first few floors of Rigbarth Maze. Now you only have to worry about how much damage you can take.
The monsters in the Rigbarth Maze will start at level 120 and will get much stronger as you progress. If you haven't equipped a better armor for a long time, you'll end up consuming a lot of recovery items here.
Prioritize crafting better armor and accessories first until the monsters on the floor you're currently on can only deal manageable damage.
Not all floors have fast travel points

Before you warp back to Rigbarth to restock and take a break, make sure to check your map first to see if you can fast travel to the same floor. Unlike the other dungeons, not all floors in Rigbarth Maze have fast travel points.
The only fast travel points in this dungeon are the Entrance, 1F, 5F, 10F, and 15F.
Rune Factory 5 Related Guides
All Walkthrough Guides
Comment
1  Anonymous almost 3 years
I would like to contribute my findings about the lvl 19 Rigbarth Maze Golden Crops walls chest. The treasure I received were all weapon recipes: - Golden Doom Pumpkin = Gae Bolg; Break Hammer - Golden King Cabbage = Dragon Slayer, Balmung - Golden Tyrant Turnip = Executioner, Rune Edge - Golden Princely Potato = Magic Broom, Hand of God Hope this is helpful
Author

Rigbarth Maze Walkthrough and Guide
Please participate in our site
improvement survey
03/2026
improvement survey
03/2026
Would you assist in
improving Game8's site?
improving Game8's site?

×
We are listening to our users' valuable opinions and discussing how to act on them.
The information collected through this survey will be used for the purpose of improving our services. In addition, the information will only be disclosed a part of a statistic in a format that will not allow identification of personal information.
Begin Survey
Not Now
×
Please rate each item regarding Game8.co's Advertisements.
Amount of Ads
Very Dissatisfied
Somewhat Dissatisfied
Fine
Somewhat Satisfied
Highly Satisfied
Placement of Ads
Timing of Ad Display
Ad Loading Speed
Safeness of Ads
Content of Ads
×
Please rate each item regarding Game8.co's Quality of Articles.
Amount of information
Very Dissatisfied
Somewhat Dissatisfied
Fine
Somewhat Satisfied
Highly Satisfied
Frequency of updates
Speed of new information
Accuracy of articles
Understandibility of articles
Readability of sentences
×
Please rate each item regarding Game8.co's Usability of the Site.
Ease of finding information
Very Dissatisfied
Somewhat Dissatisfied
Fine
Somewhat Satisfied
Highly Satisfied
Loading Speed
Use of Color
Font Size
Visibility of Images
Easy to Understand Layout
×
Please rate each item regarding Game8.co's Message Boards, Comments.
Ease of Writing
Very Dissatisfied
Somewhat Dissatisfied
Fine
Somewhat Satisfied
Highly Satisfied
Readability
Ease in Finding Information
Comment Quality
Comment Quantity
Admin Response
×
Please rate each item regarding Game8.co's Site's new design.
Please rate our site's new design
Very Dissatisfied
Somewhat Dissatisfied
Fine
Somewhat Satisfied
Highly Satisfied
Do you think that the website's design change makes the site easier to use?
Has the new design made it easier for you to find information on the site?
Has the new design improved the overall visual appeal of the site?
How would you rate your overall satisfaction with the new design of the site?
×
How likely are you to recommend Game8 to someone you know?
Very Unlikely
0
1
2
3
4
5
6
7
8
9
10
Very Likely
If you have other opinions regarding potential improvement to the website, please share them with us. We would appreciate your honest opinion.
Note: This is a free response section, so you can proceed without entering anything.
Note: Please be sure not to enter any kind of personal information into your response.
Note: Please be sure not to enter any kind of personal information into your response.
×
Thank You
×
Thank you for participating in our survey! Your answers will help us to improve the quality of our website and services.
We hope you continue to make use of Game8.
We hope you continue to make use of Game8.
Close
Rankings
- We could not find the message board you were looking for.
Gaming News


Popular Games

Genshin Impact Walkthrough & Guides Wiki
Honkai: Star Rail Walkthrough & Guides Wiki
Umamusume: Pretty Derby Walkthrough & Guides Wiki
Pokemon Pokopia Walkthrough & Guides Wiki
Resident Evil Requiem (RE9) Walkthrough & Guides Wiki
Monster Hunter Wilds Walkthrough & Guides Wiki
Wuthering Waves Walkthrough & Guides Wiki
Arknights: Endfield Walkthrough & Guides Wiki
Pokemon FireRed and LeafGreen (FRLG) Walkthrough & Guides Wiki
Pokemon TCG Pocket (PTCGP) Strategies & Guides Wiki


Recommended Games
Diablo 4: Vessel of Hatred Walkthrough & Guides Wiki
Fire Emblem Heroes (FEH) Walkthrough & Guides Wiki
Yu-Gi-Oh! Master Duel Walkthrough & Guides Wiki
Super Smash Bros. Ultimate Walkthrough & Guides Wiki
Pokemon Brilliant Diamond and Shining Pearl (BDSP) Walkthrough & Guides Wiki
Elden Ring Shadow of the Erdtree Walkthrough & Guides Wiki
Monster Hunter World Walkthrough & Guides Wiki
The Legend of Zelda: Tears of the Kingdom Walkthrough & Guides Wiki
Persona 3 Reload Walkthrough & Guides Wiki
Cyberpunk 2077: Ultimate Edition Walkthrough & Guides Wiki


All rights reserved
©2022 Marvelous Inc. All Rights Reserved. Licensed to and published by XSEED Games / Marvelous USA, Inc.
The copyrights of videos of games used in our content and other intellectual property rights belong to the provider of the game.
The contents we provide on this site were created personally by members of the Game8 editorial department.
We refuse the right to reuse or repost content taken without our permission such as data or images to other sites.
Thanks, this really helped!