Volt Forge Walkthrough and Guide
★ Story Walkthrough | Upgrades and Abilities
☆ Characters | Bosses | Puzzles
★ Viewros Map: Energy Tank | Missile Expansion | Shot Expansion
★ Game Details: amiibo Unlocks | How Long to Beat | Switch Edition Differences
This is a guide for the Volt Forge area in Metroid Prime 4: Beyond. Check out how to progress through Volt Forge, as well as guides for any bosses, upgrades, abilities, rewards, and puzzles in the area here.
| Volt Forge Guides | |
|---|---|
| Walkthrough | Exploration Map |
List of Contents
| ◀ Previous Area | Next Area ▶︎ |
|---|---|
| Fury Green | Ice Belt |
Volt Forge Interactive Map
| ・You can view different sections of Volt Forge by selecting a tower from the second dropdown in our sidebar. Click the arrow in the upper left corner to open the sidebar. |
Volt Forge Main Walkthrough
| Note: If you are aiming for a 100% completion, visit our All Missables and Points of No Return page. |
| Volt Forge Main Objectives | |
|---|---|
| 1 | Get Into Volt Forge |
| 2 | Locate the Generator |
| 3 | Return to Top Floor |
| 4 | Activate the Generator in Tower 2 |
| 5 | Transfer to Tower 3 ┣ Boss Battle: Flight Drone MCU ┗ Boss Battle: Sylux |
| 6 | Accomplish the Driving Test |
| 7 | Take the Master Teleporter Key ┗ Boss Battle: Xelios |
| 8 | Exit Volt Forge |
Get Into Volt Forge
| Objectives | |
|---|---|
| 1 |
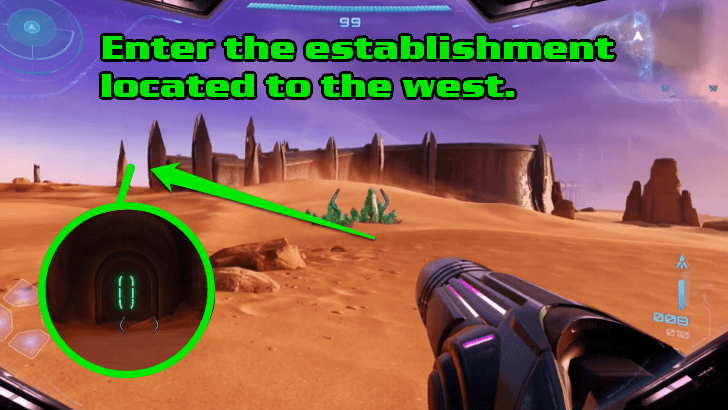 Go to the facility to your left. Walk around behind it to find its entrance. |
| 2 |
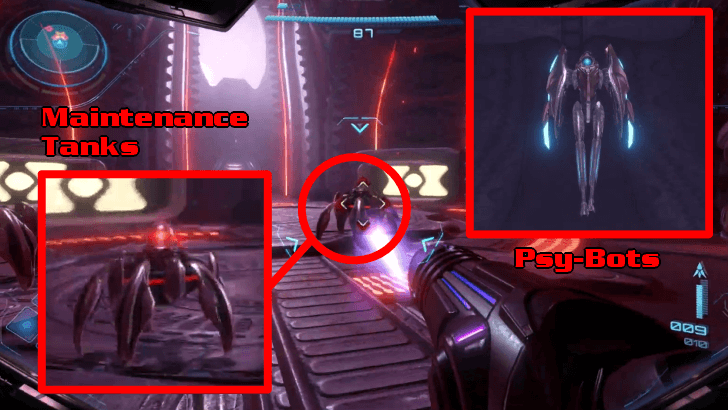
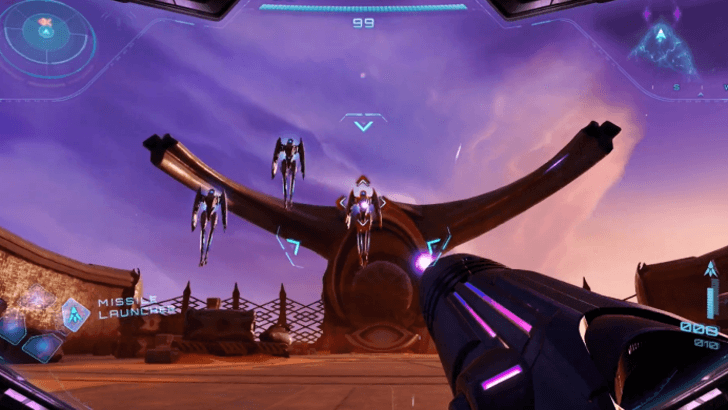 Defeat the Psy-Bot soldiers. Defeat the Psy-Bot soldiers.A cutscene will play where Psy-Bot Soldiers will be launched to your location. Defeat them first before accessing the next area. ▶︎ List of Logbooks and Scans Guide |
| 3 |
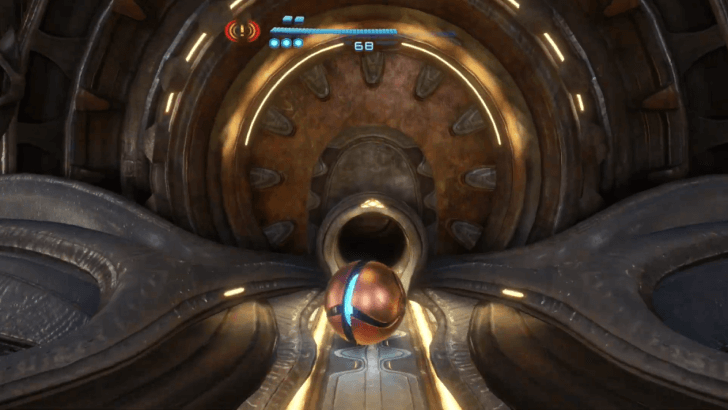
 Look for the open pipe found next to the Vi-O-La Tunnel to get inside. Switch to Morph Ball Mode to get through the pipes. ┗ Toggling Morph Ball Mode |
| 4 |
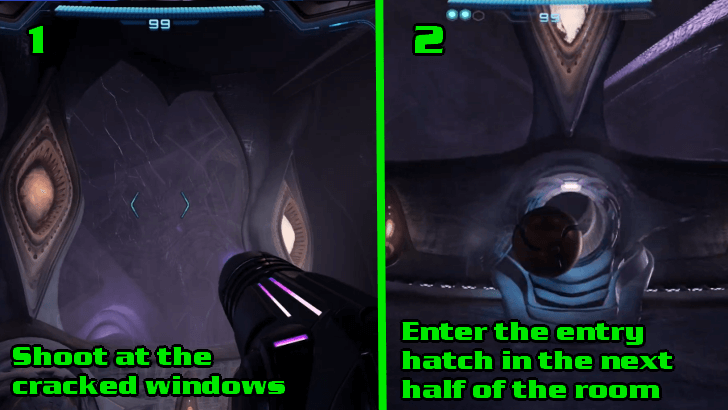 Shoot the cracked windows to access the other half of the room, then hop down and scan the area for an entry hatch. After finding this, hit the hatch in Morph Ball Mode to remove the mesh and enter. |
| 5 |
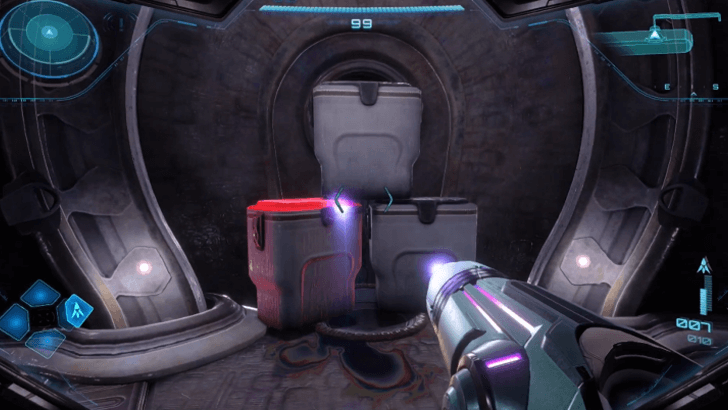 After the cutscene, go up the platform to the left and shoot at the bins blocking another hole. Go through this hole to reach Volt Forge. |
Toggling Morph Ball Mode
To switch to Morph Ball Mode, press the Y button. This is a handy feature to use to sneak in through vents and activate Bomb Slots.
Locate the Generator
| Objectives | |
|---|---|
| 1 |
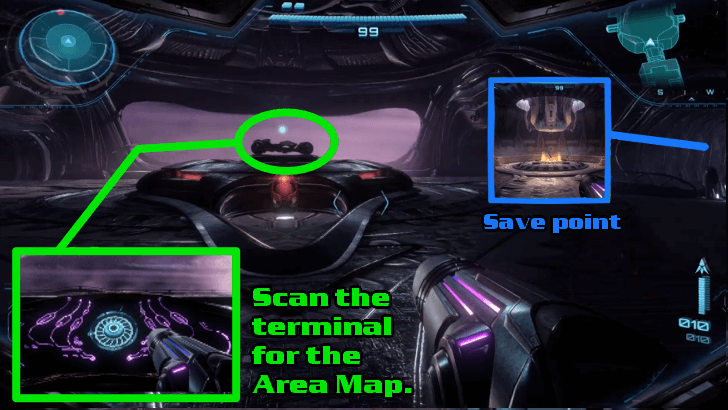 After reaching Volt Forge, keep going onwards until you find the display of the Vi-O-La. Leave this for now and save your game on the right side of the room. Afterwards, scan the terminal by the window to get the Area Map. ┗ Scanning Everything for Information ▶︎ List of Logbooks and Scans Guide |
| 2 |
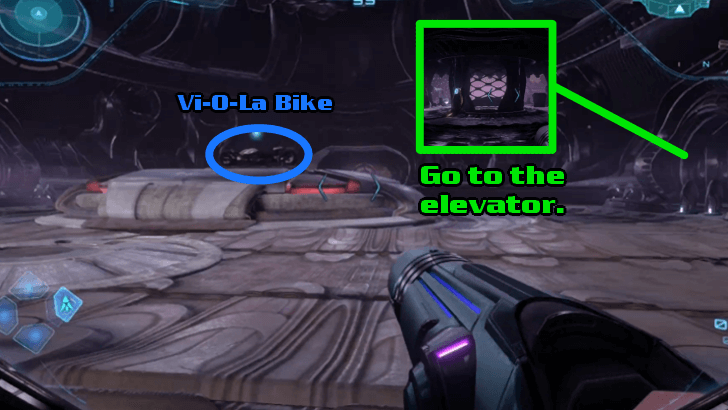 After talking with MacKenzie, you will need to go down to access the generator. Press the - button to see the Area Map. Take the room going to the right from the terminal's perspective and scan the elevator to activate this. |
| 3 |
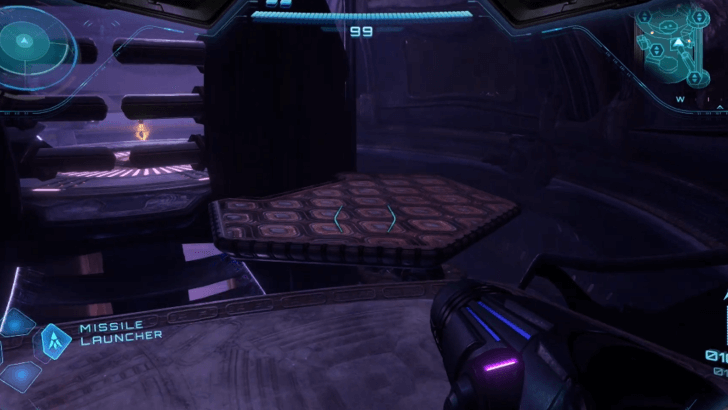 Hop on the Platforms to Reach the Bottom. Hop on the Platforms to Reach the Bottom.From the elevator, keep going onwards until you find a platform. Keep hopping from one platform to another until you reach the bottom floor. |
| 4 |
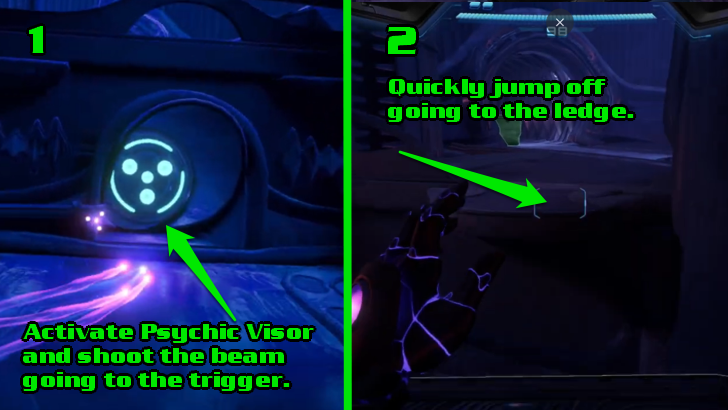 Upon reaching the bottom floor, position yourself on the platform near the ledge on the right. Use the Control Beam to aim this directly at the trigger. All platforms will be raised, but take note that this is timed and they will drop momentarily. ┗ Aim Control Beam ▶︎ Control Beam How to Unlock and Effects |
| 5 |
 Keep following the hallway until you find another elevator. Scan the terminal to activate this, then go left once you reach an intersection. Shoot down the Lock Unit to get to the next room. |
| 6 |
 Defeat the Swarm of Mecha Rats. Defeat the Swarm of Mecha Rats.As you go deeper into the floor, you will spot a reactor swarming with Mecha Rats. Keep charging your beams to eradicate them quickly. After passing through the hallway below, you will reach another elevator. ▶︎ List of Logbooks and Scans Guide |
| 7 |
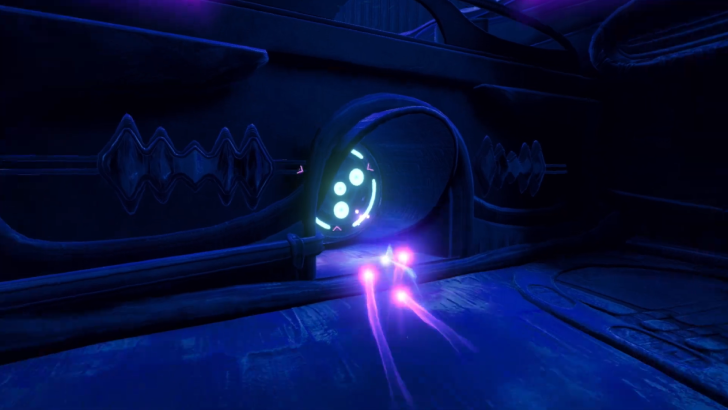
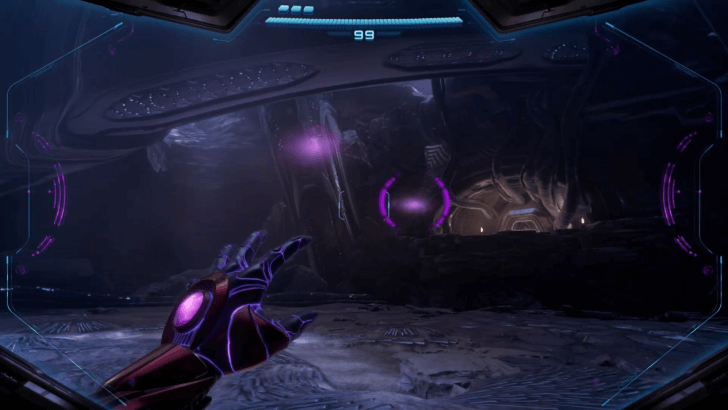
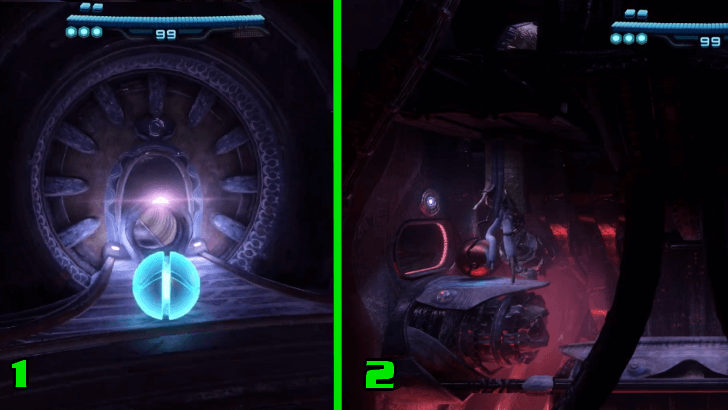 Once you go down through the elevator, go right to find a dark Maintenance Room with a couple of floating Denzards. Take down these creatures and go to the glowing spot with another vent in it. Pass through in Morph Ball form and keep going onwards until you reach the generator area. ▶︎ List of Logbooks and Scans Guide |
| 8 |
 There will be an open area with two Bomb Slots on both paths. Hit these in Morph Ball form on any order to open the tube going to the generator. |
| 9 |
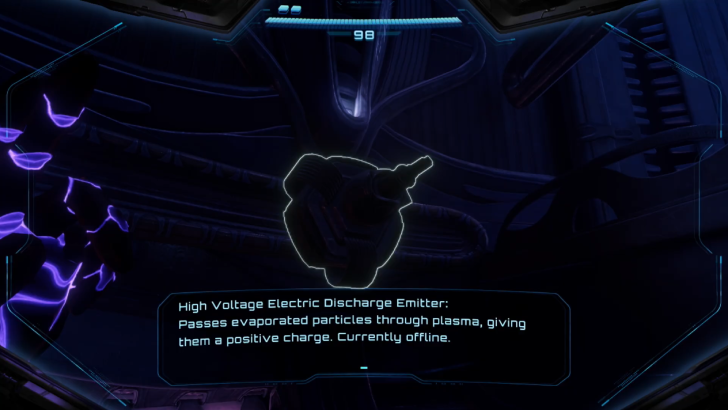
 Roll all the way down the tube line, go behind the generator, and insert yourself in the Bomb Slot. This will activate the generator and turn all signals online. |
Scanning Everything for Information
Make it a habit to scan things around the area. Press and hold the ZL button on an outlined object, creature, or person to add this information to your logbook.
List of Logbooks and Scans Guide
Aim Control Beam
Switch to your Psychic Visor and press the A/ZR button to charge. Release the button to shoot this beam directly to your target.
Control Beam How to Unlock and Effects
Return to Top Floor
| Objectives | |
|---|---|
| 1 |
 Due to the power restoration, the generator will be emitting damaging shockwaves on the tube. Be on the lookout for this by keeping out of its direction as you return to the dark room from earlier. |
| 2 |
 Return to the Maintenance Room. Look for the component printer terminal next to the big structure in the middle of the room to activate this. |
| 3 |
 Look for the second Component Printer with the tire hologram and position yourself on it. The Component Printer will register your identical shape to a tire and place you in the narrow passageway above it. |
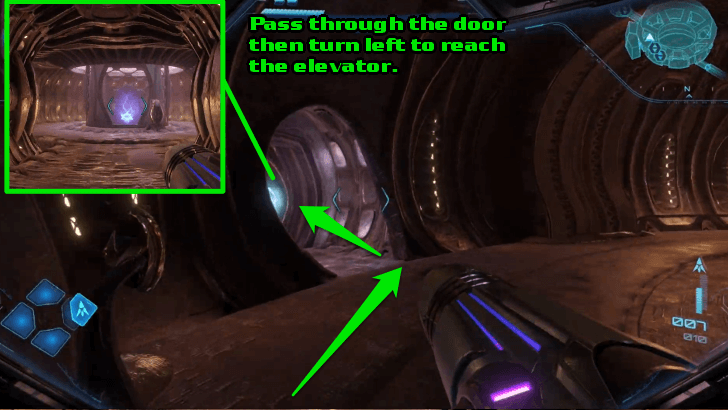
| 4 |
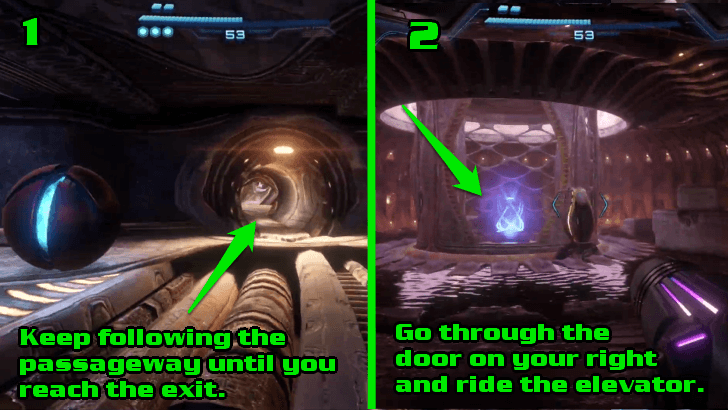 Keep following the passageway's direction until you reach the exit. Turn to your right and go through the door to find the elevator. Examine the hologram to go upwards. |
| 5 |
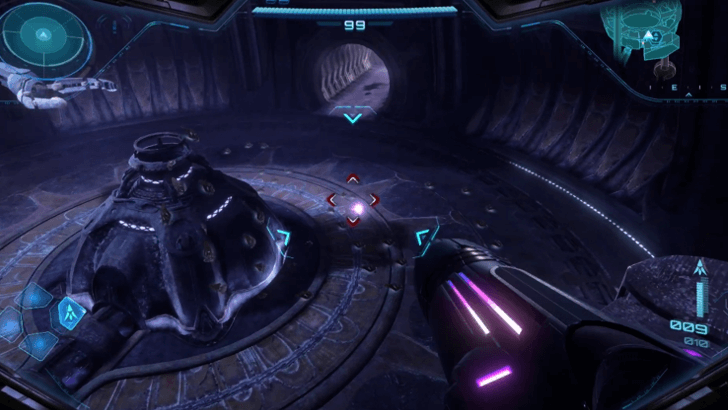
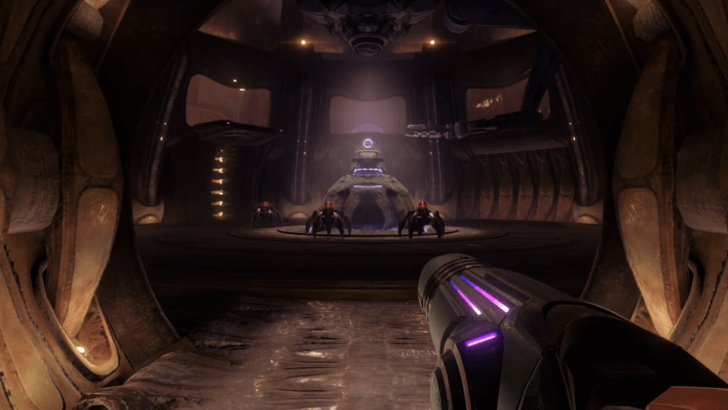 After leaving the elevator, you will find a room with three Maintenance Tanks surrounding the reactor. Defeat them before activating the Bomb Slot connected to the reactor. |
| 6 |
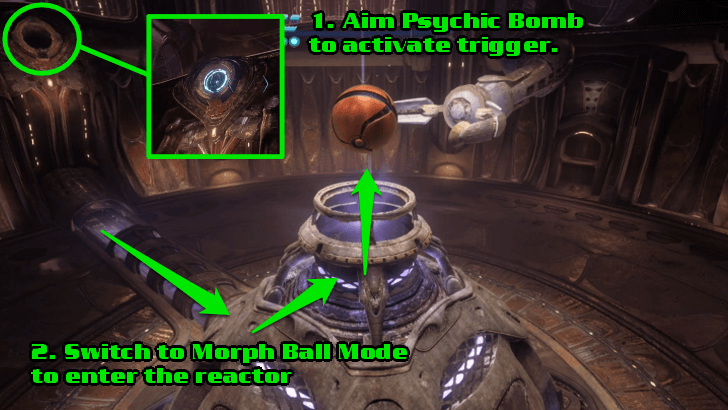 Enter Morph Ball Mode and hold the A/ZR button to form a Psychic Bomb. Afterwards, switch to Psychic Visor and aim your Psychic Bomb at the Bomb Slot by holding the ZL button. Once the tube opens, go back to Morph Ball Mode and enter the reactor. ▶︎ Psychic Bomb How to Unlock and Effects |
| 7 |
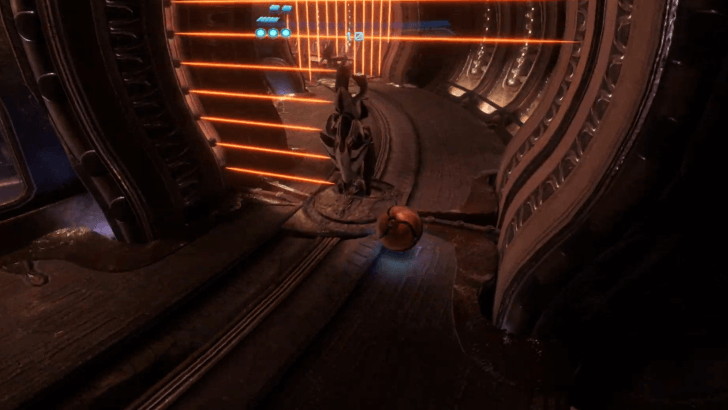 The large robot arm will take you to the upper part of the room. Follow the direction of the lasers, where you can sneak around the blocked off angles whenever a Lamorn Laser-Welding Device stops by. |
| 8 |
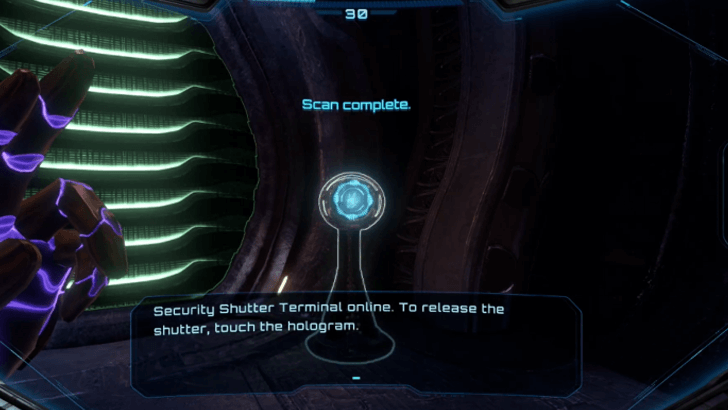 At the end of the hallway, more Maintenance Tanks will attack you. Defeat them before activating the Security Shutter Terminal. Scan this first before the Interact prompt pops up. |
| 9 |
 The door will be accessible after activating the Security Shutter Terminal. Go through this and take the door going to your left to find the next elevator that will take you upstairs. |
| 10 |
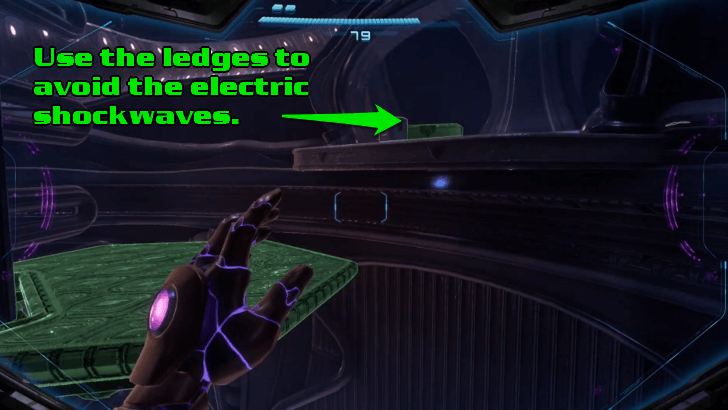 After exiting the elevator, you will find the room with the platforms from earlier. Take the one going to the right and hop off from one platform to another until you reach the top area of the floor. Watch out for the electric shockwaves as these can inflict damage. Use the ledges to avoid them. |
| 11 |
 Once you reach the top area of the room with platforms, take the elevator to reach the topmost floor of the tower. Run to the middle of the room and take the Vi-O-La Suit by activating the terminal below the bike. Having the suit will make it possible for you to drive the Vi-O-La itself. ▶︎ How to Unlock Vi-O-La and Controls |
Activate the Generator in Tower 2
| Objectives | |
|---|---|
| 1 |
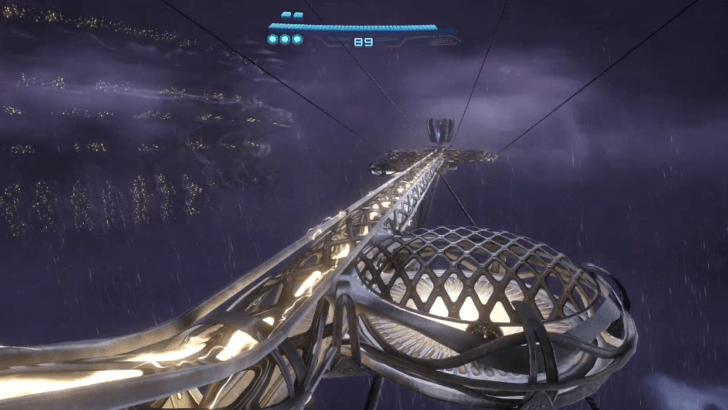
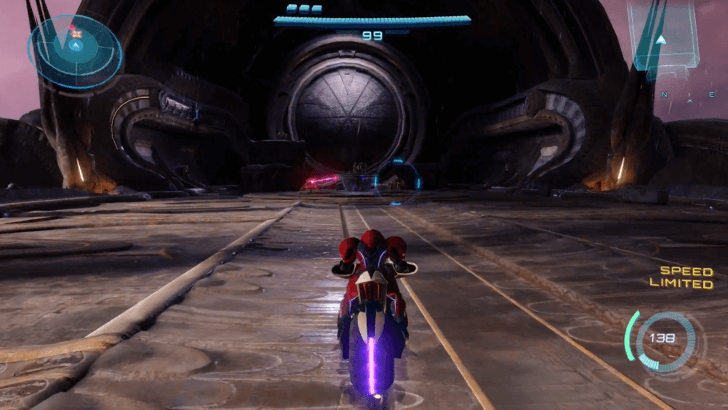
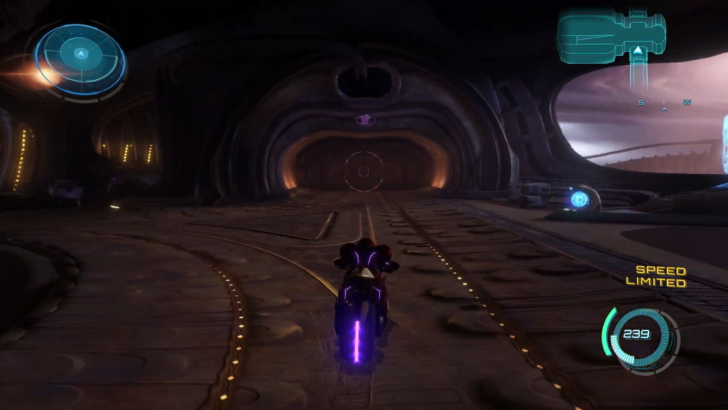
 Press the ZR/R button to accelerate your bike. Once the door opens, zoom your way through the connecting road going to the next tower. Press the ZL/L button to hit the brakes and the + button to get off the bike. |
| 2 |
 While driving the bike, take a stop in Tower 2, then go to the farthest left to access the elevator. |
| 3 |
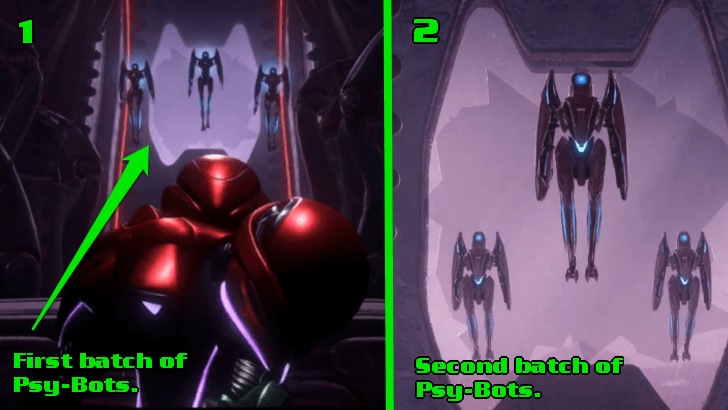 Cross the room to the opposing hallway. Three Psy-Bot Soldiers will arrive to attack you. Afterwards, another batch of three will come over to your location. You will need to defeat them first to access the next area. |
| 4 |
 After riding the elevator, keep going onwards to face another swarm of enemies. The room will be locked out until you defeat them. After defeating the enemies, take the elevator in the next room to descend into the next area. Encountered enemies: ・Maintenance Tanks ・Psy-Bots |
| 5 |
 In the next room, there will be another vent that you can go through in Morph Ball Mode. After passing through the area in the platformer viewpoint, you will reach the generator outside of the tower. |
| 6 |
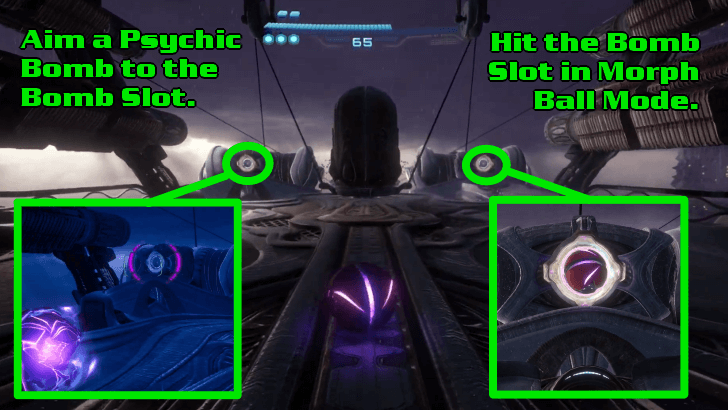 Like the previous generator, there are two Bomb Slots on both sides of the generator. The left Bomb Slot will require you to use a Psychic Bomb to reach this. The same method can be applied to the other Bomb Slot, or you can hit it in Morph Ball Mode instead. Hit them on any order. |
| 7 |
 Enter the newly accessible tube in Morph Ball Mode and go around behind the generator to activate this. Go back to where you came from while avoiding the shockwaves that come by at intervals. |
Transfer to Tower 3
| Objectives | |
|---|---|
| 1 |
 While heading back to the previous area, you will encounter a boss: the Flight Drone MCU. Use Control Beam to aim at the Energy Spheres protecting the Flight Drone MCU's core. You will need to hit all of this within a single turn of Control Beam. Destroy these spheres twice to finish off the enemy. ▶︎How to Beat Flight Drone MCU |
| 2 |
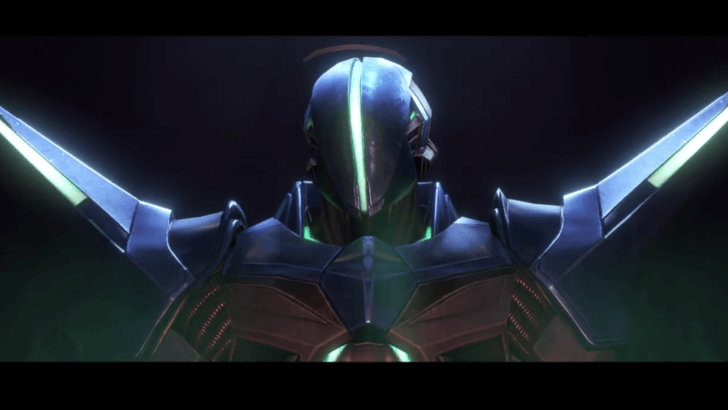
 After going past the area with the platformer viewpoint, you will be facing another boss, Sylux. Sylux does not have any particular weak points, so it's best to keep shooting at him whenever you can. While in his spinning tornado attack, bait him to one of your Morph Bombs in Morph Ball Mode to stun him. ▶︎ How to Beat Sylux (1st Encounter) |
| 3 |
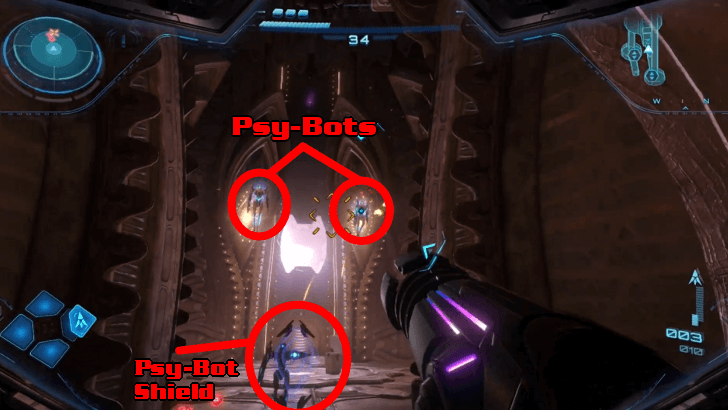 Upon beating Sylux, you can enter the recently accessible elevator room that will take you upstairs. In the next area, you will be faced with a Psy-bot Shield and 2 normal Psy-Bots. Be on the lookout for the Psy-Bot Shield's blind spots and avoid its heavy charges with its electric shield. |
| 4 |
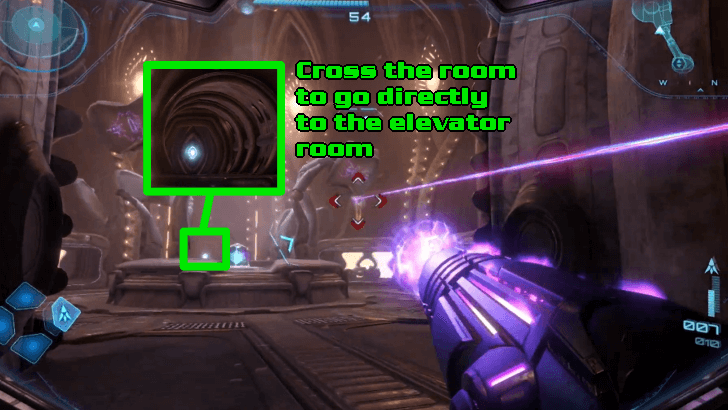 Unlike the previous areas, the next room won't require defeating the Psy-Bots to access the next elevator room. You can skip across this area and take the next elevator going to the topmost floor of the tower. |
| 5 |
 Approach the driving exit and activate the Vi-O-La by pressing the + button. Ride to Tower 3, the final area of Volt Forge. |
Take the Vi-O-La Driving Test
| Objectives | |
|---|---|
| 1 |
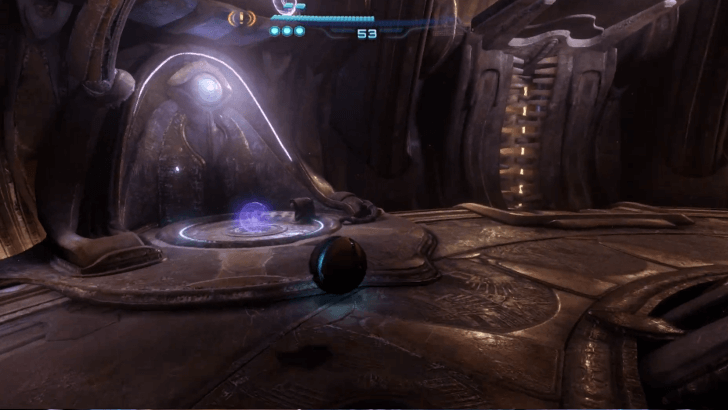
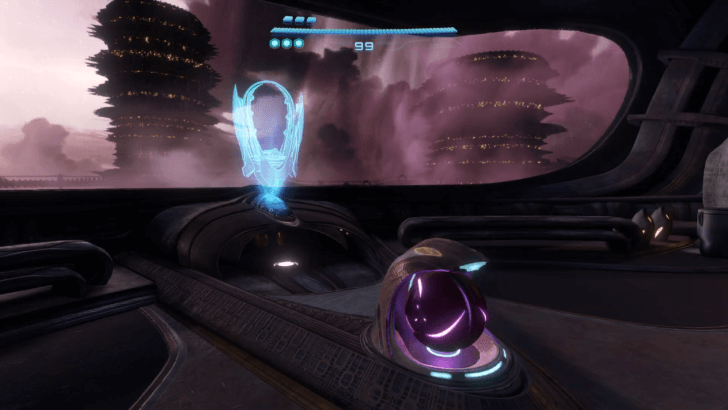
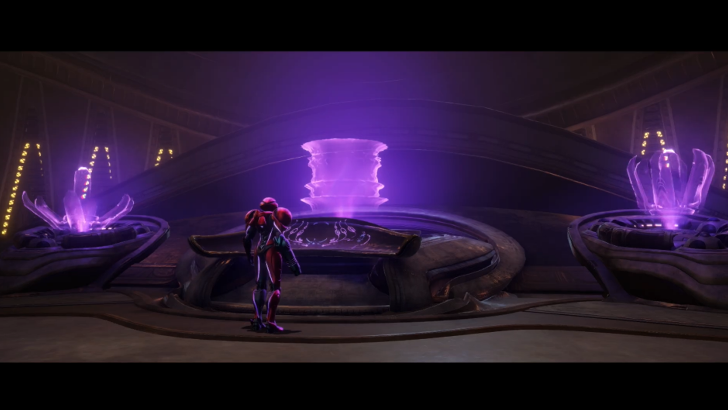 With Towers 1 and 2 online, activating Tower 3's terminal becomes possible. Scan the middle terminal among the three holograms to open the next hidden area. You will also receive the Area Map of Tower 3 afterwards. |
| 2 |
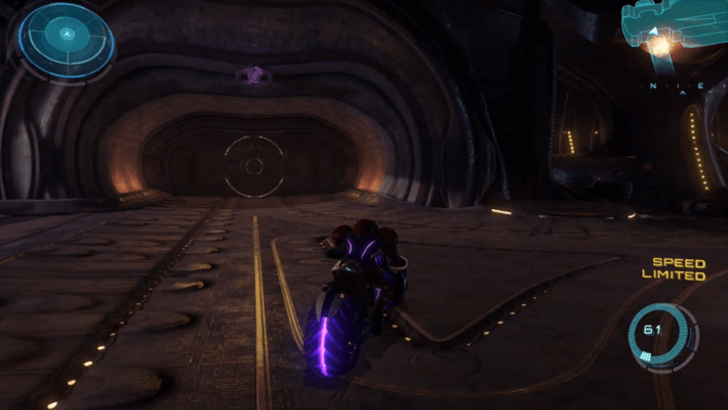
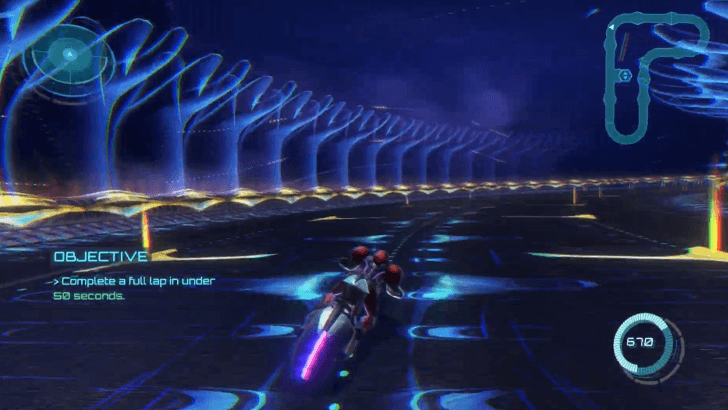 Go down the newly opened underground area to begin the vehicle certification. For the first trial, you will need to complete a full lap within 50 seconds. This is doable as long as you stick to the road course. |
| 3 |
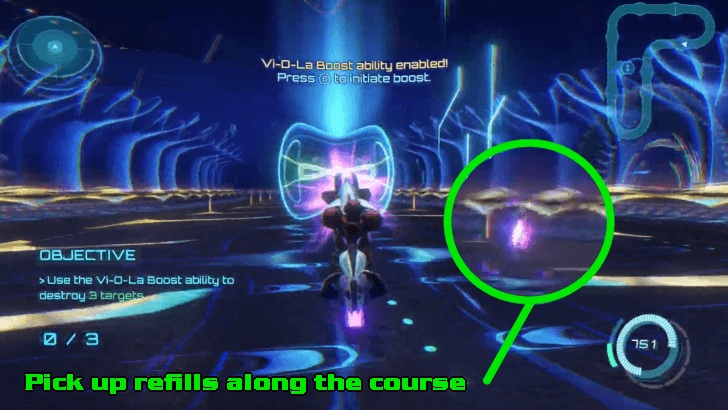 Destroy 3 Targets with the Vi-O-La's Boost. Destroy 3 Targets with the Vi-O-La's Boost.Press the B button to smash the obstacles on the way. Pick up the refills along the driving course. |
| 4 |
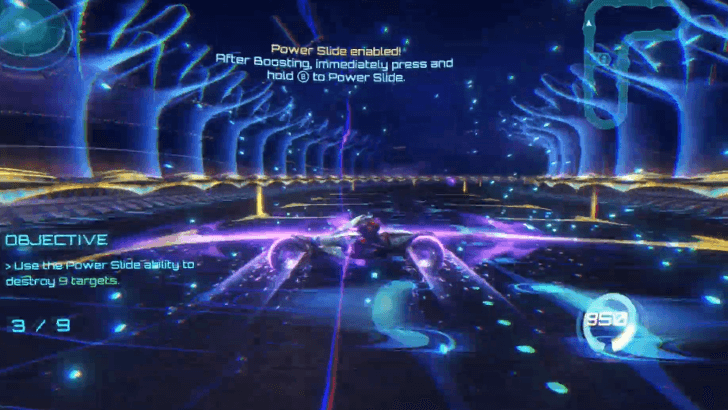 Like the Boost ability trial, there will be a group of obstacles along the way. Activate Boost, then immediately hold the B button to engage the Power Slide ability. Use this skill against the targets while picking up fuel to restore your gauge. |
| 5 |
 Press the ZL button to scan the flying targets in the driving course. Afterwards, press the A button to aim the Vi-O-La's projectiles to destroy these 2 targets. |
| 6 |
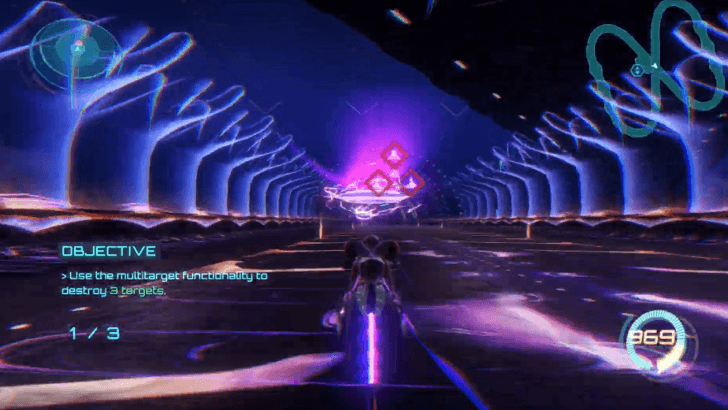 Hold the A button to lock on multiple targets. Release the A button to fire projectiles at them. Keep doing these until you have taken down three groups of targets. |
| 7 |
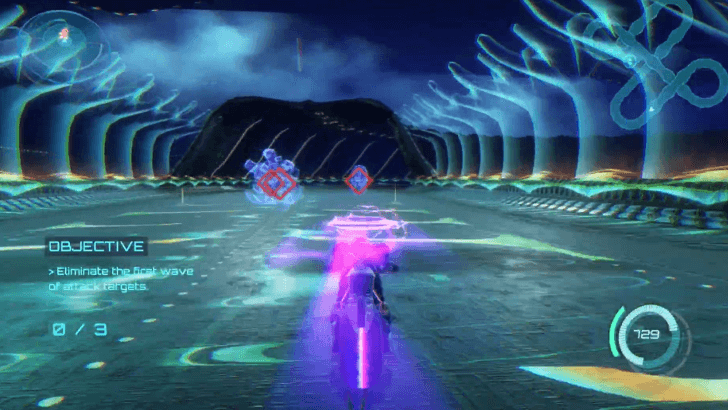 For the final test, you will be asked to eliminate a few targets to accomplish this. There will be three swarms, each containing a group of moving and attacking enemies. |
| 8 |
 After finishing all the trials, an elevator will appear that will let you exit the area. Take this elevator to accomplish your Certification. |
Take the Master Teleportation Key
| Objectives | |
|---|---|
| 1 |
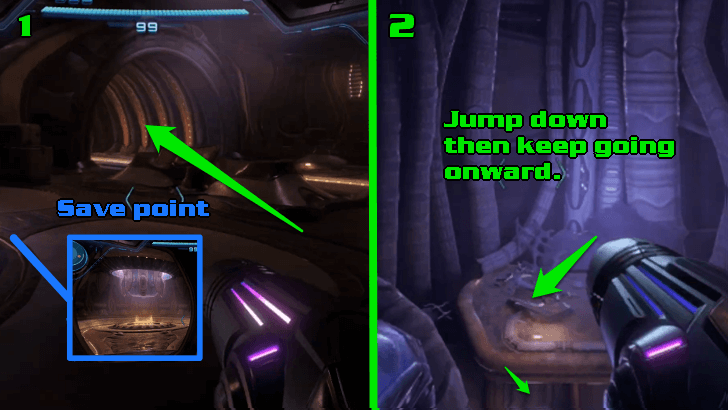 Upon getting off the elevator, you can visit the room to the left to save your game progress. Afterwards, cross the room towards the very end until you see some platforms you can jump onto. Hop onto these platforms until you reach the ground floor. |
| 2 |
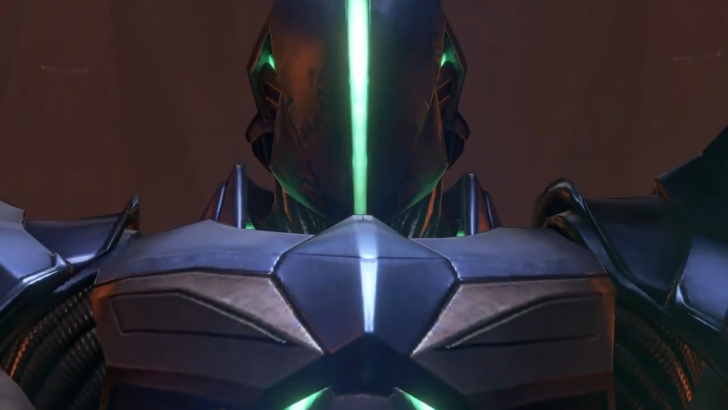
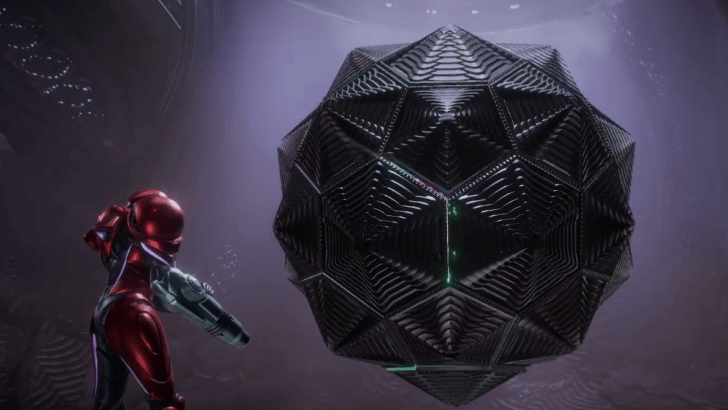 Defeat Xelios, the Final Boss of Volt Forge. Defeat Xelios, the Final Boss of Volt Forge.Keep pressing onwards to find an arena. Jump off the ledge and battle Xelios, the last boss fight in Volt Forge. ▶︎ How to Beat Xelios |
| 3 |
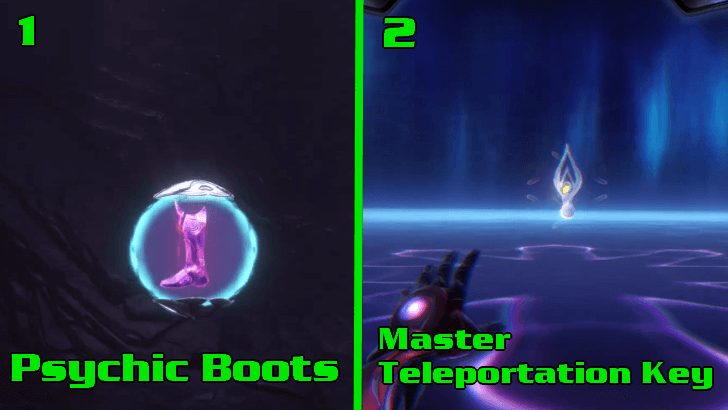 Xelios will drop the Psychic Boots upon its defeat, which can enable a second jump while airborne through the B/L buttons. This will also unlock the ability to produce Psychic Platforms. The Master Teleportation Key is obtained by standing in front of the glowing pedestal. |
Exit Volt Forge to the Open World
| Objectives | |
|---|---|
| 1 |
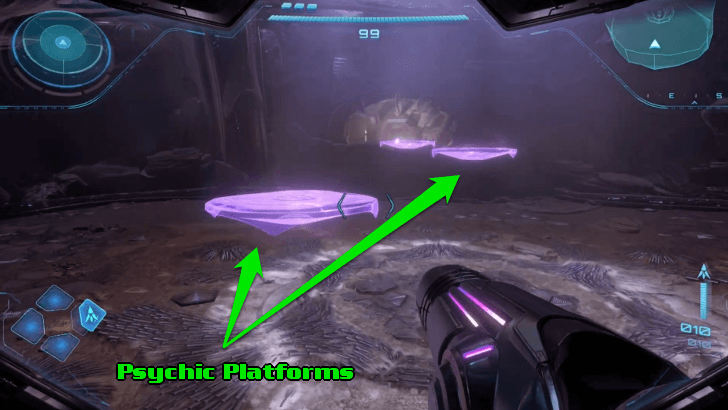 Switch to your Psychic Visor and look for some gleaming magenta wisps. Examining this will allow you to build platforms going to the upper part of the room. Hop onto these and leave the area. ┗ How to Set Psychic Platforms ▶︎ Psychic Boots How to Unlock and Effects |
| 2 |
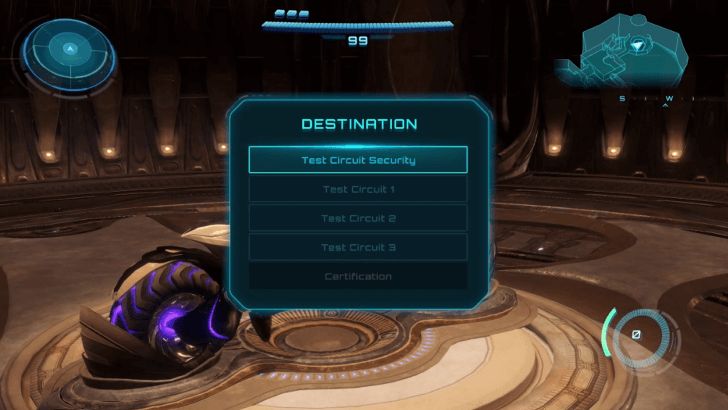 Go back up to the Vi-O-La elevator. Select the Test Circuit Security option as your destination. This will lead you back to the tower entrance. |
| 3 |
 Return to Tower 1 to Exit Volt Forge. Return to Tower 1 to Exit Volt Forge.Drive back to Tower 1 and look for the tunnel entrance at the opposite end of the room. Defeat the Psy-Bots within the area. At the top left of the room, enter the tube in Morph Ball Form and hit the bomb slot to open the tunnel going outside of Volt Forge. |
How to Set Psychic Platforms
Switch to your Psychic Visor, then look for some wisps around the area. Scan these wisps to turn them into Psychic Platforms.
Psychic Boots Effects: How to Double Jump
| Next Section: |
|---|
| Ice Belt Walkthrough and Guide |
Volt Forge Revisit (Part 1)
| Note: The following walkthrough covers the section of the game after obtaining the Psychic Boost Ball from Ice Belt. |
| Volt Forge Revisit (Part 1) Main Objectives | |
|---|---|
| 1 | Obtain Vi-O-La IC Suit ┗ Boss Battle: Flight Drone MCU (Second Encounter) |
Obtain Vi-O-La IC Suit
| Objectives | |
|---|---|
| 1 |
 Upon revisiting Volt Forge for the first time, proceed to the Vi-O-La stop in Tower 3. |
| 2 |
 Insert yourself in the nearby Morph Ball Hologram and activate the Psychic Boost Ball to activate the terminal. ┗ Psychic Boost Ball in Morph Ball Mode ▶︎ Psychic Boost Ball How to Unlock and Effects |
| 3 |
 Interact with the newly activated terminal to get the suit upgrade, Vi-O-La IC Suit. This allows Samus to travel on magma and lava without taking damage. ▶︎ Vi-O-La IC Suit How to Unlock and Effects |
| 4 |
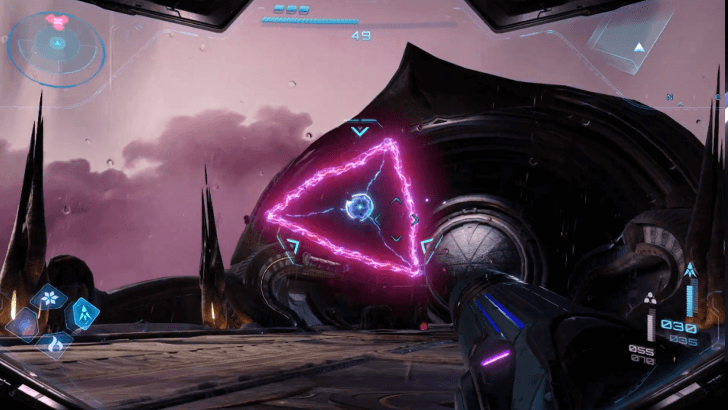 Before leaving Volt Forge, you will be facing the Flight Drone MCU for the second time. Defeat the drone by using the Control Beam to your advantage. Note that you must hit all of its Energy Spheres within a single turn of Control Beam. |
Psychic Boost Ball in Morph Ball Mode
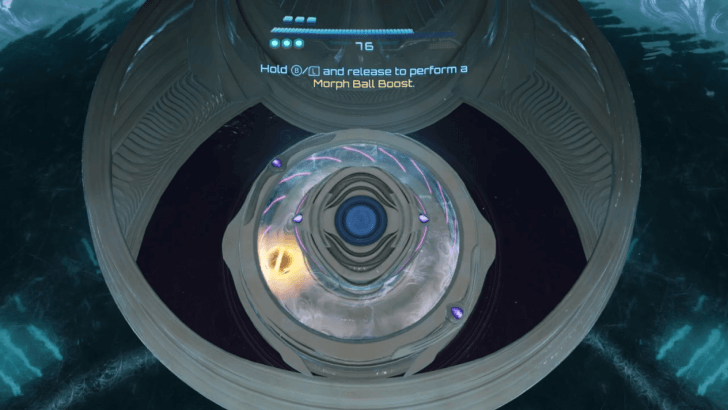
While in Morph Ball Mode, press and hold the B/L button, then release it for a surge of speed.
Psychic Boost Ball How to Unlock and Effects
| Next Section: |
|---|
| Flare Pool Walkthrough and Guide |
Volt Forge Revisit (Part 2)
| Note: The following walkthrough covers the section of the game after obtaining the Psychic Grapple from Flare Pool. |
| Volt Forge Revisit (Part 2) Main Objectives | |
|---|---|
| 1 | Obtain Thunder Chip ┗ Boss Battle: Sylux (Second Encounter) |
Obtain Thunder Chip
| Objectives | |
|---|---|
| 1 |
 Go back to the Vi-O-La Lobby in Tower 1. Enter the elevator room across the save point room. Pull the lock from the vent on the right side of the room and enter. |
| 2 |
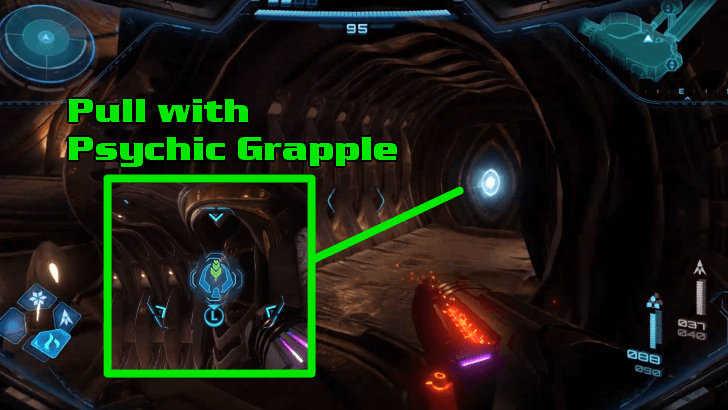
 After reaching an open area, turn to the right to find several grappling prompts that you can swing to. Use the Psychic Grapple to get across the other side. ┗ Using the Psychic Grapple ▶︎ Psychic Grapple How to Unlock and Effects |
| 3 |
 Defeat the Psy-Bots within the vicinity before entering the vent. Keep going until you reach the Manufacturing Room. Enter the room, going to the right to find a blocked path with electric hazards. |
| 4 |
 Use the Psychic Grapple to get across to the other side. Enter the room, then take the elevator to reach the Power Core. |
| 5 |
 Acquire Thunder Chip. Acquire Thunder Chip.Search the Power Core room for the Lamorn Power Cell with a damaged protective cover. Use the Psychic Grapple to pull this away. Take the Thunder Chip inside. |
| 6 |
 Sylux will appear once again to stop you. The battle will be similar to the first time you fought him. Defeat Sylux to leave the area. ▶︎ How to Beat Sylux (2nd Encounter) |
| 7 |
Backtrack to Volt Forge Entrance. After defeating Sylux, you can backtrack to the Vi-O-La Lobby, and in turn, the Vi-O-La Tunnel Entrance. |
How to Use Psychic Grapple
Aim at a target with the hook prompt and the ZL button to attach a grapple node. You can swing from one place to another with this ability.
Psychic Grapple How to Unlock and Effects
| Next Section: |
|---|
| Great Mines Walkthrough and Guide |
All Volt Forge Bosses
Flight Drone MCU Boss Fight
| Boss Overview | |
|---|---|
|
| |
| Map | Volt Forge |
| Area | Tower 2 Generator |
| Required Upgrade | Control Beam |
| Weak Point | |
| ・Energy Spheres | |
How to Beat Flight Drone MCU: Quick Boss Tips
- Use Control Beam to break its Energy Spheres within your turn.
- Dodge its projectile attacks.
- Evade its electric barrier.
- Be careful not to fall off the stage.
Sylux (1st Encounter) Boss Fight
| Boss Overview | |
|---|---|
|
| |
| Map | Volt Forge |
| Area | Tower 2 Generator |
| Required Upgrade | None |
| Weak Point | |
| ・None | |
Sylux (1st Encounter) Boss Guide
How to Beat Sylux: Quick Boss Tips
- Keep shooting at Sylux when you can.
- Dash to dodge Sylux's incoming melee attack.
- Plant Morph Bombs against Sylux during his spinning tornado attack.
- Evade Sylux's electric shock attacks.
Xelios Boss Fight
| Boss Overview | |
|---|---|
|
| |
| Map | Volt Forge |
| Area | Tower 3 |
| Required Upgrade | None |
| Weak Point | |
| ・Core | |
How to Beat Xelios: Quick Boss Tips
- Shoot its exposed core and its panels.
- Detonate Morph Bombs to escape its explosive net.
- Evade or shoot incoming projectiles.
- Get out of its explosive attack range.
- Dash or jump from electric bursts or shockwaves.
Flight Drone MCU Boss Fight
| Boss Overview | |
|---|---|
|
| |
| Map | Volt Forge |
| Area | Tower 2 Generator |
| Required Upgrade | Control Beam |
| Weak Point | |
| ・Energy Spheres | |
How to Beat Flight Drone MCU (2nd Encounter): Quick Boss Tips
- Use Control Beam to target its Energy Spheres within a single aim.
- Evade its Electric Barrier.
- Dodge its projectile attacks.
Sylux (2nd Encounter) Boss Fight
| Boss Overview | |
|---|---|

| |
| Map | Volt Forge |
| Area | Tower 1 Power Core |
| Required Upgrade | Psychic Grapple |
| Weak Point | |
| ・None | |
Sylux (2nd Encounter) Boss Guide
How to Beat Sylux (Second Encounter): Quick Boss Tips
- Use the Psychic Grapple to avoid the shock-induced floor.
- Stick to the wall nodes and shoot Sylux.
- Counter Sylux's projectiles with your Projectile Volley.
- Dodge Sylux's melee attack once he raises his arm cannon.
All Volt Forge Unlocks
Vi-O-La Suit
The Vi-O-La Suit will enable you to ride the Vi-O-La itself. This is obtained by activating the terminal below the Vi-O-La in Volt Forge Tower 1.
Vi-O-La Suit How to Unlock and Effects
Vi-O-La
The Vi-O-La is a bike that will bring you to areas faster. It has abilities that can be used to engage in combat with other enemies. A driver certification is required to harness its full potential.
How to Unlock Vi-O-La and Controls
Psychic Boots
The Psychic Boots will allow you to do a second jump while in the air. Press the B or L buttons to do this. This also provides the ability to produce Psychic Platforms in the air, which you can hop on if you aim to go to higher areas. Xelios will drop this item once it has been defeated.
Psychic Boots How to Unlock and Effects
Metroid Prime 4: Beyond Related Guides

Complete Story Walkthrough and Guide
All Walkthrough Guides
| Story Walkthrough | |
|---|---|
| Prologue Walkthrough | Fury Green Walkthrough |
| Volt Forge Walkthrough | Ice Belt Walkthrough |
| Flare Pool Walkthrough | Great Mines Walkthrough |
| Chrono Tower Walkthrough | - |
Comment
Author

Volt Forge Walkthrough and Guide
Rankings
- We could not find the message board you were looking for.
Gaming News


![Monster Hunter Stories 3 Review [First Impressions] | Simply Rejuvenating](https://img.game8.co/4438641/2a31b7702bd70e78ec8efd24661dacda.jpeg/thumb)
![The Seven Deadly Sins: Origin [First Impressions] | A Promising Start](https://img.game8.co/4440581/584e0bfb87908f12c4eab6e846eb1afd.png/thumb)

Popular Games

Genshin Impact Walkthrough & Guides Wiki
Umamusume: Pretty Derby Walkthrough & Guides Wiki
Pokemon Pokopia Walkthrough & Guides Wiki
Honkai: Star Rail Walkthrough & Guides Wiki
Monster Hunter Stories 3: Twisted Reflection Walkthrough & Guides Wiki
Arknights: Endfield Walkthrough & Guides Wiki
Wuthering Waves Walkthrough & Guides Wiki
Zenless Zone Zero Walkthrough & Guides Wiki
Pokemon TCG Pocket (PTCGP) Strategies & Guides Wiki
Monster Hunter Wilds Walkthrough & Guides Wiki


Recommended Games
Diablo 4: Vessel of Hatred Walkthrough & Guides Wiki
Cyberpunk 2077: Ultimate Edition Walkthrough & Guides Wiki
Fire Emblem Heroes (FEH) Walkthrough & Guides Wiki
Yu-Gi-Oh! Master Duel Walkthrough & Guides Wiki
Super Smash Bros. Ultimate Walkthrough & Guides Wiki
Pokemon Brilliant Diamond and Shining Pearl (BDSP) Walkthrough & Guides Wiki
Elden Ring Shadow of the Erdtree Walkthrough & Guides Wiki
Monster Hunter World Walkthrough & Guides Wiki
The Legend of Zelda: Tears of the Kingdom Walkthrough & Guides Wiki
Persona 3 Reload Walkthrough & Guides Wiki


All rights reserved
© Nintendo. Metroid and Nintendo Switch are trademarks of Nintendo.
The copyrights of videos of games used in our content and other intellectual property rights belong to the provider of the game.
The contents we provide on this site were created personally by members of the Game8 editorial department.
We refuse the right to reuse or repost content taken without our permission such as data or images to other sites.