Great Mines Walkthrough and Guide
★ Story Walkthrough | Upgrades and Abilities
☆ Characters | Bosses | Puzzles
★ Viewros Map: Energy Tank | Missile Expansion | Shot Expansion
★ Game Details: amiibo Unlocks | How Long to Beat | Switch Edition Differences
This is a guide for the Great Mines area in Metroid Prime 4: Beyond. Check out how to progress through the Great Mines, as well as guides for any bosses, upgrades, abilities, rewards and puzzles in the area here.
| Great Mines Guides | |
|---|---|
| Walkthrough | Exploration Map |
List of Contents
| ◀ Previous Area | Next Area ▶︎ |
|---|---|
| Flare Pool | Chrono Tower |
Great Mines Map
| ・You can view different sections of Volt Forge by selecting a tower from the second dropdown in our sidebar. Click the arrow in the upper left corner to open the sidebar. |
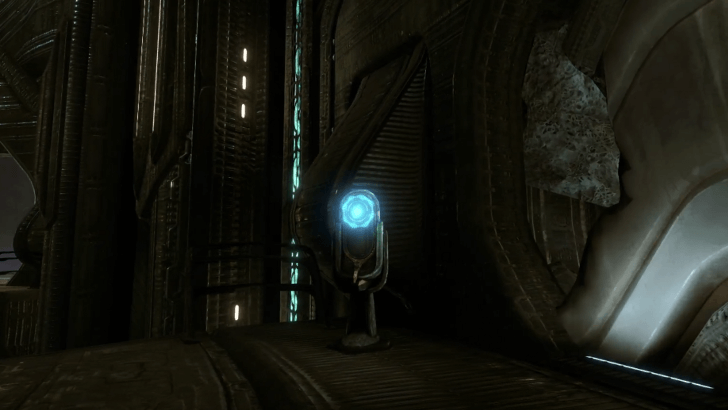
Great Mines Walkthrough and Guide
Great Mines Objectives
| Note: If you are aiming for a 100% completion, visit our All Missables and Points of No Return page. |
| Great Mines Main Objectives | |
|---|---|
| 1 | Acquire Thunder Chip from Volt Forge |
| 1 | Rescue VUE-995 in Ice Belt |
| 1 | Acquire Psychic Spider Ball in Ice Belt |
| 2 | Enter the Great Mines |
| 3 | Descend into the Mines |
| 4 | Find the Way Out Underground |
| 5 | Explore Main Shaft - Level 2 |
| 6 | Obtain the Master Teleporter Key
┗ Boss Battle: Omega Griever |
Acquire the Thunder Chip in Volt Forge
| Objectives | |
|---|---|
| 1 |  After getting the Psychic Grapple from Phenoros in Flare Pool, revisit Volt Forge and find the Collapsed Catwalk in Tower 1. |
| 2 |  Once you reach the broken pathway, cross the electric field by using the Psychic Grapple on the nodes. Once you reach the next area, ride the elevator down and continue ahead until you reach the Power Core room. |
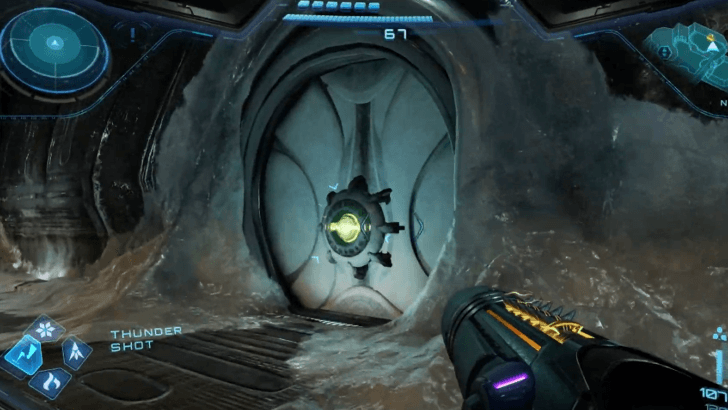
| 3 | 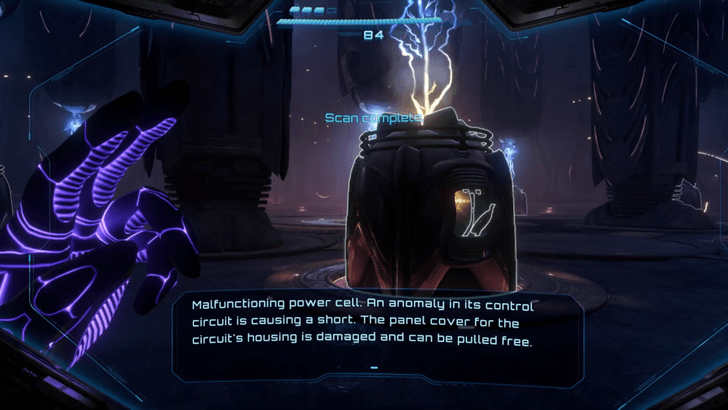 Inside the Power Core room, look for one of the misfiring power cell. Scan this power cell then open the grate using the Psychic Lasso. Take the Thunder Chip inside. |
| 4 |  As you acquire the Thunder Chip, Sylux appears and a boss fight will start. Once you defeat him, you can continue exploring Volt Forge, or return to MacKenzie in Fury Green to get the Thunder Shot. ▶ How to Beat Sylux (2nd Encounter) |
| 5 | 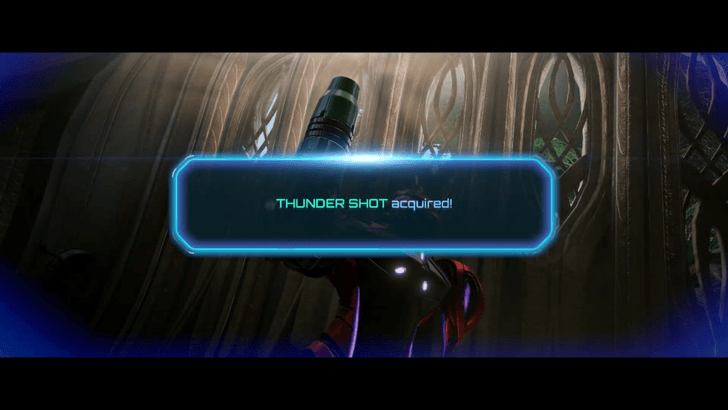 Once you get the Thunder Shot from MacKenzie, travel to Ice Belt to find a new companion and acquire the Psychic Spider Ball. |
Rescue VUE-995 in Ice Belt
| Objectives | |
|---|---|
| 1 |
 Travel to Ice Belt, then go all the way to the Control Room. Unlock the door next to the Lobby room by shooting it with Thunder Shot. Press on until you find a nonfunctional storage gate. |
| 2 |
 Going right, you will find some rubble blocking a vent. Shoot this down and enter the vent going to the Equipment Storage Room. Look at the upper right side of the storage room to find VUE-995. Aim your Fire Shot to unfreeze it. |
Acquire Psychic Spider Ball in Ice Belt
| Objectives | |
|---|---|
| 1 |
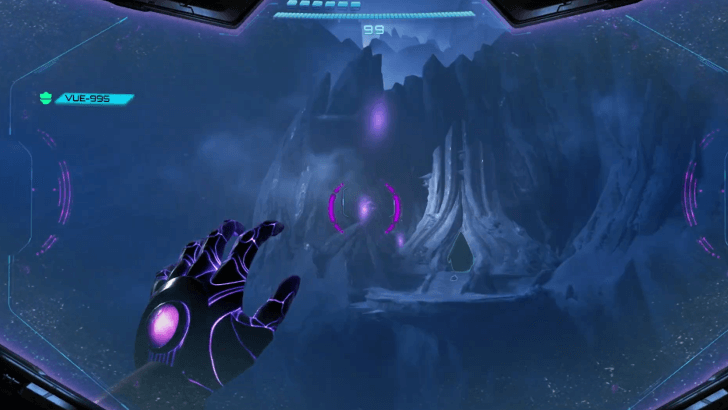 Go back to the Ice Belt in the Control Room, then go to the path on the right. Shoot a charged shot at the tempered glass to get to the Cliffside and examine the grapple wisps above in the air. |
| 2 |
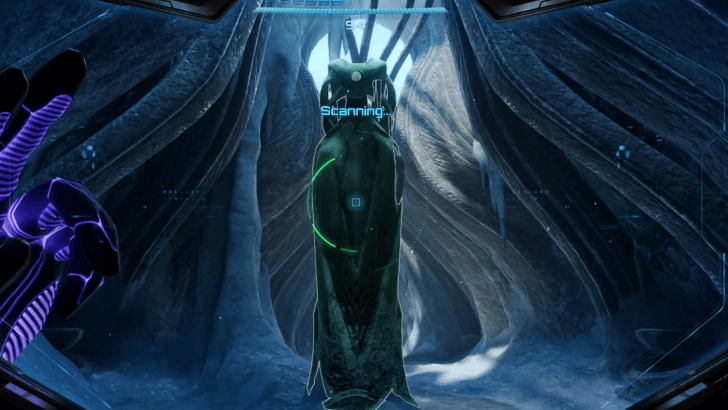 Use the Psychic Grapple to swing to the other side of the area. Go right and scan the Lamorn statue to see a cutscene play. |
| 3 |
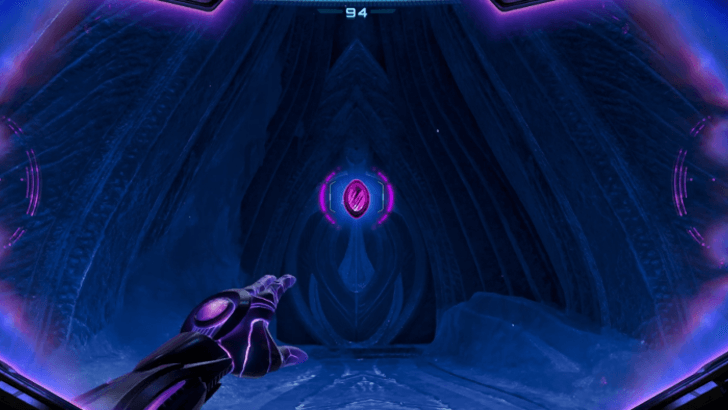 Unlock the door behind the Lamorn statue room. Use the Psychic Visor to control the node downwards. Enter the room and aim your Fire Shot twice at the frozen platforms going down. |
| 4 |
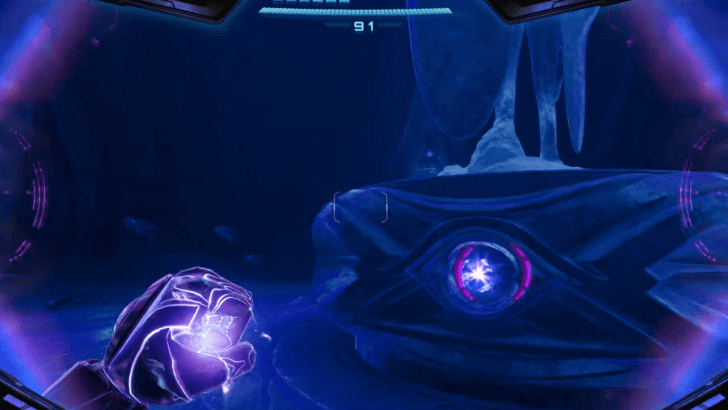 Hop down to the room with a Vahkuun Sculpture in the middle. Unfreeze the Psychic Sensor on the left and take Psychic Energy with your Psychic Visor. Insert this in the statue's socket below to move it. |
| 5 |
 Take the Psychic Spider Ball hidden under the statue. This will let you attach to magnetic Spider Ball Tracks. |
Enter the Great Mines
| Objectives | |
|---|---|
| 1 |
 Head over to the Great Mines, located on the easternmost side of Sol Valley on your map. MacKenzie will contact you and send you the coordinates to the location. There, at the entrance, you need to fix the bridge to enter the mines. |
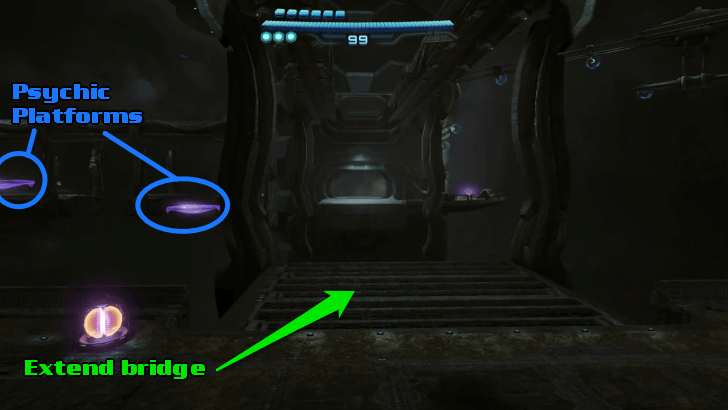
| 2 |
 To cross to the other side, use Morph Ball to climb up the magnetic path leading over the gorge. Then, drop down and scan your hand on the terminal to extend the bridge, letting your allies cross over. ┗ Switch to Morph Ball Mode ▶︎ List of Controls |
| 3 |
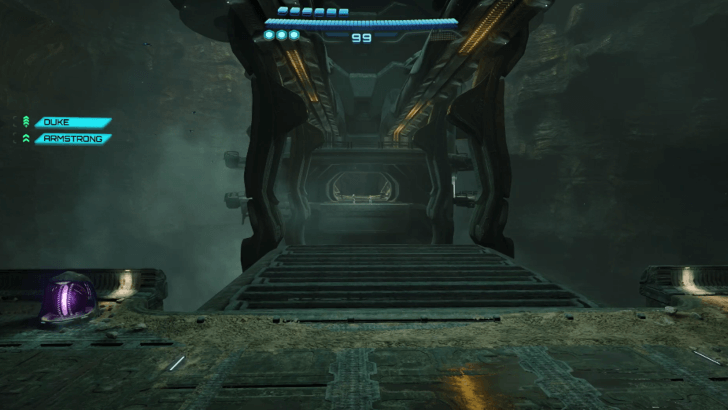
 Scan the terminal ahead to activate the elevator. After doing so, a cutscene will play where hordes of Grievers emerge from the sand. Samus will be told to descend into the Great Mines with Duke and Armstrong. You will enter the Main Shaft - Level 1. |
| 4 |
 To find a way across the main shaft, take a right and jump over the platform. On the wall is a magnetic path for you to use Morph Ball. At the top, Morph Ball again along the wall and over the gap. Launch yourself to alternate between the paths to reach the other side. |
| 5 |
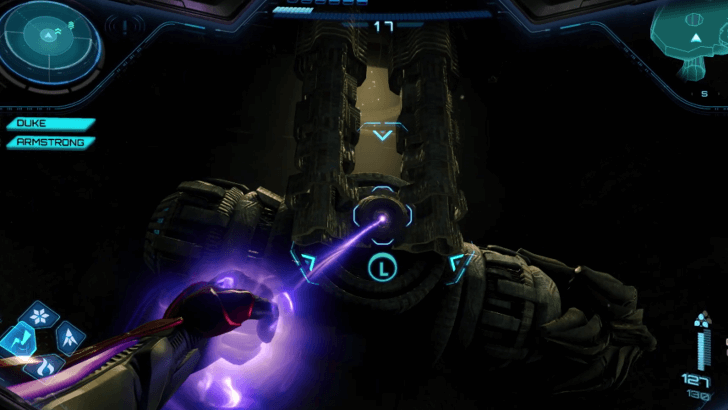
 To the side of the bridge is a Spinner. Enter Morph Ball mode to slot yourself into the Spinner, then use Psychic Boost Ball to power the bridge, letting it extend over the gap. ┗ How to Use Psychic Boost Ball ▶︎ Psychic Boost Ball How to Unlock and Effects |
| 6 |
 Ahead is a locked vault. Wait for Duke and Armstrong to pull the panels aside, then shoot the lock with Thunder Shot to open the vault to the Side Hall. Pass the corridor and head right into a room. Scan the terminal to activate the Hologram Emitter and acquire the Area Map. ┗ Scan Everything for Information ▶︎ List of Logbooks and Scans Guide |
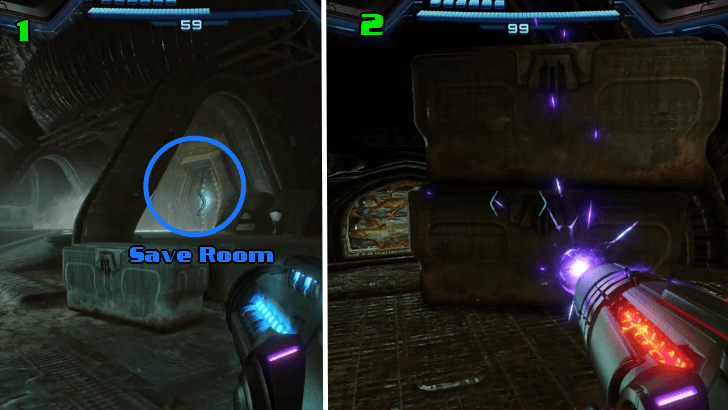
| 7 |
 From the central hologram, go to the left hall, then right to reach a save room. Afterwards, return to the Command Center and open the door leading to the Side Hall area with Psychic Boost Ball. Open the hatch on the ceiling for a Shot Expansion, then unlock the large door with Thunder Shot with Duke and Armstrong's help. |
Switch to Morph Ball Mode
To switch to Morph Ball mode, press the Y button. This mode is useful for navigating through tight spaces and activating various mechanisms.
How to Use Psychic Boost Ball
To perform Psychic Boost Ball, press and hold the B button or the L trigger, then release to burst in a surge of speed.
Psychic Boost Ball How to Unlock and Effects
Scan Everything for Information
Scanning your environment for information can give you hints about your surroundings. In many cases, scanning objects gives you the answers to activating mechanisms and fighting enemies, including bosses.
List of Logbooks and Scans Guide
Descend into the Mines
| Objectives | |
|---|---|
| 1 |
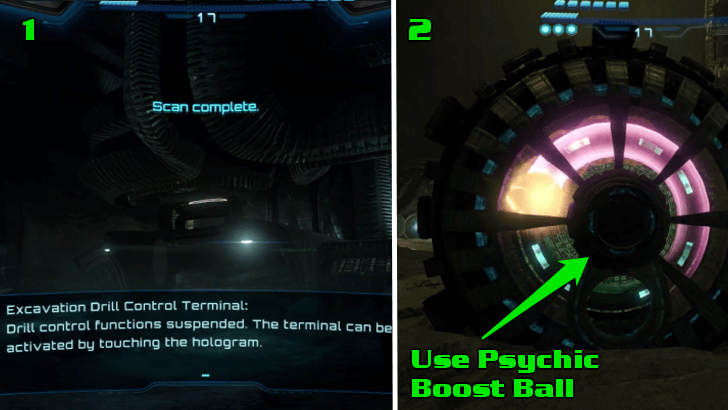 In an area with a massive drill, jump on the raised platform where the Excavation Drill Control Terminal is. Activate the terminal to link it to the drill, then head over to the front of the drill. Roll into the hole in Morph Ball mode and use Boost Ball to power the drill. |
| 2 |
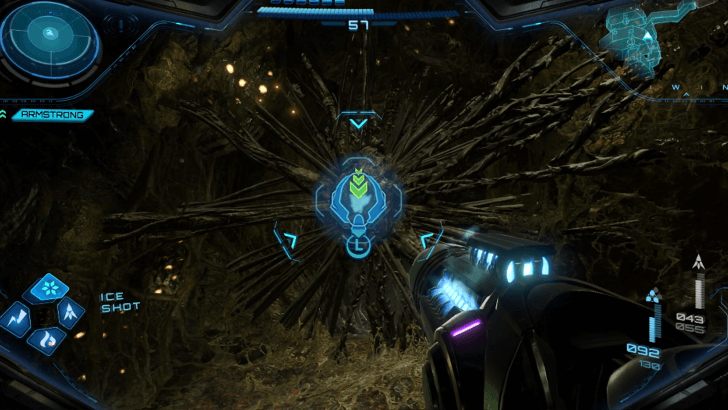
 Jump on the raised platforms, then turn around facing the drill. Pull the pin to lower the drill, aiming it at the ground. Suddenly, Maul Grievers will appear. Fend them off until the drill finally bores a hole into the ground. Freeze them with Ice Shot, then aim a charged beam to gain the advantage. Jump down the hole to descend into the mines. |
| 3 |
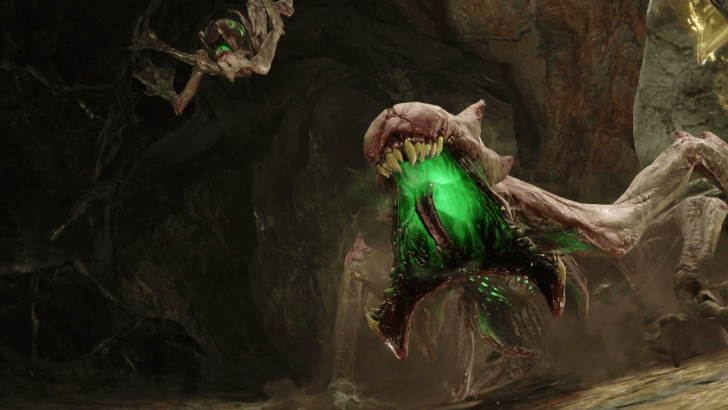 Down the hole, navigate through the cavern with Armstrong. At the end of the cavern, use a charged blast to destroy the crystallized wall. More Grievers will appear. Shoot them as you follow the path leading deeper underground. ▶︎ Ice Shot Effects: Where to Use Ice Chip |
| 4 |
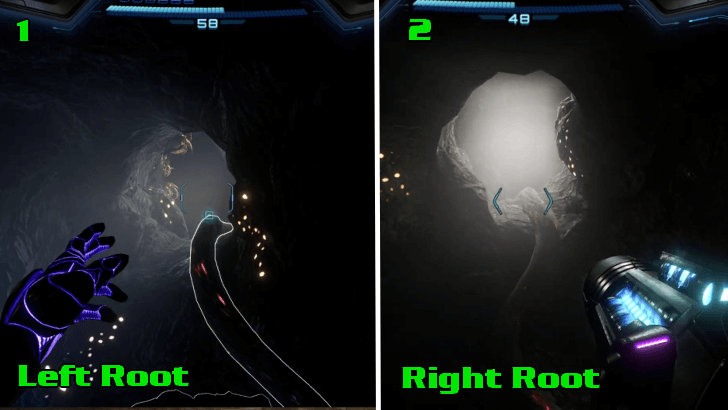 Destroy the Gornbocask to reveal a hole. Jump down and continue ahead until you find a larger Gornbocask. Use Control Beam to destroy the plant's two cores through the holes where the roots are coming from. Defeat more Grievers, then jump down the hole. ┗ How to Use Control Beam |
| 5 |
 Continue along the path. Shoot the glowing flowers to avoid being hurt while passing through. Ahead, pull the fiber bundles blocking the way. Keep shooting at the Cave Shrens that you will find as you go onwards. |
How to Use Control Beam
To use the Control Beam, toggle the Psychic Visor by pressing the X button. Press and hold the A button or the ZR trigger to release a Control Beam. You can control the trajectory of the beam with the analog stick, allowing you to aim for specific targets.
Control Beam How to Unlock and Effects
Find the Way Out Underground
| Objectives | |
|---|---|
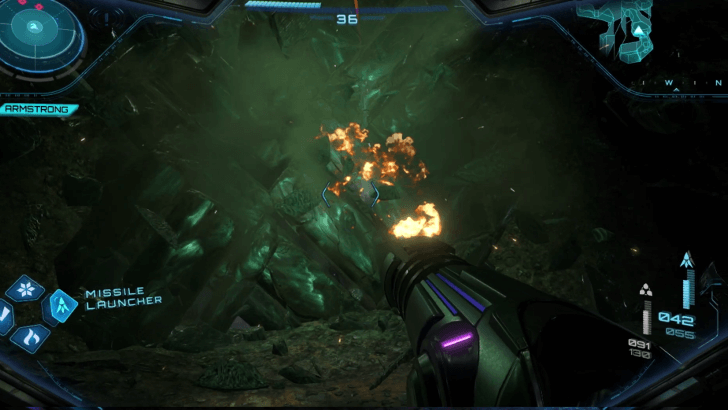
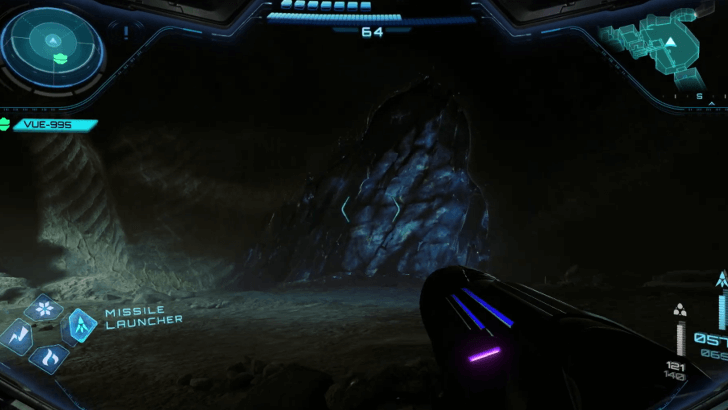
| 1 |
 Aim your Missile Launcher thrice at the rubble blocking the pathway. This will assemble a swarm of Maul Grievers along the way. Be careful of using more Missiles as this will attract more Grievers. Use the Crystal Crawlers to swing through the gaps. |
| 2 |
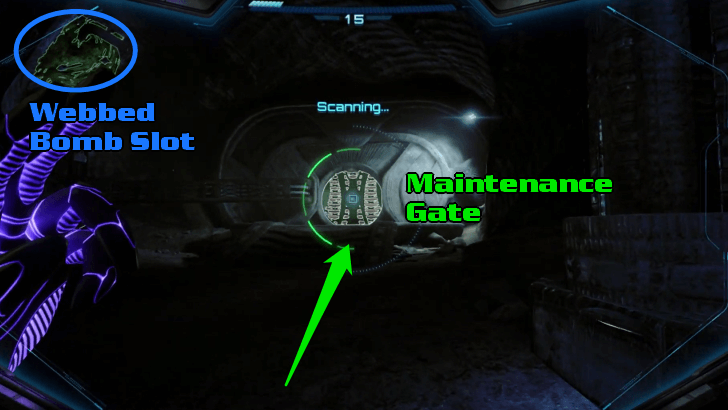 After finding the Maintenance Gate in the next area, look to the upper left to see a webbed Bomb Slot. Burn it with Fire Shot, then plant a Morph Bomb to hurl into the slot. This will open the gate. ▶︎ Fire Shot Effects: Where to Use Fire Chip |
| 2 |
 On the other side of the gate is an abandoned vehicle and a caved-in wall. Burn the webbing on the vehicle's terminal with Fire Shot. While Armstrong finds a way to break through the walls, she covers for her by picking off the Grievers. |
Explore Main Shaft - Level 2
| Objectives | |
|---|---|
| 1 |
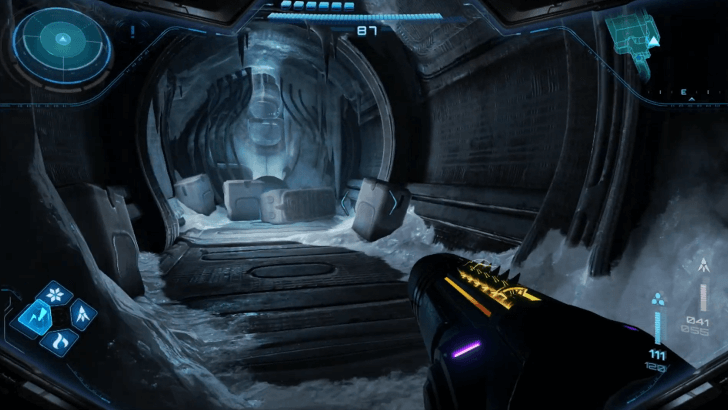
 After being separated from Armstrong, venture into Mine Shaft - Level 2. Save your progress at the Save Station first before going further. Burn the Cave Roach Nest with Fire Shot to proceed to the next area. Shoot the boxes and the debris blocking the vent at the corner of the room before using Morph Ball to pass through. |
| 2 |
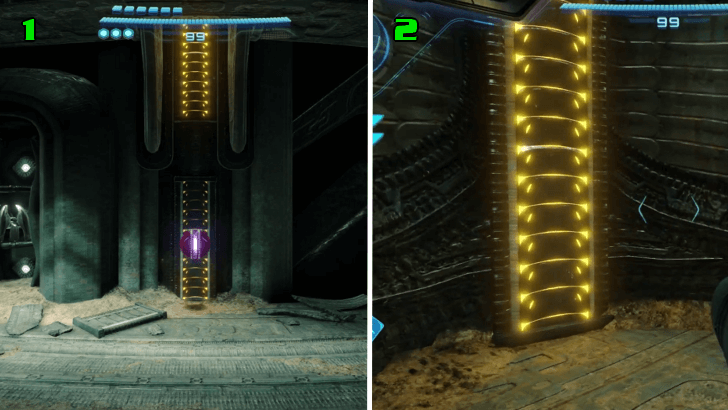
 Further along Main Shaft - Level 2, traverse across the gap by using Tether Ball to leap up the wall, then roll your way to the other side. Dropping on a platform, continue further until you find a Spinner. Activate it to extend the bridge, allowing you to backtrack. Whip out your Psychic Visor and set up some Psychic Platforms on the magenta wisps. This will lead you to an acquirable Energy Tank. Encountered enemies: ・Hives - Shoot down the Hives along the area with missiles. ▶︎ All Energy Tank Locations |
| 3 |
 Past the door ahead of the bridge, you will enter an area with a cocoon-like object. A Maul Griever Brute will emerge from it, alongside other Grievers. VUE-995 will then appear, assisting you in the battle. |
| 4 |
 After all, Grievers are defeated, continue ahead. Scan membrane blockages to direct VUE-995 to destroy these. Keep going onwards until you reach an area with a Mining Cannon hanging above; use Morph Ball to travel along the walls and power the two mechanisms with Boost Ball. This will drop the cannon and attract the attention of more Grievers. |
| 5 |
 With the Grievers gone, direct VUE-995 to break the frame with a scan. Blast the frame with a charge shot, then obtain the Super Missile. Defeat another wave of Grievers. ┗ How to Use Super Missile |
| 6 |
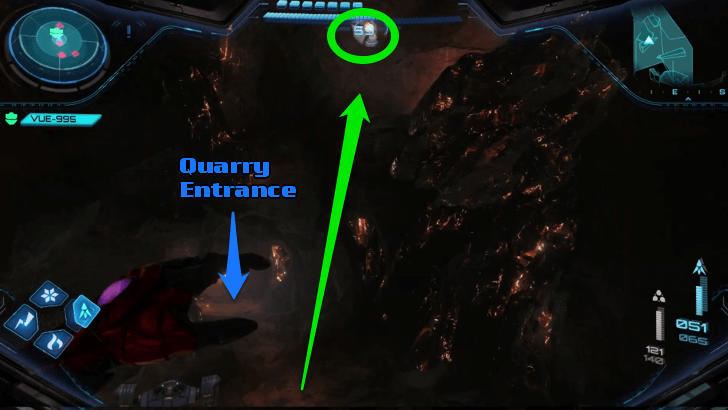
 While at Easing Tunnel, destroy the Koornicite Ore with Super Missile and take the Missile Expansion in it. Afterwards, backtrack to the Quarry to destroy the Koornicite Ore blocking the path to another area. Proceed with VUE-995 onwards. Let VUE-995 clear any paths blocked by membranes to advance further. |
| 7 |
 In the next area, you will need to get across the room. Aim your Psychic Grapple at the hook in a hidden path located above the door entrance on your right. Double jump to reach the distant platforms until you get to the other side. Direct VUE-995 to burn down the path blocked by a membrane to get to the next area. |
| 8 |
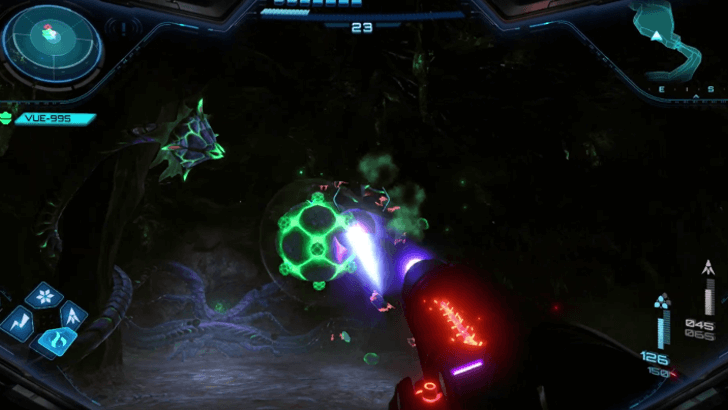 Use the Psychic Grapple to destroy the lock going to the next area. Keep directing VUE-995 to break down the membranes by scanning them as you go further. Watch out for the Goura Ghaspores in the area that will aim their sporangium towards you. These sporangia are impenetrable, so you will need to deflect them by shooting them. Make sure this is directed back to the Gouora Ghaspores to defeat them. |
| 9 |
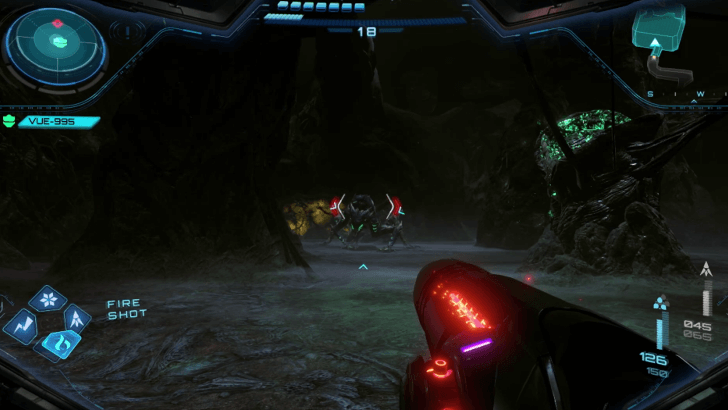 Continue to the next area. VUE-995 will be incapacitated after attempting to break down a membrane. Fend off the Grievers and the large mutated variant. VUE-995 will free himself afterwards and destroy more membranes. Run through the tunnels to evade the Grievers before facing them. |
How to Use Super Missile
To release a Super Missile, first equip your Missile subweapon by pressing the right analog button. Then, hold the R trigger to charge up a Super Missile. Release the trigger to launch it.
Obtain the Master Teleporter Key
| Objectives | |
|---|---|
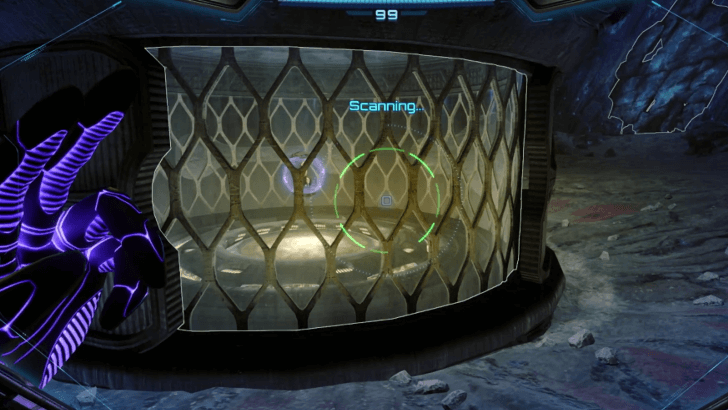
| 1 |
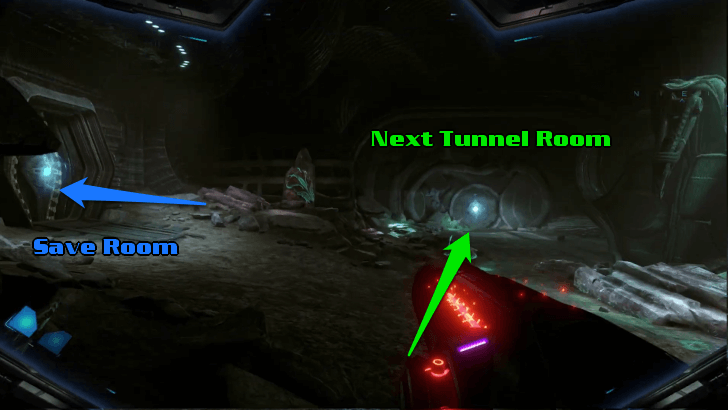 Go into the tunnel without VUE-995, and you will find a room with a large Maul Griever cocoon in the middle. Move to the next room, then visit the room to the left for the save room. After saving, keep going past the tunnels until you find the room with the Crystal Extraction area with the Master Teleporter Key in it. |
| 2 |
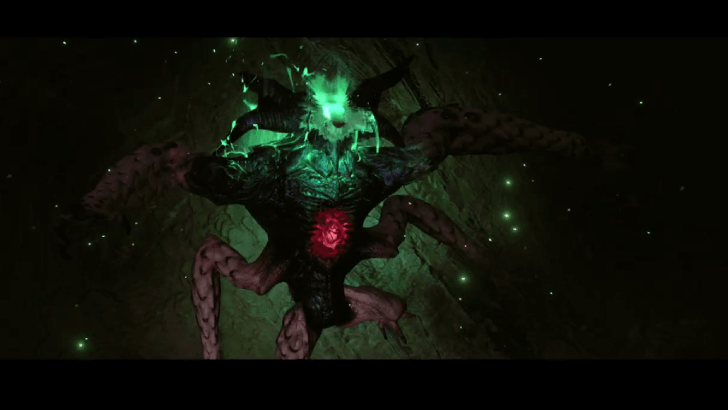 The Omega Griever will show itself before you. Defeat it by focusing on its abdominal organ. Avoid its poisonous spit and attacks by dodging or dashing away.[/red]. ┗ How to Beat Omega Griever |
| 3 |
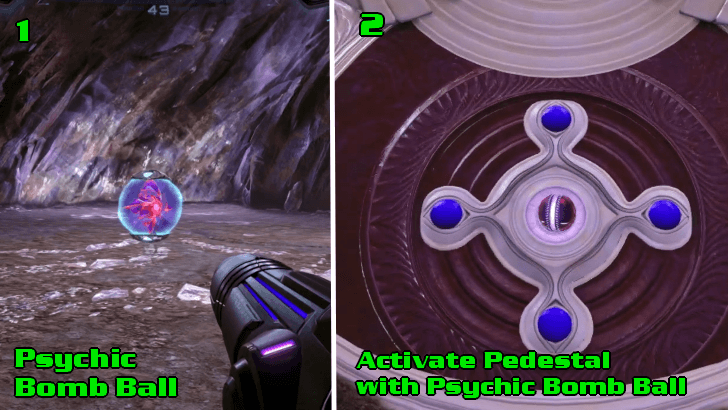 After defeating the Omega Griever, you acquire the Psychic Power Bomb. Use the Psychic Power Bomb on the Shrine's Pedestal to activate this. Acquire the fifth Master Teleporter Key afterwards. ┗ How to Use Psychic Power Bomb |
| 4 |
 Leave through the blocked door. Blast the door with a Psychic Power Bomb, then plant a Psychic Power Bomb to destroy it completely. |
| 5 |
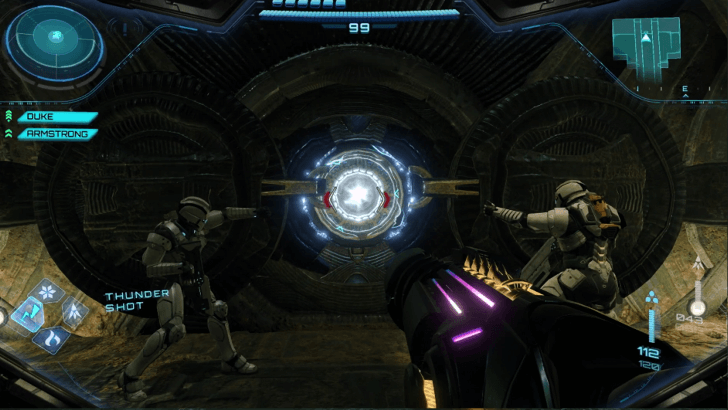
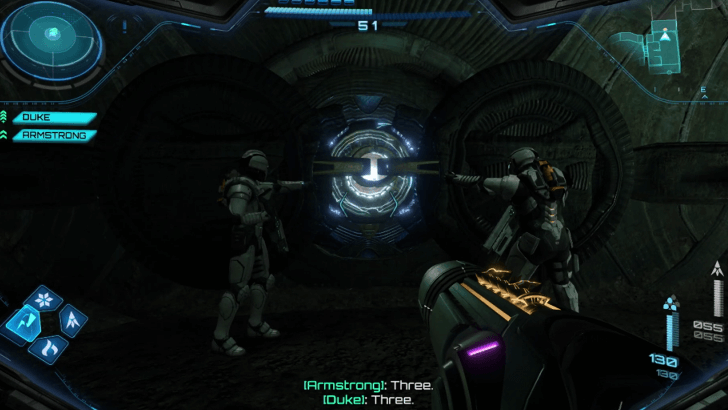
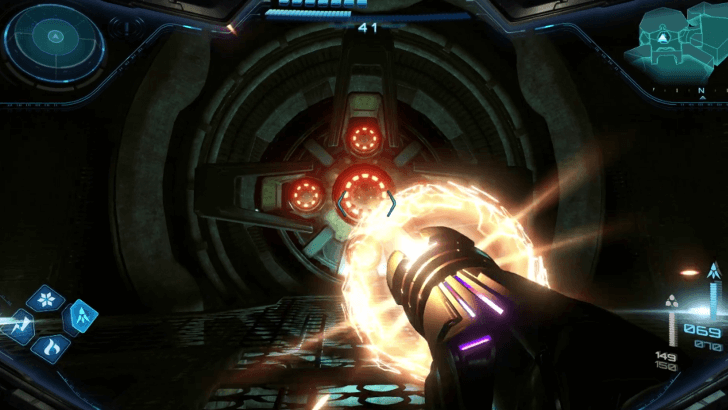 At the end of a corridor, destroy the Enhanced Locked Gate Unit with a Super Missile. Get inside the Energy Converter, then use Psychic Power Bomb in the slot in Morph Ball mode. |
| 6 |
 Still in Morph Ball mode, climb up the magnetic path. At the top, scan the terminal to summon the elevator. You will be reunited with Duke, Armstrong, and VUE-995. |
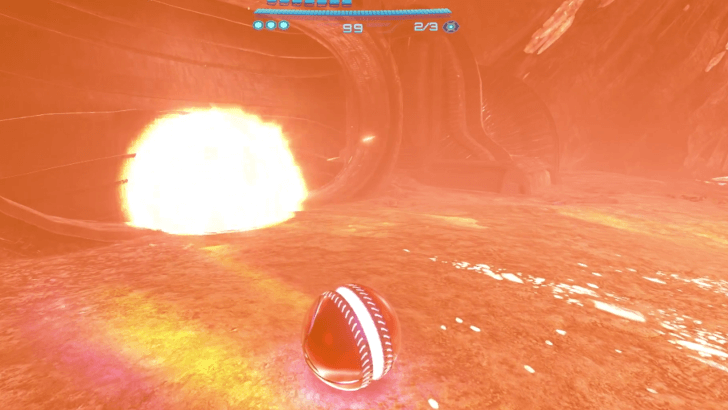
How to Use Psychic Power Bomb
To use Psychic Power Bomb, hold the R trigger to plant and detonate one bomb that releases a powerful wave of Psychic Energy. You can also add Mote properties to the bomb by pressing and holding the R trigger.
| Next Section: |
|---|
| Chrono Tower Walkthrough and Guide |
All Great Mines Bosses
Omega Griever Boss Fight
| Boss Overview | |
|---|---|

| |
| Map | Great Mines |
| Area | Crystal Extraction |
| Required Upgrade | Psychic Bomb |
| Weak Point | |
| ・Abdominal Organ ・Exposed Limbs and Back |
|
How to Beat Omega Griever: Quick Boss Tips
- Shoot the abdominal organ.
- Avoid poisonous spit.
- Fire missiles at the exposed head if caught by the tongue.
- Plant Morph Bombs to expose the abdominal organ when incapacitated.
- Dodge melee and ranged attacks.
All Great Mines Unlocks
Super Missile
The Super Missile is a powerful upgrade for your Missile Launcher. Instead of shooting a single missile, the Super Missile allows you to launch five missiles at a time for a devastating attack.
In exploration, the Super Missile can also destroy durable walls, requiring a powerful weapon to use.
Psychic Power Bomb
The Psychic Power Bomb is an upgrade for your Morph Ball form. This upgrade allows you to release a more powerful bomb that releases a wave of Psychic Energy. If necessary for a puzzle, you can add Mote properties to the bomb.
Metroid Prime 4: Beyond Related Guides

Complete Story Walkthrough and Guide
All Walkthrough Guides
| Story Walkthrough | |
|---|---|
| Prologue Walkthrough | Fury Green Walkthrough |
| Volt Forge Walkthrough | Ice Belt Walkthrough |
| Flare Pool Walkthrough | Great Mines Walkthrough |
| Chrono Tower Walkthrough | - |
Comment
Author

Great Mines Walkthrough and Guide
Rankings
- We could not find the message board you were looking for.
Gaming News

![Monster Hunter Stories 3 Review [First Impressions] | Simply Rejuvenating](https://img.game8.co/4438641/2a31b7702bd70e78ec8efd24661dacda.jpeg/show)
![Monster Hunter Stories 3 Review [First Impressions] | Simply Rejuvenating](https://img.game8.co/4438641/2a31b7702bd70e78ec8efd24661dacda.jpeg/thumb)
![The Seven Deadly Sins: Origin [First Impressions] | A Promising Start](https://img.game8.co/4440581/584e0bfb87908f12c4eab6e846eb1afd.png/thumb)

Popular Games

Genshin Impact Walkthrough & Guides Wiki
Umamusume: Pretty Derby Walkthrough & Guides Wiki
Pokemon Pokopia Walkthrough & Guides Wiki
Honkai: Star Rail Walkthrough & Guides Wiki
Monster Hunter Stories 3: Twisted Reflection Walkthrough & Guides Wiki
Arknights: Endfield Walkthrough & Guides Wiki
Wuthering Waves Walkthrough & Guides Wiki
Zenless Zone Zero Walkthrough & Guides Wiki
Pokemon TCG Pocket (PTCGP) Strategies & Guides Wiki
Monster Hunter Wilds Walkthrough & Guides Wiki


Recommended Games
Diablo 4: Vessel of Hatred Walkthrough & Guides Wiki
Cyberpunk 2077: Ultimate Edition Walkthrough & Guides Wiki
Fire Emblem Heroes (FEH) Walkthrough & Guides Wiki
Yu-Gi-Oh! Master Duel Walkthrough & Guides Wiki
Super Smash Bros. Ultimate Walkthrough & Guides Wiki
Pokemon Brilliant Diamond and Shining Pearl (BDSP) Walkthrough & Guides Wiki
Elden Ring Shadow of the Erdtree Walkthrough & Guides Wiki
Monster Hunter World Walkthrough & Guides Wiki
The Legend of Zelda: Tears of the Kingdom Walkthrough & Guides Wiki
Persona 3 Reload Walkthrough & Guides Wiki


All rights reserved
© Nintendo. Metroid and Nintendo Switch are trademarks of Nintendo.
The copyrights of videos of games used in our content and other intellectual property rights belong to the provider of the game.
The contents we provide on this site were created personally by members of the Game8 editorial department.
We refuse the right to reuse or repost content taken without our permission such as data or images to other sites.