How to Beat Omega Griever
★ Story Walkthrough | Upgrades and Abilities
☆ Characters | Bosses | Puzzles
★ Viewros Map: Energy Tank | Missile Expansion | Shot Expansion
★ Game Details: amiibo Unlocks | How Long to Beat | Switch Edition Differences
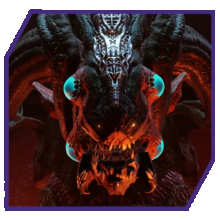
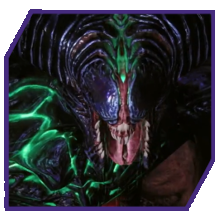
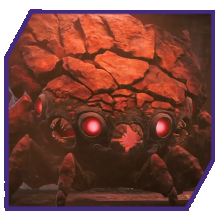
Omega Griever is a boss fought in the Crystal Extraction on the Great Mines map in Metroid Prime 4: Beyond. Check out how to beat Omega Griever, where the boss is located, its weak points, and any required abilities for the fight here.
List of Contents
Omega Griever Location
Found in Crystal Extraction
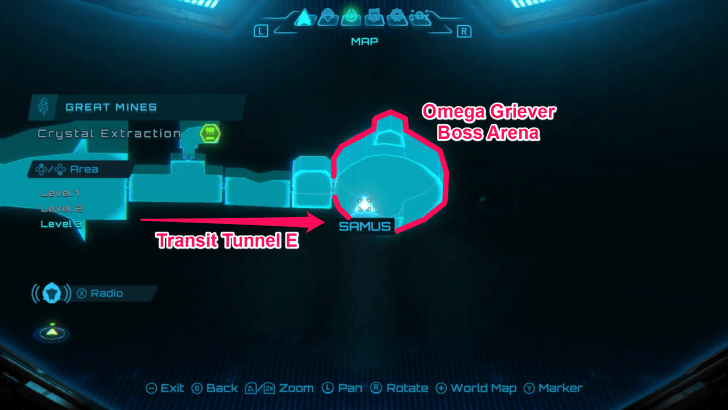
Find the Omega Griever by opening a Morph Ball tunnel using Psychic Lasso in Transit Tunnel E. Continue through the tube until you reach the boss arena with a statue.
How to Beat Omega Griever
| Omega Griever Boss Tips |
|---|
|
|
Shoot the Limbs to Expose Abdomen
At the start of the fight, bring the Omega Griever down to the ground by shooting at its exposed forearms, back, or legs. This staggers the Omega Griever, causing it to expose its red abdomen.
Shoot the abdomen with a high-damage weapon (like missiles) to force the Omega Griever to drop down.
Drop Psychic Bombs Near Abdomen when Staggered
When the Omega Griever is on the ground, continue shooting at its limbs to stagger it. Once staggered, quickly use Morph Ball to roll under the Omega Griever and plant all your Psychic Bombs underneath it to damage and show its abdomen. Shoot at its exposed abdomen to inflict more damage.
Psychic Bomb How to Unlock and Effects
Dodge Melee Attacks
| Lunge Attack |
|---|
The Omega Griever does a charging lunge attack. It can lunge at you twice, so dash or strafe to the side to dodge it. |
| Double Arm Swipe |
Jump or dash away from the Omega Griever when it does its double arm swipe attack. |
Dodge Ranged Attacks
| Ground Strike |
|---|
| The Omega Griever strikes the ground twice, making an arena-wide shockwave. Time your jumps to evade the attack. |
| Tongue Grab |
The Omega Griever's grab attack has it shoot its tongue in a straight line. Strafe to the side to dodge the attack. If grabbed, the boss slowly drags you and damages your health. You can shoot it point blank in the face a few times to stagger it. |
Fight Through Maul Grievers in Second Phase
When the Omega Griever's health drops to 80% it will jump up through a wall to call upon a group of Maul Grievers to attack you.
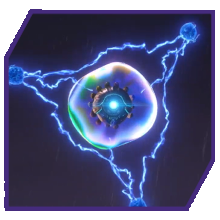
Then the Omega Griever absorbs the Green Crystal in the wall to grow a tough skin that protects its exposed left arm, making it invulnerable to any weapon.
Eliminate all of the Maul Grievers, then focus on dropping the Omega Griever back to the ground by shooting at its exposed limbs, back, or abdomen.
Evade Poison Attacks
| Poison Spray |
|---|
The Omega Griever spits poison fluids that stucks you in place when hit. Run away from the attack, or mash the A button to break free. |
| Poison Boulder |
The Omega Griever forms a large ball of poison fluid and hurls it at you, causing massive damage. Dash away to evade the attack. |
| Multi Poison Shot |
While hanging on the wall, the Omega Griever shoots poison fluids at you five times. The poison fluids leave a puddle on the ground that damages you when walked on. |
Evade Multiple Ground Strike Attacks
| Double Ground Strikes |
|---|
After passing below 70% of its health, the Omega Griever strikes the ground two times now, making double shockwaves across the arena. Time your jumps twice to evade. |
| Charged Ground Strikes |
When the Omega Griever's health drops to below 50%, it'll charge up then strikes the ground twice, creating two shockwaves each (a total of four). This can be dodged by timing your jumps correctly, or using the Psychic Boots to double jump. At this point, the Omega Griever will begin to move and attack faster. |
How to Get Double Jump (Space Jump)
Jump Away from Laser Beam
The Omega Griever shoots a fast laser beam around the arena in a circle, you can dash forward or time your jump to avoid the attack.
Continue with Targeting and Shooting Its Abdomen
Keep shooting the Omega Griever in its weak spots so it'll get staggered or expose its belly. Damage its exposed abdomen with high-damage weapons or the Psychic Bombs until you defeat it.
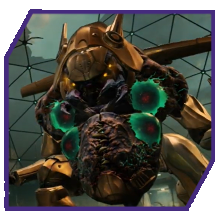
Omega Griever Overview
| Boss Overview | |
|---|---|

| |
| Map | Great Mines |
| Area | Crystal Extraction |
| Required Upgrade | Psychic Bomb |
| Weak Point | |
| ・Abdominal Organ ・Exposed Limbs and Back |
|
Metroid Prime 4: Beyond Related Guides
List of All Story Bosses
 Aberax Aberax
|
 Carvex Carvex
|
 Sylux (1st Encounter) Sylux (1st Encounter)
|
 Xelios Xelios
|
 Keratos Keratos
|
 Phenoros Phenoros
|
 Sylux (2nd Encounter) Sylux (2nd Encounter)
|
 Omega Griever Omega Griever
|
 Varmis Varmis
|
 Sylux (Final Boss) Sylux (Final Boss)
|
List of All Mini-bosses
 Flight Drone MCU Flight Drone MCU
|
 Hover Shuttle Transport Hover Shuttle Transport
|
 Behemoth Behemoth
|
Comment
Author

How to Beat Omega Griever
Rankings
- We could not find the message board you were looking for.
Gaming News

![Monster Hunter Stories 3 Review [First Impressions] | Simply Rejuvenating](https://img.game8.co/4438641/2a31b7702bd70e78ec8efd24661dacda.jpeg/show)
![Monster Hunter Stories 3 Review [First Impressions] | Simply Rejuvenating](https://img.game8.co/4438641/2a31b7702bd70e78ec8efd24661dacda.jpeg/thumb)
![The Seven Deadly Sins: Origin [First Impressions] | A Promising Start](https://img.game8.co/4440581/584e0bfb87908f12c4eab6e846eb1afd.png/thumb)

Popular Games

Genshin Impact Walkthrough & Guides Wiki
Umamusume: Pretty Derby Walkthrough & Guides Wiki
Pokemon Pokopia Walkthrough & Guides Wiki
Honkai: Star Rail Walkthrough & Guides Wiki
Monster Hunter Stories 3: Twisted Reflection Walkthrough & Guides Wiki
Arknights: Endfield Walkthrough & Guides Wiki
Wuthering Waves Walkthrough & Guides Wiki
Zenless Zone Zero Walkthrough & Guides Wiki
Pokemon TCG Pocket (PTCGP) Strategies & Guides Wiki
Monster Hunter Wilds Walkthrough & Guides Wiki


Recommended Games
Diablo 4: Vessel of Hatred Walkthrough & Guides Wiki
Cyberpunk 2077: Ultimate Edition Walkthrough & Guides Wiki
Fire Emblem Heroes (FEH) Walkthrough & Guides Wiki
Yu-Gi-Oh! Master Duel Walkthrough & Guides Wiki
Super Smash Bros. Ultimate Walkthrough & Guides Wiki
Pokemon Brilliant Diamond and Shining Pearl (BDSP) Walkthrough & Guides Wiki
Elden Ring Shadow of the Erdtree Walkthrough & Guides Wiki
Monster Hunter World Walkthrough & Guides Wiki
The Legend of Zelda: Tears of the Kingdom Walkthrough & Guides Wiki
Persona 3 Reload Walkthrough & Guides Wiki


All rights reserved
© Nintendo. Metroid and Nintendo Switch are trademarks of Nintendo.
The copyrights of videos of games used in our content and other intellectual property rights belong to the provider of the game.
The contents we provide on this site were created personally by members of the Game8 editorial department.
We refuse the right to reuse or repost content taken without our permission such as data or images to other sites.