Flare Pool Walkthrough and Guide
★ Story Walkthrough | Upgrades and Abilities
☆ Characters | Bosses | Puzzles
★ Viewros Map: Energy Tank | Missile Expansion | Shot Expansion
★ Game Details: amiibo Unlocks | How Long to Beat | Switch Edition Differences
This is a guide for the Flare Pool area in Metroid Prime 4: Beyond. Check out how to progress through Flare Pool, as well as guides for any puzzles and bosses in the Flare Pool area here.
| Flare Pool Guides | |
|---|---|
| Walkthrough | Exploration Map |
List of Contents
| ◀ Previous Area | Next Area ▶︎ |
|---|---|
| Ice Belt | Great Mines |
Flare Pool Map
| ・You can view different sections of Volt Forge by selecting a tower from the second dropdown in our sidebar. Click the arrow in the upper left corner to open the sidebar. |
Flare Pool 100% Exploration Guide
Flare Pool Main Walkthrough
| Note: If you are aiming for a 100% completion, visit our All Missables and Points of No Return page. |
| Flare Pool Main Objectives | |
|---|---|
| 1 | Retrieve Ice Chip in Ice Belt |
| 2 | Obtain Vi-O-La IC Suit in Volt Forge |
| 3 | Rescue Ezra Duke |
| 4 | Rescue Nora Armstrong |
| 5 | Detatch Clamps |
| 6 | Escape! ┗ Boss Battle: Phenoros |
Retrieve Ice Chip in Ice Belt
| Objectives | |
|---|---|
| 1 |
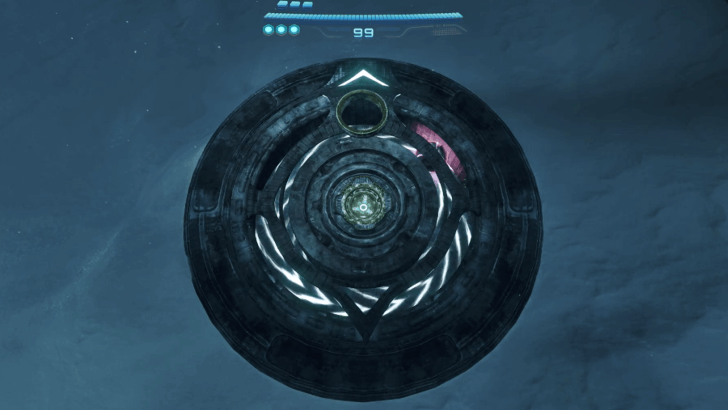 Go through Ice Belt up until the Snowfield area and look for the Loading Crane near the entrance to the Control Room. Insert yourself in the Loading Crane in Morph Ball Mode through the hologram. Use the Psychic Boost Ball to get launched across the field to find a hidden area. ▶︎ Ice Belt Walkthrough and Guide |
| 2 |
 Proceed to the hidden area to find a Cryopod on the ceiling. Take the slopes on the right to get to the terminal on top. Toggle Morph Ball Mode and roll over to the hologram to activate the terminal. Interact with this to lower the Cryopod. |
| 3 |
 Interact with the lowered Cryopod to acquire the Ice Chip. Revisit Fury Green and bring the chip to MacKenzie to acquire the Ice Shot. ▶︎ Fury Green Revisit (Part 2) ▶︎ Ice Shot Effects: Where to Use Ice Chip |
Obtain Vi-O-La IC Suit in Volt Forge
| Objectives | |
|---|---|
| 1 |
 Upon revisiting Volt Forge for the first time, proceed to the Vi-O-La stop in Tower 3. ▶︎ Volt Forge Revisit (Part 1) |
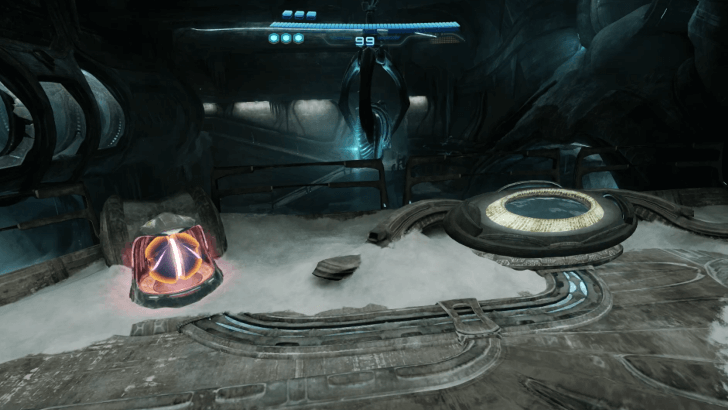
| 2 |
 Insert yourself in the nearby Morph Ball Hologram and activate the Psychic Boost Ball to activate the terminal. ▶︎ Psychic Boost Ball How to Unlock and Effects |
| 3 |
 Interact with the newly activated terminal to get the suit upgrade, Vi-O-La IC Suit. This allows Samus to travel on magma and lava without taking damage. ▶︎ Vi-O-La IC Suit How to Unlock and Effects |
| 4 |
 Before leaving Volt Forge, you will be facing the Flight Drone MCU for the second time. Defeat the drone by using the Control Beam to your advantage. Note that you must hit all of its Energy Spheres within a single turn of Control Beam. |
Rescue Ezra Duke
| Objectives | |
|---|---|
| 1 | 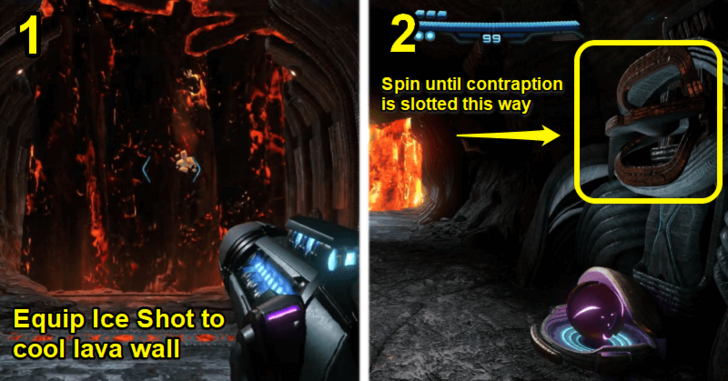 Once you've acquired the Ice Shot and the Vi-O-La IC Suit, return to Flare Pool. Use Ice Shot on the wall of lava and the Missile Launcher to break the solidified lava. Pass through, then use Morph Ball on the contraption ahead to stop the flow of lava for good. ┗ Switch to Missile Launcher ▶︎ Missile Launcher How to Unlock and Effects |
| 2 | 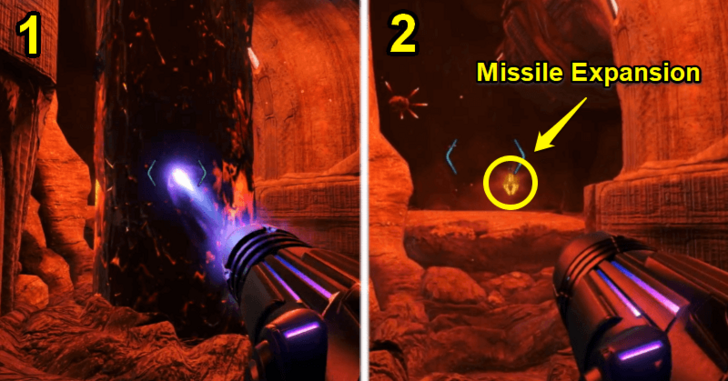 Head onwards down the path to the main bridge. Along the way, you can freeze another lava wall to obtain another Missile Expansion. ▶︎ All Missile Expansion Locations |
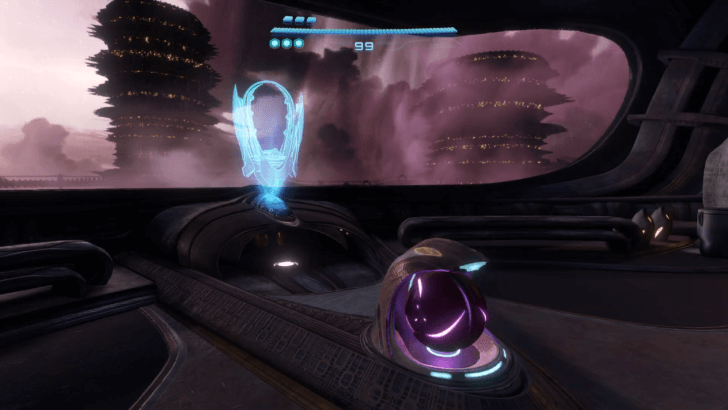
| 3 | 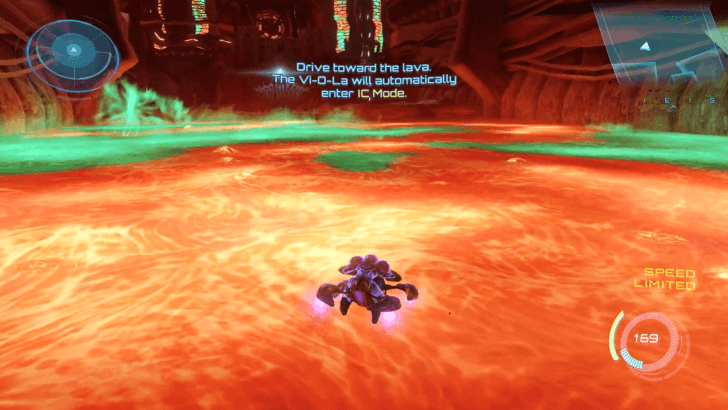 Once you reach the bridge area, go down to the lava and the IC Suit will activate automatically, allowing you to ride over the lava. Head to the left side of the lava, enter the building, then ride up the elevator. Note: There is a Psychic Boost Rail and a Scout Bot on the right side of the lava, as well as a Tether Node, which requires the Psychic Spider Ball. |
| 4 | 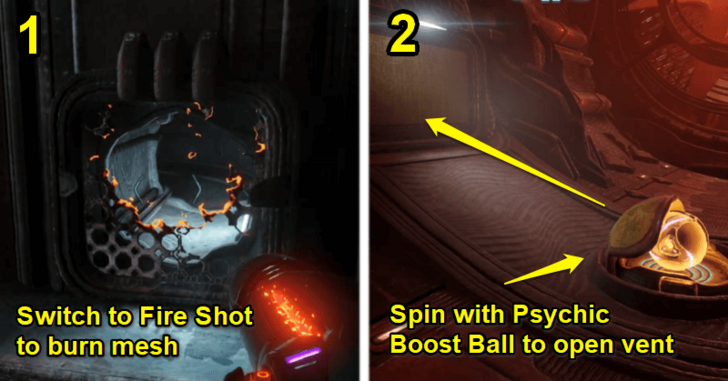 Proceed through the area until you get a distress signal, coming from the Boiler Room. Use Fire Shot on the vent grill then Morph Ball inside. Use Psychic Boost Ball on the nearby spinner and continue through the area. Beware of the ceiling turrets. ┣ Switch to Fire Shot ┗ How to Use Psychic Boost Ball ▶︎ Fire Shot Effects: Where to Use Fire Chip ▶︎ Psychic Boost Ball How to Unlock and Effects |
| 5 | 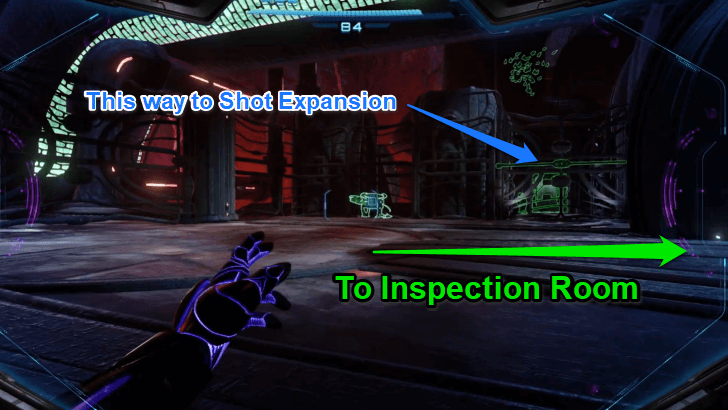 Enter the half-pipe area with large fans and use Psychic Boost Ball to get up on top of the ramp. Activate the elevator and ride further up. You can proceed further by going into the big door. You can obtain a Shot Expansion by using the Psychic Lasso to pull open the nearby gate and ride the elevator down. Shoot a missile to break the coverings around the Shot Expansion. ┗ How to Use Psychic Lasso ▶︎ Psychic Lasso How to Unlock and Effects ▶︎ All Shot Expansion Locations |
| 6 | 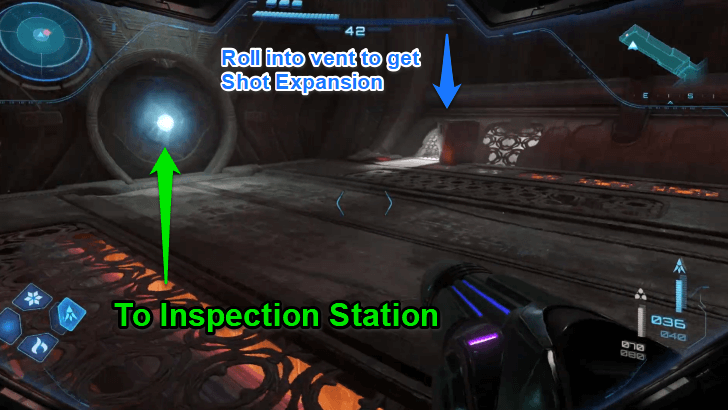 Beside the next door to the Inspection Station, there is a vent with another Shot Expansion. Burn the mesh with Fire Shot, then roll into the vent with Morph Ball. Destroy the obstructions with bombs before getting the Shot Expansion. |
| 7 | 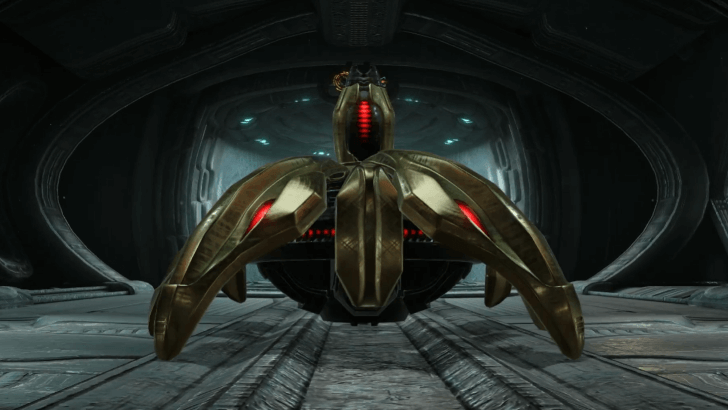 Head into the giant doors into the Inspection Station. Enter the next area and defeat the Heavy Maintenance Tank. Jump and duck under its laser beams. Because of its heavy armor, you have to attack it with missiles. |
| 8 |  After defeating the Heavy Maintenance Tank, you will see a large Security Gate, which you cannot access yet. Instead, go to the smaller door down an alley beside the large spinning generators to find the Save Point. After saving, go north into the other small door at the end. |
| 9 | 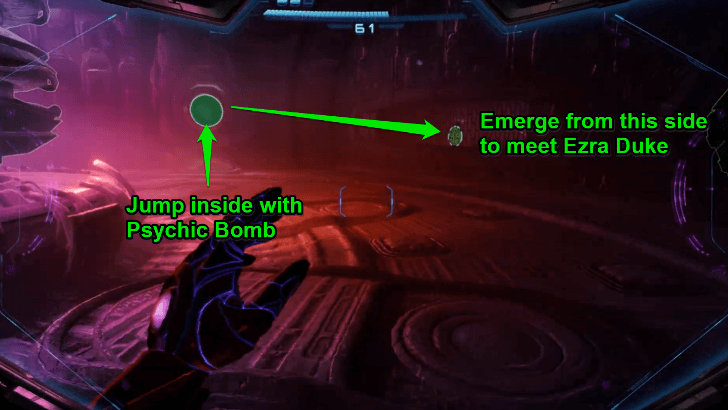 In the next area, use Psychic Bomb to jump into the nearby hole to find a Lava Heat Boiler. Jump into the next hole to find yourself in a new room with a cutscene, introducing Ezra Duke. ┗ How to Plant a Psychic Bomb ▶︎ Psychic Bomb How to Unlock and Effects |
| 10 | 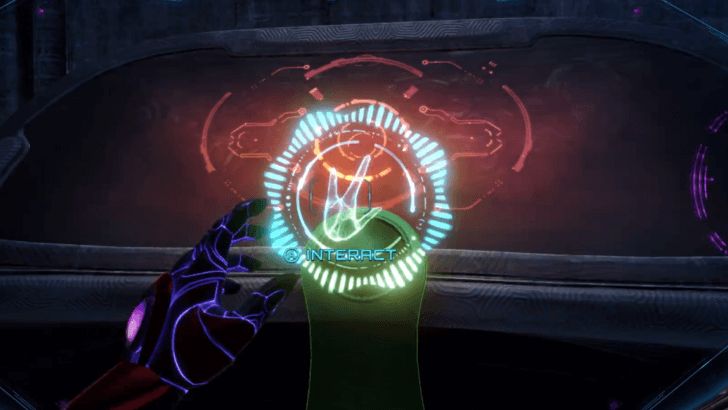 After the cutscene with Duke, scan the terminal in front of you to activate the hologram. Interact with the hologram to turn off the boiler. This also activates the Spinner in the boiler room. |
| 11 | 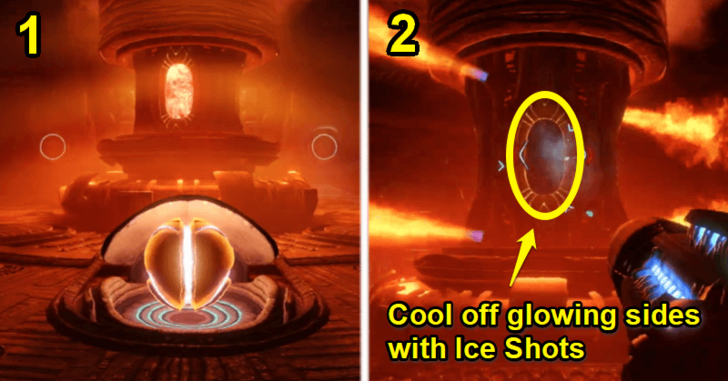 Head back to the boiler room and power the Spinner with Psychic Ball Boost. This causes the boiler to start spewing flames. Fire Ice Shots at the boiler's glowing parts in order to stop it. When it starts to spin really fast, revert back into Morph Ball mode. ┗ Switch to Ice Shot ▶︎ Ice Shot Effects: Where to Use Ice Chip |
| 12 | 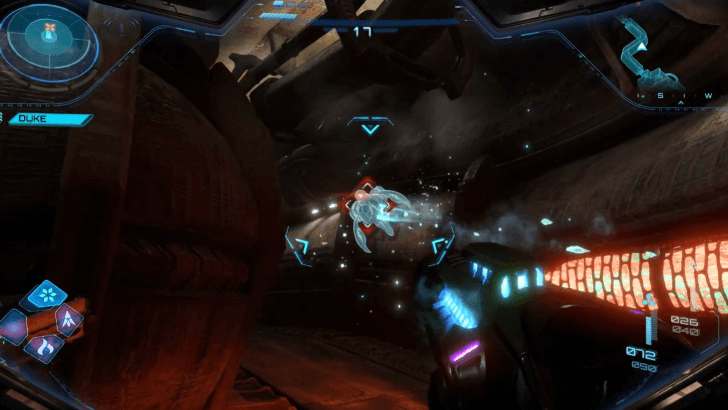 Make your way back to the Security Gate. Beat the Heavy Maintenance Tank on the way. After beating it, enter the door to trigger a cutscene and a call with Nora Armstrong. You will receive a new distress signal. |
Switch to Missile Launcher
To switch to the Missile Launcher, press the right directional button on your Nintendo Switch. To launch a missile, press the R trigger.
Missile Launcher How to Unlock and Effects
Switch to Fire Shot
To switch to the Fire Shot, press the down directional button on your Nintendo Switch. To fire a shot, press the R trigger.
Fire Shot Effects: Where to Use Fire Chip
How to Use Psychic Boost Ball
Toggle Morph Ball mode by pressing the Y button. Like the Boost Ball, press the B button or the L trigger.
Psychic Boost Ball How to Unlock and Effects
How to Use Psychic Lasso
Press the ZL button and aim at your desired target with the right joystick. Then, press the left joystick to begin pulling the target.
Psychic Lasso How to Unlock and Effects
How to Plant a Psychic Bomb
To plant a Psychic Bomb, plant a regular bomb in Morph Ball mode. Press the Y button to toggle Morph Ball mode, then plant a bomb with B or ZR.
Psychic Bomb How to Unlock and Effects
Switch to Ice Shot
To switch to the Ice Shot, press the up directional button on your Nintendo Switch. To launch a shot, press the R trigger.
Ice Shot Effects: Where to Use Ice Chip
Rescue Nora Armstrong
| Objectives | |
|---|---|
| 1 | 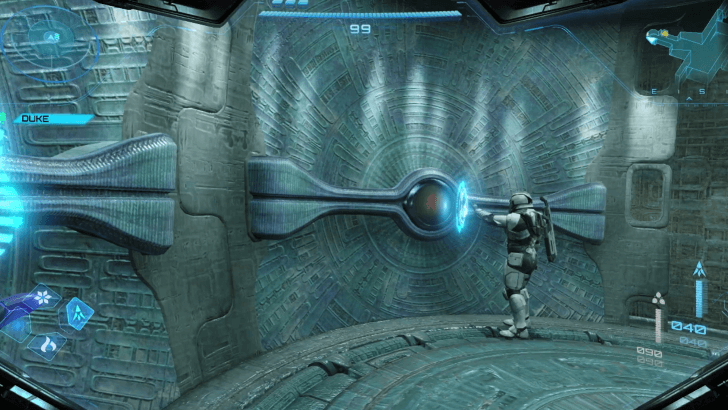 Together with Ezra, activate the switches on the Security Gate at the Entry Bay. Proceed further, unlocking another Security Gate, and reach a room with offline Psy-bots. |
| 2 | 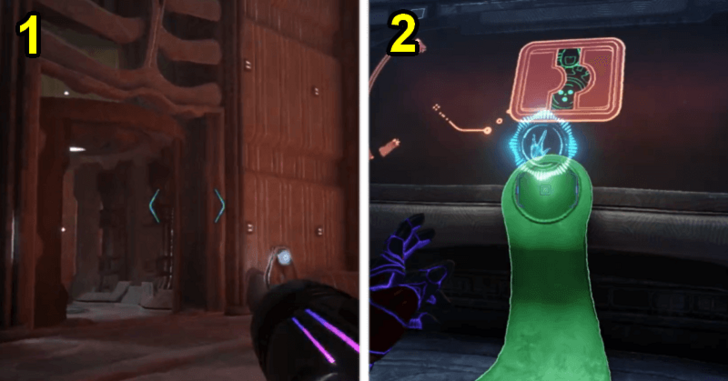 Ride the elevator to the side of the room. Scan the terminal first to activate the elevator. At the top, shoot the ceiling turret before scanning the Maintenance Tank Terminal. A cutscene will show you a glowing hatch in the opposite wall. |
| 3 |
Fire a Control Beam at the Hatch Break the left window with a missile, then fire a Control Beam at the hatch, found on the other side of the central pillar. The doors will open, allowing you to head into the next room. ┗ How to Use Control Beam ▶︎ Control Beam How to Unlock and Effects |
| 4 | 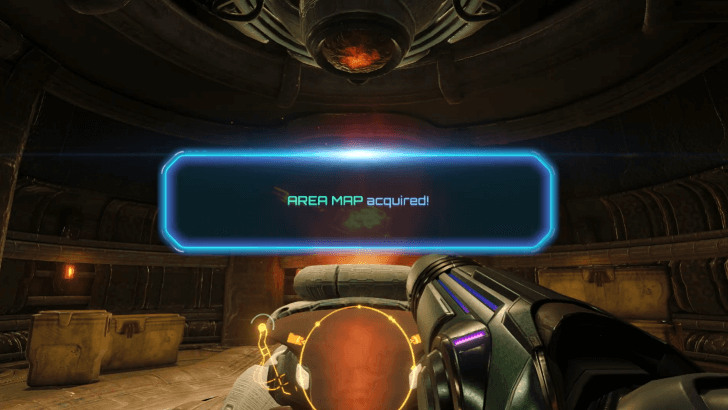 Head down a corridor protected by a ceiling turret. Interact with the switch to obtain an Area Map. |
| 5 | 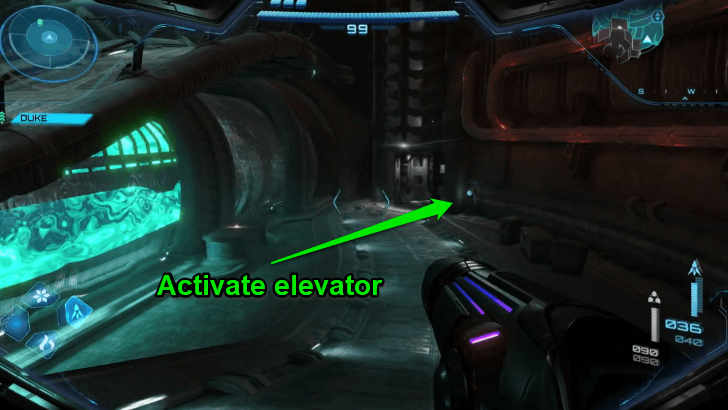 Continue down the main corridor until you reach a large room where green liquid is being poured into a container. Head to the other side of the container by going up the ramp. Activate the elevator on the other side. |
| 6 | 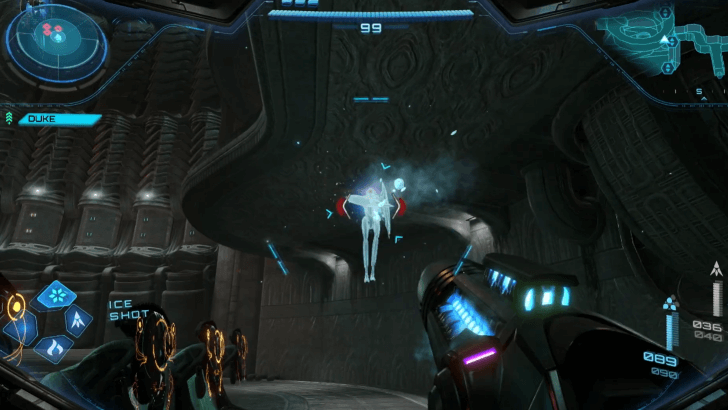 Exiting the elevator, you will enter a cutscene where the Psy-bots will awaken. The Psy-bots are weak to Ice Shot. Fire missiles when they're frozen to beat them easily. Continue heading up the path to the top floor, then ride the elevator. Defeat more Psy-bots and proceed to the next room. |
| 7 |  Before the room with the double doors, there is a side room with a Psychic Container holding an Energy Tank inside. Toggle Psychic Visor to trace the line with the Mote and get the Energy Tank. ┗ Dragging a Mote with Psychic Visor ▶︎ All Energy Tank Locations ▶︎ Psychic Visor How to Unlock and Effects |
| 8 | 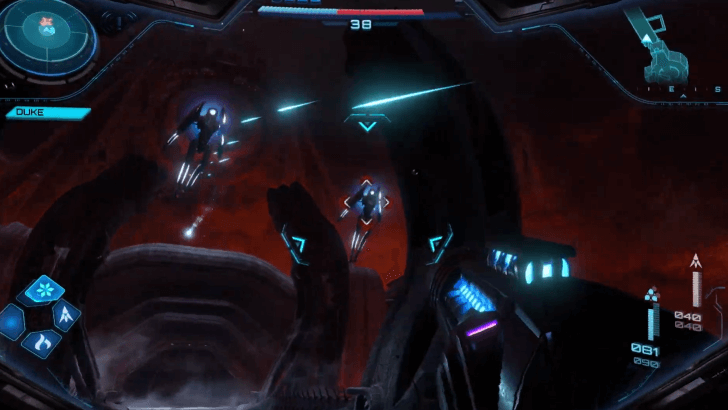 After obtaining the Energy Tank, proceed through the double doors with Ezra and fight more Psy-bots. A Psy-bot Gunner will appear. Alternate between Ice Shot and Missiles to defeat it quickly. When all enemies are defeated, unlock the next set of double doors. |
| 9 | 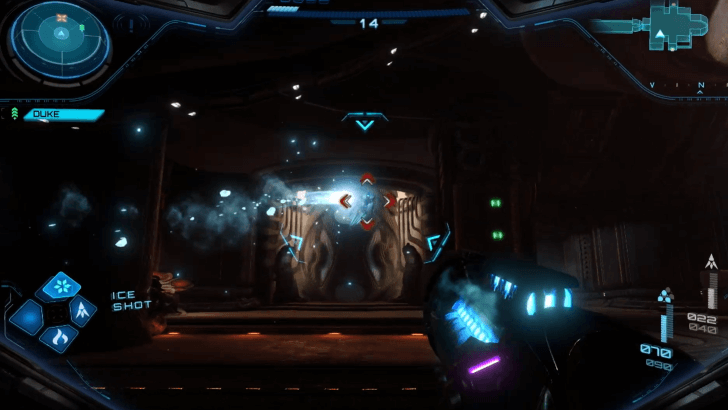 There will be more Psy-bots in the Control Room. Defeat them and scan the terminal for a cutscene, where you will be told to put the facility on maintenance mode. You will obtain a new Area Map afterwards. |
| 10 | 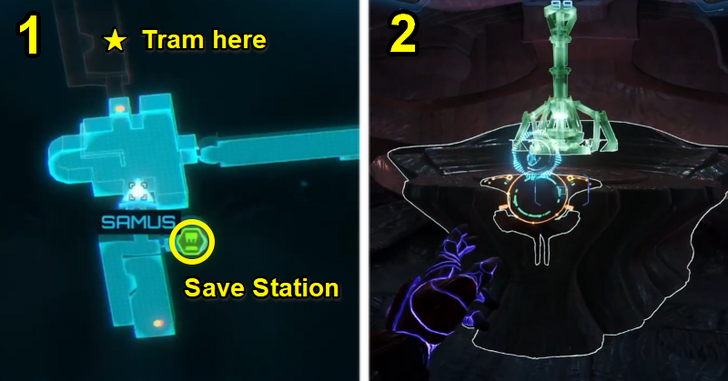 First, access the Save Station on the left side of the room, then go to the Transportation Bay to the right side. Scan both terminals inside the tram to activate the hologram needed to power it on. Proceed to the South Clamp, where Nora Armstrong is. |
How to Use Control Beam
To use the Control Beam, toggle the Psychic Visor by pressing the X button. Press and hold the A button or the ZR trigger to release a Control Beam. You can control the trajectory of the beam with the analog stick, allowing you to aim for specific targets.
Control Beam How to Unlock and Effects
Dragging a Mote with Psychic Visor
To drag a Mote using the Psychic Visor, first toggle the visor with the X button. Aim at the Mote then hold the ZL trigger to grasp it. Use the left analog stick to drag it along its intended path.
Psychic Visor How to Unlock and Effects
Detach Clamps
| Objectives | |
|---|---|
| 1 | 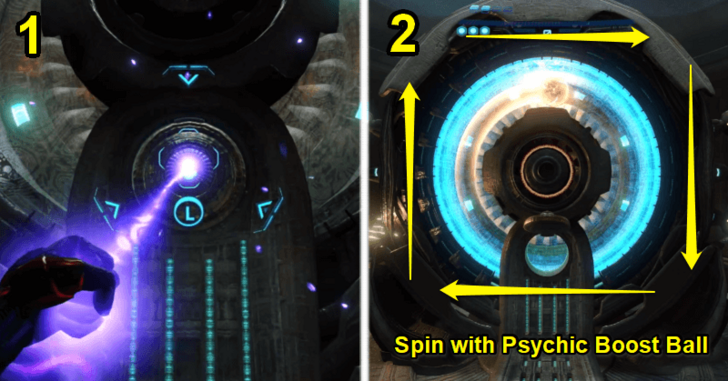 After meeting Nora Armstrong, use the Psychic Lasso to pull the hatch off the maintenance tank in front of you. Enter the hole via Morph Ball and Psychic Bomb, then spin around with Psychic Boost Ball to release the first clamp. |
| 2 | 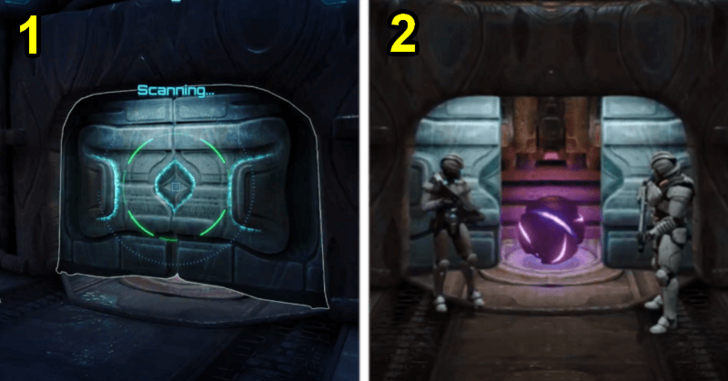 Return to the tram to go to the next clamp. Open the double doors into a room and scan the Maintenance Tank Elevator Hatch to have Ezra and Nora open it for you. Toggle Morph Ball to head down a level. |
| 3 |
Activate Switch Inside the Pillar Roll into the hole behind the central pillar, then propel yourself with Psychic Bomb into the glowing circle to activate the platforms. Continue ascending with the bombs. You will have to be quick, as the platforms retract after a while. After activating the switch at the top, return to Duke and Armstrong. |
| 4 | 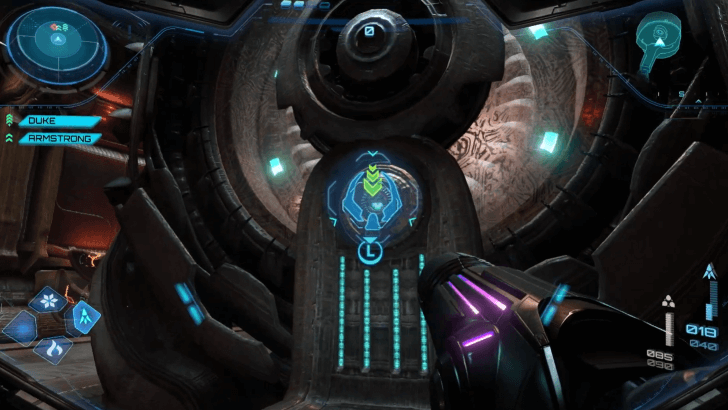 Just like last time, use Psychic Lasso on the hatch to enter the hole. Then, use Psychic Boost Ball to spin around to detach the clamp. Head back to the tram for one last ride. |
Escape!
| Objectives | |
|---|---|
| 1 | 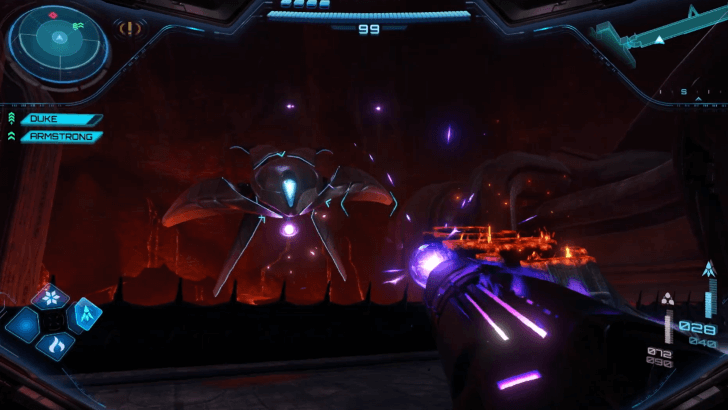 The tram will crash in a cutscene. Save your progress in the Save Station to your right, then head through the door into the Control Room. Head back out the main door and prepare for an ambush on the bridge. Defeat all enemies on the bridge first before dealing with the Hover Shuttle Transport. ▶︎ How to Beat Hover Shuttle Transport |
| 2 |
 Defeat Psy-bot Shocker Defeat Psy-bot ShockerA vent will open following the battle. Use Morph Ball to roll through the vent, then use bombs to clear the obstacles along the way. Drop down to engage the battle with a Psy-Bot Shocker. Freeze the Psy-Shocker with Ice Shot to get the upperhand, then keep shooting at it while incapacitated. Evade its electric shockwaves by double jumping. |
| 3 |
 Head Back To Lava Lake. Head Back To Lava Lake.Retrace your steps, backtracking to the Undercarriage. Defeat the Psy-Bots and Maintenance Tanks along the way. Take the elevator down, and attempt to return to the Lava Lake at the beginning of the area. Enter the newly opened gate at Lava Lake and prepare for a boss fight. |
| 4 | 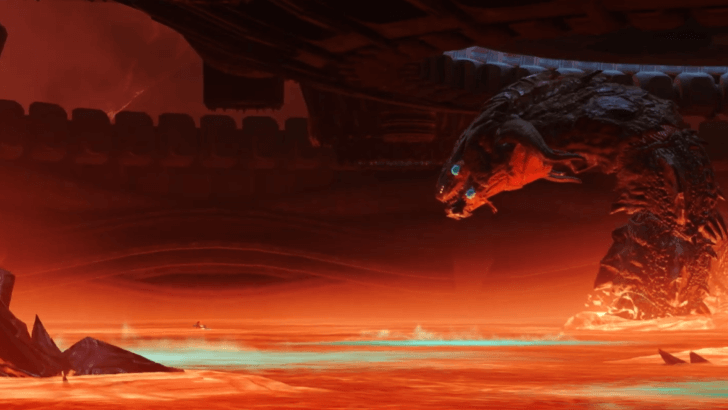 Defeat Phenoros, which has two phases. In the first phase, pursue Phenoros on Vi-O-La and shoot its internal blue membranes. In its second phase, shoot its blue head spots and tongue. When Phenoros fakes being dead, use Control Beam to shoot its core nested deep within its body. ▶︎ How to Beat Phenoros |
| 5 |
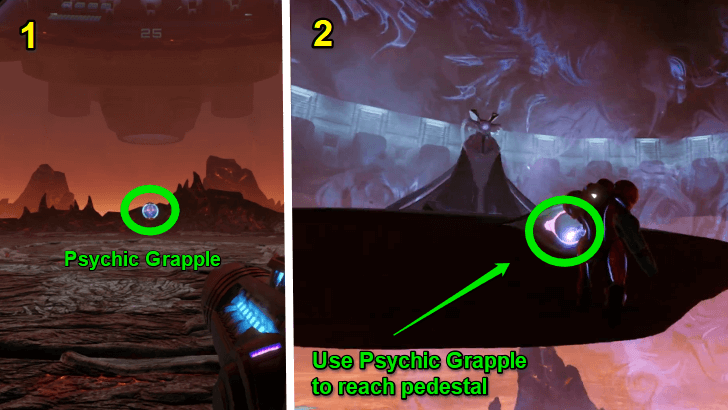 After defeating Phenoros, obtain the Psychic Grapple. Use it to grapple up to the Lamorn statue and obtain the Master Teleporter Key. ▶︎ Psychic Grapple How to Unlock and Effects |
| 6 |
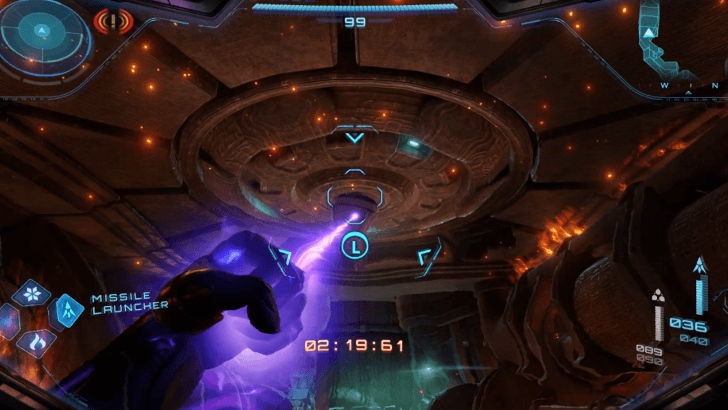 Escape Flare Pool! Escape Flare Pool!The place will self-destruct in 5 minutes. From the statue's platform, grapple onto the nearby pillar, which will bring you up and out of the Volcano Heart. You need to use your new ability multiple times to find a way out of the crumbling area. Some areas will require Scanning and using other abilities like your Psychic Lasso and Missiles in order to get through. ▶︎List of All Upgrades and Psychic Abilities |
How to Use Psychic Grapple
To use Psychic Grapple, press the ZL trigger to latch onto your target and swing yourself toward your desired direction.
Psychic Grapple How to Unlock and Effects
| Next Section: |
|---|
| Great Mines Walkthrough and Guide |
Flare Pool Revisit
| Note: After obtaining the Teleporter Patches from MacKenzie at Base Camp, you need to locate six Mech Parts to disable the force field around Chrono Tower. One of the Mech Parts is found under the Lava Lake Bridge in Flare Pool. |
| Flare Pool Revisit Main Objectives | |
|---|---|
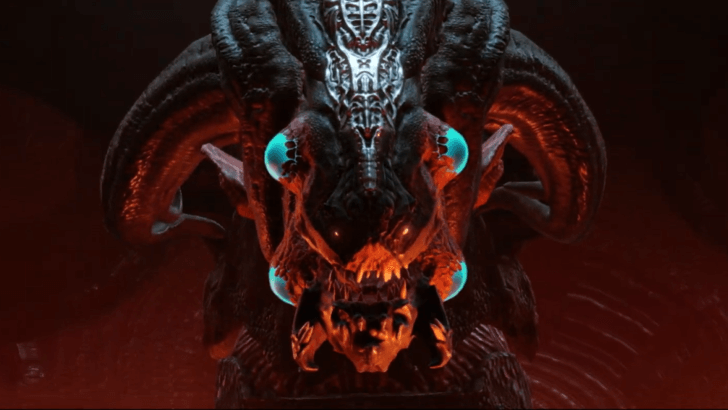
| 1 | Get the Mech Part in Flare Pool ┗ Boss Battle: Behemoth |
Get the Mech Part in Flare Pool
| Objectives | |
|---|---|
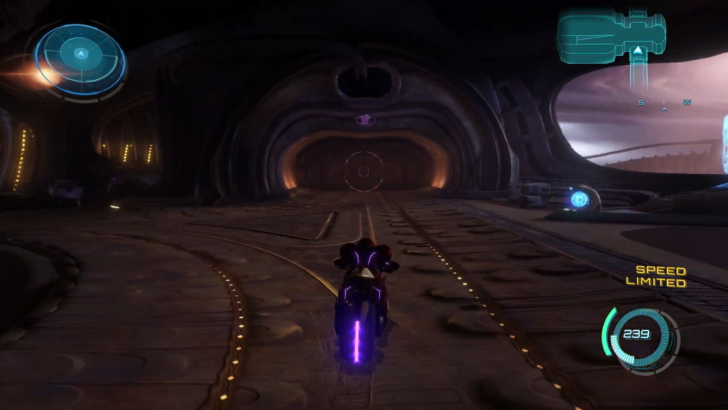
| 1 |  Return to the Flare Pool and drive down the side of Lava Lake Bridge. Destroy the Koornicite Ore below the bridge with a Super Missile to find a hidden gate. The next gate inside will not open, so you need to find another way by destroying a small pile of rocks hiding a passage. Navigate inside in Morph Ball mode. ┗ How to Shoot Super Missiles ▶︎ Flare Pool 100% Exploration Guide ▶︎ Super Missile How to Unlock and Effects |
| 2 |  Emerging out of the alternate route, you will find the Mech Part in the Expansion Site. Defeat Behemoth before attaching a Teleporter Patch to the Mech Part. ▶︎ How to Beat Behemoth |
| 3 | 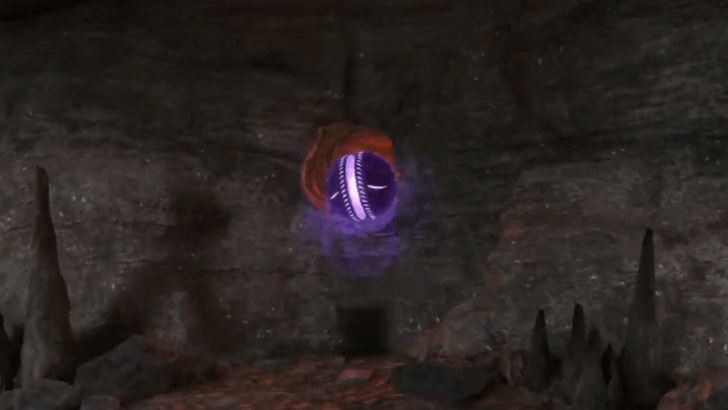 Leave Flare Pool by exiting the way you came. Hop up into the hole in Morph Ball mode to exit through the Lava Works. If this is the last Mech Part, you can return to Base Camp in Fury Green to rejoin your allies. |
How to Shoot Super Missiles
Switch to the Missile subweapon by pressing the right directional button. Afterwards, aim at your target by charging up your Missile through the R Button to become a Super Missile, then release this for a powerful blast.
Super Missile How to Unlock and Effects
| Next Section: |
|---|
| Chrono Tower Walkthrough and Guide |
All Flare Pool Bosses
Hover Shuttle Transport Boss Fight
| Boss Overview | |
|---|---|

| |
| Map | Flare Pool |
| Area | Control Room Bridge |
| Required Upgrade | None |
| Weak Point | |
| ・Cockpit Window | |
Hover Shuttle Transport Boss Guide
How to Beat Hover Shuttle Transport: Quick Boss Tips
- Defeat Psy-bots First
- Shoot the Cockpit Window
- Hide Behind Walls to Evade Laser Beam
Phenoros Boss Fight
| Boss Overview | |
|---|---|
| |
| Map | Flare Pool |
| Area | Volcano Heart |
| Required Upgrade | Ice Shot |
| Weak Point | |
| ・Internal Membranes ・Tongue ・Head Spots |
|
How to Beat Phenoros: Quick Boss Tips
- Shoot Blue Membranes in First Phase
- Shoot Head Spots and Tongue in Second Phase
- Dash Away from Lunge Attack
- Dodge Ranged Attacks
- Use Control Beam to Destroy Core
All Flare Pool Unlocks
Fire Shot
The Fire Shot upgrade allows you to deal massive fire elemental damage to targets. You can obtain this by taking the Fire Chip to MacKenzie in Fury Green after going to Flare Pool for the first time.
Fire Shot Effects: Where to Use Fire Chip
Psychic Grapple
The Psychic Grapple is an ability that gives Samus a grappling hook, letting her safely swing across large gaps. This ability is automatically unlocked after defeating Phenoros in Flare Pool.
Psychic Grapple How to Unlock and Effects
Metroid Prime 4: Beyond Related Guides

Complete Story Walkthrough and Guide
All Walkthrough Guides
| Story Walkthrough | |
|---|---|
| Prologue Walkthrough | Fury Green Walkthrough |
| Volt Forge Walkthrough | Ice Belt Walkthrough |
| Flare Pool Walkthrough | Great Mines Walkthrough |
| Chrono Tower Walkthrough | - |
Comment
Author

Flare Pool Walkthrough and Guide
Rankings
- We could not find the message board you were looking for.
Gaming News


![Monster Hunter Stories 3 Review [First Impressions] | Simply Rejuvenating](https://img.game8.co/4438641/2a31b7702bd70e78ec8efd24661dacda.jpeg/thumb)
![The Seven Deadly Sins: Origin [First Impressions] | A Promising Start](https://img.game8.co/4440581/584e0bfb87908f12c4eab6e846eb1afd.png/thumb)

Popular Games

Genshin Impact Walkthrough & Guides Wiki
Umamusume: Pretty Derby Walkthrough & Guides Wiki
Pokemon Pokopia Walkthrough & Guides Wiki
Honkai: Star Rail Walkthrough & Guides Wiki
Monster Hunter Stories 3: Twisted Reflection Walkthrough & Guides Wiki
Arknights: Endfield Walkthrough & Guides Wiki
Wuthering Waves Walkthrough & Guides Wiki
Zenless Zone Zero Walkthrough & Guides Wiki
Pokemon TCG Pocket (PTCGP) Strategies & Guides Wiki
Monster Hunter Wilds Walkthrough & Guides Wiki


Recommended Games
Diablo 4: Vessel of Hatred Walkthrough & Guides Wiki
Cyberpunk 2077: Ultimate Edition Walkthrough & Guides Wiki
Fire Emblem Heroes (FEH) Walkthrough & Guides Wiki
Yu-Gi-Oh! Master Duel Walkthrough & Guides Wiki
Super Smash Bros. Ultimate Walkthrough & Guides Wiki
Pokemon Brilliant Diamond and Shining Pearl (BDSP) Walkthrough & Guides Wiki
Elden Ring Shadow of the Erdtree Walkthrough & Guides Wiki
Monster Hunter World Walkthrough & Guides Wiki
The Legend of Zelda: Tears of the Kingdom Walkthrough & Guides Wiki
Persona 3 Reload Walkthrough & Guides Wiki


All rights reserved
© Nintendo. Metroid and Nintendo Switch are trademarks of Nintendo.
The copyrights of videos of games used in our content and other intellectual property rights belong to the provider of the game.
The contents we provide on this site were created personally by members of the Game8 editorial department.
We refuse the right to reuse or repost content taken without our permission such as data or images to other sites.