Ice Belt Walkthrough and Guide
★ Story Walkthrough | Upgrades and Abilities
☆ Characters | Bosses | Puzzles
★ Viewros Map: Energy Tank | Missile Expansion | Shot Expansion
★ Game Details: amiibo Unlocks | How Long to Beat | Switch Edition Differences
This is a guide for the Ice Belt area in Metroid Prime 4: Beyond. Check out how to progress through Ice Belt, as well as guides for any bosses, upgrades, abilities, rewards and puzzles in the area here.
| Ice Belt Guides | |
|---|---|
| Walkthrough | Exploration Map |
List of Contents
| ◀ Previous Area | Next Area ▶︎ |
|---|---|
| Volt Forge | Flare Pool |
Ice Belt Map
| ・You can view different sections of Volt Forge by selecting a tower from the second dropdown in our sidebar. Click the arrow in the upper left corner to open the sidebar. |
Ice Belt 100% Exploration Guide
Ice Belt Main Walkthrough
| Note: If you are aiming for a 100% completion, visit our All Missables and Points of No Return page. |
Retrieve the Fire Chip for MacKenzie
| Objectives | |
|---|---|
| 1 |  Once you've acquired Vi-O-La, drive southeast and use it to open the entrance to Flare Pool. Immediately upon entering, use the Psychic Boots on the psychic platforms to find a Missile Expansion. Keep walking until a cutscene triggers, showing the main bridge of Flare Pool. ┗ How to Use Psychic Boots ▶︎ Psychic Boots How to Unlock and Effects ▶︎ How to Unlock Vi-O-La and Controls |
| 2 |  Upon reaching the main bridge, get on Vi-O-La and use it to bring up the bridge. A cutscene will play, and you'll end up not being able to cross the bridge. Then, head back into the cave you just came out of. |
| 3 |  You will then be attacked by Psy-bot Soldiers. To make this fight easier, you can use Control Beam to knock all of them to the ground. Once they're dealt with, enter the door they came out of and proceed onwards. ┗ How to Use Control Beam ▶︎ Control Beam How to Unlock and Effects |
| 4 |  Hop on top of the Demolition Crane, transform into a Morph Ball, and roll into the gap, making sure to break the blockages with Psychic Bombs. The crane will break and reveal the Fire Chip, which you can now pick up. ┗ Switch to Morph Ball ▶︎ List of Controls |
| 5 | 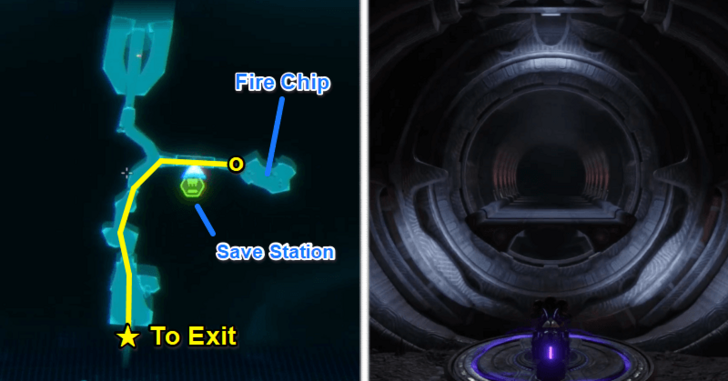 Retrace your steps back to the beginning of the area. Lava will pour behind you, blocking the path back to the bridge. Exit Flare Pool and make your way back to Base Camp. |
| 6 | 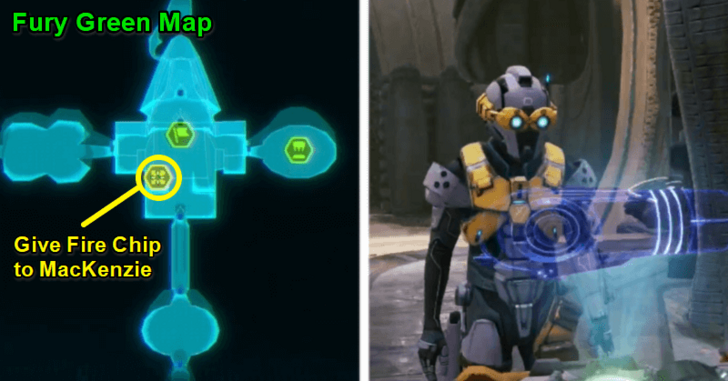 Head back to Fury Green, into Sol Valley, and use the Cargo Launcher to get back to Base Camp. Then, give the Fire Chip to MacKenzie. |
How to Use Psychic Boots
To use the Psychic Boots, press the B or L button twice to perform a double jump.
Psychic Boots How to Unlock and Effects
How to Use Control Beam
To use the Control Beam, toggle the Psychic Visor by pressing the X button. Press and hold the A button or the ZR trigger to release a Control Beam. You can control the trajectory of the beam with the analog stick, allowing you to aim for specific targets.
Control Beam How to Unlock and Effects
Switch to Morph Ball
To switch to Morph Ball mode, press the Y button. This mode is useful for navigating through tight spaces and activating various mechanisms.
Look for Ice Belt in Sol Valley
| Objectives | |
|---|---|
| 1 |
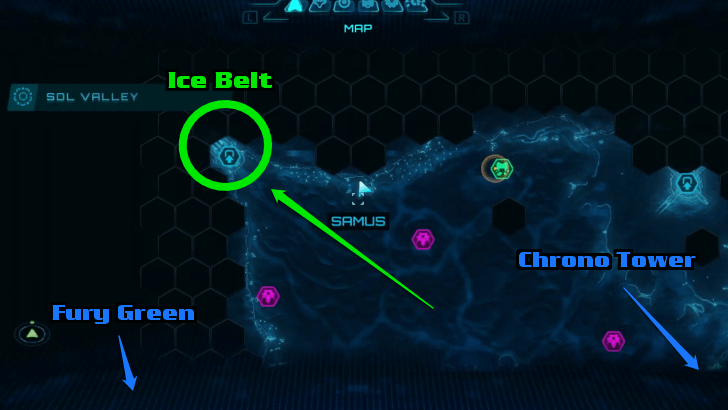 Ice Belt is located at the northeast corner of Sol Valley, notably in front of curved misty mountains from a distance. ▶︎Viewros (Sol Valley) Interactive Map |
| 2 |
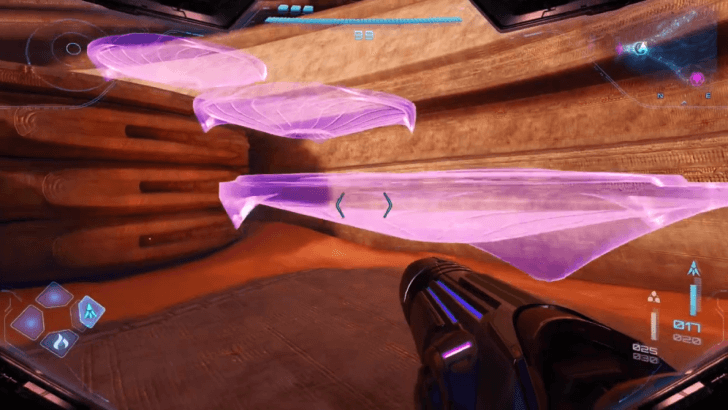 Place Psychic Platforms Going to the Top Ledge. Place Psychic Platforms Going to the Top Ledge. After arriving at the entrance of Ice Belt, set up some platforms going up to the ledge on the right side of the area. Defeat the Sand Grievers around the place to set these up properly. ┗ Psychic Boots How to Unlock and Effects ▶︎List of All Upgrades and Psychic Abilities |
| 3 |
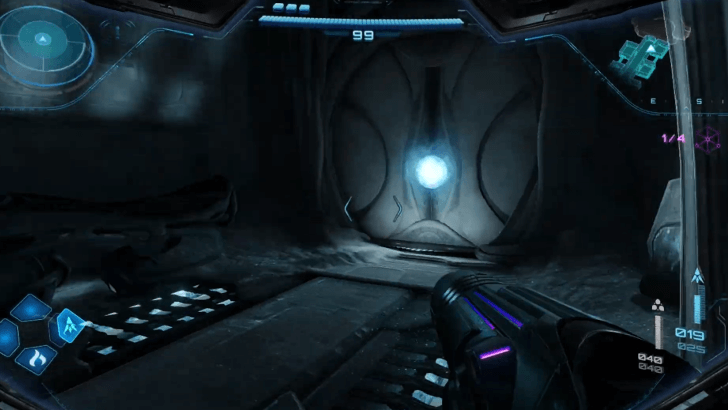
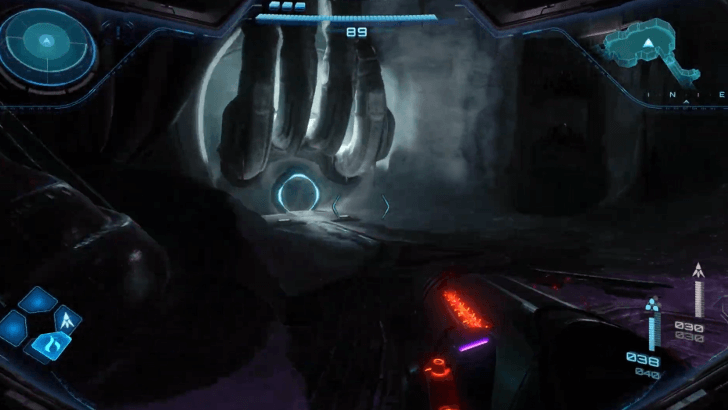
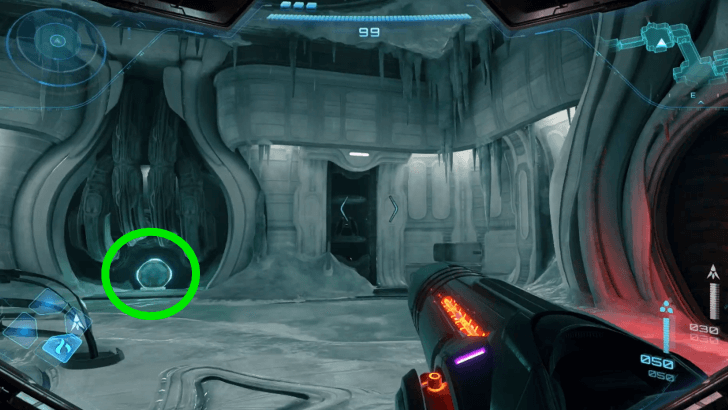
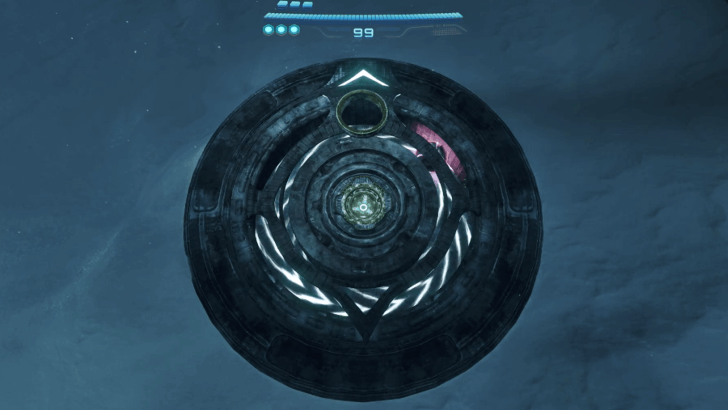
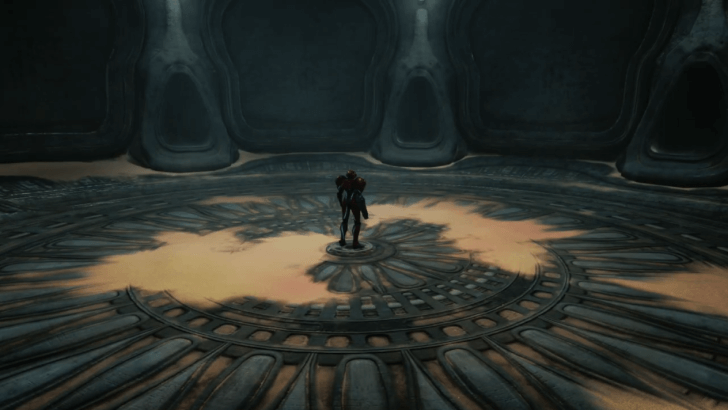 Take the Elevator at the Center of the Room. Take the Elevator at the Center of the Room.Enter the door leading to a room with a hologram in the middle. Stand on the hologram to activate an elevator platform and access the next floor downstairs. |
| 4 |
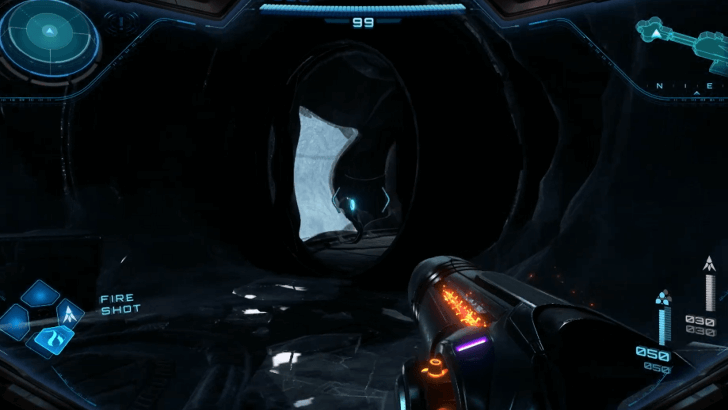
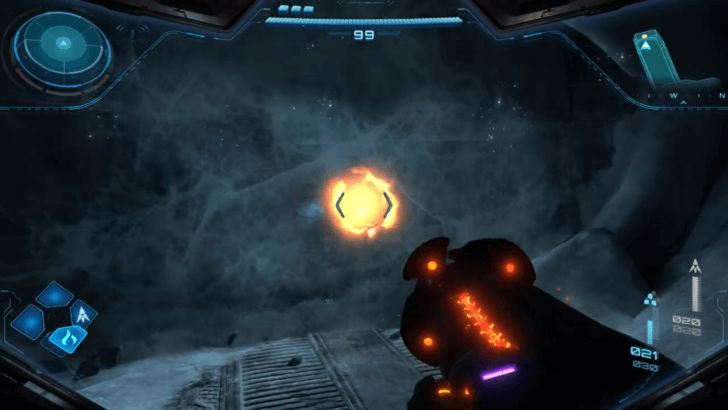 Keep Going Onwards to Reach Ice Belt. Keep Going Onwards to Reach Ice Belt.After reaching downstairs, keep going onwards through each door you find. You will pass by two rooms until you find a door locked behind an ice wall. Shoot this down with Fire Shot and go through this door to reach Ice Belt. ▶︎ Fire Shot Effects: Where to Use Fire Chip |
How to Use the Psychic Boots
Press the B or L buttons again to do a double jump. This will also grant the ability to set up Psychic Platforms in the air.
Psychic Boots How to Unlock and Effects
Descend Further into Ice Belt
| Objectives | |
|---|---|
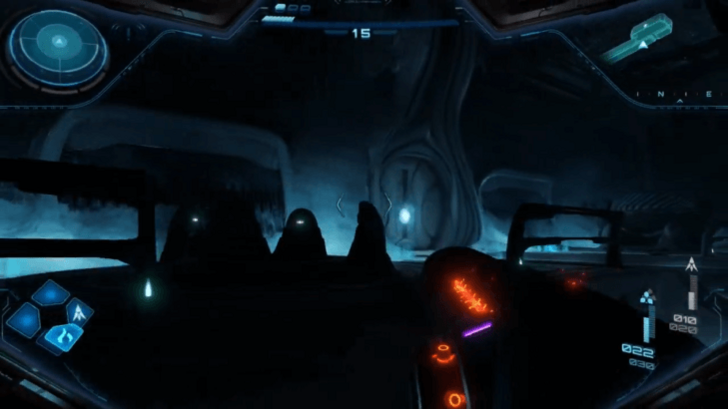
| 1 |
 Resist the Snow Wolves. Resist the Snow Wolves.As you head further down near the establishment overlooking the area, you will be surrounded by numerous Snow Wolves. Keep shooting down on the wolves who will stop and approach you until a cutscene plays. |
| 2 |
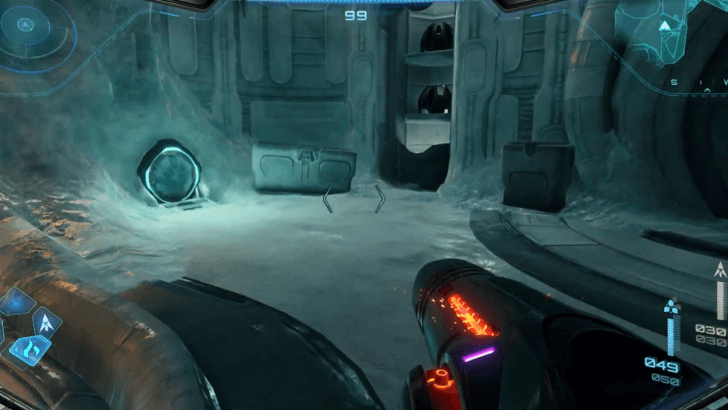
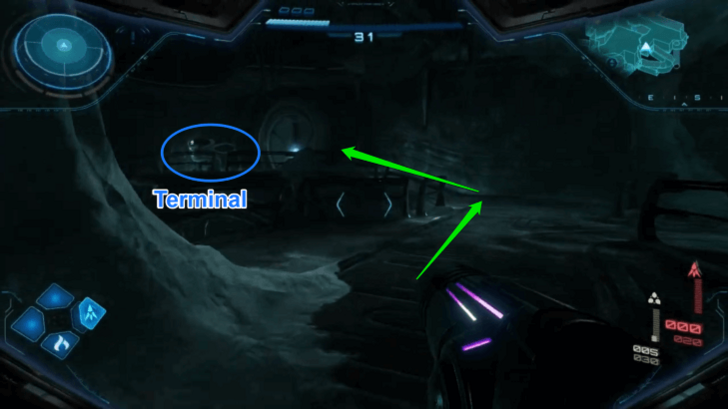 Enter the Vault Leading to the Control Room. Enter the Vault Leading to the Control Room.Enter the Pedestrian Door and keep going onwards until you reach an intersection. Take the path to your left to the Control Room and keep going on ahead until you find another accessible door going to the Lobby in front of an offline terminal. |
| 3 |
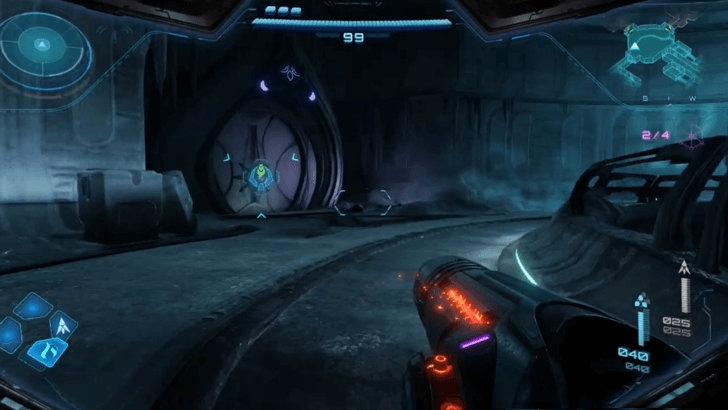
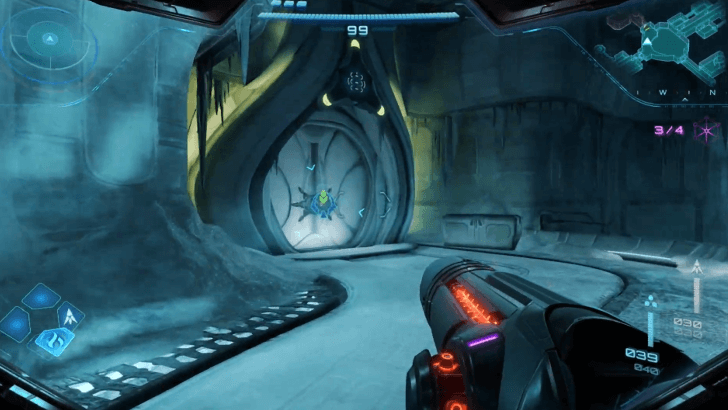
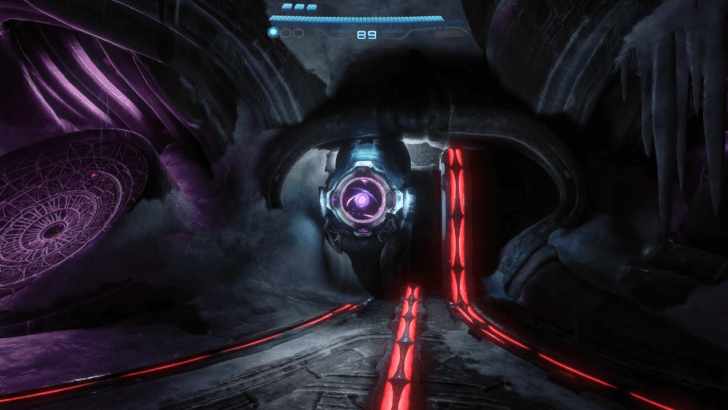
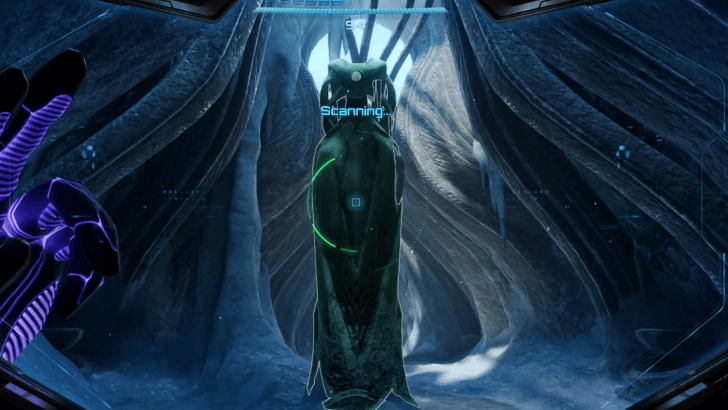
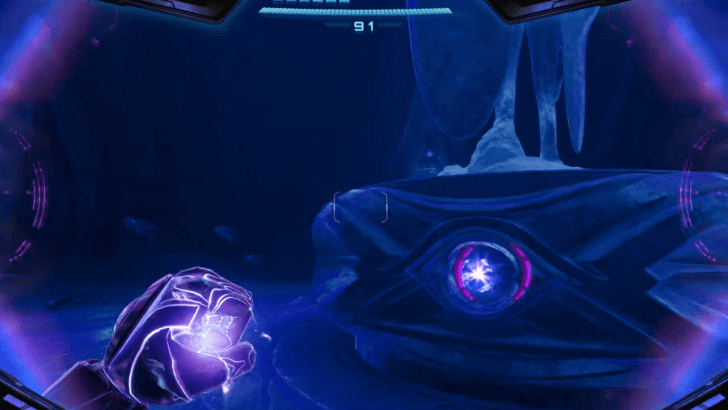
 Approach the Eye Structure on the Wall. Approach the Eye Structure on the Wall.Enter the Lobby in front of the offline terminal to find a structure in the shape of an eye at the end of it. Approach it and let a cutscene unfold featuring the appearance of Reger Tokabi. ▶︎ List of All Characters and Companions |
| 4 |
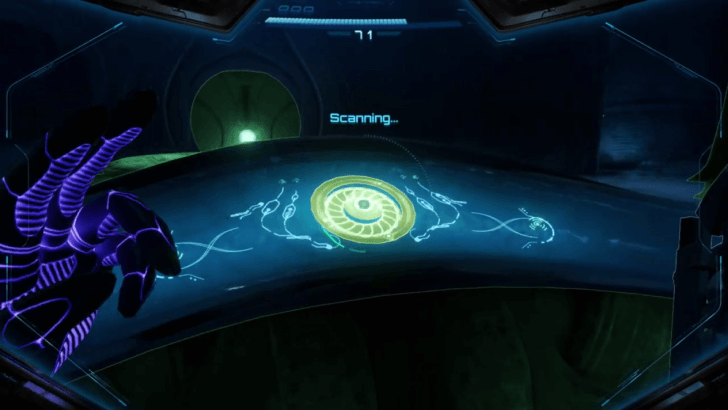 Scan the Terminal for the Area Map. Scan the Terminal for the Area Map.Go to the terminal in front of Reger Tokabi and scan this. A cutscene will play regarding Samus' next objective. You will acquire an Area Map afterwards. ┗ Scan Everything for Information ▶︎ List of Logbooks and Scans Guide |
| 5 |
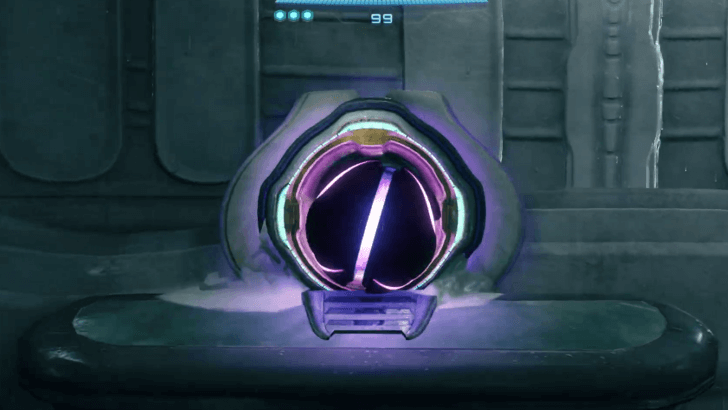
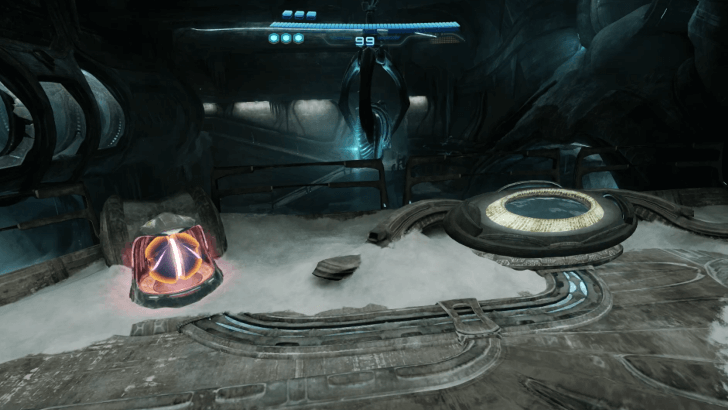
 Enter the Pod Maintenance Gate. Enter the Pod Maintenance Gate.Exit the room and turn to your left. You will find a huge Pod Maintenance Gate right next to a closed-off Conduit Access Hatch. Enter the gate and switch to Morph Ball Mode on top of the damaged manhole. This will lead you to another area underground. ┗ Switch to Morph Ball Mode |
| 6 |
 Follow the Road Until the Next Room. Follow the Road Until the Next Room.Upon reaching the underground, there is only one path that will lead you all the way to the next area. Keep following the road until you reach a door. You will be stumbling upon some Snow Roaches along the way. |
| 7 |
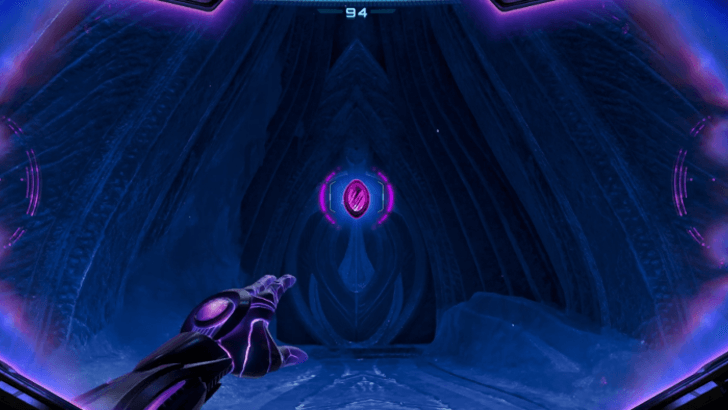
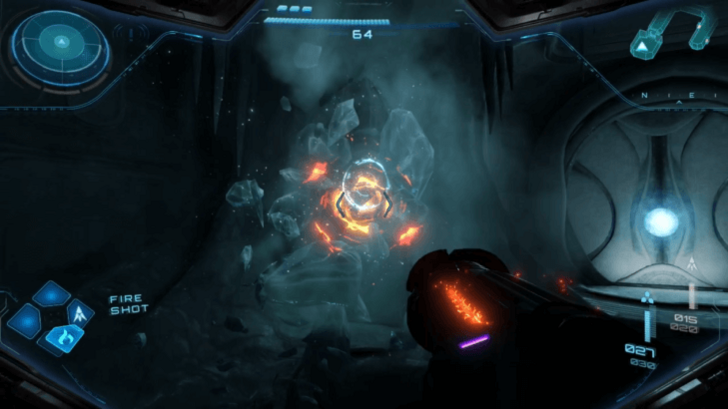 Find the Bomb Slot. Find the Bomb Slot.You will find a large Psychic Lock at the end of the room. This can only be unlocked with a TK Code at hand. For now, leave this be and go to the room located to the left. Examine the Bomb Slot near the door entrance that is trapped in ice. Aim at this with Fire Shot and insert yourself into the slot in Morph Ball Mode. |
| 8 |
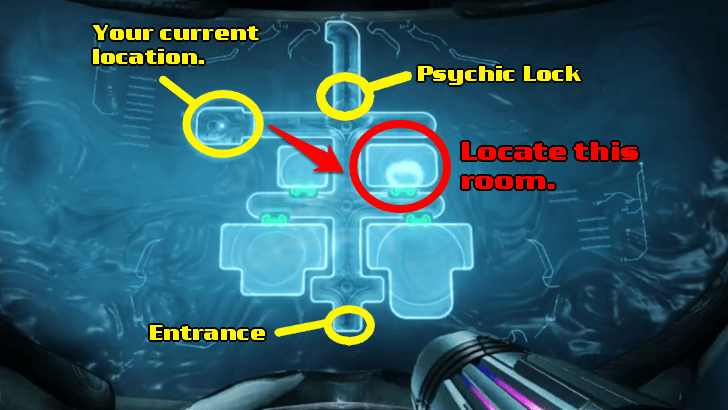 Find the room with the Nova DNA Sequencer. From your current location, leave the room, turn right to the middle of the room, then turn left at the first corner. The room in question is through the door on the left of the hallway. |
| 9 |
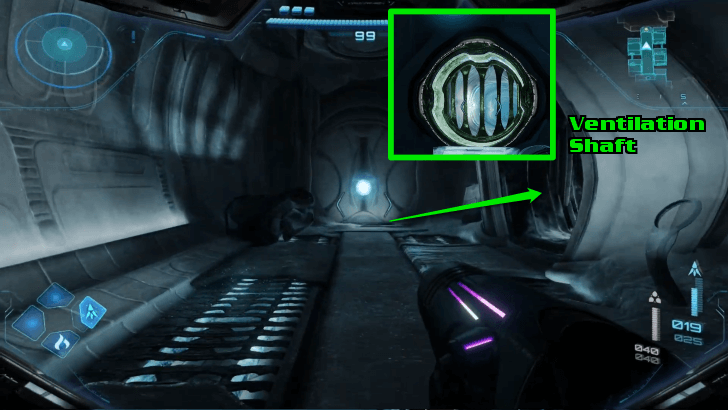
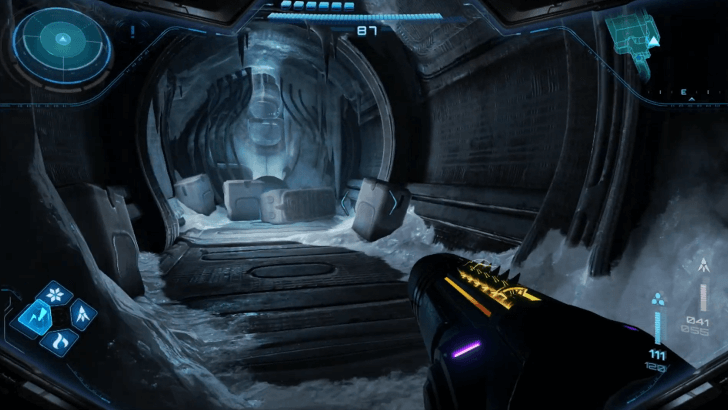
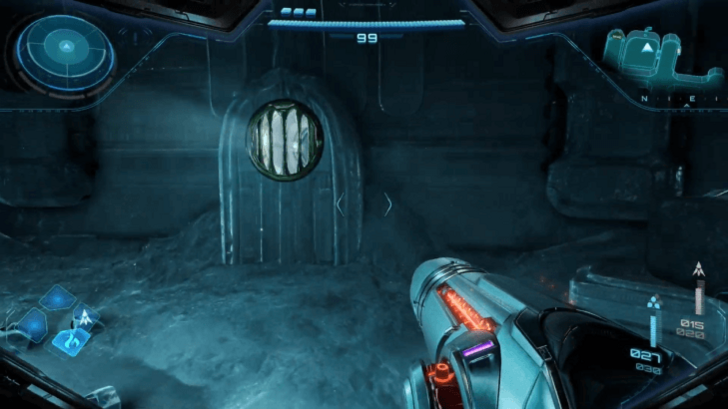 Enter the Ventilation Shaft. Enter the Ventilation Shaft.After reaching the room, search the Ventilation Shaft on the right side of the area. Shoot at its metals, then hop into the shaft in Morph Ball Mode. Follow the direction of the tube to reach another room. |
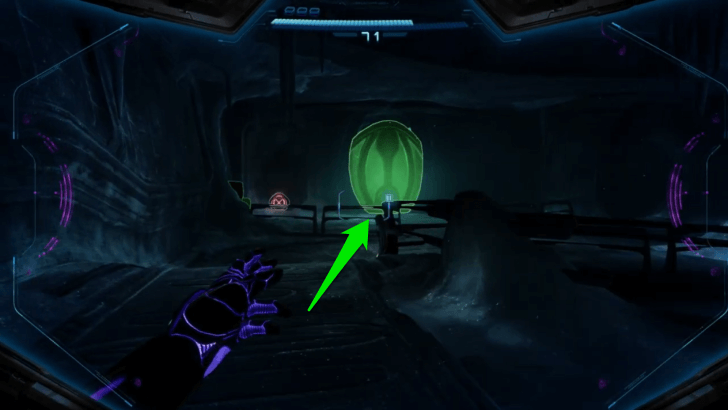
| 10 |
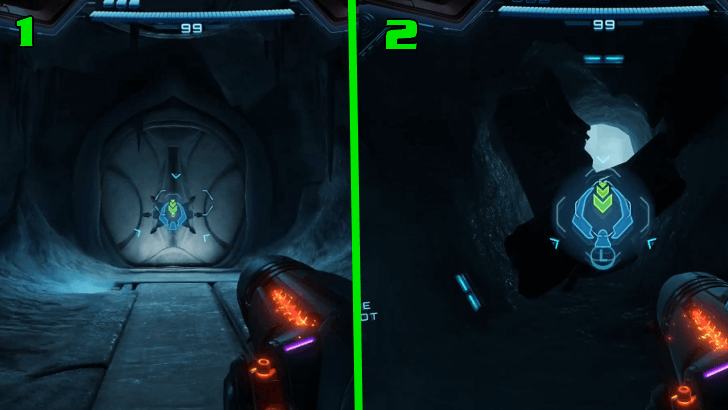
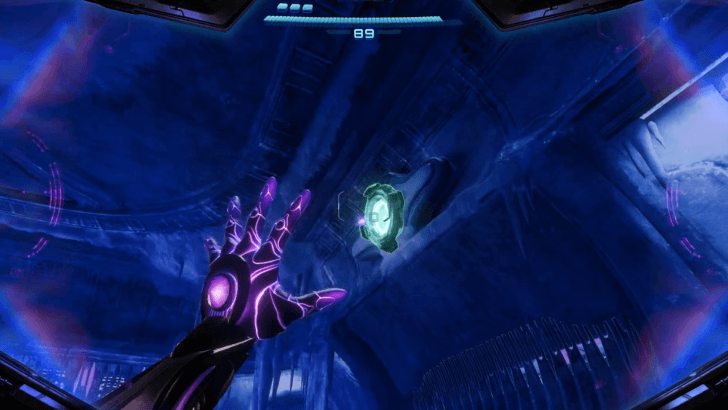
 Unlock the Psychic Container. Unlock the Psychic Container.Go in front of the Psychic Container found in the middle of the room and enter your Psychic Visor to control its locking node. Follow the lines that it will show you to unlock this. The Psychic Container will drop another tool for your journey: the Psychic Lasso. ┗ How to Use the Psychic Visor ▶︎ Psychic Lasso How to Unlock and Effects |
| 11 |
 Exit the Room Using the Psychic Lasso. Exit the Room Using the Psychic Lasso.Exit the room using the Psychic Lasso. Afterwards, backtrack to the Psychic Lock, then go to the hallway on the right. Open the door at the end with the Psychic Lasso and pass through. Use the Psychic Lasso again on the rubble on the left, then keep going onwards to reach another room with a terminal. Scan this to acquire another Area Map. ┗ Using the Psychic Lasso ▶︎ Psychic Lasso How to Unlock and Effects |
Scan Everything for Information
Make it a habit to scan everything along the way. This can provide you with clues on what to do next, apart from adding more logging information to your logbook.
List of Logbooks and Scans Guide
Switching to Morph Ball Mode
Press the Y button to toggle Morph Ball Mode. This is a useful feature for entering narrow tubes and for activating Bomb Slots.
How to Use the Psychic Visor
Press the X Button to switch visors. The Psychic Visor will let Samus use her psychic abilities.
Psychic Visor How to Unlock and Effects
Using the Psychic Lasso
Press the ZL Button and aim using the right joystick. Press on the left joystick to attach the Psychic Lasso, then pull this down for the target to pull along.
Psychic Lasso How to Unlock and Effects
Solve the Bio-Lab Psychic Lock
| Objectives | |
|---|---|
| 1 | 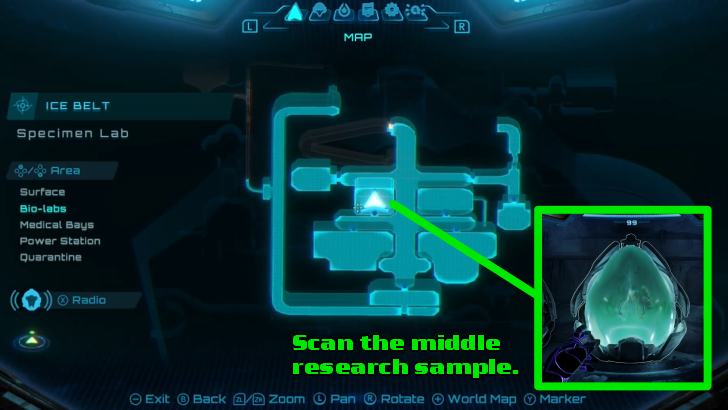 Locate the room with three research samples inside. This is located in one of the rooms to the left of the Psychic Lock. Scan the research sample in the middle to get the first Bio-Lab TK Code. ┗ Rotate TK Code for the Optical Puzzle ▶︎ TK Code Puzzle Solutions and Locations |
| 2 |
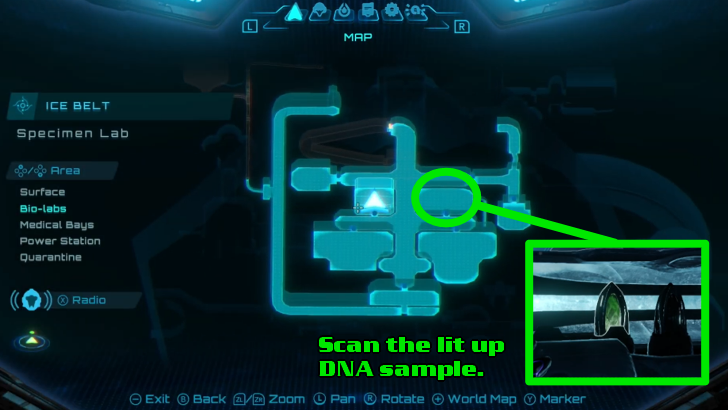 Backtrack to the room with the Ventilation Shaft. Open the container in front of the shaft with the Psychic Lasso to reveal the DNA Samples. Scan the lit-up DNA Sample to get the second Bio-Lab Code. |
| 3 |
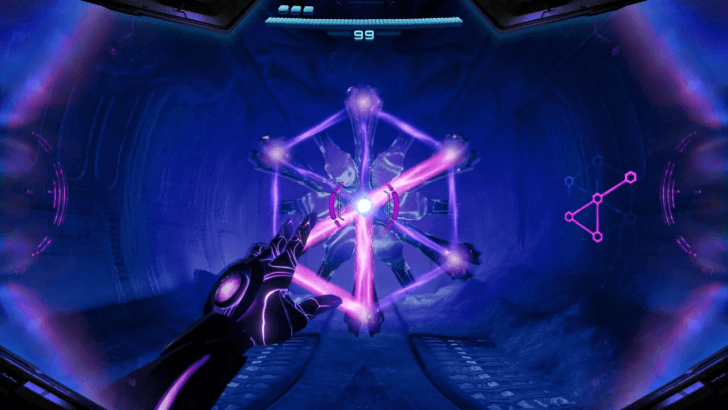 Return to the Psychic Lock and open your Psyche Visor. Now that you have all the TK Codes for the area, a specific pattern will appear from your perspective. Follow this pattern to unlock the Psychic Lock. |
Rotate the TK Code Fragment to Solve the Optical Puzzle
Rotate the TK Code Fragment until a more whole shape is seen objectively. You will need to solve this optical illusion puzzle before you can acquire the fragment.
TK Code Puzzle Solutions and Locations
Solve the Medical Bays Psychic Lock
| Objectives | |
|---|---|
| 1 |
 After solving the first Psychic Lock, you will find the second lock in the next area. Go to the door opposite the second Psychic Lock for a save room. After saving your progress, look for a space with a stretcher facing a cracked Tempered Window. Shoot this down and hop onto the other side of the Staging Corridor. Encountered enemies in Medical Bays: ・Maintenance Tanks ▶︎ TK Code Puzzle Solutions and Locations |
| 2 |
 Follow the Staging Corridor and enter the already opened room at the farthest end to the right. Shoot a charged beam against the metal railings to enter the shaft in Morph Ball Mode. |
| 3 |
Scan the Uptight Test Capsule. At the end of the ventilator tube, look through the canisters on the left in the room. Scan the uptight one to get the first TK Lock Fragment. Rotate this around to solve the optical puzzle. ▶︎ TK Code Puzzle Solutions and Locations |
| 4 |
 Backtrack to the Staging Corridor and proceed to the nearby door to the right to reach the Medical Hub. Follow the path going to the left and use the Psychic Lock to pull on the lock of the first door you see. Enter this room and keep pushing onwards until you find a window overlooking a Storage Bay. |
| 5 |
 Proceed to the Storage Bay by pulling the lock on the door to the right with the Psychic Lasso. While passing through the corridor, open the first door you will find on your right. |
| 6 |
Thaw the Crane with Fire Shot. On top of the frozen specimen on the left, there is a frozen crane that you can thaw. Shoot a Fire Shot at it to reveal another Griever Specimen. Interact with the specimen's terminal to open this and scan it for the second TK Code Fragment. ▶︎Fire Shot Effects: Where to Use Fire Chip |
| 7 |
 Backtrack to the Medical Hub. Unlock the next door to the left with the Psychic Lasso, then go all the way south until you reach the Surgery Bay. Open the room to the left to see a floating Balsallae System in the center of the room. |
| 8 |
Activate and Scan the Balsallae System. Scan the access panel behind the Balsallae System to activate this. Once the Balsallae System has been opened, scan it to reveal the third TK Code Fragment. Go back to the Surgery Bay and enter the room at the opposite path to get a Missile Expansion in a locked vent. |
| 9 |
 Go back to the Medical Hub and open the last door on the west side of the area. Keep pushing all the way to the west until you find the Recovery Bay. |
| 10 |
Scan the Thawed Monitor. From the Recovery Bay, go around the right side of the room to find a vent. Shoot the broken metal railings and hop into the small room in Morph Ball Mode. Defeat the enemies inside, then thaw the frozen monitor at the left part of the room with Fire Shot. Scan the monitor after pulling this for the fourth and final TK Code Fragment. |
| 11 |
Open the Second Psychic Lock. Return to the Second Psychic Lock and examine this with your Psychic Visor. Follow the newly visible patterns to open this. |
Activate the Turbine
| Objectives | |
|---|---|
| 1 |
 Upon opening the second Psychic Lock, keep pressing onwards. Aim a Fire Shot if you reach a frozen pathway to access the door beyond this. Pass through the next room, then turn left. Walk all the way until you see a view of the hanging bridges outside. |
| 2 |
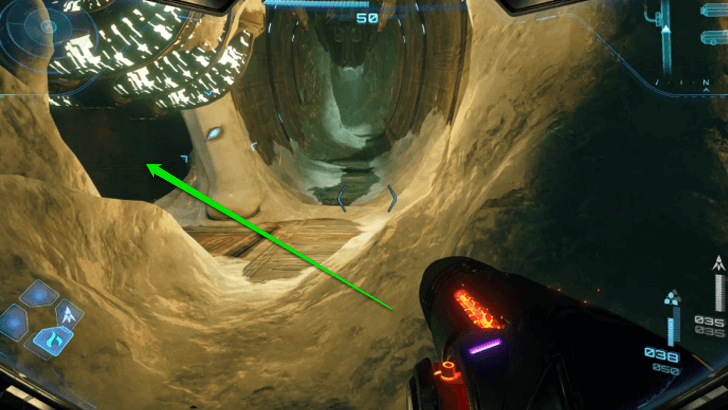
 Hop down from the ledge, then turn right to cross the first hanging bridge. Keep following the bridges until you reach a cliff. Be careful not to get swept along with the strong, icy winds. |
| 3 |
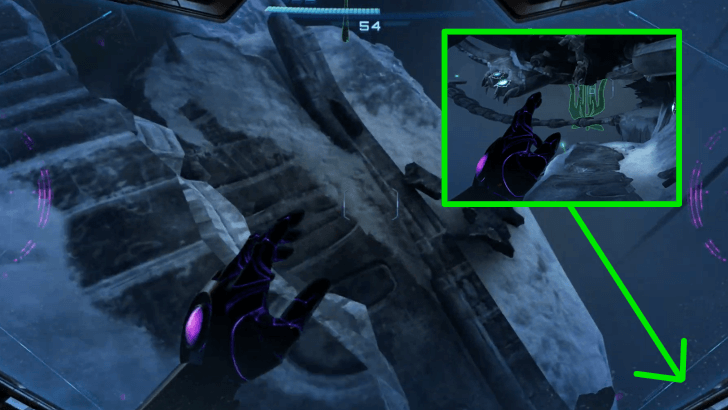
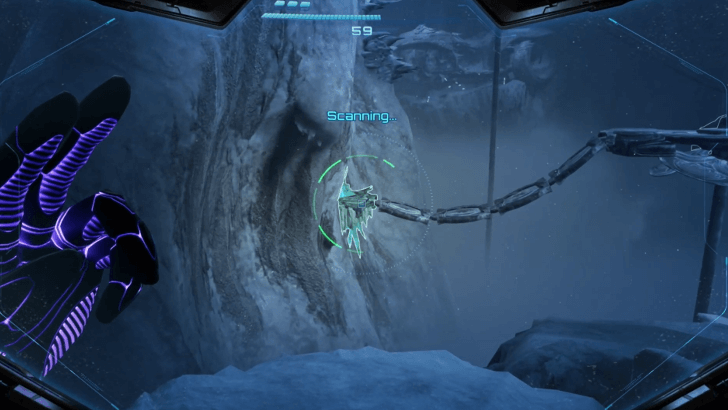 From a distance, you will find an anchor-chain stuck on a rock wall. This is connected to a nearby platform. Position yourself at the very edge of the cliff and charge a beam at it to break this. The platform will move closer to you, making the distance shorter. |
| 4 |
 Keep an eye out for the strong winds that will make jumping to the platform difficult. Once this calms down, you can jump to the platform, then to the hanging bridge. Run all the way to the cracked tempered glass and shoot at it before the bridge falls down. |
| 5 |
 After arriving at the Power Station, the path will be linear from then onwards. Go past every room until you reach the Turbine area. In cases where you are blocked by some rubble or frozen walls, shoot a charged beam or a Fire Shot, respectively, at these to get to the next room. There is a save room in the Maintenance Access area, two rooms away from the turbine room. |
| 6 |
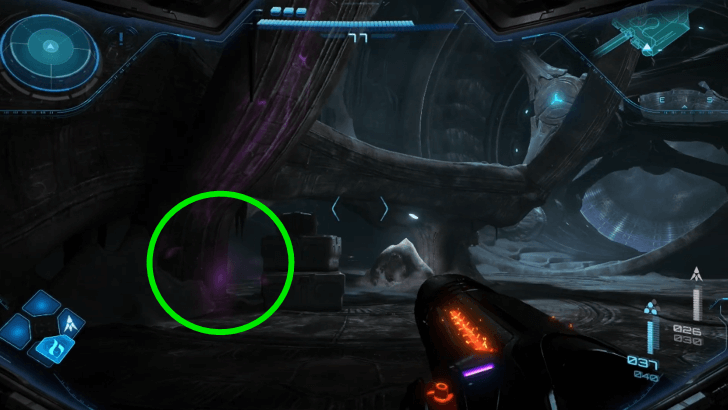 In the Lower Airlock room, jump down to the lower ground and look around. Shoot down the stacks of boxes to find a magenta colored wisp. Use your Psychic Visor and examine this to reveal a glowing Morph Ball course connecting to the ceiling. |
| 7 |
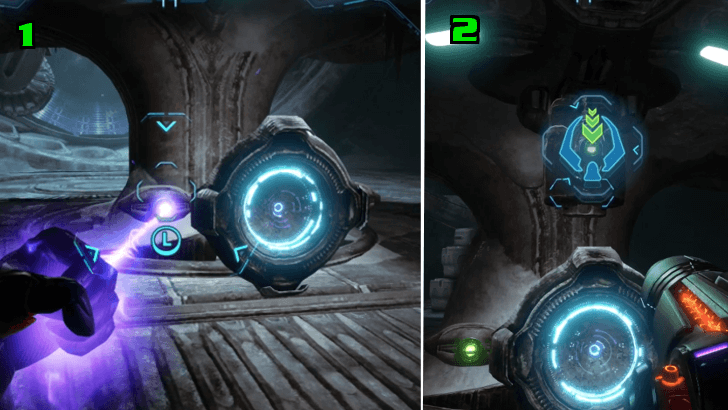 Directly under the turbine terminal, you will find a Slot Connector and a frozen Bomb Slot. Aim a Fire Shot to thaw the Bomb Slot, then pull this directly under the Slot Connector using the Psychic Lasso. Pull the Slot Connector to connect this to the Bomb Slot. Afterwards, insert yourself in Morph Ball Mode. |
| 8 |
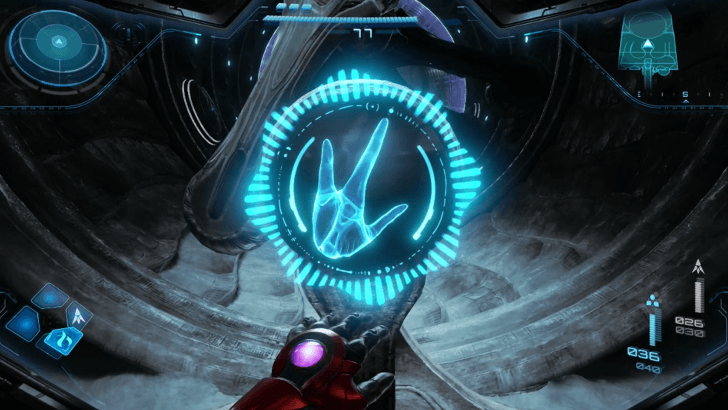 Go back up to the fully online Turbine Terminal. Interact with this to open the trigger in the center of the turbine. |
| 9 |
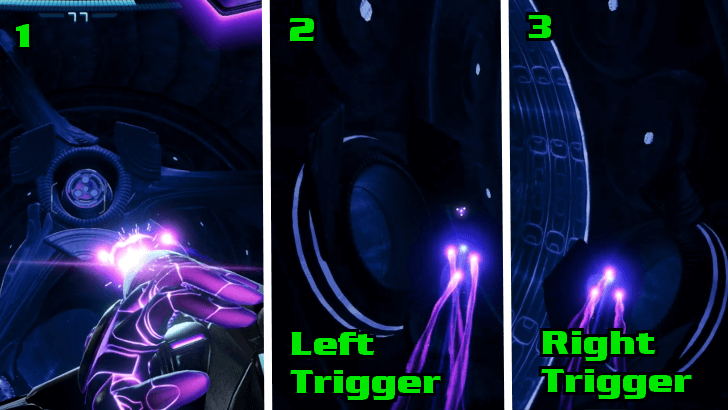 Aim a Control Beam at the Generator Maintenance Slot. However, this is not yet fully activated. Shoot two more Control Beams to the hidden triggers—One at the left side of the second turbine and another to the right at the very back. |
Return to the Surface
| Objectives | |
|---|---|
| 1 |
 With the turbines activated, power has been restored to the Ice Belt. Backtrack to the room with the Lamorn Electric Lock Unit. In the middle of the room, insert yourself in the glowing Bomb Slot in Morph Ball Mode. After this, watch the cutscene unfold. |
| 2 |
 After activating the Bomb Slot, there is a ventilation shaft that opens along. Go to that shaft in Morph Ball Mode to get to another room. |
| 3 |
 On top of the shutter, you can find a trigger where you can aim a Psychic Bomb for this. Examine the pod inside beside the shutter entrance inside to get a Shot Expansion. ┗ How to Use a Psychic Bomb ▶︎ Psychic Bomb How to Unlock and Effects |
| 4 |
 Roll down under the door that you destroyed earlier in Morph Ball Mode and run back to the entrance of the Power Station. Access the Cargo Gondola Lift on the right side of the room to get back to the Medical Bay. |
| 5 |
 Retrace your steps back to the Medical Bay. However, due to the sudden lockdown in the facility, you will be blocked with an inaccessible door. Go through the vent at the right side of the room to find the Storage Bay area. |
| 6 |
 The facility is slowly teeming with Frostburn Grievers. Keep shooting at them as you run past the Storage Bay area and find another vent in the next room. Switch to Morph Ball Mode and enter this vent. You will need to navigate through the area from a platformer point of view. |
| 7 |
 Each room from here onwards is connected through vents. Keep sneaking in them until you reach the entrance of the Medical Bay, where the second Psychic Lock was previously located. |
| 8 |
 Keep passing through the areas that you have previously visited with Psychic Locks until you reach the tunnel. There will be another vent that you can enter along the way to the left. Go through the vent and pass through another area in the platformer viewpoint. |
| 9 |
 Upon reaching the topmost floor, you will be accompanied by Reger Tokabi. Eliminate the sudden swarm of Frostburn Grievers with him. Another cutscene will play after this. |
How to Throw a Psychic Bomb
Produce a normal bomb, then switch to Psychic Visor. Aim the bomb at a specific target to become a Psychc Bomb.
Psychic Bomb How to Unlock and Effects
Visit the Deepest Parts of Ice Belt
| Objectives | |
|---|---|
| 1 |
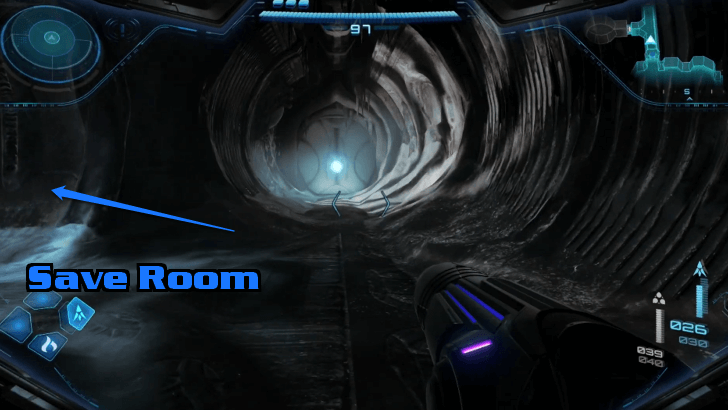
 After the battle with the swarm of Frostburn Grievers, Reger Tokabi will inform you of the elevator that will take you to the deepest parts of the Ice Belt. Ride this elevator. There will be a save point room on the west side of the room. |
| 2 |
 Run to the farthest end of the room from the elevator. There will be a large hatch locked with two heavy clamps. Use the Psychic Lasso to remove these. Enter the door behind this once the hatch has been removed. |
| 3 |
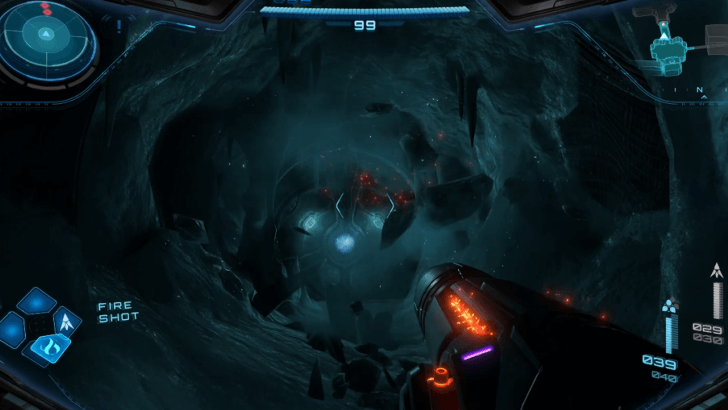
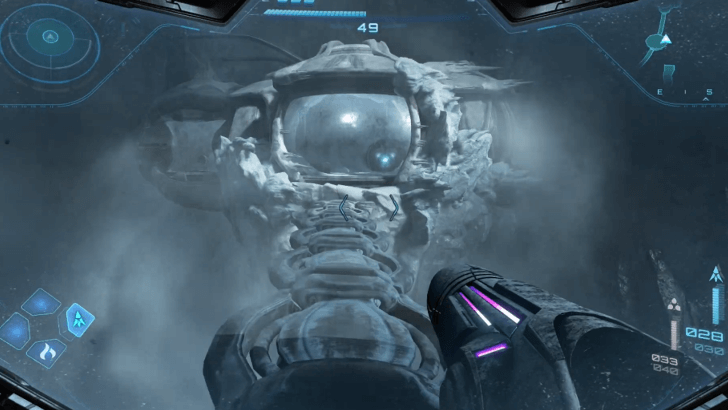
 In this area, you will face the only boss battle in Ice Belt: Keratos. Focus on shooting at Keratos' eye while dodging its lunges and projectiles. Keratos will shoot Blizzards at times, so be sure to counter this with Fire Shot. ▶︎ How to Beat Keratos |
| 4 |
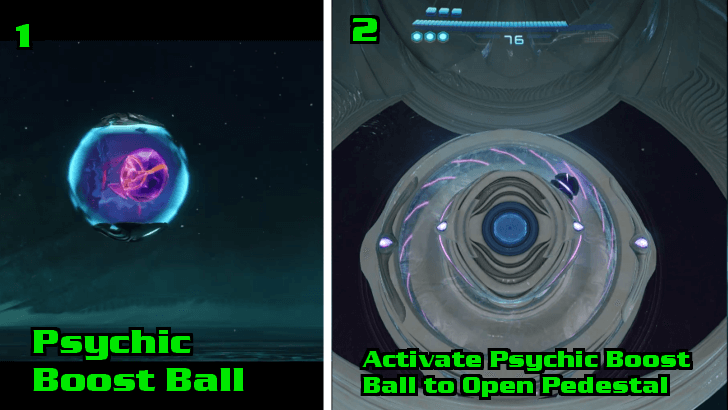 Keratos will drop the Psychic Boost Ball. While in Morph Ball mode, press and hold the B or L Button, then release it for a surge of speed. Demonstrate this repeatedly on the stage to get the Master Teleportation Key. ▶︎ Psychic Boost Ball How to Unlock and Effects |
Retrieve Ice Chip in the Loading Crane Area
| Objectives | |
|---|---|
| 1 |
 Activate the elevator through the Morph Ball terminal beside it. Reunite with Reger Tokabi in the Control Room. After the cutscene, exit the room and go to the Loading Crane area overlooking the Snowfield. |
| 2 |
 Insert yourself in the Loading Crane in Morph Ball Mode through the hologram. Use the Psychic Boost Ball to get launched across the Snowfield to a hidden area. |
| 3 |
 Proceed to the hidden area to find a Cryopod on the ceiling. Take the slopes on the right to get to the terminal on top. Toggle Morph Ball Mode and roll over to the hologram to activate the terminal. Interact with this to lower the Cryopod. |
| 4 |
 Interact with the lowered Cryopod to acquire the Ice Chip. Revisit Fury Green and bring the chip to MacKenzie to acquire the Ice Shot. ▶︎ Fury Green Revisit (Part 2) ▶︎ Ice Shot Effects: Where to Use Ice Chip |
| Next Section: |
|---|
| Flare Pool Walkthrough and Guide |
Ice Belt Revisit
| Note: The following walkthrough covers the section of the game after obtaining the Thunder Chip from Volt Forge Revisit (Part 2). |
| Ice Belt Revisit Main Objectives | |
|---|---|
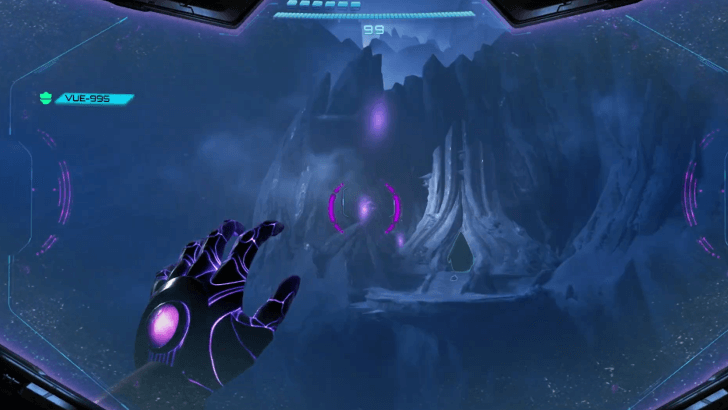
| 1 | Rescue VUE-995 |
| 2 | Acquire Psychic Spider Ball |
Rescue VUE-995
| Objectives | |
|---|---|
| 1 |
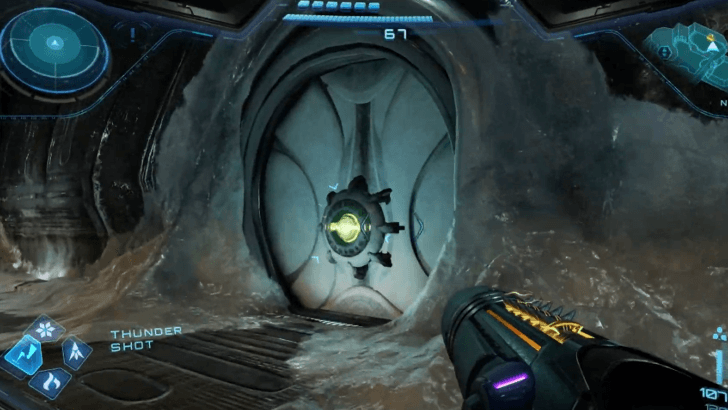 Travel to Ice Belt, then go all the way to the Control Room. Unlock the door next to the Lobby room by shooting it with Thunder Shot. Press on until you find a nonfunctional storage gate. |
| 2 |
 Going right, you will find some rubble blocking a vent. Shoot this down and enter the vent going to the Equipment Storage Room. Look at the upper right side of the storage room to find VUE-995. Aim your Fire Shot to unfreeze it. |
Acquire Psychic Spider Ball
| Objectives | |
|---|---|
| 1 |
 Go back to the Control Room and go down the right path of the room. Shoot a charged shot at the tempered glass to get to the Cliffside and examine the grapple wisps above in the air. |
| 2 |
 Use the Psychic Grapple to swing to the other side of the area. Go right and scan the Lamorn statue to see a cutscene play. |
| 3 |
 Unlock the door behind the Lamorn statue room. Use the Psychic Visor to control the node downwards. Enter the room and aim your Fire Shot twice at the frozen platforms going down. |
| 4 |
 Hop down to the room with a Vahkuun Sculpture in the middle. Unfreeze the Psychic Sensor on the left and take Psychic Energy with your Psychic Visor. Insert this in the statue's socket below to move it. |
| 5 |
 Take the Psychic Spider Ball hidden under the statue. This will let you attach to magnetic Spider Ball Tracks. |
| Next Section: |
|---|
| Great Mines Walkthrough and Guide |
All Ice Belt Bosses
Keratos Boss Fight
| Boss Overview | |
|---|---|
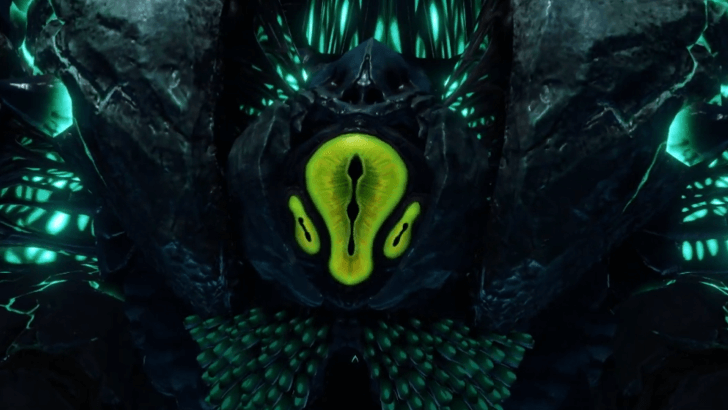
| |
| Map | Ice Belt |
| Area | Quarantine Chamber |
| Required Upgrade | Fire Shot |
| Weak Point | |
| ・Abdominal Core | |
How to Beat Keratos: Quick Boss Tips
- Keep shooting at Keratos' eye.
- Dodge its lunges to shoot at its Abdominal Core.
- Counter its blizzard attack with Fire Shot.
- Dodge projectiles to avoid freezing.
All Ice Belt Unlocks
Psychic Boost Ball
The Psychic Boost Ball will provide you with a sudden surge of speed while in Morph Ball Mode. Press, hold, then release the ZL or B buttons to activate this.
Psychic Boost Ball How to Unlock and Effects
Metroid Prime 4: Beyond Related Guides

Complete Story Walkthrough and Guide
All Walkthrough Guides
| Story Walkthrough | |
|---|---|
| Prologue Walkthrough | Fury Green Walkthrough |
| Volt Forge Walkthrough | Ice Belt Walkthrough |
| Flare Pool Walkthrough | Great Mines Walkthrough |
| Chrono Tower Walkthrough | - |
Comment
Author

Ice Belt Walkthrough and Guide
Rankings
- We could not find the message board you were looking for.
Gaming News


![Monster Hunter Stories 3 Review [First Impressions] | Simply Rejuvenating](https://img.game8.co/4438641/2a31b7702bd70e78ec8efd24661dacda.jpeg/thumb)
![The Seven Deadly Sins: Origin [First Impressions] | A Promising Start](https://img.game8.co/4440581/584e0bfb87908f12c4eab6e846eb1afd.png/thumb)

Popular Games

Genshin Impact Walkthrough & Guides Wiki
Umamusume: Pretty Derby Walkthrough & Guides Wiki
Pokemon Pokopia Walkthrough & Guides Wiki
Honkai: Star Rail Walkthrough & Guides Wiki
Monster Hunter Stories 3: Twisted Reflection Walkthrough & Guides Wiki
Arknights: Endfield Walkthrough & Guides Wiki
Wuthering Waves Walkthrough & Guides Wiki
Zenless Zone Zero Walkthrough & Guides Wiki
Pokemon TCG Pocket (PTCGP) Strategies & Guides Wiki
Monster Hunter Wilds Walkthrough & Guides Wiki


Recommended Games
Diablo 4: Vessel of Hatred Walkthrough & Guides Wiki
Cyberpunk 2077: Ultimate Edition Walkthrough & Guides Wiki
Fire Emblem Heroes (FEH) Walkthrough & Guides Wiki
Yu-Gi-Oh! Master Duel Walkthrough & Guides Wiki
Super Smash Bros. Ultimate Walkthrough & Guides Wiki
Pokemon Brilliant Diamond and Shining Pearl (BDSP) Walkthrough & Guides Wiki
Elden Ring Shadow of the Erdtree Walkthrough & Guides Wiki
Monster Hunter World Walkthrough & Guides Wiki
The Legend of Zelda: Tears of the Kingdom Walkthrough & Guides Wiki
Persona 3 Reload Walkthrough & Guides Wiki


All rights reserved
© Nintendo. Metroid and Nintendo Switch are trademarks of Nintendo.
The copyrights of videos of games used in our content and other intellectual property rights belong to the provider of the game.
The contents we provide on this site were created personally by members of the Game8 editorial department.
We refuse the right to reuse or repost content taken without our permission such as data or images to other sites.