Hazard Zone Game Mode Guide
Welcome to our walkthrough for Battlefield 2042!
☆Updates and Patch Notes: Update 1.05
★How to Fix All Error Codes, Bugs, and Known Issues
☆All Specialist Classes and Best Loadouts
★Best Guns in Battlefield 2042
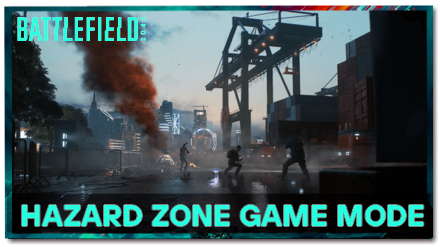
Hazard Zone is one of the four available Game Modes in Battlefield 2042. Read on to learn how to play Hazard Zone, tips and tricks on how to win, and how you can select equipment specific to your needs in every match!
List of Contents
How to Play for Hazard Zone
| Breakthrough Objectives |
|---|
Pick a Role
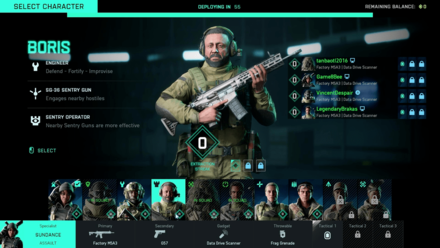
The Specialist's classes thrive the most in Hazard Mode, with each class or "role" shining in the small, squad-focused environment. Picking your role within a squad will allow you to synchronize your movements with other players – it is particularly important to have someone be able to revive fallen comrades, resupply the squad, and so on to outlast other teams.
Select Equipment
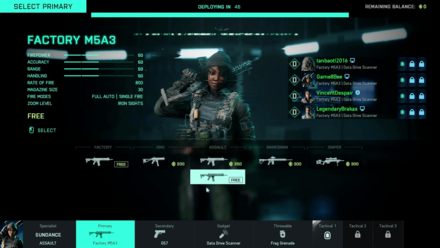
You'll also be able to select your loadout at the start of each match – these, however, are equipment that needs to be bought with the Dark Market Credit you unlock through the successful retrieval of Data Drives and your subsequent extraction from the map, killing Occupying Forces as well as eliminating opposing players.
Tactical Upgrades
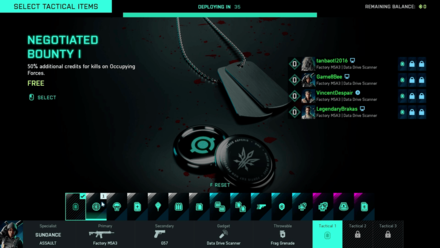
On top of equipment and Specialists, you'll also have the chance to buy Tactical Upgrades – passive abilities that provide you with in-game perks such as faster weapon swapping, knowing where each Data Drives are before they arrive, and being able to carry more throwable gadgets amongst others.
Slots for new players in Hazard Mode will be limited, with more slots being unlocked with every successful extraction of either the player or their team from Hazard Zone matches.
Collect Data Drives
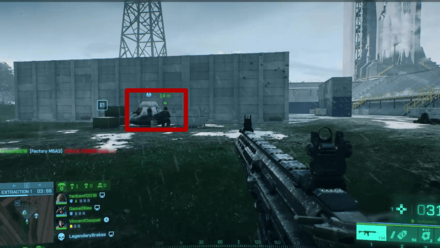
Hazard Mode is unique in the sense that battling other players isn't the main objective of the game – players instead will need to collect Data Drives scattered around the map inside of fallen Satellite Pods.
You can use your scanner to look for the general location of each Drive, even if the Drive has already been picked up by an opposing player. Be the way, however, as opponents can also scan players on your squad for any Drives that you may have, which may make your two squads open fire on each other in an attempt to steal the Drives.
Successfully Extract from Map
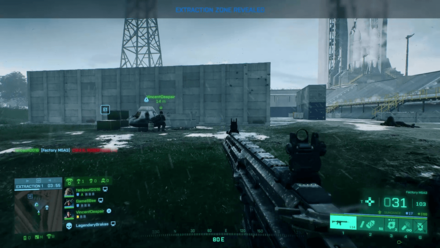
In every Hazard Zone match, players are given two points of opportunity to extract themselves or their team from the field. These occur within 8 Minutes from a match starting, and 8 Minutes again after the first extraction craft leaves, with each extraction point being randomized in where exactly they will pick up any team that successfully manages to get to them.
Squads will simply have to board and defend the pick-up zone until they can successfully extract from the location, with any Data Drives collected being lost if players do not manage to extract.
Hazard Zone Tips
| Tips |
|---|
|
|
Scan the Environment
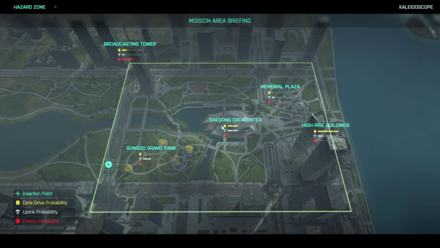
Although maps are smaller in Hazard Zone, teams will still need to scout areas they intend to go to in order to know what strategy they can take to deal with any obstacles in their intended destination. In particular, knowing whether or not enemy teams are present in a target destination is a good way to either steal their Data Drives or simply eliminate an opposing team to lessen the competition out on the field.
Carry Up to Three Data Drives
In Hazard Zone, the goal is to collect and exit the map with Data Drives that crash into the ground on falling satellites. In order to get the most Dark Market Credit possible in every match players enter, they will need to take advantage of each player's ability to carry up to 3 Data Drives that they can carry with them until the team can safely extract.
Communicate With the Team
Communication is the key to successfully extracting from the map in Hazard Zone. Despite the match occuring on a map where there are less players compared to other Game Modes, the chances of coming across enemy teams is high, and so a key essential to successful rounds of the game is to let the squad know about key things such as enemy locations, the location of Data Drives, and which areas the team should go to as they search for more drives to capture.
How to Spot Enemies and Use the Ping System
Select the Right Specialist
The unique characteristics of each Specialist is highlighted in Hazard Zone, with their unique Specialties and Traits capable of bringing a team to success or downfall. Mixing and matching Specialists is essential to ensure that every member of the squad can operate their roles successfully, particularly when the player's squad is pit against enemy teams.
All Specialist Classes and Traits
What is the Hazard Zone Game Mode
Battle Royale With a Twist
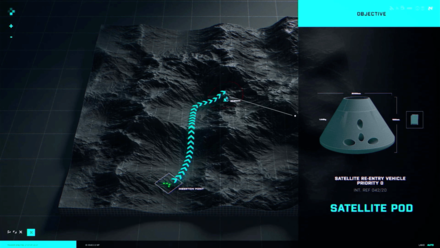
Hazard Zone offers a new taste of a game similar to the classic Battle Royale mode. You will have to collect as many Data Drives as you can and get extracted before the storm comes while fighting other teams and AI with the same objectives.
Focused Team Experience
| Player Count | 24 Players or 6 Teams (PS4 / XBOX One) 32 Players or 8 Teams (PS5 / XBOX One Series X / PC) |
|---|---|
| Variants | Multiplayer Only |
Unlike the chaos that surrounds Conquest and Breakthrough, Hazard Mode is a much more team-focused game mode that requires players to work with each other to get the most out of their experience. Unlike the other game modes, Hazard Mode also presents you with challenges not centered around other human players, but also AI – called Occupying Forces as well who will defend the coveted Data Drives you are after.
Purchasable Weapons and Gear
Unlike the normal modes of Conquest and Breakthrough, Hazard Zone will instead make all weapons and gear exclusive from the ones you unlock through Leveling Up.
You will have to purchase everything that you can equip with Dark Market Credit – the currency you use to purchase things from Hazard Zone which can be earned through actions such as eliminating opponents or successfully extracting yourself or your team from the map.
Battlefield 2042 Related Guides

All Game Mode Guides
| Game Modes | |
|---|---|
 Conquest Conquest |
 Breakthrough Breakthrough |
 Hazard Zone Hazard Zone |
 Battlefield Portal Battlefield Portal |
Author
Hazard Zone Game Mode Guide
improvement survey
03/2026
improving Game8's site?

Your answers will help us to improve our website.
Note: Please be sure not to enter any kind of personal information into your response.

We hope you continue to make use of Game8.
Rankings
- We could not find the message board you were looking for.
Gaming News
Popular Games

Genshin Impact Walkthrough & Guides Wiki

Honkai: Star Rail Walkthrough & Guides Wiki

Umamusume: Pretty Derby Walkthrough & Guides Wiki

Pokemon Pokopia Walkthrough & Guides Wiki

Resident Evil Requiem (RE9) Walkthrough & Guides Wiki

Monster Hunter Wilds Walkthrough & Guides Wiki

Wuthering Waves Walkthrough & Guides Wiki

Arknights: Endfield Walkthrough & Guides Wiki

Pokemon FireRed and LeafGreen (FRLG) Walkthrough & Guides Wiki

Pokemon TCG Pocket (PTCGP) Strategies & Guides Wiki
Recommended Games

Diablo 4: Vessel of Hatred Walkthrough & Guides Wiki

Cyberpunk 2077: Ultimate Edition Walkthrough & Guides Wiki

Fire Emblem Heroes (FEH) Walkthrough & Guides Wiki

Yu-Gi-Oh! Master Duel Walkthrough & Guides Wiki

Super Smash Bros. Ultimate Walkthrough & Guides Wiki

Pokemon Brilliant Diamond and Shining Pearl (BDSP) Walkthrough & Guides Wiki

Elden Ring Shadow of the Erdtree Walkthrough & Guides Wiki

Monster Hunter World Walkthrough & Guides Wiki

The Legend of Zelda: Tears of the Kingdom Walkthrough & Guides Wiki

Persona 3 Reload Walkthrough & Guides Wiki
All rights reserved
© 2021 Electronic Arts Inc.
The copyrights of videos of games used in our content and other intellectual property rights belong to the provider of the game.
The contents we provide on this site were created personally by members of the Game8 editorial department.
We refuse the right to reuse or repost content taken without our permission such as data or images to other sites.





![Monster Hunter Stories 3 Review [First Impressions] | Simply Rejuvenating](https://img.game8.co/4438641/2a31b7702bd70e78ec8efd24661dacda.jpeg/thumb)


