This survey will take about 1 minute.
Your answers will help us to improve our website.
Zelda: Breath of the Wild (BotW)
Divine Beast Tamer's Trial Dungeon Walkthrough
★ Sequel: Tears of the Kingdom Guide here!
★ Get a head start with our Beginner's Guide
┗ The Best Recipes to Cook | Rupee Farming
★ Shrines Locations | Korok Seeds Locations
★ Explore after the story with our Post Game Guide
This is a dungeon walkthrough for Divine Beast Tamer's Trial in The Legend of Zelda: Breath of the Wild (BotW). Read on to learn how to activate all terminals, get all the Treasure Chests, and overcome Monk Maz Koshia's final trial!
List of Contents
How to Find the Divine Beast Tamer's Trial
The Divine Beast Tamer's Trial is located in the Shrine of Resurrection on the Great Plateau. You can access the dungeon after completing all four Champion's Song quests and returing the Sheiikah Slate.
| Divine Beast Tamer's Trial | |
|---|---|
 Enlarge Enlarge |
|
Divine Beast Tamer's Trial Dungeon Walkthrough
Guide Overview
|
|
Activate the Guidance Stone
| Objectives | Guide | |
|---|---|---|
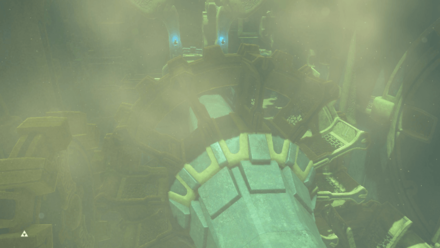
| 1 | 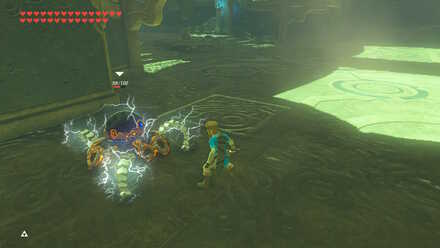 Enlarge Enlarge |
Press forward and defeat the Guardian Scout on the left side of the area. |
| 2 | 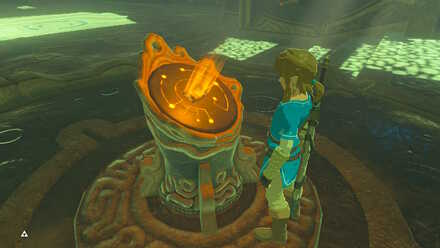 Enlarge Enlarge |
Head to the central area and activate the Guidance Stone. |
| 3 | 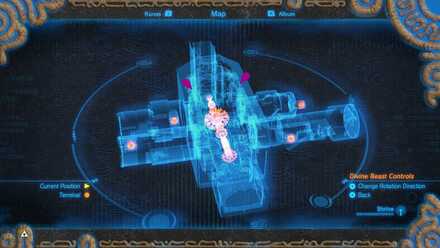 Enlarge Enlarge |
Take a good look at the map of the dungeon, which looks and has similar functions to previous Divine Beasts. The four terminals Link needs to activate are located in four separate rooms. |
Activate the First Terminal in the Cylindrical Room
| Objectives | Guide | |
|---|---|---|
| 1 | 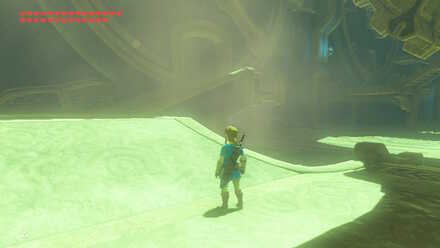 Enlarge Enlarge |
Make your way back to the entrance and head into the left side room. |
| 2 | 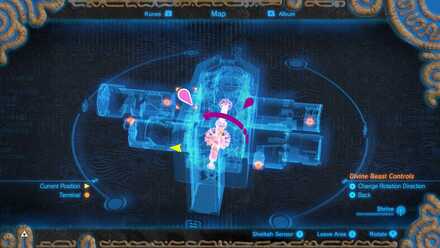 Enlarge Enlarge Enlarge Enlarge |
Use the map to chance the rotation direction of the dungeon to the left. The room itself will not spin, but the gears outside it will activate. |
| 3 | 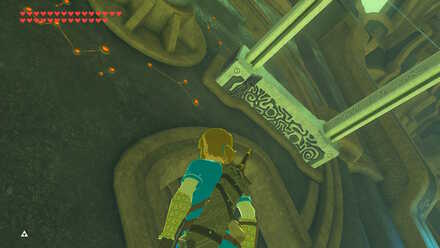 Enlarge Enlarge |
Use Magnesis on the spinning metal slab and push it into the slot on the wall. This causes the left room to start spinning. |
| 4 | 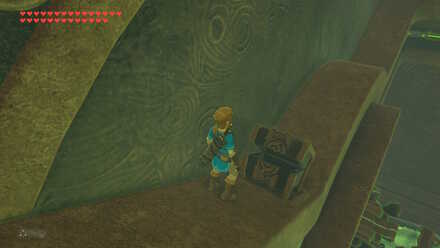 Enlarge Enlarge(Optional) |
Enter the Cylindrical Room and stand on the spinning ledge to reach the treasure chest that contains a Gerudo Scimitar. |
| 5 | 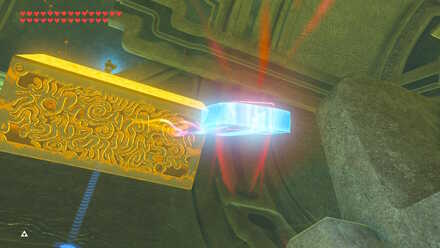 Enlarge Enlarge |
Look for the spinning structure in the middle of the room with a metal slab on its end. Use Magnesis on the metal slab and extend it to the right. |
| 6 | 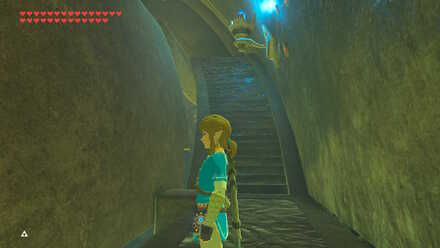 Enlarge Enlarge |
Stand on the spinning middle structure to reach a small ledge to the right stairs. |
| 7 | 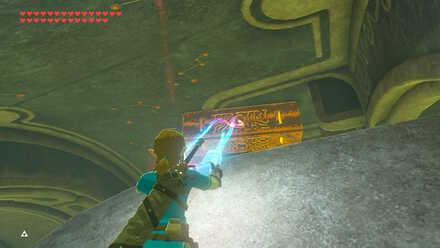 Enlarge Enlarge |
Head up the stairs and use Magnesis on the right metal slab and extend it to the left to drop it on the floor. |
| 8 | 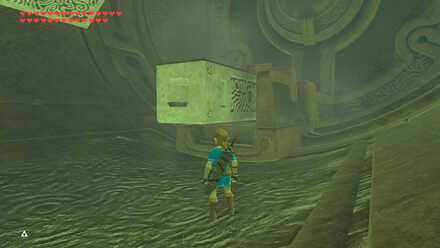 Enlarge Enlarge |
Place the metal slab on the middle slot in the room. This causes the other metal slab to hit it and cause the other side of the structure to spin. |
| 9 | 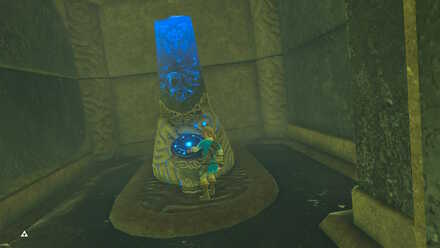 Enlarge Enlarge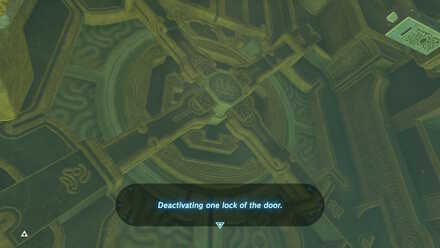 Enlarge Enlarge |
Head into the room and activate the First Terminal. This deactivates one of the locks on the main door. |
| 9 | 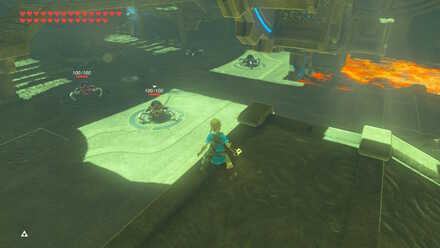 Enlarge EnlargeThe First Lock Opens |
Exit the Cylindrical Room and dispatch the four Guardian Scouts that have appeared. |
Activate the Second Terminal in the Lava Room
| Objectives | Guide | |
|---|---|---|
| 1 |  Enlarge Enlarge |
On the right side of the room is a spinning wheel on lava. Make sure the gears are glowing red and is spinning upwards. |
| 2 | 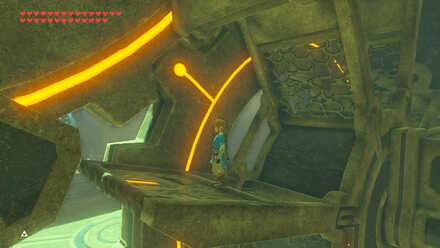 Enlarge Enlarge |
Ride the wheel upwards and head inside the lava room. |
| 3 | 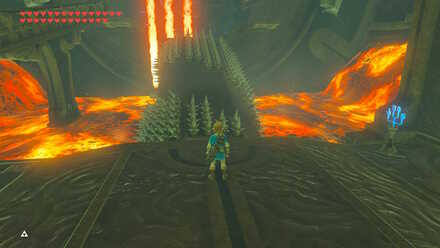 Enlarge Enlarge |
Activate the dungeon controls so that the central path with the spikes is spinning to the right. Head to the opposite side of the room by crossing the non-spiked path. |
| 4 | 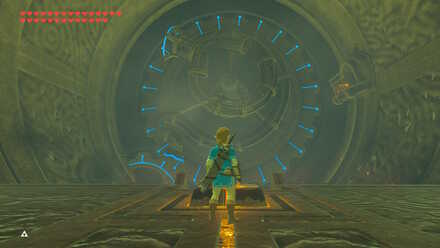 Enlarge Enlarge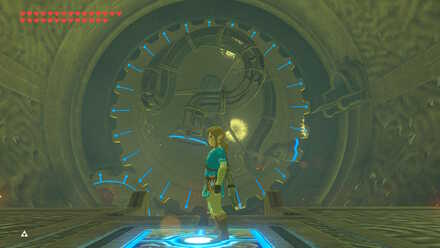 Enlarge Enlarge |
This part of the room has a spinning section of the wall with some chutes. Wait for the lower chute is below the orb and stand on the switch to drop it. Note: You can also use Stasis on the spinning gear and make it easier for the orb to drop into the cute. |
| 5 | 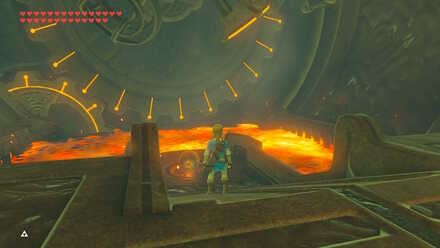 Enlarge Enlarge |
Once the orb is in the chute, use the dungeon controls and rotate it to the opposite side so that the orb doesn't fall into the lava. Adjust the rotation accordingly until the orb falls outside of the chutes and on the extended platform. |
| 6 |  Enlarge Enlarge |
Place the orb on the sliding chute so that it falls on the switch on the opposite side. This unlocks the gate with the Second Terminal inside. |
| 7 | 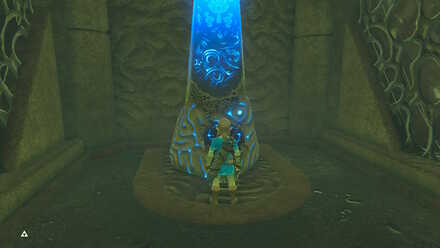 Enlarge Enlarge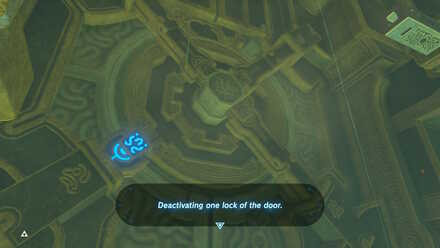 Enlarge Enlarge |
Head into the room and activate the Second Terminal. This deactivates one of the locks on the main door. |
| 8 | 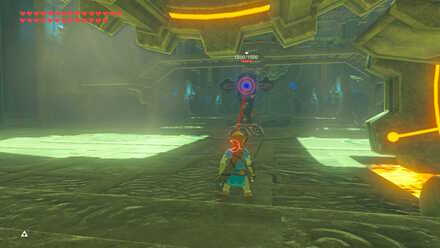 Enlarge Enlarge |
Exit the Lava Room and dispatch the Guardian Turret that appeared in the central area. |
Activate the Third Terminal in the Fan Room
| Objectives | Guide | |
|---|---|---|
| 1 | 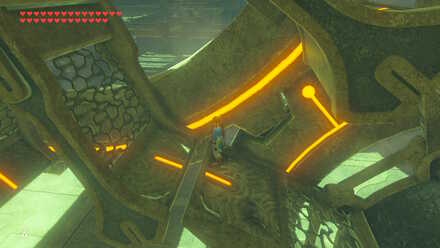 Enlarge Enlarge |
Ride the spinning platforms up to the upper level of the main area. Note: Make sure the gears glow red so that the platforms takes you to the upper level. |
| 2 |  Enlarge Enlarge |
Cross the spinning axle and defeat the Guardian Scout on the other end. |
| 3 | 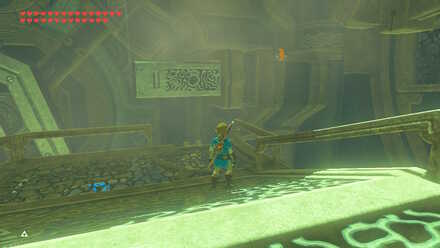 Enlarge Enlarge Enlarge Enlarge(Optional) |
After defeating the Guardian Scout, head to the right side of the platform where you can see a metal slab. Optional: Use Magnesis on the chest and open it to receive 5 Bomb Arrows. |
| 4 | 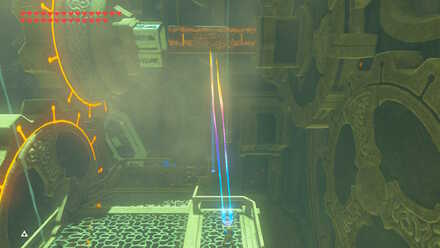 Enlarge Enlarge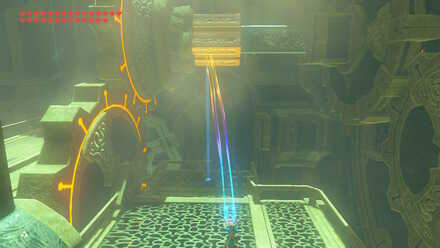 Enlarge Enlarge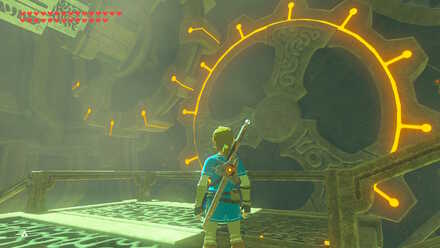 Enlarge Enlarge |
Use Magnesis on the metal slab and attach it into the slot on the upper right side with the wall of gears. Use Magnesis on the other metal slab and extend it so that it fits with the other one. This should activate the wall of gears to the right. |
| 5 | 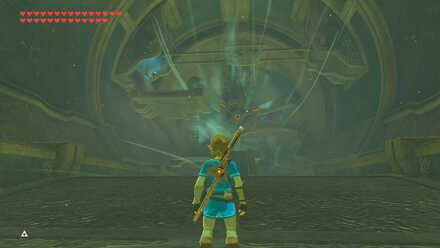 Enlarge Enlarge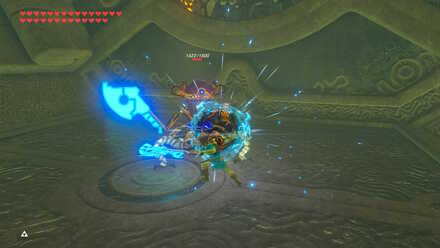 Enlarge Enlarge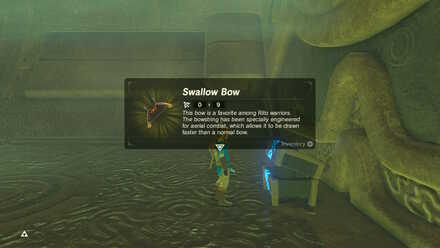 Enlarge Enlarge(Optional) |
Drop down and enter the door through the wall of gears and inside the Fan Room. Use Stasis on the giant fan and quickly make your way to the back area and defeat the hidden Guardian Scout. Optional: Open the chest its guarding to receive a Swallow Bow. |
| 6 | 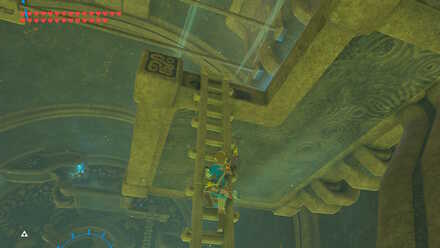 Enlarge Enlarge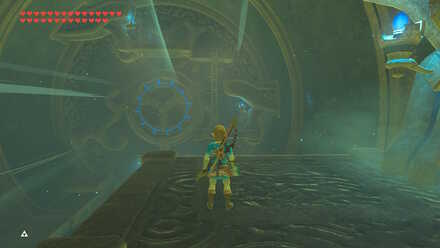 Enlarge Enlarge |
Make your way back to the other side of the fan and climb up the ladder and onto a platform. Rotate the dungeon so that the gears on the opposite side of the room glow blue. This causes the wind to blow away from the fan. |
| 7 | 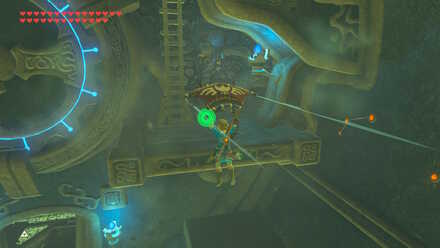 Enlarge Enlarge |
Ride the current using your Paraglidier and glide to the opposite platform with the stairs. |
| 8 |  Enlarge Enlarge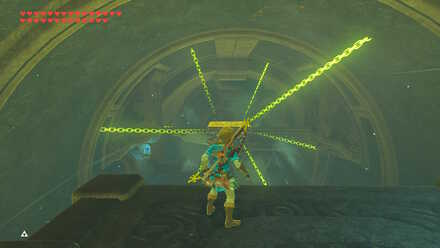 Enlarge Enlarge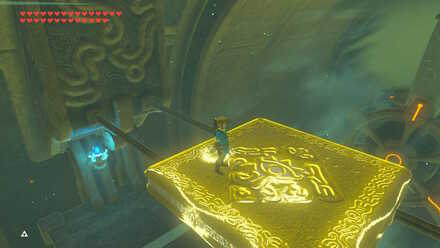 Enlarge Enlarge |
Rotate the dungeon once more so that the wind is now blowing towards the fan. Use Stasis on the moving platform when it reaches the middle. Ride the current using the Paraglider to reach the platform. |
| 9 | 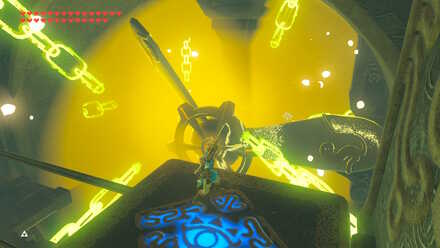 Enlarge Enlarge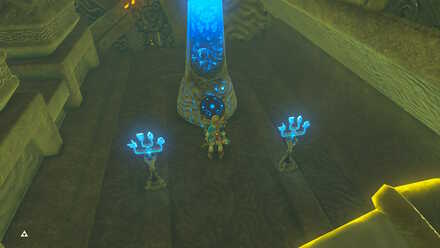 Enlarge Enlarge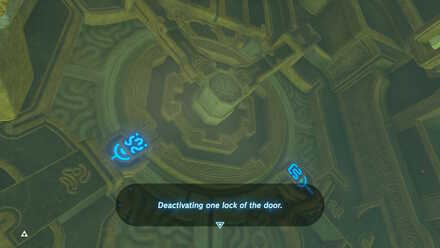 Enlarge Enlarge |
Wait for the moving platform to reach the right side of the room and then quickly use Stasis on the giant fan. Paraglide down to Third Terminal and activate it. This deactivates one of the locks on the main door. |
| 10 | 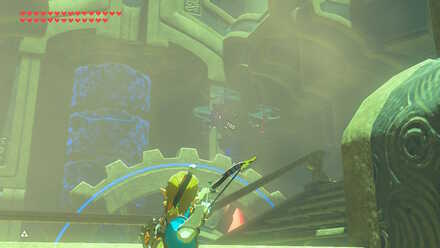 Enlarge Enlarge |
Make your way out of the Fan Romm and up the platform. Destory the Guardian Skywatcher that's now hovering around near the main entrance of the dungeon. |
Activate the Fourth Terminal in the Water Room
| Objectives | Guide | |
|---|---|---|
| 1 | 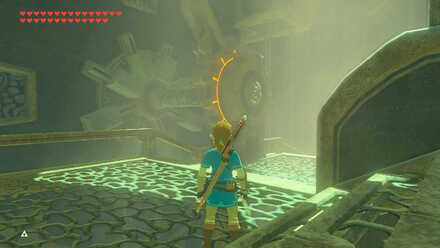 Enlarge Enlarge |
Head to the upper left level of the main room, which is on the opposite side of the Fan Room. |
| 2 | 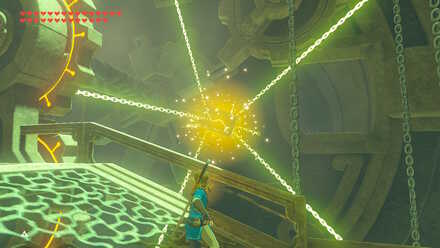 Enlarge Enlarge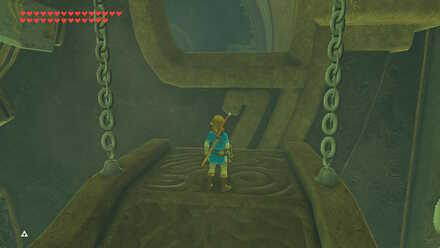 Enlarge Enlarge |
Use Stasis on one of the small rectangular blocks once they extend down from their shaft. This causes the extended block to hit the gear that raises a small bridge to the Water Room. |
| 3 | 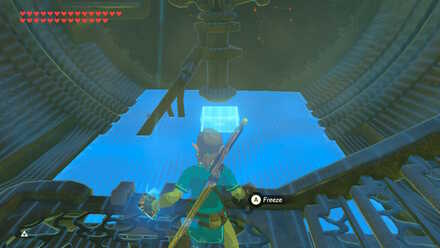 Enlarge Enlarge |
Use Cryonis on the water under the pin to raise it. This causes the pin to connect with the rest of the moving gears. |
| 4 | Enlarge |
Ride the rotating platform to reach the upper level. Glide to the upper level and head through the hallway and into the flooded back part of the room. |
| 5 | 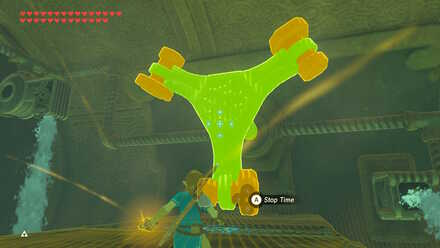 Enlarge Enlarge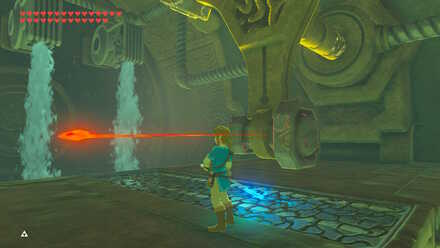 Enlarge Enlarge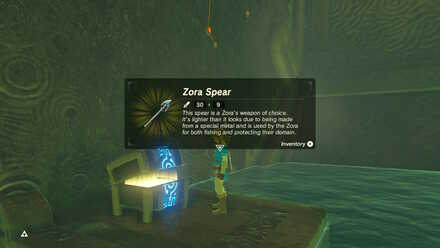 Enlarge Enlarge |
Use Stasis on the spigot-like structure. Hit ithe structure with a weapon on its right side so that it spins counter-clockwise once stasis ends. This drains the water from the basin on the left. Drop down the basin and open the chest to receive a Zora's Spear. |
| 6 | 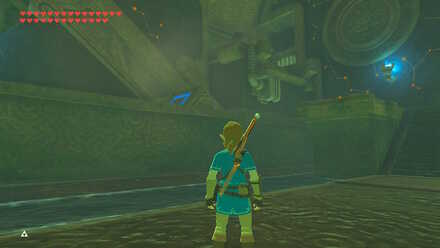 Enlarge Enlarge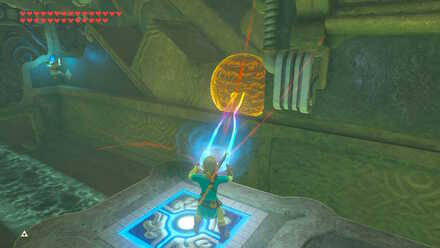 Enlarge Enlarge |
Head into the room opposite of the chest. This is the room with a switch on a small platform. Stand on the switch and use Magnesis and grab the metal ball from its container. |
| 7 | 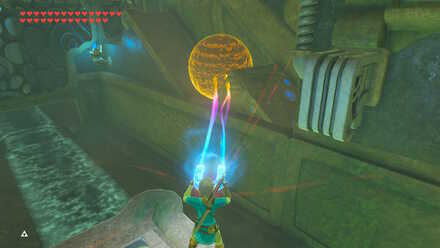 Enlarge Enlarge Enlarge Enlarge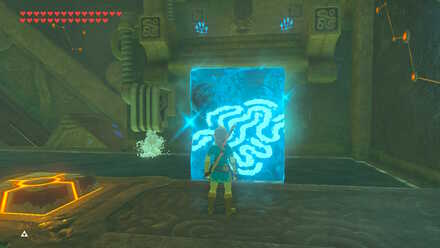 Enlarge Enlarge |
Place the metal ball on top of the block. Step on the switch to launch the ball to the opposite room. This also causes the metal ball to hit the spigot, which will flood the rooms once more. Use Cryonis to create an ice block to reach the platform where the Fourth Terminal is located. |
| 8 | 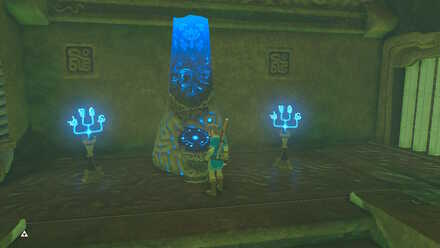 Enlarge Enlarge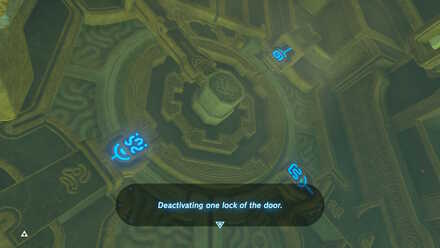 Enlarge Enlarge |
Activate the Fourth Terminal with the Sheikah Slate. This deactivates one of the locks on the main door. |
| 9 | 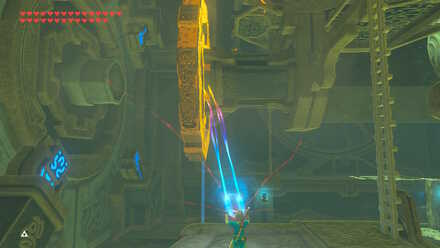 Enlarge Enlarge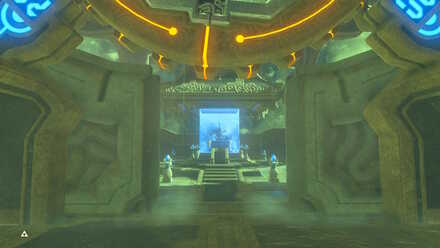 Enlarge Enlarge |
With all terminals activated, head to the main door and use Magnesis on the spinning gear and attach it with the axle on the main door. This opens the door, revealing the altar room where Monk Maz Koshia resides. |
Defeat Monk Maz Koshia
| Objectives | Guide | |
|---|---|---|
| 1 | 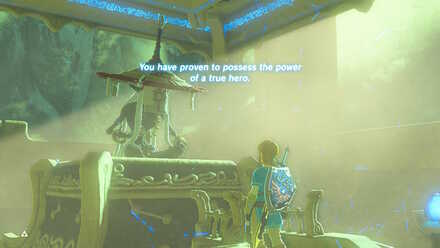 Enlarge Enlarge |
Examine the altar of Monk Maz Koshia. |
| 2 | 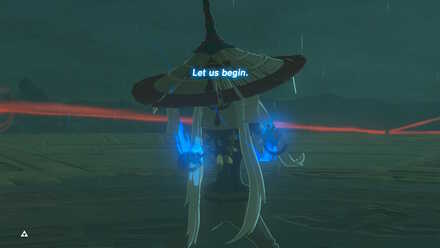 Enlarge Enlarge |
Prove your worthiness by defeating Monk Maz Koshia in a final battle. He wields a Guardian Sword and uses a plethora of Sheikah abilities that will test the limts of Link's combat skills. ・Monk Maz Koshia Guide |
| 3 | 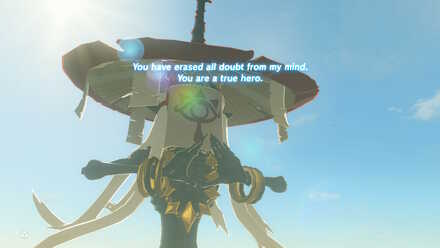 Enlarge Enlarge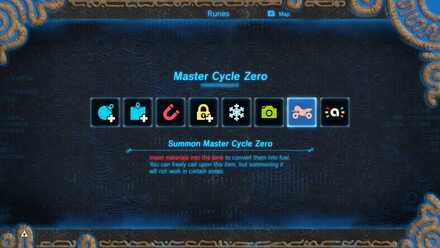 Enlarge Enlarge |
After defeating Monk Maz Koshia, he will commend Link's bravery and acknowledge him as a true hero. He will also reward Link with a new rune that summons the Master Cycle Zero - his personal Divine Beast. |
How to Beat Monk Maz Koshia
As the Arbiter of Worthiness, Monk Maz Koshia is one of the toughest bosses in the game. Not only is he quick and nimble, he also employs powerful Sheikah abilities that will will leave Link chasing after him throughout the fight.
Monk Maz Koshia has three phases, using different sets of skills each time.
First Phase
In this stage, Monk Maz Koshia's combat skills are quite similar to the Yiga Clan Footsoldiers. He will teleport around the arena, slashing Link with his Guardian Sword. Use Stasis to freeze the monk in place and pummel him with your strongest weapons!
The monk also uses a magic spell similar to the ones used by Yiga Clan Blademasters, which causes a pillar of rock to erupt beneath Links' feet. When this happens, prepare to glide up using the air vents that appear and shoot the monk's head with your bow to stun him.
Second Phase
During the second phase, Monk Maz Koshia will split himself into 9 illusory copies. These copies employ the same abilities as the original and can damage Link. Hitting a copy causes it to vanish in a puff of smoke.
The most challenging part of this phase is finding the real Maz Koshia, but there are many ways you can go about revealing the original.
Use Urbosa's Fury
Urbosa's Fury will knock out all copies and momentarily stun the real monk, allowing you to freeze him with Stasis and strike him with your strongest weapons.
Use Multi-Shot Bows
Multi-Shot Bows are also a good weapon to use against him in this stage since you can hit multiple copies with your 3-Shot or 5-Shot bows.
Note: The battle takes place in the rain, so you can't use Bomb Arrows against the monk.
Third Phase
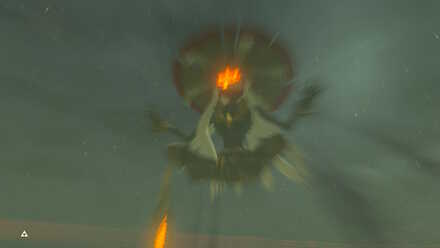
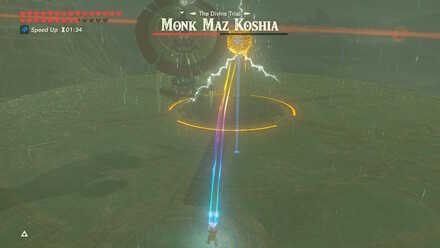
During his third and last phase, Monk Maz Koshia will magically increase his size to roughly the same size of a Hinox, and will levitate above the arena.
Shoot his Eye
Shoot Monk Maz Koshia's head to interrupt his attacks. Shooting him three times consecutively also knocks him down to the arena.
Reflect his Laser Beam
Monk Maz Koshia will use a laser beam similar to Guardian Stalkers. Ready your shield and parry the laser beam to reflect his attack and deal good damage to him!
Redirect his Lightning
Monk Maz Koshia will summon large spiked metal balls that he will throw at Link. After throwing his last metal ball, he will then charge up a lightning attack that will strike all metal balls and deal damage to the surrounding area.
Use Magnesis on one of the spiked metal balls and bring it close to Monk Maz Koshia. When he unleashes his lightining, he will get hit by his own attack and will fall to the arena, allowing you to hit him with your weapons.
Divine Beast Tamer's Trial Dungeon Rewards
Dungeon Rewards
| Divine Beast Tamer's Trial Rewards | ||
|---|---|---|
| Master Cycle Zero | Picture of the Champions | |
Divine Beast Tamer's Trial Tips and Tricks
Stock Up on Food and Elixirs
Before taking on the final boss, you can return to Hyrule Overworld by returning the Sheikah Slate on its pedestal near the entrance of the dungeon. Stock up on food and elixirs that provide plenty or full healing, as well as dishes with food buffs that boost attack or defense.
Stock Up on Weapons
You can return to Hyrule Overland to restock on weapons and arrows by using the Sheikah Slate on the pedestal near the entrance of the dungeon. It's also a good idea to farm multi-shot bows from Lynels to help with the boss' second phase.
List of Dungeon Treasures
| Chest Location | How to Find | |
|---|---|---|
| 1 | Enlarge |
Enter the Cylindrical Room and stand on the spinning ledge to reach the treasure chest that contains a Gerudo Scimitar. |
| 2 | Enlarge (Optional) |
Head to the right side of the upper platform where you can see a metal slab. Use Magnesis on the chest and open it to receive 5 Bomb Arrows. |
| 3 | Enlarge |
Drop down and enter the door through the wall of gears and inside the Fan Room. Use Stasis on the giant fan and quickly make your way to the back area and defeat the hidden Guardian Scout. Open the chest its guarding to receive a Swallow Bow. |
| 4 | Enlarge |
Use Stasis on the spigot-like structure in the Water Room. Hit ithe structure with a weapon on its right side so that it spins counter-clockwise once stasis ends. This drains the water from the basin on the left. Drop down the basin and open the chest to receive a Zora's Spear. |
Zelda: BotW Related Guides

All BotW Dungeons by Type
| BotW Dungeons | |
|---|---|
| Shrines | Divine Beasts |
| Hyrule Castle | |
List of All Divine Beasts
| Divine Beasts | |
|---|---|
| Divine Beast Vah Ruta | Divine Beast Vah Rudania |
| Divine Beast Vah Medoh | Divine Beast Vah Naboris |
| Divine Beast Tamer's Trial | |
Comment
Author

The Legend of Zelda: Breath of the Wild Walkthrough & Guides Wiki
Divine Beast Tamer's Trial Dungeon Walkthrough
Please participate in our site
improvement survey
04/2026
improvement survey
04/2026
Would you assist in
improving Game8's site?
improving Game8's site?

×
We are listening to our users' valuable opinions and discussing how to act on them.
The information collected through this survey will be used for the purpose of improving our services. In addition, the information will only be disclosed a part of a statistic in a format that will not allow identification of personal information.
Begin Survey
Not Now
×
Please rate each item regarding Game8.co's Advertisements.
Amount of Ads
Very Dissatisfied
Somewhat Dissatisfied
Fine
Somewhat Satisfied
Highly Satisfied
Placement of Ads
Timing of Ad Display
Ad Loading Speed
Safeness of Ads
Content of Ads
×
Please rate each item regarding Game8.co's Quality of Articles.
Amount of information
Very Dissatisfied
Somewhat Dissatisfied
Fine
Somewhat Satisfied
Highly Satisfied
Frequency of updates
Speed of new information
Accuracy of articles
Understandibility of articles
Readability of sentences
×
Please rate each item regarding Game8.co's Usability of the Site.
Ease of finding information
Very Dissatisfied
Somewhat Dissatisfied
Fine
Somewhat Satisfied
Highly Satisfied
Loading Speed
Use of Color
Font Size
Visibility of Images
Easy to Understand Layout
×
Please rate each item regarding Game8.co's Message Boards, Comments.
Ease of Writing
Very Dissatisfied
Somewhat Dissatisfied
Fine
Somewhat Satisfied
Highly Satisfied
Readability
Ease in Finding Information
Comment Quality
Comment Quantity
Admin Response
×
Please rate each item regarding Game8.co's Site's new design.
Please rate our site's new design
Very Dissatisfied
Somewhat Dissatisfied
Fine
Somewhat Satisfied
Highly Satisfied
Do you think that the website's design change makes the site easier to use?
Has the new design made it easier for you to find information on the site?
Has the new design improved the overall visual appeal of the site?
How would you rate your overall satisfaction with the new design of the site?
×
How likely are you to recommend Game8 to someone you know?
Very Unlikely
0
1
2
3
4
5
6
7
8
9
10
Very Likely
If you have other opinions regarding potential improvement to the website, please share them with us. We would appreciate your honest opinion.
Note: This is a free response section, so you can proceed without entering anything.
Note: Please be sure not to enter any kind of personal information into your response.
Note: Please be sure not to enter any kind of personal information into your response.
×
Thank You
×
Thank you for participating in our survey! Your answers will help us to improve the quality of our website and services.
We hope you continue to make use of Game8.
We hope you continue to make use of Game8.
Close
Rankings
- We could not find the message board you were looking for.
Gaming News


![Forza Horizon 6 Review [Preview] | Beautiful Roads With a Whole Lot of Oversteer](https://img.game8.co/4460981/a7254c24945c43fbdf6ad9bea52b5ce9.png/thumb)
![Borderlands Mobile Review [Playtest] | The Same Borderlands Made Easy](https://img.game8.co/4465500/aac0c880a39ec5cd46073e49d18f3ed5.png/thumb)
Popular Games

Genshin Impact Walkthrough & Guides Wiki
Crimson Desert Walkthrough & Guides Wiki
Umamusume: Pretty Derby Walkthrough & Guides Wiki
Honkai: Star Rail Walkthrough & Guides Wiki
Monster Hunter Stories 3: Twisted Reflection Walkthrough & Guides Wiki
Wuthering Waves Walkthrough & Guides Wiki
The Seven Deadly Sins: Origin Walkthrough & Guides Wiki
Pokemon TCG Pocket (PTCGP) Strategies & Guides Wiki
Pokemon Pokopia Walkthrough & Guides Wiki
Zenless Zone Zero Walkthrough & Guides Wiki


Recommended Games
Monster Hunter World Walkthrough & Guides Wiki
Fire Emblem Heroes (FEH) Walkthrough & Guides Wiki
Pokemon Brilliant Diamond and Shining Pearl (BDSP) Walkthrough & Guides Wiki
Super Smash Bros. Ultimate Walkthrough & Guides Wiki
Diablo 4: Vessel of Hatred Walkthrough & Guides Wiki
Cyberpunk 2077: Ultimate Edition Walkthrough & Guides Wiki
Yu-Gi-Oh! Master Duel Walkthrough & Guides Wiki
Elden Ring Shadow of the Erdtree Walkthrough & Guides Wiki
The Legend of Zelda: Tears of the Kingdom Walkthrough & Guides Wiki
Persona 3 Reload Walkthrough & Guides Wiki


All rights reserved
© 2020 Nintendo. The Legend of Zelda, Wii U, and Nintendo Switch are trademarks of Nintendo.
The copyrights of videos of games used in our content and other intellectual property rights belong to the provider of the game.
The contents we provide on this site were created personally by members of the Game8 editorial department.
We refuse the right to reuse or repost content taken without our permission such as data or images to other sites.