Gauntlet: Onslaught Raid Guide
★ New Characters: Helhest | Rossi-11
☆ New Bow Weapons and Axion Artifacts
★ Tier Lists: Characters | Weapons | Artifacts
☆ Best Builds: Helhest | Rossi-11 | Estela
★ Weapon Guides: Exotics | Mythics
☆ Redeem Codes for November 2025

Gauntlet: Onslaught is a Raid in Destiny: Rising unlocked at Chapter 4-3. See an overview of the raid, recommended characters, a full walkthrough of all three scenarios, strategies for each one, and the rewards you can earn here!
List of Contents
How to Unlock Gauntlet: Onslaught
Gauntlet: Onslaught Unlock Requirements
| Chapter | Chapter 4-3 |
|---|---|
| Req. Team Level | 50 |
| Completed Quests | Operation: Avenging Arrow |
Gauntlet: Onslaught Overview
All Gauntlet: Onslaught Modes
| Level Range | Lv. 50-80 |
|---|---|
| Recommended Power | 39600 |
| Weapon Combat Modifiers | ・Speed Shinkas ・Impact Shinkas |
| Elemental Modifiers | ・Solar ・Void |
| Combatant Race | Fallen |
| Party Size | 6 Characters |
Gauntlet: Onslaught has three different raid options, each having its own set of puzzles and enemies.
Gauntlet: Onslaught Best Characters
Best Characters to Use In Every Scenario
| Tank | DPS / Support |
|---|---|
 Jolder Jolder
|
 Tan-2 Tan-2
|
| DPS | DPS |
 Gwynn Gwynn
|
 Wolf Wolf
|
Jolder's ability to create a large shield with her super Barrier of Starlight is invaluable for protecting teammates against multiple enemy attacks. Similarly, Tan-2's Blessing of Dusk or Blessing of Dawn can provide damage boost and healing respectively to the entire team.
Gwynn and Wolf can take to the field, battling the enemies equipped with different element guns while others assist. Gwynn will be essential for close combat Shinkas, while Wolf can deal with the ranged ones. Additionally, they are invaluable for clearing regular and elite enemies during the entire raid!
Alternative Characters
| DPS | DPS |
|---|---|
 Ning Fei Ning Fei
|
 Ikora Ikora
|
| Tank | Support |
 Kabr Kabr
|
 Attal Attal
|
Both Ning Fei and Ikora are great options for DPS thanks to their skills which can quickly dispatch regular and elite enemies throughout the raid. Ikora's Nova Bomb, in particular, can clear large groups of enemies and deal burst damage to the boss.
While Kabr's Resistor Barricade offers a smaller shield, it also charges faster, which means he can provide shielding relatively faster compared to Jolder. Meanwhile, Attal is a great option for pure support and can also deal burst damage with her Song of Faith super when needed.
Break In Walkthrough
| Break In Guide |
|---|
|
|
Enter the Eclipse Monolith Outpost
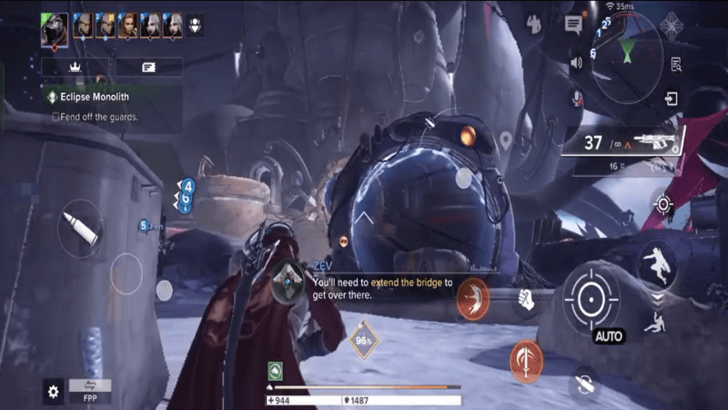
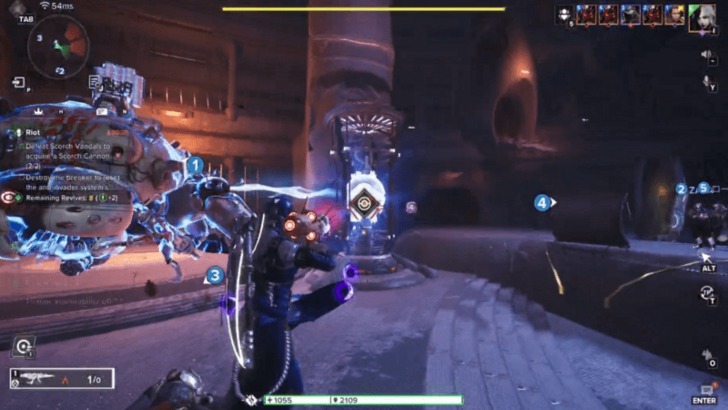
As soon as you spawn, push forward until you hit the arena that triggers enemies and puts you in a revive-restricted zone. Your fireteam has only six total revives, so every death matters.
In the middle is a circular portal, while enemies spawn on both sides. Among them are Shinkas, these need to be taken out with impact weapons like shotguns or melee Supers. They aren’t strictly required for progression, but leaving them alive will make things chaotic.
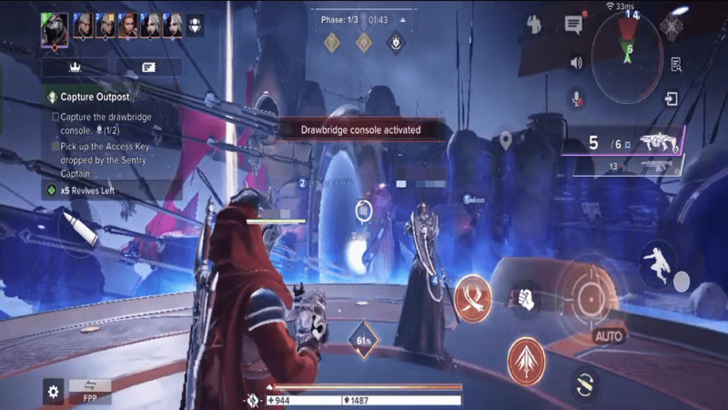
Collect Access Keys from Sentry Captains

Next, two Sentry Captains will spawn, one near each Shinka. Defeat them to grab their Access Keys. Only two keys exist at a time, meaning only two players can initially cross the bridge.
Extend the Bridge with Platforms
To build the bridge, at least one teammate must stand on each of the left and right plates. While they’re held, the bridge extends, allowing the two key-holders to cross through the portal.
In the first round, split the four non-key players equally to hold both plates. It is recommended to have Tanks or Healers, either Tan-2 or Kabr, to survive the enemy waves while holding the plates.
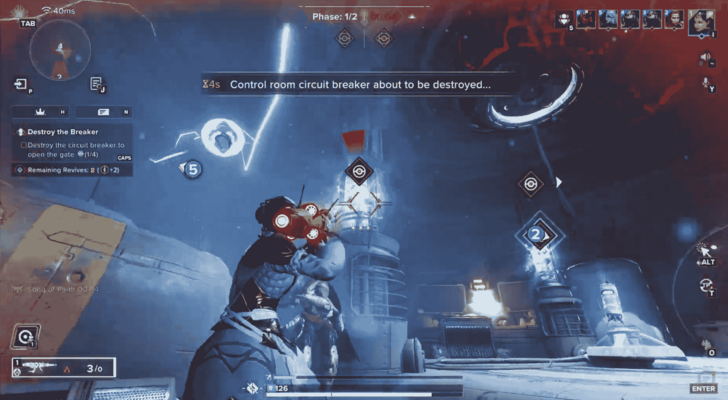
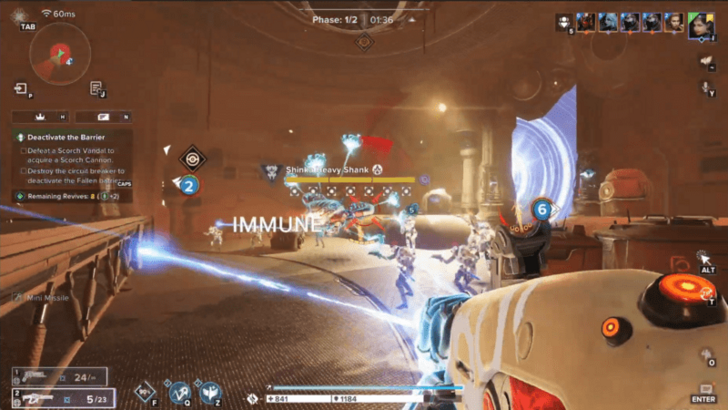
Acquire and Use Scorch Cannons
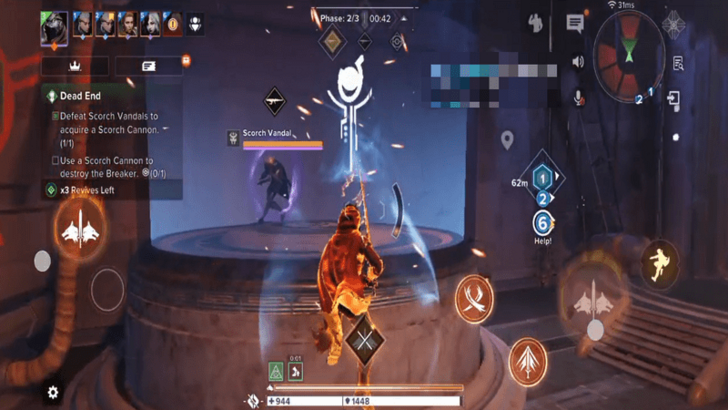
On the other side of the bridge, the key-holders will encounter Scorch Vandals carrying Scorch Cannons behind force fields. Once defeated, grab a cannon and shoot one of the glowing Breaker nodes at the back of the arena to progress.
Repeat the Process
After the first Breaker is destroyed, New Shinkas and Sentry Captains spawn on the starting side and players can grab keys and cross while the two remaining teammates hold the plates alone. Survivability here is key so leave your tanks and supports behind.
On the far side, use another Scorch Cannon to destroy the second Breaker. Finally, the last two players collect keys. By this point, the four teammates on the far side stands on the plates on their side of the bridge to extend the bridge for them. Once everyone is across, destroy the third and final Breaker.
Defeat Remaining Enemies
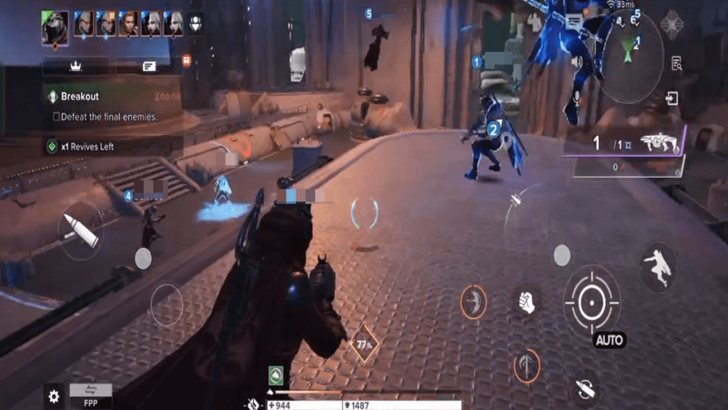
With all six players reunited, push inside the arena where explosive-type Shinkas spawn. Their shields can be blown off quickly with rockets or grenade launchers, or chipped down with sustained fire. Clear them out, and the encounter will complete.
The Menace Above Walkthrough
| The Menace Above Guide |
|---|
|
|
Solve the Symbol Puzzle
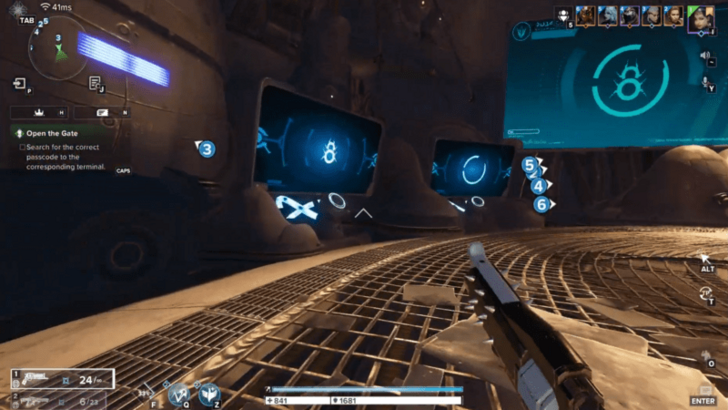
Once the raid begins, you’ll arrive in a chamber filled with monitors, each showing a different symbol. The large central monitor displays the combination you need to recreate, which is done by activating the two smaller monitors that contain the correct pieces. For example, if the big screen shows a circle with a smaller circle inside it, then one player activates the large circle monitor while another activates the smaller inner circle.
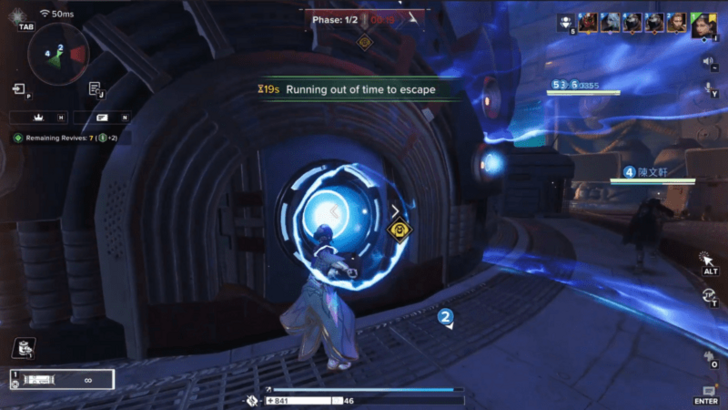
Once this is done correctly, two batteries will appear. These are picked up by two teammates, who then use them to hold back the electrical gates. Standing under the gates with the batteries allows the rest of the fireteam to safely pass through, after which everyone drops into the next area.
Send Teammates Into the Portals
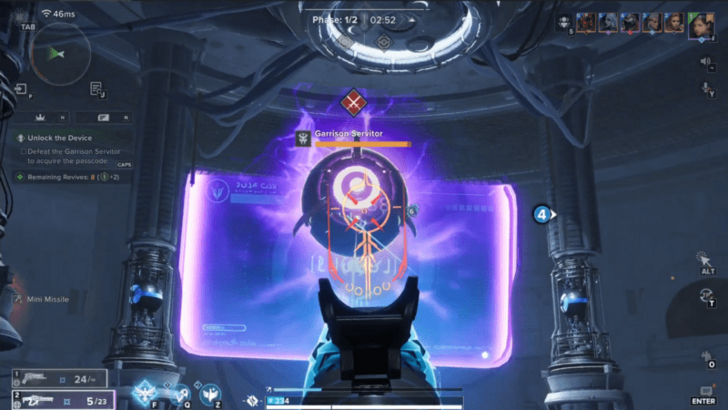
In this next area, you’ll need to insert the two batteries into the large device and two portals will open. Send one teammate into each portal, ideally someone durable and capable such as Gwynn who can go solo. Inside, they’ll encounter a Servitor along with other enemies. Once the Servtor is defeated, a new monitor becomes visible, displaying another combined symbol. The player must activate the two nearby monitors that match this code to complete their side of the puzzle.
The Four Remaining Players Will Also Have Concurrent Tasks
Meanwhile, the players left outside continue dealing with their own enemies. Shinka Servitors will appear here as well, shielding the big monitor in the room. Once the shielded Shinka is taken down, the monitor will reveal the symbol needed, and players must activate the matching smaller monitors to input the code.
When both sides complete their objectives, the four outside players are automatically teleported into the two portal rooms, splitting the team evenly three and three.
Destroy Objects with Scorch Cannons
With the team divided, each side now has to deal with a Scorch Vandal. Killing it drops a Scorch Cannon, which must be used to destroy four glowing blue objects in the room. Accuracy is important since you only get four shots, but if done correctly, a new battery becomes available.
One teammate picks up the battery and repeats the earlier mechanic by standing beneath electrical barriers so the others can pass through unharmed. As you move along the corridors, floating eyes appear, and these must be destroyed quickly or they will trap and kill players.
Fight Shinkas and Clear the Path
Continuing down the passage leads to a fight with an Explosive Shinka. This enemy is heavily shielded, but its barrier can be broken quickly with rocket launchers or grenade launchers.
Once defeated, another Scorch Vandal spawns. Killing it provides a cannon that is used to disable a barrier blocking the hallway. The team then progresses until reaching a teleporter, which transports everyone back to the central arena.
Insert Batteries and Repeat
Back in the main room, the batteries collected along the way are placed into the glowing slots of the central device. A wave of enemies will spawn, and once cleared, the cycle repeats. Another round of portals opens, more Servitors and monitors need to be dealt with, and batteries must once again be transported and inserted.
The main difference in the second phase is that the required monitors may be farther apart, demanding tighter coordination. When both batteries are finally placed a second time, an elevator activates and lifts the team upward, concluding the encounter and rewarding loot.
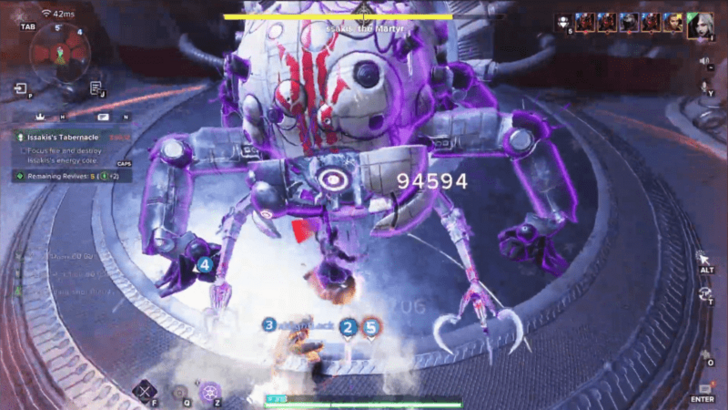
Issakis's Tabernacle Walkthrough
| Issaki's Tabernacle Guide |
|---|
|
|
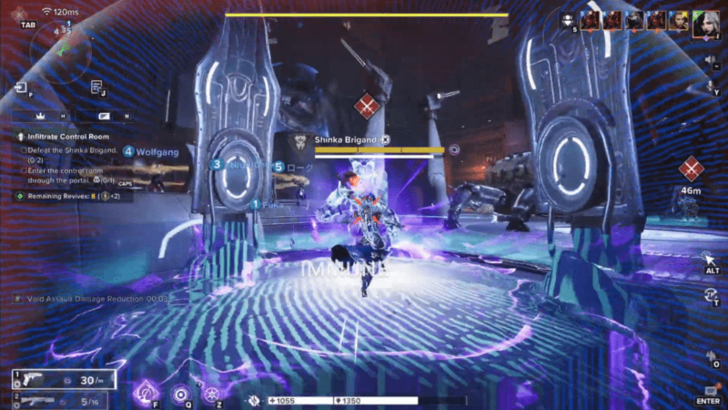
Defeat the Precision Shinkas
Drop into the arena and immediately focus on the two Precision Shinkas that spawn on opposite sides. Break their shields with precision weapons such as Tan-2’s Sniper Rifle and burn them fast.
You can pile all six players onto one and then rotate, or split three and three to cover both. Once they’re dead, the spider tank boss jumps to a side of the arena and floods it with enemies.
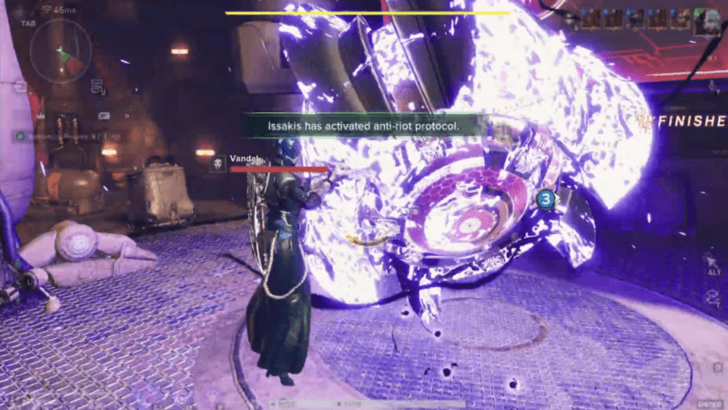
Kill Scorch Vandals and Destroy Blue Objects
The boss’s side fills with Servitors with Solar Shields and eventually, two Scorch Vandals will spawn. Take them out quickly, grab their Scorch Cannons, and use the two single-shot blasts to break the glowing blue objects on each side of the boss.
The boss will leap to the opposite side and repeat the cycle. All the while, watch for the sweeping Arc shockwave. You can either jump it on reaction or stay elevated, but don’t get caught in its path as it will deal massive damage.
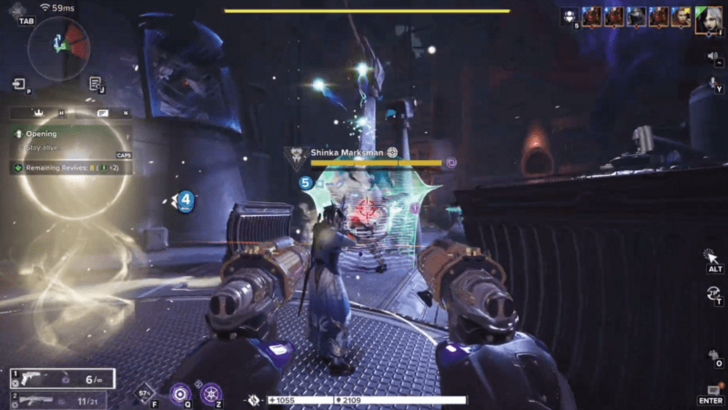
Handle Close-Quarter Shinkas and Enter Portals
When all four objects are destroyed, the tank returns to center and two Close-Quarter Shinkas emerge from portals. Kill them with Shotguns or supers and send one teammate into each portal. The team naturally splits three-and-three to cover both sides.
Defeat Servitors and Use Monitors Inside
Players who enter the portals face massive Servitors. Once killed, monitors inside reveal the boss’s weak points. Ping the glowing part so your teammates outside see a picture, making it easy to target the right spot. Use the connecting hallway to help the other player who went through the portal if you finish quickly.
Destroy Eyes and Dodge Missiles Outside
Meanwhile, the outside team must destroy waves of floating Eyes, which can trap and kill if ignored. Afterward, the boss launches missiles across the arena, shown by red circles on the floor. Keep moving while waiting for the inside players to ping the weak points.
Target Correct Weak Points
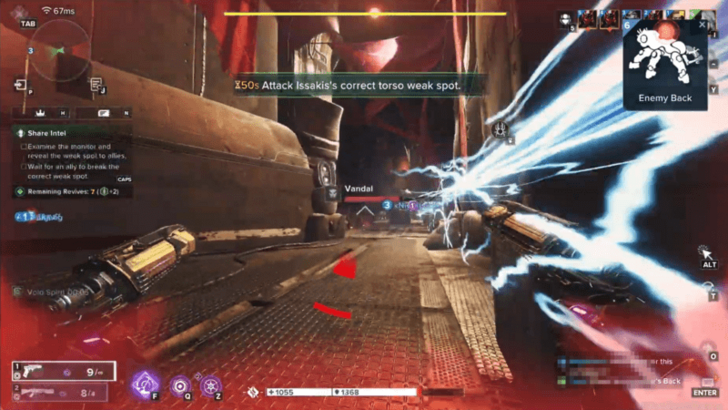
Shoot the two glowing parts identified by your portal teammates, but be careful as shooting the wrong limb wipes the team. Once the correct spots are broken, the portal players reappear outside and the boss becomes vulnerable.
Damage the Boss
The boss staggers, exposes its critical point, and enters a damage phase. Drop Tan-2’s Super or other DPS buffs and unload with your strongest weapons.
Aim for half health, since the fight only allows two damage phases. Back off as the window ends, because enemies swarm in and can easily wipe the team.
Repeat for Phase Two
The cycle repeats with Scorch Vandals, blue objects, portals, Servitors, and Eyes. The difference is that the second set of callouts focuses on specific legs instead of other body parts, and the Arc wave reaches higher, striking platforms that were safe earlier. B
reak the correct limbs, trigger the second damage phase, and finish the tank to clear Issakis’s Tabernacle.
Gauntlet: Onslaught Rewards
All Possible Rewards
|
・Mysterious Artifact - Gallows ・Random Mythic Weapon ・Random Legendary Weapon ・Ascension Cell x5 ・Gwynn Card ・Team XP x2000 ・Glimmer x400 |
These are all the possible rewards you can get after finishing each one of the Gauntlet: Onslaught raids.
Destiny: Rising Related Guides
List of All Raids (Gauntlet Ops)
All Raids
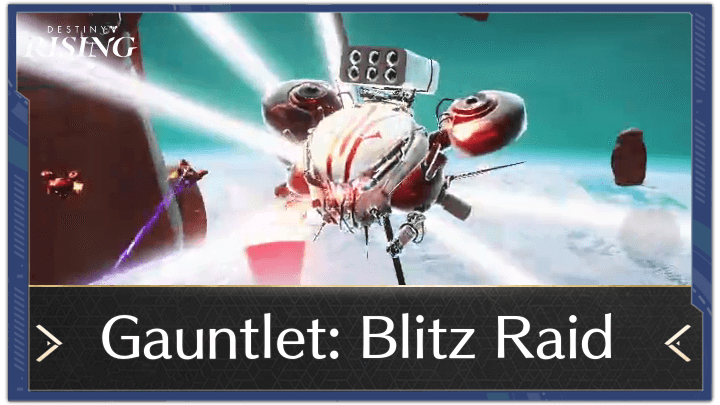 Gauntlet: Blitz Gauntlet: Blitz |
 Gauntlet: Onslaught Gauntlet: Onslaught |
Comment
Author
Gauntlet: Onslaught Raid Guide
Rankings
- We could not find the message board you were looking for.
Gaming News

![Monster Hunter Stories 3 Review [First Impressions] | Simply Rejuvenating](https://img.game8.co/4438641/2a31b7702bd70e78ec8efd24661dacda.jpeg/show)
![The Seven Deadly Sins: Origin [First Impressions] | A Promising Start](https://img.game8.co/4440581/584e0bfb87908f12c4eab6e846eb1afd.png/thumb)
![The Liar Princess and the Blind Prince Review [PC] | Lovely to Look at but Tedious to Play](https://img.game8.co/4442586/8d95f5faf05780f1765ce7e0938bd825.jpeg/thumb)
![Marathon Cryo Archive Map Teased as [REDACTED] on Selection Screen](https://img.game8.co/4442236/6357203e58172f6de57f1991e7c39b22.png/thumb)
Popular Games

Genshin Impact Walkthrough & Guides Wiki
Umamusume: Pretty Derby Walkthrough & Guides Wiki
Pokemon Pokopia Walkthrough & Guides Wiki
Honkai: Star Rail Walkthrough & Guides Wiki
Monster Hunter Stories 3: Twisted Reflection Walkthrough & Guides Wiki
Arknights: Endfield Walkthrough & Guides Wiki
Wuthering Waves Walkthrough & Guides Wiki
Zenless Zone Zero Walkthrough & Guides Wiki
Pokemon TCG Pocket (PTCGP) Strategies & Guides Wiki
Monster Hunter Wilds Walkthrough & Guides Wiki


Recommended Games
Diablo 4: Vessel of Hatred Walkthrough & Guides Wiki
Cyberpunk 2077: Ultimate Edition Walkthrough & Guides Wiki
Fire Emblem Heroes (FEH) Walkthrough & Guides Wiki
Yu-Gi-Oh! Master Duel Walkthrough & Guides Wiki
Super Smash Bros. Ultimate Walkthrough & Guides Wiki
Pokemon Brilliant Diamond and Shining Pearl (BDSP) Walkthrough & Guides Wiki
Elden Ring Shadow of the Erdtree Walkthrough & Guides Wiki
Monster Hunter World Walkthrough & Guides Wiki
The Legend of Zelda: Tears of the Kingdom Walkthrough & Guides Wiki
Persona 3 Reload Walkthrough & Guides Wiki


All rights reserved
©2024 Bungie
©1997-2024 NetEase.Inc.
The copyrights of videos of games used in our content and other intellectual property rights belong to the provider of the game.
The contents we provide on this site were created personally by members of the Game8 editorial department.
We refuse the right to reuse or repost content taken without our permission such as data or images to other sites.