This survey will take about 1 minute.
Your answers will help us to improve our website.
Zelda: Breath of the Wild (BotW)
Divine Beast Vah Naboris Dungeon Walkthrough
★ Sequel: Tears of the Kingdom Guide here!
★ Get a head start with our Beginner's Guide
┗ The Best Recipes to Cook | Rupee Farming
★ Shrines Locations | Korok Seeds Locations
★ Explore after the story with our Post Game Guide
This is a dungeon walkthrough for Divine Beast Vah Naboris in The Legend of Zelda: Breath of the Wild (BotW). To learn how to find and activate all terminals and get all the Treasure Chests in the camel Divine Beast, how to beat Thunderblight Ganon, as well as get Urbosa's Fury, please read on.
List of Contents
How to Find Divine Beast Vah Naboris
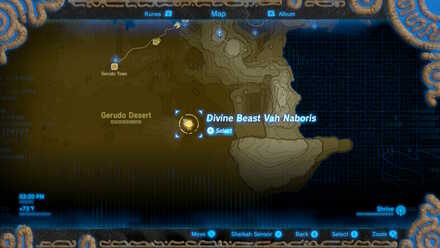
East of Gerudo Desert
| Map Location | Overworld Location |
|---|---|
 View Full Image |
 View Full Image |
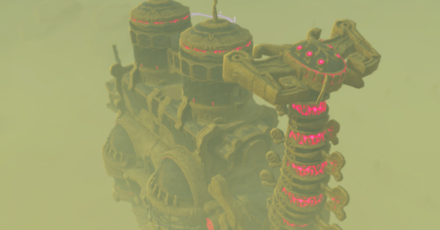
The camel Divine Beast Vah Naboris can be found in the East Barrens of Gerudo Desert. You can enable its waypoint after shooting its feet down when you fight it alongside Gerudo Chief Riju.
Divine Beast Vah Naboris Rewards
Dungeon Rewards
| Divine Beast Vah Naboris Rewards | ||
|---|---|---|
| Heart Container | Urbosa's Fury | |
Divine Beast Vah Naboris Dungeon Walkthrough
Guide Overview
|
|
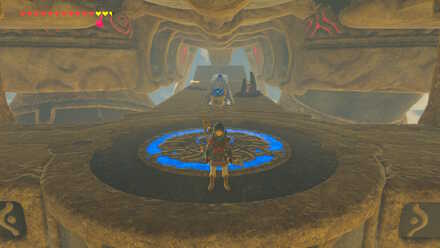
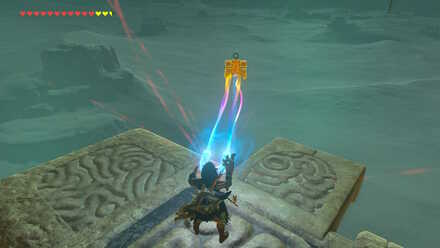
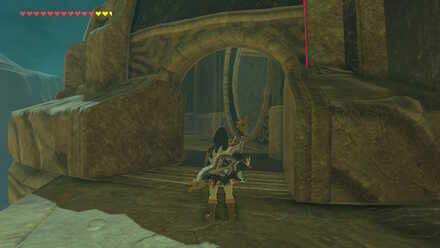
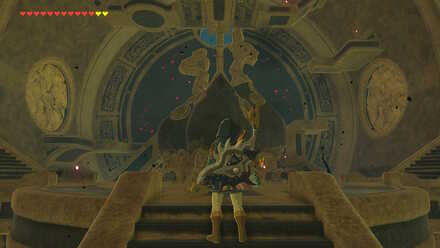
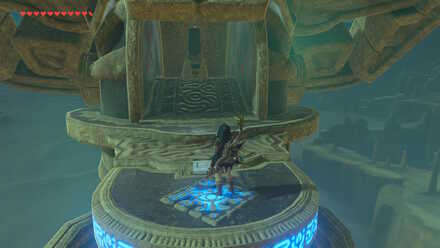
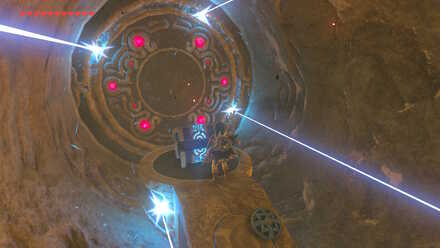
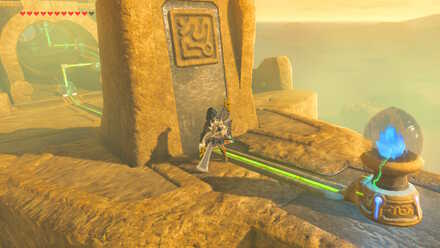
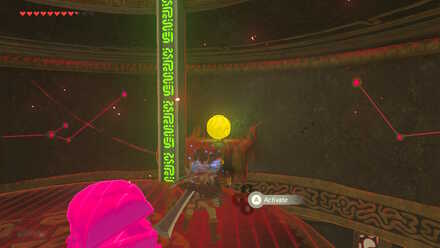
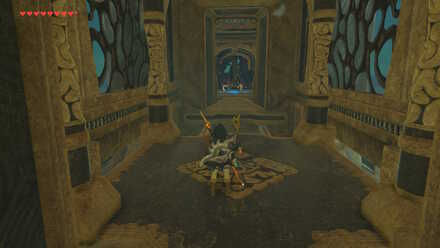
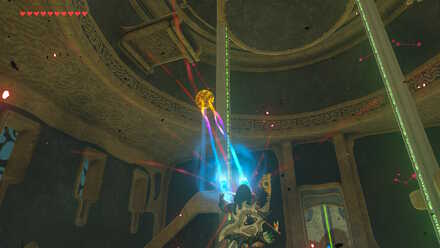
Activate the Guidance Stone
| Activate the Guidance Stone Walkthrough | |
|---|---|
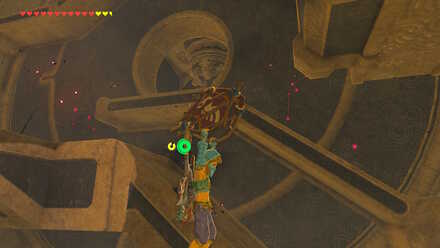
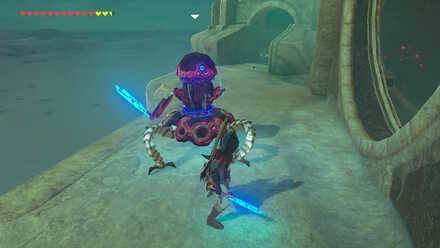
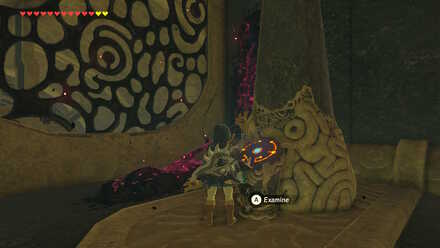
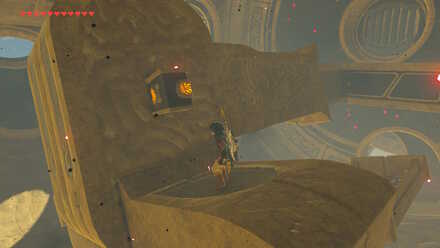
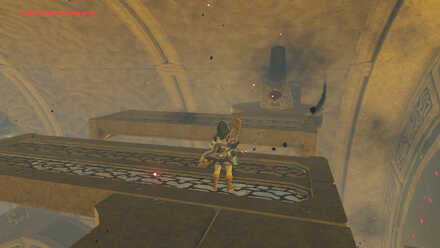
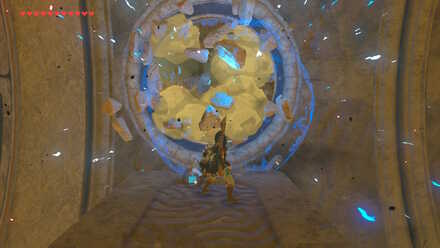
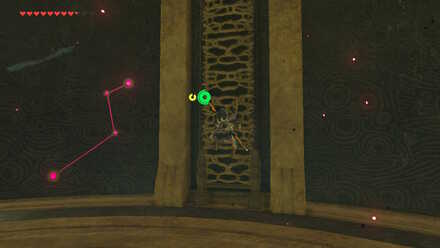
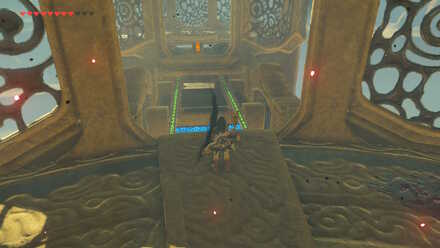
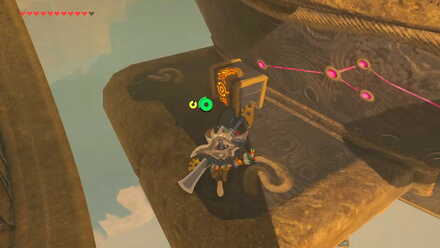
| 1 | 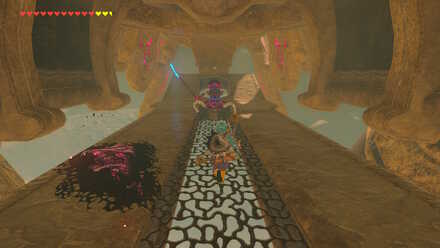 Eliminate the Enemies Just waiting at the entrance is a Guardian Scout II. Defeat it to get a Guardian Spear. Up the ramp is malice blocking the way. Shoot the eyeball to destroy it. |
| 2 |
 Go Up the Ramp at the Back Wall At the back wall of the main room, climb the ramp from the right side leading to the Guidance Stone. |
 Optional: Get the Treasure Chest at the Back To get it, use Stasis on the chest, and shoot an arrow to cut the rope. Switch your rune to Magnesis, and grab the chest just in time before it falls far out of reach |
|
| 3 |
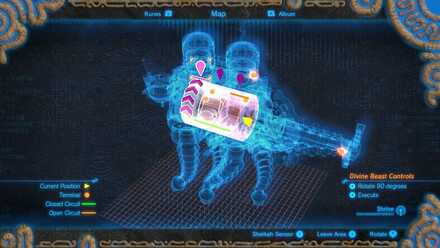
 Activate the Guidance Stone You will also gain the ability to rotate sections of the main room by 90 degrees. By doing so, you can activate and deactivate electrical circuits across the dungeon. Note: There is a Treasure Chest behind the room, but it will be accessed later on. |
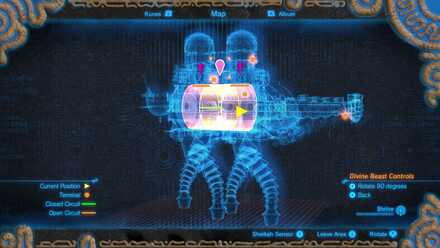
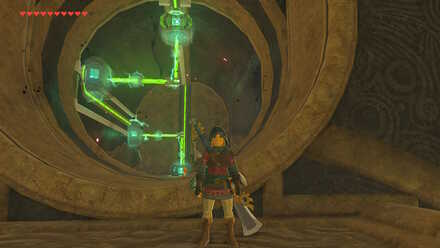
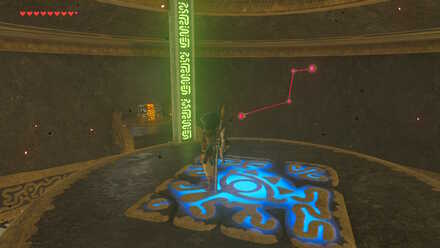
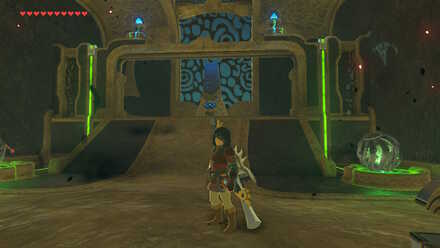
How to Rotate Vah Naboris's Sections
The main room has three sections which you can individually rotate.
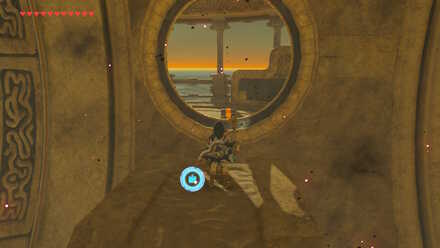
To do so, open up the map by pressing the (-) button, and use the left control stick to select which section to rotate. Once you're on the section you want to rotate, press A to rotate it 90 degrees. Repeatedly press A if you need to rotate it several times!
Press B to return to the game and set things in motion.
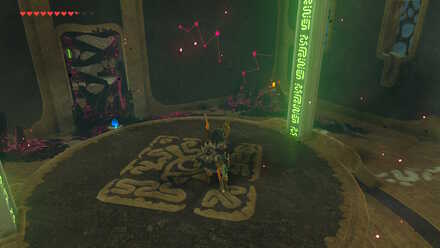
Activate Terminal 1
| Activate Terminal 1 Walkthrough | |
|---|---|
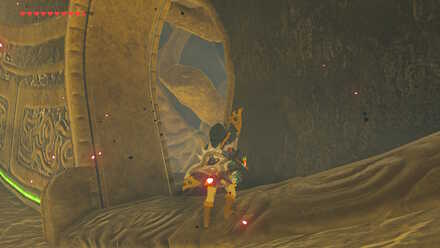
| 4 |
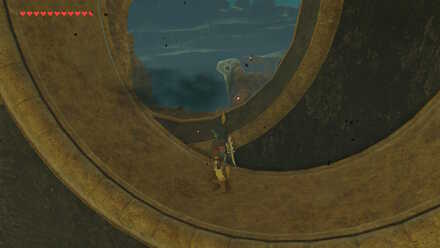
 Go Outside to the Left Hole Facing the Guidance Stone, go up the left ramp from the main control unit. |
| 5 |
 Defeat the Guardian Scout Defeat the Scout outside to get a Guardian Sword. |
| 6 |
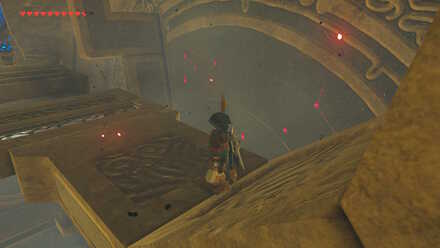
 Walk to the Hole Past the Arch Walk past the arch just up ahead. On the wall to the right is a hole blocked by the wall in the main room. |
| 7 |
 Rotate the Back Section of the Beast Rotate the back section of the Beast (the one closest to the Guidance Stone) two times, so that its circuit is at the top |
| 8 |
 Enter the Enclosure After the rotation, the hole will reveal the entrance to a terminal. Enter the hole to get into the enclosure. |
| 9 |
 Rotate the Back Section of the Beast Rotate the same section again once so that the terminal is upright. |
| 10 |
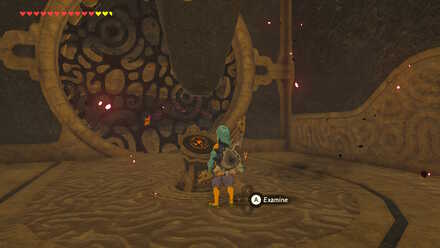
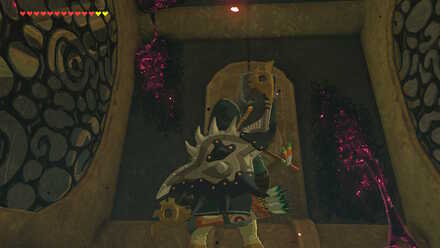
 Activate the Terminal Examine the first terminal to activate it. |
| 11 |
 Go Back to the Main Room To go back, rotate the back section three times again, until the circuit is back at the top again, and exit the hole. |
Optional: Get the Two Treasure Chests Above the Main Control Unit
| Main Control Unit Treasure Chests Walkthrough | |
|---|---|
| 1 |
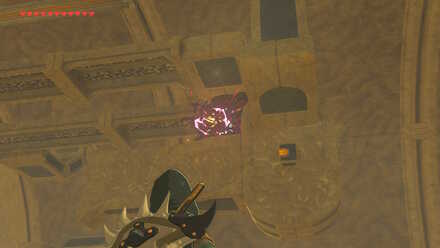 Destroy the Eyeball In the main room there are two Treasure Chests just above the main control unit. To get it, rotate the middle section until you see the eyeball. Destroy it to get rid of the malice. |
| 2 |
 Glide Down to the Middle Section Go up a ramp of any other section, and rotate the middle section so that its circuit is facing left or right. Glide to the platform to get to the Chest containing a Knight's Bow. |
| 3 |
 Walk Along the Platform as It Rotates To get the other chest on the opposite side, rotate the middle section again twice, and carefully walk along the platform as it rotates. Open the other Chest containing an Ancient Shaft. |
Activate Terminal 2
| Activate Terminal 2 Walkthrough | |
|---|---|
| 12 |
 Rotate the Front Section of the Beast From the main room, rotate the front section of Vah Naboris (the one closest to the neck) so that its circuit is at the bottom. |
| 13 |
 Position Yourself by the Ramp Find the terminal at the bottom, and position yourself by the ramp across it. |
| 14 |
 Rotate the Front Section of the Beast Rotate the same part while you ride up the ramp that goes to the terminal's platform. |
| 15 |
 Activate the Terminal When the front section's circuit is at the top, you should be upright with the terminal. Jump to get across, and activate it. |
Optional: Get the Hidden Treasure Chest
| Hidden Treasure Chest Walkthrough | |
|---|---|
| 1 |
 Go Outside to the Right Hole In the same section there is a Treasure Chest behind a breakable wall containing an Ancient Spring. Facing the Guidance Stone, go out the right hole from the main control unit, and defeat the Guardian Scout II for an Ancient Battle Axe. |
| 2 |
 Destroy the Breakable Wall To the right is a breakable wall that you can destroy with a Remote Bomb, opening a hole back to the main room. |
| 3 |
 Cross to the Other Side With the hole revealed, go inside and cross the platform to get to the other side. |
| 4 |
 Destroy the Other Breakable Wall You cannot reach the other wall by foot, so you will need to throw a Remote Bomb at it, and detonate it just as it hits the wall. |
| 5 |
 Glide to the Platform With another hole revealed, jump to the platform that has a Treasure Chest containing an Ancient Spring. |
Activate Terminal 3
| Activate Terminal 3 Walkthrough | |
|---|---|
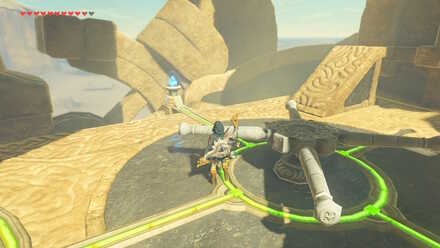
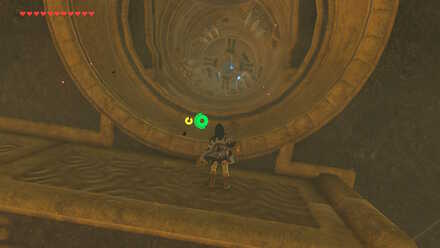
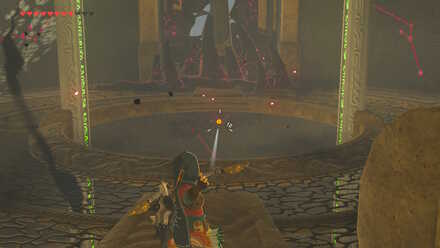
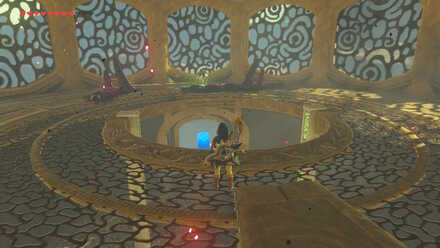
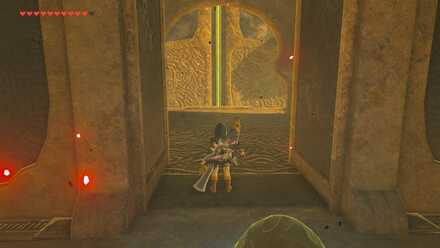
| 16 |
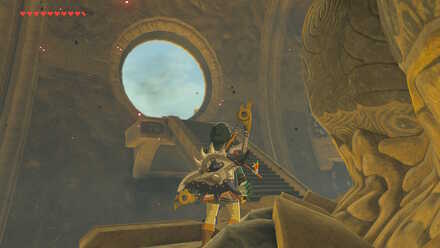
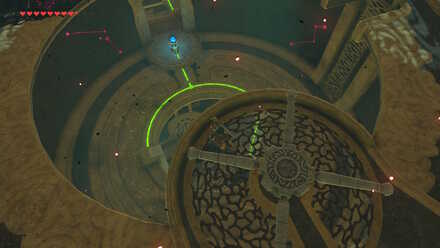
 Align the Circuits Open up the map and rotate all sections so that all circuits are at the top. This activates the rotating wall by Vah Naboris's head. Three entryways are revealed from the wall, one at the top, at the center, and at the bottom. |
| 17 |
 Exit the Top Entryway Step into any of the holes at the wall, so you can ride it to the top entryway leading to Vah Naboris's neck. |
| 18 |
 Rotate the Wheel Below is a large wheel which you can push to rotate. Rotate it in either direction to activate the lantern on the side. Do the same for the other direction, so the two lanterns on both sides are blue. This will activate an elevator up to the Beast's head. |
| 19 |
 Activate the Terminal Ride the elevator up, and activate the third terminal. |
Optional: Get the Treasure Chest in the Center Entryway
| Center Entryway Treasure Chest Walkthrough | |
|---|---|
| 1 |
 Enter the Center Entryway On the same wall, make your way to the center entryway. Make sure that the all circuits are aligned to the top so that the gate to the entrance is open. |
| 2 |
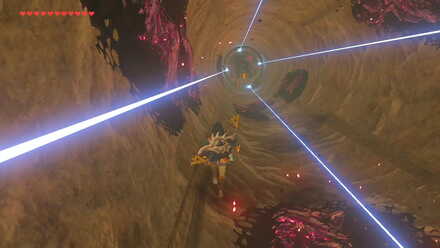 Short Route: Run Through the Hazards Upon entering, you will see a long hallway full of spikes and lasers that rotate slowly. You can simply run forward and avoid them as you go. |
|
Long Route: Disconnect the Circuits If you want to play safe, you can also rotate any of the Beast's section so that the circuit disconnects and the laser hazards stop moving. |
|
| 3 |
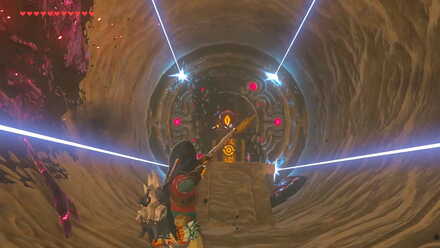 Destroy the Eyeball Shoot the eyeball at the end of the hallway. |
| 4 |
 Get the Treasure Chest Open the Treasure Chest containing a Knight's Shield. |
Activate Terminal 4
| Activate Terminal 4 Walkthrough | |
|---|---|
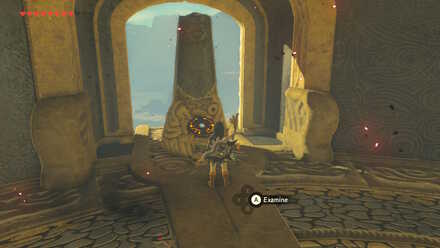
| 20 |
 Ride a Hole to Get to the Top Make sure that all circuits are at the top, then ride a hole in the rotating wall to get to the top. |
| 21 |
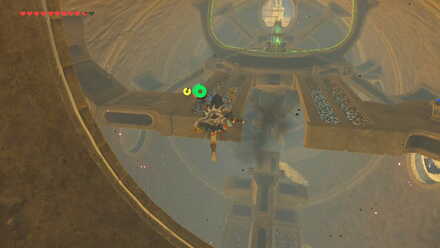 Glide to the Platform Time your jump and glide to the highest platforms in the room. |
| 22 |
 Get to the Other Side Carefully make your way to the other side by jumping through platforms. |
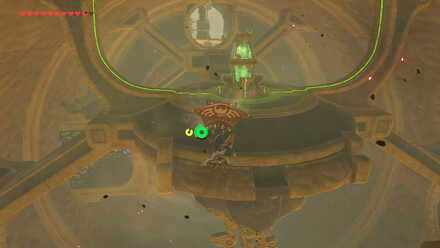
| 23 |
 Connect the Circuits At the other end you will see an extension of circuits, which can be activated by connecting the metal blocks on the wall and ceiling. Use Magnesis to drag the first two blocks by the main circuit, and drag the last two at the opposite side. This will activate Naboris's tail, raising it to 90 degrees. |
| 24 |
 Get to the Top You will need to position yourself by the pillar at the end of the tail. To do so, deactivate the circuit first by rotating a section of the Beast. Go the the pillar at the end, and activate the circuits again to go up with the tail. |
| 25 |
 Destroy the Eyeballs Malice will be blocking the entrance to the room, so destroy the eyeball in front of you. Upon entering the room, more malice will block next doorway, so shoot the other eyeball to the right. The next room will have a deactivated platform. |
| 26 |
 Take the Elevator Down Destroy the eyeball at the corner before its mouth spits out Cursed Monsters. This will open up a doorway. |
| 27 |
 Get the Metal Ball Above the room, there are platforms on both sides with items on top of them. On the right side is a metal ball which you can grab using Magnesis. You can bring it with you, or you can leave it on the platform for now, but remember its location for later. |
 Optional: Get the Treasure Chest On the platform in the other side is a Treasure Chest containing an Ancient Screw. Use Magnesis to get it. |
|
| 28 |
 Go Up the Ladder Take the elevator to go back to the previous room, and climb up the ladder to the right to get to another room above. Note: There is a Treasure Chest in front, but it will be out of reach. It will be accessed later on. |
| 29 |
 Rotate the Wheel to Activate the Platform In the upper room is a large wheel that you can use to rotate the floor below. Rotate it to connect the circuit and activate the moving platform in the next room. |
| 30 |
 Go to the Next Room Ride the moving platform to the next room where a terminal is located. Defeat the Guardian Scout II found on the elevator. |
| 31 |
 Destroy the Eyeball The terminal is blocked by malice. Look through the elevator's hole, and shoot the eyeball on the ceiling of the room below. |
| 32 |
 Activate the Terminal Examine the fourth terminal to activate it. |
Activate Terminal 5
| Activate Terminal 5 Walkthrough | |
|---|---|
| 33 |
 Get the Metal Ball In the fourth terminal room, ride the elevator to go up to the room above, and get the metal ball. |
 Optional: Get the Treasure Chest At the back of the room is a moving platform which leads back to the previous room with the wheel. Go to it to open the Treasure Chest containing a Topaz. |
|
| 34 |
 Ride the Elevator Down Take the elevator to get to the bottom room, and destroy the eyeball in the corner to open up the doorway that leads outside. |
| 35 |
 Bring the Metal Ball to the Door Inductor With the ball you got from the top floor, use Magnesis to bring it up to the cube-shaped inductor on top of the locked door. This will activate it and unlock the door to the next room. |
| 36 |
 Defeat the Guardians The last terminal will be in the next room. Defeat the two Guardians first. |
| 37 |
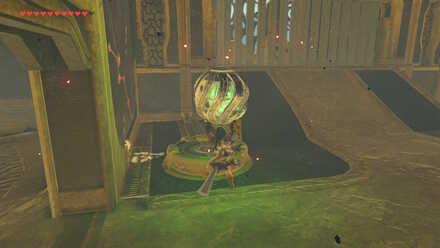 Place the Metal Ball Into the Platform Get the metal ball used earlier and place it on one of the platforms. This will power up one side of the gate blocking the terminal. |
| 38 |
 Get the Other Metal Ball The doorway to the right leads back to the first room with the first elevator. Get the metal ball that you took earlier. If you didn't bring the first metal ball yet, ride the elevator up. Use Magnesis to get the metal ball on the left platform above. |
| 39 |
 Place the Metal Ball Into the Platform Bring the metal ball and place it on top of the other platform to open up the gate. |
| 40 |
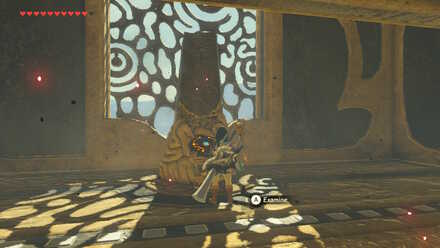 Activate the Terminal Activate the fifth and last terminal. |
Optional: Get the Treasure Chest Outside
| Outside Treasure Chest Walkthrough | |
|---|---|
| 1 |
 Go Outside The last Treasure Chest is the one that is seen outside the Guidance Stone. Go outside the doorway to the right where the tail is. |
| 2 |
Bring the Tail Down The platform to the Chest is found on the tail's inner side, so bring it down to access the platform. To do so, simply open the map and move a section to disconnect the circuit. |
| 3 |
 Glide Down to the Platform Glide down to the tail, and carefully make your way just before the bottom of the tail where the Chest is. |
| 4 |
 Get the Treasure Chest Open the Chest for an Ancient Gear. To go back, glide down to the platform below to get back to the main room. |
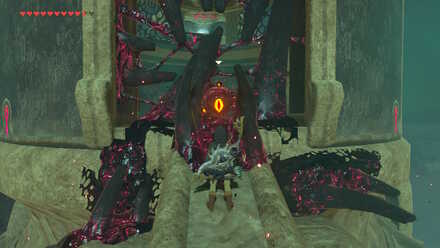
Defeat Thunderblight Ganon
| Activate Terminal 1 Walkthrough | |
|---|---|
| 41 |
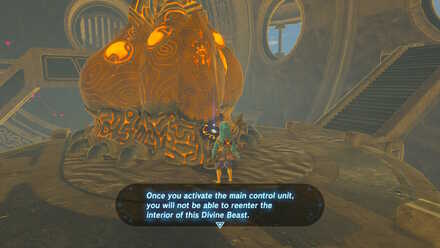
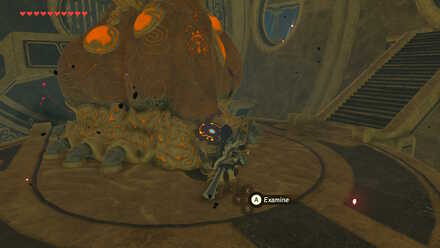 Examine the Main Control Unit Go back to the main room to examine the main control unit. Make sure you are prepared at this point because activating it will start the fight against Thunderblight Ganon. You are free to leave the dungeon to prepare and come back when you are ready. |
| 42 |
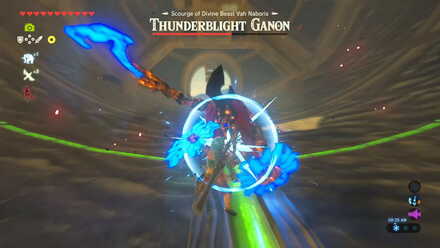
Defeat Thunderblight Ganon Take back Vah Naboris by defeating Thunderblight Ganon. He uses lightning attacks and is equipped with an axe and shield. ➤ Thunderblight Ganon Guide |
| 43 |
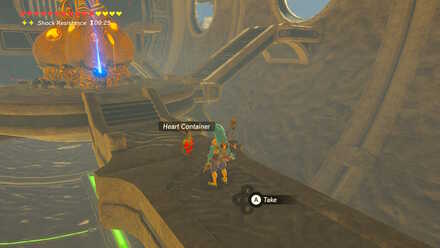 Take the Heart Container After the battle, you will receive a Heart Container, as well as the divine power, Urbosa's Fury. |
| 44 |
 Activate the Main Control Unit Use the terminal to go back to Gerudo Town. Report to Chief Riju and finish the main quest. ➤ Divine Beast Vah Naboris Quest Guide |
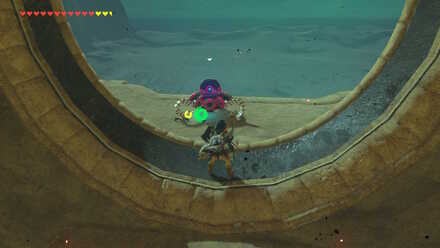
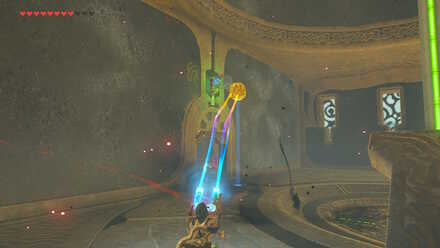
How to Beat Thunderblight Ganon
Parry and Perform Perfect Dodges to Attack
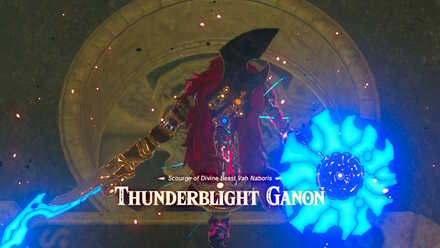
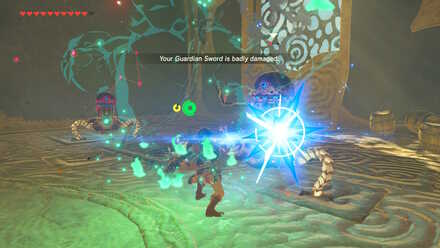
Like all Ganon fights, this battle has two phases. Thunderblight Ganon's attack pattern will change after you get his HP down to 50%.
He will attack you often, and block arrows and attacks with his shield, so do your best to parry and do perfect dodges, so you have the opportunity to hit back. This may be difficult since he moves very quickly but make sure to reset your Focus after he moves. Breaking his shield will stun him, to break his shield you will need to hit it multiple times to break it.
At the start of the second phase, you will need to break his shield before you can do any damage on him. When he starts launching metal pillars at you, use Magnesis to grab one and hold it near him to break his shield and bring him down.
Thunderblight Ganon Boss Guide
Divine Beast Vah Naboris Tips and Tricks
Stock Up on Electric-Resistant Food and Elixirs
Cook up some electric-resistance food using ingredients like Zapshrooms and Electric Safflinas, or make some Electro Elixirs.
If you have a small number of hearts, pack up some Hearty Dishes for extra hearts, or get a special spa plan in Hotel Oasis at Gerudo Town to get extra temporary hearts and stamina.
The Best Recipes You Need to Cook
Wear Shock Resistance Armor
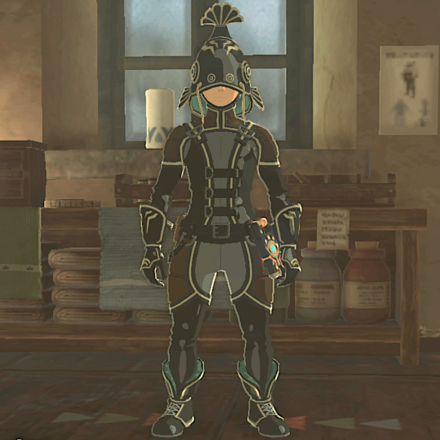
The only way to get immunity against electricity and shock is to wear the Rubber Armor Set. Each piece is obtained in a certain way, and wearing all pieces gives you the Unshockable set bonus effect.
It may be worth getting it for the battle against Thunderblight Ganon, and all electric-based obstacles.
You are Free to Leave the Area Anytime
During your stay in Vah Naboris, you can leave and come back anytime, as you can fast-travel to it. Take note that every time you leave, you will always arrive at the Travel Gate. Press the - button to open up the map, and press X to leave the area.
If you find yourself in a tough situation against Thunderblight Ganon, you can retreat and prepare for your return.
Get Everything Before You Leave for Good
After defeating Thunderblight Ganon, and using the main terminal to leave, you cannot come back inside the Divine Beast anymore, so if you want to get all the chests, do so before leaving for good.
How to Get the Treasure in Divine Beast Vah Naboris
All Treasure Chests
Treasure Chest 1
| Treasure Chest 1 Walkthrough | |
|---|---|
| 1 |
Farther in the back of the main room is a Treasure Chest hanging on a rope. It contains an Ancient Core. To get it, use Stasis on the Chest, and shoot an arrow to cut the rope. Switch your rune to Magnesis, and grab the Chest just in time before it falls far out of reach. |
Treasure Chest 2
| Treasure Chest 2 Walkthrough | |
|---|---|
| 1 |
In the main room there are two Treasure Chests just above the main control unit. To get them, rotate the middle section until you see the eyeball. Destroy it to get rid of the malice. |
| 2 |
Go up a ramp of any other section, and rotate the middle section so that its circuit is facing left or right. Glide to the platform to get to the Chest containing a Knight's Bow. |
Treasure Chest 3
| Treasure Chest 3 Walkthrough | |
|---|---|
| 1 |
There is a Treasure Chest behind a breakable wall containing an Ancient Spring. Facing the Guidance Stone, go out the right hole from the main control unit, and defeat the Guardian Scout II with an Ancient Battle Axe. |
| 2 |
To the right is a breakable wall that you can destroy with a Remote Bomb, opening a hole back to the main room. |
| 3 |
With the hole revealed, go inside and cross the platform to get to the other side. |
| 4 |
You cannot reach the other wall by foot, so you will need to throw a Remote Bomb at it, and detonate it just as it hits the wall. |
| 5 |
With another hole revealed, jump to the platform that has a Treasure Chest containing an Ancient Spring. |
Treasure Chest 4
| Treasure Chest 4 Walkthrough | |
|---|---|
| 1 |
Align all circuits to the top so that the front wall rotates, and the gate to the center entryway is open. |
| 2 |
Upon entering, you will see a long hallway full of spikes and lasers that rotate slowly. You can simply run forward and avoid them as you go, or cut the circuit to stop the hazards from rotating. |
| 3 |
Shoot the eyeball at the end of the hallway. |
| 4 |
Open the Treasure Chest containing a Knight's Shield. |
Treasure Chest 5
| Treasure Chest 5 Walkthrough | |
|---|---|
| 1 |
On the platform of the top room is a Treasure Chest containing an Ancient Screw. Use Magnesis to get it. |
Treasure Chest 6
| Treasure Chest 6 Walkthrough | |
|---|---|
| 1 |
Get to the second room at the top, and take the platform up. There is a moving platform which leads back to the previous room with the wheel. Go to it to open the Treasure Chest containing a Topaz. |
Treasure Chest 7
| Treasure Chest 7 Walkthrough | |
|---|---|
| 1 |
The last Treasure Chest is the one that is seen outside the Guidance Stone. Go outside the doorway to where the tail is. |
| 2 |
The platform to the Chest is found on the tail's inner side, so bring it down to access the platform. To do so, simply open the map and move a section to disconnect the circuit. |
| 3 |
Glide down to the tail, and carefully make your way just before the bottom of the tail where the Chest is. |
| 4 |
Open the Chest for an Ancient Gear. To go back, glide down to the platform below to get back to the main room. |
Zelda: BotW Related Guides

All BotW Dungeons by Type
| BotW Dungeons | |
|---|---|
| Shrines | Divine Beasts |
| Hyrule Castle | |
List of All Divine Beasts
| Divine Beasts | |
|---|---|
| Divine Beast Vah Ruta | Divine Beast Vah Rudania |
| Divine Beast Vah Medoh | Divine Beast Vah Naboris |
| Divine Beast Tamer's Trial | |
Author

The Legend of Zelda: Breath of the Wild Walkthrough & Guides Wiki
Divine Beast Vah Naboris Dungeon Walkthrough
Please participate in our site
improvement survey
04/2026
improvement survey
04/2026
Would you assist in
improving Game8's site?
improving Game8's site?

×
We are listening to our users' valuable opinions and discussing how to act on them.
The information collected through this survey will be used for the purpose of improving our services. In addition, the information will only be disclosed a part of a statistic in a format that will not allow identification of personal information.
Begin Survey
Not Now
×
Please rate each item regarding Game8.co's Advertisements.
Amount of Ads
Very Dissatisfied
Somewhat Dissatisfied
Fine
Somewhat Satisfied
Highly Satisfied
Placement of Ads
Timing of Ad Display
Ad Loading Speed
Safeness of Ads
Content of Ads
×
Please rate each item regarding Game8.co's Quality of Articles.
Amount of information
Very Dissatisfied
Somewhat Dissatisfied
Fine
Somewhat Satisfied
Highly Satisfied
Frequency of updates
Speed of new information
Accuracy of articles
Understandibility of articles
Readability of sentences
×
Please rate each item regarding Game8.co's Usability of the Site.
Ease of finding information
Very Dissatisfied
Somewhat Dissatisfied
Fine
Somewhat Satisfied
Highly Satisfied
Loading Speed
Use of Color
Font Size
Visibility of Images
Easy to Understand Layout
×
Please rate each item regarding Game8.co's Message Boards, Comments.
Ease of Writing
Very Dissatisfied
Somewhat Dissatisfied
Fine
Somewhat Satisfied
Highly Satisfied
Readability
Ease in Finding Information
Comment Quality
Comment Quantity
Admin Response
×
Please rate each item regarding Game8.co's Site's new design.
Please rate our site's new design
Very Dissatisfied
Somewhat Dissatisfied
Fine
Somewhat Satisfied
Highly Satisfied
Do you think that the website's design change makes the site easier to use?
Has the new design made it easier for you to find information on the site?
Has the new design improved the overall visual appeal of the site?
How would you rate your overall satisfaction with the new design of the site?
×
How likely are you to recommend Game8 to someone you know?
Very Unlikely
0
1
2
3
4
5
6
7
8
9
10
Very Likely
If you have other opinions regarding potential improvement to the website, please share them with us. We would appreciate your honest opinion.
Note: This is a free response section, so you can proceed without entering anything.
Note: Please be sure not to enter any kind of personal information into your response.
Note: Please be sure not to enter any kind of personal information into your response.
×
Thank You
×
Thank you for participating in our survey! Your answers will help us to improve the quality of our website and services.
We hope you continue to make use of Game8.
We hope you continue to make use of Game8.
Close
Rankings
- We could not find the message board you were looking for.
Gaming News


![Forza Horizon 6 Review [Preview] | Beautiful Roads With a Whole Lot of Oversteer](https://img.game8.co/4460981/a7254c24945c43fbdf6ad9bea52b5ce9.png/thumb)
![Borderlands Mobile Review [Playtest] | The Same Borderlands Made Easy](https://img.game8.co/4465500/aac0c880a39ec5cd46073e49d18f3ed5.png/thumb)
Popular Games

Genshin Impact Walkthrough & Guides Wiki
Crimson Desert Walkthrough & Guides Wiki
Umamusume: Pretty Derby Walkthrough & Guides Wiki
Honkai: Star Rail Walkthrough & Guides Wiki
Monster Hunter Stories 3: Twisted Reflection Walkthrough & Guides Wiki
Wuthering Waves Walkthrough & Guides Wiki
The Seven Deadly Sins: Origin Walkthrough & Guides Wiki
Pokemon TCG Pocket (PTCGP) Strategies & Guides Wiki
Pokemon Pokopia Walkthrough & Guides Wiki
Zenless Zone Zero Walkthrough & Guides Wiki


Recommended Games
Monster Hunter World Walkthrough & Guides Wiki
Fire Emblem Heroes (FEH) Walkthrough & Guides Wiki
Pokemon Brilliant Diamond and Shining Pearl (BDSP) Walkthrough & Guides Wiki
Super Smash Bros. Ultimate Walkthrough & Guides Wiki
Diablo 4: Vessel of Hatred Walkthrough & Guides Wiki
Cyberpunk 2077: Ultimate Edition Walkthrough & Guides Wiki
Yu-Gi-Oh! Master Duel Walkthrough & Guides Wiki
Elden Ring Shadow of the Erdtree Walkthrough & Guides Wiki
The Legend of Zelda: Tears of the Kingdom Walkthrough & Guides Wiki
Persona 3 Reload Walkthrough & Guides Wiki


All rights reserved
© 2020 Nintendo. The Legend of Zelda, Wii U, and Nintendo Switch are trademarks of Nintendo.
The copyrights of videos of games used in our content and other intellectual property rights belong to the provider of the game.
The contents we provide on this site were created personally by members of the Game8 editorial department.
We refuse the right to reuse or repost content taken without our permission such as data or images to other sites.
There is also one chest with 5 bomb arrows. I think its entrance vis a vis the one what You need to open with bomb. Go left and there is a small chamber with chest