Korok Seed Locations: How to Get All Korok Seeds
★ Expansion Pass and DLC Details
☆ All Korok Seed Locations
★ Costumes List: How to Unlock Costumes
This is a guide to Korok Seed Locations in the game Hyrule Warriors: Age of Calamity for the Nintendo Switch. The guide below includes an interactive map, more details about each Korok Seeds' location, as well as information on the Korok Seed Sensor and the Korok Seed Tracker.
List of Contents
Korok Seeds Story Mode Interactive Map
| Icon | How to Use |
|---|---|
 | Show Names This button reveals the Name of every icon currently shown. |
 | Show Pins This button will toggle between showing and hiding all the pins that you have already marked as acquired. |
 | Fullscreen This button will change the map display to fill the screen. |
 | Search Mode Toggle This button will display a search bar which you can use to search for an individual pin by its name. |
 | Icon Mode Toggle In Search Mode, this button will toggle you back to Icon Mode, removing the search bar and displaying the icons again. |
 | All Pins This button is shown along with the Icons on the right when there are over 6 types of pins. Click it for a full selection of all available pin types. |
 | Counter Tracks the number of pins you have of a certain type. The pin type shown is set to the page and currently cannot be changed; however, all pin type counters can be viewed by clicking the checklist icon on the right side. |
| View All Counters This icon is found on the right side of the Counter. When a map has more than one pin type, click this icon to see Counters for all pin types. |
Challenges Korok Seed Locations
Mipha's Training
| 1 | 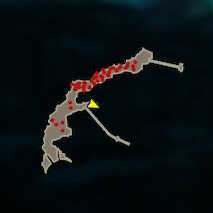 |
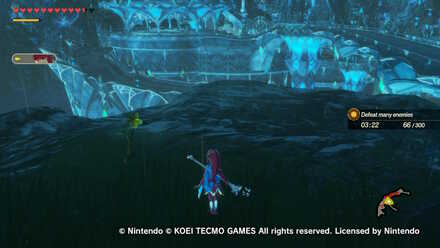 Turn right where the road splits and find a flower to the left of the bridge. |
Mipha's Training Challenge Walkthrough
Cross the Hebra Mountains
| 1 | 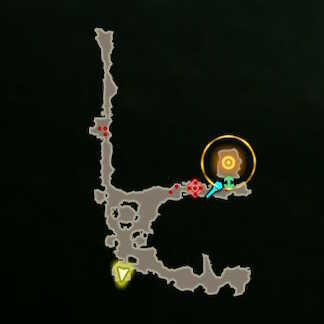 |
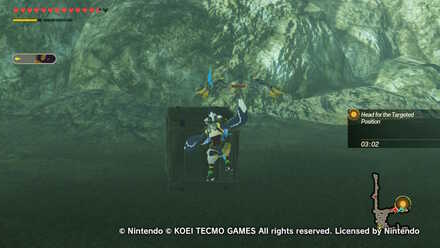 Keep going South until you reach the farthest crate. |
Cross the Hebra Mountains Challenge Walkthrough
Anti-Ice Training: II
| 1 | 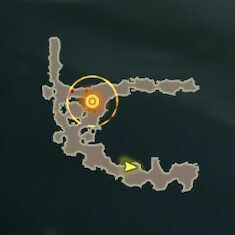 |
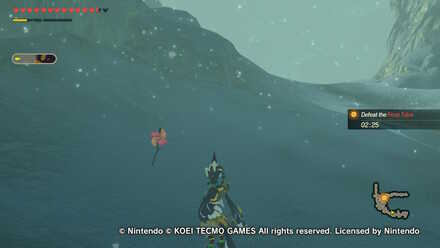 Head to the Southwest path and find a pinwheel. |
Anti-Ice Training: II Challenge Walkthrough
Innkeeper's Request
| 1 | 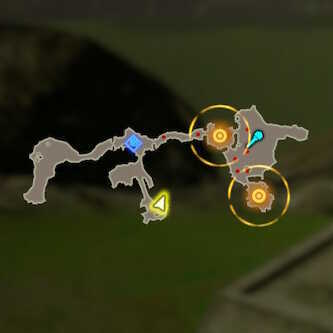 |
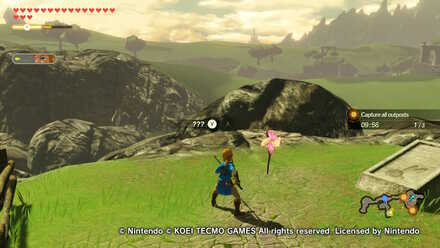 Find a pinwheel on the southern path. |
Innkeeper's Request Challenge Walkthrough
Winged Escort
| 1 | 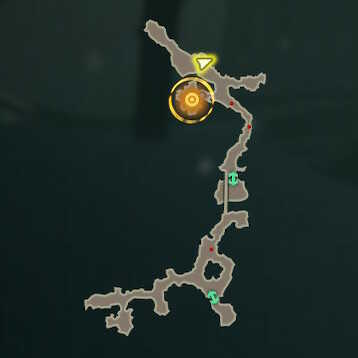 |
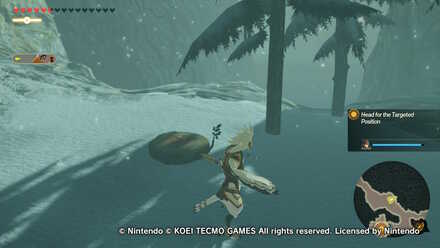 Run north of the final targeted position and find a tree stump. |
Winged Escort Challenge Walkthrough
Defend Zora's Domain
| 1 | 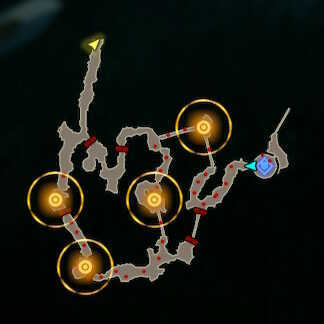 |
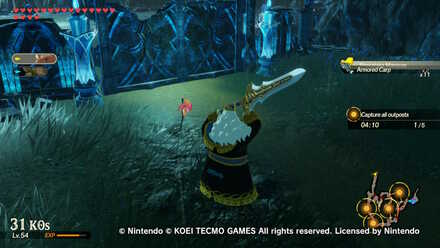 Run north of where you start the Challenge and find a pinwheel. |
Defend Zora's Domain Challenge Walkthrough
Elemental Uproar
| 1 | 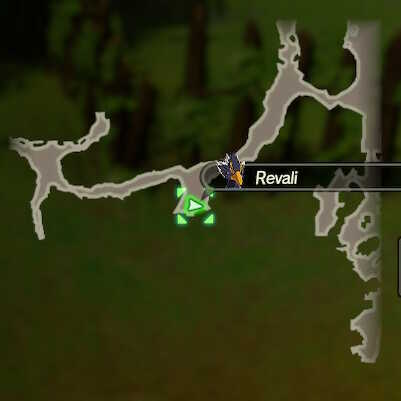 |
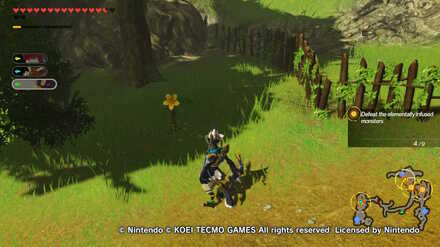 Run to the path on the center of the map and find a flower. |
| 2 | 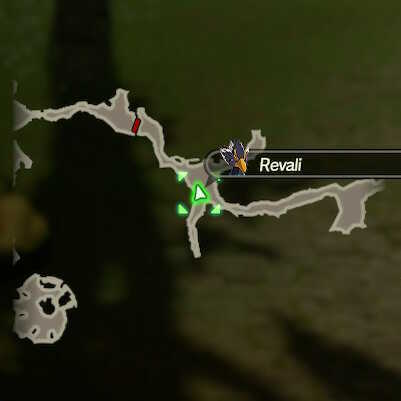 |
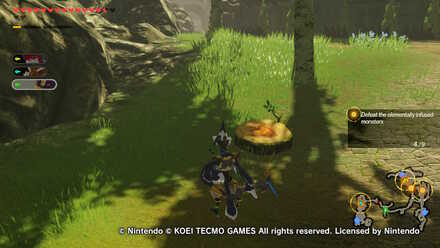 Keeping going west, past Korok 1, and find a tree stump. |
Elemental Uproar Challenge Walkthrough
Polishing His Technique
| 1 | 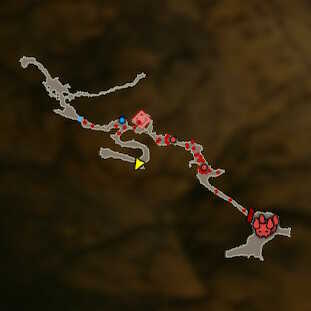 |
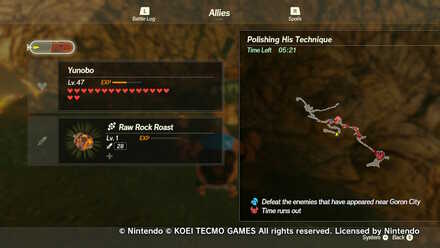 Take the path downwards on the center of the map and find a pinwheel. |
Polishing His Technique Challenge Walkthrough
Hair-Width Trial: Expert+
| 1 | 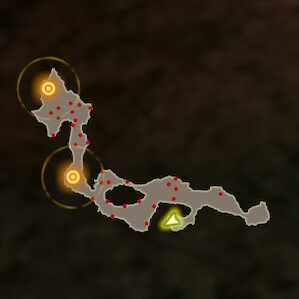 |
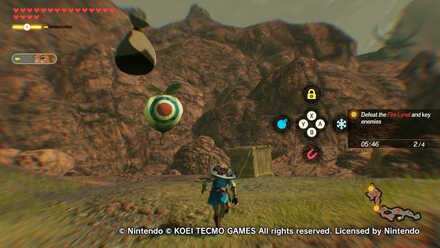 Find a hidden area south of the field and find a balloon. |
Hair-Width Trial: Expert+ Challenge Walkthrough
Hunting Partners
| 1 |  |
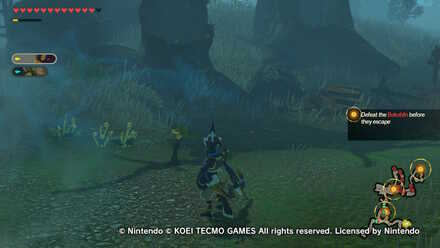 Find a flower on the southeastern path. |
Hunting Partners Challenge Walkthrough
Defend Hyrule Castle
| 1 | 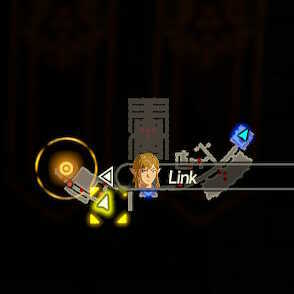 |
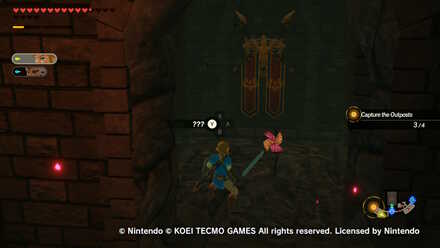 Destroy a bombable wall on west of the map and find a pinwheel. |
Defend Hyrule Castle Challenge Walkthrough
What Do Korok Seeds Do?
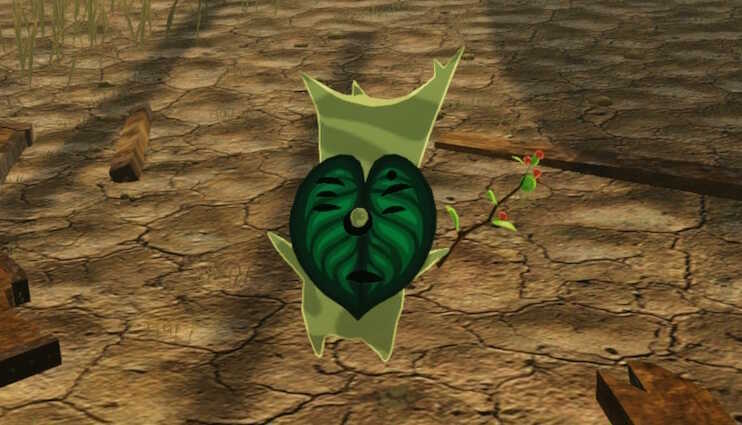
A Korok Seed is an item you receive after spotting a hidden Korok on the map. Breath of the Wild first introduced Korok Seeds as a way for a player to expand their inventory space.
In Age of Calamity, you can exchange your Korok Seeds for buffs and upgrades to strengthen up for battle!
Found in Story Battles and Challenges
Koroks can be disguised as flowers, pinwheels, tree stumps, or glowing spots on the ground. To reveal the hidden Korok, approach the item and press the Y Button.
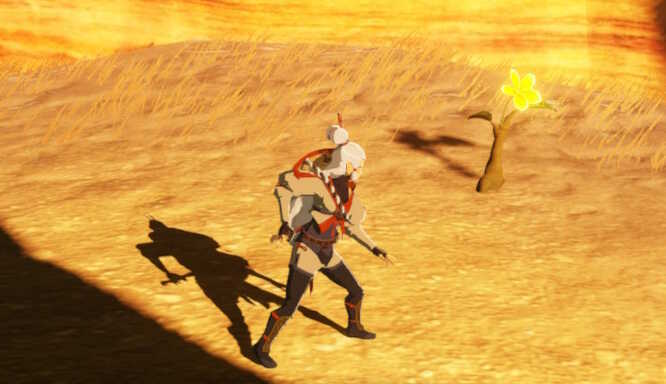 Press the Y Button to uncover the Korok. |
Koroks can also be hidden inside of floating balloons, crates, and bombable rocks. Keep an eye out for any of these items as you charge into battle all across Hyrule!
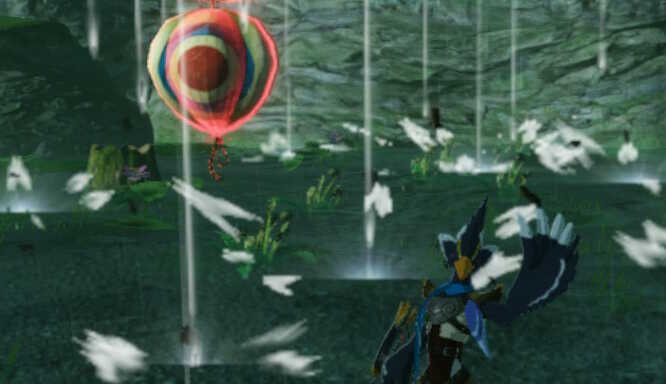 You may have to use a rune from your Shiekah Slate to uncover some Koroks. |
Earn as Rewards from Challenges and Quests
You can also grind for Koroks Seeds by completing challenges. Turn on your Sheikah Sensor to find any Challenges that will reward you with Korok Seeds.
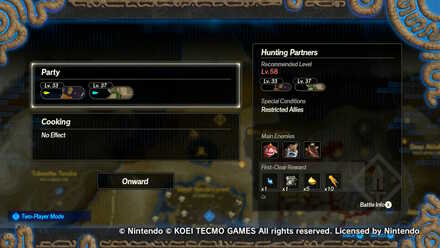 Find Korok Seeds as rewards from Challenges! |
Challenges With Korok Seeds as Rewards
| Battles |
|---|
| Challenge 21-30 Hestu's Training (x3) |
| Challenge 31-40 Escape the Lost Woods (x5) |
| Challenge 41-50 Forest Dance Festival (x5) |
| Challenge 51-60 Hunting Partners (x5) |
| Challenge 61-70 Hold the Line (x5) |
Quests With Korok Seed Rewards
Helping with Heights
| How to Unlock | ||||
|---|---|---|---|---|
| Clear the Battle: Each Step Like Thunder | ||||
| Reward | ||||
| Hestu: +2 Bonus Hearts Korok Seed x15 |
||||
| Required Materials | ||||
|
×15 |
×100 |
×10 |
×28 |
×30 |
Used as a Material in Quests
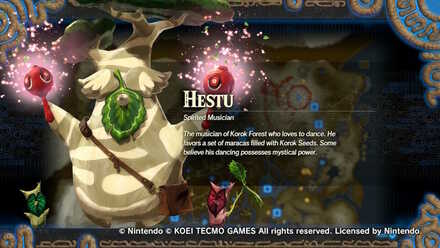
Korok Seeds become useable after Chapter 3: Freeing Korok Forest, after unlocking Hestu as a party member.
After the battle, Quests requiring Koroks Seeds will appear on the map. Complete the Quests to earn rewards, such as Hetsu's Bonus Combos and Hearts and increased Apple and Weapon capacity.
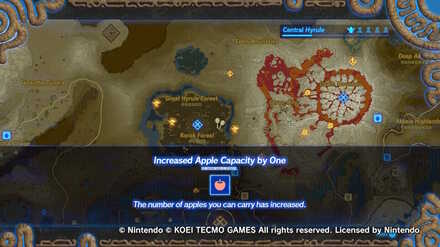 You can increase your Apple Capacity by completing Quests with Korok Seeds! |
Quests Korok Seeds Are Used For
How to Use the Korok Sensor
Find Weapons With Hidden Seals
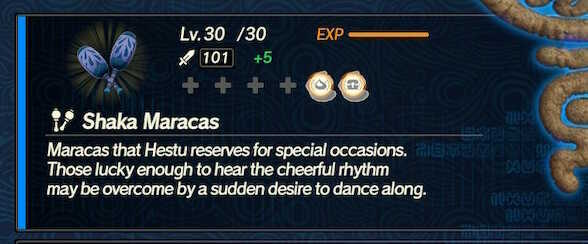
Some weapons will have Hidden Seals that detect nearby Koroks during a Battle. Be sure to upgrade them to the appropriate level to make use of the seal.
| Weapon | Base Atk | Hidden Seals |
|---|---|---|
|
|
11 | Level 25: Damage at 30% Hearts or Less: +8% Level 30: Detects Nearby Koroks |
|
|
42 | Level 25: Detects Nearby Koroks Level 30: Increased Blupee Encounters |
|
|
29 | Level 25: Attack Range: +7% Level 30: Detects Nearby Koroks |
|
|
34 | Level 25: Detects Nearby Koroks Level 30: Detects Nearby Chests |
|
|
52 | Level 25: Detects Nearby Koroks Level 30: Regular-Attack Damage: +7% |
|
|
43 | Level 25: Special-Attack Charge Rate: +10% Level 30: Detects Nearby Koroks |
|
|
53 | Level 25: Detects Nearby Koroks Level 30: Damage to Locked-On Target: +10% |
How to Unlock the Korok Seed Tracker
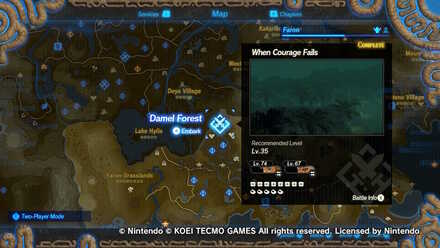
If you're having a hard time finding Korok Seeds without a guide, you can unlock a Quest that shows you how many Korok Seeds there are in a Story Battle or Challenge before starting it. You'll also be able to go back to previous Story Battles and Challenges to check for any Korok Seeds you've missed.
A Most Peculiar Korok
| Quest Unlock Condition | ||||
|---|---|---|---|---|
| Complete the Quest: Good Cheer | ||||
| Reward | ||||
| See Korok Details in Battle Info | ||||
| Required Materials | ||||
|
×5 |
×5 |
×5 |
×5 |
×5 |
Note: The Quest, Good Cheer, unlocks after clearing Chapter 3: The Road Home, Beseiged.
Age of Calamity Tips and Tricks

Age of Calamity Tips and Tricks
Comment
Very helpful! This saved my life, though some of the numbers in green are at the wrong spots but it's right in the descriotion.
Author
Korok Seed Locations: How to Get All Korok Seeds
improvement survey
03/2026
improving Game8's site?

Your answers will help us to improve our website.
Note: Please be sure not to enter any kind of personal information into your response.

We hope you continue to make use of Game8.
Rankings
- We could not find the message board you were looking for.
Gaming News
Popular Games

Genshin Impact Walkthrough & Guides Wiki

Honkai: Star Rail Walkthrough & Guides Wiki

Umamusume: Pretty Derby Walkthrough & Guides Wiki

Pokemon Pokopia Walkthrough & Guides Wiki

Resident Evil Requiem (RE9) Walkthrough & Guides Wiki

Monster Hunter Wilds Walkthrough & Guides Wiki

Wuthering Waves Walkthrough & Guides Wiki

Arknights: Endfield Walkthrough & Guides Wiki

Pokemon FireRed and LeafGreen (FRLG) Walkthrough & Guides Wiki

Pokemon TCG Pocket (PTCGP) Strategies & Guides Wiki
Recommended Games

Diablo 4: Vessel of Hatred Walkthrough & Guides Wiki

Cyberpunk 2077: Ultimate Edition Walkthrough & Guides Wiki

Fire Emblem Heroes (FEH) Walkthrough & Guides Wiki

Yu-Gi-Oh! Master Duel Walkthrough & Guides Wiki

Super Smash Bros. Ultimate Walkthrough & Guides Wiki

Pokemon Brilliant Diamond and Shining Pearl (BDSP) Walkthrough & Guides Wiki

Elden Ring Shadow of the Erdtree Walkthrough & Guides Wiki

Monster Hunter World Walkthrough & Guides Wiki

The Legend of Zelda: Tears of the Kingdom Walkthrough & Guides Wiki

Persona 3 Reload Walkthrough & Guides Wiki
All rights reserved
© Nintendo © KOEI TECMO GAMES All rights reserved. Licensed by Nintendo.
The copyrights of videos of games used in our content and other intellectual property rights belong to the provider of the game.
The contents we provide on this site were created personally by members of the Game8 editorial department.
We refuse the right to reuse or repost content taken without our permission such as data or images to other sites.


![Monster Hunter Stories 3 Review [First Impressions] | Simply Rejuvenating](https://img.game8.co/4438641/2a31b7702bd70e78ec8efd24661dacda.jpeg/thumb)


