Divine Beast Vah Ruta Dungeon Walkthrough
★ Sequel: Tears of the Kingdom Guide here!
★ Get a head start with our Beginner's Guide
┗ The Best Recipes to Cook | Rupee Farming
★ Shrines Locations | Korok Seeds Locations
★ Explore after the story with our Post Game Guide
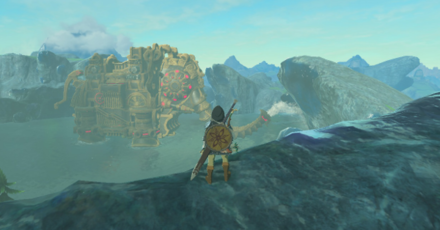
This is a dungeon walkthrough for Divine Beast Vah Ruta in The Legend of Zelda: Breath of the Wild (BotW). Read on to learn how to find and activate all terminals, get all the Treasure Chests, and get Mipha's Grace.
List of Contents
How to Find Divine Beast Vah Ruta
Southeast of Zora's Domain
| Divine Beast Vah Ruta Location | |
|---|---|
 |
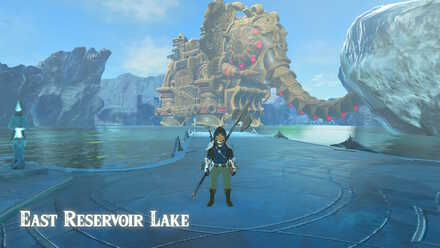 |
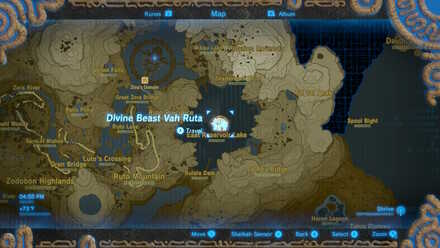
Divine Beast Vah Ruta can be found southeast of Zora's Domain, in East Reservoir Lake at the Lanayru Tower Region. You can enable its waypoint after you activate the orbs on the Divine Beast's back with Prince Sidon.
Lanayru Tower Region
Divine Beast Vah Ruta Rewards
Dungeon Rewards
| Divine Beast Vah Ruta Rewards | ||
|---|---|---|
| Heart Container | Mipha's Grace | |
Divine Beast Vah Ruta Dungeon Walkthrough
Guide Overview
| Divine Beast Vah Ruta Guide |
|---|
|
|
Activate the Guidance Stone
| Objective | |
|---|---|
| 1 | 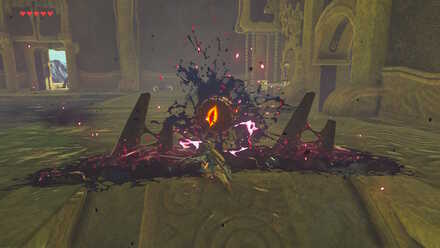 To get rid of the black goo known as malice by the entrance, you have to get rid of the small eyeball. Once you get inside, defeat the Guardian Scout I. In the pool to the left, an eyeball can be found on the water. Shoot it to eliminate it. |
| 2 | 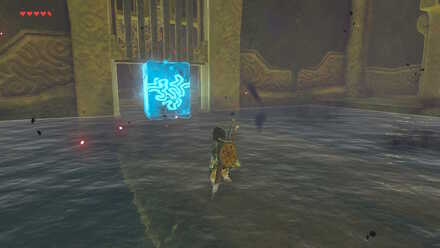 To the left, you will find the Guidance Stone, barred by a gate. Use Cryonis to build an ice block under the gate to open it. Treasure: In the pool left-side of the gate, there will be a steel chest containing an Ancient Spring. |
| 3 | 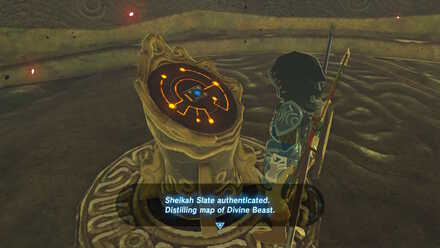 Examine the Guidance Stone to unlock the map of Vah Ruta. At this point, you will also be able to move the Beast's trunk at certain angles by opening the map. |
Activate Terminal 1
| Objective | |
|---|---|
| 4 | 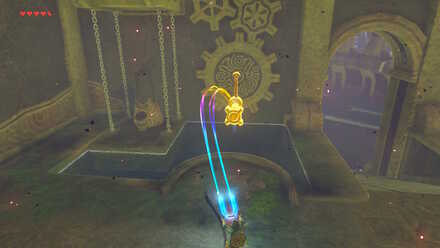 To the right of the room, you will find gears on the wall. Use Magnesis to turn the gears and reveal the first terminal. |
| 5 | 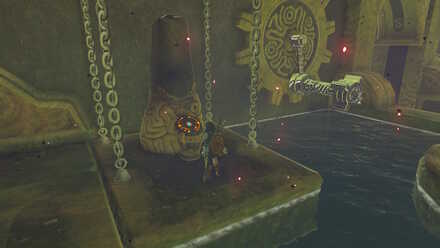 Step up to it and press A to activate the terminal. |
Activate Terminal 2
| Objective | |
|---|---|
| 6 | 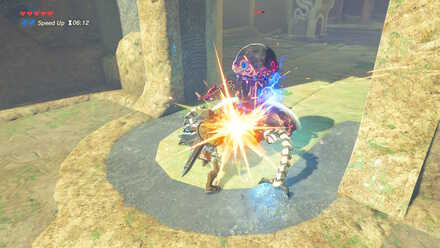 Go out of the room and go up. Defeat the Guardian Scout to get a Guardian Sword. |
| 7 | 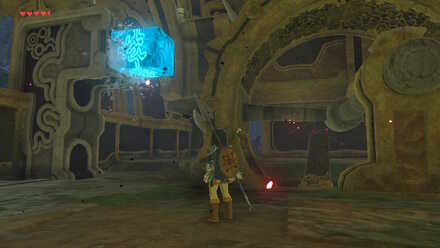 Upon entering the room, you will see a small gear being pushed by water and a larger gear. The second terminal is inside the smaller gear. Use Cryonis to create an ice block on the mouth of the fountain, just when the terminal is parallel to the ground. Treasure: There is a chest containing a Silver Rupee on the platform left-side of the fountain. |
| 8 | 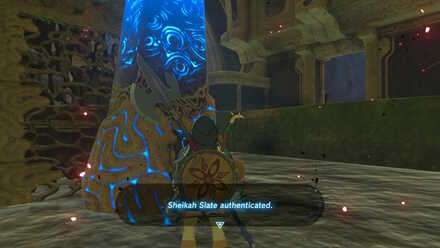 Go to the gear to activate the second terminal. |
Activate Terminal 3
| Objective | |
|---|---|
| 9 | 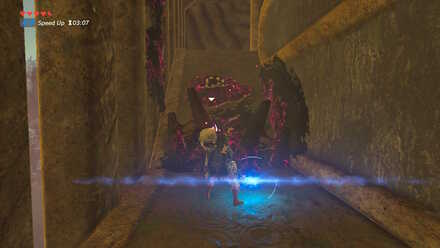 Leave the room and go up to the third floor. More malice will block the way; you will see a mouth that spits phantom skulls. Aim to the top left to shoot the eyeball with a bow. |
| 10 | 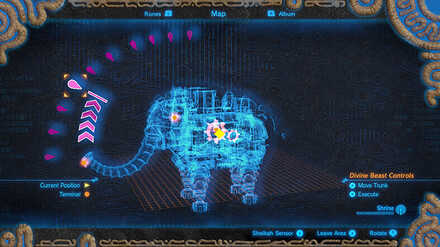 On the third floor, you will have access to the larger gear seen from the second floor. With access to Vah Ruta, open up your map by pressing the - button, and move the trunk upwards. By moving the trunk upwards, water will shoot down, moving the large gear. |
| 11 | 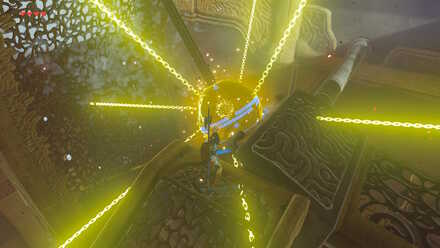 Similar to the last one, the third terminal can be found inside the large gear. However, it is gated off, unless the orange ball is attached to the center of the gear. While the ball falls to the center of the gear, use Stasis to hold the ball in place. Treasure: There is also a chest containing an Ancient Core in the gear, trapped between 2 stone slabs. |
| 12 | 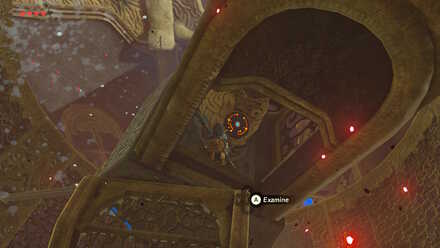 With the ball in place, the gate should be open, allowing you to access the third terminal when it reaches your side. |
Activate Terminal 4
| Objective | |
|---|---|
| 13 | 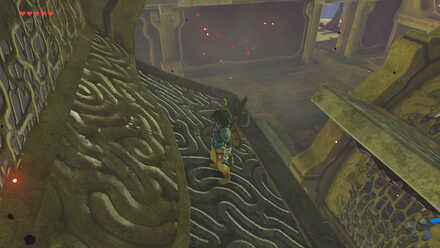 Go back to the second floor to ride the larger gear. Make sure that the gear is spinning towards the other side before you hop on it, you can do this by adjusting Vah Ruta's trunk to control the water fall. Treasure: There is a chest containing 10 Fire Arrows on one of the tooth of the large gear. |
| 14 | 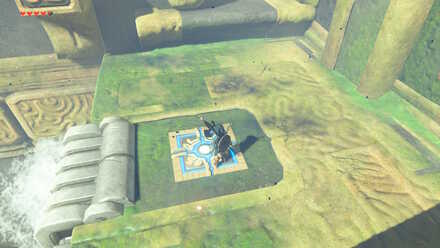 Upon reaching the other side, you will be met by a Guardian Scout II. Defeat it to get a Guardian Spear. To the left, you will see a pressure plate. Activate it to open up a waterfall, which will serve as a shortcut from the first to the second floor. Treasure: There is a chest containing a Knight's Halberd on the platform above where the pressure plate is. |
| 15 | 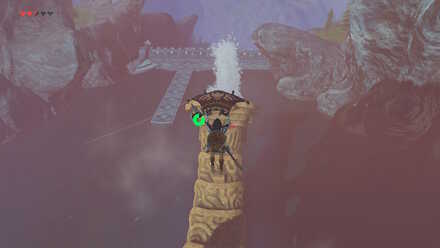 Now, follow the hallway that leads outside. The fourth terminal is on the underside of the trunk, at the tip. Lower the trunk at the lowest angle, and while that happens, glide down to get to the tip. Treasure: There is a chest containing an Ancient Shaft near the end of the trunk. |
| 16 | 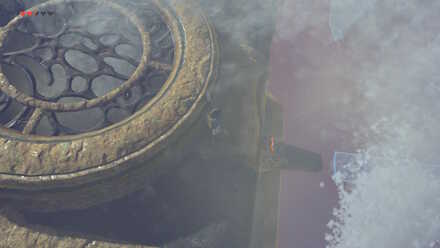 When you are on the snout, raise the trunk and make your way to the other side. Do this carefully since it is easy to fall off. |
| 17 | 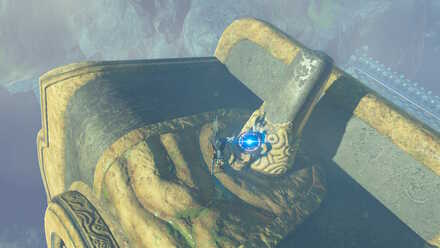 Press A to activate the fourth terminal. |
Activate Terminal 5
| Objective | |
|---|---|
| 18 | 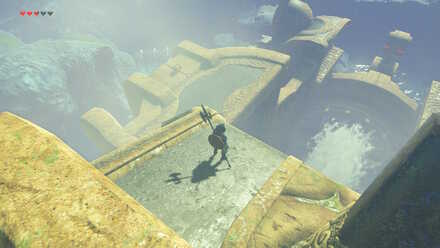 While you are at the fourth terminal, raise the trunk at the highest angle, so you can reach the top of Vah Ruta's head. Treasure: There is a chest containing 10 Ice Arrows on the platform left of Vah Ruta's head. |
| 19 | 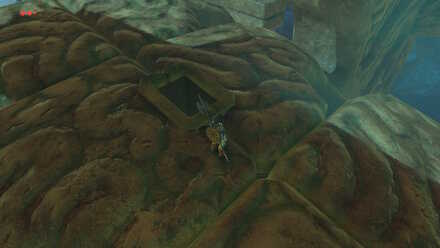 Go down the square-shaped hole. You will be on the fourth floor where you can access the fifth and final terminal. |
| 20 | 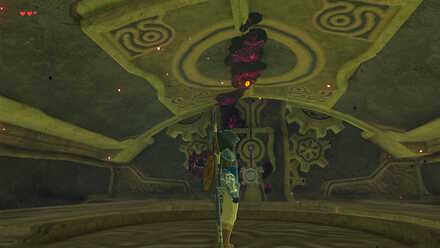 Shoot the eyeball on the ceiling. Be wary because it has a mouth and can conjure phantom skulls |
| 21 | 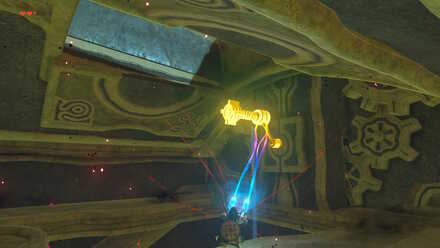 On the wall is a lever. Use Magnesis to wind it and open up the ceiling. |
| 22 | 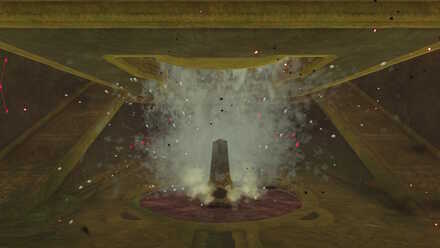 The terminal is just below but is engulfed in flames. With the ceiling open, lower the trunk to the 5th level from the top and watch the water put out the fire. |
| 23 | 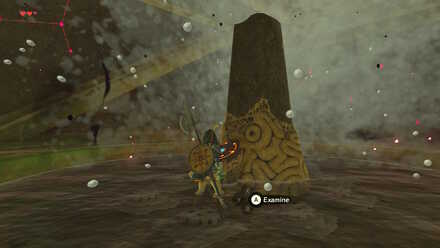 Activate the fifth and last terminal. |
Defeat Waterblight Ganon
| Objective | |
|---|---|
| 24 | 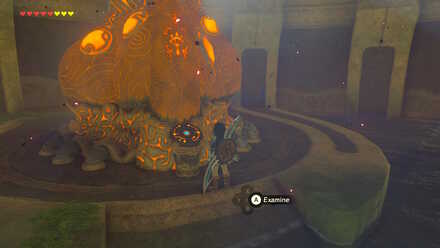 Glide down to the first floor and enter the main control room. At the end, you will find the main control unit. Make sure you are prepared at this point because activating it will start the fight against Waterblight Ganon. You are free to leave to prepare and come back when you are ready. |
| 25 | 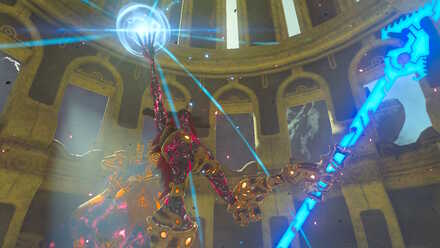 The real battle begins. Defeat Waterblight Ganon to truly free Divine Beast Vah Ruta. We recommend having bows ready as it is the best way to defeat him. |
| 26 | 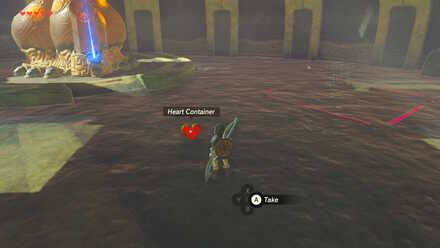 After the battle, you will receive a Heart Container, as well as the divine power, Mipha's Grace. |
| 27 | 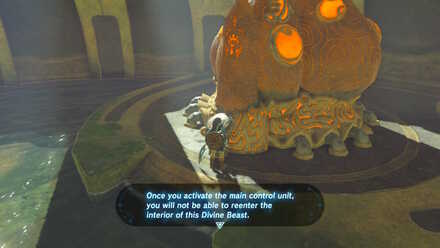 Use the terminal to go back to Zora's Domain. Report to King Dorephan and finish the main quest. |
How to Beat Waterblight Ganon
Waterblight Ganon Attacks
 |
 |
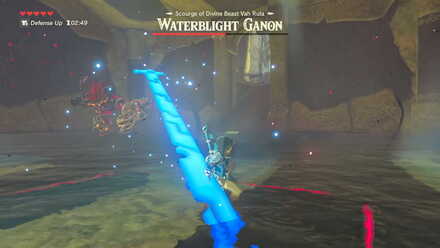 |
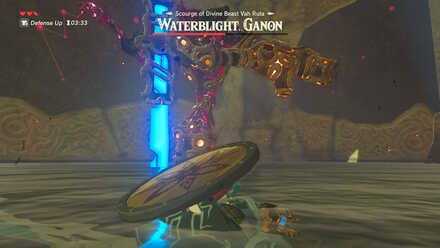 |
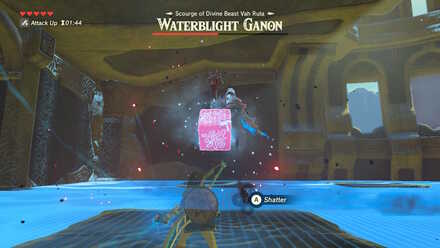 Individual Ice Blocks |
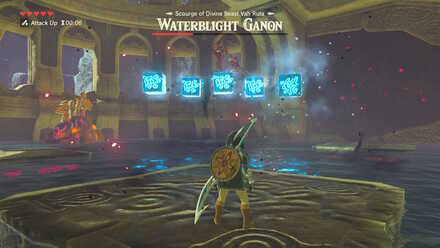 Multiple Ice Blocks |
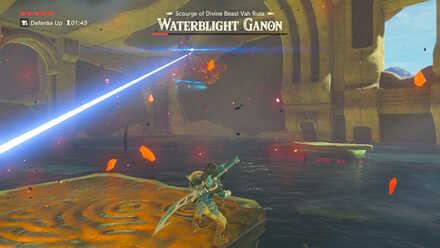 Laser |
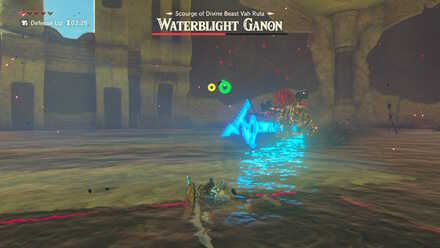
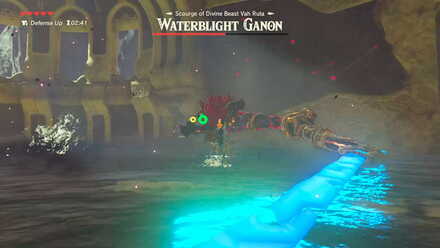
The boss battle has two phases, with Waterblight Ganon changing its attack patterns after you get it down to 50% HP. Avoid his attacks and aim for his eye to stun him. Keep the Cryonis rune equipped and ready to destroy ice blocks or create a path for yourself through the water.
How to Get the Treasure Chests in Divine Beast Vah Ruta
|
|
Treasure Chest 1
| Treasure Chest 1 Walkthrough | |
|---|---|
| 1 | 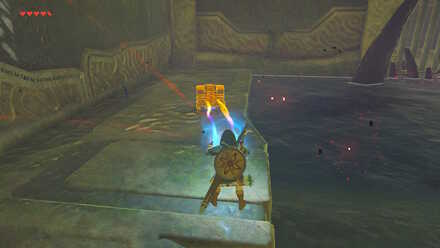 To the left of the entrance, there is a pool of water. At the bottom is a Treasure Chest containing an Ancient Spring. Use Magnesis to get it out. |
Treasure Chest 2
| Treasure Chest 2 Walkthrough | |
|---|---|
| 1 | 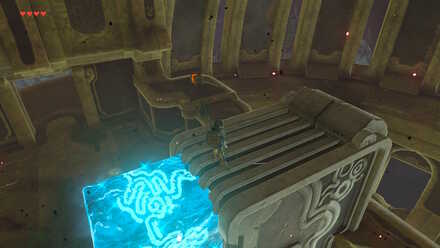 On the second floor, you will find a Treasure Chest containing a Silver Rupee on an elevated floor. To get there, go to the other side of the smaller gear and ride the platform up. Once you get to the other side, immediately use Cryonis on the waterfall mouth, and time your jump off the gear. Climb the ice block and make your way to the Treasure Chest. |
Treasure Chest 3
| Treasure Chest 3 Walkthrough | |
|---|---|
| 1 | 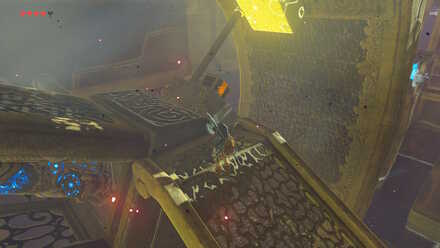 On the third floor with the third terminal, you can get a Treasure Chest on the large which contains an Ancient Core. Move the trunk to get the gear moving, then when the block on top of the chest slides up (while the gear rotates), use Stasis to hold it off, then open the Treasure Chest when it reaches your side. |
Treasure Chest 4
| Treasure Chest 4 Walkthrough | |
|---|---|
| 1 | 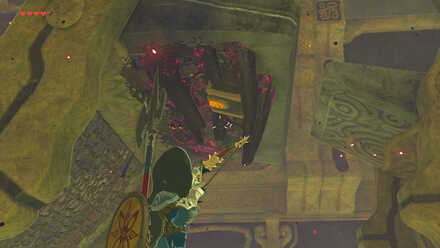 Another Treasure Chest containing 10 Fire Arrows can be found on the tooth of the large gear. It is covered by malice, so you need to destroy the eyeball. Depending on the Chest's position on the gear, you will need to keep moving the trunk to get the perfect position to destroy the eyeball and get the chest. |
Treasure Chest 5
| Treasure Chest 5 Walkthrough | |
|---|---|
| 1 | 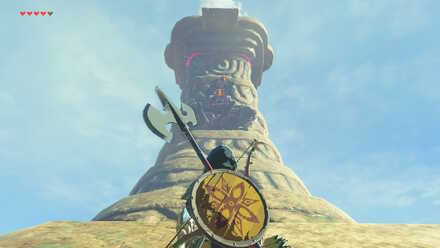 Just before the tip of Vah Ruta's trunk, you can find a Treasure Chest covered with malice, so destroy the eyeball. An Ancient Shaft can be found inside. |
Treasure Chest 6
| Treasure Chest 6 Walkthrough | |
|---|---|
| 1 |  On the left-raised platform at the top of Vah Ruta's head, there is a Treasure Chest. To get rid of the malice, shoot the eyeball on the opposite platform. Inside you will find 10 Ice Arrows. |
Treasure Chest 7
| Treasure Chest 7 Walkthrough | |
|---|---|
| 1 | 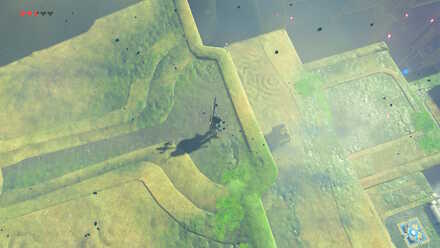 After activating the last platform, look below to see a Treasure Chest on a platform. If you miss it, you can use the waterfall you activated with the pressure plate to propel you into the air. Swim up, and descend to the platform with a Treasure Chest containing a Knight's Halberd. |
Divine Beast Vah Ruta Tips and Tricks
Prepare Your Bow and Arrows
For this dungeon, you will mainly use your bow to destroy eyeballs, as well as to battle Waterblight Ganon. You should have a large number of arrows after your trip going to Zora's Domain.
Stock Up on Food and Elixirs
Make sure to cook food and elixirs to gain an advantage in battle. If you have a small number of hearts, consider packing defense-boosting food, or resting in water beds in Zora's Domain to give extra temporary hearts and stamina.
You are Free to Leave the Area Anytime
During your stay in Vah Ruta, you can leave and come back anytime, as you can fast-travel to it. Take note that every time you leave, you will always arrive at the Travel Gate. Press the - button to open up the map, and press X to leave the area.
If you find yourself in a tough situation against Waterblight Ganon, you can retreat and prepare for your return.
Get Everything Before You Leave for Good
After defeating Waterblight Ganon, and using the main terminal to leave, you cannot come back inside the Divine Beast anymore, so if you want to get all the chests, do so before leaving for good.
Zelda: BotW Related Guides

All BotW Dungeons by Type
| BotW Dungeons | |
|---|---|
| Shrines | Divine Beasts |
| Hyrule Castle | |
List of All Divine Beasts
| Divine Beasts | |
|---|---|
| Divine Beast Vah Ruta | Divine Beast Vah Rudania |
| Divine Beast Vah Medoh | Divine Beast Vah Naboris |
| Divine Beast Tamer's Trial | |
Author
The Legend of Zelda: Breath of the Wild Walkthrough & Guides Wiki
Divine Beast Vah Ruta Dungeon Walkthrough
improvement survey
04/2026
improving Game8's site?

Your answers will help us to improve our website.
Note: Please be sure not to enter any kind of personal information into your response.

We hope you continue to make use of Game8.
Rankings
- We could not find the message board you were looking for.
Gaming News
Popular Games

Genshin Impact Walkthrough & Guides Wiki

Crimson Desert Walkthrough & Guides Wiki

Umamusume: Pretty Derby Walkthrough & Guides Wiki

Honkai: Star Rail Walkthrough & Guides Wiki

Monster Hunter Stories 3: Twisted Reflection Walkthrough & Guides Wiki

Wuthering Waves Walkthrough & Guides Wiki

The Seven Deadly Sins: Origin Walkthrough & Guides Wiki

Pokemon TCG Pocket (PTCGP) Strategies & Guides Wiki

Pokemon Pokopia Walkthrough & Guides Wiki

Zenless Zone Zero Walkthrough & Guides Wiki
Recommended Games

Monster Hunter World Walkthrough & Guides Wiki

Fire Emblem Heroes (FEH) Walkthrough & Guides Wiki

Pokemon Brilliant Diamond and Shining Pearl (BDSP) Walkthrough & Guides Wiki

Super Smash Bros. Ultimate Walkthrough & Guides Wiki

Diablo 4: Vessel of Hatred Walkthrough & Guides Wiki

Cyberpunk 2077: Ultimate Edition Walkthrough & Guides Wiki

Yu-Gi-Oh! Master Duel Walkthrough & Guides Wiki

Elden Ring Shadow of the Erdtree Walkthrough & Guides Wiki

The Legend of Zelda: Tears of the Kingdom Walkthrough & Guides Wiki

Persona 3 Reload Walkthrough & Guides Wiki
All rights reserved
© 2020 Nintendo. The Legend of Zelda, Wii U, and Nintendo Switch are trademarks of Nintendo.
The copyrights of videos of games used in our content and other intellectual property rights belong to the provider of the game.
The contents we provide on this site were created personally by members of the Game8 editorial department.
We refuse the right to reuse or repost content taken without our permission such as data or images to other sites.


![Forza Horizon 6 Review [Preview] | Beautiful Roads With a Whole Lot of Oversteer](https://img.game8.co/4460981/a7254c24945c43fbdf6ad9bea52b5ce9.png/thumb)
![Borderlands Mobile Review [Playtest] | The Same Borderlands Made Easy](https://img.game8.co/4465500/aac0c880a39ec5cd46073e49d18f3ed5.png/thumb)


fun